blokdots & ProtoPie
blokdots is a code-free software used to build interactive hardware prototypes with Arduino. By using ProtoPie and blokdots together, you can bridge the gap between hardware and software prototyping without a line of code.
This integration is available with all plans. However, by using blokdots with ProtoPie Connect you can unlock new possibilities, such as the ability to create hardware-software interactions involving three or more devices. Learn more about how the blokdots plugin works in ProtoPie Connect.
Here is the simplest ecosystem for connecting ProtoPie to blokdots:
- ProtoPie Studio - for creating interactions.
- ProtoPie Player - for running prototypes on smart devices.
- blokdots - to facilitate the communication between Arduino and prototypes via socket.IO.
![[object Object]](https://cdn.sanity.io/images/vidqzkll/production/e6281a443275cb3fd116a17ca4081b7dbb04e22d-2984x1172.png/blokdots_and_protopie_environment.png?fm=webp)
Getting Ready
To use blokdots with ProtoPie you will need the following:
- Have the blokdots app installed on your desktop.
- Set up your Arduino board. Check the supported boards here.
- A USB cable to connect your Arduino board to your laptop or PC.
- Activate the free trial of blokdots pro.
Connecting Arduino to blokdots
Open blokdots and connect your Arduino board to your laptop or PC.
Once you see that your board is ready in the top-left corner, you can start setting up your components.
Setting Up Components in blokdots
- Click Connect A New Component and pick the ones you want to connect.
- Choose an available Grove slot or hardware pin from the list
- Click on Set Component.
This step is necessary for blokdots to know which components of the Arduino board to control.
![[object Object]](https://cdn.sanity.io/images/vidqzkll/production/091b7da8514db455c765eeab447293683e4328ab-2248x1696.png/blokdots-wizard-bg.png?fm=webp)
Connecting ProtoPie with Arduino via blokdots
The blokdots app allows ProtoPie and Arduino to send messages from one to another. To make this happen, you will need to:
- Set up Send and Receive in ProtoPie Studio
In ProtoPie Studio, the Receive Trigger and the Send Response will initiate communication between the devices. Make sure to set the Channel to ProtoPie Studio. The Message and Value can be set to whatever you wish.
2. Create condition cards in blokdots
To add logic to a blokdots component, you need to add and configure cards in the main area of the Project View. There are two types of cards in blokdots: “If This Then That” cards and “Mapping” cards.
As the final interactions take place between ProtoPie Player and Arduino, the combination of both will make communication possible.
Receiving messages from blokdots to ProtoPie
To send a message from blokdots to ProtoPie, a condition card should have the following structure:
- If
the action of any input hardware component - Then
ProtoPie Playershouldsendmessage
In the smart home prototype example below, turning the Potentiometer on the Arduino board will change the temperature degree value displayed on the pie file running in the ProtoPie Player.
![[object Object]](https://cdn.sanity.io/images/vidqzkll/production/d0195bc31ad8bb1db4d9685b5d61d4b907147b0d-1188x262.png/blokdots-to-protopie.png?fm=webp)
To receive messages from blokdots, use the Receive trigger in ProtoPie Studio as below.
![[object Object]](https://cdn.sanity.io/images/vidqzkll/production/4fef2678c0e1f920bd7804cabfbb0414bbe7313e-1760x953.png/receive_trigger_protopie_studio.png?fm=webp)
Sending messages from ProtoPie to blokdots
To send messages from ProtoPie Studio to blokdots, use the Send response.
![[object Object]](https://cdn.sanity.io/images/vidqzkll/production/c4c280987357b6a60faae371988bf02a7124ea2f-1760x952.png/send_response_protopie_studio.png?fm=webp)
To receive a message from ProtoPie, the condition card in blokdots should have the following structure:
- If
ProtoPie Playerisreceivingmessage - Then
the action of any input hardware component
![[object Object]](https://cdn.sanity.io/images/vidqzkll/production/397453f25df630ca995f48fdb0ccef9f8be012ca-1192x266.png/protopie-to-blokdots.png?fm=webp)
Testing your Interactions
To test your interactions, do the following:
1. Connect ProtoPie Player with blokdots (iOS only for now)
Scan the QR code that blokdots will show when hovering above the ProtoPie icon in the lower-left corner or type the IP address. The ProtoPie Player component will change to green once it is set up.
![[object Object]](https://cdn.sanity.io/images/vidqzkll/production/86e224f171452ed5458f8fa8e46185be7af031ea-725x400.png/connect-blokdots-player.png?fm=webp)
2. Connect ProtoPie Studio with ProtoPie Player
Learn more about how to connect ProtoPie Player.
3. Run your project in blokdots
Click on the Run Project button at the top of the project window.
![[object Object]](https://cdn.sanity.io/images/vidqzkll/production/4202f5b40ffbabef84d5f07340c14408b9ac3e74-1072x712.png/run-blokdots-project.png?fm=webp)
If you want to learn more about the ProtoPie and blokdots integration and test it out on your own, check out this step-by-step tutorial.
FAQs
My Arduino board is not detected. What should I do?
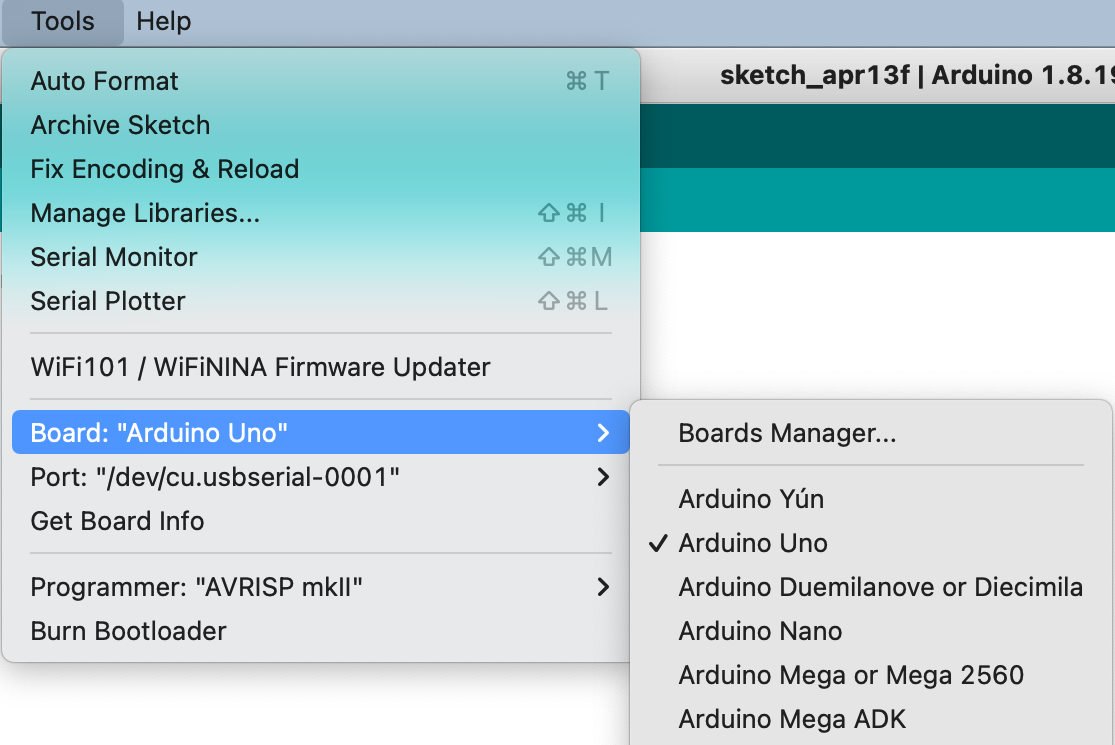
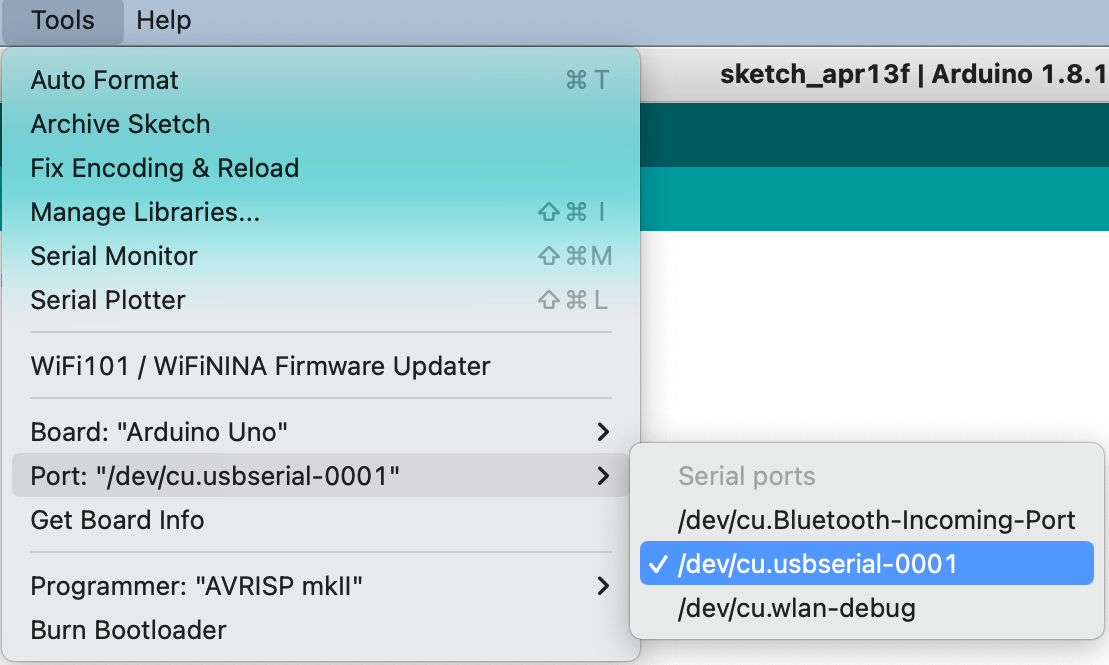
If your board does not appear in the Arduino application Port menu and you get a “Board not connected” message in your blokdots application, please follow these troubleshooting steps.
I get an error message on the blokdots app that Firmata cannot be uploaded. What does it mean?
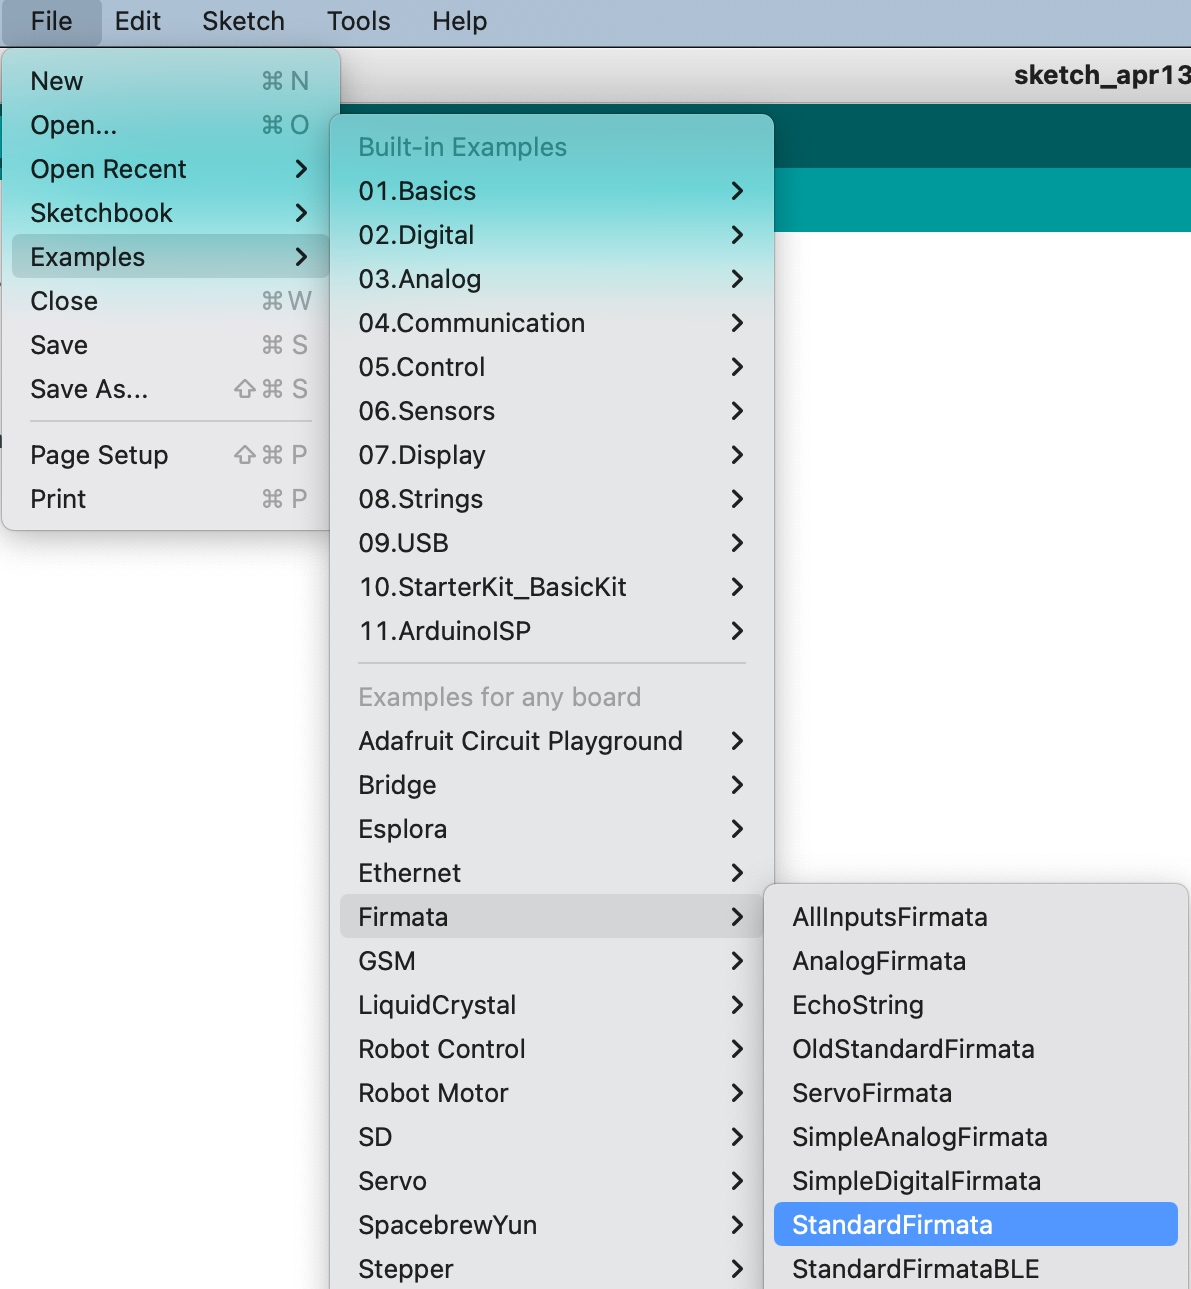
To be able to communicate with blokdots, the Arduino board needs to be flashed with Firmata, a protocol that allows it to communicate with your computer. Once you open blokdots and plug in your Arduino, blokdots flashes the board with the Firmata automatically. However, in case you get an error message that Firmata cannot be uploaded you can follow these steps to troubleshoot it:
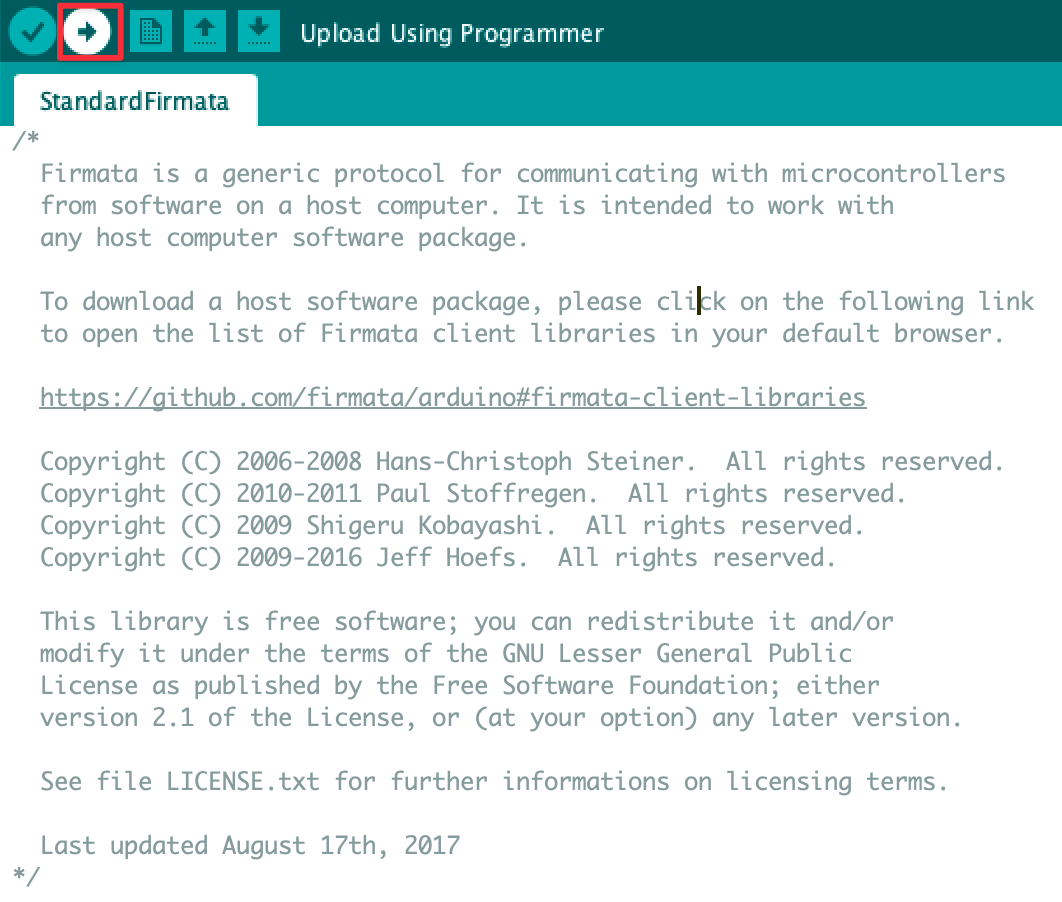
Open Arduino IDE → File → Examples → Firmata → StandardFirmata → Click on the Arrow icon to upload Firmata. Once the sketch is compiled, you will get a notification message that Firmata has been successfully uploaded.