Recording Page
The recording page provides a comprehensive view of the interaction recording, with all the necessary interaction specifications for implementation.
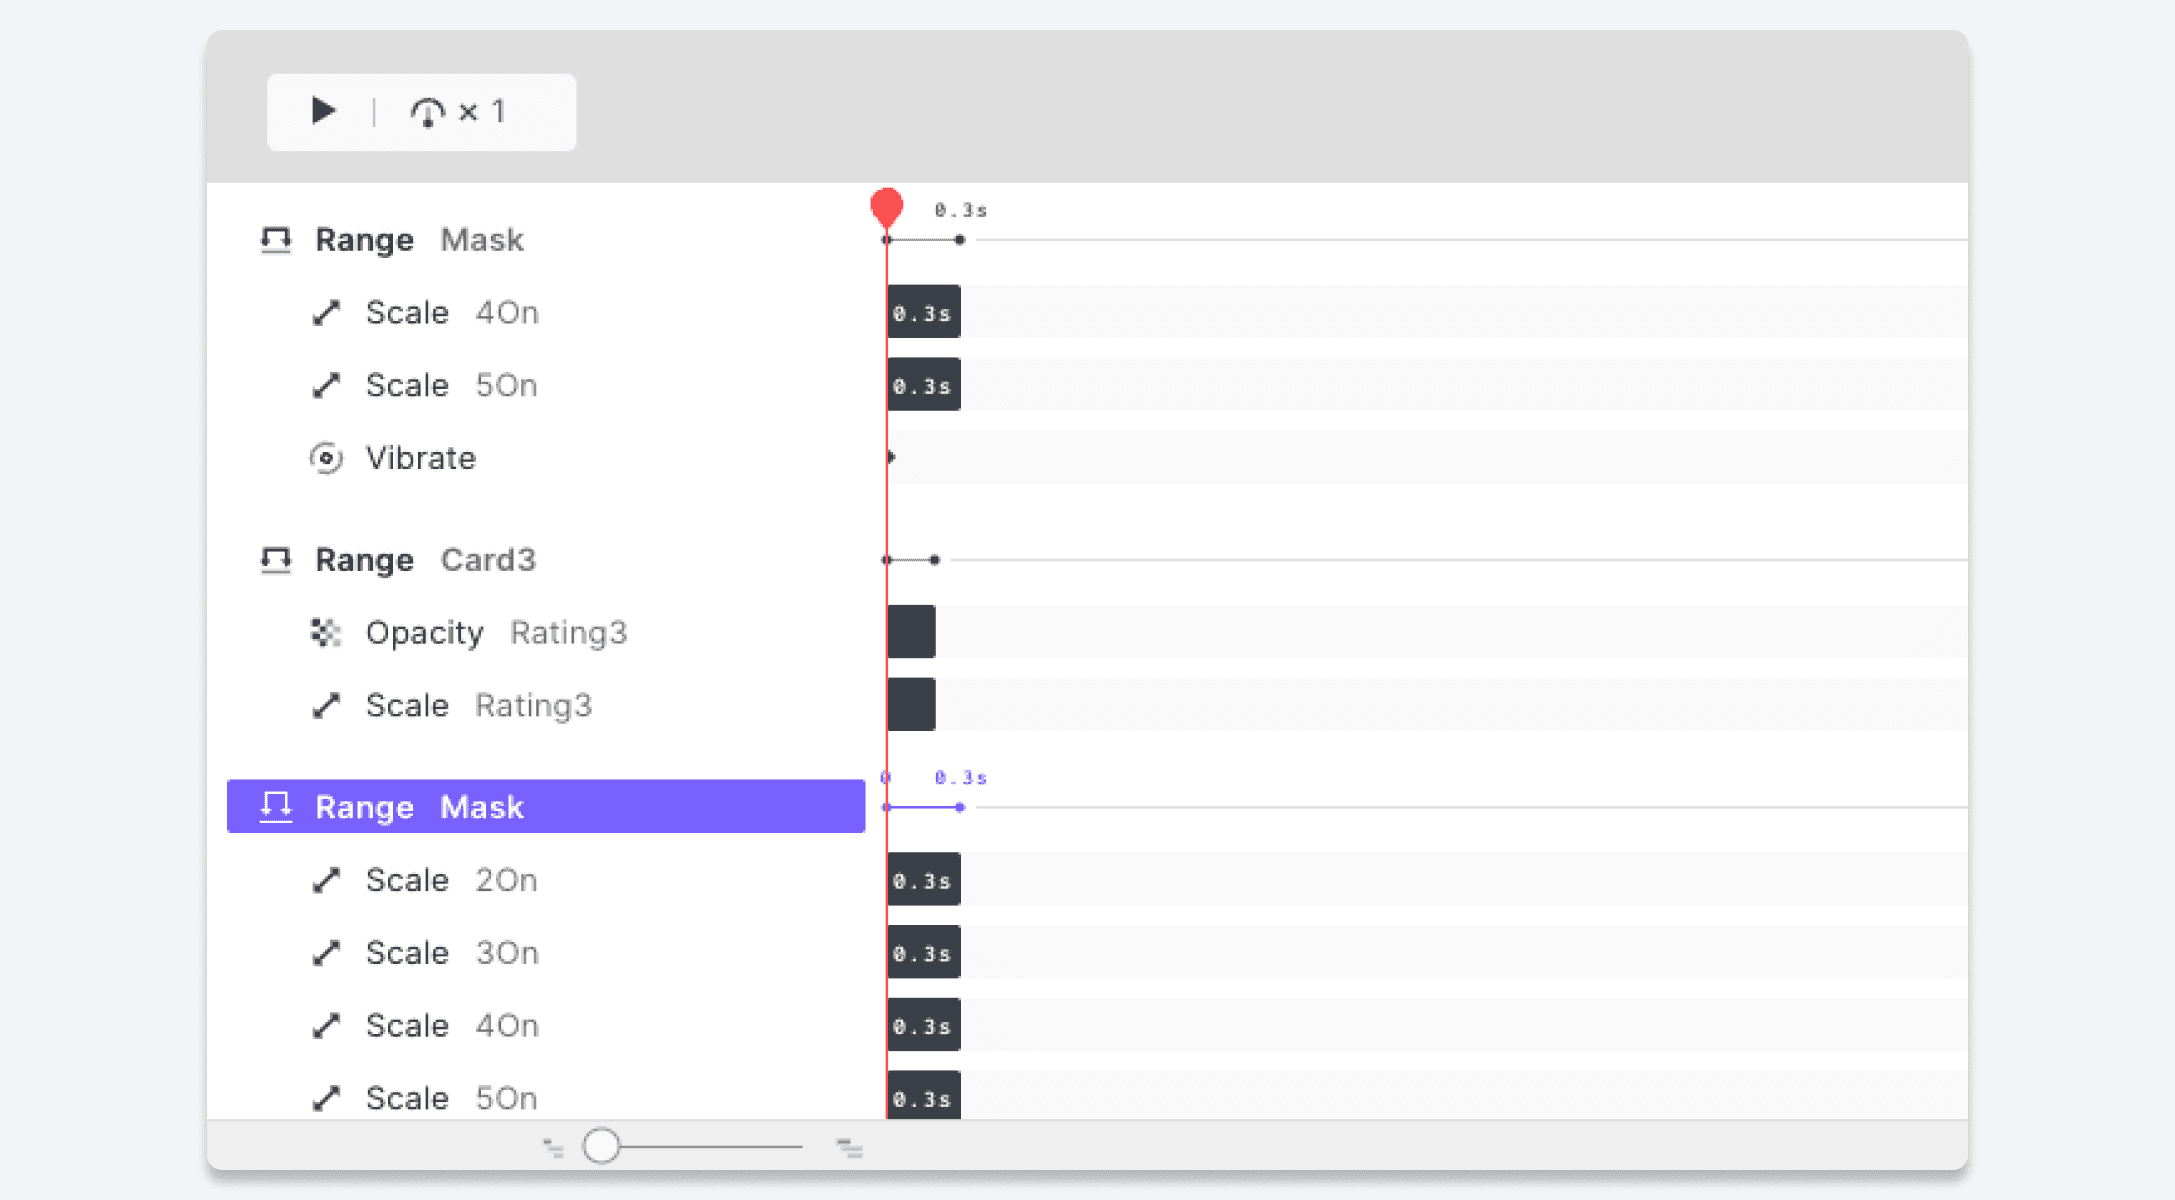
Timeline
To replay the recorded scenario of an interaction recording, simply click the Play button and adjust the playback speed as desired. For more precise control, you can use the timeline scrubber to navigate forward or backward to any specific point in time.
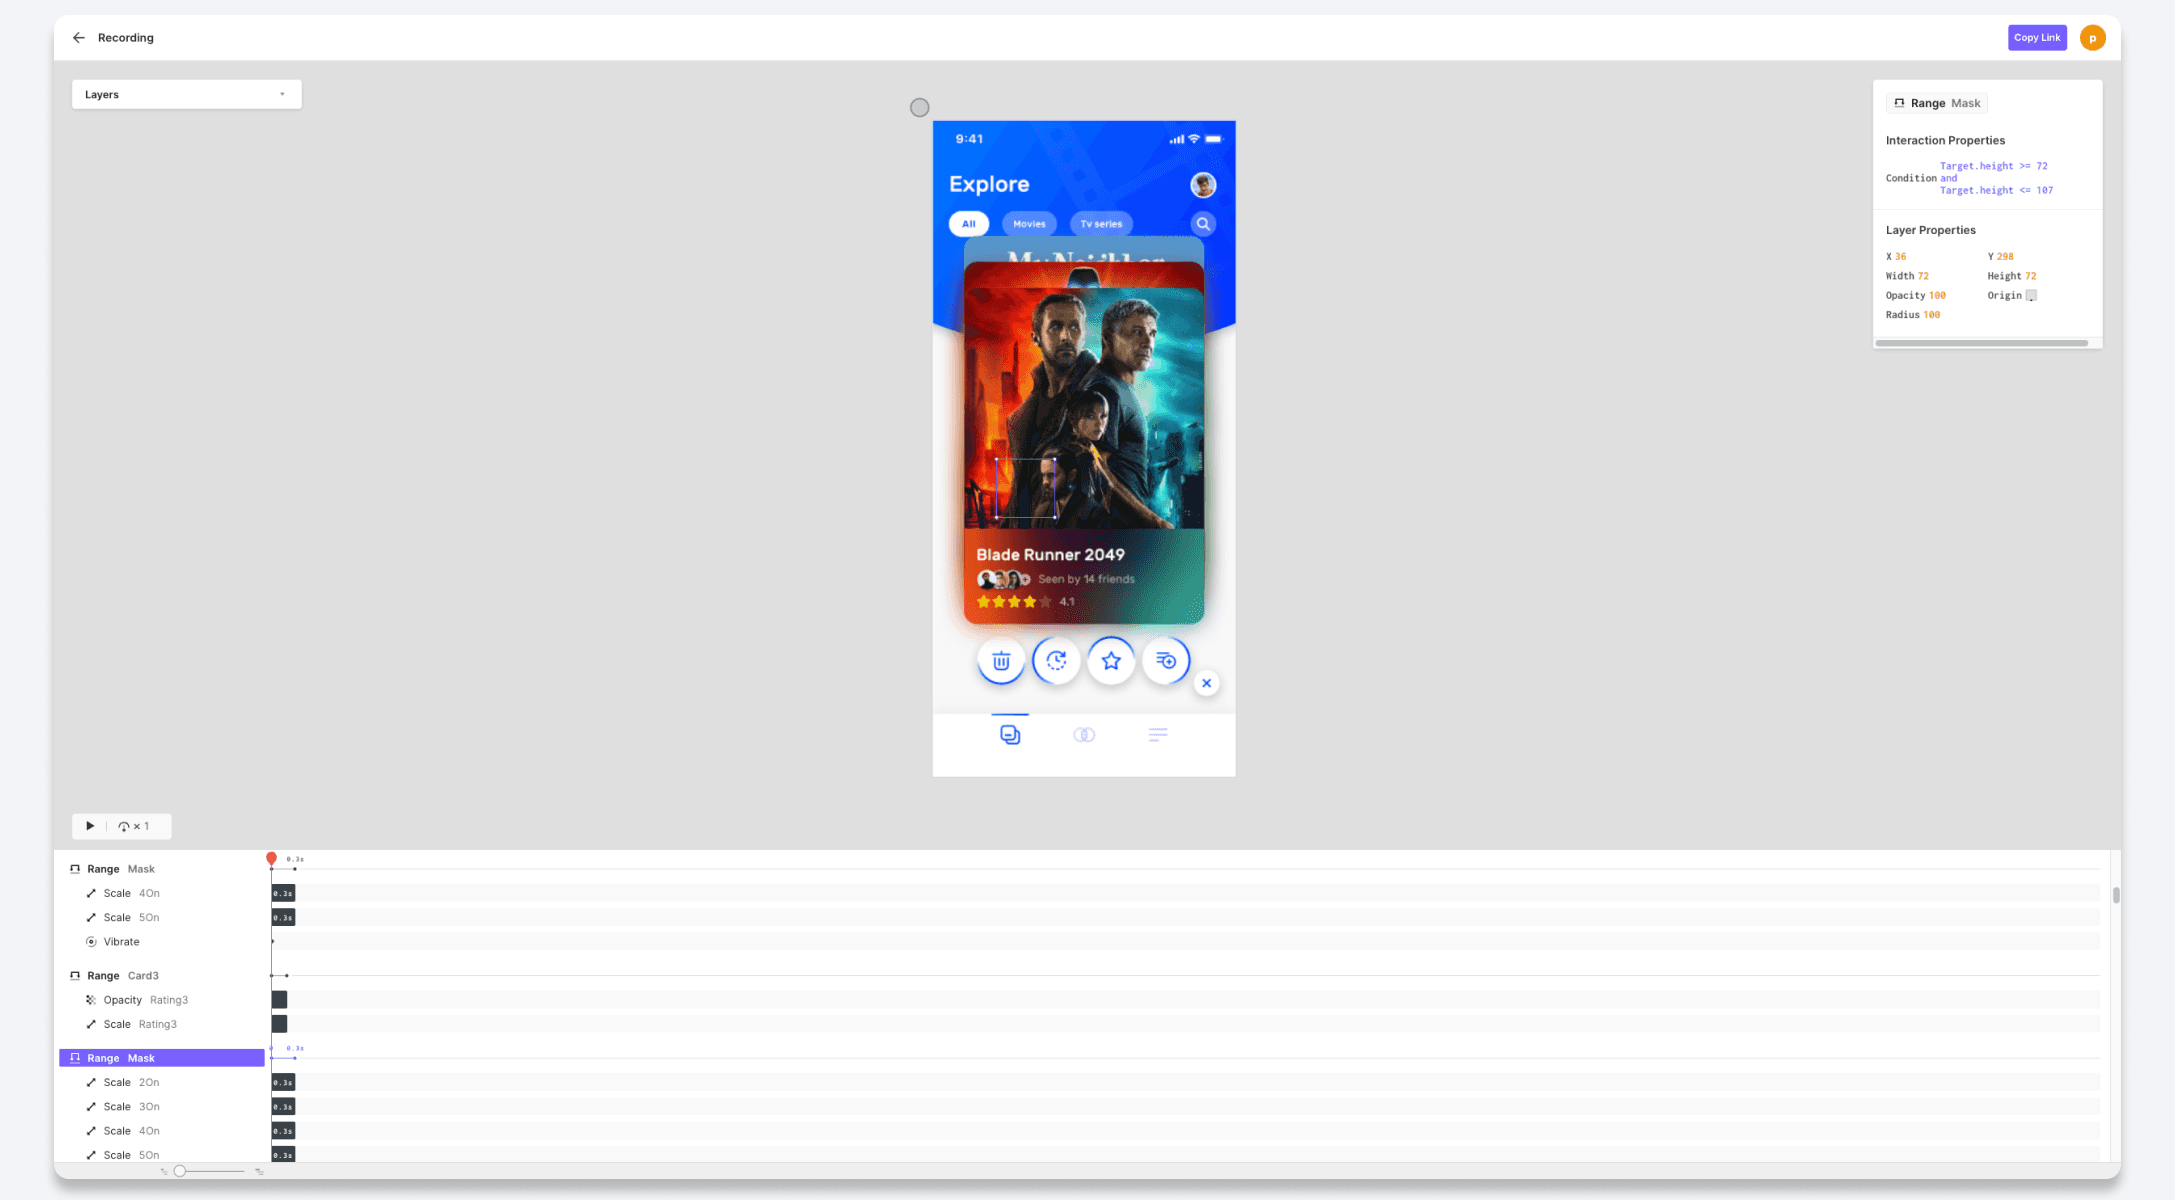
Interaction Specs
If you select any trigger or response on the timeline, you will see the corresponding interaction specifications and layer properties in the property panel on the right side of the page.
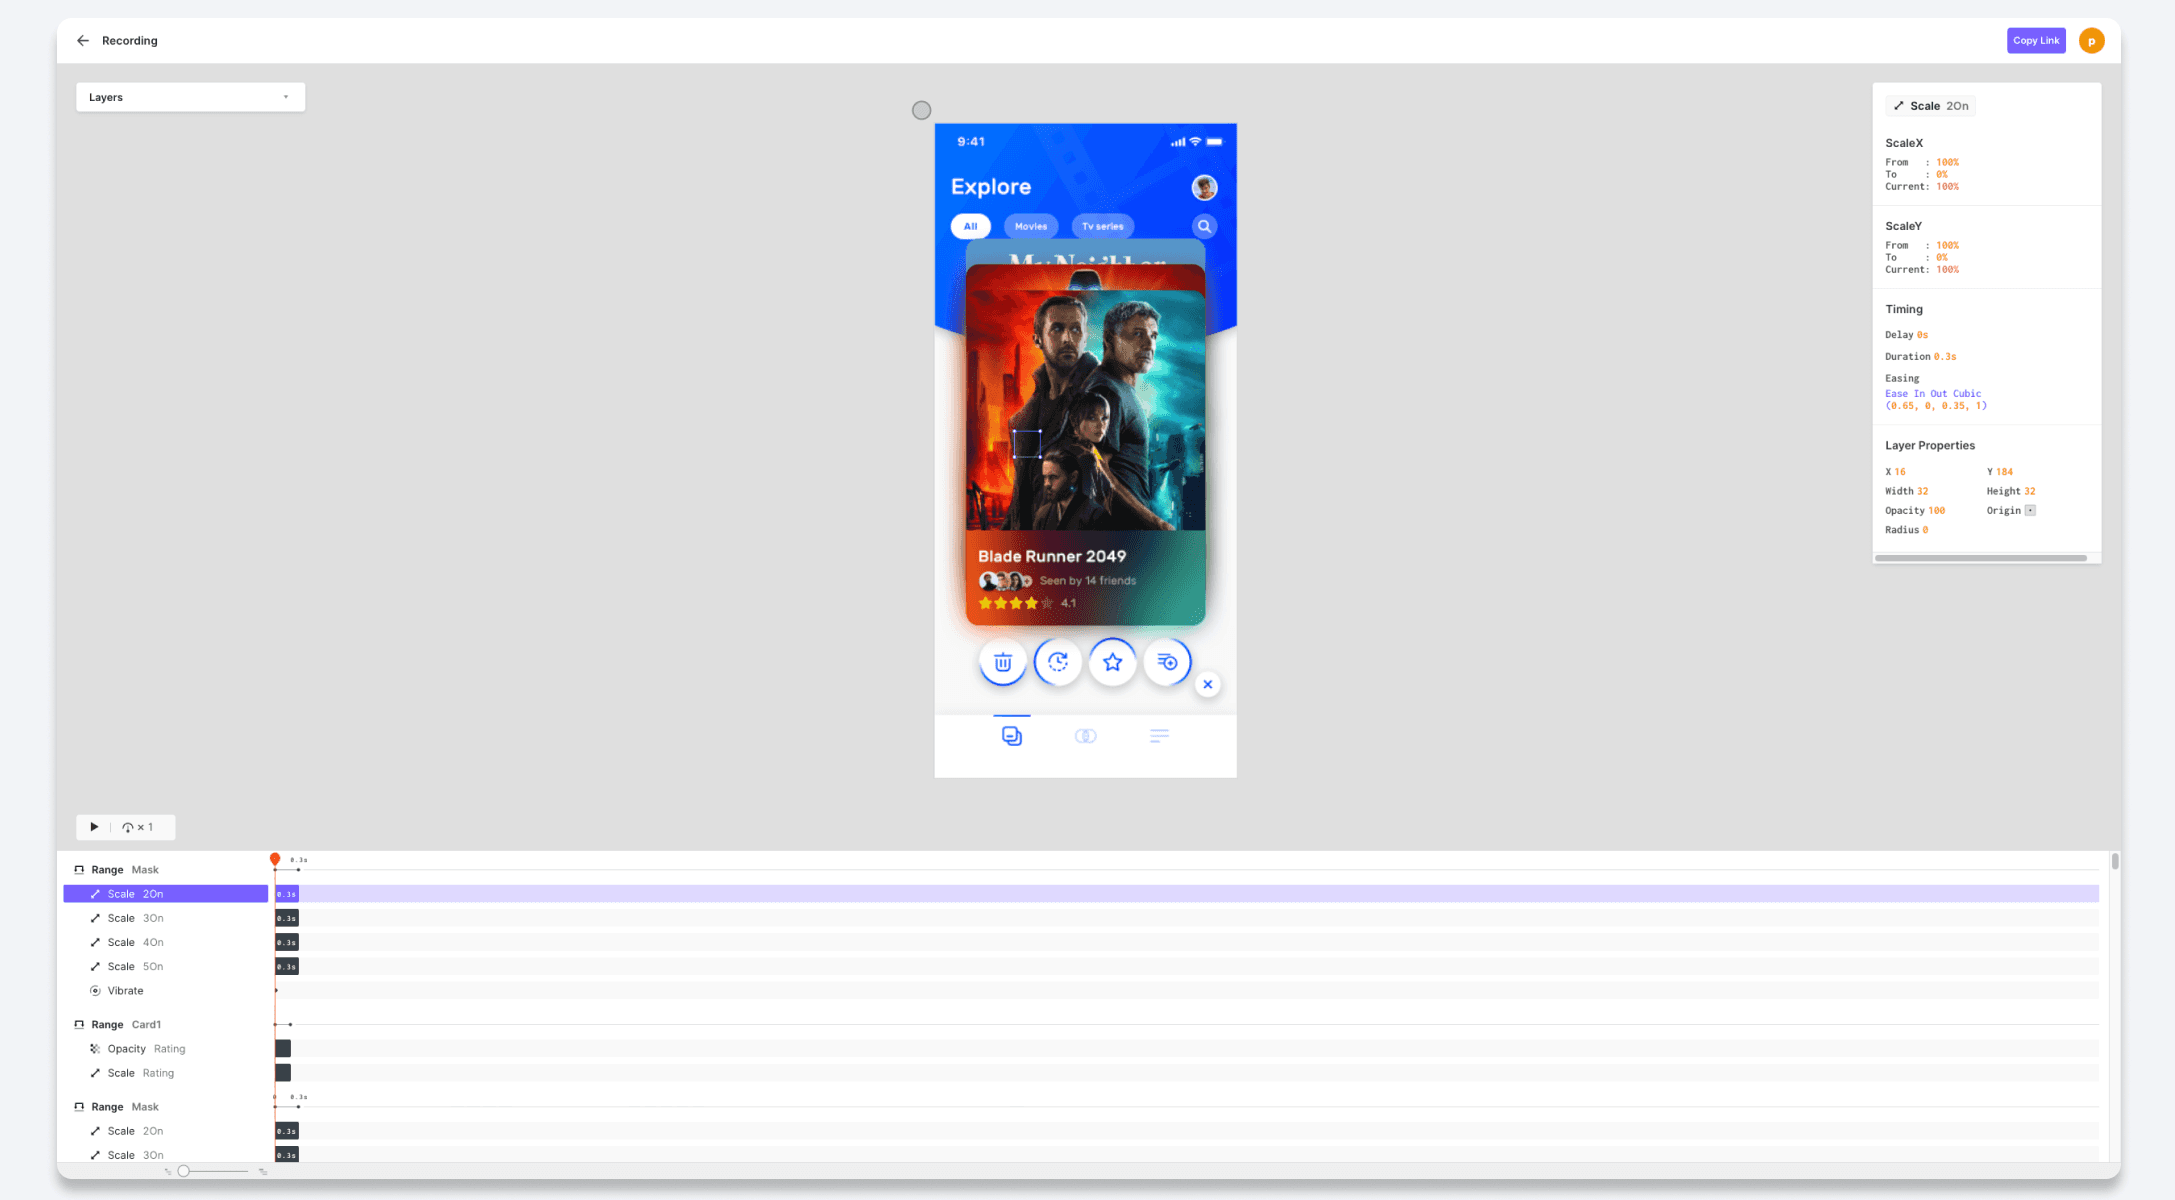
Layer Panel
The layer panel, located on the left side, provides a visual representation of the prototype's layer structure. By selecting a specific layer in the panel, it will be highlighted in the preview area, allowing for easy navigation and identification.
Distance Between Objects
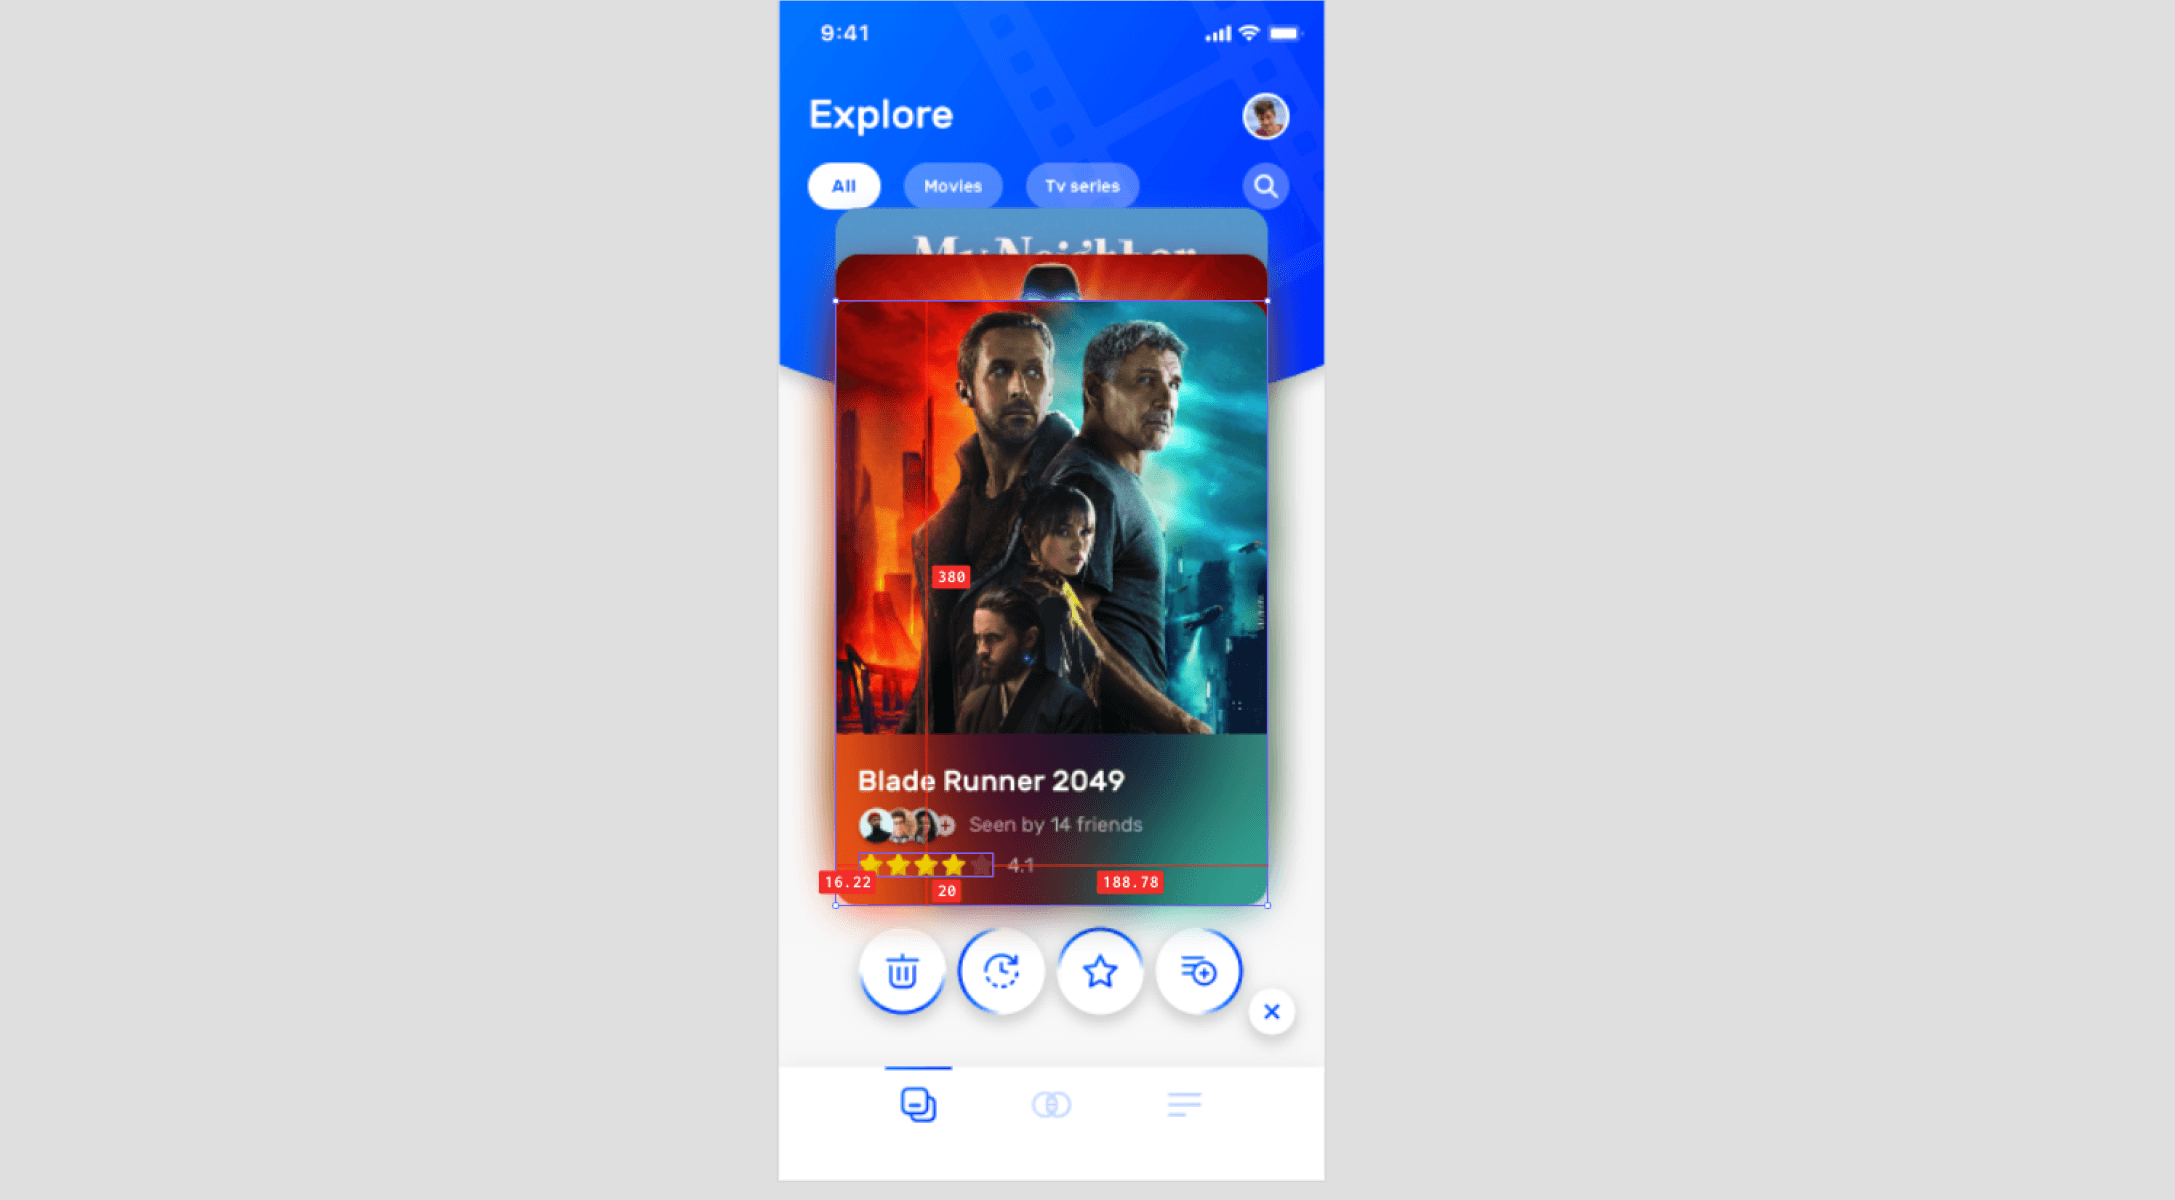
To check the horizontal and vertical distance between objects in the preview, simply hover your mouse over the objects of interest. The distance measurements will be displayed.
Shortcuts
Enhance your efficiency by utilizing these handy shortcuts to control the timeline: