ProtoPie MCP ベータ版を提供開始!詳しくはこちら。

ProtoPie MCPのベータ版が提供開始!

Introducing ProtoPie

始める

Making Your First Prototype

ProtoPie Ecosystem

ProtoPie Studio Interface

Import

始める

Importing From Adobe XD

Importing From Figma

Importing From Sketch

ProtoPie Genie

Basic Elements

Containers

Devices

Layers

Preview Window

Scenes

Scroll/Paging

Shortcuts

System Status Bar

Triggers & Responses

Easing

Annotations

Responses

Timelines

Triggers

Formulas

始める

Functions

Layer Properties

Syntax

Formulas Use Cases

Variables

始める

Variables

Predefined Variables

Variables Use Cases

AI

始める

AI Interaction Creation

AI Document Q&A

AI Panel Interface

Tips for Best Results

ProtoPie MCP

Getting Started

Studio MCP 概要

Studio MCP インストールとセットアップ

Code MCP 概要

Code MCP インストールとセットアップ

Dev View

Auto Layout

시작하기

Auto Layout Properties

Components

始める

Component Guides

Editing Components

Nested Components

Send & Receive Messages

Interaction Libraries

始める

Managing Interaction Libraries

Managing Library Members

Voice Prototyping

Getting Started

Listen Response

Speak Response

Use Cases

Voice Command Trigger

Connecting Devices

Connecting blokdots

Connecting Mobile Devices

ProtoPie Cloud

始める

Managing Prototypes

Managing Storage

Sharing Prototypes

ProtoPie Player

Testing Prototypes

Managing Fonts

Offline Testing

ProtoPie Player for Wear OS

Teams

始める

Editors & Viewers

Onboarding Your Team

Projects

Team Owner & Team Admin

Handoff

始める

Creating Interaction Recordings

Managing Interaction Recordings

Recording Page

User Testing

始める

Overview

Creating Test Rooms

External Integrations

Managing Test Sessions

Test Results & Analysis

User Testing on ProtoPie Cloud

ProtoPie Connect

始める

API Plugin

Arduino Plugin

blokdots Plugin

Connect Embedded

Custom Layer Integrations

Custom Plugins

Connect Devices

Gamepad Plugin

IFTTT Plugin

Logitech G29 Steering Wheel Plugin

Testing Prototypes

Feature Comparison

Unity Plugin

ProtoPie Enterprise

始める

Organization Settings

Service Admin

Single Sign-On (SSO)

Security

Overview

Access Control

Data Transit, Storage & Backup

Incident Response

Network & ProtoPie Player App Security

Physical Security

Risk Management

Menu

Introducing ProtoPie

始める

Making Your First Prototype

ProtoPie Ecosystem

ProtoPie Studio Interface

Import

始める

Importing From Adobe XD

Importing From Figma

Importing From Sketch

ProtoPie Genie

Basic Elements

Containers

Devices

Layers

Preview Window

Scenes

Scroll/Paging

Shortcuts

System Status Bar

Triggers & Responses

Easing

Annotations

Responses

Timelines

Triggers

Formulas

始める

Functions

Layer Properties

Syntax

Formulas Use Cases

Variables

始める

Variables

Predefined Variables

Variables Use Cases

AI

始める

AI Interaction Creation

AI Document Q&A

AI Panel Interface

Tips for Best Results

ProtoPie MCP

Getting Started

Studio MCP 概要

Studio MCP インストールとセットアップ

Code MCP 概要

Code MCP インストールとセットアップ

Dev View

Auto Layout

시작하기

Auto Layout Properties

Components

始める

Component Guides

Editing Components

Nested Components

Send & Receive Messages

Interaction Libraries

始める

Managing Interaction Libraries

Managing Library Members

Voice Prototyping

Getting Started

Listen Response

Speak Response

Use Cases

Voice Command Trigger

Connecting Devices

Connecting blokdots

Connecting Mobile Devices

ProtoPie Cloud

始める

Managing Prototypes

Managing Storage

Sharing Prototypes

ProtoPie Player

Testing Prototypes

Managing Fonts

Offline Testing

ProtoPie Player for Wear OS

Teams

始める

Editors & Viewers

Onboarding Your Team

Projects

Team Owner & Team Admin

Handoff

始める

Creating Interaction Recordings

Managing Interaction Recordings

Recording Page

User Testing

始める

Overview

Creating Test Rooms

External Integrations

Managing Test Sessions

Test Results & Analysis

User Testing on ProtoPie Cloud

ProtoPie Connect

始める

API Plugin

Arduino Plugin

blokdots Plugin

Connect Embedded

Custom Layer Integrations

Custom Plugins

Connect Devices

Gamepad Plugin

IFTTT Plugin

Logitech G29 Steering Wheel Plugin

Testing Prototypes

Feature Comparison

Unity Plugin

ProtoPie Enterprise

始める

Organization Settings

Service Admin

Single Sign-On (SSO)

Security

Overview

Access Control

Data Transit, Storage & Backup

Incident Response

Network & ProtoPie Player App Security

Physical Security

Risk Management

Annotations

Annotations are documentation blocks that can be placed between interaction pieces (triggers and responses) to provide context and explanations. They act as inline comments appearing directly in your interaction flow, making them ideal for:

  • Documenting interaction logic for team handoffs

  • Explaining complex prototype behaviors

  • Providing implementation notes for developers

  • Adding context for stakeholder reviews

Creating Annotations

From the Top Bar

Click the Annotation button in the top toolbar to add an annotation:

  • With interaction piece selected: Creates a Trigger-level or Response-level annotation directly below the selected piece.

  • With no selection: Creates a Trigger-level annotation at the bottom of the interaction panel.

  • With layer selected: Deselects the layer and creates a Trigger-level annotation at the bottom.

Between Interaction Pieces

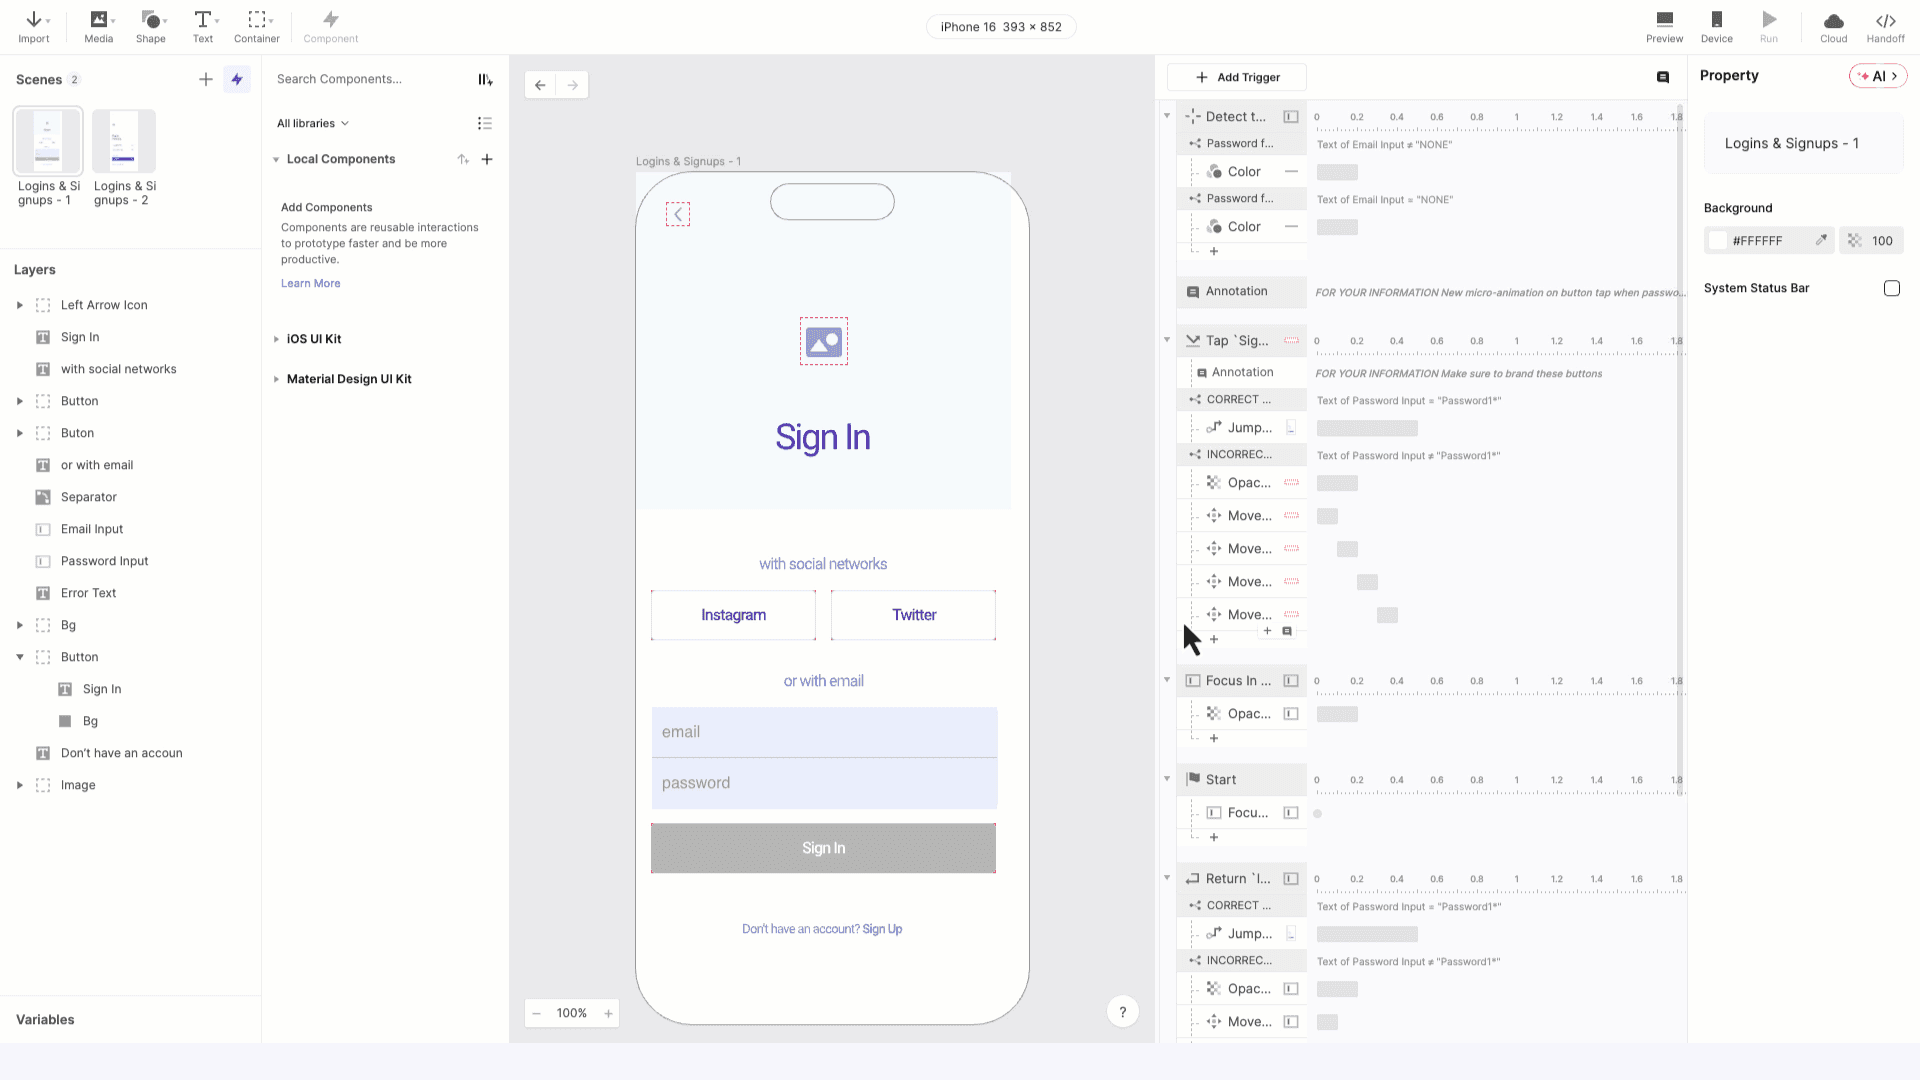
Hover between any interaction pieces to reveal the + button, then select Annotation. This creates a Response-level annotation at that specific position.

[object Object]

Annotation Levels

Annotations exist at two hierarchical levels.

Trigger Level

Trigger-level annotations that provide general context for a set of interactions. These are created from the top bar or by dragging Response-level annotations to the trigger level.


[object Object]

Response Level

Annotations nested within triggers that document specific responses or interaction sequences. Created between interaction pieces or by dragging Trigger-level annotations under a trigger.


[object Object]

💡Tip: You can easily convert between levels by dragging annotations to different positions in the interaction hierarchy. You can also use shortcuts to move them:

  • To the top:

    • Mac: ] or ⌥⌘ ]

    • PC: ] or Ctrl + Alt + ]

  • To the bottom:

    • Mac: [ or ⌥⌘ [

    • PC: [ or Ctrl + Alt + [

Editing Annotations

Click on an annotation to edit its content in the property panel. Annotations support full markdown formatting, allowing you to:

  • Add headers and emphasis (bold, italic)

  • Create lists and tables

  • Include code blocks for technical documentation

  • Add links to external resources

When focused, you'll see raw markdown text. When you click away, the content renders with proper formatting.