ProtoPie MCP ベータ版を提供開始!詳しくはこちら。

ProtoPie MCPのベータ版が提供開始!

Introducing ProtoPie

始める

Making Your First Prototype

ProtoPie Ecosystem

ProtoPie Studio Interface

Import

始める

Importing From Adobe XD

Importing From Figma

Importing From Sketch

ProtoPie Genie

Basic Elements

Containers

Devices

Layers

Preview Window

Scenes

Scroll/Paging

Shortcuts

System Status Bar

Triggers & Responses

Easing

Annotations

Responses

Timelines

Triggers

Formulas

始める

Functions

Layer Properties

Syntax

Formulas Use Cases

Variables

始める

Variables

Predefined Variables

Variables Use Cases

AI

始める

AI Interaction Creation

AI Document Q&A

AI Panel Interface

Tips for Best Results

ProtoPie MCP

Getting Started

Studio MCP 概要

Studio MCP インストールとセットアップ

Code MCP 概要

Code MCP インストールとセットアップ

Dev View

Auto Layout

시작하기

Auto Layout Properties

Components

始める

Component Guides

Editing Components

Nested Components

Send & Receive Messages

Interaction Libraries

始める

Managing Interaction Libraries

Managing Library Members

Voice Prototyping

Getting Started

Listen Response

Speak Response

Use Cases

Voice Command Trigger

Connecting Devices

Connecting blokdots

Connecting Mobile Devices

ProtoPie Cloud

始める

Managing Prototypes

Managing Storage

Sharing Prototypes

ProtoPie Player

Testing Prototypes

Managing Fonts

Offline Testing

ProtoPie Player for Wear OS

Teams

始める

Editors & Viewers

Onboarding Your Team

Projects

Team Owner & Team Admin

Handoff

始める

Creating Interaction Recordings

Managing Interaction Recordings

Recording Page

User Testing

始める

Overview

Creating Test Rooms

External Integrations

Managing Test Sessions

Test Results & Analysis

User Testing on ProtoPie Cloud

ProtoPie Connect

始める

API Plugin

Arduino Plugin

blokdots Plugin

Connect Embedded

Custom Layer Integrations

Custom Plugins

Connect Devices

Gamepad Plugin

IFTTT Plugin

Logitech G29 Steering Wheel Plugin

Testing Prototypes

Feature Comparison

Unity Plugin

ProtoPie Enterprise

始める

Organization Settings

Service Admin

Single Sign-On (SSO)

Security

Overview

Access Control

Data Transit, Storage & Backup

Incident Response

Network & ProtoPie Player App Security

Physical Security

Risk Management

Menu

Introducing ProtoPie

始める

Making Your First Prototype

ProtoPie Ecosystem

ProtoPie Studio Interface

Import

始める

Importing From Adobe XD

Importing From Figma

Importing From Sketch

ProtoPie Genie

Basic Elements

Containers

Devices

Layers

Preview Window

Scenes

Scroll/Paging

Shortcuts

System Status Bar

Triggers & Responses

Easing

Annotations

Responses

Timelines

Triggers

Formulas

始める

Functions

Layer Properties

Syntax

Formulas Use Cases

Variables

始める

Variables

Predefined Variables

Variables Use Cases

AI

始める

AI Interaction Creation

AI Document Q&A

AI Panel Interface

Tips for Best Results

ProtoPie MCP

Getting Started

Studio MCP 概要

Studio MCP インストールとセットアップ

Code MCP 概要

Code MCP インストールとセットアップ

Dev View

Auto Layout

시작하기

Auto Layout Properties

Components

始める

Component Guides

Editing Components

Nested Components

Send & Receive Messages

Interaction Libraries

始める

Managing Interaction Libraries

Managing Library Members

Voice Prototyping

Getting Started

Listen Response

Speak Response

Use Cases

Voice Command Trigger

Connecting Devices

Connecting blokdots

Connecting Mobile Devices

ProtoPie Cloud

始める

Managing Prototypes

Managing Storage

Sharing Prototypes

ProtoPie Player

Testing Prototypes

Managing Fonts

Offline Testing

ProtoPie Player for Wear OS

Teams

始める

Editors & Viewers

Onboarding Your Team

Projects

Team Owner & Team Admin

Handoff

始める

Creating Interaction Recordings

Managing Interaction Recordings

Recording Page

User Testing

始める

Overview

Creating Test Rooms

External Integrations

Managing Test Sessions

Test Results & Analysis

User Testing on ProtoPie Cloud

ProtoPie Connect

始める

API Plugin

Arduino Plugin

blokdots Plugin

Connect Embedded

Custom Layer Integrations

Custom Plugins

Connect Devices

Gamepad Plugin

IFTTT Plugin

Logitech G29 Steering Wheel Plugin

Testing Prototypes

Feature Comparison

Unity Plugin

ProtoPie Enterprise

始める

Organization Settings

Service Admin

Single Sign-On (SSO)

Security

Overview

Access Control

Data Transit, Storage & Backup

Incident Response

Network & ProtoPie Player App Security

Physical Security

Risk Management

Auto Layout

Auto Layout in ProtoPie Studio is designed to automate alignment and spacing, simplifying layout creation and adjustment. By transforming regular containers into Auto Layout Containers, it ensures consistency and flexibility throughout the design process.
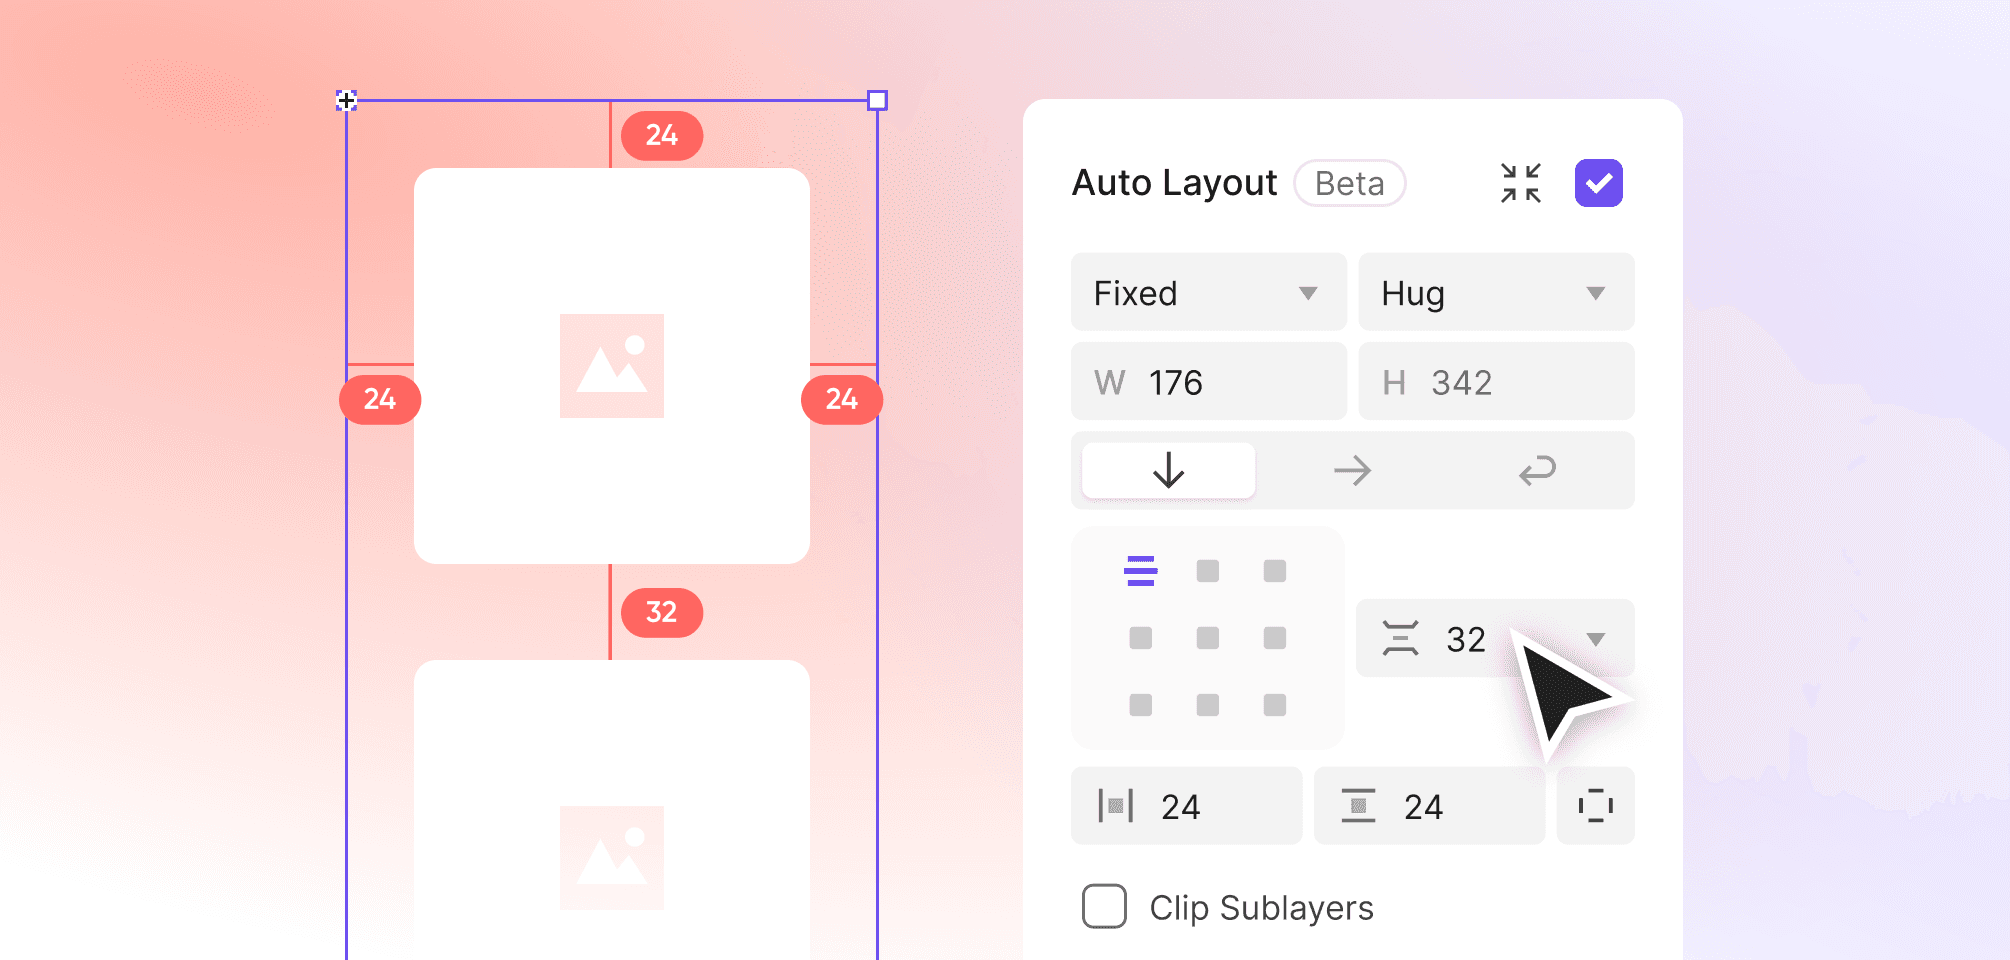

{'_type': 'localeString', 'en': 'Auto Layout', 'ja': 'Auto Layout', 'ko': 'Auto Layout', 'zh': 'Auto Layout'}

Difference Between Fixed Layout & Auto Layout

Fixed Layout and Auto Layout provide different ways to handle alignment and spacing in design.

  • Fixed Layout: Requires manual adjustments to maintain consistency, offering precise but static control.

  • Auto Layout: Dynamically adapts to content changes, reducing manual effort and enabling responsive designs.

Getting Started with Auto Layout

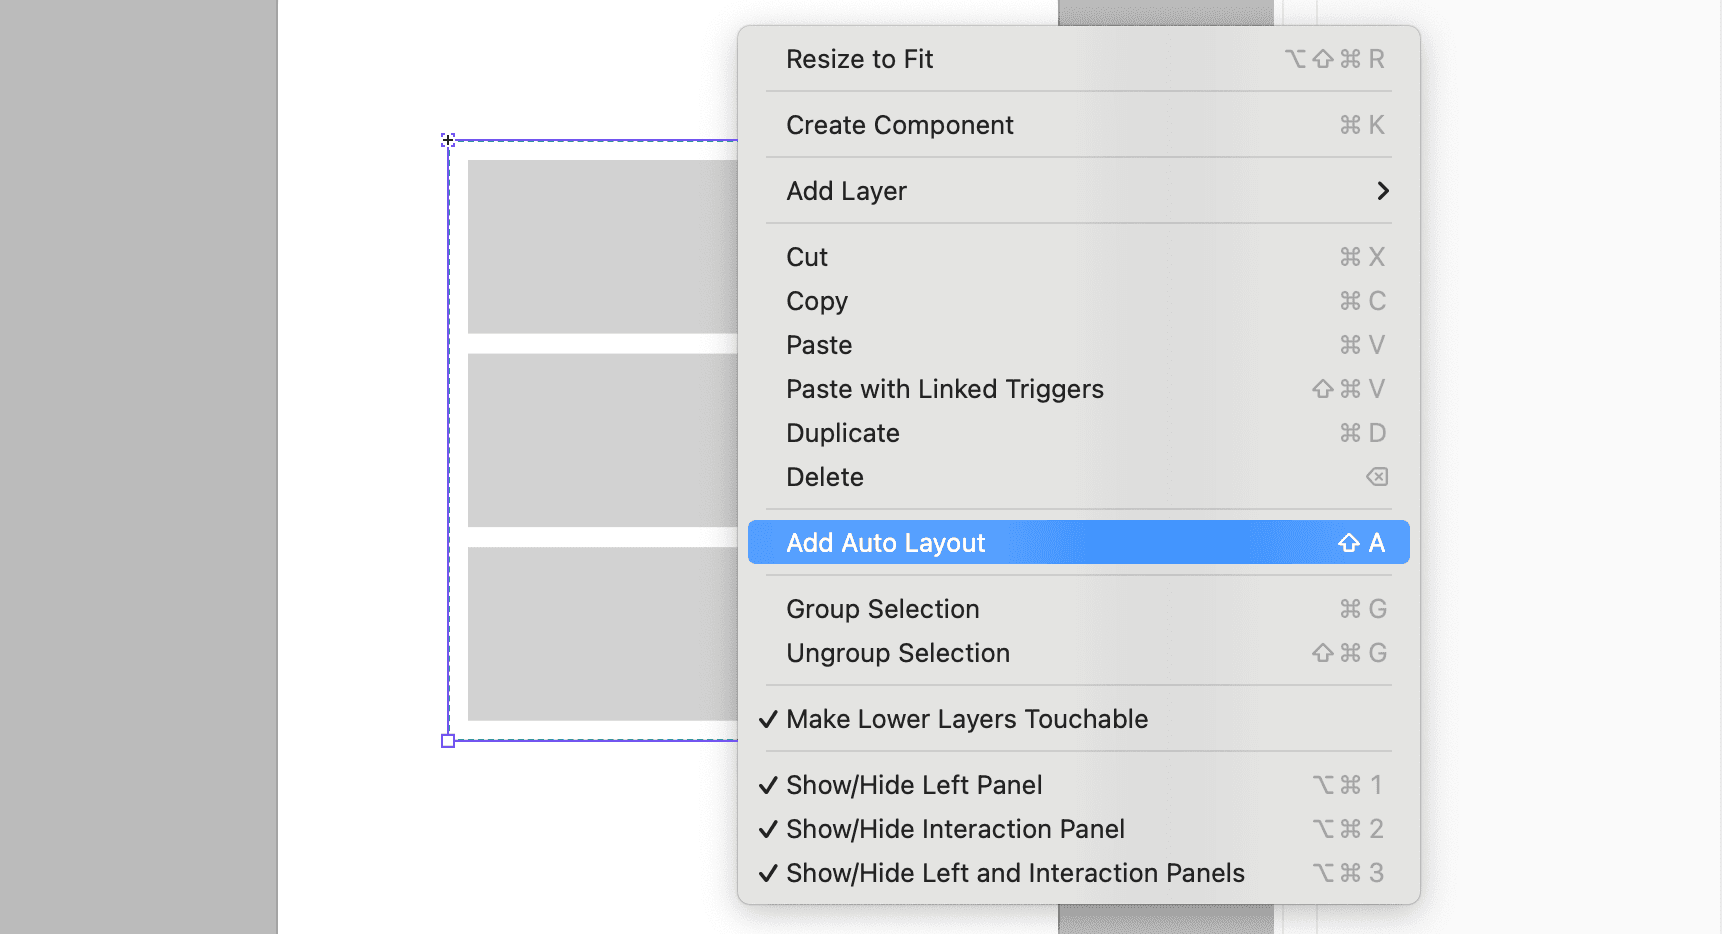
You can enable Auto Layout for containers, components, or multiple objects using the Property Panel, right-click menu, or a simple shortcut. Once applied, Auto Layout automatically assigns default properties.

How to Apply Auto Layout

You can enable Auto Layout via:

  • Property Panel: Select a layer or container and check the Auto Layout option.

  • Right-Click Menu: Right-click and select "Add Auto Layout."

  • Shortcut: Use the Shift+A shortcut.


{'_type': 'localeString', 'en': 'Apply Auto Layout', 'ja': 'Apply Auto Layout', 'ko': 'Apply Auto Layout', 'zh': 'Apply Auto Layout'}

When you apply Auto Layout, the following default properties are assigned:

  • Direction: Vertical

  • Resizing: Hug Contents for both width and height

  • Alignment: Top-Left

  • Gap: 10px

  • Padding: 10px (applied uniformly to all sides)

Auto Layout Visibility in the Property Panel

The Auto Layout option becomes visible in the Property Panel depending on the selected layer type or group. Here’s how it works for different cases:

  • Single Container: Enable Auto Layout for a container to transform it into an Auto Layout container.

  • Main Components: Apply Auto Layout to components for consistent behavior across instances.

  • Multiple Objects: Add Auto Layout to multiple selected objects, grouping them into a single Auto Layout container.

How to Remove Auto Layout

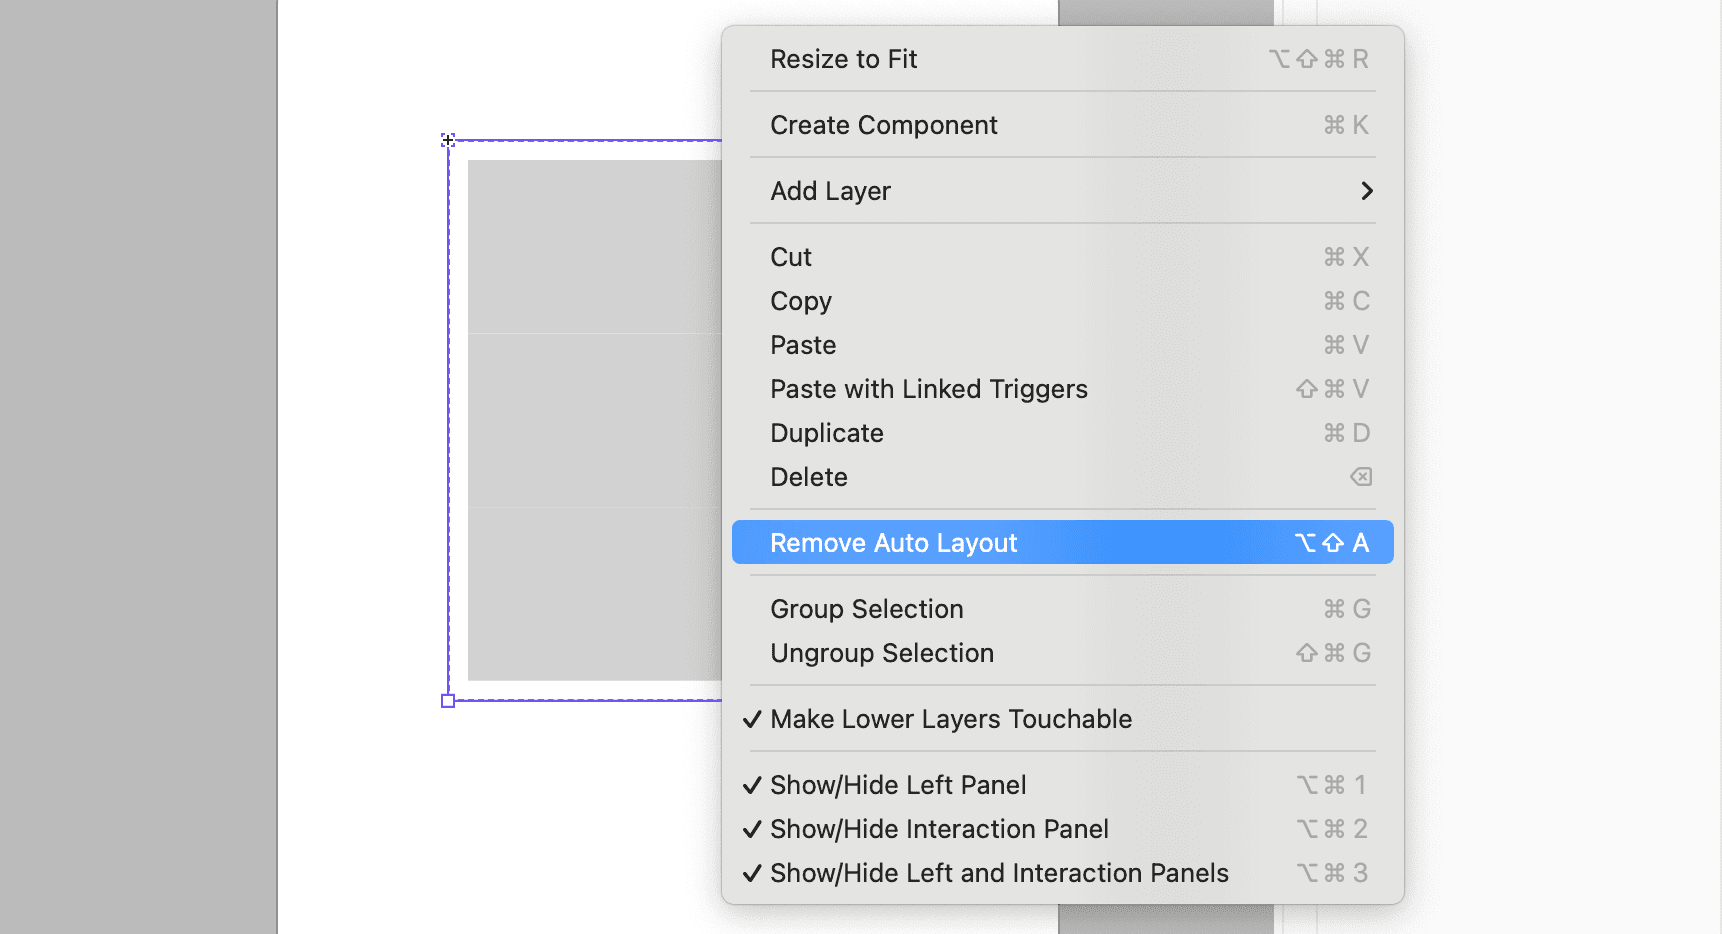
You can restore manual control over alignment and spacing by disabling Auto Layout. This feature allows you to switch back to Fixed Layout when needed.

You can remove Auto Layout via:

  • Property Panel: Uncheck the Auto Layout option.

  • Right-Click Menu: Select "Remove Auto Layout."

  • Shortcut: Use Option+Shift+A (Mac) / Alt+Shift+A (Windows).


{'_type': 'localeString', 'en': 'Remove Auto Layout', 'ja': 'Remove Auto Layout', 'ko': 'Remove Auto Layout', 'zh': 'Remove Auto Layout'}

Notes on Auto Layout

While Auto Layout is powerful and flexible, there are a few things to keep in mind to make the most of this feature. Here are some important points about how Auto Layout interacts with specific layers:

  • Mask Layers: Applying Auto Layout to a mask layer replaces the mask option with Auto Layout.

  • Audio Layers: Auto Layout does not affect resizing or interactions with audio layers.

  • Auto Layout can be applied to single non-container layers, but only via shortcuts or the right-click menu. It is not accessible in the Property Panel.