Studio MCP Installation & Setup
Available with MCP Core.
Step 1 — Turn on the MCP Server in Studio
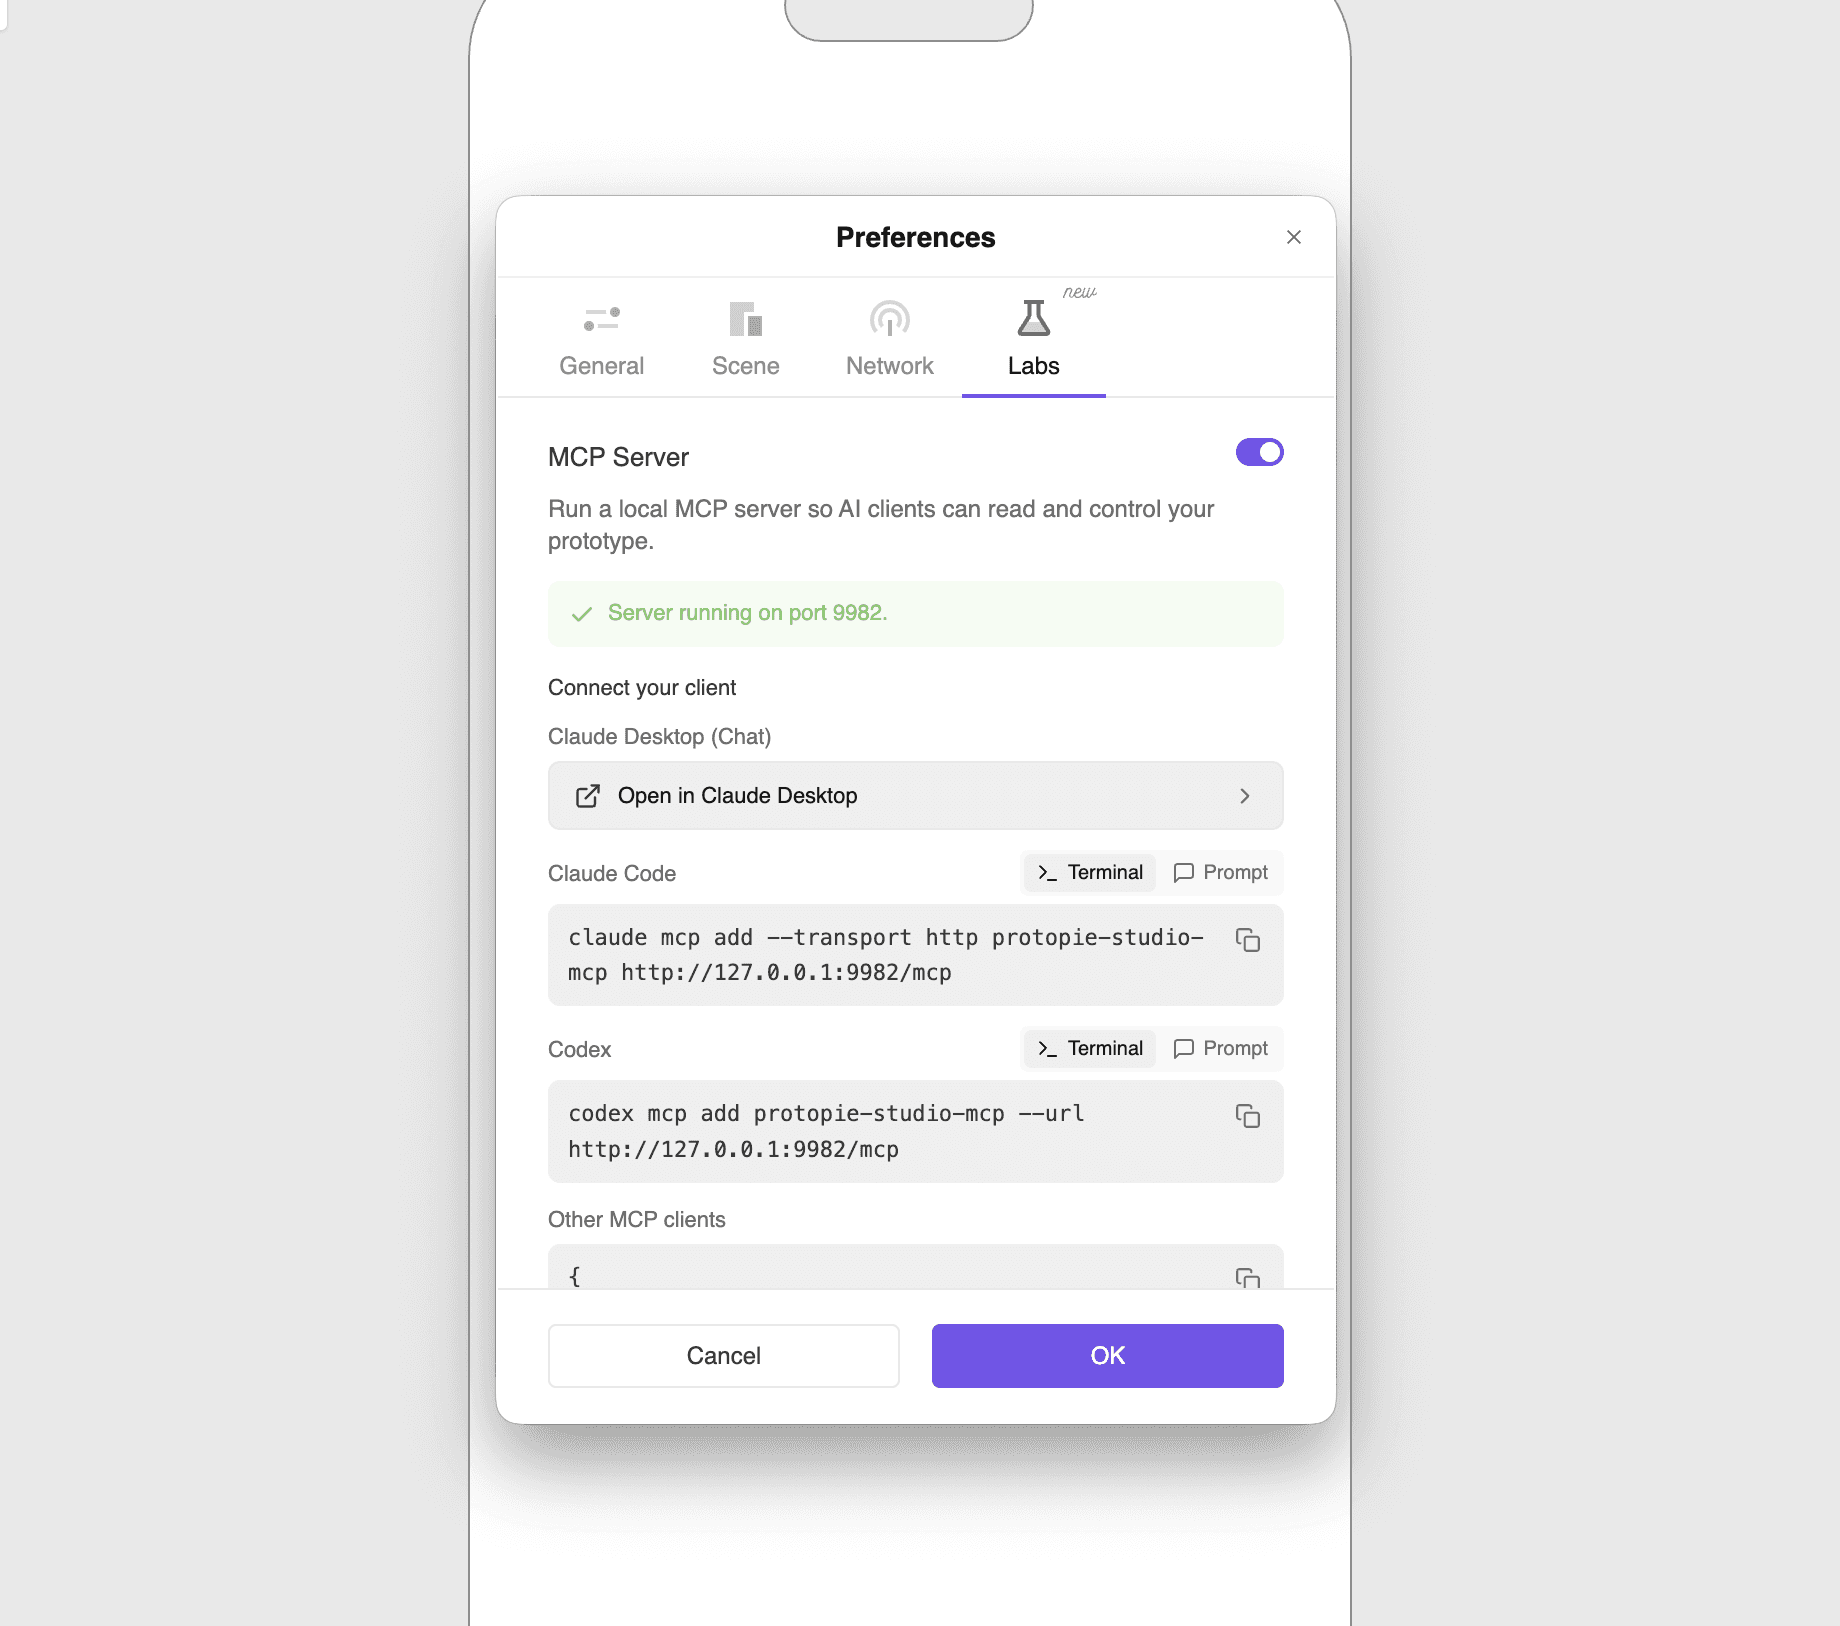
In ProtoPie Studio, open Preferences → Labs.
Turn on the MCP Server toggle. The server starts immediately — no save or app restart needed.
Below the toggle, you’ll see the server status and per-client connection details. Use each copy button to grab the exact command or config.
🔢 About the port — the default port is 9982, but if it’s already in use another port is assigned automatically. Always copy the actual command/URL shown in Labs.
Step 2 — Connect from your AI client
Pick the client that matches your setup. If code and the terminal feel like a hassle, 2-1 (Claude Desktop one-click) is the easiest. Options 2-2 through 2-5 all connect to the same address, http://127.0.0.1:<PORT>/mcp, where <PORT> is the actual port shown in Labs (default 9982).
2-1. Claude Desktop (Chat) — one-click (recommended, easiest)
Connect with a single button — no code or config files.
In Studio, turn on Preferences → Labs → MCP Server.
On the same screen, click Open in Claude Desktop.
Claude Desktop automatically shows a prompt to install the ProtoPie Studio MCP extension (
.mcpb). Install it.The extension auto-detects and connects to the current Studio port — no extra setup.
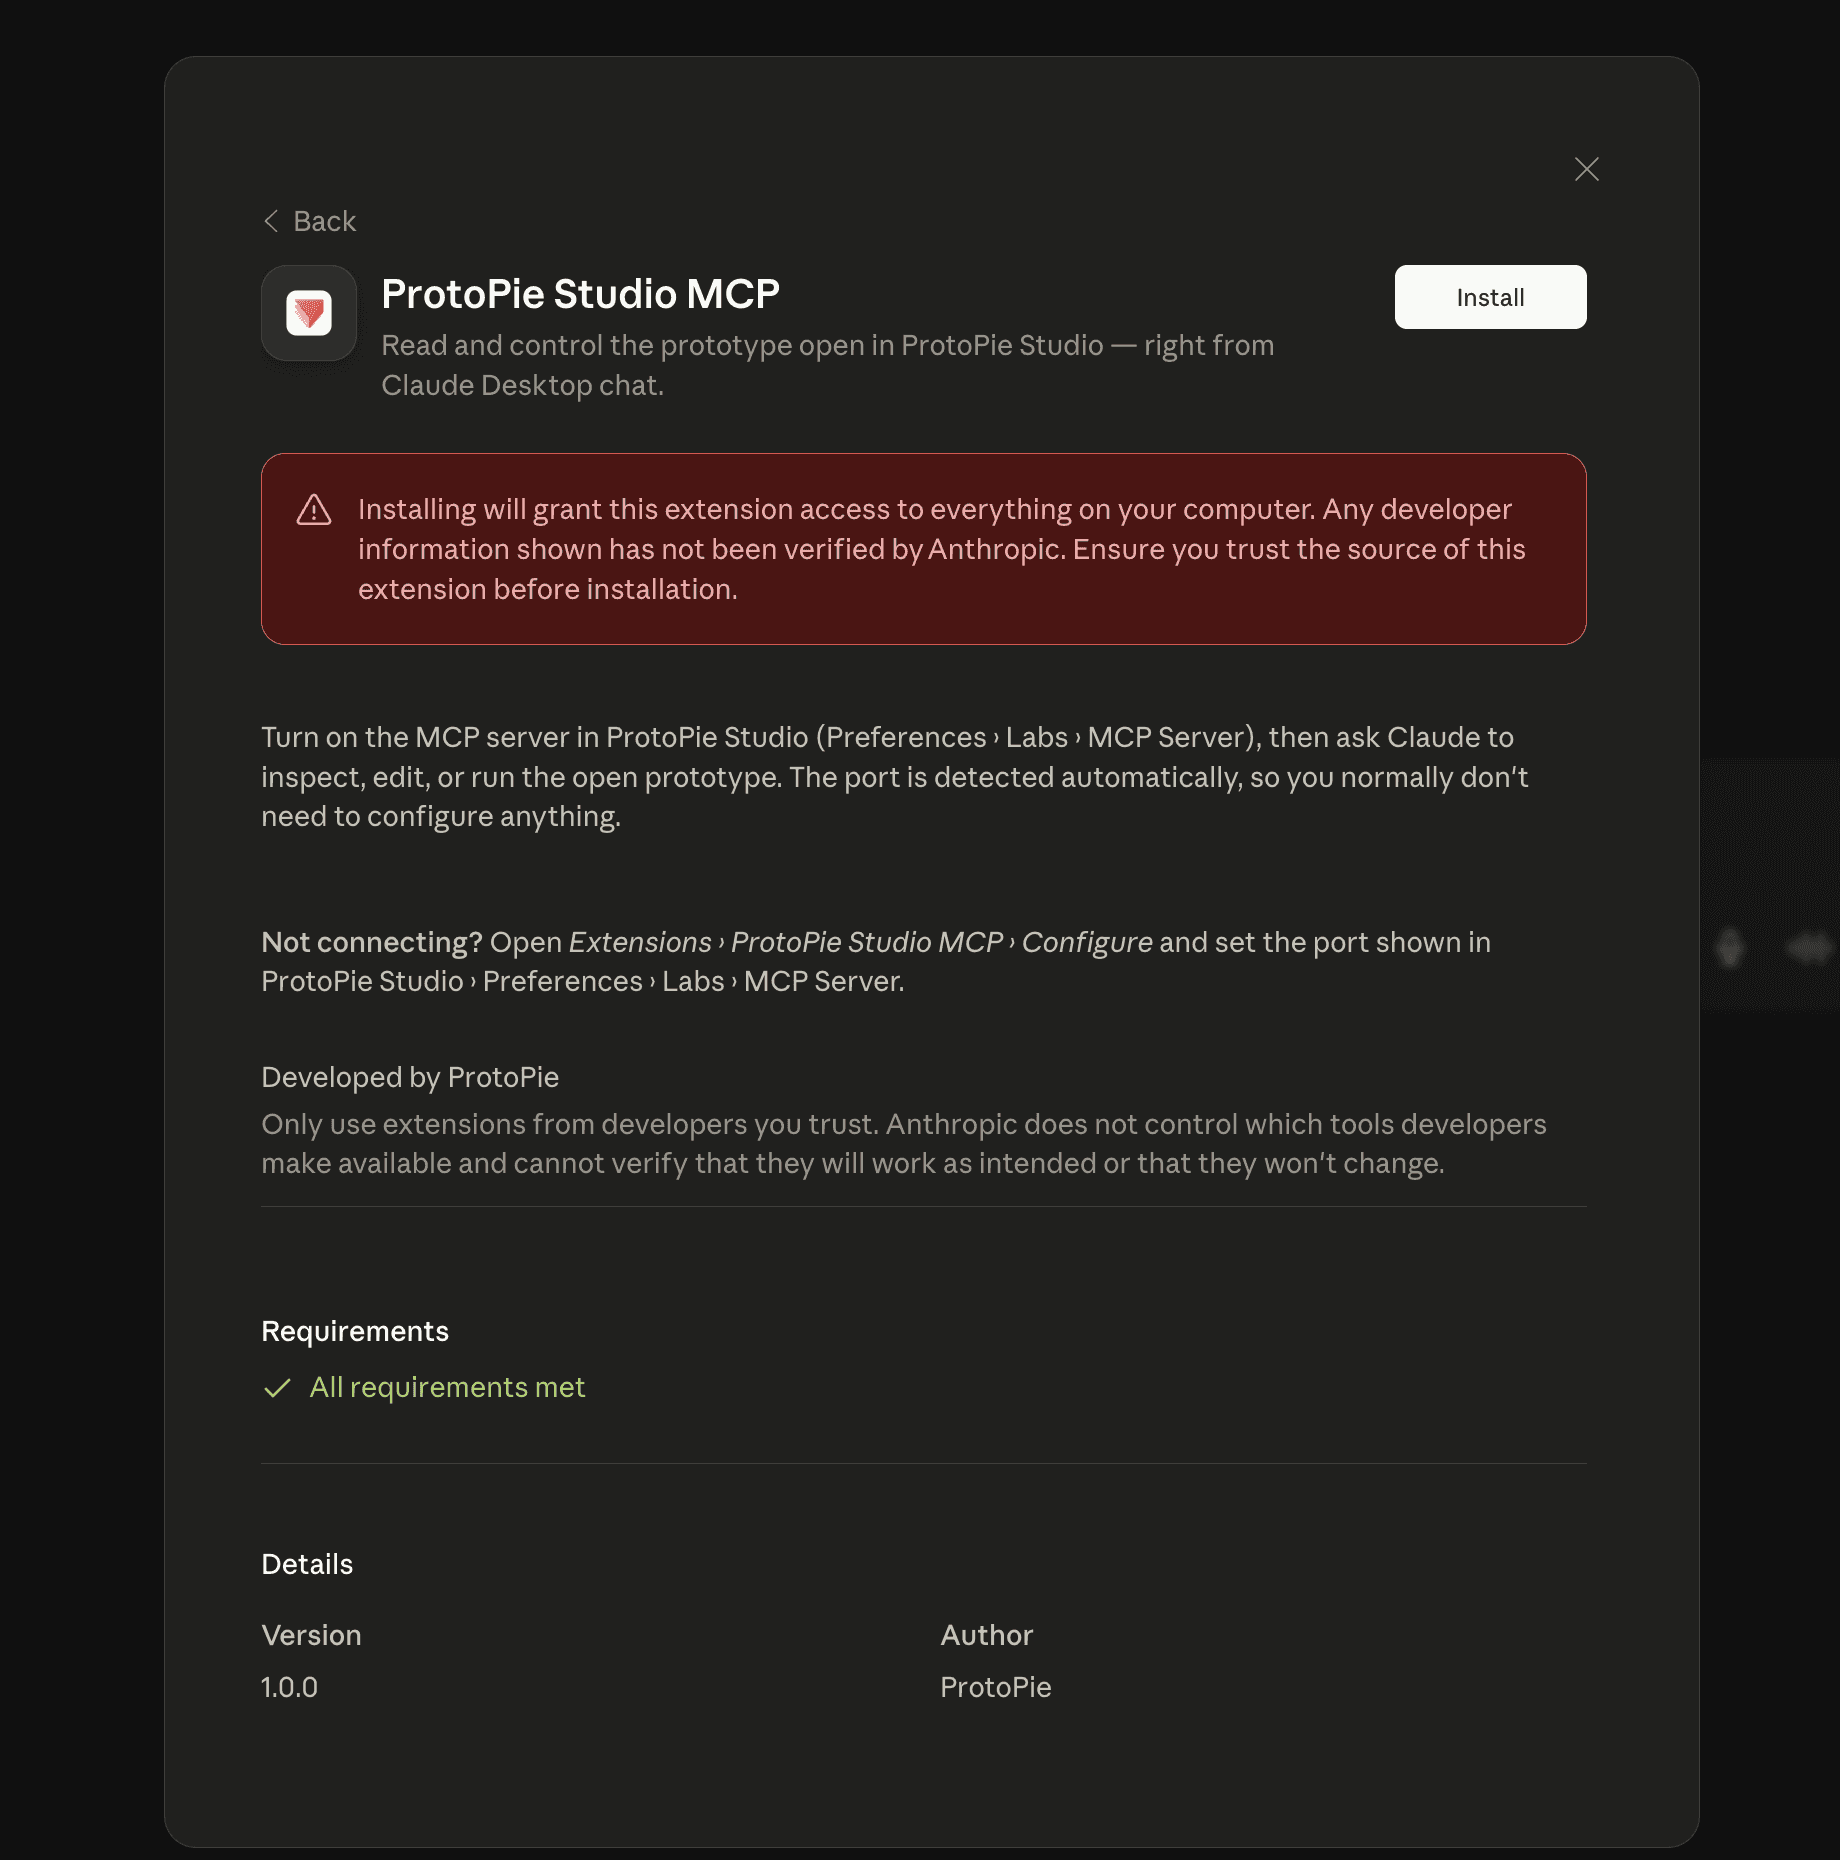
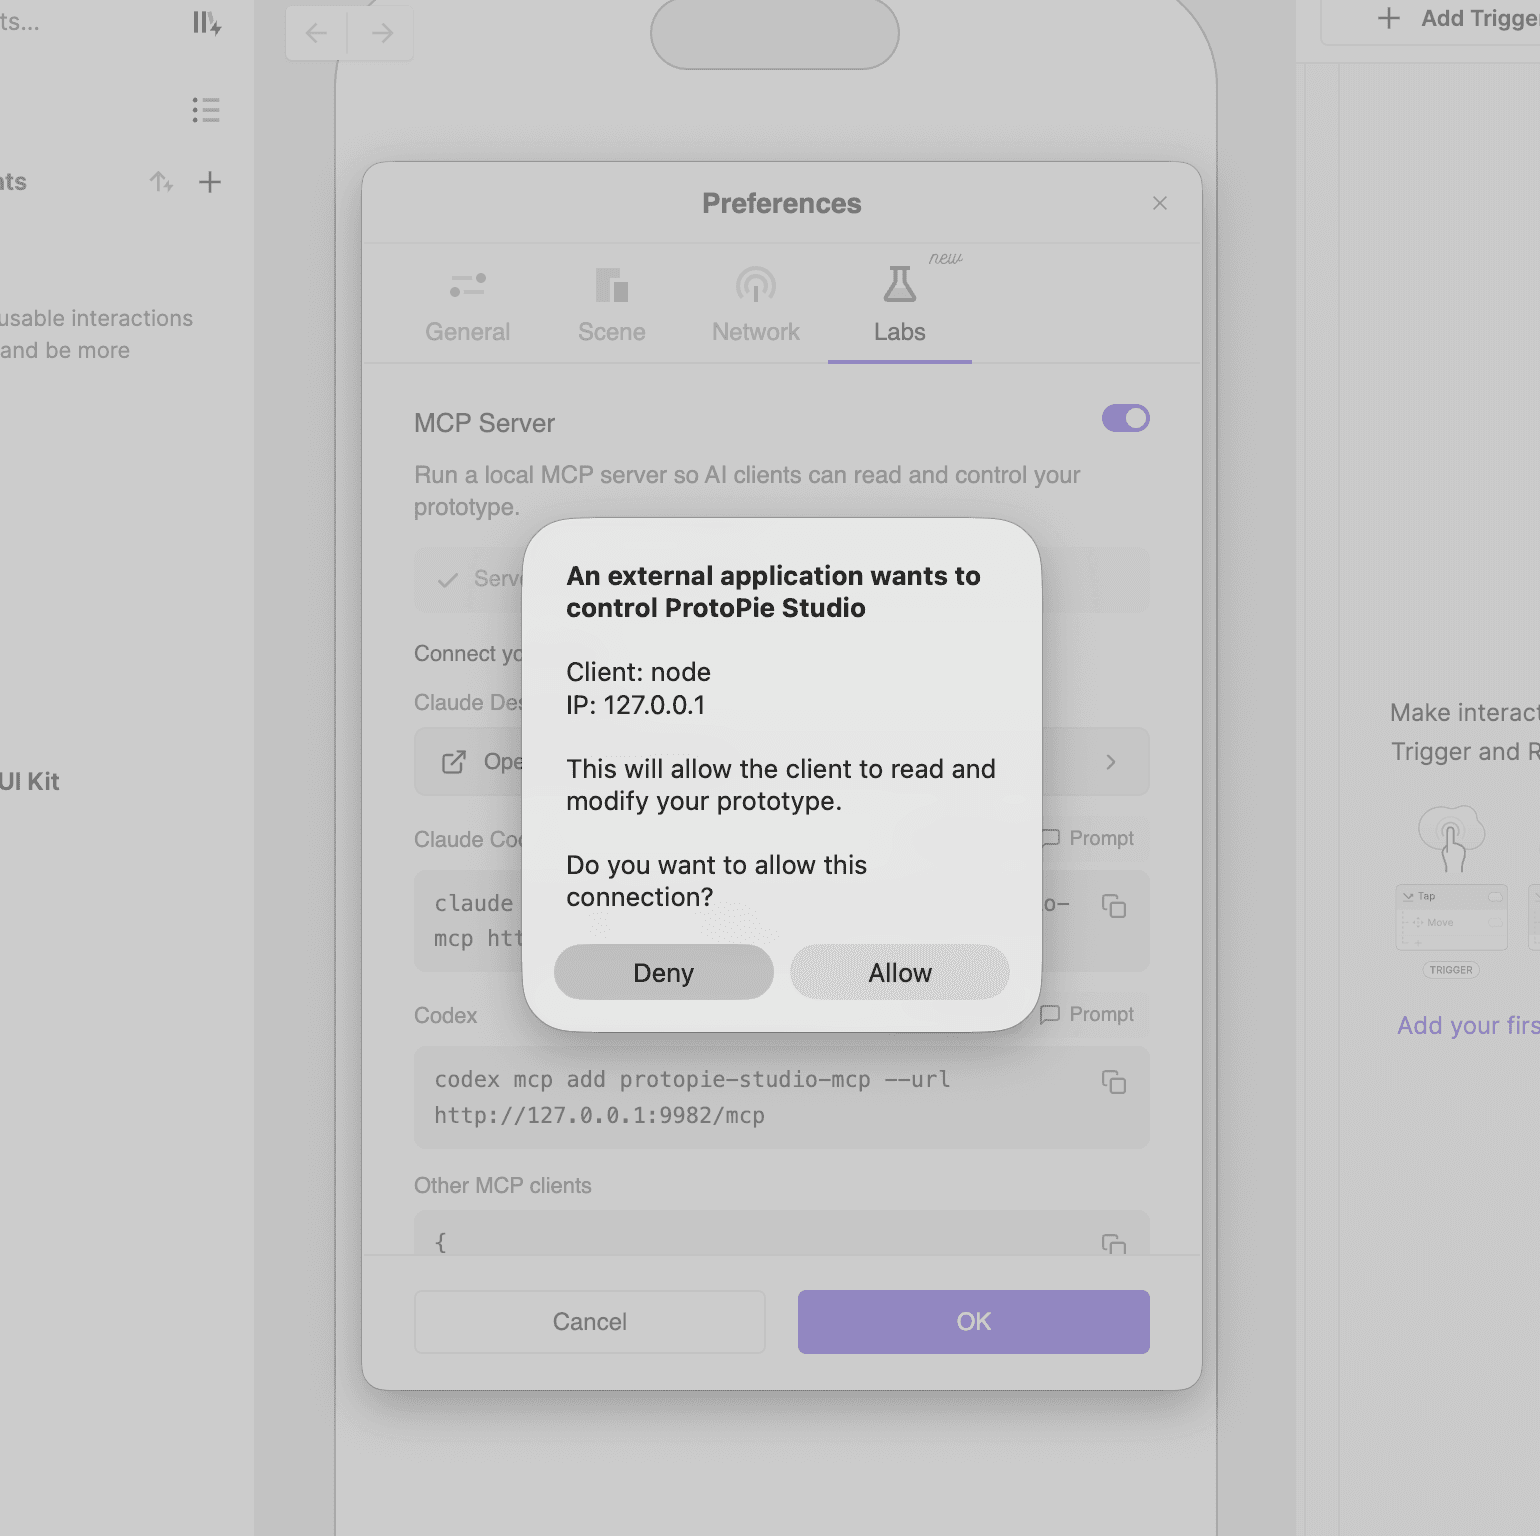
Use it right away in the Claude Desktop chat. On first use, approve the Allow dialog in Studio.
⚠️ Claude Desktop’s Chat mode and Code tab keep separate MCP lists. This one-click extension is for Chat mode; for the Code tab, follow 2-2.
Manual alternative (when the button isn’t available)
Chat mode’s
claude_desktop_config.jsononly supports stdio, so an HTTP server goes through themcp-remotebridge (requires Node.js /npx).Open
claude_desktop_config.jsonvia Settings → Developer → Edit Config:macOS:
~/Library/Application Support/Claude/claude_desktop_config.jsonWindows:
%APPDATA%\Claude\claude_desktop_config.json
Add it under
mcpServers:Save, then fully quit and restart Claude Desktop. Approve Allow on first use.
2-2. Claude Code (terminal CLI, or the Code tab in Claude Desktop)
Connect from the terminal or from Claude Desktop’s Code tab (Claude Code built in) with the same command.
🗂️ Authoring in the Code tab — the Code tab asks you to choose a working directory (folder) first. That folder becomes your workspace, and the MCP server registers to it (local scope). If you switch folders the server may not appear there — use --scope user (below) to make it available everywhere.
Move into your project folder (working directory), then run:
This registers it for the current project (local scope) only. To use it across all projects, add
--scope user:Reload Claude Code, run
/mcp, and selectprotopie-studio-mcp.When Studio shows the Allow / Deny dialog, click Allow.
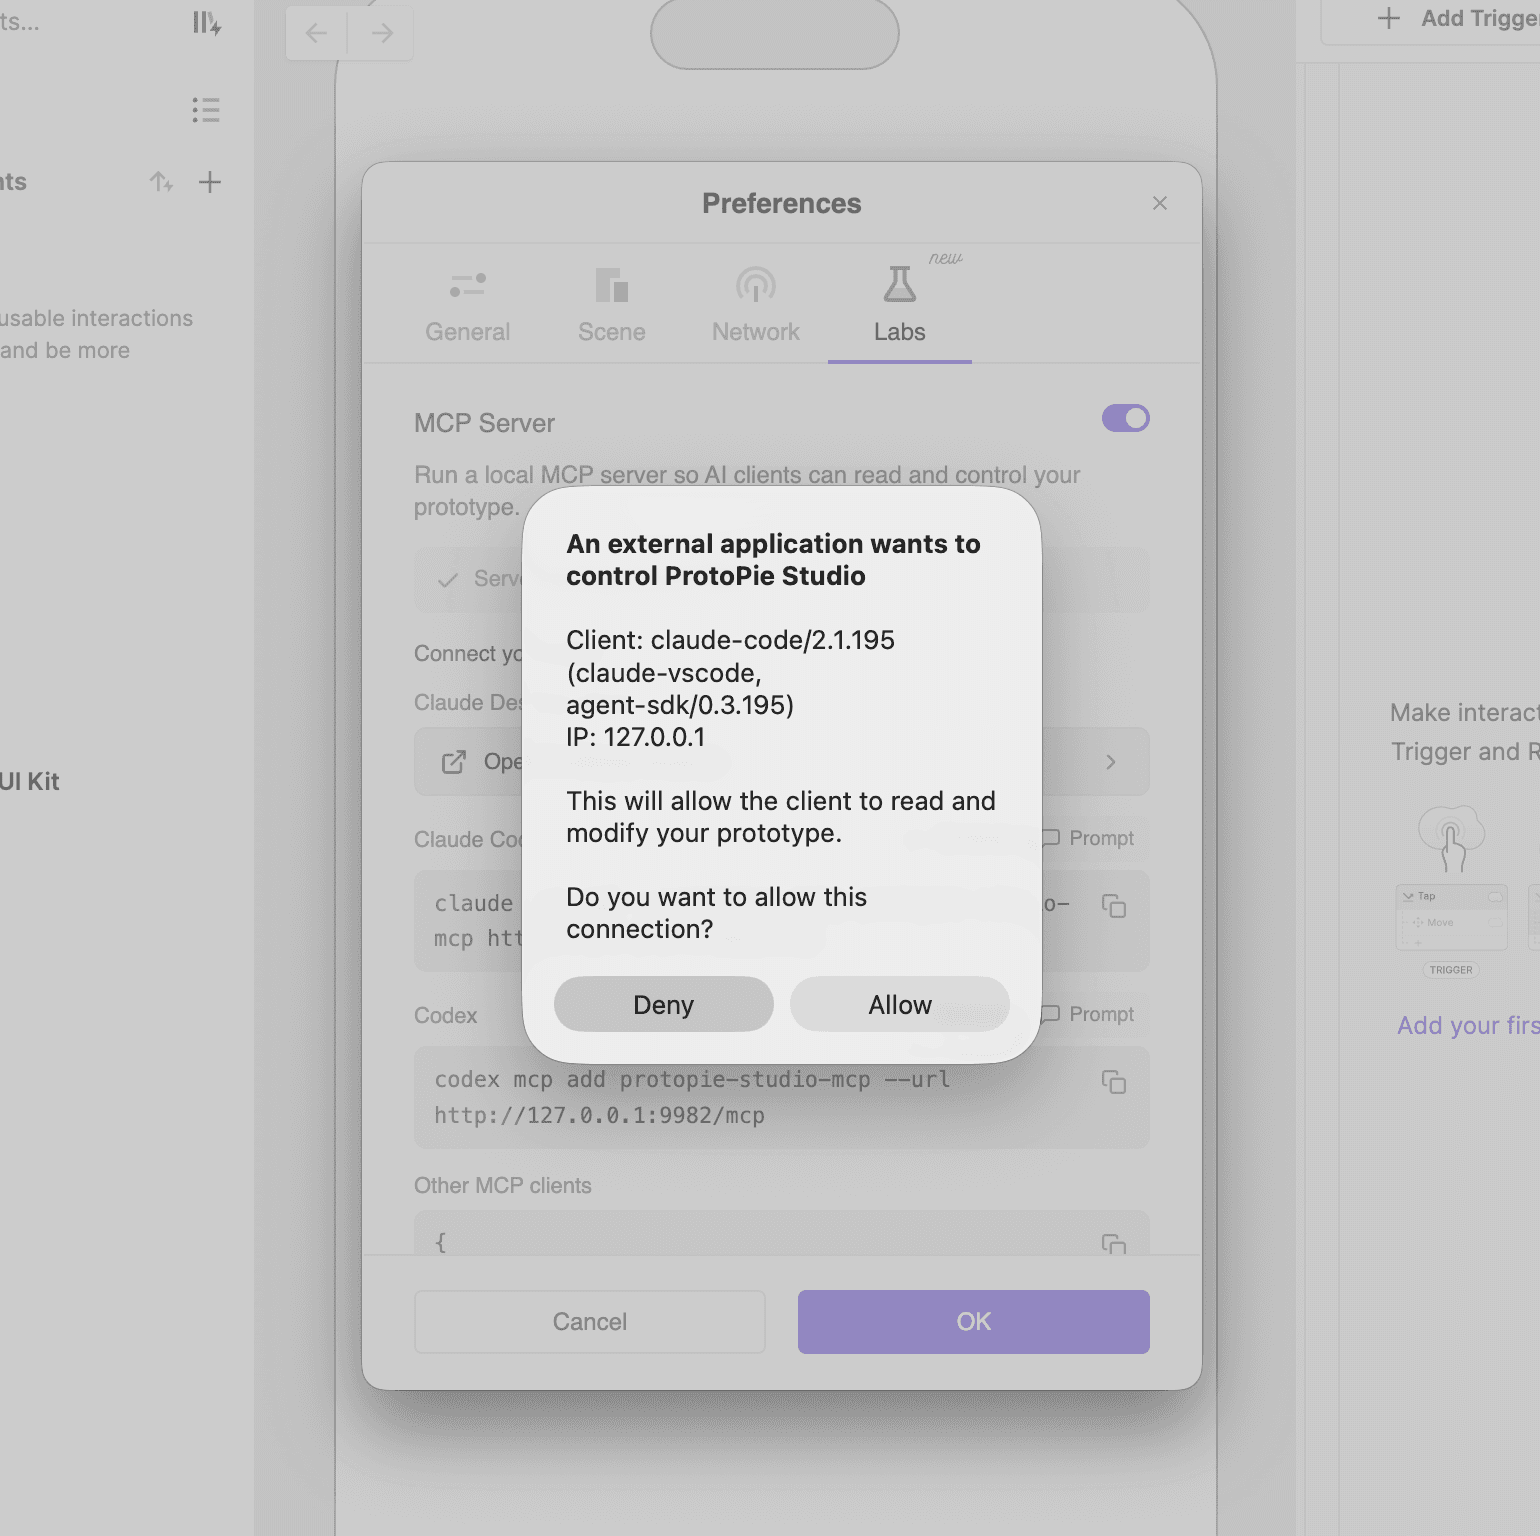
You’re done when
protopie-studio-mcpshows as connected in the tool list.
2-3. Codex
Run it in the terminal, or paste the JSON into your config:
2-4. Cursor
Settings → MCP → + Add new MCP server (or edit your project’s
.cursor/mcp.jsondirectly).Add the JSON:
Save → connect → approve Allow in Studio on first use.
2-5. VS Code (Agent mode)
Cmd/Ctrl + Shift + P→ MCP: Add Server → choose HTTP.Enter
http://127.0.0.1:9982/mcpas the URL andprotopie-studio-mcpas the Server ID, then pick a scope. This saves aserversentry inmcp.jsonwithtype: "http"and theurl.Start the server, find the tools in Agent mode, and approve Allow on first use.
ℹ️ VS Code note — MCP / Agent mode requires GitHub Copilot to be enabled on your account.
ℹ️ Other MCP clients — paste the JSON from the “Other MCP clients” item in Labs:
Step 3 — Approve the connection (Allow / Deny)
The first time a client connects, Studio shows an Allow / Deny dialog. Click Allow to connect.
Before you approve, the connection is temporarily refused — just reconnect (retry) from the client.
Step 4 — Use Studio MCP
Studio MCP acts on the prototype that is open and focused in Studio — there’s no link to paste. With a .pie file open, ask the AI things like:
“Analyze the interactions in the current prototype.”
“Add a Tap trigger to this button.”
“Make a screen where tapping flips the card.”
“Capture a preview of the current screen.”
Reconnecting the MCP server after updating ProtoPie
After updating the ProtoPie Studio version, you may need to remove and reconnect the existing MCP server so your AI client uses the latest connection and extension information. The exact port may change after an update, so always check the current address in Preferences → Labs before reconnecting.
Claude Desktop (Chat)
If the ProtoPie Studio MCP extension (.mcpb) needs to be updated, reinstall it from the version included with your current ProtoPie Studio app.
In Claude Desktop, remove the existing ProtoPie Studio MCP extension.
In ProtoPie Studio, go to Preferences → Labs.
Click Open in Claude Desktop and install the extension again.
Restart Claude Desktop if the updated tools do not appear right away.
On first use after reconnecting, approve the Allow dialog in Studio.
Studio updates do not automatically update an already installed Claude Desktop extension.
Claude Code
Remove the existing server, then add it again using the current URL shown in Labs. If you originally registered the server for a specific project, run the commands from that same project folder.
If you previously used --scope user or another scope, use the same scope when removing and adding the server again.
After reconnecting, restart Claude Code or reload the MCP connection, then approve the Allow dialog in Studio when prompted.
Codex
Remove the existing server, then add it again using the current URL shown in Labs.
Restart Codex or start a new session after reconnecting.
Other MCP clients
Remove the existing protopie-studio-mcp configuration, then add it again using the same setup method for your client. Copy the latest URL or JSON from Preferences → Labs, because the actual port may not be 9982.
If you use both Claude Desktop Chat and Claude Code, reconnect them separately. The Claude Desktop Chat extension and Claude Code MCP registration are managed independently.
Troubleshooting & FAQs
The AI client won’t connect to ProtoPie. → Make sure you approved the Allow dialog in ProtoPie Studio; before approval, connections are temporarily refused. Even if the client shows an Authenticate button, that doesn’t apply here — use Reconnect (retry) instead.
Tools are missing or the connection drops. → Check that MCP Server is on under Preferences → Labs, that Studio is running, and that a
.piefile is open. If this happened after updating ProtoPie Studio or Studio MCP, follow Reconnect after updating Studio MCP above.I don’t see the
Open in Claude Desktopbutton. → Confirm ProtoPie Studio is 10.3.0 or later (the button ships from 10.3.0). On an older version, update, or use the manual alternative (mcp-remote) in 2-1 or another client.I added the ProtoPie MCP in Claude Desktop but the tools don’t show. → Chat mode and the Code tab keep separate MCP lists. Add Chat mode via the
Open in Claude Desktopextension (.mcpb), and the Code tab via theclaude mcp addcommand. Make sure you added it in the mode you’re using.How do I check which extensions (
.mcpb) are installed in Claude Desktop (Chat)? → In Claude Desktop, pressCmd + ,to open Preferences, then click Extensions to see the list of installed.mcpbextensions.The port/address doesn’t match. → The port isn’t always
9982— copy the actual command/URL shown in Labs. If you see a “port unavailable” message, quit the app holding that port and restart Studio.ProtoPie MCP works in one project but not another (Claude Code / Code tab). → Local scope only registers in the folder where you ran the command. Use
--scope userto make it available everywhere.
Learn more about Code MCP.