

Overview
The evolving role of high-fidelity prototyping in UX design
What is Figma?
When should you use Figma for prototyping?
What is ProtoPie?
When should you use ProtoPie for prototyping?
Ten advantages ProtoPie offers over Figma
How to use Figma & ProtoPie together
ProtoPie vs. Figma: what’s the verdict?
The evolving role of high-fidelity prototyping in UX design
As customer needs change all the time, product and UI/UX design keep up to meet these new challenges. This is why high-fidelity prototyping tools have become stronger over time.
The numbers speak for themselves. According to a report by the Digital Journal, the UX service market soared to an impressive valuation of $19.2 billion in 2022.
This changing landscape intensifies project stakes, placing more responsibilities on designers overseeing intricate digital experiences. As stakeholders pressure design teams to excel in speed and innovation, high-fidelity prototyping becomes crucial for maintaining a competitive edge.
Thus, a pressing question emerges: what is the best advanced prototyping tool on the market to meet these demands head-on?
Interestingly, Figma has caught significant attention with the launch of its "advanced prototyping" features at Config 2023. This provides paying users access to variables, expressions & conditionals. We at ProtoPie fully support and warmly commend this development. With tools like Figma and ProtoPie available, designers are empowered to excel in advanced prototyping. Thanks to Figma, we're thrilled to see high-fidelity prototyping and interaction design gaining well-deserved attention from designers.
However, this progression raises questions for designers about how Figma and ProtoPie, both esteemed tools in the design space, differ in their approach to advanced prototyping.
Let's delve into an enlightening comparison between Figma and ProtoPie.
What is Figma?
Figma is the world’s most popular UI design tool, according to the 2022 Design Tools Survey. While it’s not a prototyping tool at heart, it does have prototyping capabilities.
Need to showcase a sequence of basic transitions between static screens? Easily do that in Figma by linking frames and adding simple interactions. It is great for simple clickable prototypes with a few states—focusing on a flow, not the actual interactions.
Even with a few states, it can quickly lead to “noodle chaos” whenever you add more. More states lead to more noodles.
In theory, the wiring model of linking frames with each other makes sense. However, when a prototype grows in complexity, it becomes difficult to make sense of, manage, or maintain.
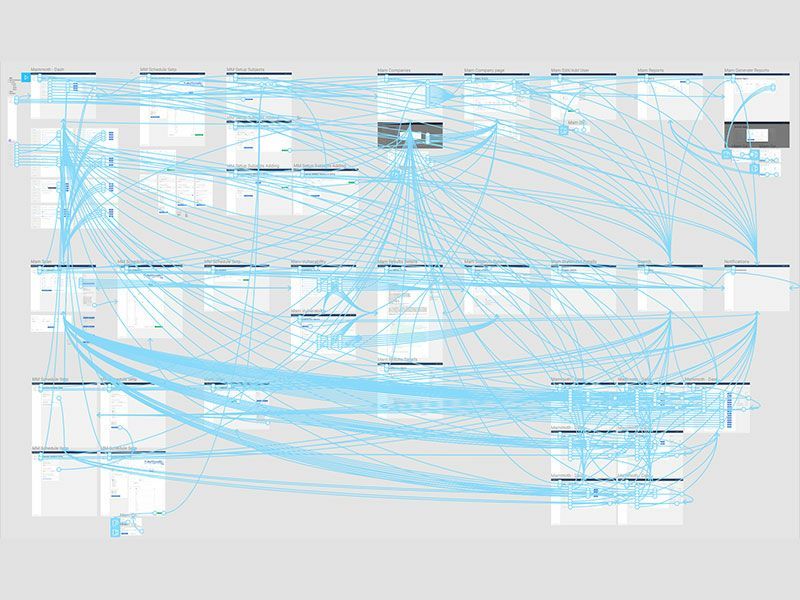
Organized chaos in Figma. Image by
As a response to this, Figma announced its “advanced prototyping” features. This gives its paying users access to variables, expressions & conditionals. Figma started shifting away from purely linear prototyping.
When should you use Figma for prototyping?
Figma is a great tool if your project meets the following specific use cases:
“Isolated” and basic interactions.
Click-through prototypes with frames that have a few states.
Visual preview of the user flow.
Early-stage prototyping without having to remake interactions.
Simple cause-and-effect interactions.
This is where ProtoPie comes in. By using ProtoPie instead of or alongside Figma, you can create realistic, dynamic, and multimodal prototypes for one or multiple connected devices. This allows you to validate concepts that involve complex interactions, such as tilting a phone in a game or activating a display in a car using voice commands.
ProtoPie's extensive language support enables you to create voice interactions that feel like natural conversations, even for complex use cases.
Figma alone might not be the right tool to make prototypes with, especially in situations concerning:
multiple screens & devices,
sophisticated albeit realistic micro-interactions (beyond tapping and clicking),
or connecting prototypes with (custom) hardware, APIs, etc.
What is ProtoPie?
According to the 2022 Design Tools Survey, ProtoPie was ranked the top choice for designers in the advanced prototyping category. We want to position ProtoPie as the easiest high-fidelity prototyping tool to turn your interaction design ideas into realistic prototypes.
With ProtoPie, you can create highly interactive prototypes for all digital products across various industries:
Mobile
Desktop
Web
IoT
In-car experiences
... and much more.
Design teams and their companies across different industries use ProtoPie daily—next to their UI design tool Figma—for all kinds of high-fidelity prototyping. Some of these leading companies are Meta, Microsoft, Mercedes-Benz, Riot Games, The Washington Post, and many more.
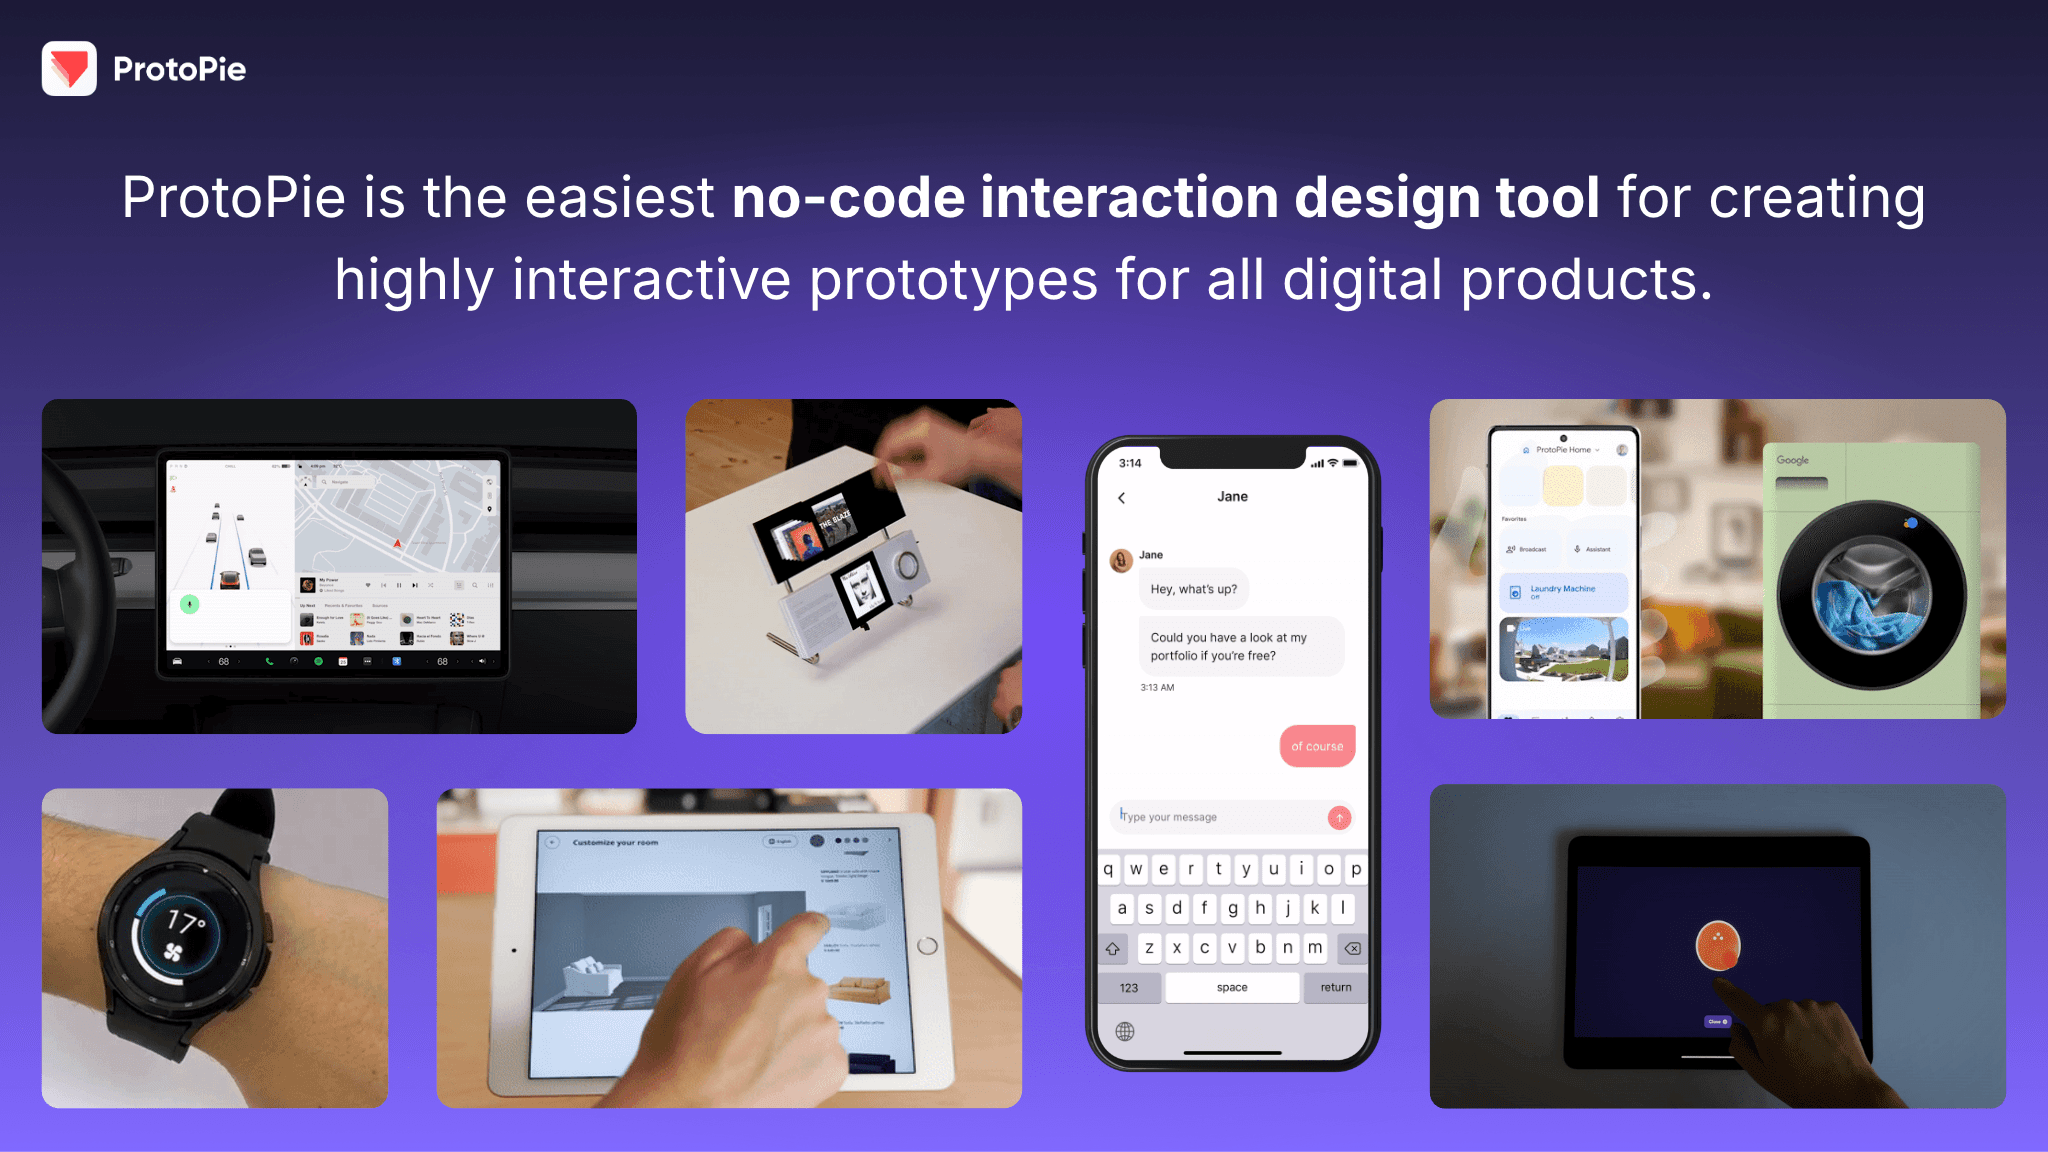
ProtoPie is the easiest no-code interaction design tool for creating highly interactive prototypes for all digital products.
When should you use ProtoPie for prototyping?
If your prototyping projects sound more like the following, you'd be better off using ProtoPie:
Scenarios with multiple states and dependencies.
Conditional and cause-and-effect interactions that trigger other interactions.
Interactions with specific touchscreen triggers but also “non-standard” triggers.
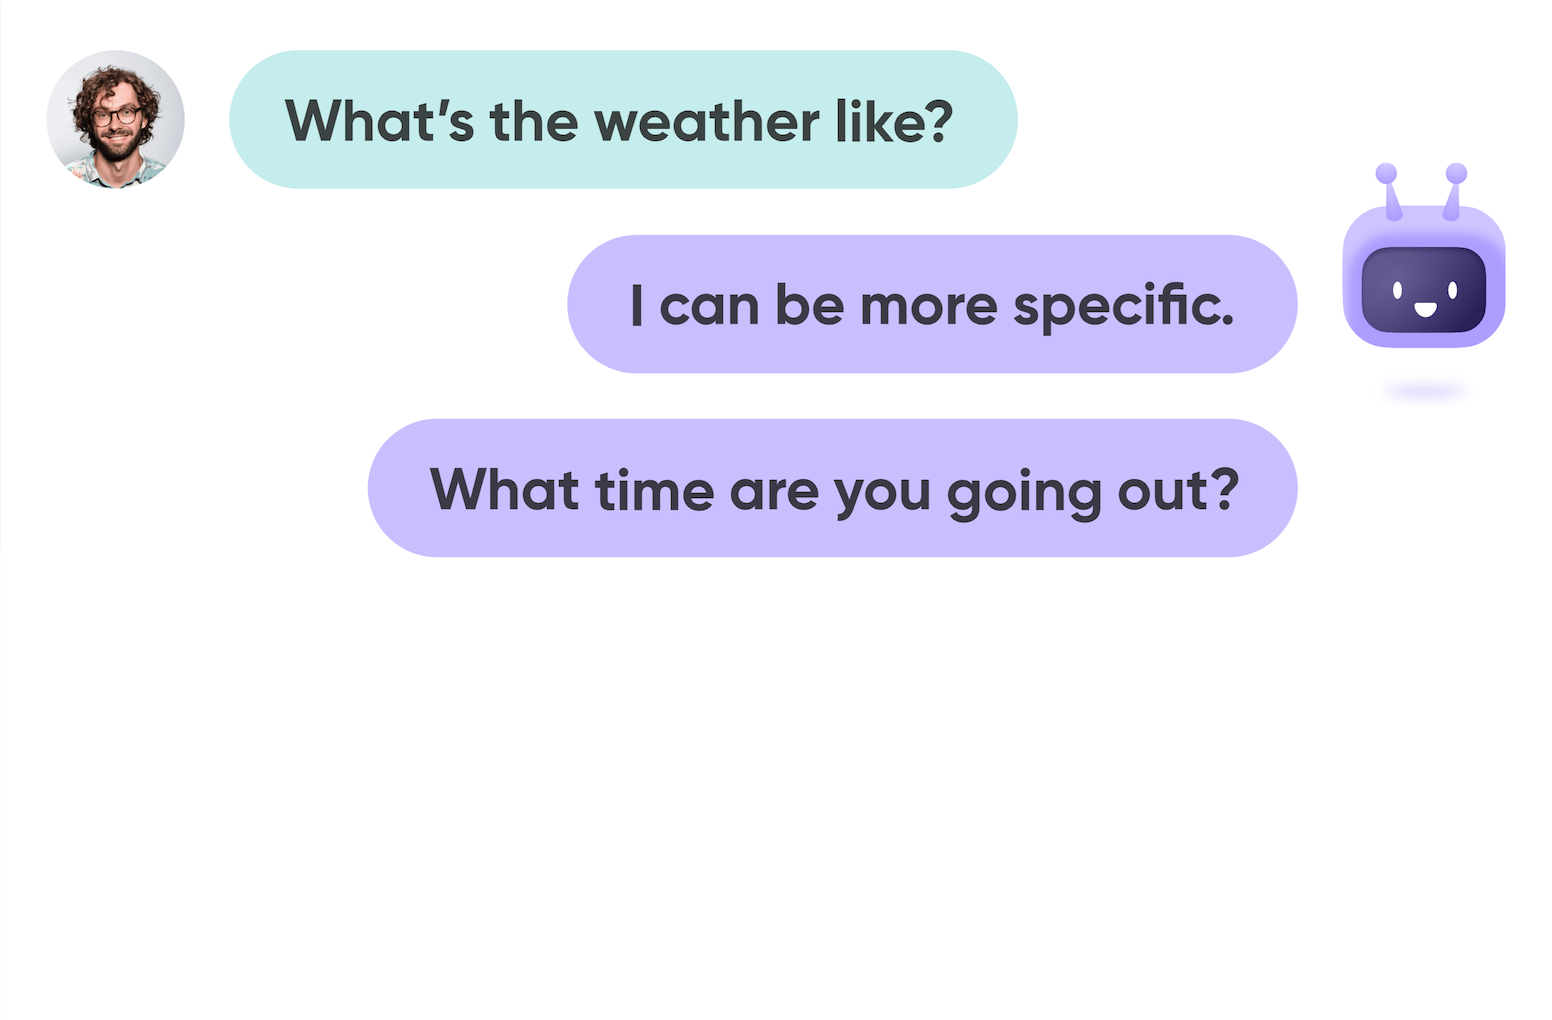
Multimodal interactions, e.g., interactions involving text input, voice, media playback, sensors, etc.
Interactions across multiple devices and screens.
Interactions involving custom hardware, APIs, web & camera-embedded content, etc.
Connected prototyping experiences.
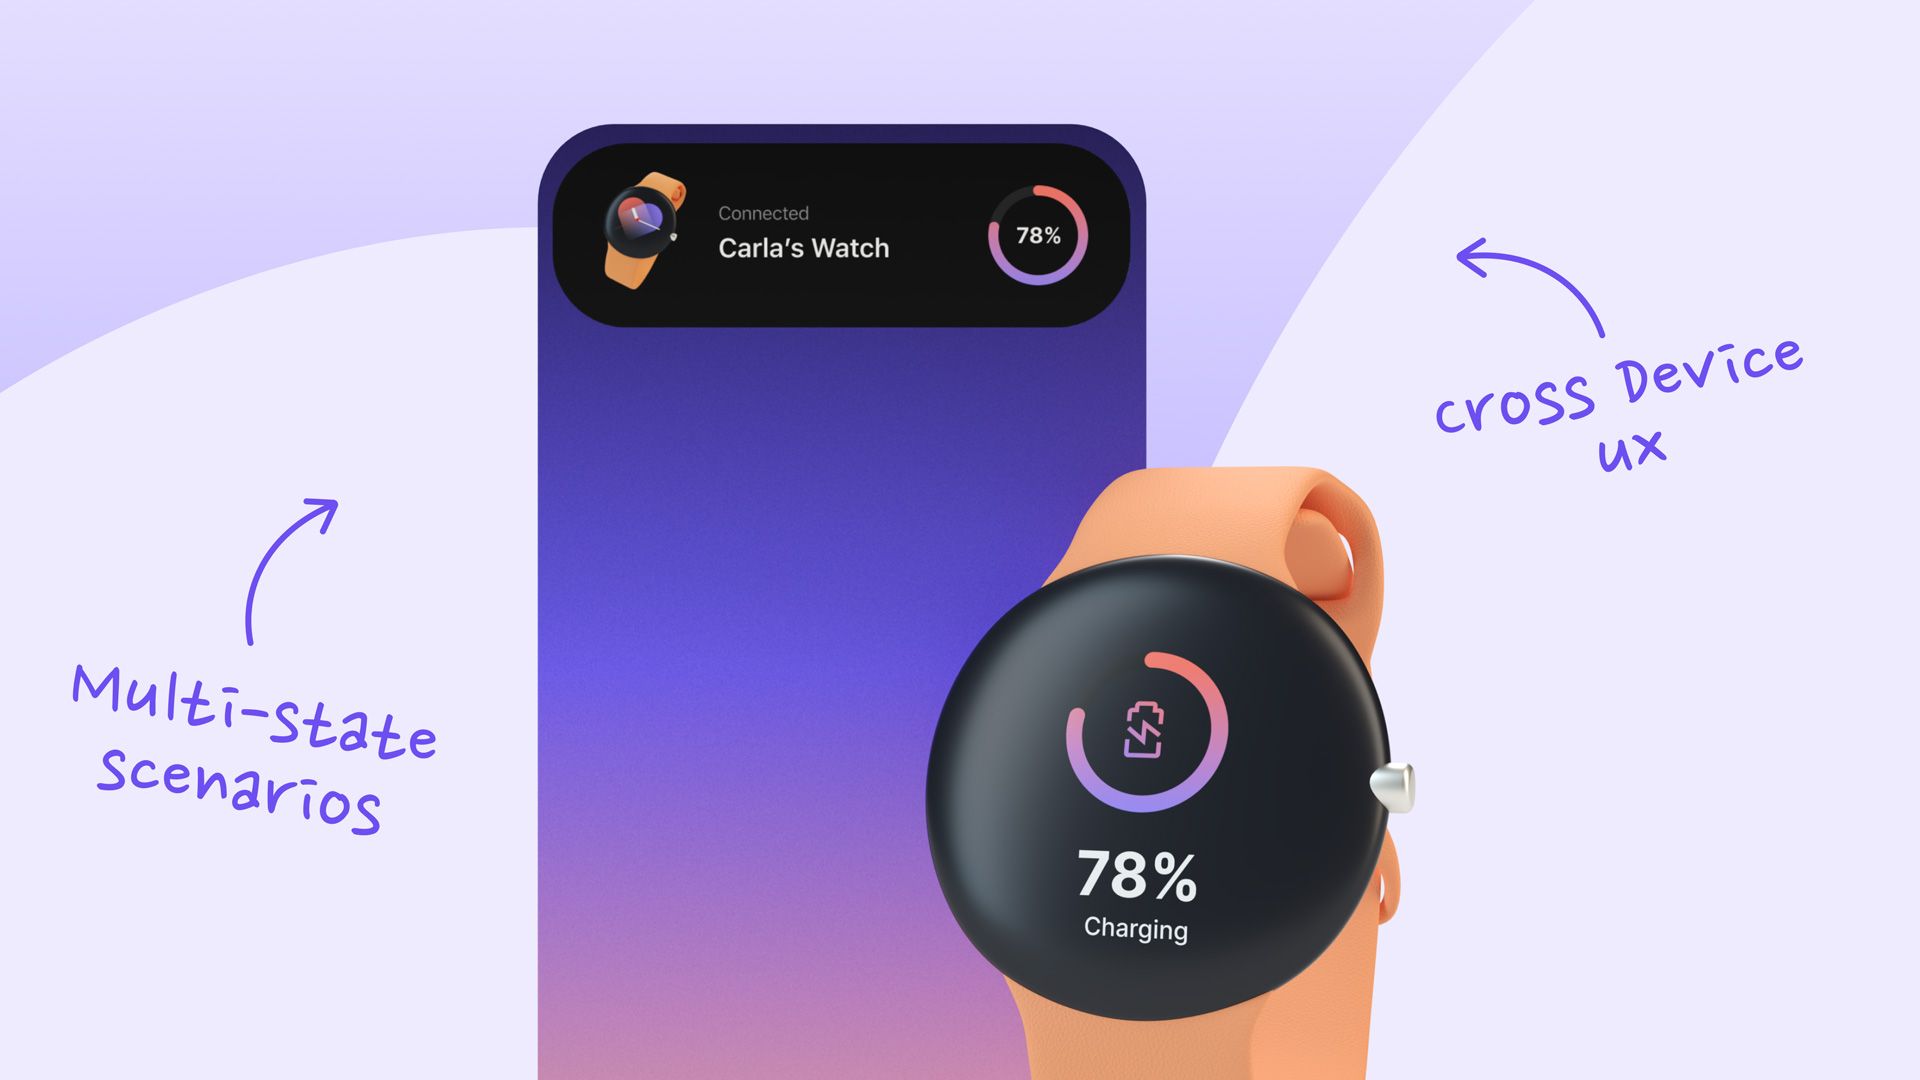
Prototype cross-device interactions with ProtoPie.
Ten advantages ProtoPie offers over Figma
There’s no magic wand in design. Instead, designers must selectively pick the tools they will work with. Needless to say, these need to have the right benefits and features. ProtoPie offers a range of essential features making it your go-to high-fidelity prototyping tool.
Let’s delve into the 10 benefits that ProtoPie has over Figma.
1. Leverage a wide range of triggers & responses for multimodality
Figma’s list of triggers is limited to mostly standard tap & mouse triggers. This is fine for simple user flows, interactions, and presentations. But here’s the rub: if you want anything more complex, you’ll be waiting for eternity.
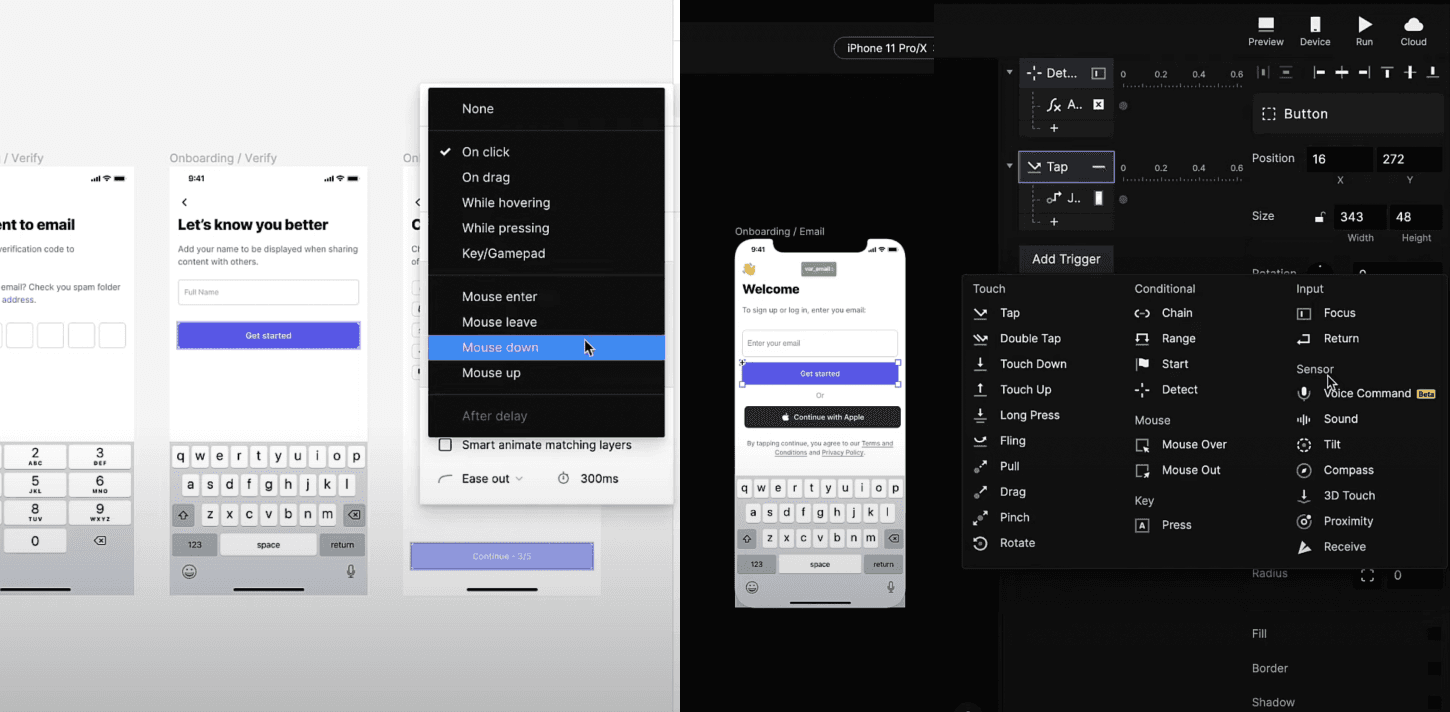
See the differences among interaction triggers in Figma & ProtoPie.
ProtoPie is different because it has an immense list of triggers & responses that allow for multimodal interactions.
For triggers alone, ProtoPie has six different categories: touch, conditional, mouse, key, input, and sensor. The foundational touch triggers include everything from tapping, sliding, and pulling to pinching or rotating your phone. Also, you may combine these. For example, a mouse-over interaction that only works when a mouse button is held down.
More powerful are the conditional triggers. You can chain a series of events or detect data inputted—for example, a user’s email address. There are triggers for where the mouse moves—over or out of an element. A trigger set on key presses. Sensory triggers, from voice and sound to phone tilt or compass.
2. Add drag and scrollable areas to prototypes
You can make drag interactions and scrollable areas in Figma. But, they are limited to specific elements only. Also, they cannot influence other elements or interactions in the same frame.
In ProtoPie, drag interactions and scrollable areas can cause other interactions. For example, dragging a layer to the right or left could decrease or increase the total score. You could prototype these kinds of interactions on a single screen.
Discover how scroll can affect other layers, such as parallax scroll.
3. Type real text in prototypes
Advanced prototypes must emulate real-life products. If you are designing a smartphone app, your prototype needs to function like the final product one would use on an actual smartphone.
Imagine you’re prototyping a login page. In ProtoPie, add an input layer and some additional interactions. Done!
In Figma, you’d have to create a complex set of wires prototyping the keyboard itself as a workaround. Otherwise, you have to ask people to rely on their imagination to figure out how they’d type. Not only is this more hassle and against the premise of realistic prototyping, but it also takes more time.

A mobile prototype that allows text input.
Try this example prototype with text input.
4. Play audio, video, and Lottie files in prototypes
Your designs need to be as rich as possible—there might be times when you need to insert media files into your prototypes. Hence, ProtoPie supports audio, video, and Lottie files. And that’s not all. If you’re on the Enterprise plan, you can add dynamic media to your prototype users through a self-hosted URL.

Video player prototype with media playback, made with ProtoPie.
Figma, on the other hand, offers no way for users to directly embed audio or Lottie. But video is possible. If you’re creating media-rich prototypes, then there’s only one option: ProtoPie.
Try this example prototype with media playback.
5. Bring “if/then” conditioning into your prototypes
Conditions are the mainstay of successful prototypes, setting out key “if/then” rules. Imagine you have a reusable toggle button component. For example, toggle to the right to enable airplane mode and toggle to the left to disable airplane mode. Enabling airplane mode would lead to certain icons appearing and disappearing. At the same time, specific options would get grayed out.
You can make your own reusable toggle button using interactive components and variants in Figma. Traditionally, making the toggle button affect other layers and interactions uniquely depending on a state has been difficult. The latest advanced prototyping features—Figma made available to its paying users—allow you to do simple “if/then” conditioning.
On the other hand, this is where ProtoPie gets to shine and show its true colors. The real magic happens when you combine conditional interactions with ProtoPie’s formulas & variables.
Check out this
Try this example prototype with conditions.
6. Harness the power of dynamic interactions
ProtoPie’s formulas & variables are at the heart of dynamic interactions. This is one of the things that set ProtoPie apart from Figma or any other prototyping tool. A prototype instantly becomes dynamic by simply adding a formula to an interaction.
Besides literal values, formulas can consist of variables, arithmetic & modulo operations, text appends, layer properties, and functions.
It is worth mentioning that you can use all the properties of objects in formulas. For example, it’s possible to monitor the x-position of an object in motion and trigger some responses whenever a particular (calculated) value has been reached.
Use formulas for dynamic interactions, for example,
showing a warning when the volume level exceeds a certain threshold,
and parse an API response in JSON format.

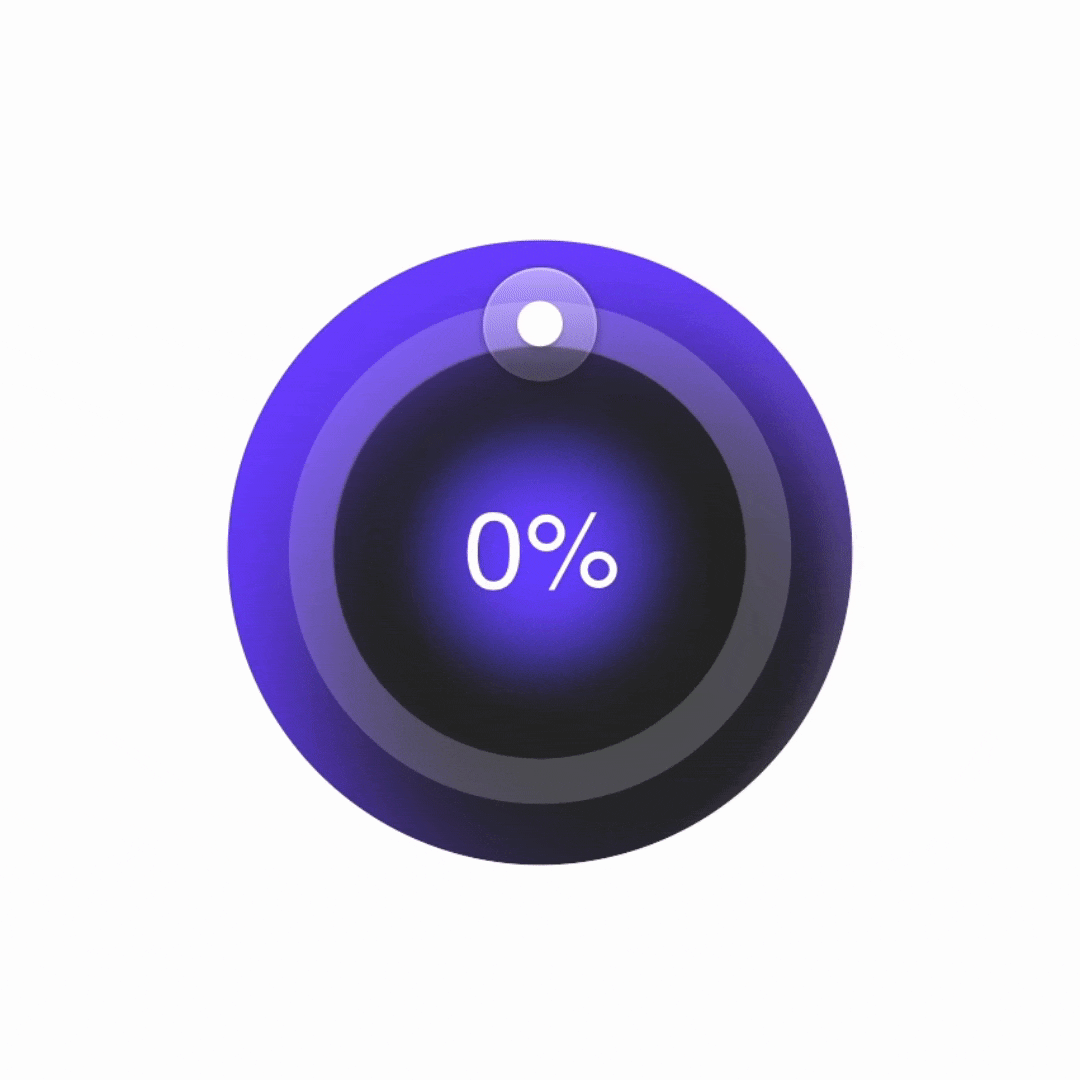
Checking a bank account balance prototype.
7. Get the most out of your smart device’s built-in hardware
You want your prototypes to interact seamlessly with the hardware they’re designed for. Take smartphones and tablets, for instance. They come jam-packed with a range of hardware capabilities.
ProtoPie gets the most out of your device's built-in hardware, e.g., camera (for taking photos, scanning QR & barcodes), microphone, gyroscope, and proximity sensor. Prototyping Instagram or TikTok-like apps, voice assistants, dictation apps, mobile games, and augmented reality (AR) apps—it’s all possible with ProtoPie.
Learn more about camera, voice prototyping, and sensors.
8. Test prototypes across multiple devices
We live in an interconnected world. UX isn't limited to a single device. People engage with a whole ecosystem of connected devices. Hence, designers need to prototype multi-device experiences.
Examples of a wide variety of multi-device scenarios:
Sending a text message from one phone to the other and showing a notification.
Picking up where you left off on your smart TV after binge-watching the latest Netflix show on your tablet.
Playing a mobile game on a tablet with a physical game controller.
Adjusting your home security cameras from a single app.
Driving a car with a physical steering wheel while controlling the infotainment system by voice.
Watch our livestream recording with Riot Games to see how they use ProtoPie for creating game experiences on mobile, desktop, and console platforms.
Figma prototypes don’t allow you to go this far. To prototype the aforementioned scenarios and use them for usability testing, you’ll need ProtoPie. If you think about this, there are endless multi-device scenarios that people face every day already.
9. Share & hand off prototypes safely
Besides its fidelity, what adds value to a high-fidelity prototype is what you can accomplish with it.
ProtoPie changes the ballgame, and here’s why. With prototypes made with ProtoPie, there are essentially three things you can achieve:
By sharing: communicate ideas, and convince and/or get buy-in from stakeholders.
By user testing: validate ideas quickly and meaningfully.
By handoff: minimize the communication gap between designers & developers.
Sharing your prototypes with stakeholders is a seamless process in ProtoPie. You have full control over who can access your prototypes and how to display them. Enable people to interact with your prototypes via ProtoPie Cloud or ProtoPie Player on iOS, iPadOS & Android.
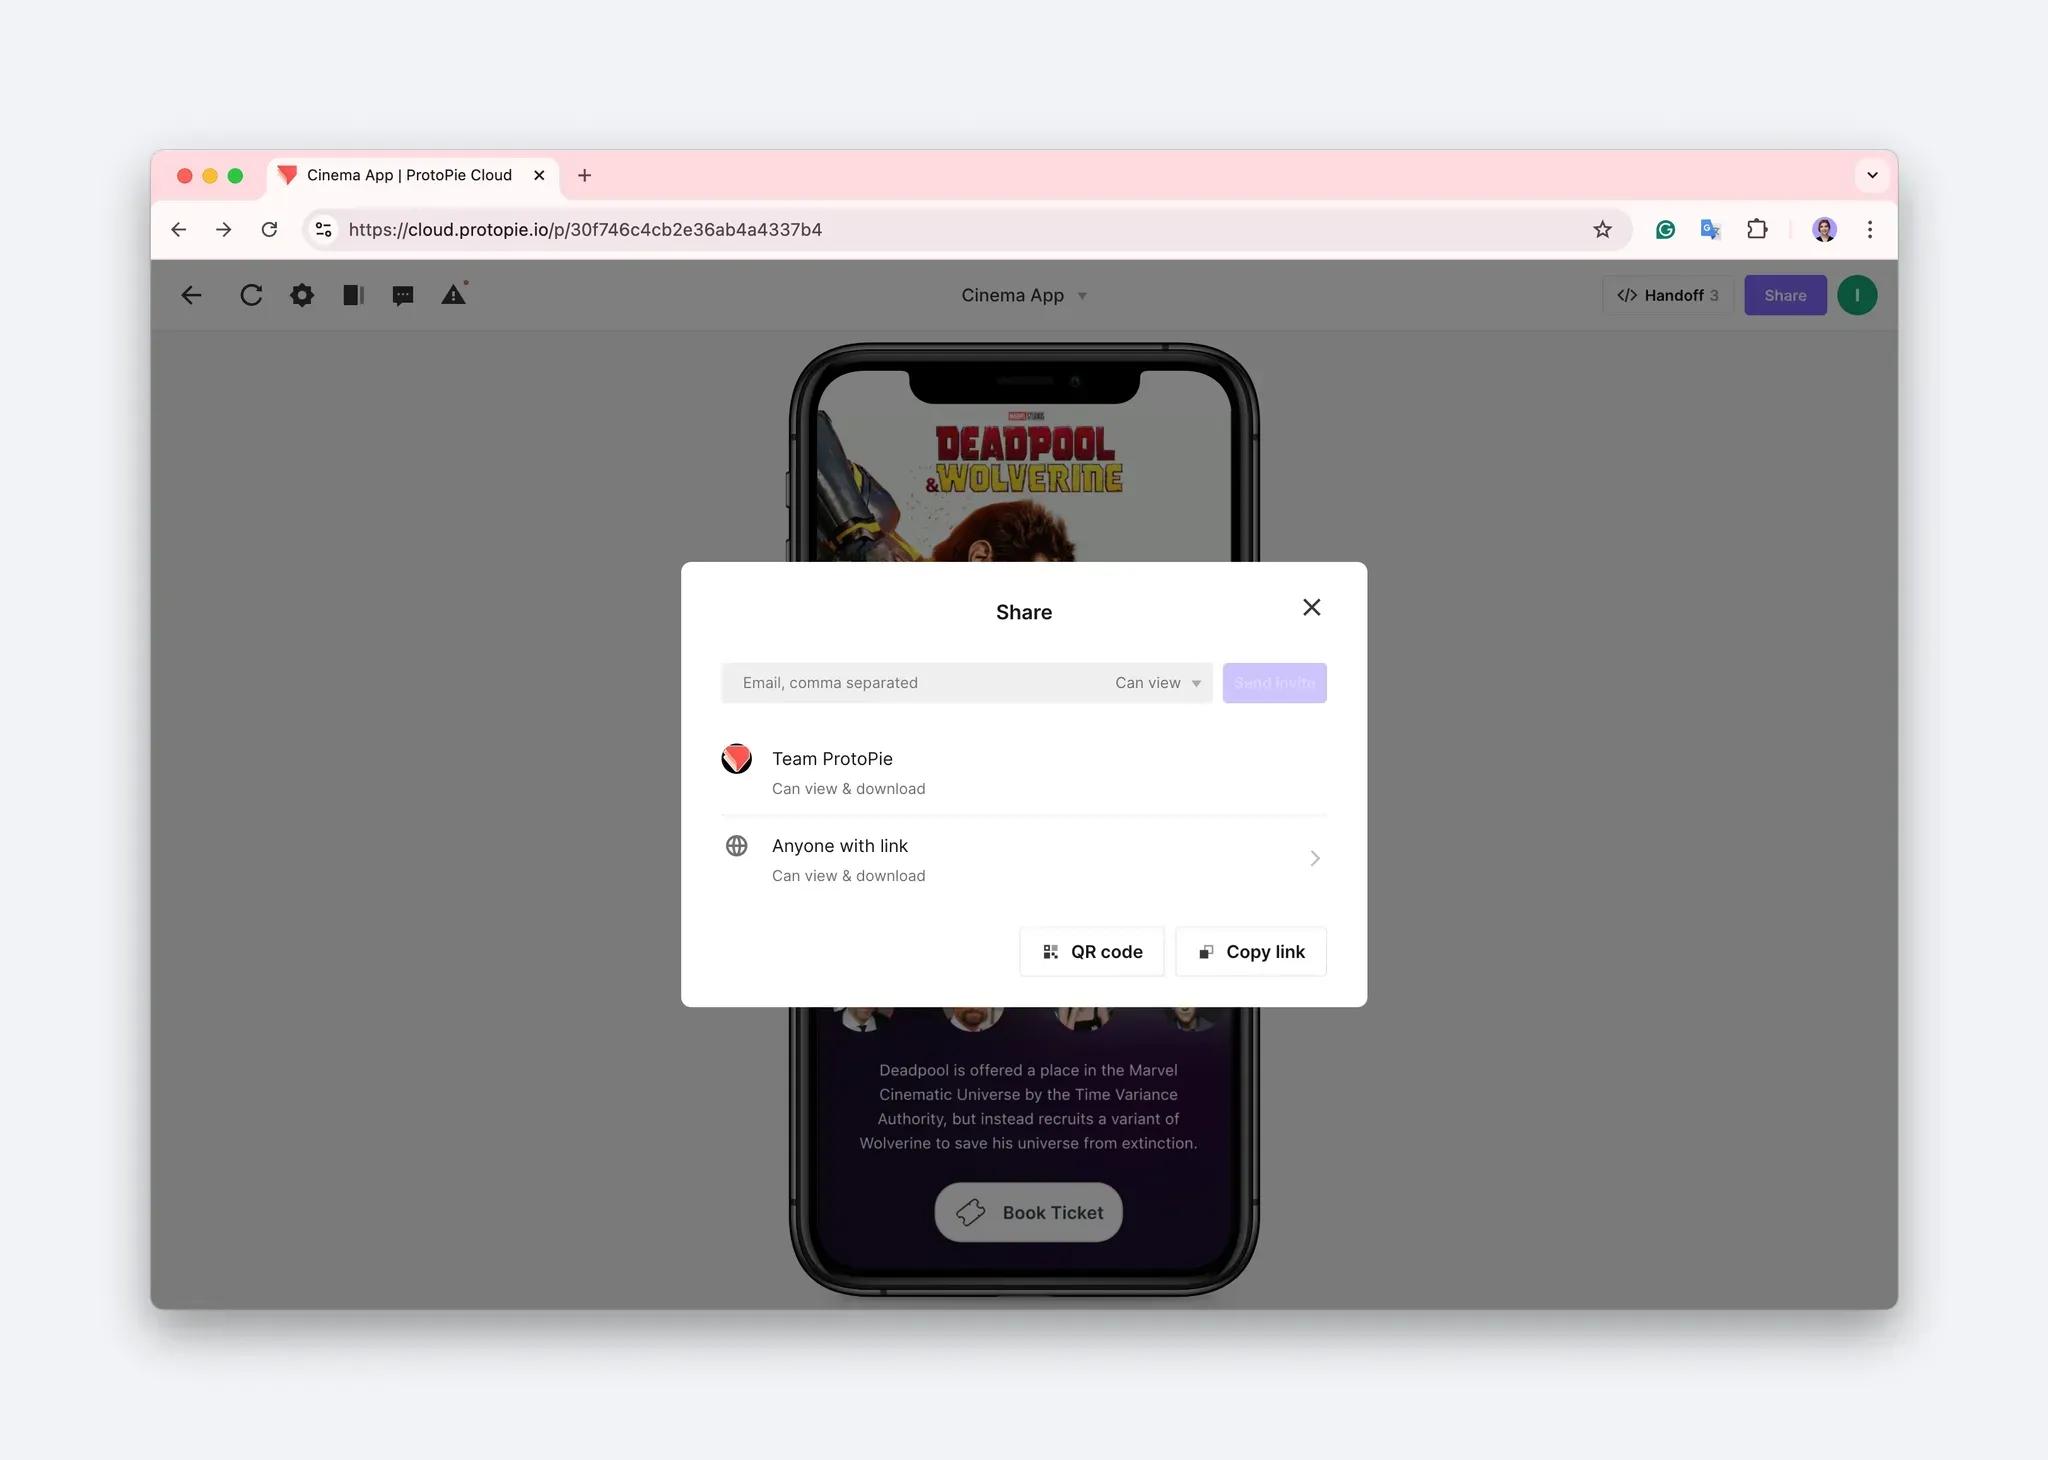
You should remain in control of who can access prototypes as they may contain sensitive information.
With ProtoPie’s user testing features, we equip designers & researchers to do moderated user testing (remotely & in-person), all within a single ecosystem with your prototypes readily available. This way, you’d be able to get valuable feedback, and ultimately save time & resources.
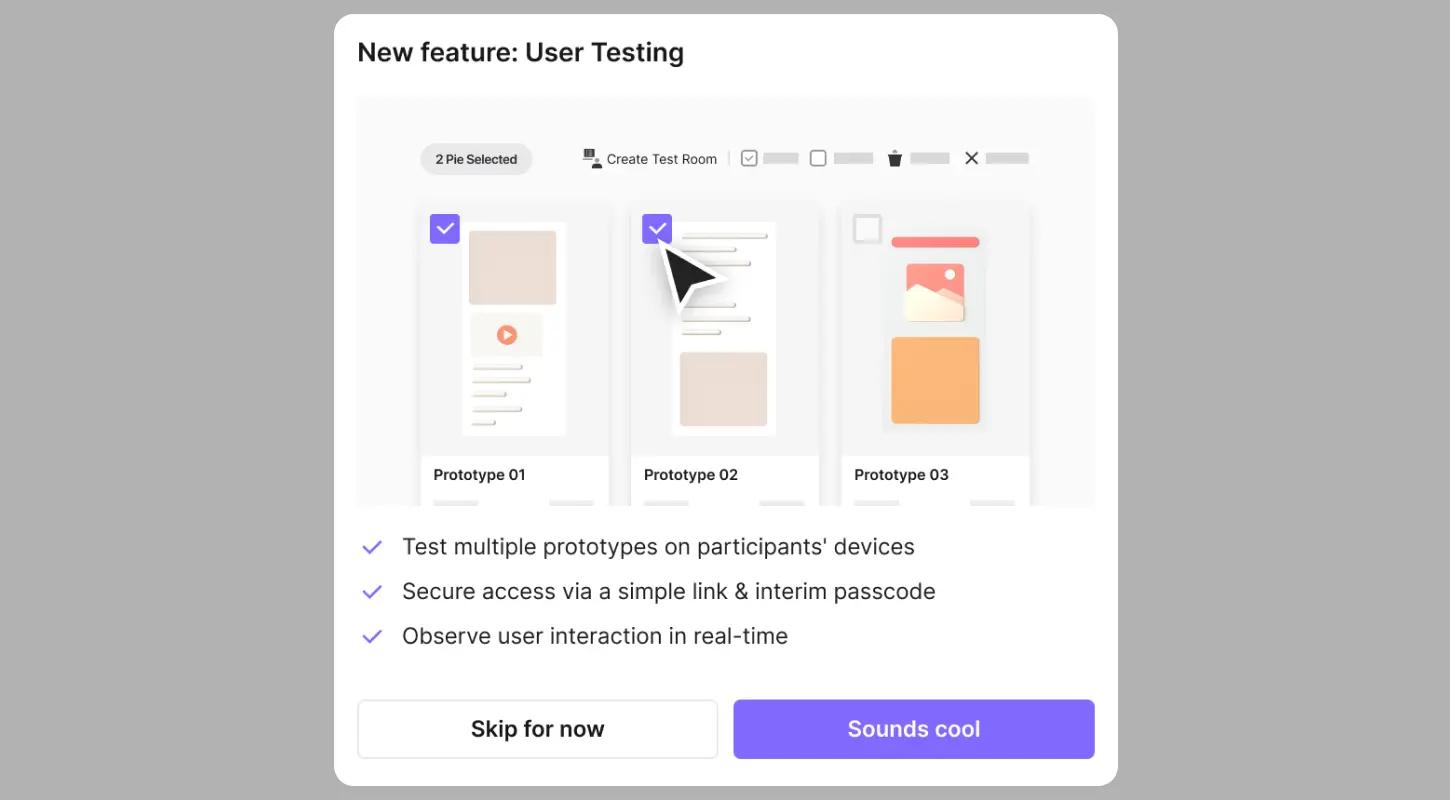
Increase the value of your prototypes by putting them to the test.
Increase the value of your prototype even more with ProtoPie its handoff feature. Let developers know exactly what and how to implement by providing them with the exact interaction specs. Try this example interaction recording.
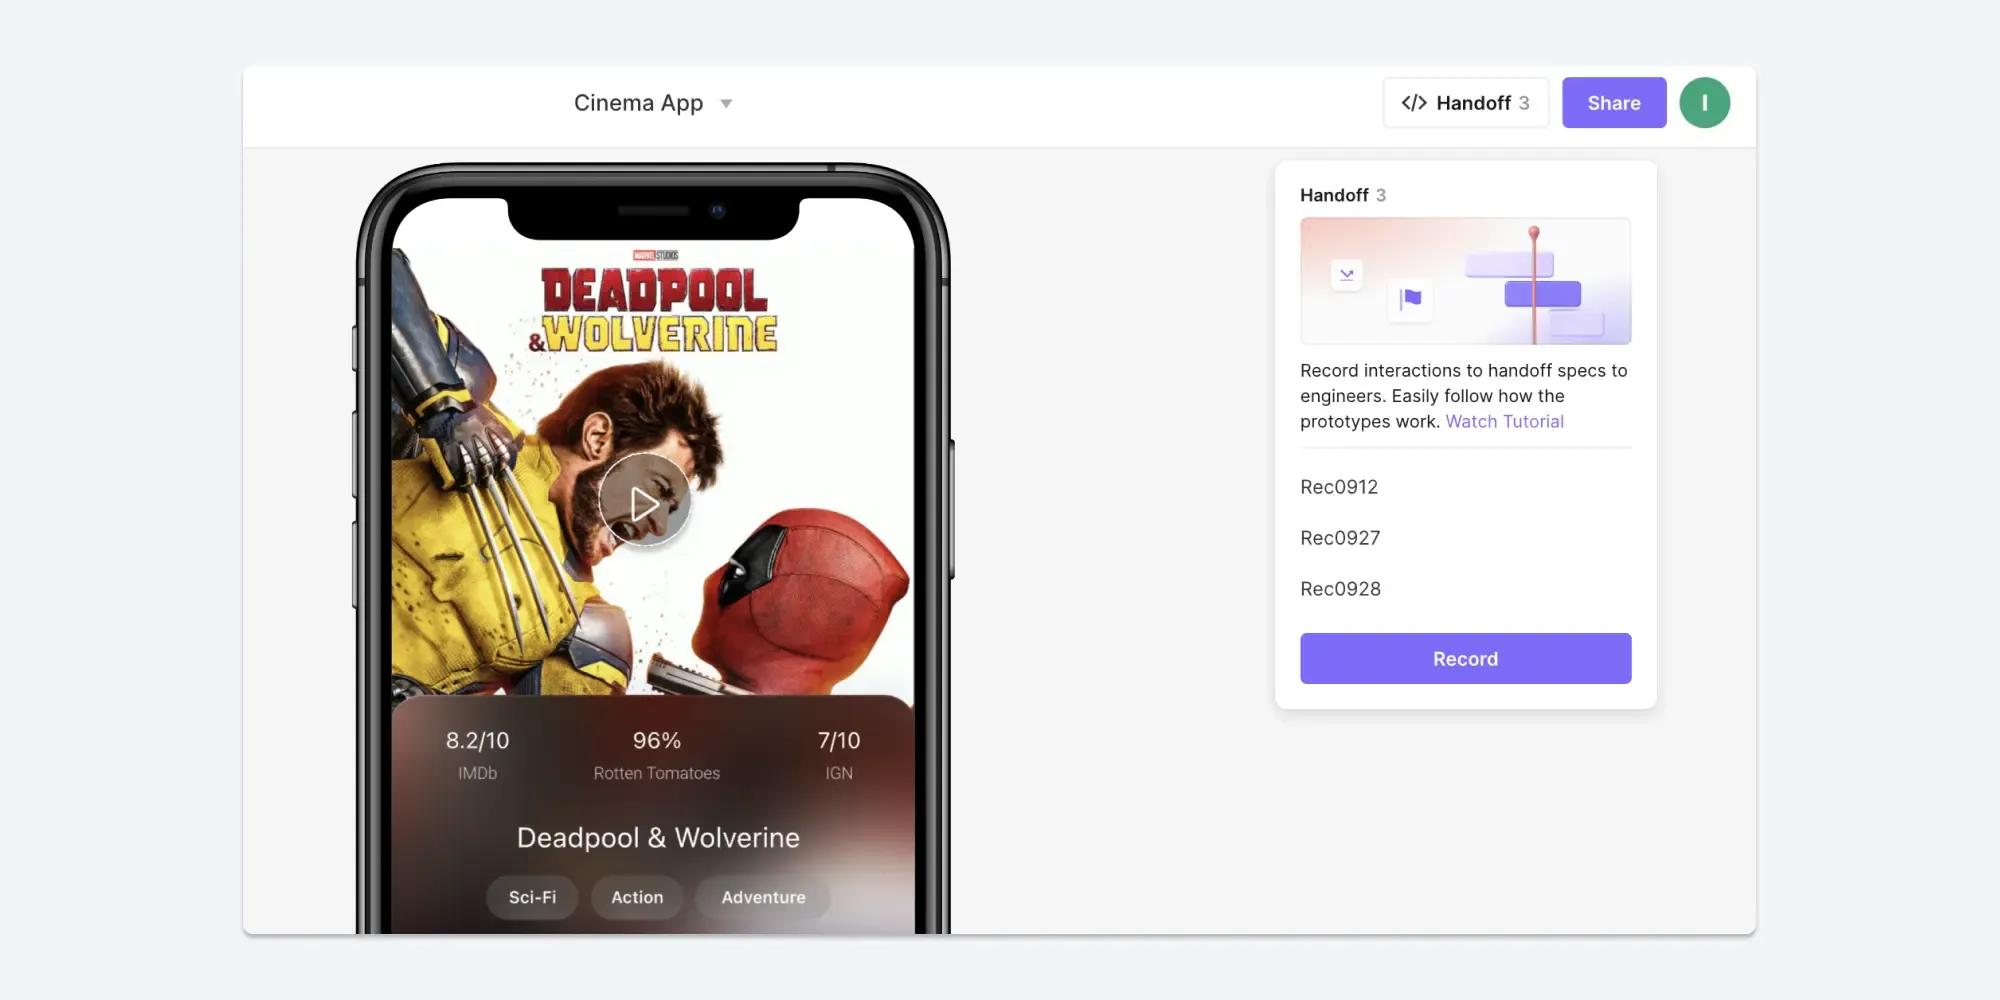
All the interaction specs your engineers need in a single overview.
10. Create dynamic experiences with ProtoPie Connect
ProtoPie Connect, an extension app from the ProtoPie ecosystem, is a game-changer for creating interactive, connected prototyping experiences. Whether you're working with multiple screens, integrating custom hardware, or tapping into APIs, ProtoPie Connect opens up a world of possibilities for dynamic prototyping.
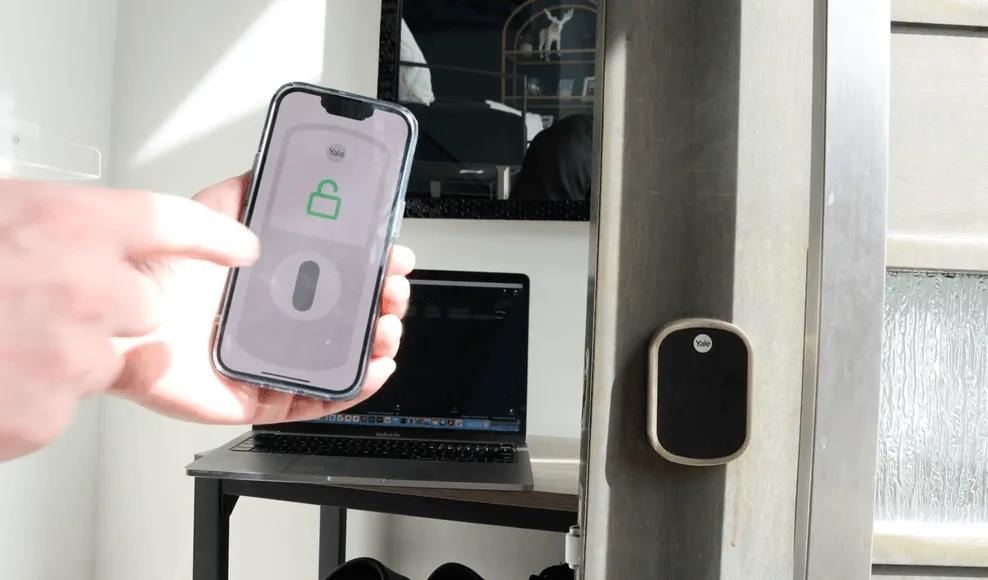
IoT Prototyping with smart locks, ProtoPie, and Home Assistant.
How to use Figma & ProtoPie together
While Figma is great, it's still often insufficient for high-fidelity prototyping. To create lifelike, multimodal, dynamic interactions, you'll need a complete tool stack consisting of both Figma and ProtoPie.
For advanced prototyping, you could choose between Figma and ProtoPie. But why? You don’t have to make an “either/or” choice. In fact, Figma and ProtoPie work best when used together as they each serve different purposes. Take this example of how to build interactive design systems with ProtoPie and Figma.

Export your designs from Figma into ProtoPie and add dynamic, conditional interactions.
Use Figma when designing the UI of your product and flesh out ideas visually. Import your Figma designs into ProtoPie, and create dynamic, multimodal, and realistic prototypes. While iterating, go back and forth between the two as much as you see fit.
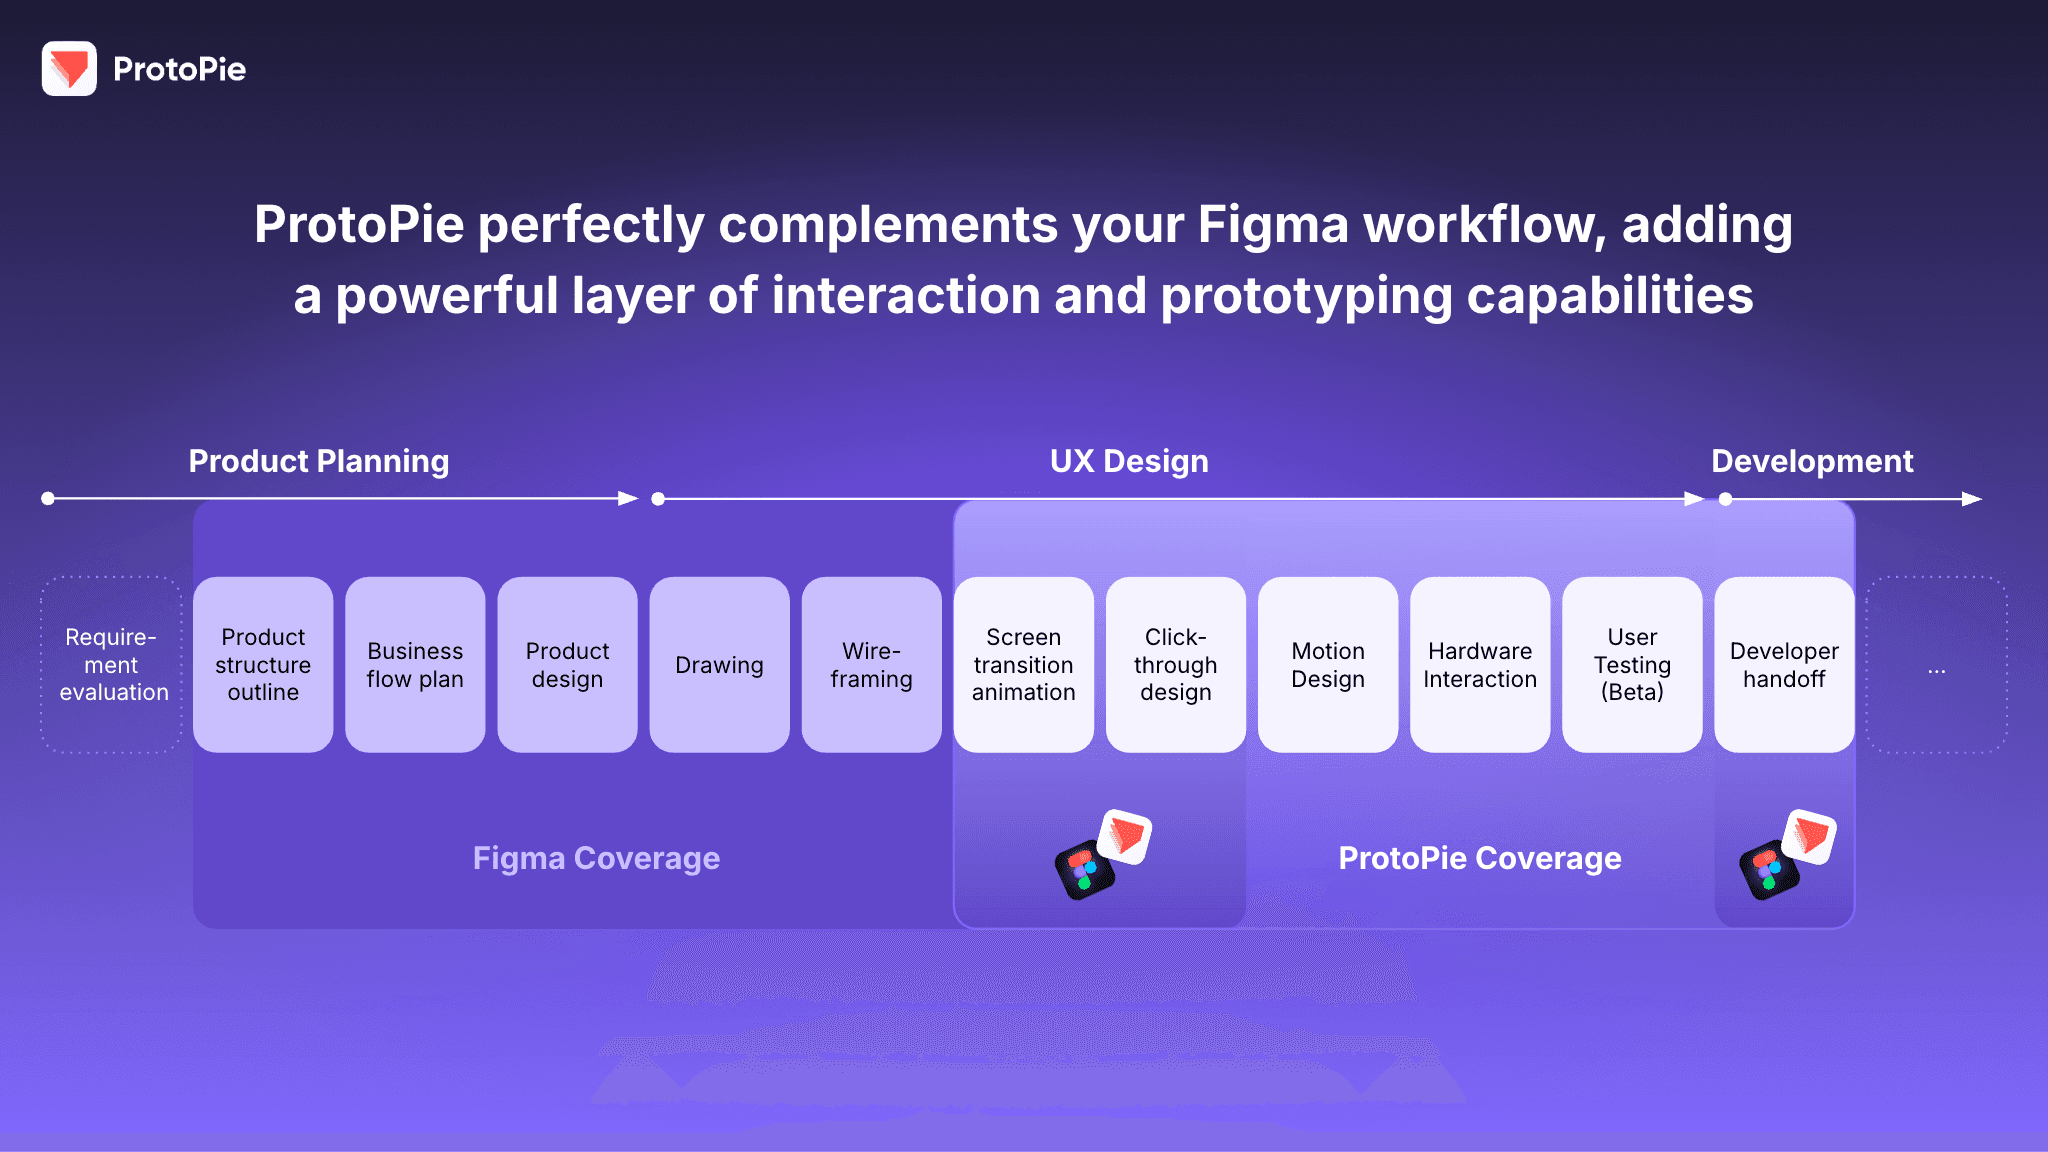
ProtoPie perfectly complements your Figma workflow.
ProtoPie vs. Figma: what’s the verdict?
ProtoPie allows you to create realistic, multimodal, and dynamic prototypes for multi-state scenarios beyond a single device. These are either very hard to do with Figma or impossible with Figma alone, despite its recent “advanced prototyping” features.
ProtoPie offers essential high-fidelity prototyping features (for free, out of the box) that Figma doesn’t have. However, the “advanced prototyping” features Figma offers are only accessible to users on the Professional plan and higher.
It’s not an “either/or” choice. For the greatest prototyping impact, use Figma & ProtoPie together to get the most bang for your buck. Why?
Figma & ProtoPie still serve different purposes.
Each tool has its strong suits that complement each other.
Discover how to
for optimal workflow.
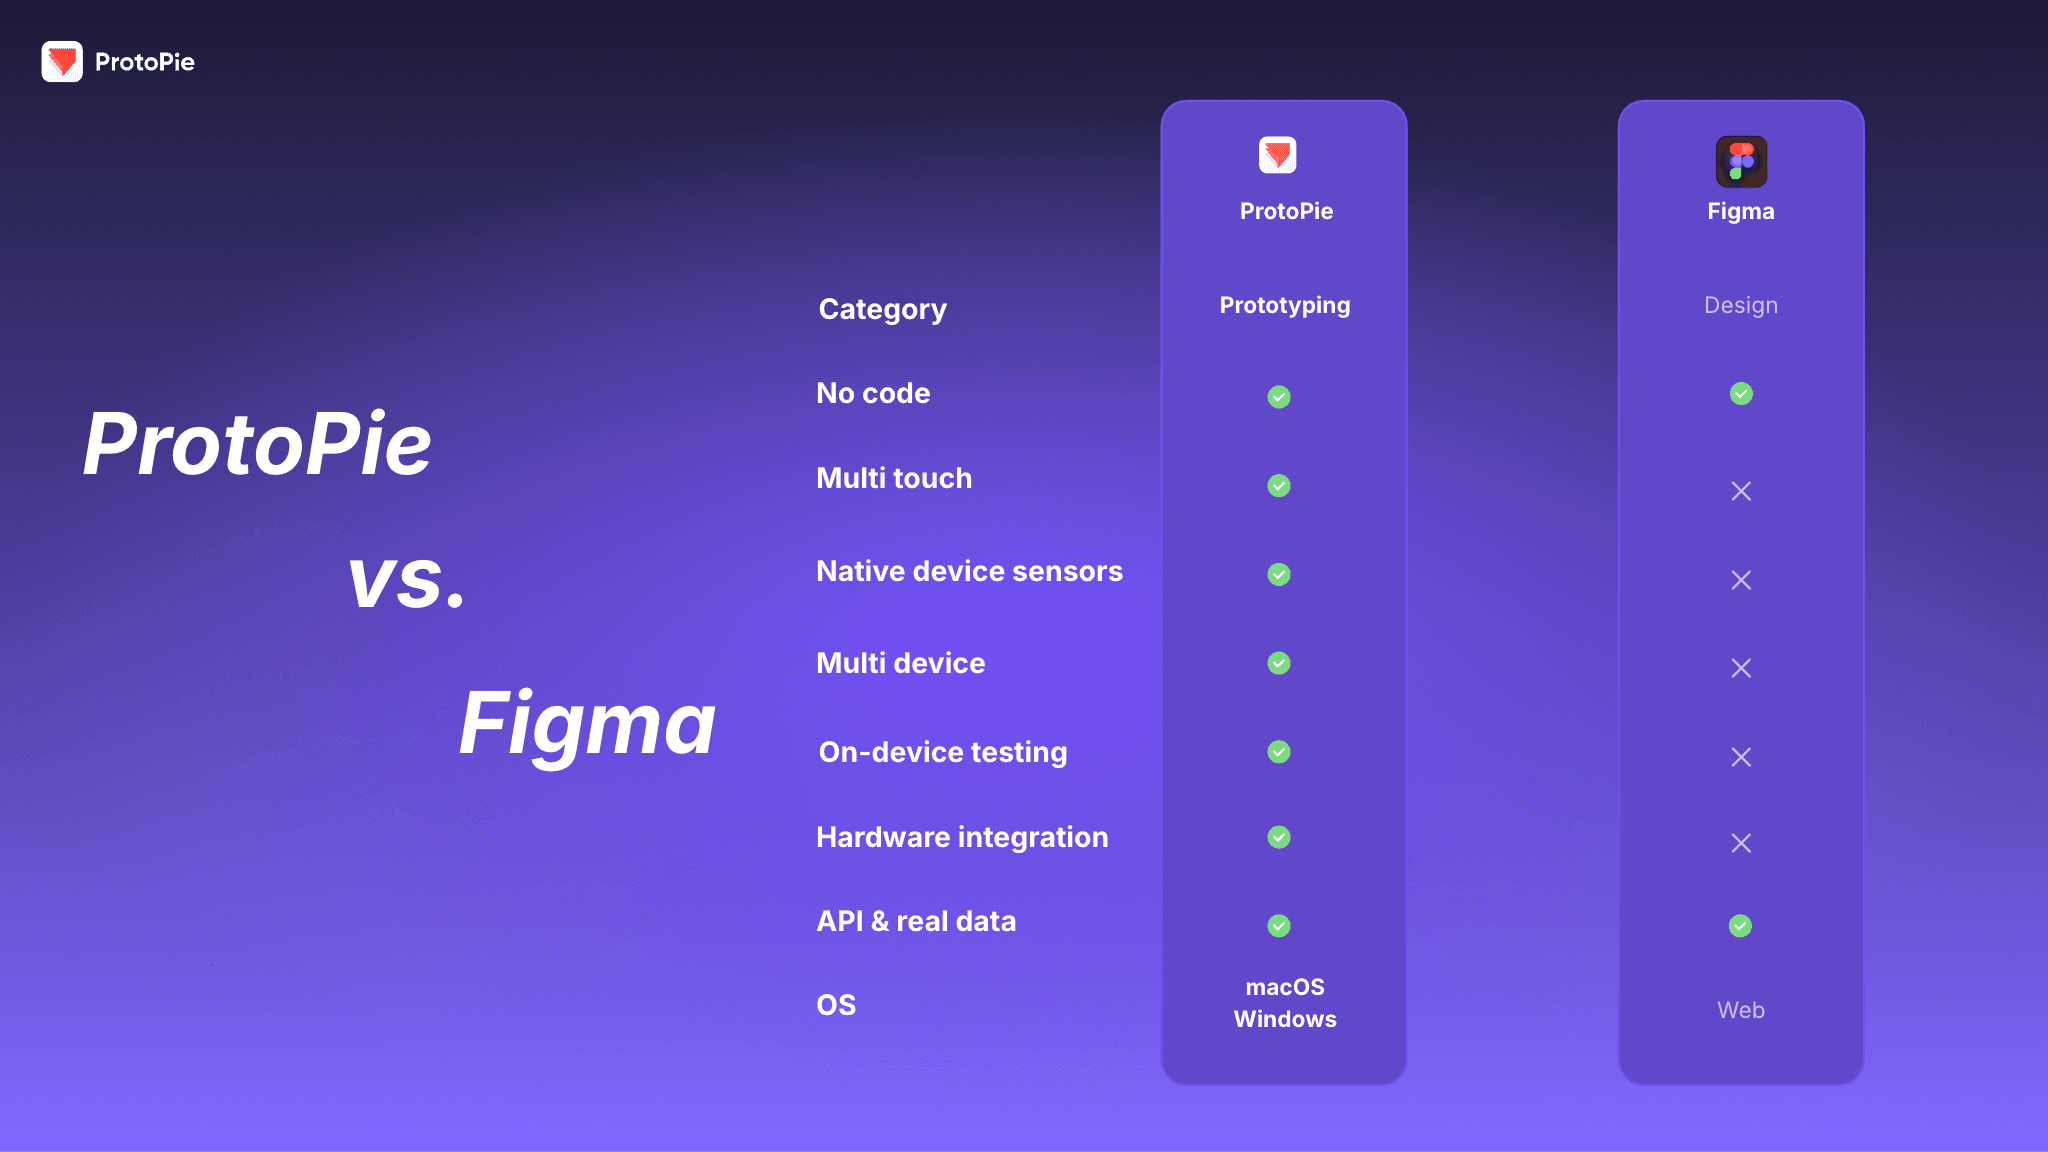
Unlike Figma, ProtoPie allows you to create realistic, multimodal, and dynamic prototypes for multi-state scenarios beyond a single device.
Dive into limitless no-code, high-fidelity prototyping
Ready to benefit from the power of both Figma & ProtoPie? Turn your Figma designs into realistic, high-fidelity prototypes with ProtoPie—using features Figma doesn’t have.


