
Figma is an excellent tool for fast prototyping. When you want to present your designs to clients, test the most important flows with users or handoff microinteractions to developers. However, for now, in Figma it’s impossible to use variables or create keyframe animations that would work in the Presentation view.
This is where ProtoPie steps in. It allows you to transform your Figma designs into high-fidelity prototypes with conditional interactions, multi-touch gestures, camera, and device sensors access, media playback, voice control, and so much more. Today I will show you how to use inputs in ProtoPie.
Start in Figma
1. Create your design
First things first, we need to have some designs to work on. Let’s say you are to design a view with an input that allows users to add new profiles to their accounts. To make it a bit fancier, we’ll add a simple illustration which we’ll also animate. Remember to name all layers properly to keep everything neat and make your life easier later.
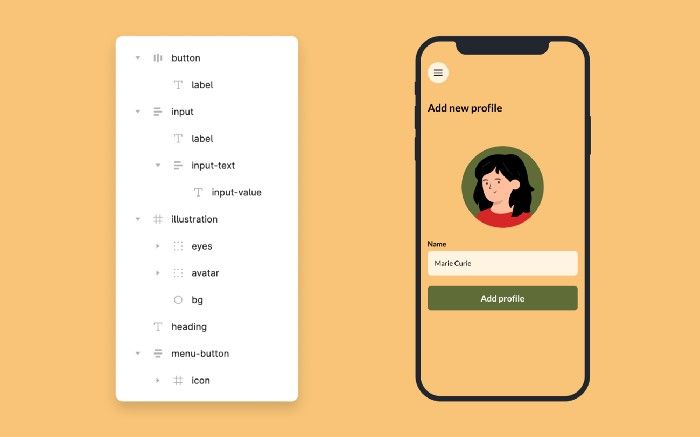
Layer naming in Figma.
2. Export to ProtoPie
You will need to export your design from Figma. First, install the ProtoPie plugin.
When your plugin is ready and the ProtoPie app is running in the background, just select the frame you want to work on and hit the export button to send it directly to ProtoPie. Your top-level frame will be imported as a scene with exactly the same layer hierarchy, naming, and positioning as set up in Figma.
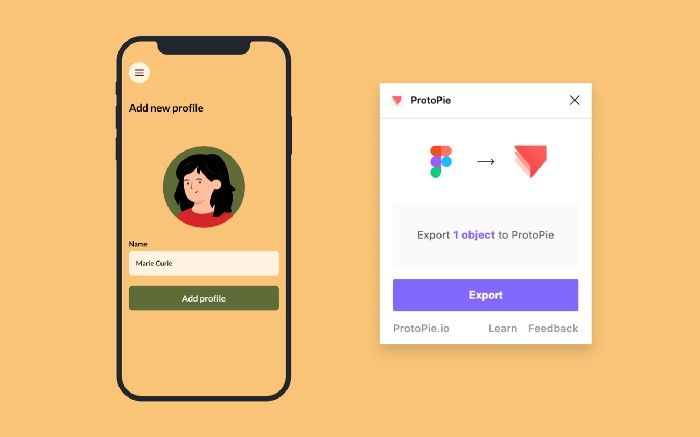
Export design from Figma to ProtoPie.
Continue in ProtoPie
3. Add an interactive input layer
Now the fun part begins! When you switch to the ProtoPie window you will notice that the interface is quite similar to Figma. The left panel contains all your layers, the top toolbar allows you to add different types of objects to your prototype, and the panels on the right side include properties, timeline, and interactions. Even the preview button is located in a similar place, so it should be easy peasy to navigate inside this app for anyone who has any experience with any UI design software.
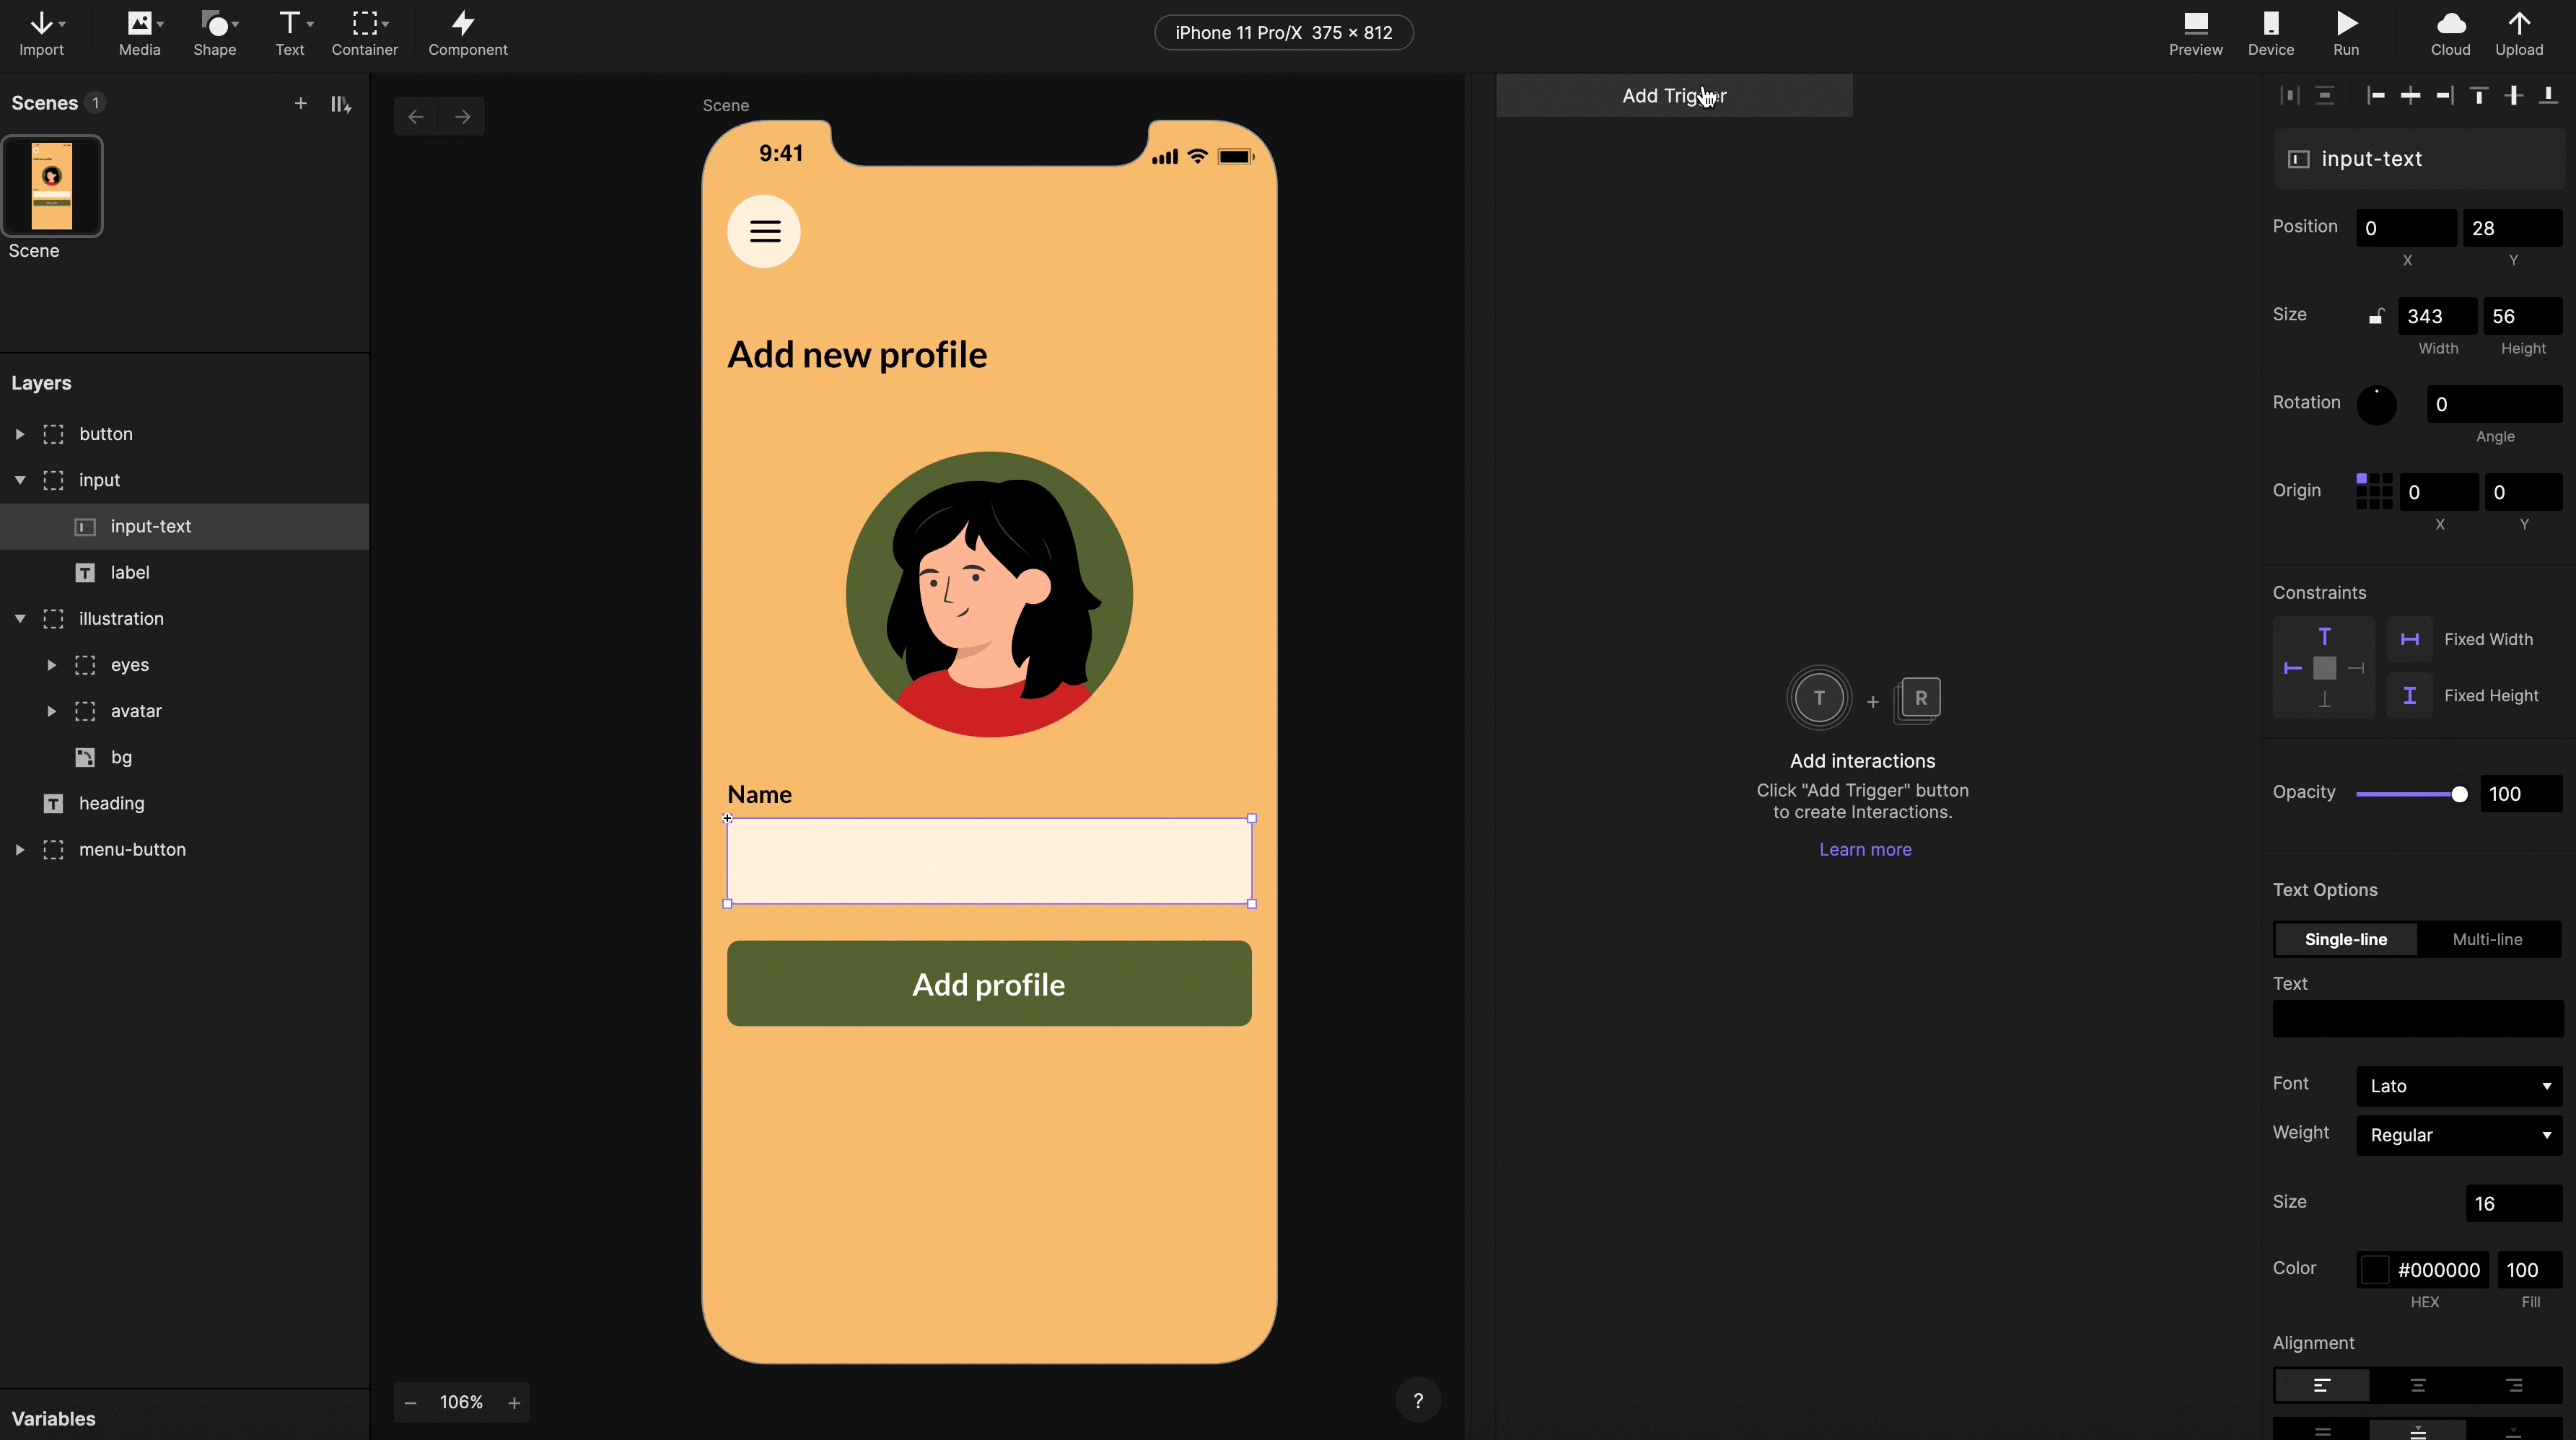
First, replace the placeholder with an interactive input layer. It’s on the top left toolbar, underneath Text. After that, you alter its properties in the Property panel on the right. You may hide the placeholder text, round the edges, change the background fill and border, and, finally, adjust the font and text color to match your design.
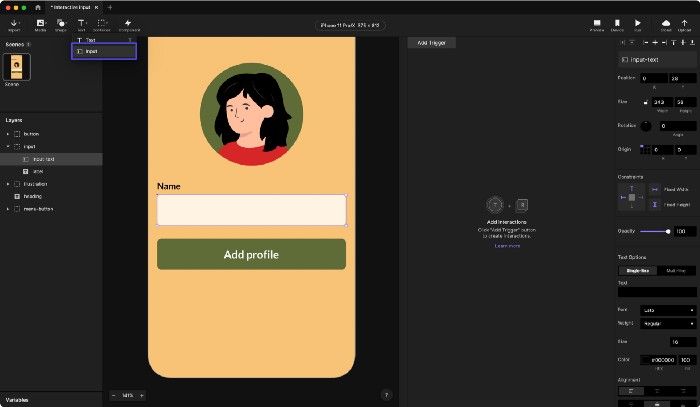
Adding interactive input in ProtoPie.
4. Add triggers and responses to create the interaction
You’ll need three components to create an interaction: an object, a trigger, and a response. Our object is the input. Triggers cause one or more responses to be executed. A response is a modification in an object that is activated.
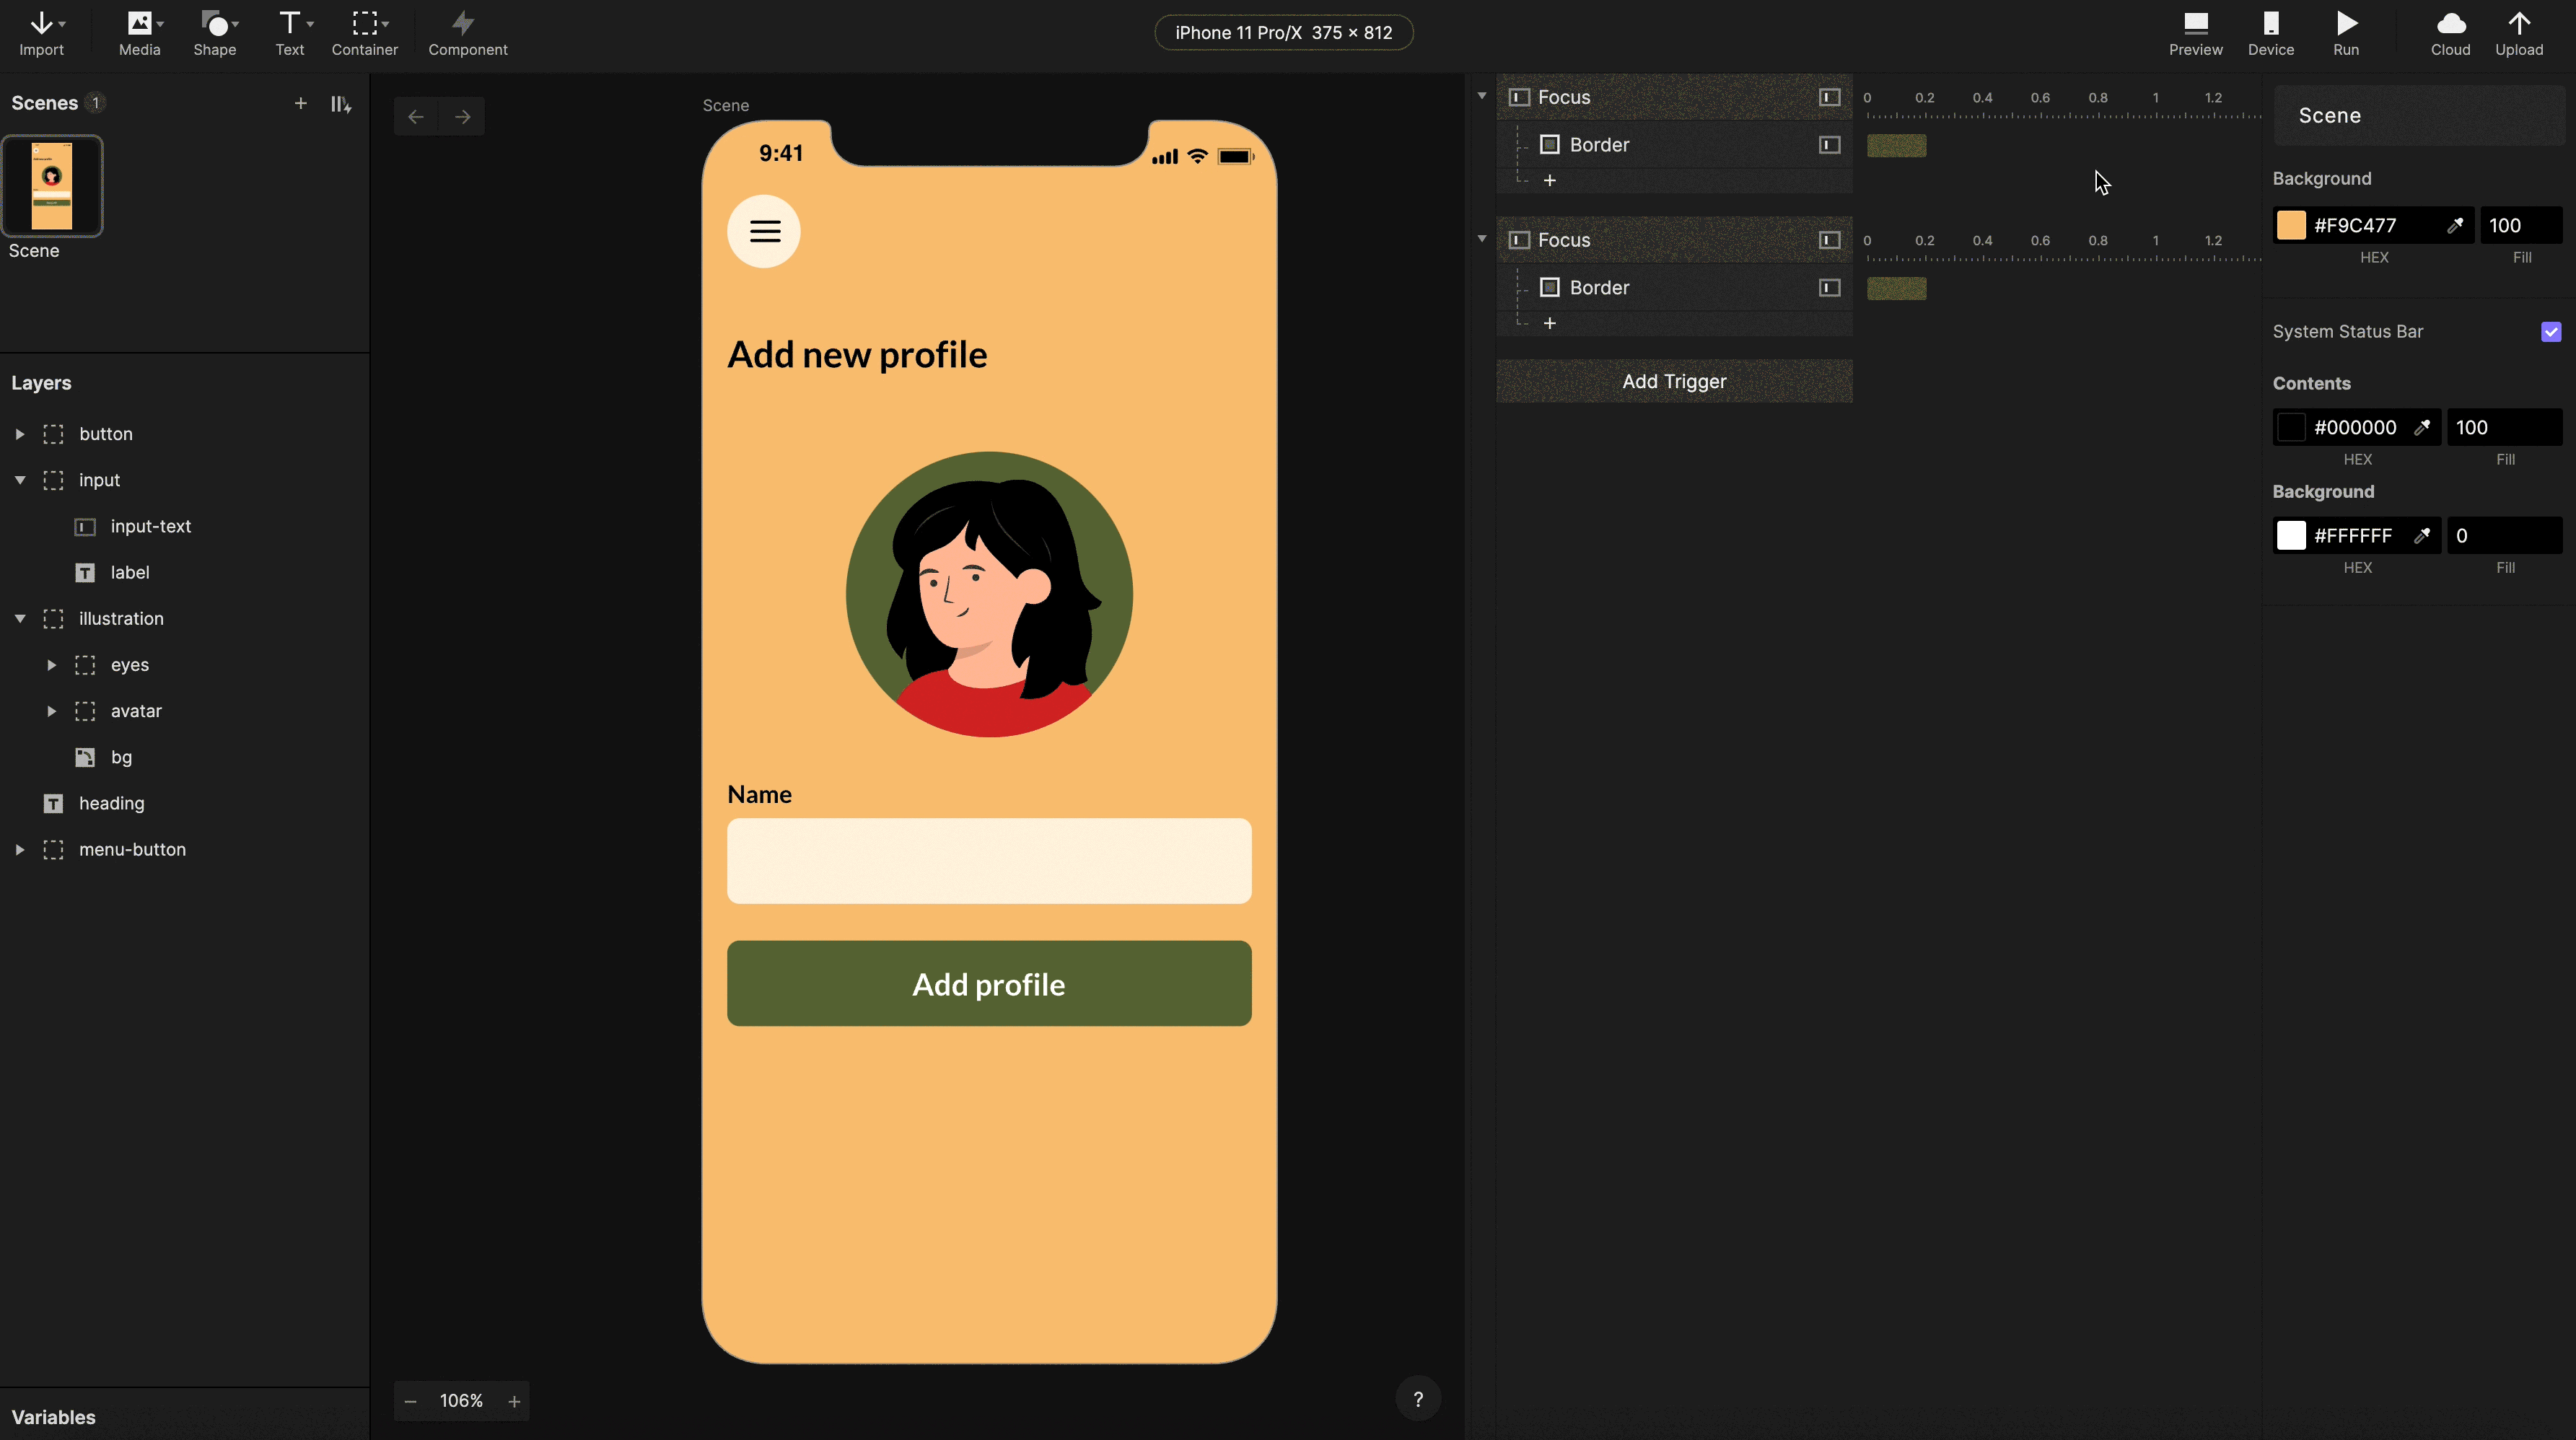
We will use the focus trigger. When our input layer focuses in, by default, the blinking cursor and the native smartphone keyboard will show up. Additionally, we would like to add a green border around the input. The Focus out trigger would do the polar opposite.
To add a trigger, select the interactive input layer, go to the Interaction panel, click the “Add Trigger” button to expand all the options and select “Focus”. Then, under the Focus trigger click the plus sign to create a response. Select “Border” and change the width to 2px.
You need to add another focus trigger to define what should happen when the input is no longer active. Again, select the input and click “Add Trigger” → “Focus”. Then, in the Properties panel switch from “Focus In” to “Focus Out”. After that, you can add the “Border” response and change the width to 0.
Adding focus triggers.
5. Preview the prototype
You can check your prototype in the preview window. It can be opened from the top right corner of the toolbar. If any of your interactions fail, you will catch it while testing in the preview pane. As you make changes to your layers or interactions, the prototype refreshes automatically by default.
Previewing the interaction.
6. Animate the illustration
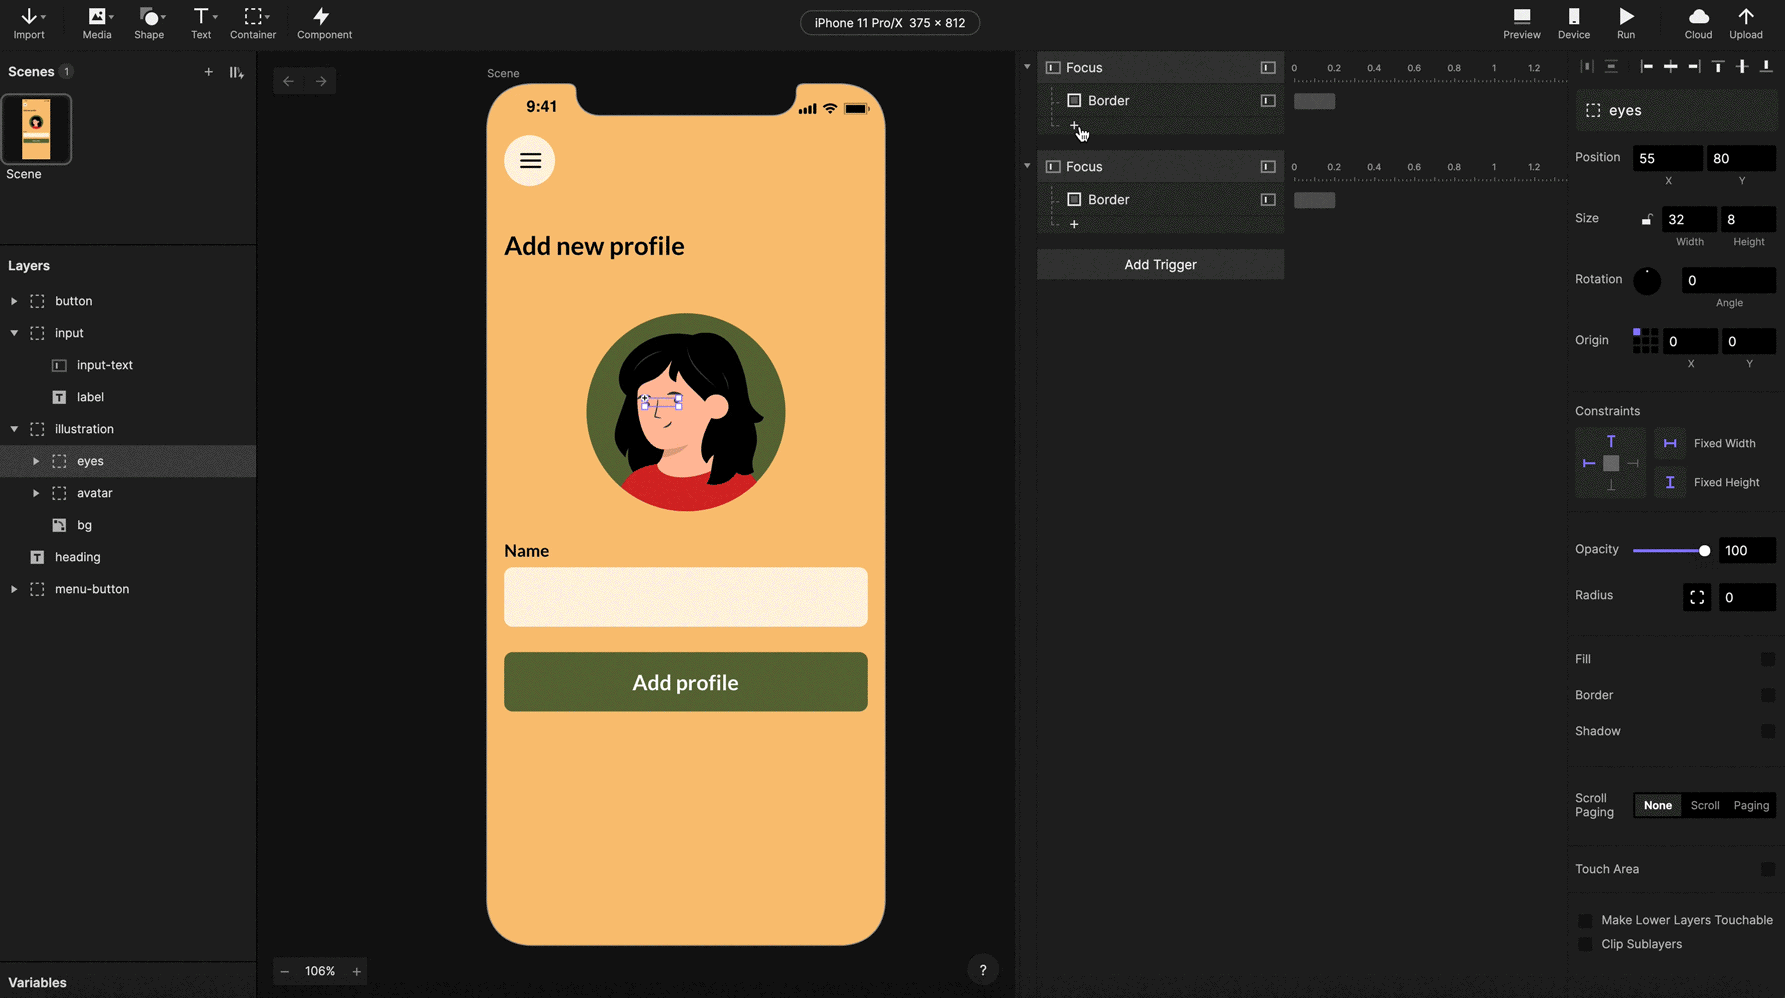
Let’s add the icing on the cake and animate the illustration based on what is going on with our input, shall we? :) Let’s say we want the avatar’s eyes to follow the cursor position inside the input.
With the eyes layer selected, you can add the Move response to focus triggers. You’ll be able to move this layer to predefined coordinates this way. You want the eyes to fix on the cursor when the input is focused. You can approximate its location by counting the number of characters in the text you entered. You can do this by passing the input text as a parameter to the length() formula. Select the x position and click the formula symbol. I’m using the formula 53+length(‘input-text’.text)/4 for x and 83 for y in my illustration. Then, add the Move response to the focus out event to reset the eyes' position (in my example, x:55 and y:80).
Adding the Move response.
Lastly, to make the eyes follow the cursor also when you’re typing, add the Detect trigger. Then, paste the Move response from the focus in trigger.

Adding Detect trigger with Move response.
The final result
Time to preview your finished microinteraction :)
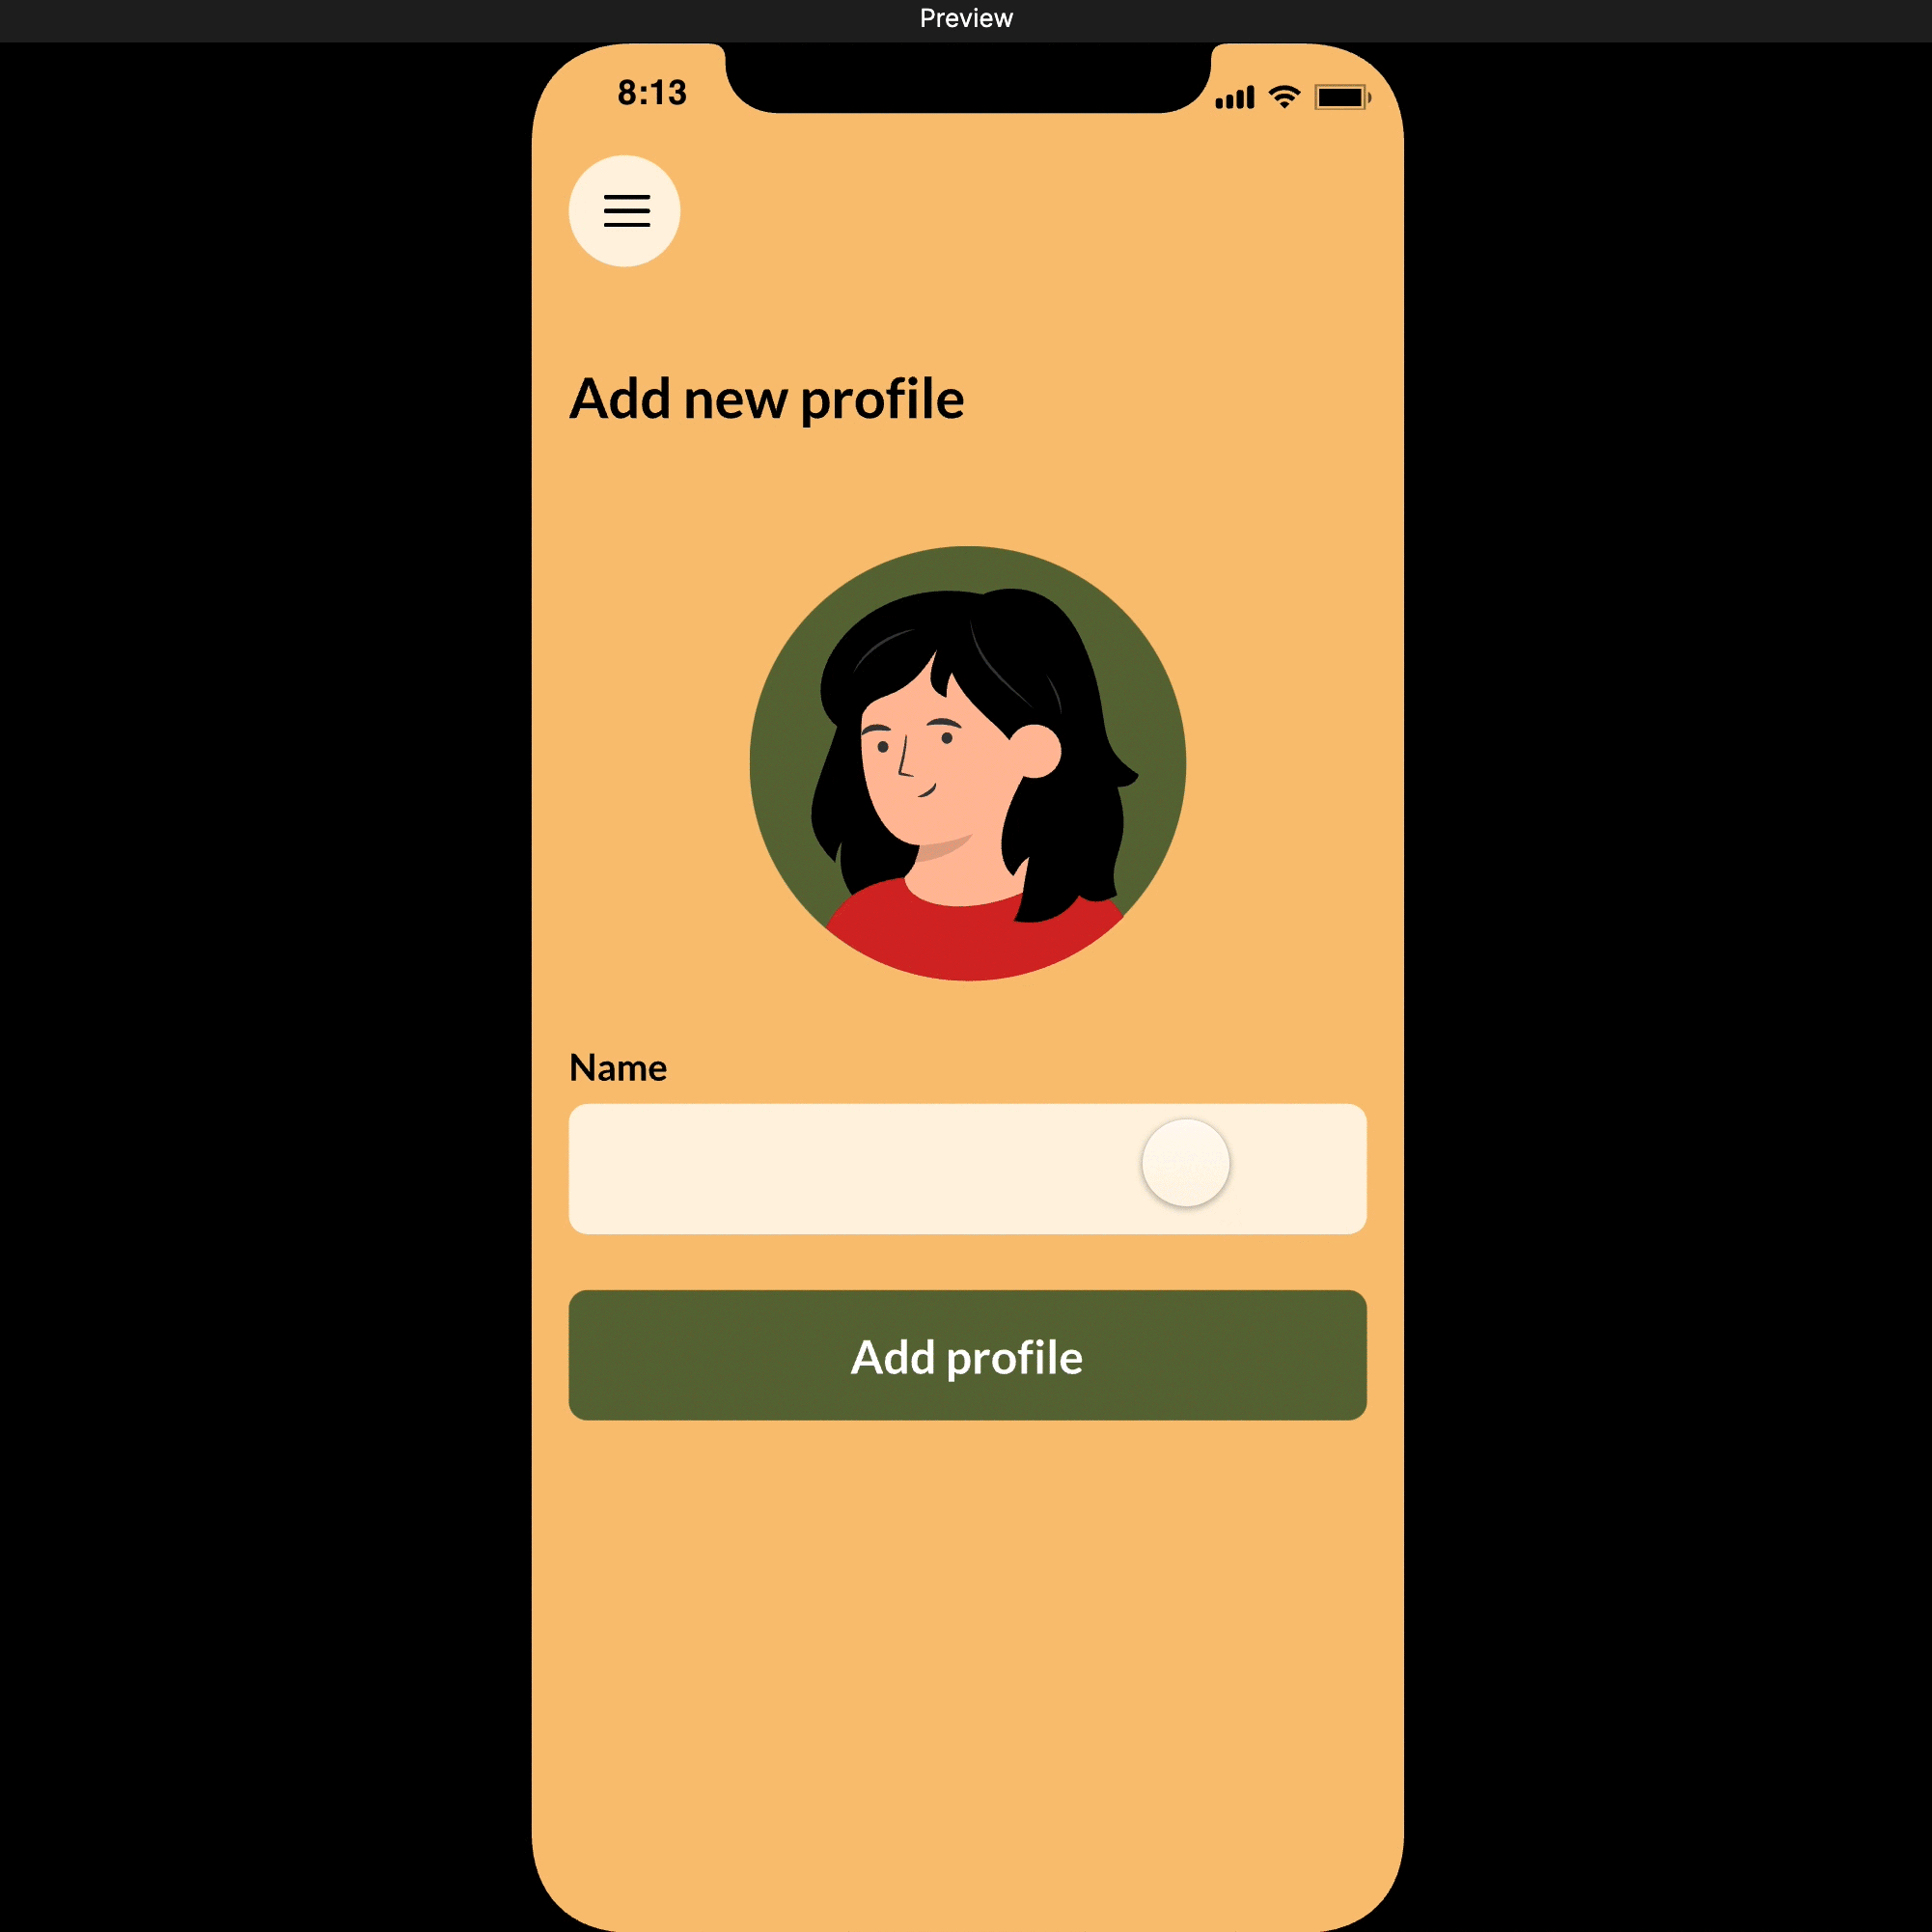
Text input microinteraction.
Conclusion
Microinteraction prototyping is a very effective way to discuss and test your design decisions. ProtoPie and Figma workflow is almost seamless. All the sketches can be prepared in Figma. In ProtoPie, designers can easily make interactive prototypes using formulas, variables, and conditional logic. This way it’s also easier for developers to work their magic in code because interaction recordings eliminate all of the guesswork needed in recreating After Effects animations.
ProtoPie helps designers bring their ideas to life in the form of high-fidelity interactive prototypes. Start building your own ultra-high-fidelity prototype without writing a single line of code today.


