ProtoPie AI 已上线——现已进入 Beta 版。了解更多

ProtoPie AI 已上线——现已进入 Beta 版。了解更多

介绍 ProtoPie

入门

制作你的第一个原型

ProtoPie 生态系统

ProtoPie Studio 界面

导入

入门

从 Adobe XD 导入

从 Figma 导入

从 Sketch 导入

ProtoPie 精灵

基本元素

容器

设备

图层

预览窗口

场景

滚动/分页

快捷键

系统状态栏

触发条件与响应

缓动

注释

回复

时间线

触发器

公式

入门

功能

图层属性

语法

公式使用场景

变量

入门

变量

预定义变量

变量使用案例

AI

入门

AI 交互创作

AI 文档问答

AI 面板界面

获得最佳效果的提示

ProtoPie MCP

Getting Started

Studio MCP Introduction

Studio MCP Installation & Setup

Code MCP Introduction

Code MCP 安装与设置

Dev View

自动布局

入门

自动布局属性

组件

入门

组件指南

编辑组件

嵌套组件

发送和接收消息

交互库

入门

管理交互库

管理图书馆会员

语音原型设计

入门

收听回复

朗读回复

应用场景

语音命令触发

连接设备

连接 blokdots

连接移动设备

ProtoPie Cloud

入门

管理原型

管理存储

共享原型

ProtoPie Player

测试原型

管理字体

离线测试

适用于 Wear OS 的 ProtoPie Player

团队

入门

编辑者和查看者

让您的团队快速上手

项目

团队所有者和团队管理员

交接

入门

创建交互录制

管理交互录制

录制页面

用户测试

入门

概述

创建测试房间

外部集成

管理测试会话

测试结果与分析

ProtoPie Cloud 上的用户测试

ProtoPie Connec

入门

API 插件

Arduino 插件

blokdots 插件

连接嵌入式

自定义层集成

自定义插件

连接设备

游戏手柄插件

IFTTT 插件

罗技 G29 方向盘插件

测试原型

功能比较

Unity 插件

ProtoPie 企业版

入门

组织设置

服务管理员

单点登录(SSO)

安全

概述

访问控制

数据传输、存储与备份

事件响应

网络与 ProtoPie Player 应用的安全性

物理安全

风险管理

菜单

介绍 ProtoPie

入门

制作你的第一个原型

ProtoPie 生态系统

ProtoPie Studio 界面

导入

入门

从 Adobe XD 导入

从 Figma 导入

从 Sketch 导入

ProtoPie 精灵

基本元素

容器

设备

图层

预览窗口

场景

滚动/分页

快捷键

系统状态栏

触发条件与响应

缓动

注释

回复

时间线

触发器

公式

入门

功能

图层属性

语法

公式使用场景

变量

入门

变量

预定义变量

变量使用案例

AI

入门

AI 交互创作

AI 文档问答

AI 面板界面

获得最佳效果的提示

ProtoPie MCP

Getting Started

Studio MCP Introduction

Studio MCP Installation & Setup

Code MCP Introduction

Code MCP 安装与设置

Dev View

自动布局

入门

自动布局属性

组件

入门

组件指南

编辑组件

嵌套组件

发送和接收消息

交互库

入门

管理交互库

管理图书馆会员

语音原型设计

入门

收听回复

朗读回复

应用场景

语音命令触发

连接设备

连接 blokdots

连接移动设备

ProtoPie Cloud

入门

管理原型

管理存储

共享原型

ProtoPie Player

测试原型

管理字体

离线测试

适用于 Wear OS 的 ProtoPie Player

团队

入门

编辑者和查看者

让您的团队快速上手

项目

团队所有者和团队管理员

交接

入门

创建交互录制

管理交互录制

录制页面

用户测试

入门

概述

创建测试房间

外部集成

管理测试会话

测试结果与分析

ProtoPie Cloud 上的用户测试

ProtoPie Connec

入门

API 插件

Arduino 插件

blokdots 插件

连接嵌入式

自定义层集成

自定义插件

连接设备

游戏手柄插件

IFTTT 插件

罗技 G29 方向盘插件

测试原型

功能比较

Unity 插件

ProtoPie 企业版

入门

组织设置

服务管理员

单点登录(SSO)

安全

概述

访问控制

数据传输、存储与备份

事件响应

网络与 ProtoPie Player 应用的安全性

物理安全

风险管理

What is Studio MCP?

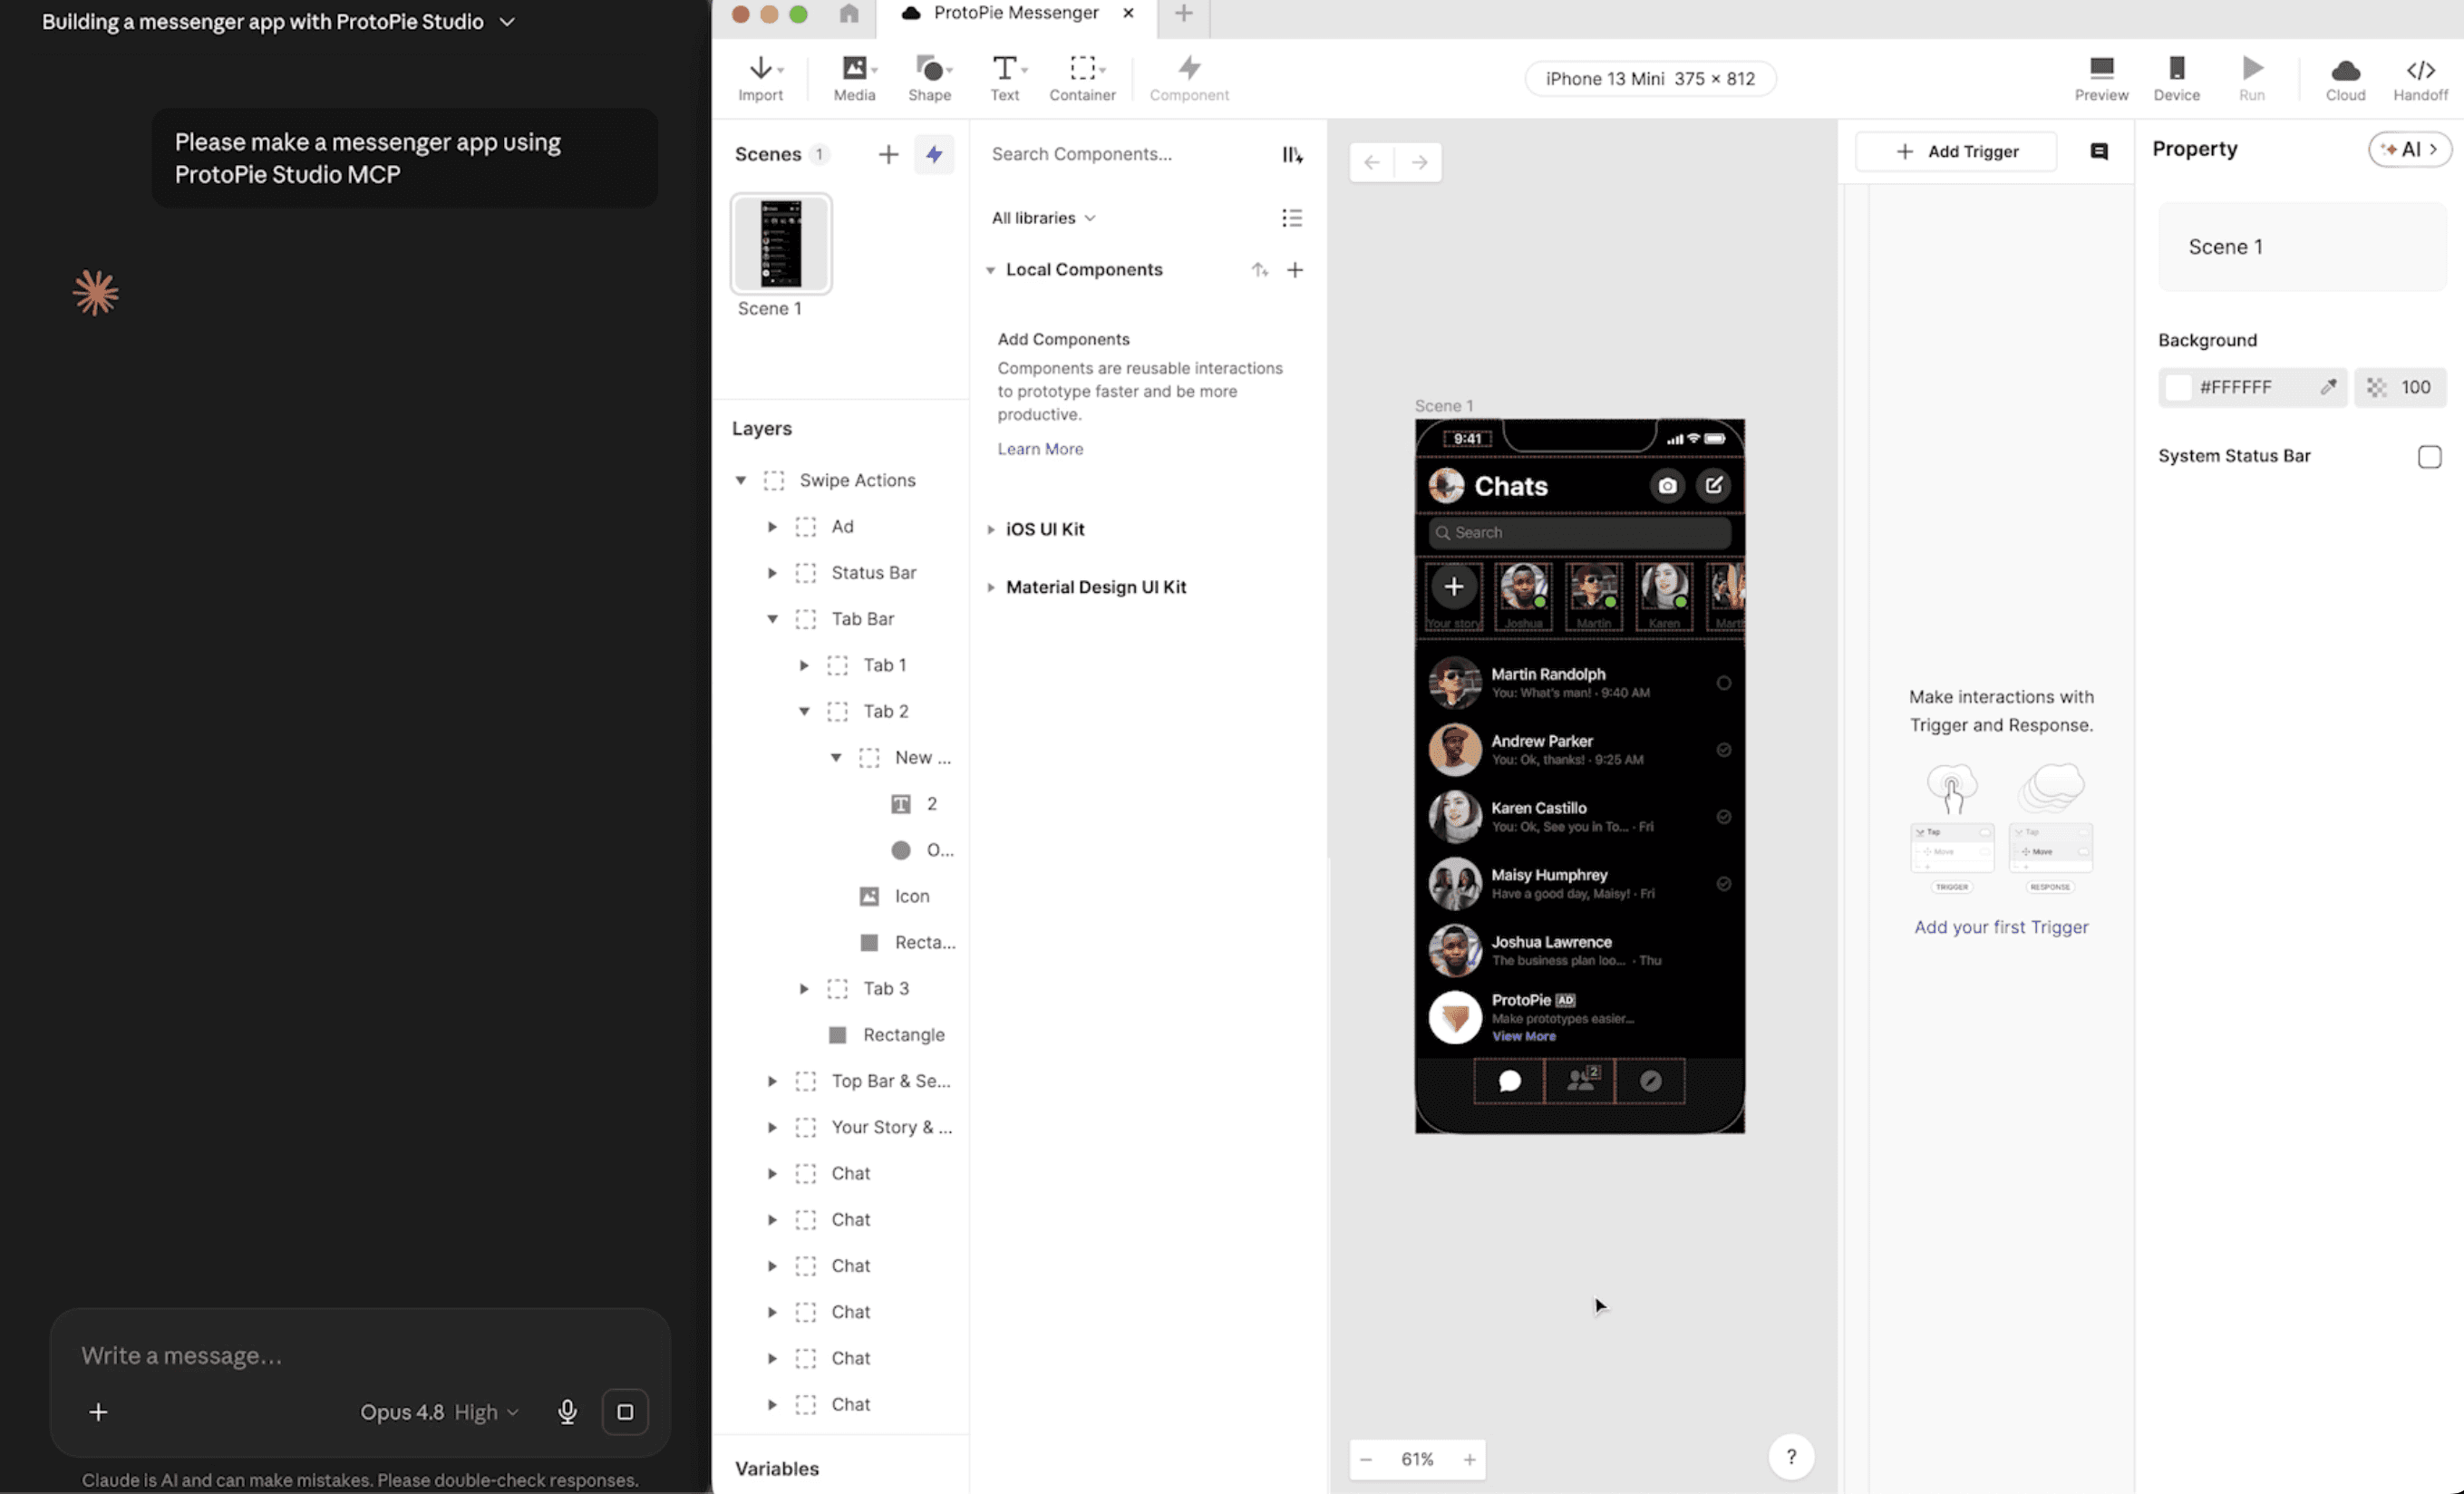
Studio MCP runs a local MCP server from inside ProtoPie Studio so that AI clients — Claude Desktop, Claude Code, Codex, and others — can read and control the prototype you currently have open. You can ask the AI to inspect an interaction, build new ones, or capture the canvas, all from a chat prompt.

What you can do

  • Analyze the interactions in the current prototype.

  • Author layers and layouts by prompt — create, modify, arrange, and style layers to build or refine a screen.

  • Author interactions by prompt — for example, add a Tap trigger to a button, or build a screen where tapping flips a card.

  • Capture a preview of the current screen.

Requirements

  • ProtoPie Studio 10.3.0 or later (the MCP Server ships from 10.3.0).

  • Your AI client and ProtoPie Studio must run on the same computer.

  • A ProtoPie Pro or Enterprise plan.

Which client should I connect?

The experience is identical once connected — only the connection method differs. Pick the one that fits your setup.

Client

Best for

How you connect (summary)

Claude Desktop (Chat)

Designers who’d rather avoid code and the terminal — the easiest path

Click Open in Claude Desktop in Labs → install the extension (.mcpb) once → it connects automatically

Claude Code (terminal CLI, or the Code tab in Claude Desktop)

Designers and design engineers comfortable with a code editor or terminal

Run a claude mcp add command

Codex / Cursor / VS Code / others

People already using another MCP client

Register the endpoint via a command or config


Learn how to install and setup Studio MCP