行业

汽车

航空

金融

游戏

医疗科技

物联网

数字产品

使用场景

面向企业

面向个人

面向团队

用于教育

主要特点

硬件与系统集成

公测版

ProtoPie MCP

多设备原型设计

交互逻辑

开发交接

ProtoPie AI

用户测试

插件

Figma

Sketch

Adobe XD

洞见与灵感

博客

白皮书

客户成功案例

活动与网络研讨会

ProtoPie 画廊

产品学习与支持

ProtoPie 学堂

下载 ProtoPie

产品文档

社区

行业

汽车

航空

金融

游戏

医疗科技

物联网

数字产品

使用场景

面向企业

面向个人

面向团队

用于教育

主要特点

硬件与系统集成

公测版

ProtoPie MCP

多设备原型设计

交互逻辑

开发交接

ProtoPie AI

用户测试

插件

Figma

Sketch

Adobe XD

洞见与灵感

博客

白皮书

客户成功案例

活动与网络研讨会

ProtoPie 画廊

产品学习与支持

ProtoPie 学堂

下载 ProtoPie

产品文档

社区

菜单

将 IFTTT 与 ProtoPie Connect 一起使用

什么是 IFTTT?

IFTTT 是一项网页自动化服务,可与多种设备和服务集成,包括 TwitterDropboxEvernoteFitbitAmazon Alexa,以及 Google Assistant

IFTTT 代表 “If This Then That(如果这样就那样)”,你在 IFTTT 中创建的 Applet 与 ProtoPie 的触发器和响应工作方式类似:如果这件事发生——那么那件事就会发生。

了解更多 IFTTT Applet

IFTTT 插件如何工作?

ProtoPie Connect 通过称为 Webhooks 的消息与 IFTTT 的合作服务通信。它们与 ProtoPie 中的发送和接收消息类似。一条消息(“事件”)会发送到 IFTTT,作为响应,IFTTT 会将该消息转换为一个操作。

通过将 ProtoPie Connect 与 IFTTT 的 Webhooks 结合使用,你可以将原型连接到其所有合作的网络服务和设备。

在 IFTTT 中创建 Applet

IFTTT 网站上创建一个账户。

配置触发器


{'_type': 'localeString', 'en': 'configuring-trigger-in-ifttt'}
  1. 登录后,点击 IFTTT 页面右上角的 Create

  2. If This 部分点击 Add,并搜索 Webhooks

  3. 选择“Receive a web request

  4. 为你的事件命名并点击 Create Trigger。名称中只能使用字母、数字和下划线(例如:“send_email”)

配置操作


{'_type': 'localeString', 'en': 'configuring-the-action-in-ifttt'}
  1. Then That 部分点击 Add 按钮

  2. Choose a service 字段中搜索你想要的操作

  • 例如,“Gmail” - “Send yourself an Email”

    3.   Configure the action fields
    3.   Configure the action fields
    3.   Configure the action fields
    3.   Configure the action fields
    3.   Configure the action fields
  • 填写“Subject、Body、To address、CC address、BCC address 和 Attachment URL”部分。点击 Add ingredient 按钮最多可添加 3 个可自定义值(”Value1, Value2, Value3”),这些值需要在 ProtoPie Studio 中进行配置(请参见在 ProtoPie Studio 中配置消息)

  • 点击 Update Action

  • 检查你的 Applet,然后点击 Finish

    4.   Your Applet is now active. It can be deactivated and reactivated by switching the **Connected** button
    4.   Your Applet is now active. It can be deactivated and reactivated by switching the **Connected** button
    4.   Your Applet is now active. It can be deactivated and reactivated by switching the **Connected** button
    4.   Your Applet is now active. It can be deactivated and reactivated by switching the **Connected** button
    4.   Your Applet is now active. It can be deactivated and reactivated by switching the **Connected** button

将 IFTTT 连接到 ProtoPie Connect

配置 ProtoPie Connect 以向 IFTTT 发送请求。

测试你的 Applet

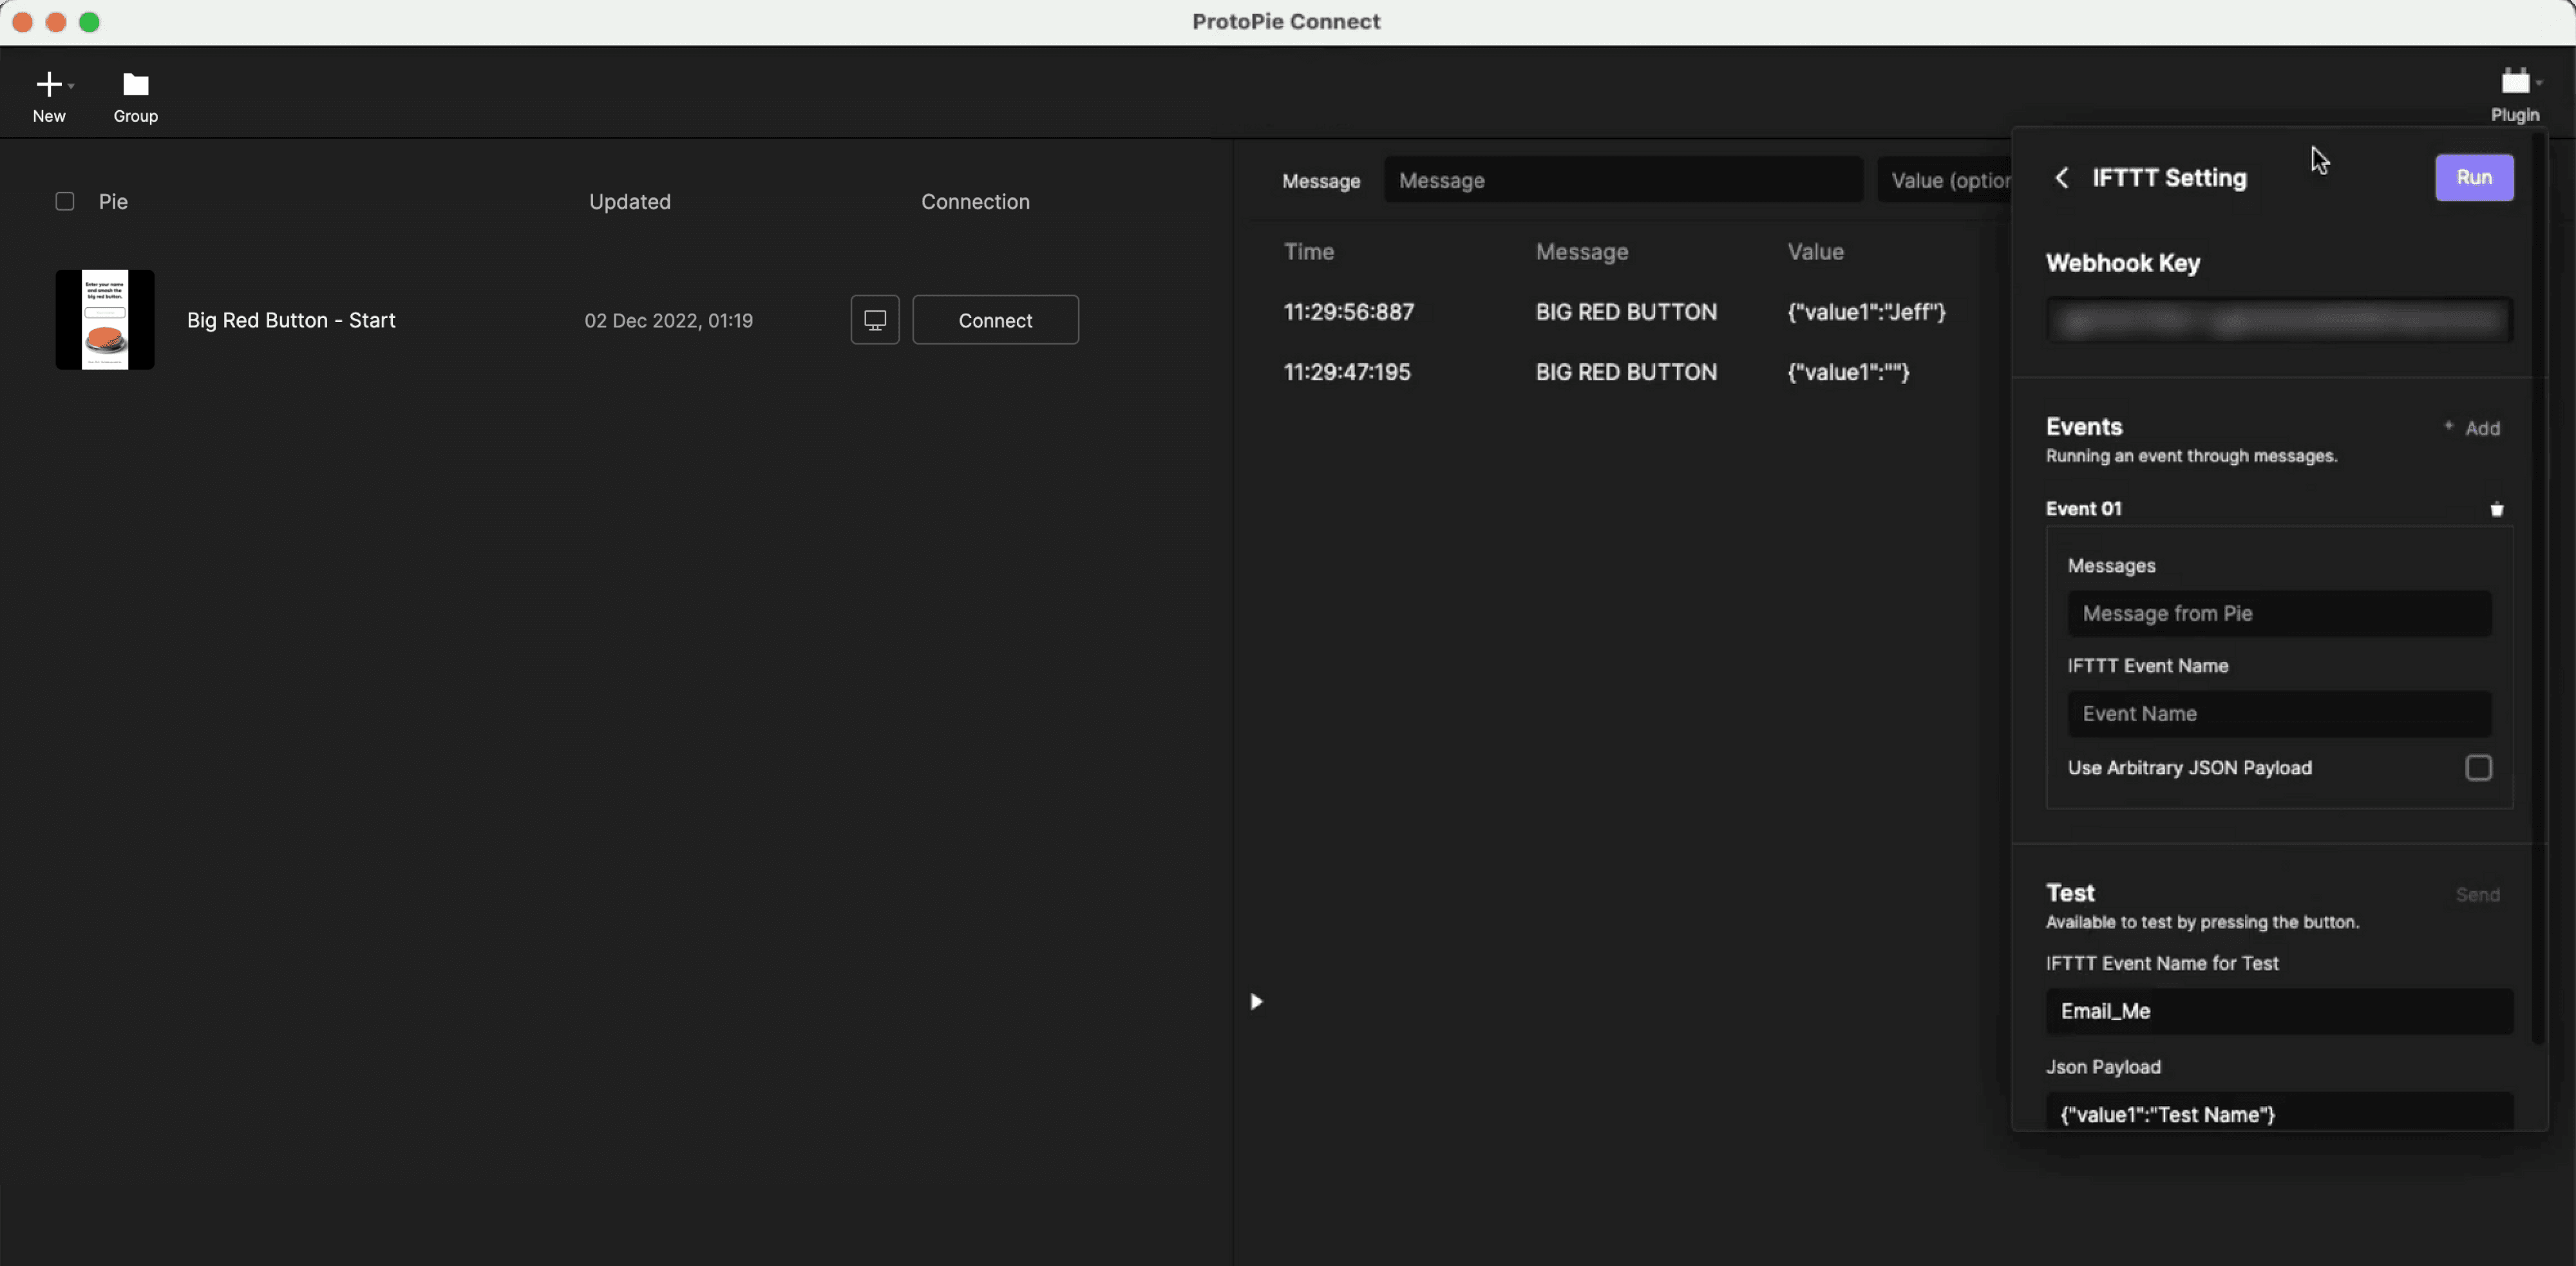
  1. 打开并登录 ProtoPie Connect。


  2. 在插件下拉菜单中选择 IFTTT

    • 复制并粘贴你的私有 Webhook Key,你可以在 IFTTT 网站的 Explore → ”Webhooks” → Documentation 下找到它

    • 点击 Run 按钮


  3. 你可以在 Test 部分测试该 Applet

    • 输入你的事件名称和 JSON 负载

    • 点击 Send


{'_type': 'localeString', 'en': 'testing-your-applet'}

你可以前往 IFTTT 网站上的 My Applets 并点击 View activity,以验证你的 Applet 是否正常工作。
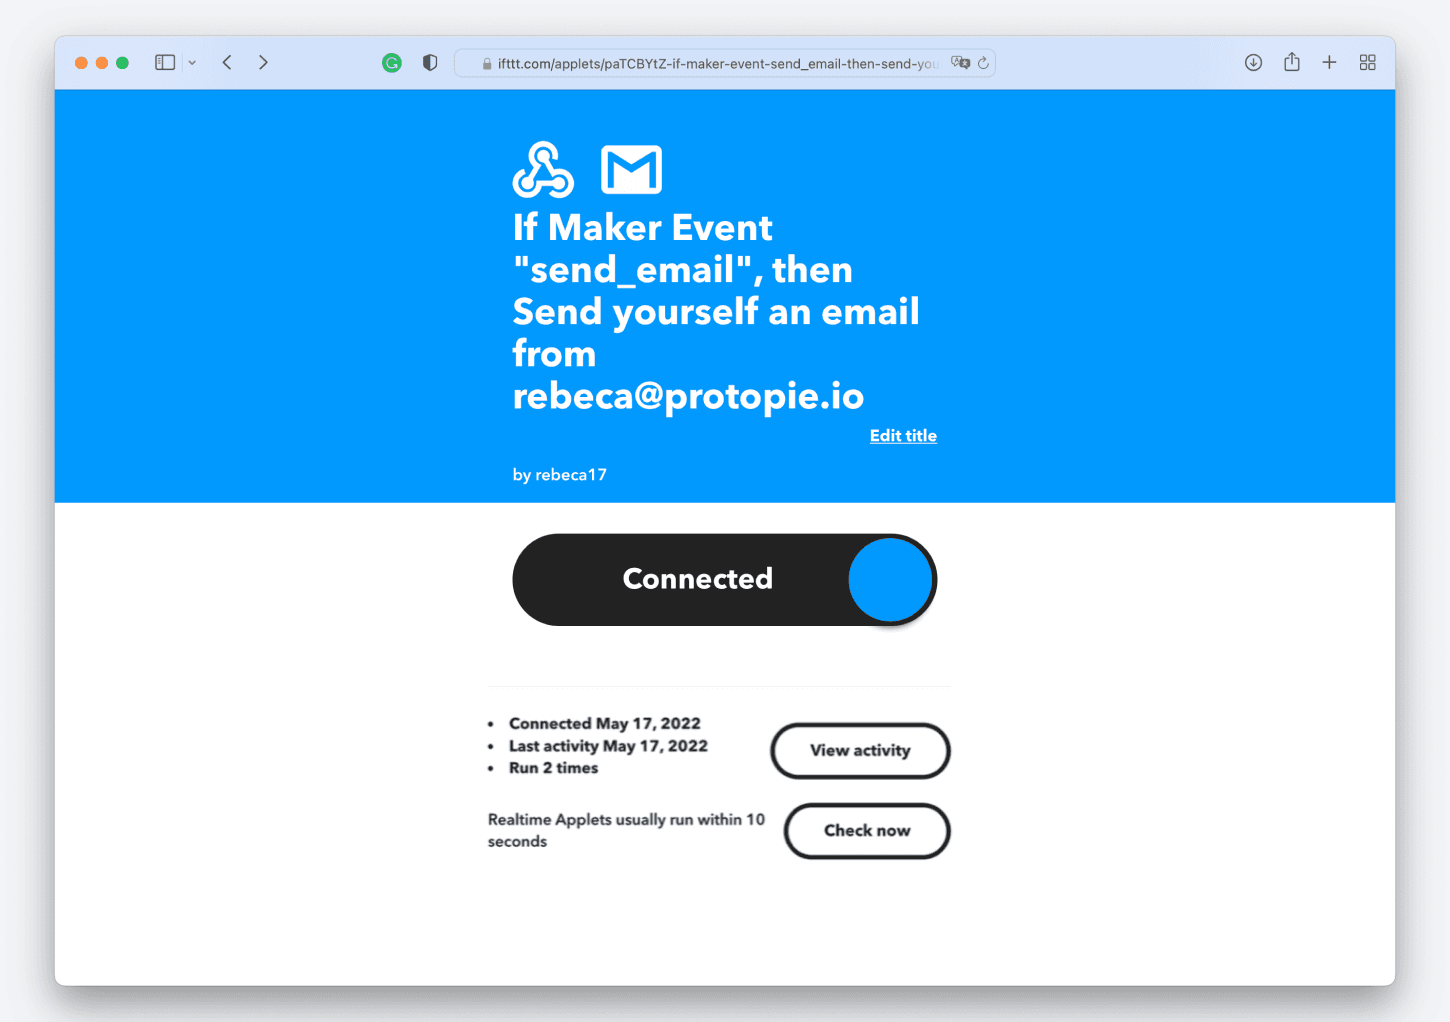

{'_type': 'localeString', 'en': 'view-activity-applet'}
  1. 你将收到一封电子邮件,其中包含 JSON 负载中指定的值。

在 ProtoPie Studio 中配置消息

现在你已经创建并测试了 Applet,接下来需要在原型中使用 ProtoPie Studio 配置相应的消息。

设置将触发 Applet 中操作的 Send 响应。

  • 使用通道“ProtoPie Studio”与 ProtoPie Connect 通信,并启用“Send Value Together”。

  • 如果你在 IFTTT Applet 中使用了一个或多个值,请配置你的 JSON 负载值。
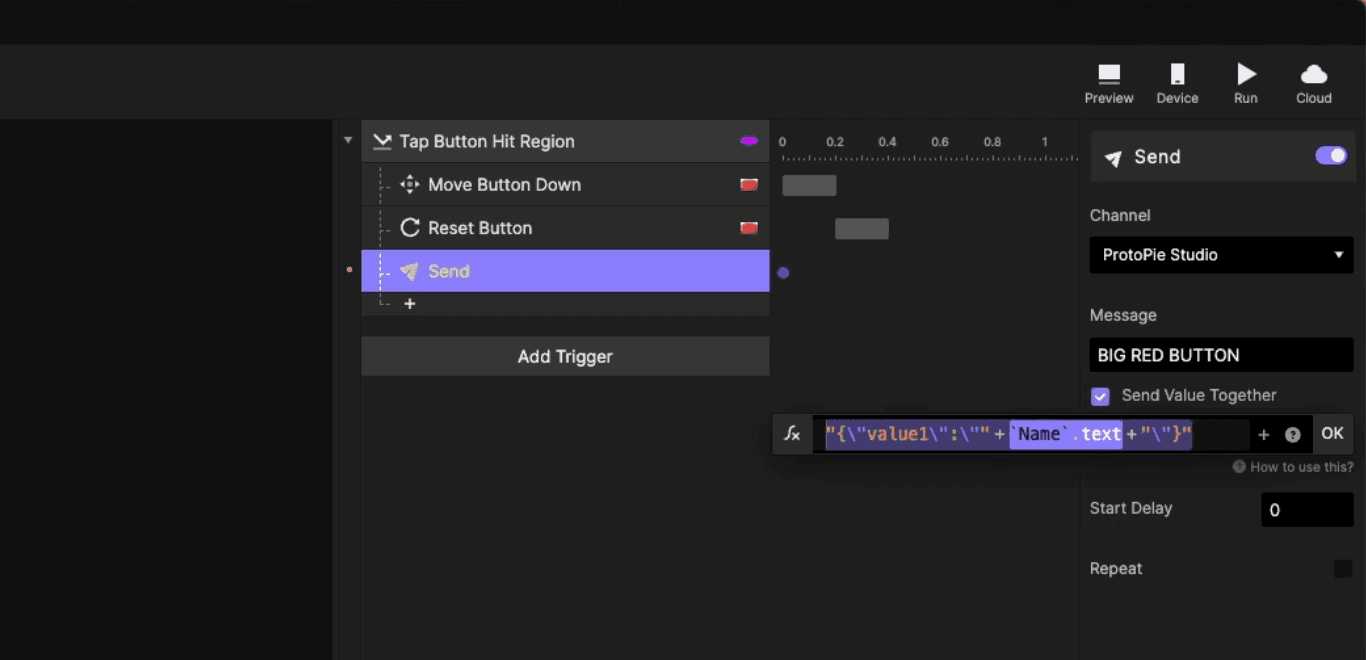
{'_type': 'localeString', 'en': 'json-upload-ifttt'}
  • 在 ProtoPie Connect 中测试原型