

In this step-by-step guide, we will show you how to test your HMI (Human-Machine Interface) designs in a 3D virtual reality (VR) environment. We used ProtoPie to create interactive HMI prototypes, which can then be integrated via ProtoPie Connect into 3D VR Unity Projects for a truly immersive testing experience.
Get ready to explore each stage of the process, and discover how these tools can enhance the quality of your automotive designs. Let's begin this exciting journey into HMI design and prototyping in the automotive industry!
You can take a look at the demo below to see how the end result could look like.
Sign-up to get news and tips about 3D prototyping!
TL;DR
Create your HMI prototypes
Create the project in Unity
Set up Unity to embed prototypes from ProtoPie
Show prototypes inside Unity
Establish the data connection between ProtoPie and Unity
Pro Tip: use this custom template to import your prototypes
1. Create your HMI prototypes
To get started with this, you need to create your HMI prototypes in ProtoPie. If you’re already using ProtoPie for your prototyping, then you can skip this step. If not, then go ahead and learn how to Design Your Own Car Dashboard Using ProtoPie.
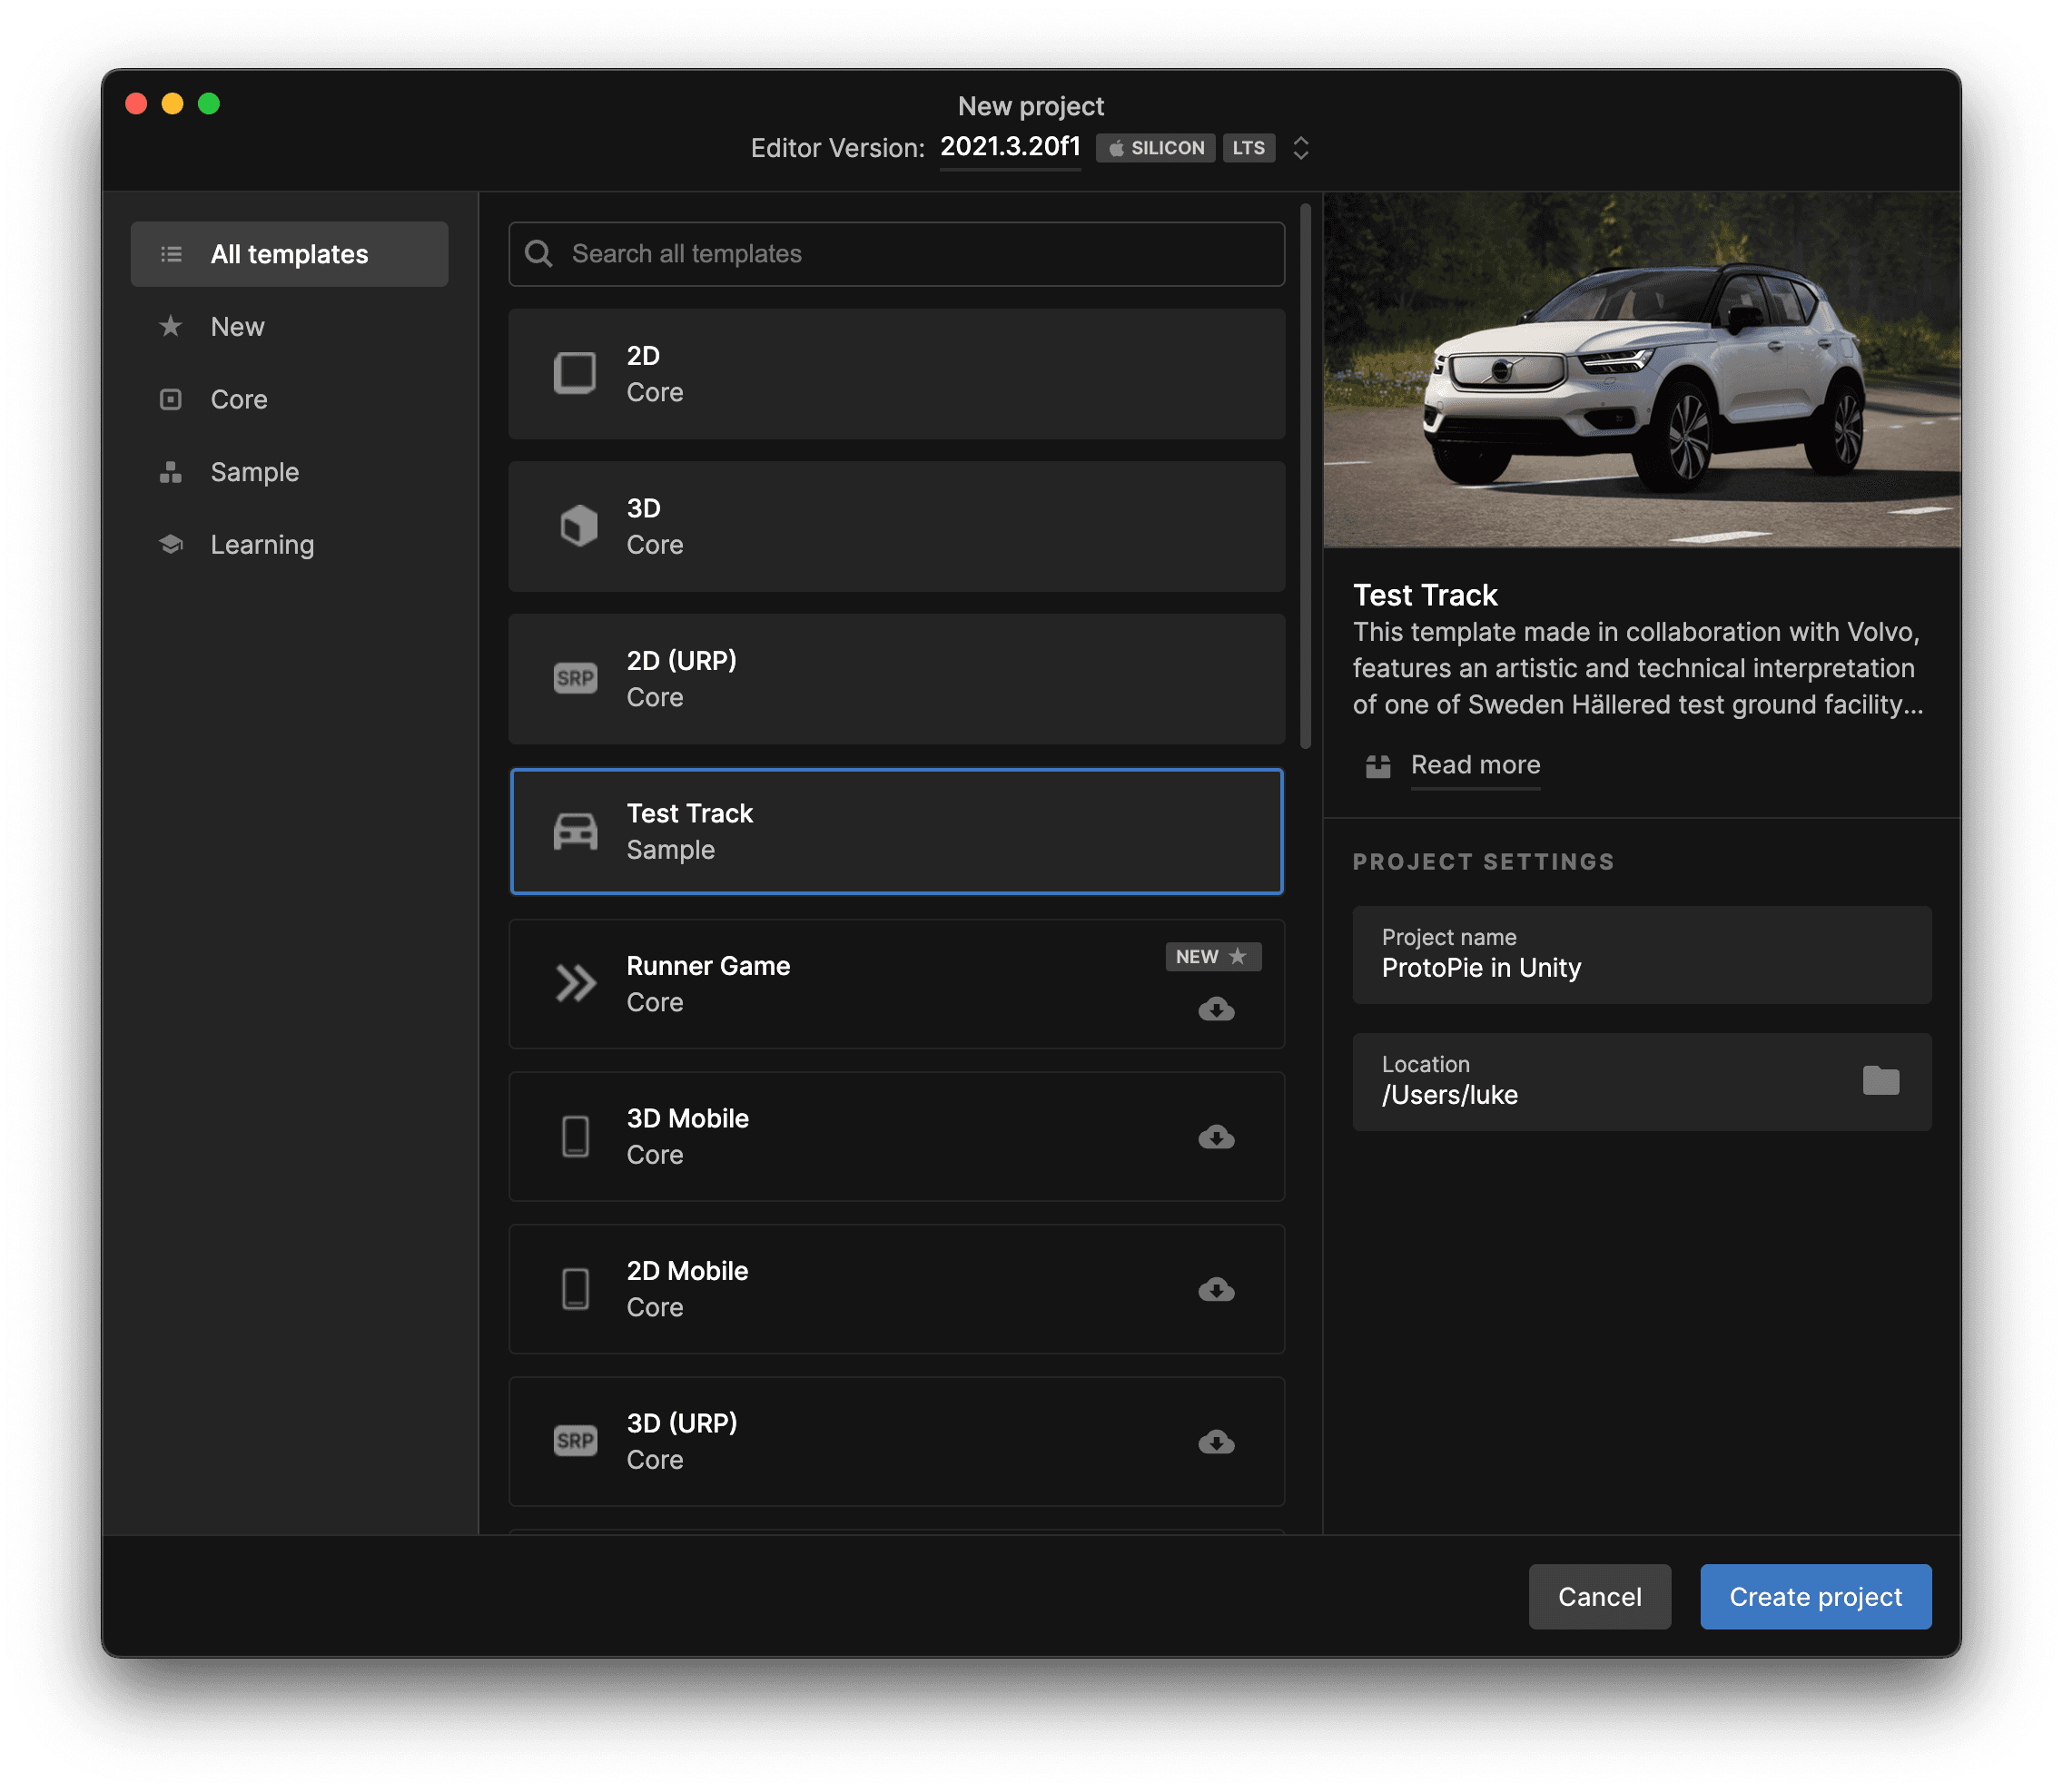
2. Create the project in Unity
Now that you created your HMI prototypes, download and install Unity on the laptop or PC you’re using ProtoPie with. The demo used Unity version 2021.3.14f1, and we recommend installing this version or any long-term support version that came after it.
Next, create a New project from the Unity Hub. Choose the Test Track template and configure the Project name and Location. This template is provided by Volvo when installing the Unity Editor and provides the 3D environment used for this demonstration.
Are you as excited about 3D Prototyping as we are? Then sign up to get updates and tips about 3D prototyping.
3. Setting up Unity to embed Pies (prototypes) from ProtoPie
💡 We will embed a Webview (Web Browser) in the Unity project and use the Web Player feature in ProtoPie Connect to show the pies.
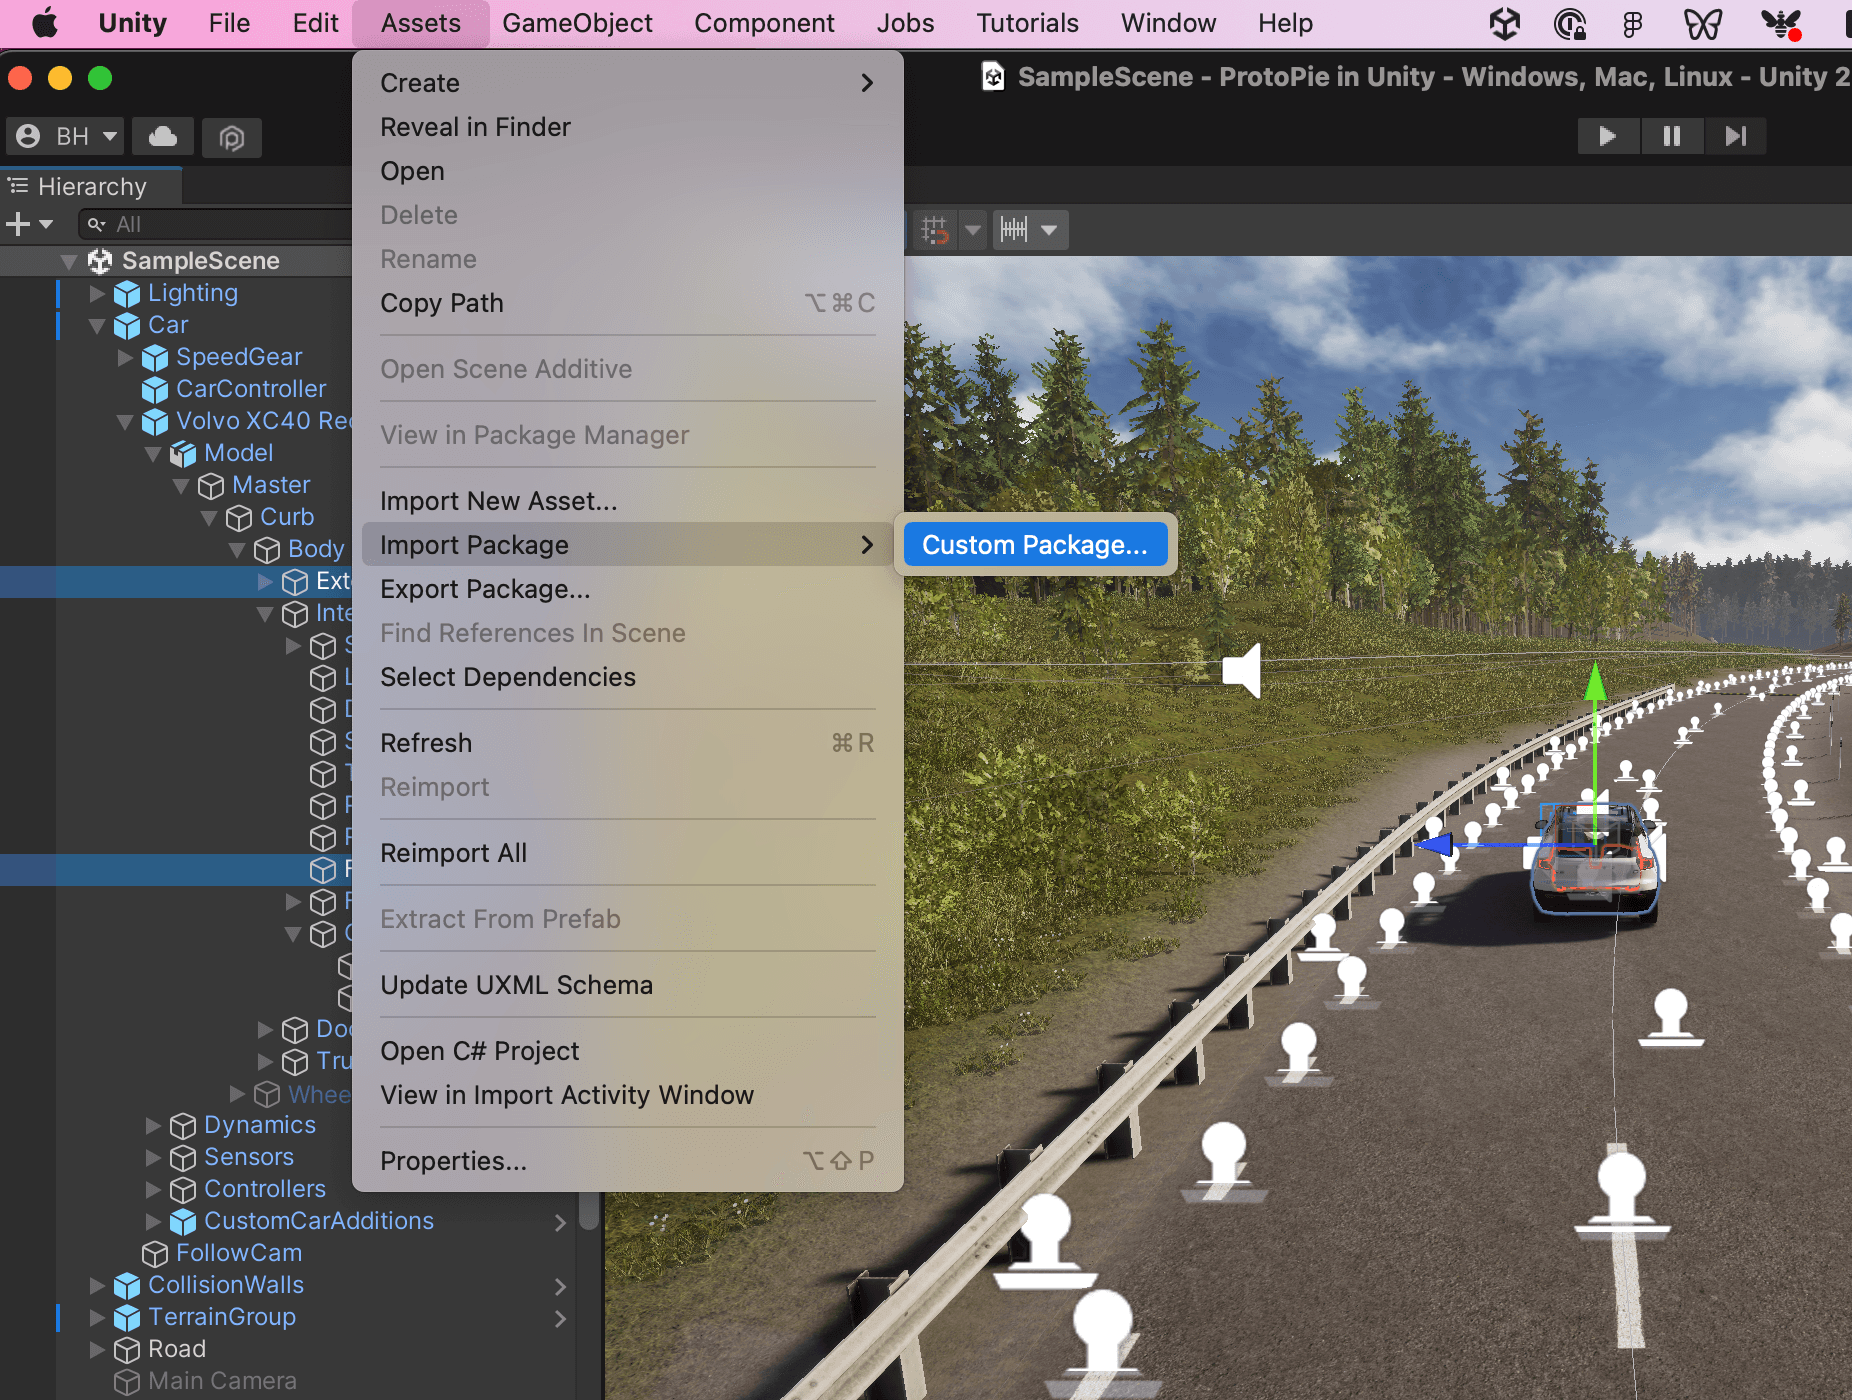
In this step-by-step guide, we will be using the Vuplex 3D Webview for Windows and macOS plugin for Unity. It will make setting up web views in 3D projects quite easy compared to other alternatives.
In Unity, go to Assets > Import Package > Custom Package. Locate the Vuplex plugin you downloaded, select Open, and Import the plugin to the project.
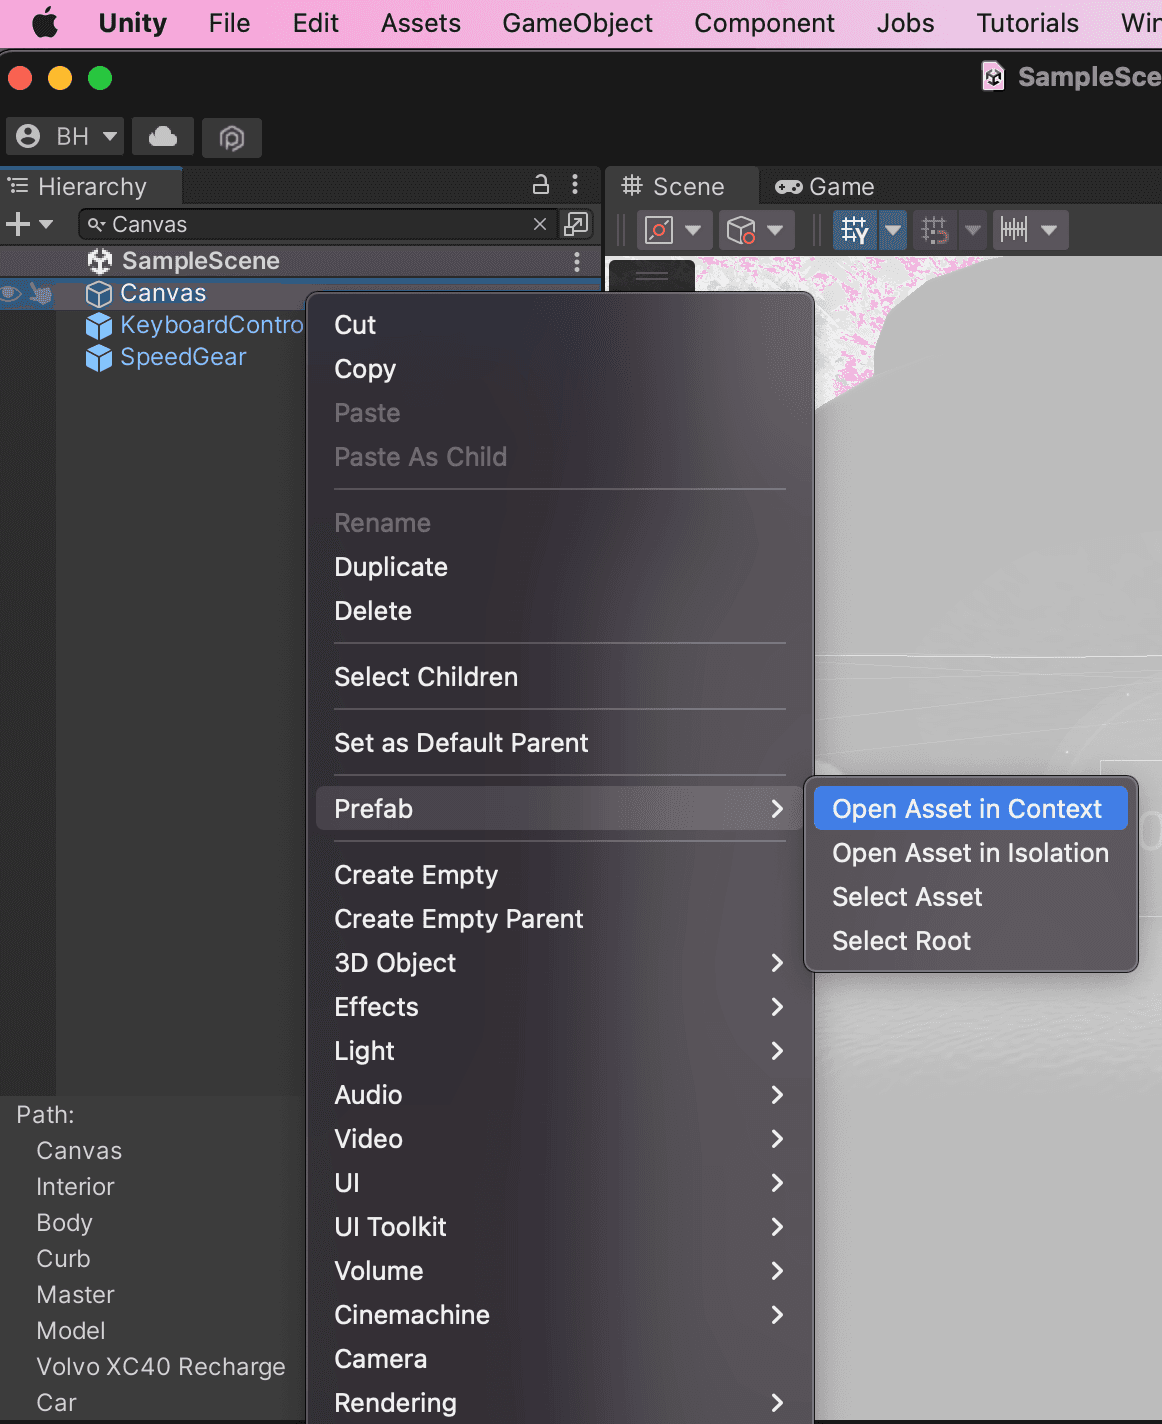
In the Unity project, use the Hierarchy pane to locate the **Canvas **object using the search box. Right-click and select Prefab > Open Asset in Context.
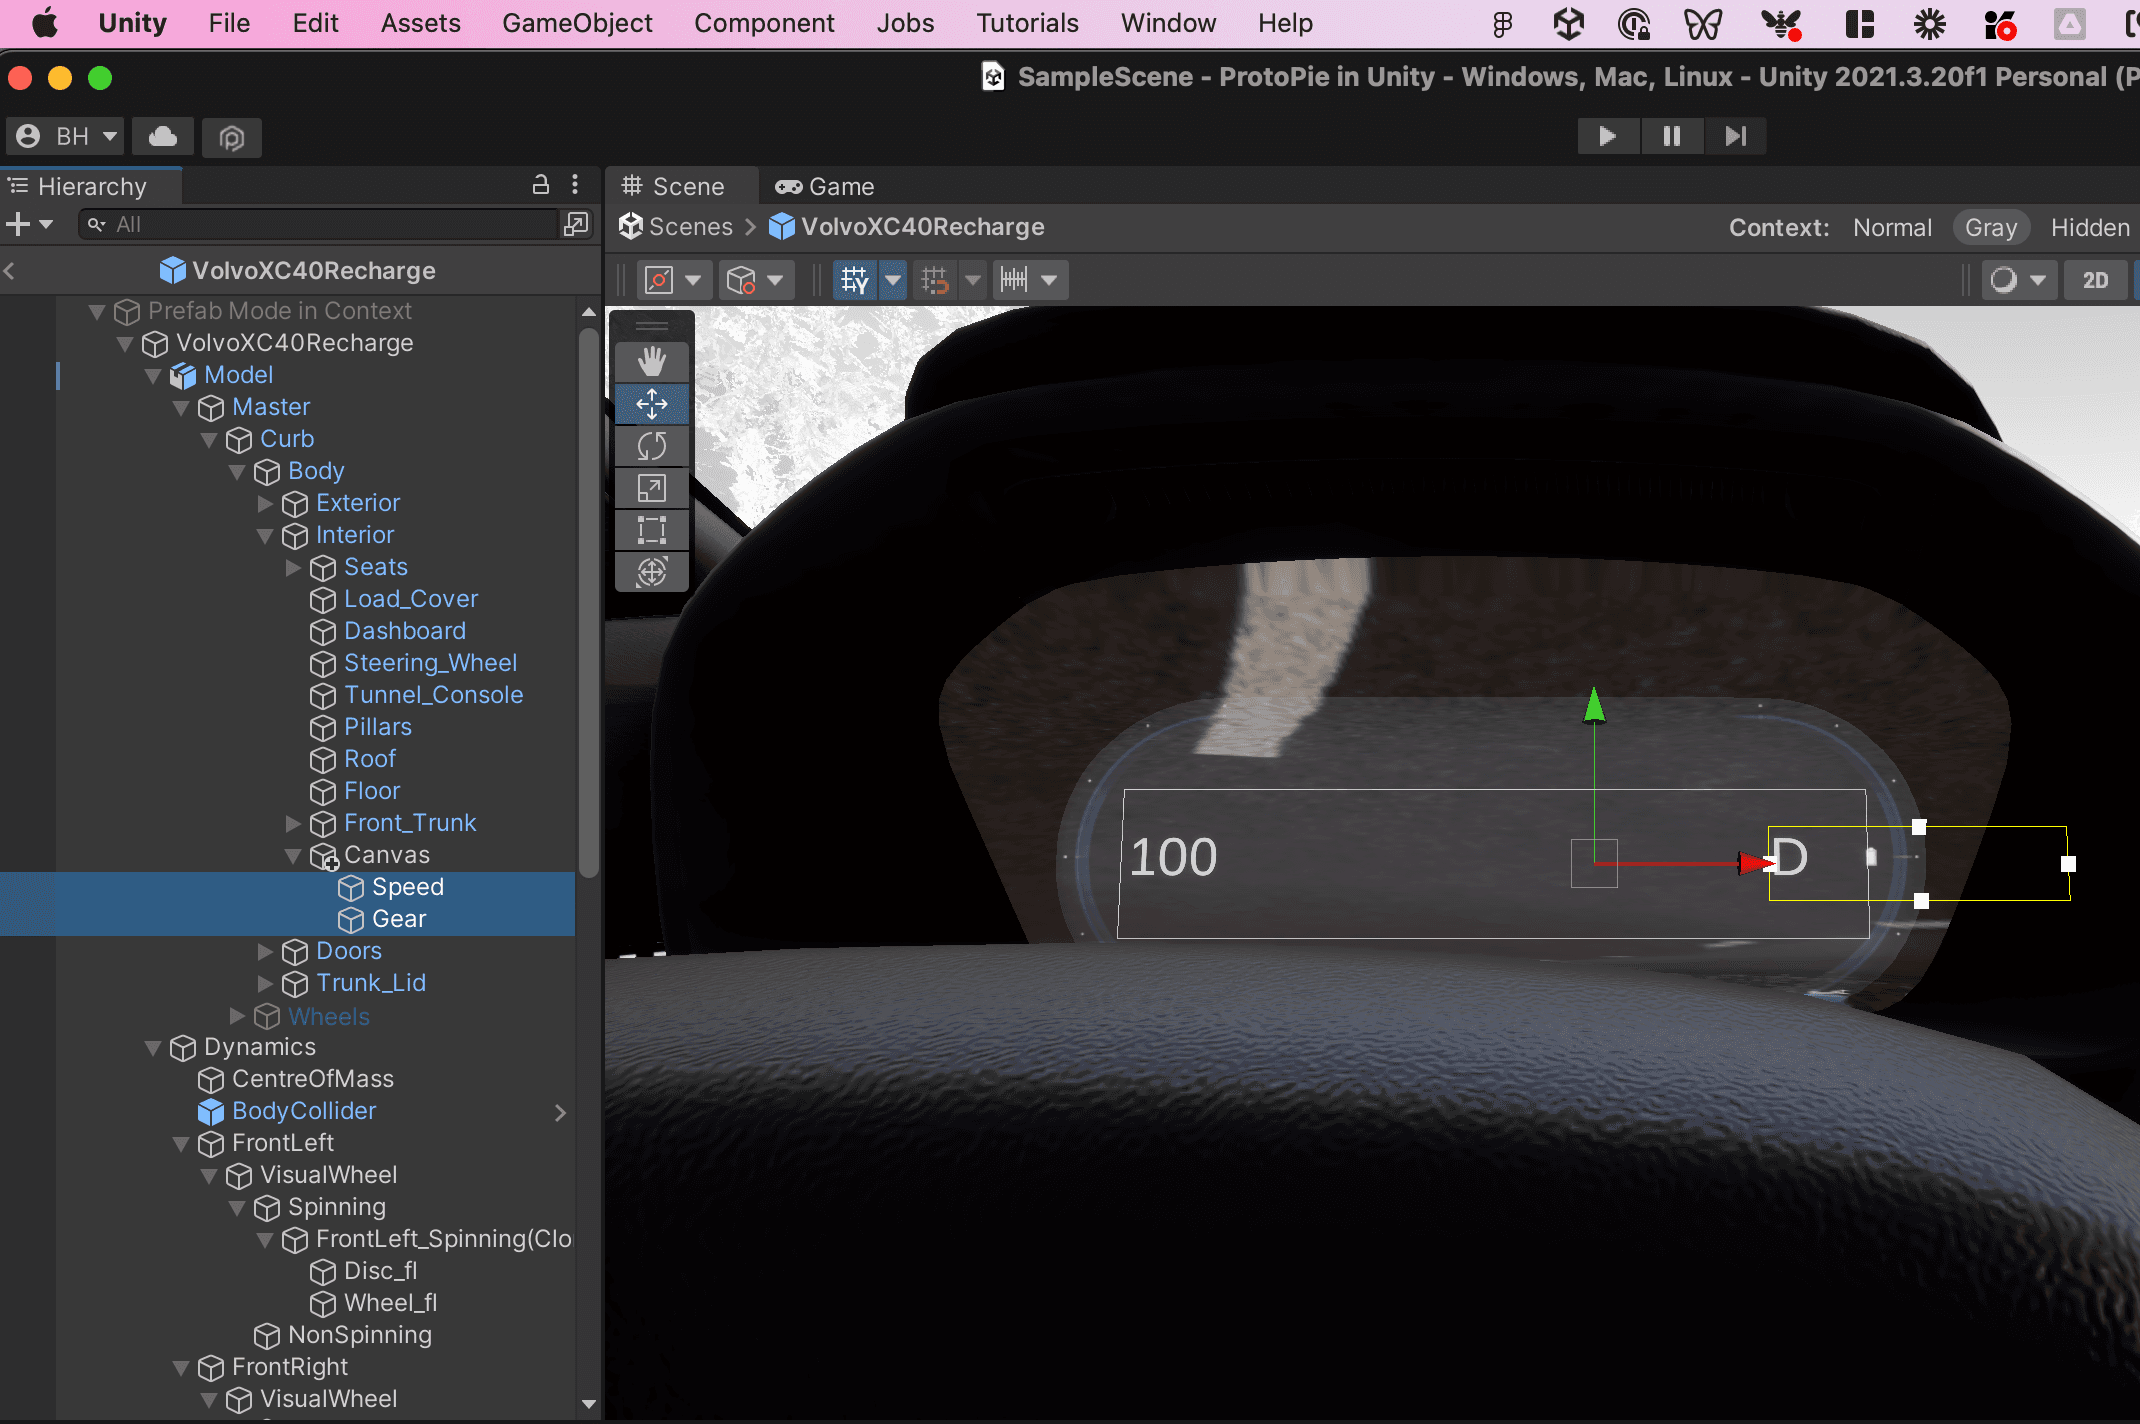
In the Hierarchy pane, delete the **Speed and Gear **objects as we will be replacing them with our own Pies from ProtoPie.
In the Project pane, locate the CanvasWebViewPrefab by searching or manually at Assets > Vuplex > WebView> Core > Prefabs > Resources.
Drag and drop the **CanvasWebViewPrefab **from the Project pane to be under Canvas in the **Hierarchy **pane.
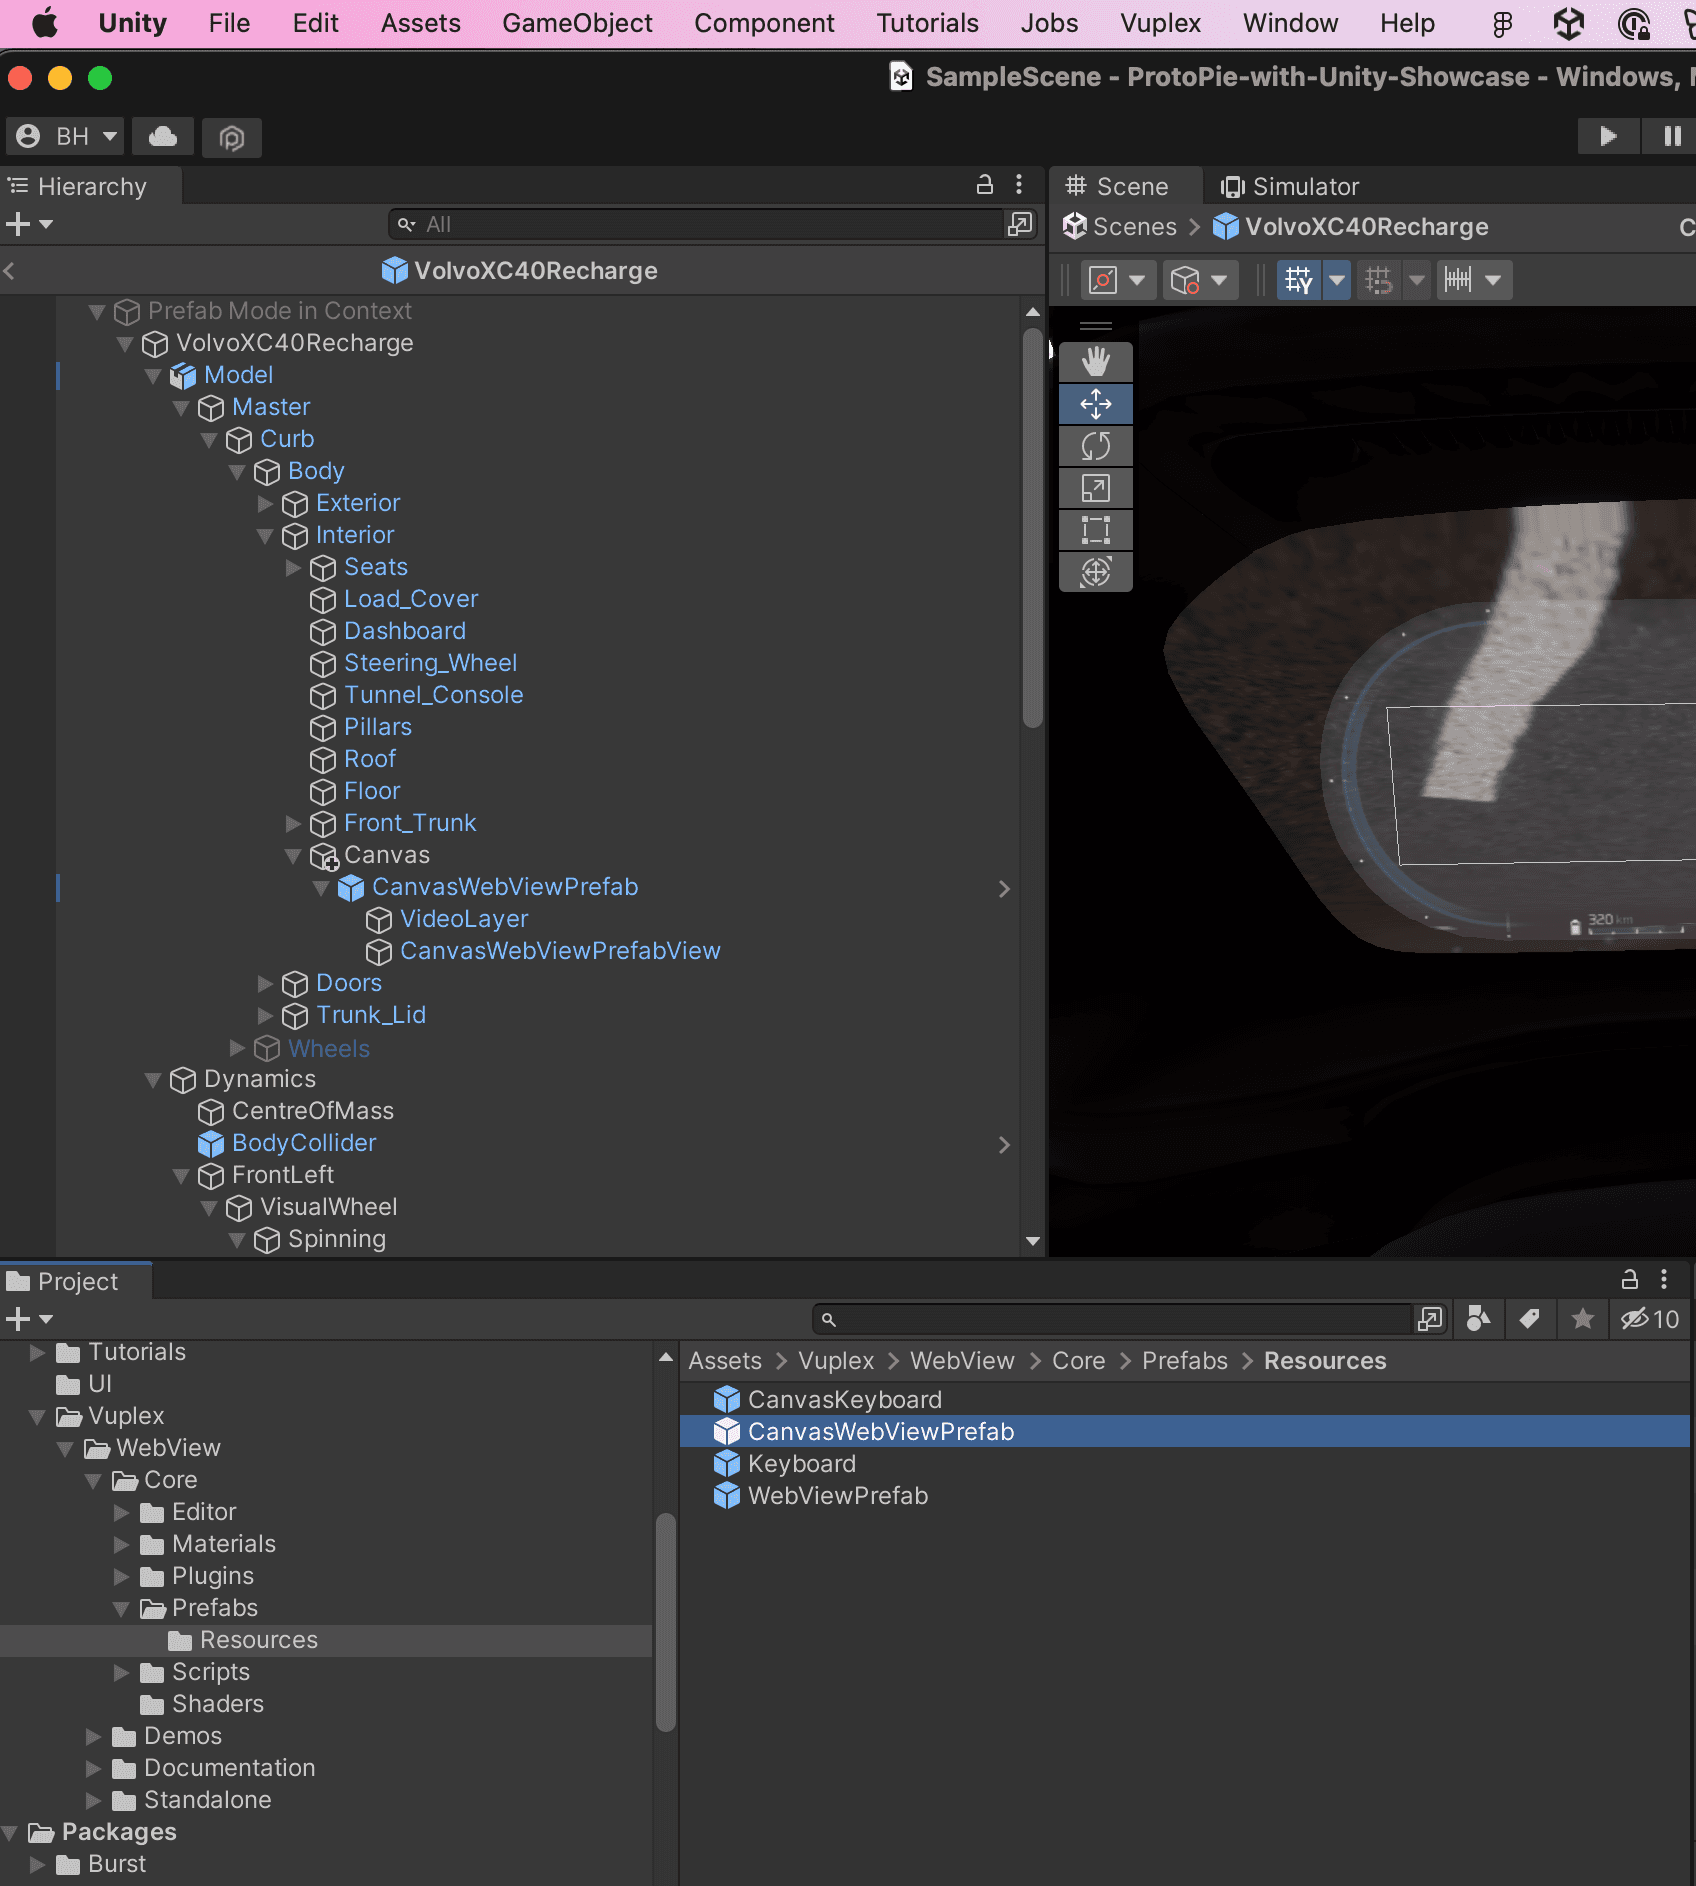
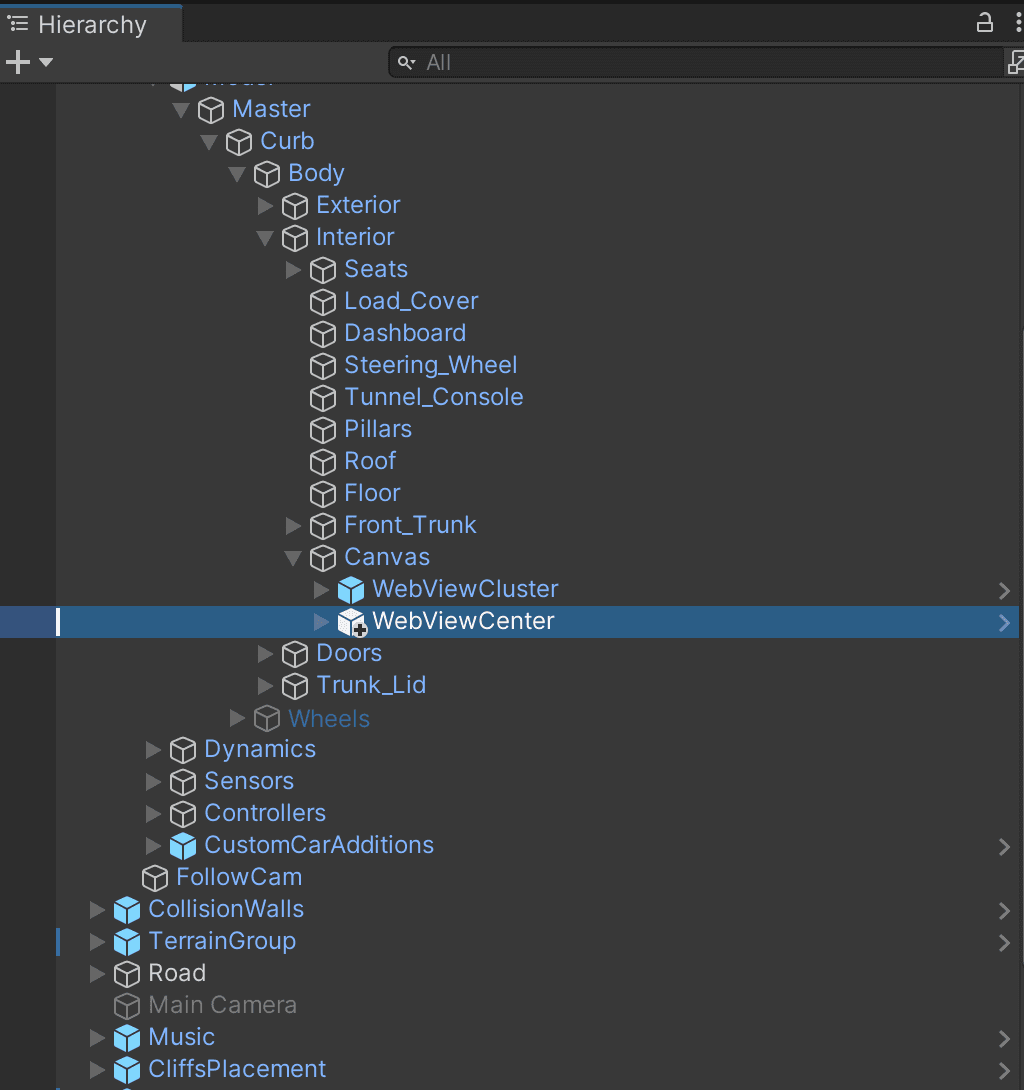
Since we will need two web views, let’s create another one, and rename them to WebViewCluster and **WebViewCenter. **
The WebViewCluster will be responsible for the cluster display in front of the driver, and the WebViewCenter will be responsible for the center display between the driver and the front passenger.
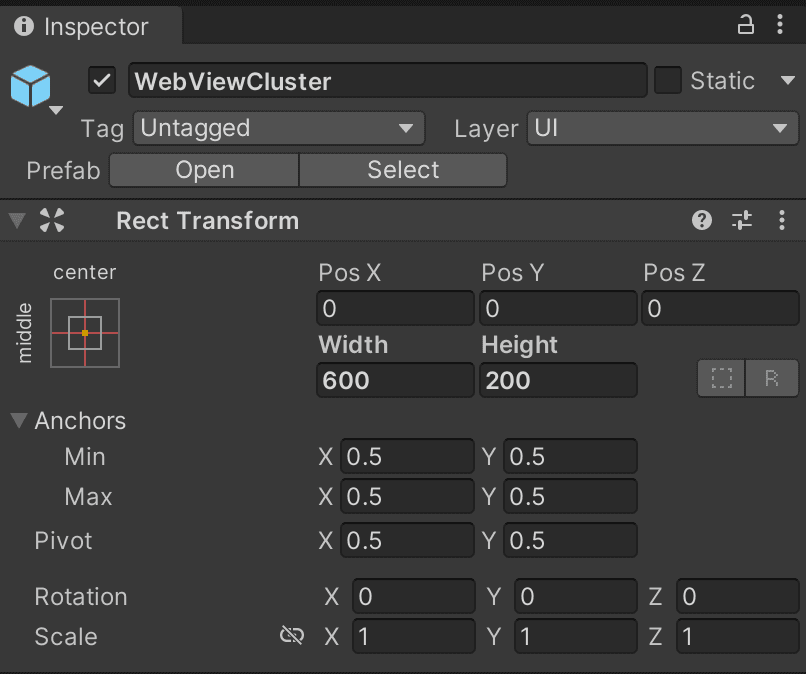
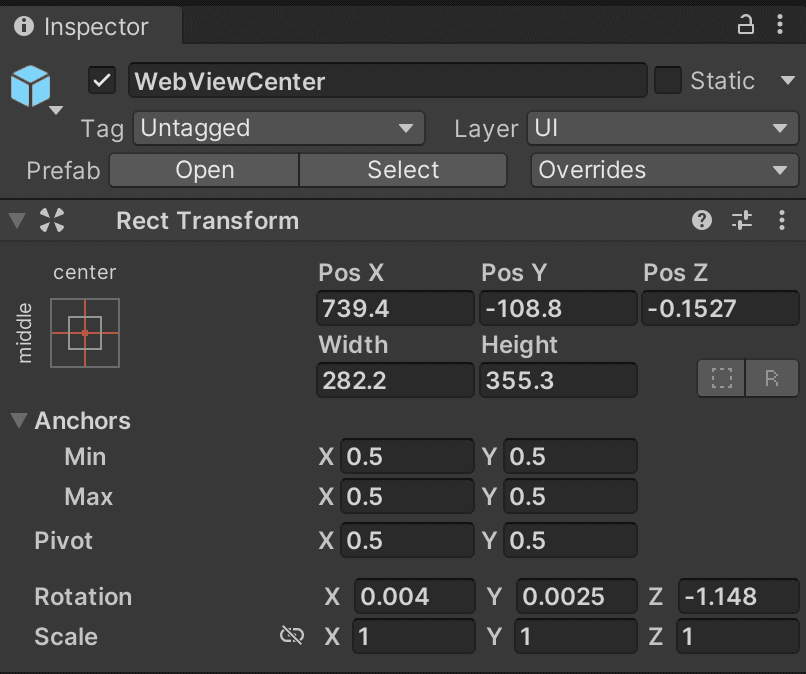
Use the appropriate tools in the **Scene pane **to adjust the size and position of the **WebViewCluster **and WebViewCenter objects.
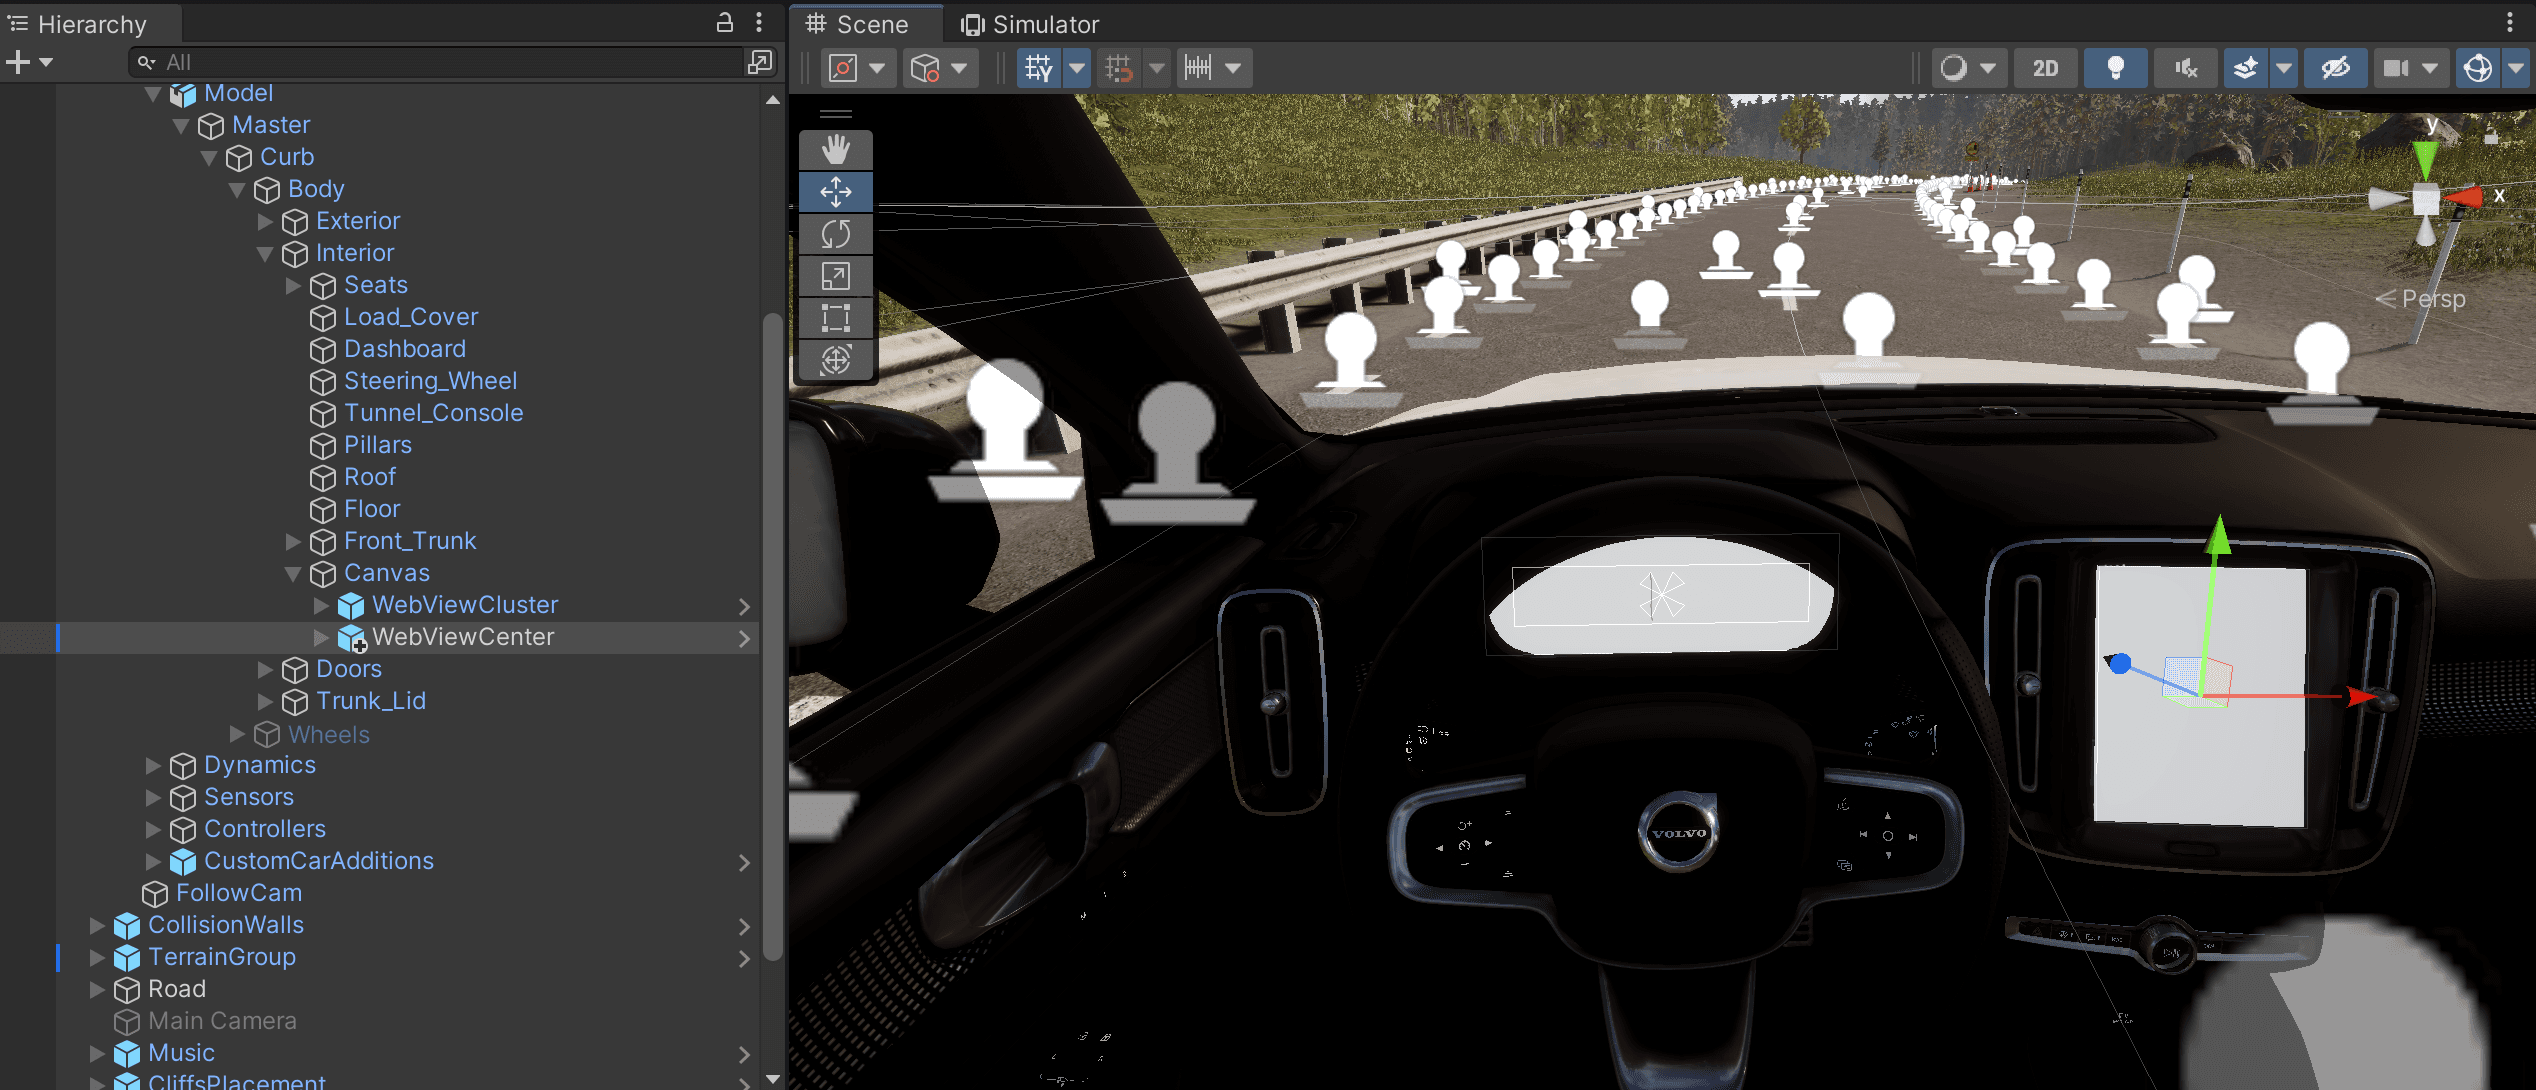
You can check out the two images of the inspector pane below, to see how I adjusted the WebViewCluster and WebViewCenter objects.
4. Showing the Pies inside Unity
💡 ProtoPie Connect has the ability to create a web URL for your Pies, and we’ll be using the URLs to show them in Unity.
In ProtoPie Connect, add the Pies that we want to show inside Unity. We are using two Pies: Cluster Display and Center Display.
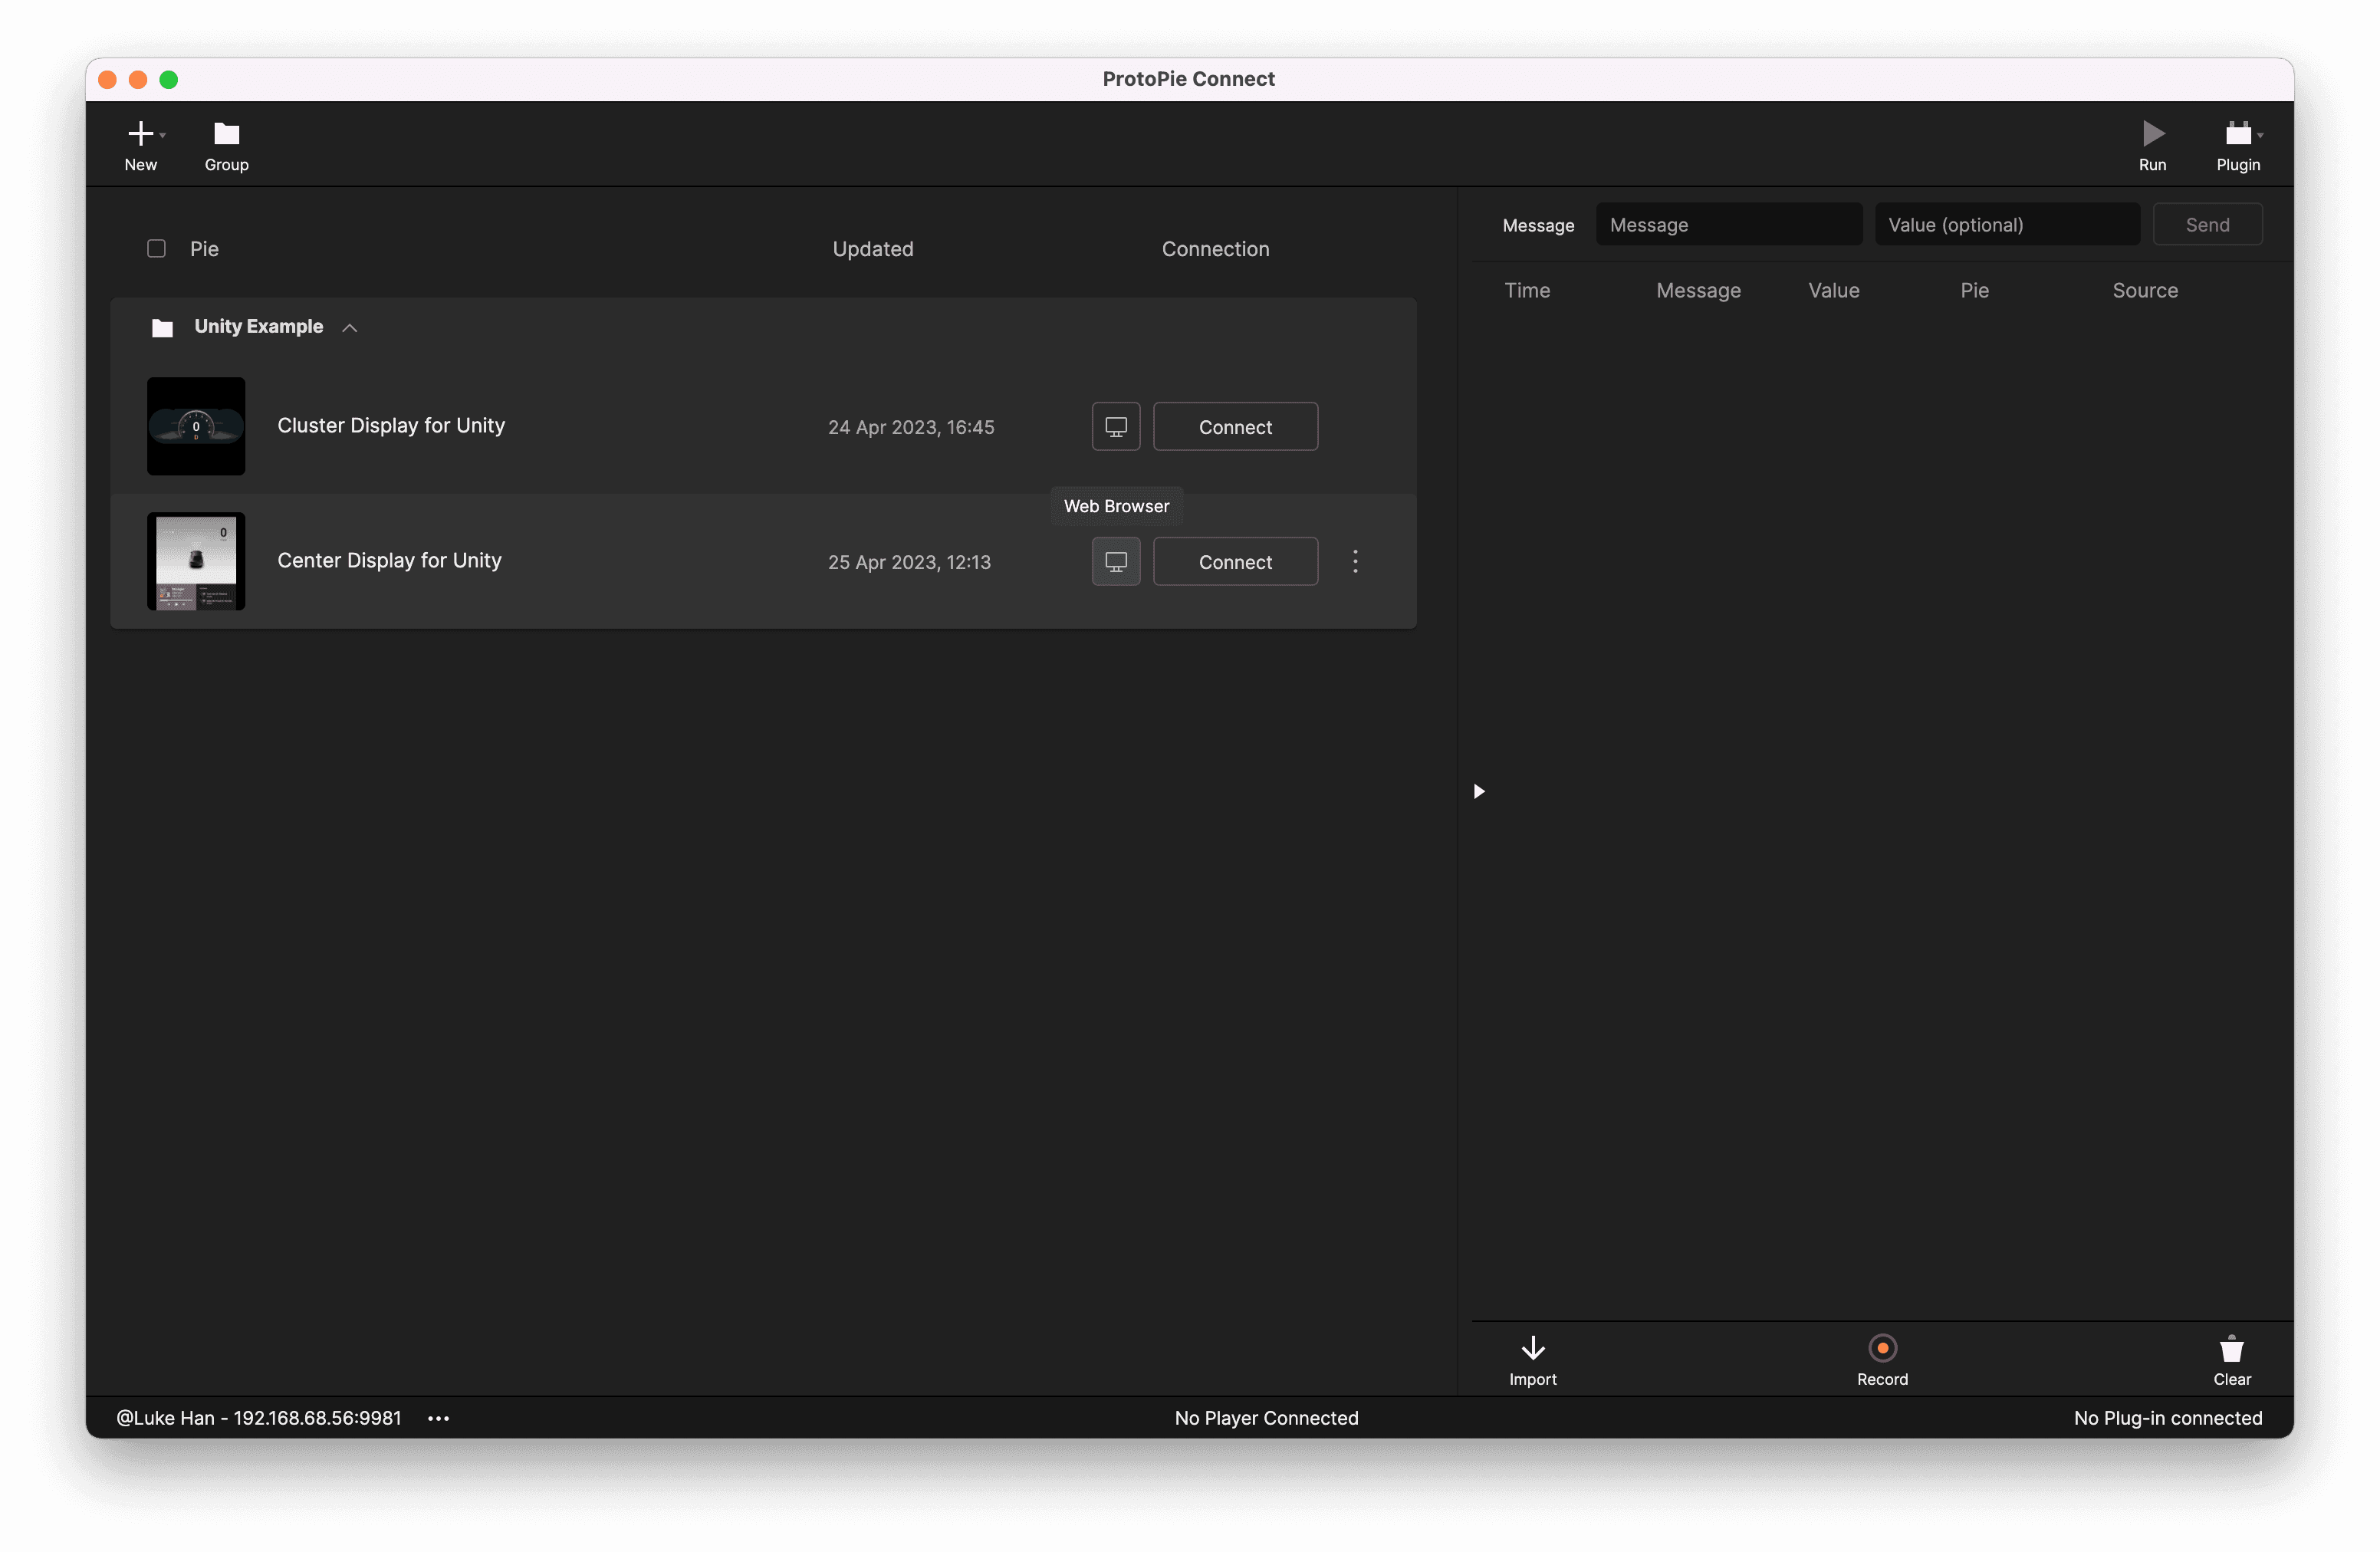
Below, you can find the two Pies (prototypes) on cloud.
The pie can be opened in the web browser. Note the URL of the pies for both pies. (If ProtoPie Connect is not in the same PC/laptop replace 'localhost:9981' with the IP address shown in the bottom left corner of ProtoPie Connect, which in the screenshot above is 192.168.68.56:9981)

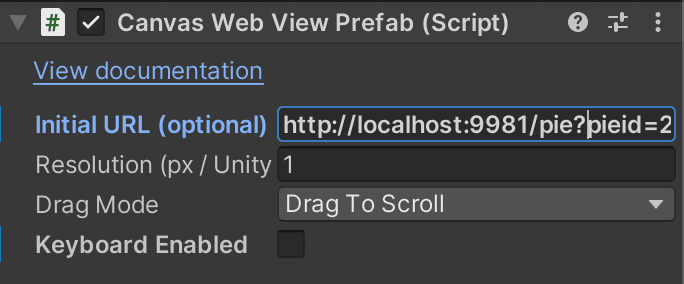
In Unity in the Hierarchy pane, locate the WebViewCluster and **WebViewCenter **objects we created above. For each object’s Inspector pane (on the right), locate the Canvas Web View Prefab (Script).
We will change the** Initial URL (optional)** to the URL of the pies we got from ProtoPie Connect’s Web Player.
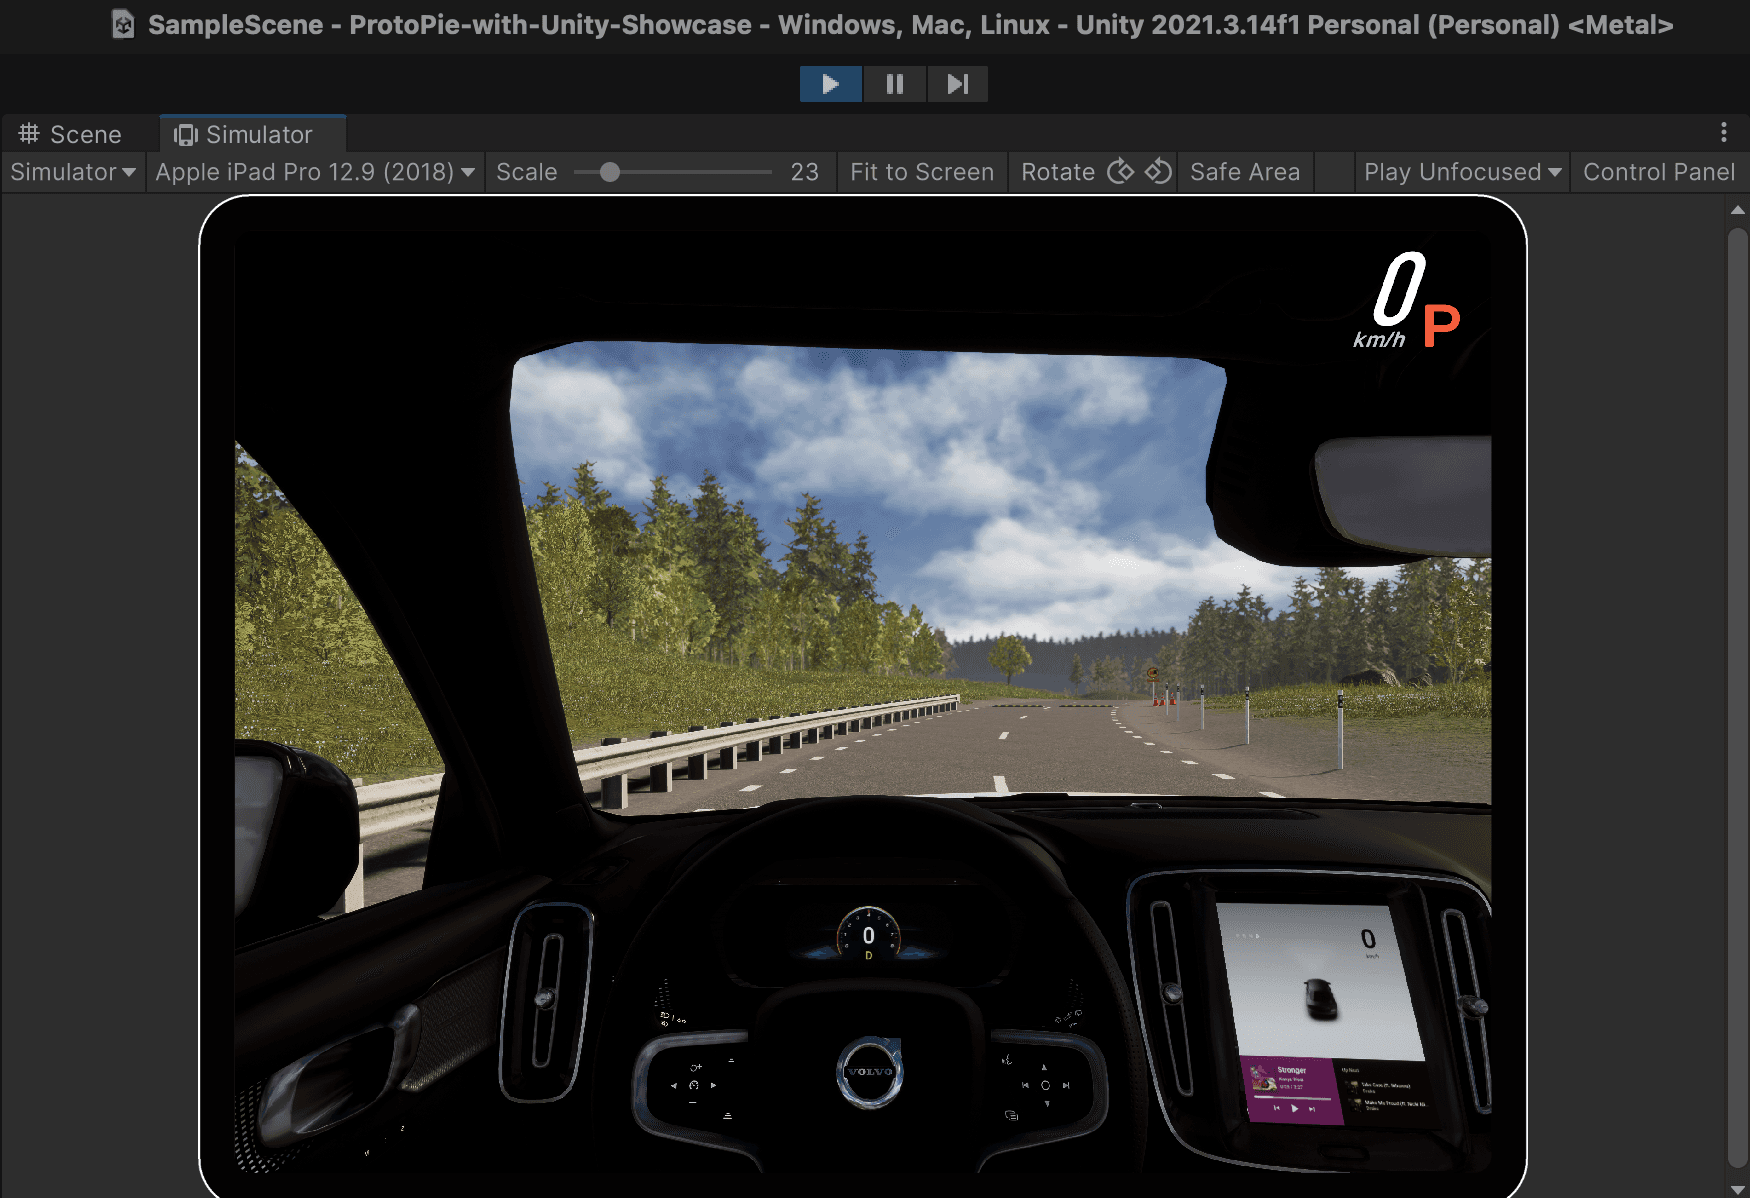
Press Play to test and see the Pies embedded inside Unity! (You can get a better view using the Simulator pane and press C on the keyboard to change the view to the interior of the car).
💡 At this point, any changes and edits you make in the prototype will be relayed automatically via ProtoPie Connect! (as long as it’s the same Pie added in ProtoPie Connect and the URL doesn’t change)
5. Establish the data connection between ProtoPie and Unity to make them interactive
💡 ProtoPie Connect uses socket.io technology to enable integration with other applications.
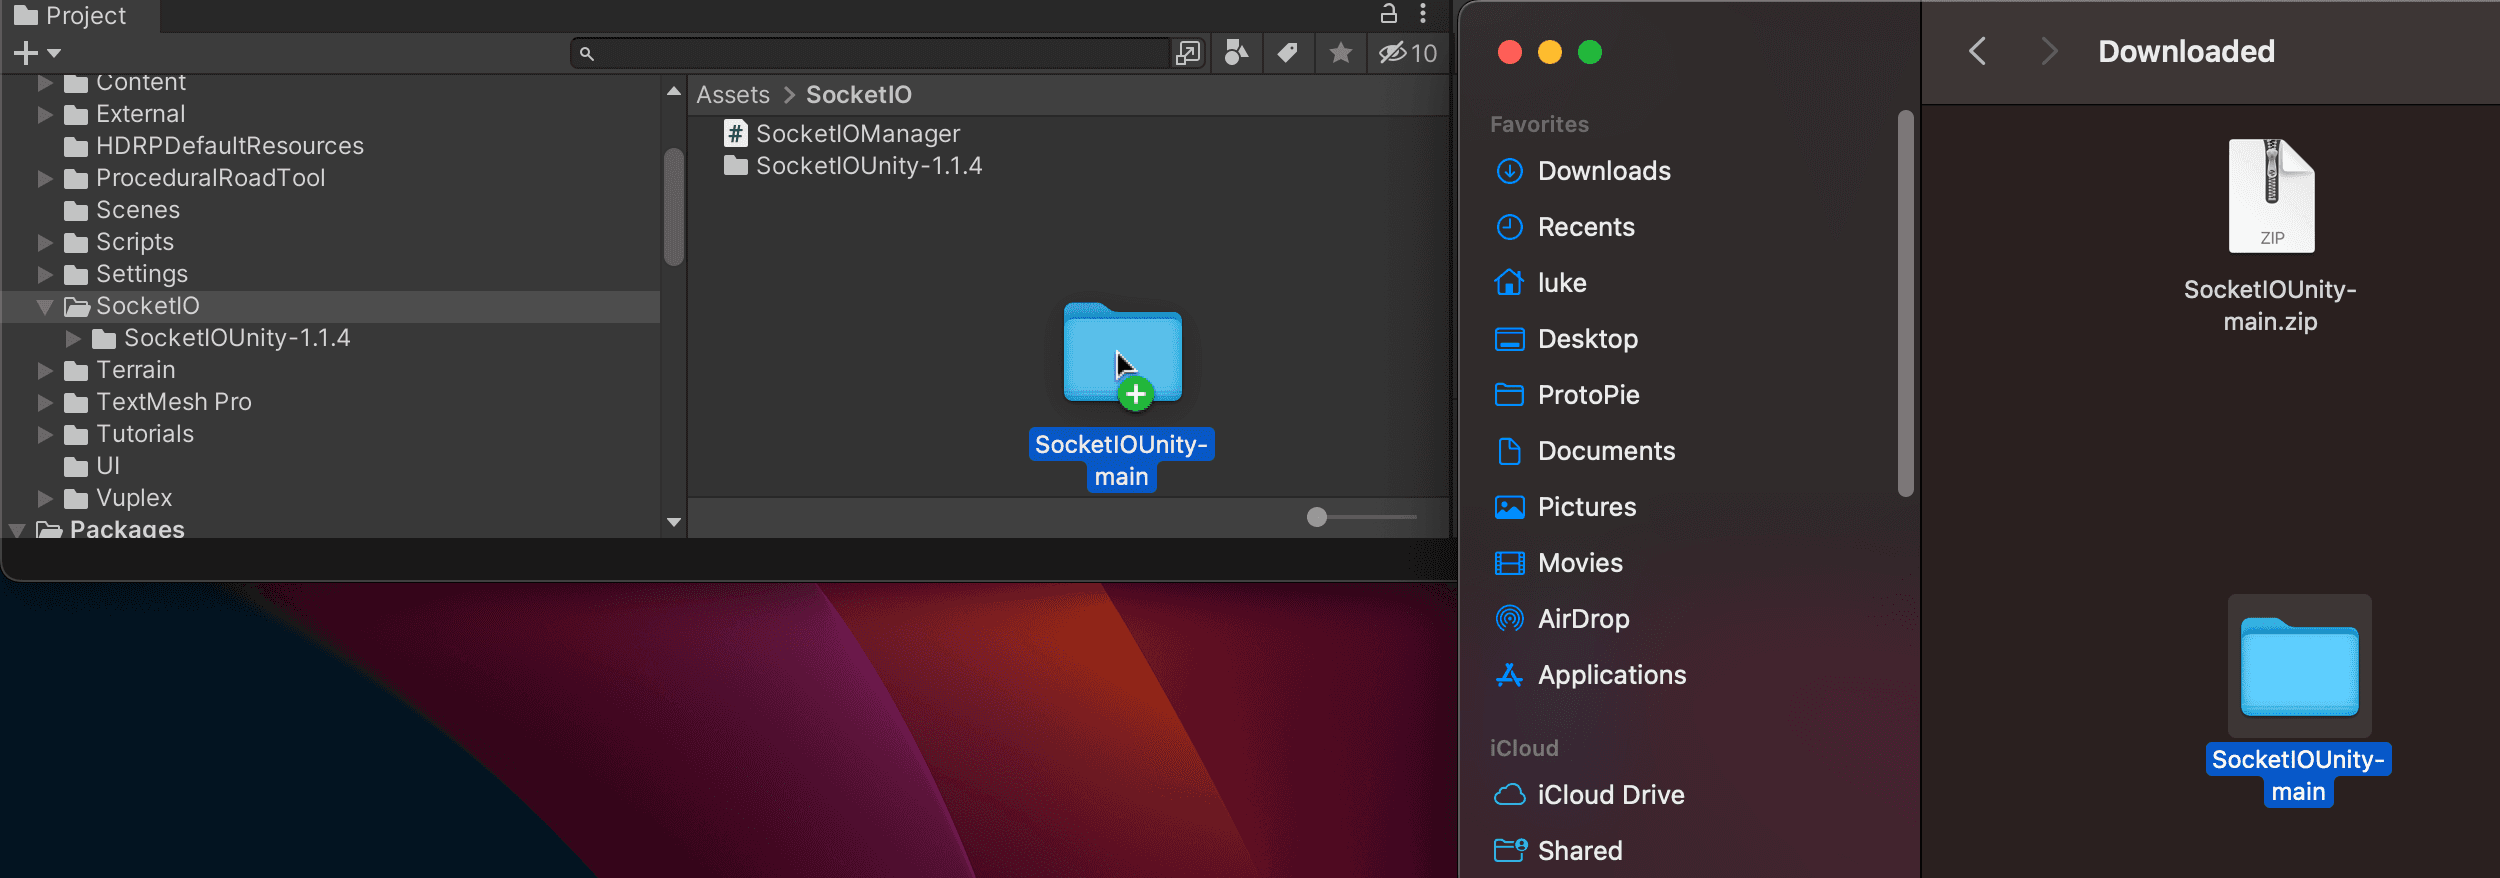
For this step-by-step guide, we will be using the SocketIO for Unity library by itisnajim. Which can be downloaded from Github.
In the** Project pane, go to the Assets folder and create a folder inside called SocketIO**. Unzip the SocketIOUnity zip file we downloaded above, and drag and drop the folder to the SocketIO folder in the Project pane.
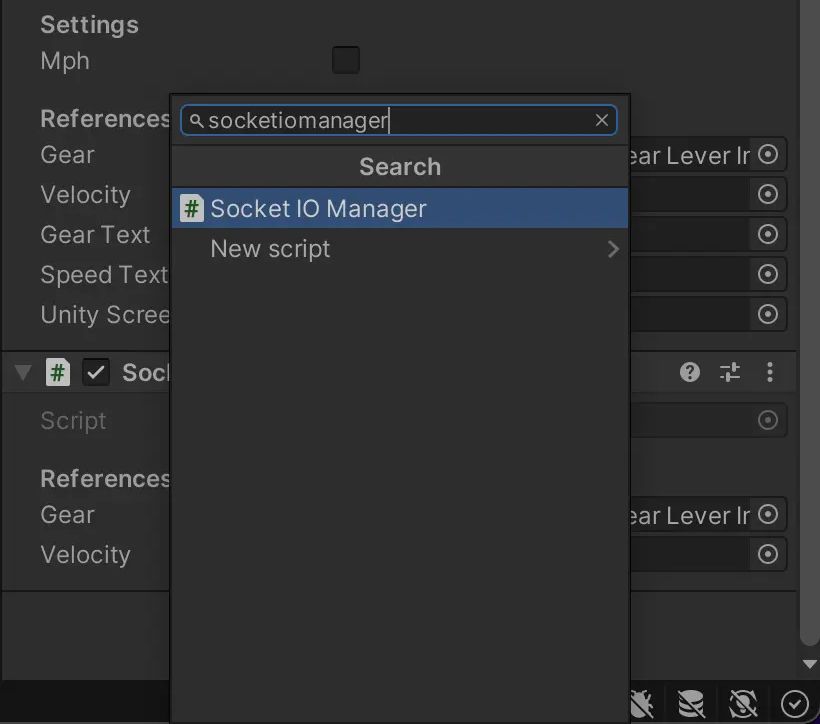
Right-click on the **Assets > SocketIO **folder, and create a C# Script. We’ll name this SocketIOManager.

Insert the following code into the SocketIOManager.cs file and save.
💡 This is a simple Bridge app to connect to ProtoPie Connect’s Socket.io server (Enterprise plan feature). It will communicate Socket.io messages to ProtoPie Connect, which will allow Pies to interact with Unity’s data.
In the Hierarchy pane, locate the Canvas object, which is the parent object of WebViewCluster and WebViewCenter objects. In the Inspector pane, locate Add Component button far below, and add the SocketIOManager script.
6. Pro Tip: use this custom template to import your prototypes
To make things easier for you, our Creative Technologist Freddie has created a Unity template to import high-fidelity ProtoPie prototypes into Unity. Check out the template here.
7. You're ready to drive!
Congratulations! You're now ready to test your HMI designs in a 3D virtual reality environment using ProtoPie Connect and Unity.
Take advantage of these powerful tools to create immersive and interactive prototypes that will elevate your automotive prototyping and testing process to new heights. Get ready to unlock the full potential of your designs in the world of virtual reality.
Revolutionize your automotive design with ProtoPie!
Get started for free with ProtoPie today and unleash the full potential of your automotive design and HMI prototyping projects.
Happy prototyping!
[Get started for free] {Get updates and tips about 3D prototyping}


