
In today's digital landscape, in-app messaging apps have become vital to modern communication, and high-fidelity prototyping for such experiences is essential for creating, testing, and perfecting seamless and engaging user interactions.
In this tutorial, I’ll show you how you can create an in-app messaging experience with two devices. We’ll use the Snapchat in-messenger app as an example.
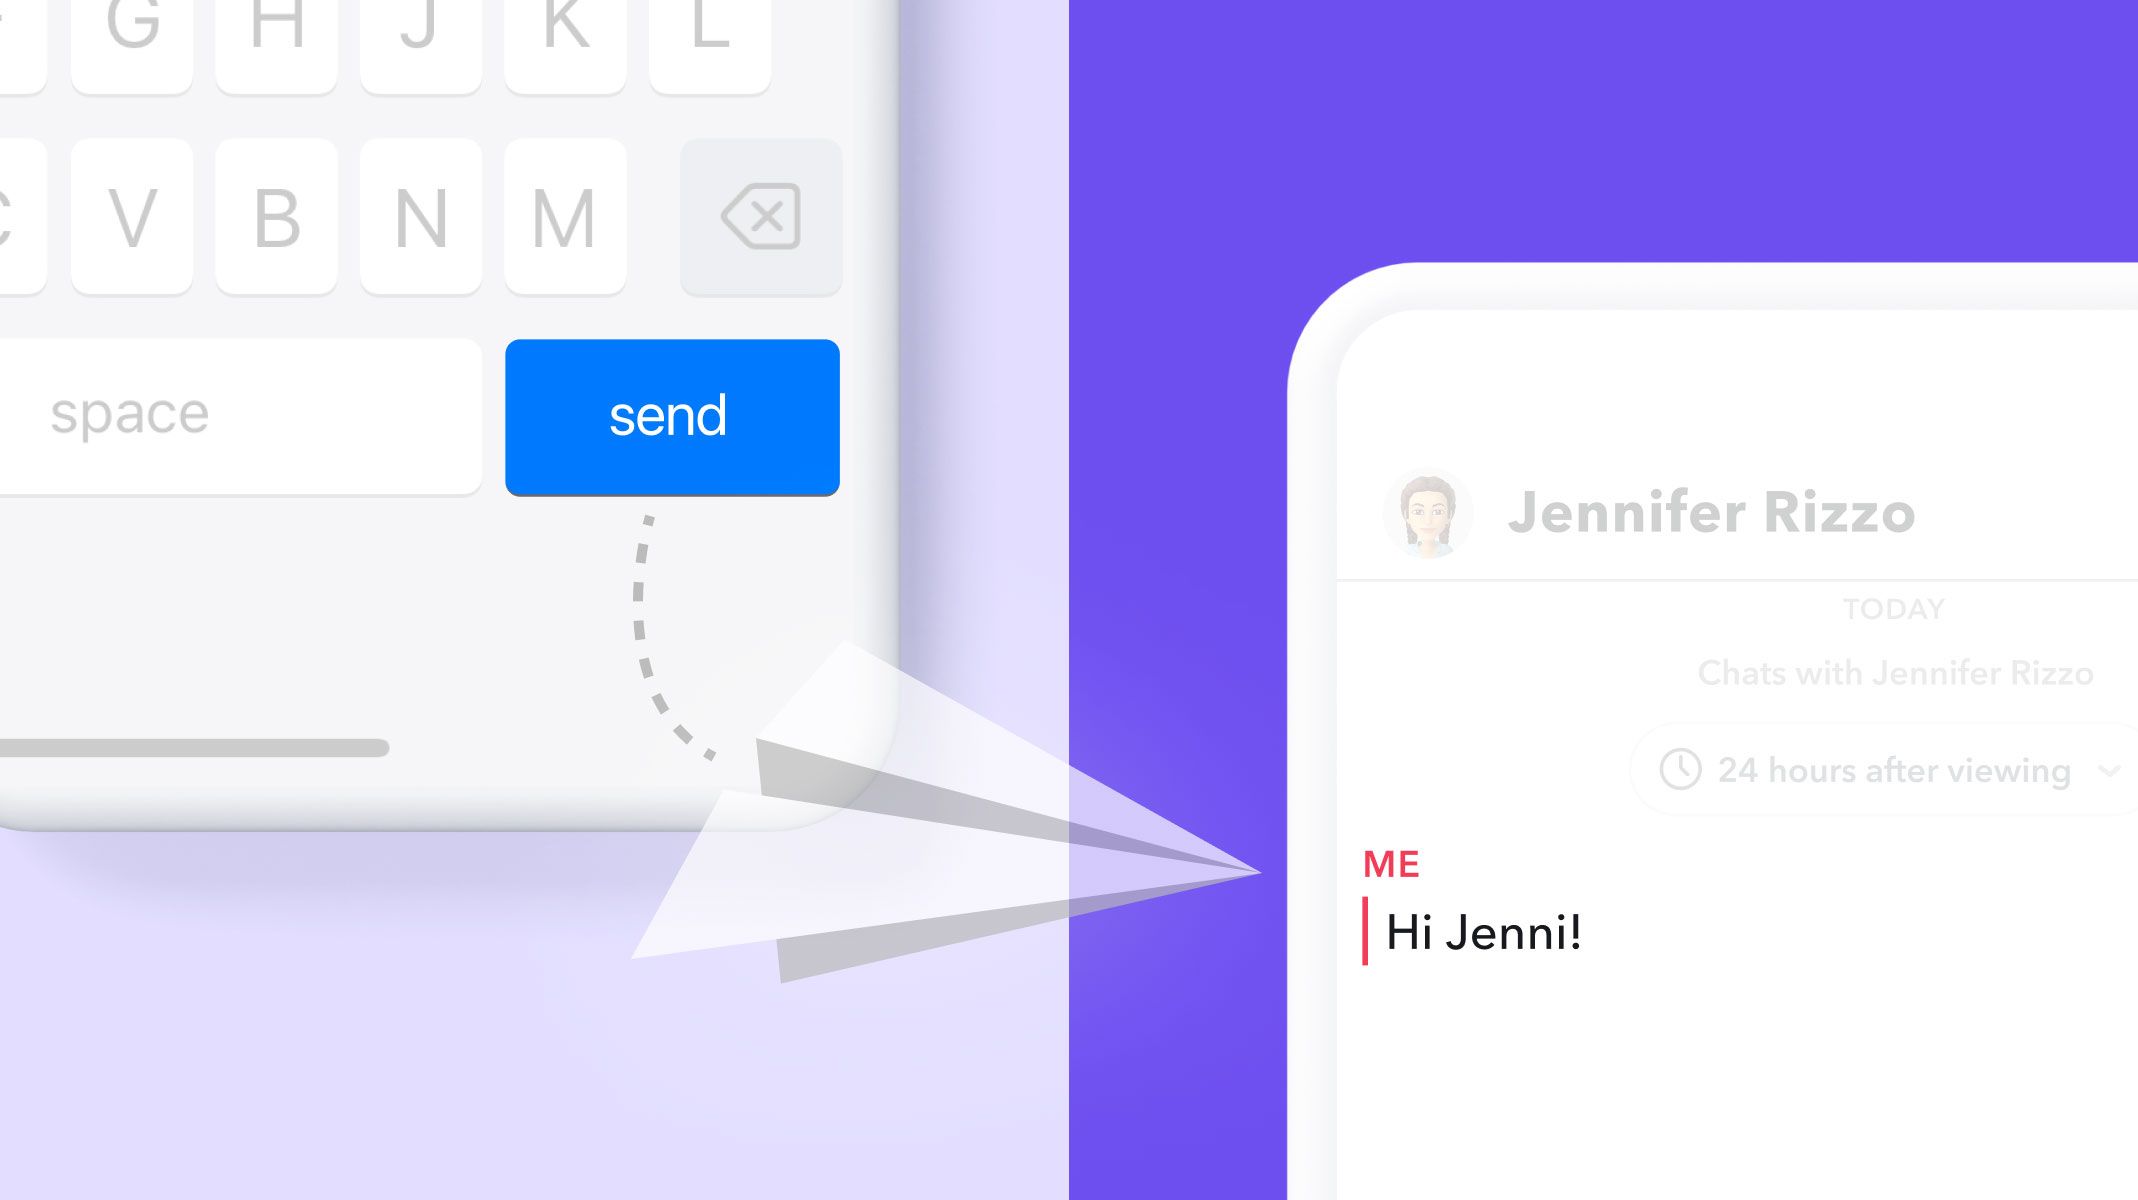
Take a look at the demo video below to see what we’ll be creating in this tutorial.
Sign up for the latest cross-device prototyping news.
Completed Pie File (Sender)Completed Pie File (Receiver)
Overview
Let’s start prototyping
Step 1: Snapchat UI and export your designs to ProtoPie
Step 2: Start prototyping the first Pie
Step 3: Create the messaging interaction
Step 4: On to the second Pie (receiving the message)
Step 5: Use ProtoPie Connect for cross-device communication
Become a prototyping pro with ProtoPie
If you are new to ProtoPie, this guide will assist you in diving into the world of cross-device experiences by utilizing the power of ProtoPie.
Note: For the purpose of this article, we did not fully prototype the Snapchat App. Instead, our focus was on prototyping the messaging interaction from one device to another. In your own projects, you may also want to highlight a specific feature. Therefore, it is crucial to manage expectations regarding timing and precisely what you want to showcase to your stakeholders.
Let’s start prototyping! 🍴
Step 1: Export your Snapchat UI designs to ProtoPie
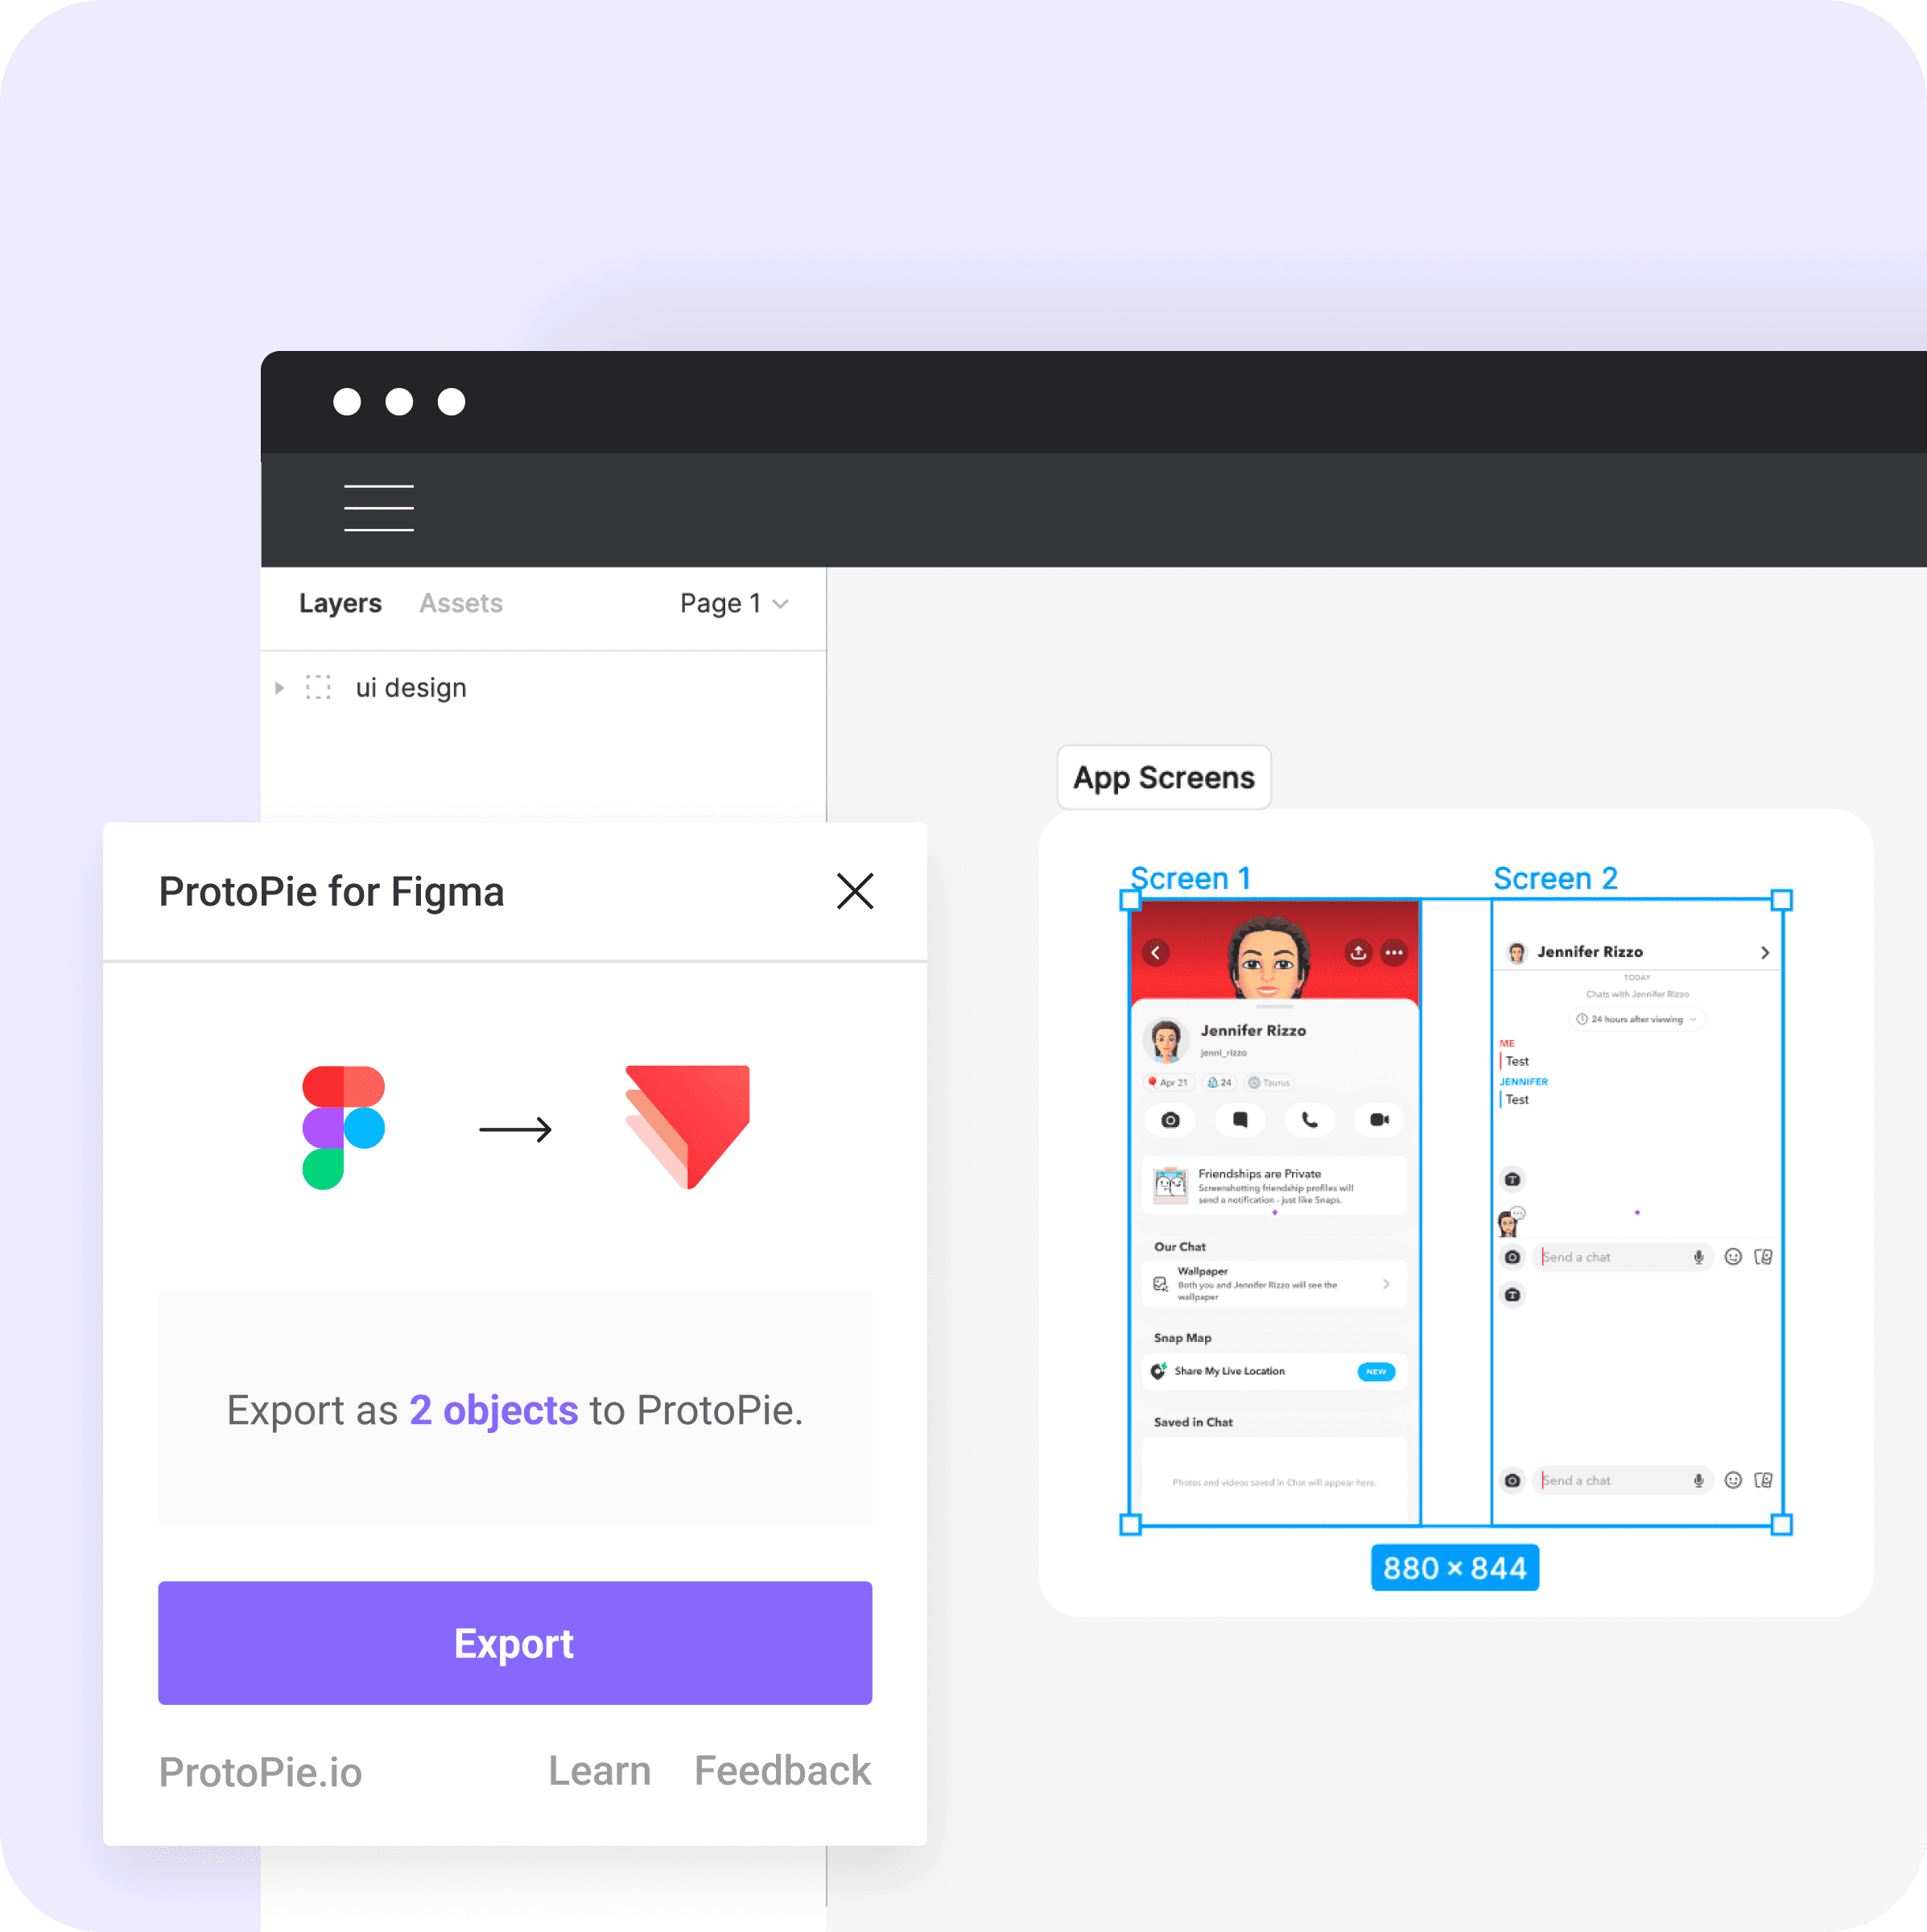
Export your designs from Figma to ProtoPie.
In ProtoPie Studio, create a New Pie. Before diving into the prototyping process, we have made the screens available on our ProtoPie page in the Figma Community. You can open the Figma file with your own account to gain edit access. Afterward, you'll be able to export the designs directly from Figma into ProtoPie to begin prototyping.
If you haven't yet downloaded the ProtoPie Plugin, you can find it by searching in your favorite design tool of your choice or clicking the buttons below.
Next, select the screens and open the ProtoPie Plugin - click Export Screens to move your designs to ProtoPie. Find more information on how to export your designs, or check out this video on
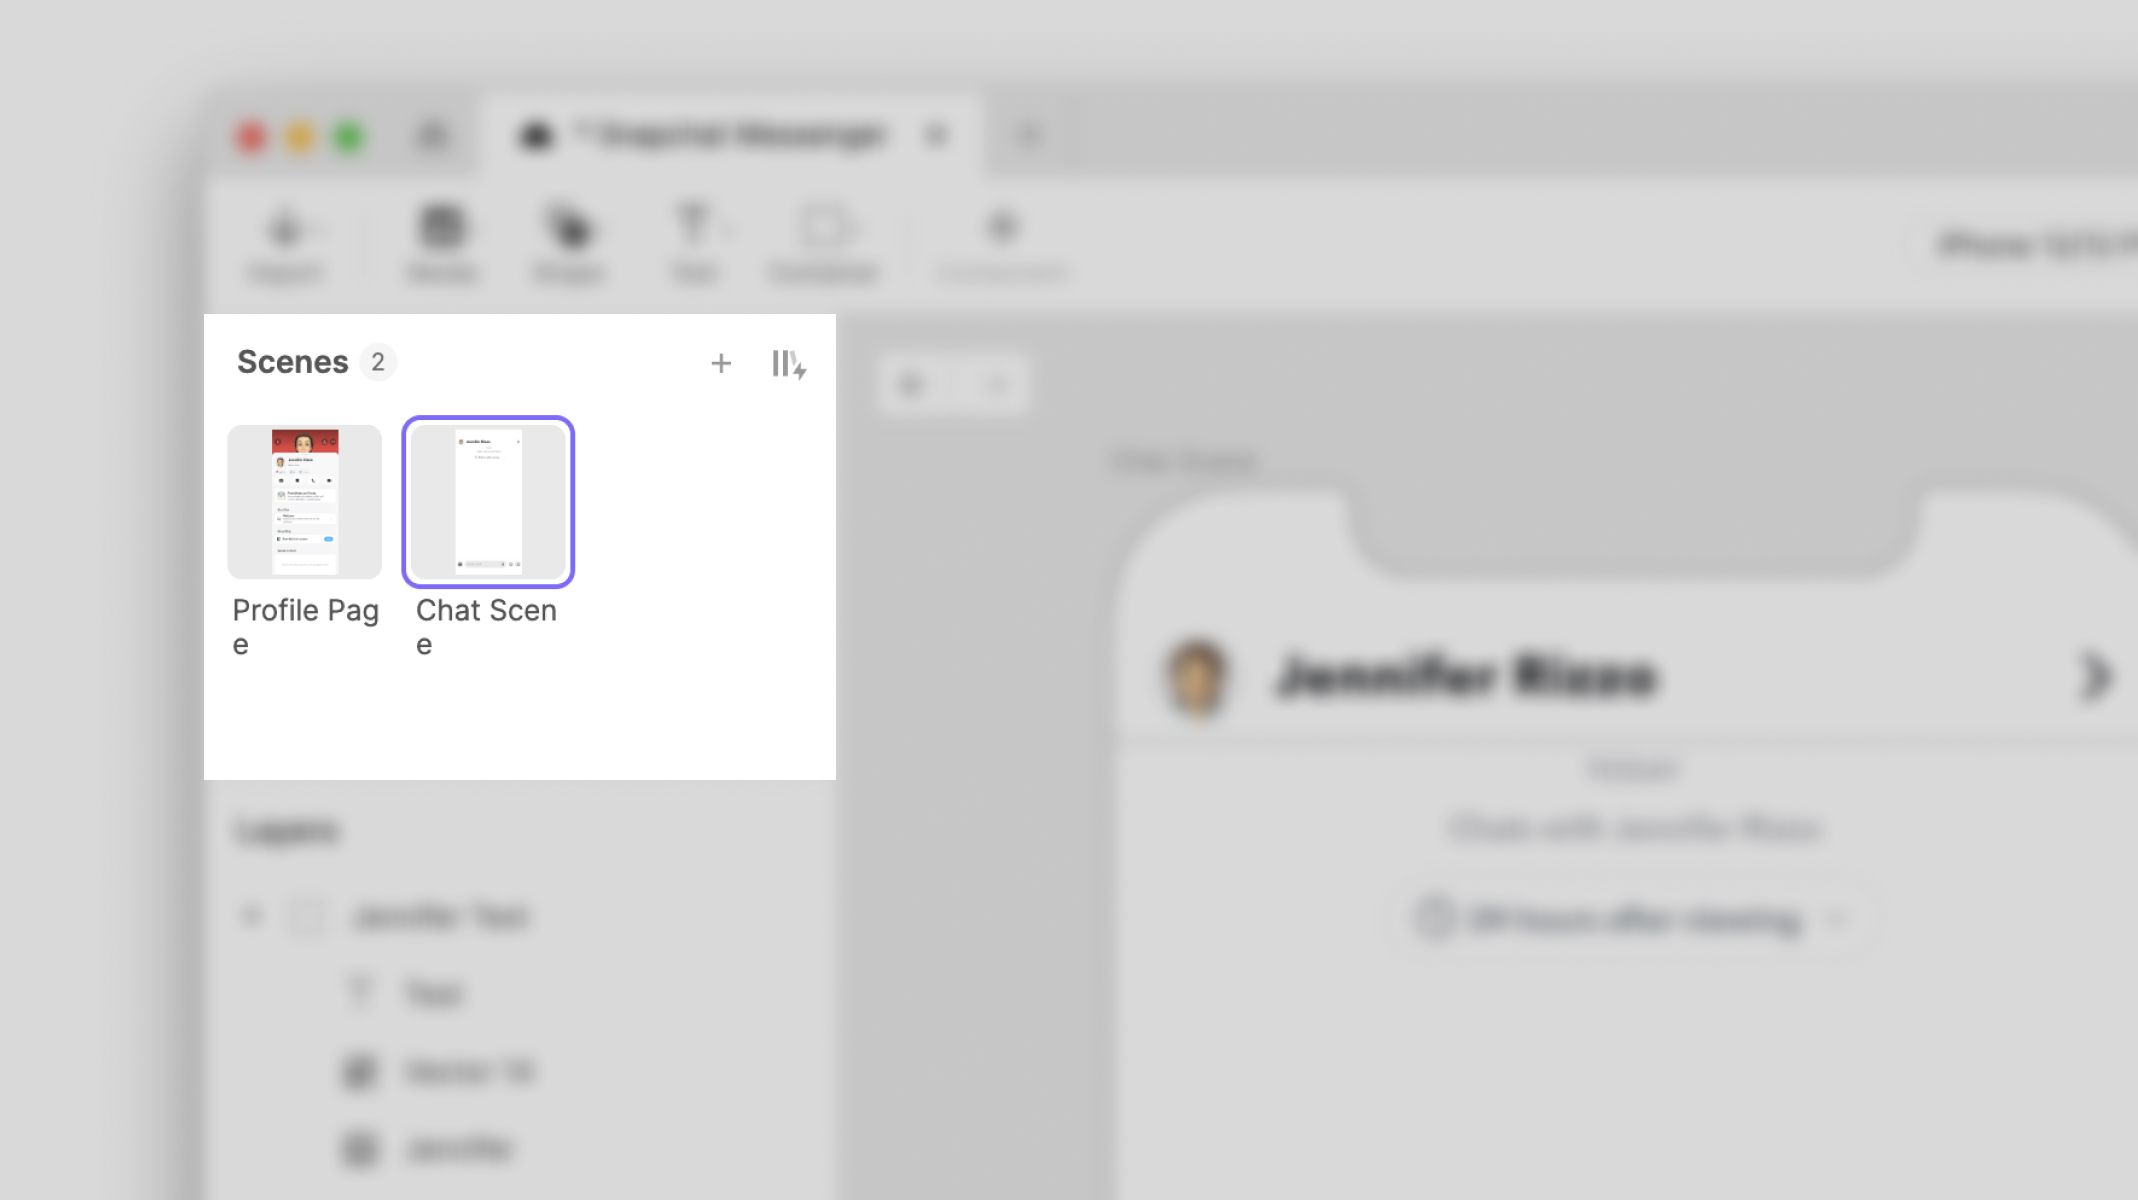
For this experience, we’re going to build two Pies - one Pie for the sender and another for the receiver. Both will be able to text back and forth.
With our screens designed and ready, we can now move on to ProtoPie Studio. Let’s start with the first Pie (prototype) - Select the two screens, open the Plugin, and click Export.
Step 2: Start prototyping the first Pie
Start prototyping.
We’ll start with the first Pie, which will be the Pie sending the message. The experience flow will start on the profile page, where the user will tap on the message icon, which will open the messaging screen.
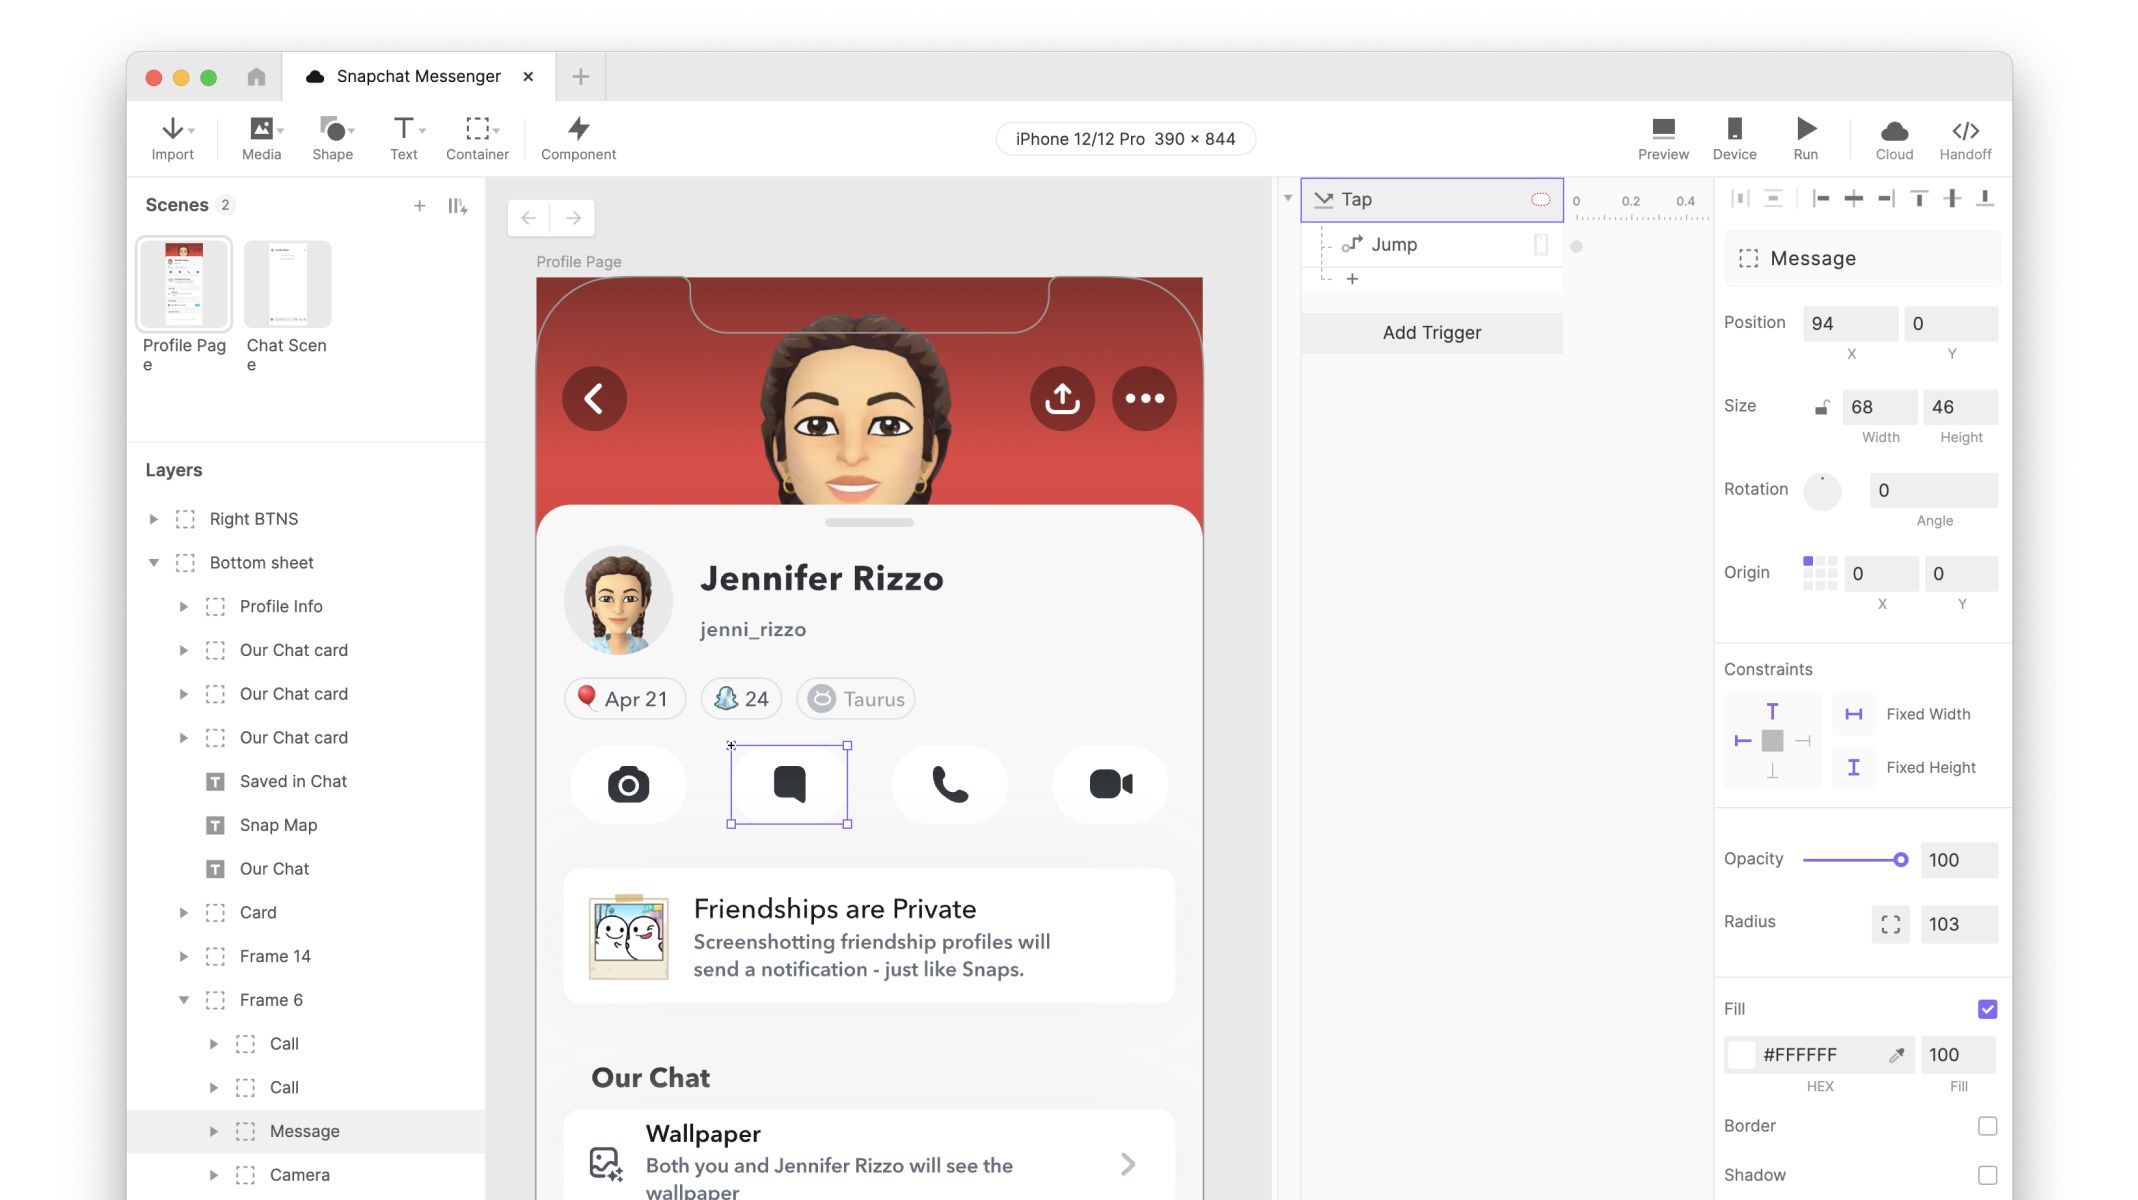
Tap trigger.
In ProtoPie terms, the* trigger* is a Tap, and the response will, in this case, be a **Jump **to another screen where we have the Messaging UI.
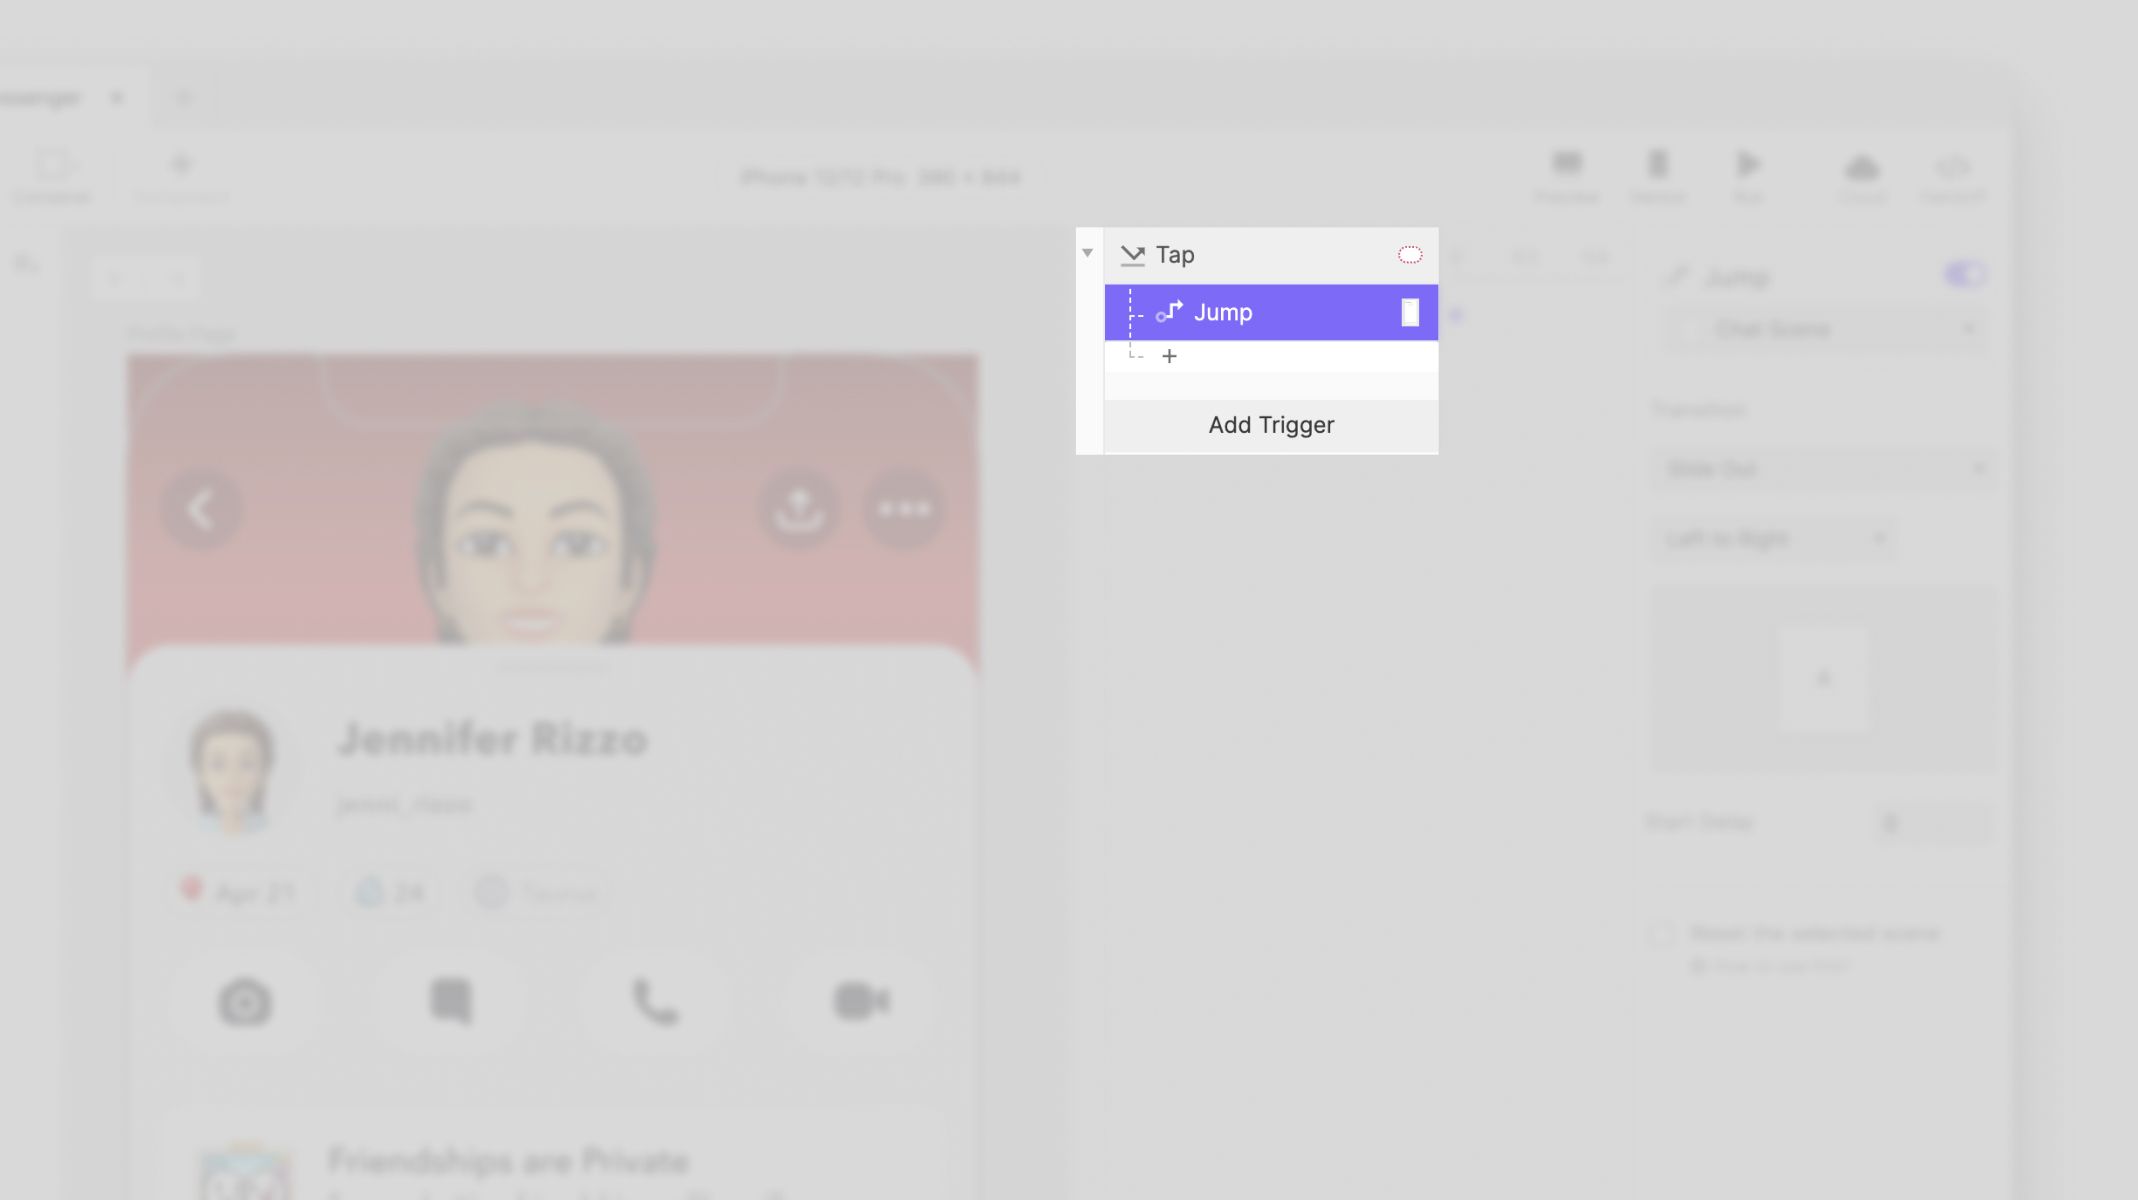
Jump response.
The Jump response allows for different types of transitions; in this particular case, we want to follow a similar interaction that happens in Snapchat, so we’re going with Slide Out, Left to Right.
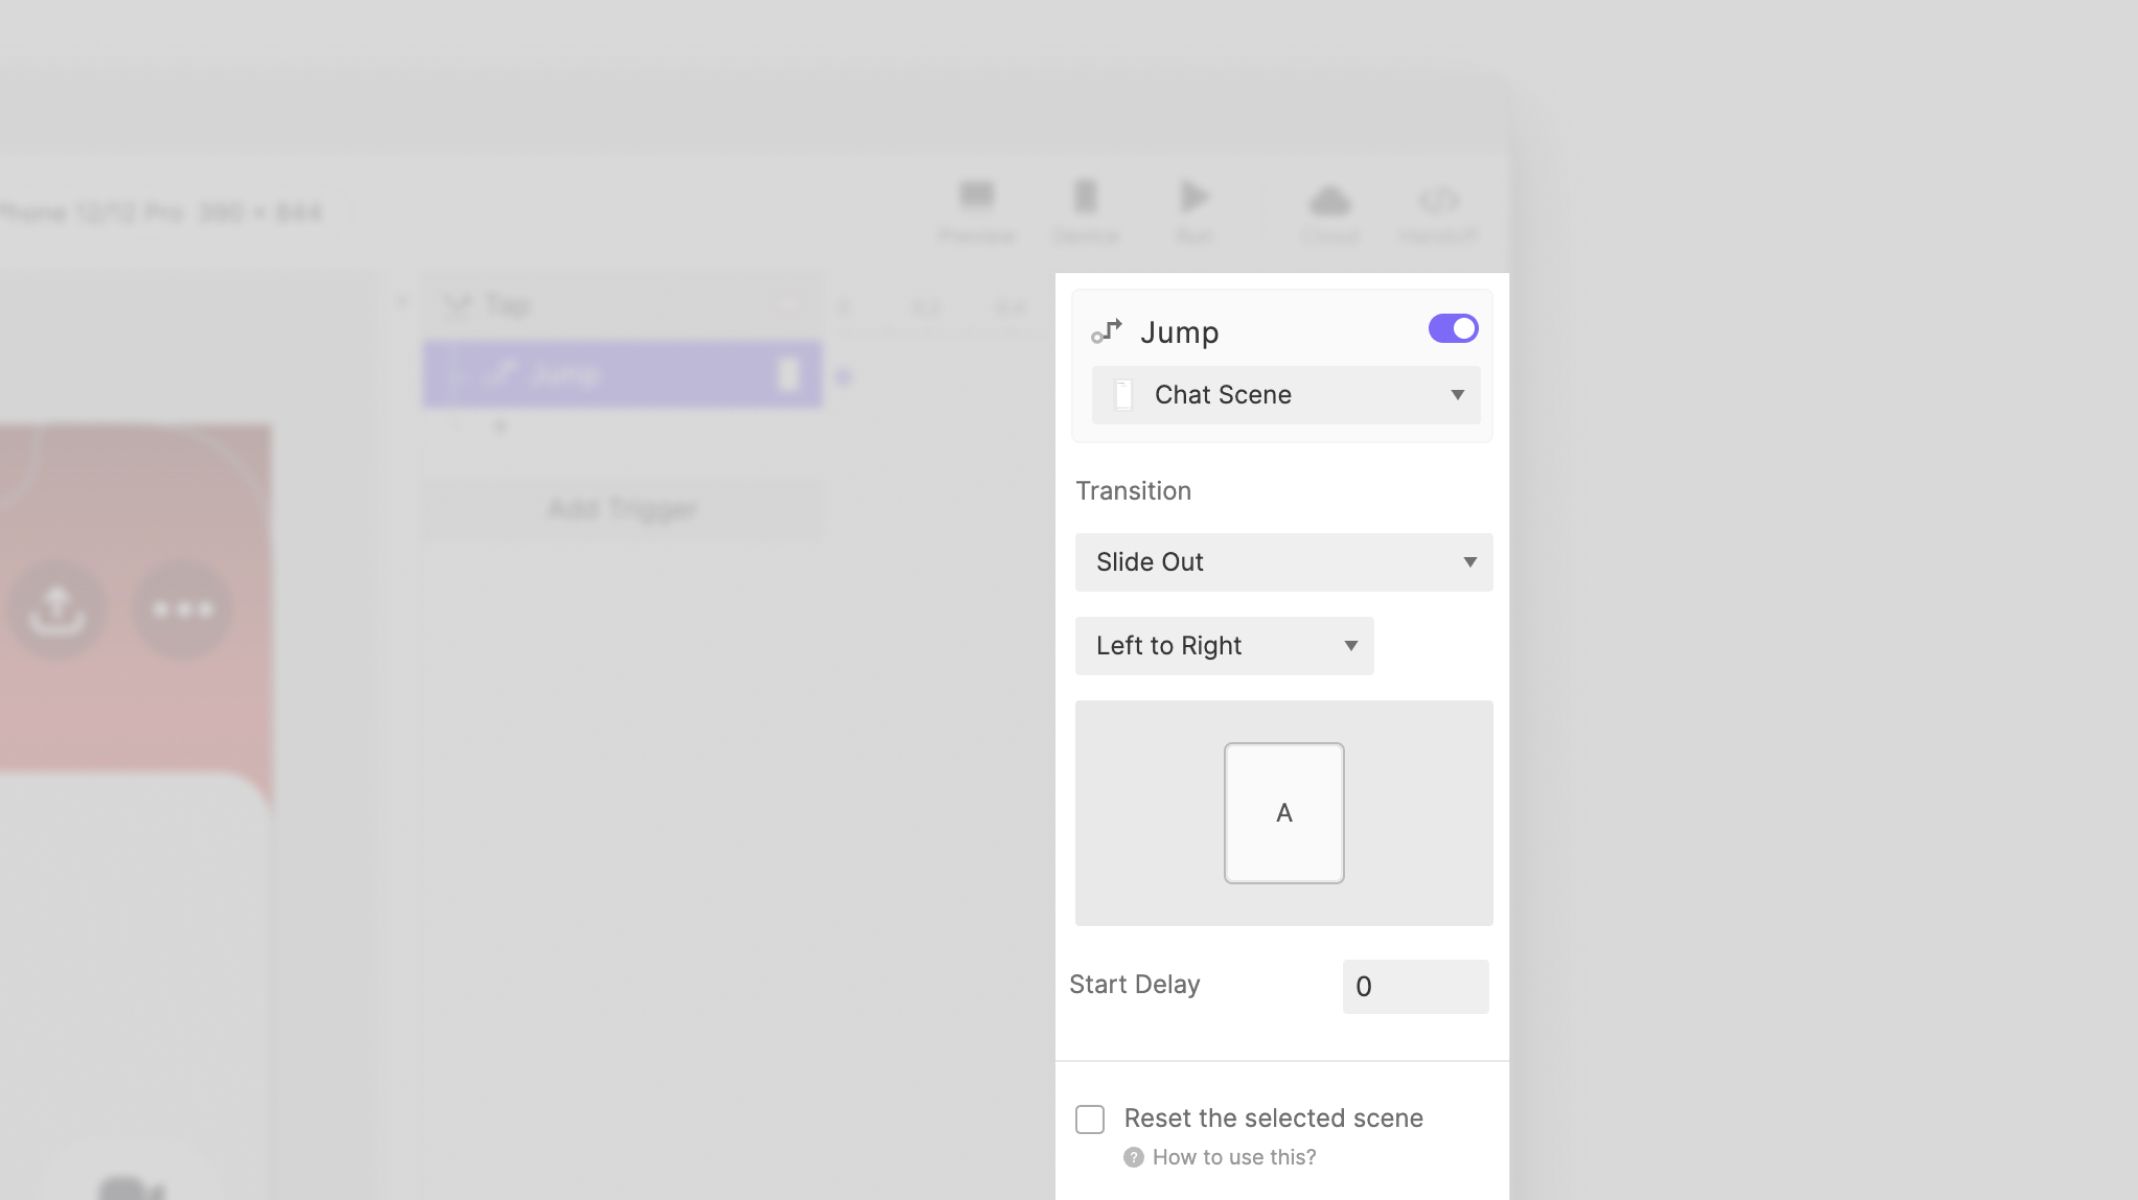
Slide Out transition.
You’re done with the first screen!
Finished first screen of the prototype.
Step 3: Create the messaging interaction on the second screen (sending the message)
Second screen.
Moving on to the second Screen. This is where the messaging interaction will take place.
After the Jump from the previous scene, we added a Start trigger - once a scene loads, this trigger will activate any response you attach to it.
For this scene, we wanted to add some transitions right after the scene is loaded, so we’ve used both Move and Focus responses.
Sign up for the latest news on cross-device prototyping.
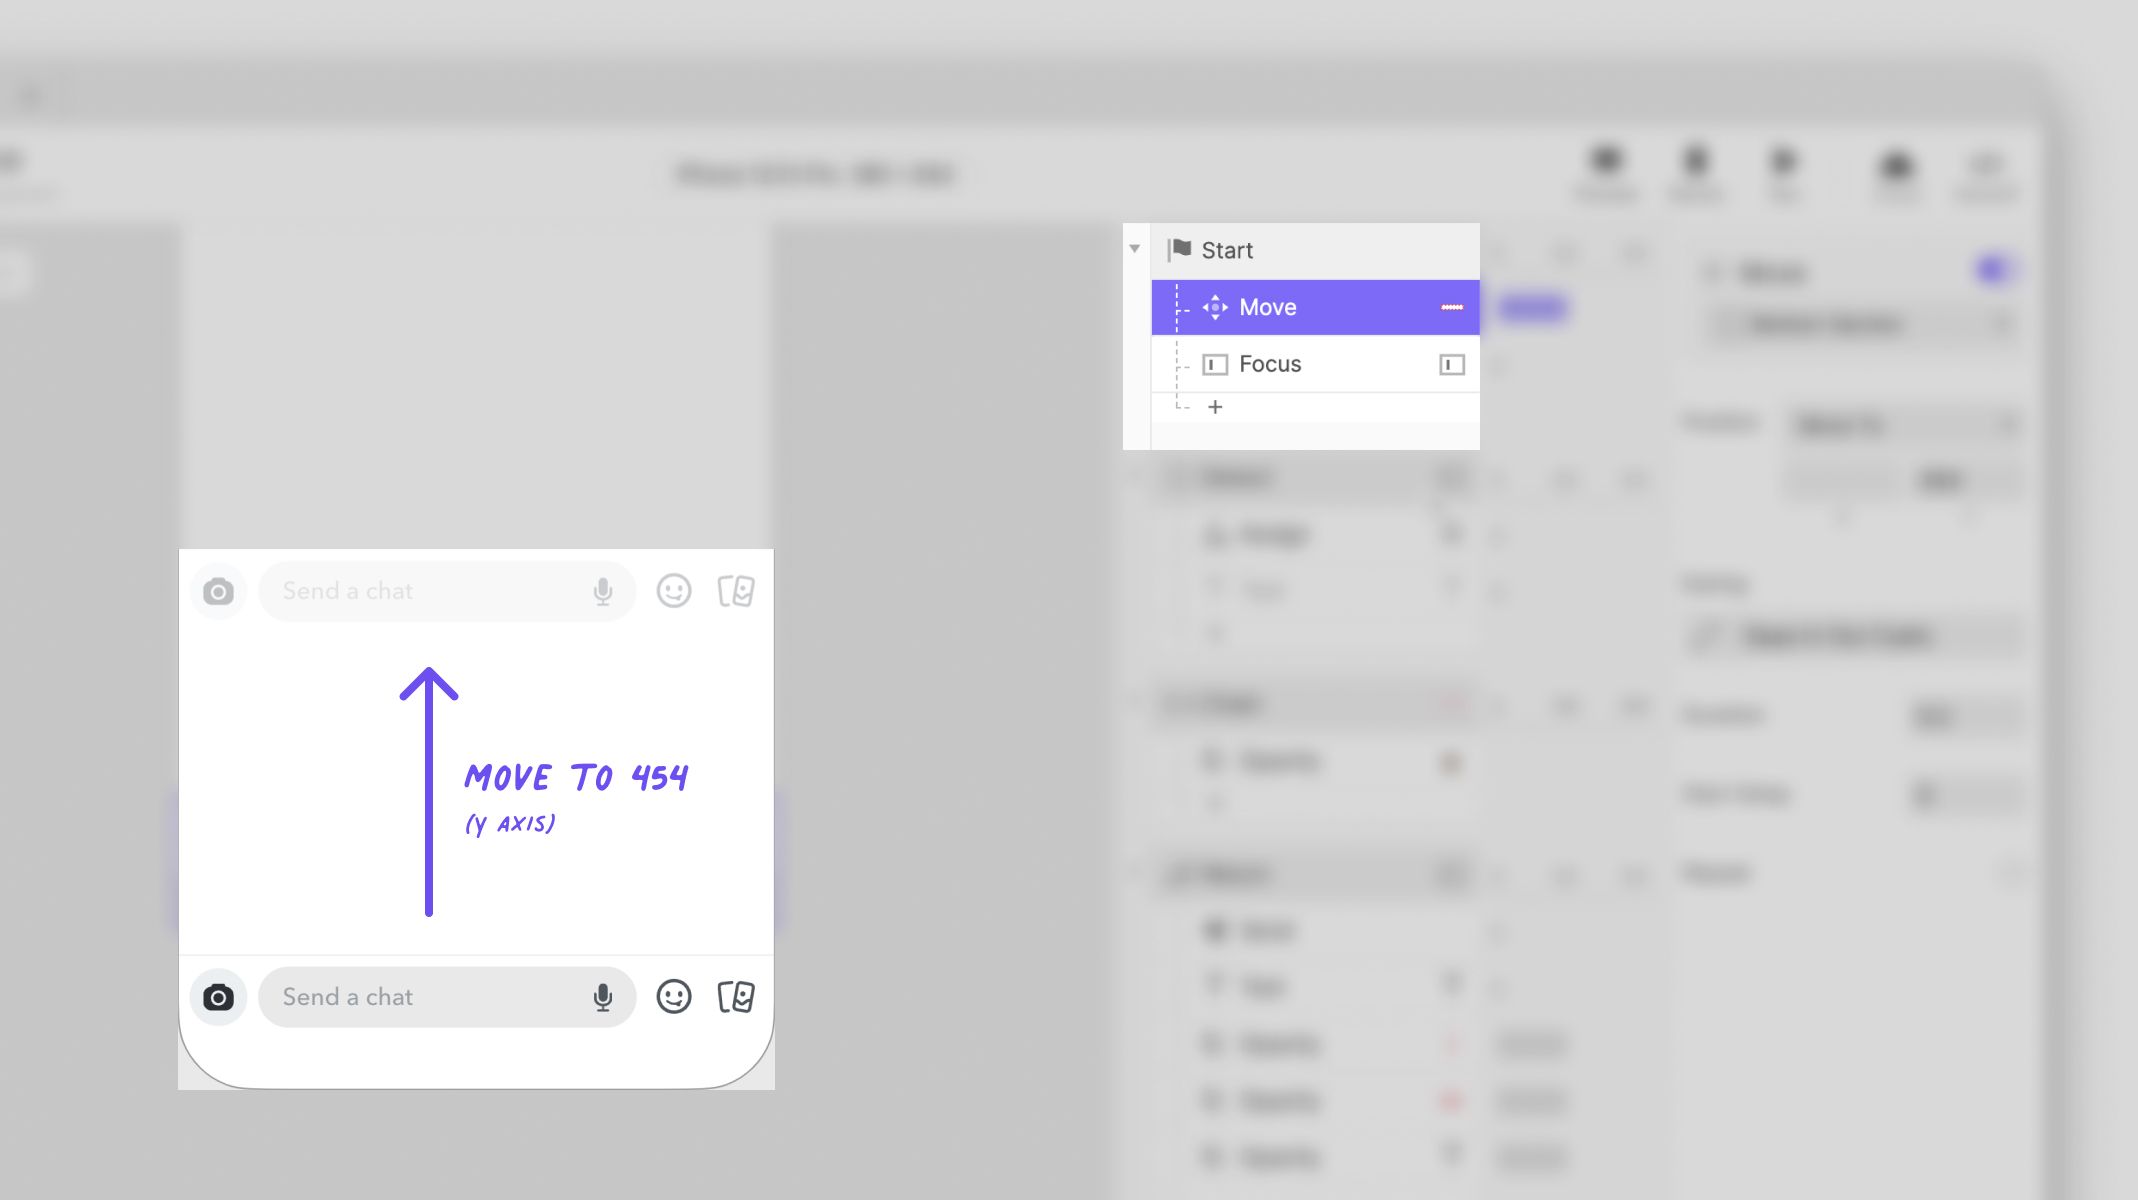
Move and Focus responses.
Be sure to take advantage of the newly revamped easing options, and you can even create your own custom presets!
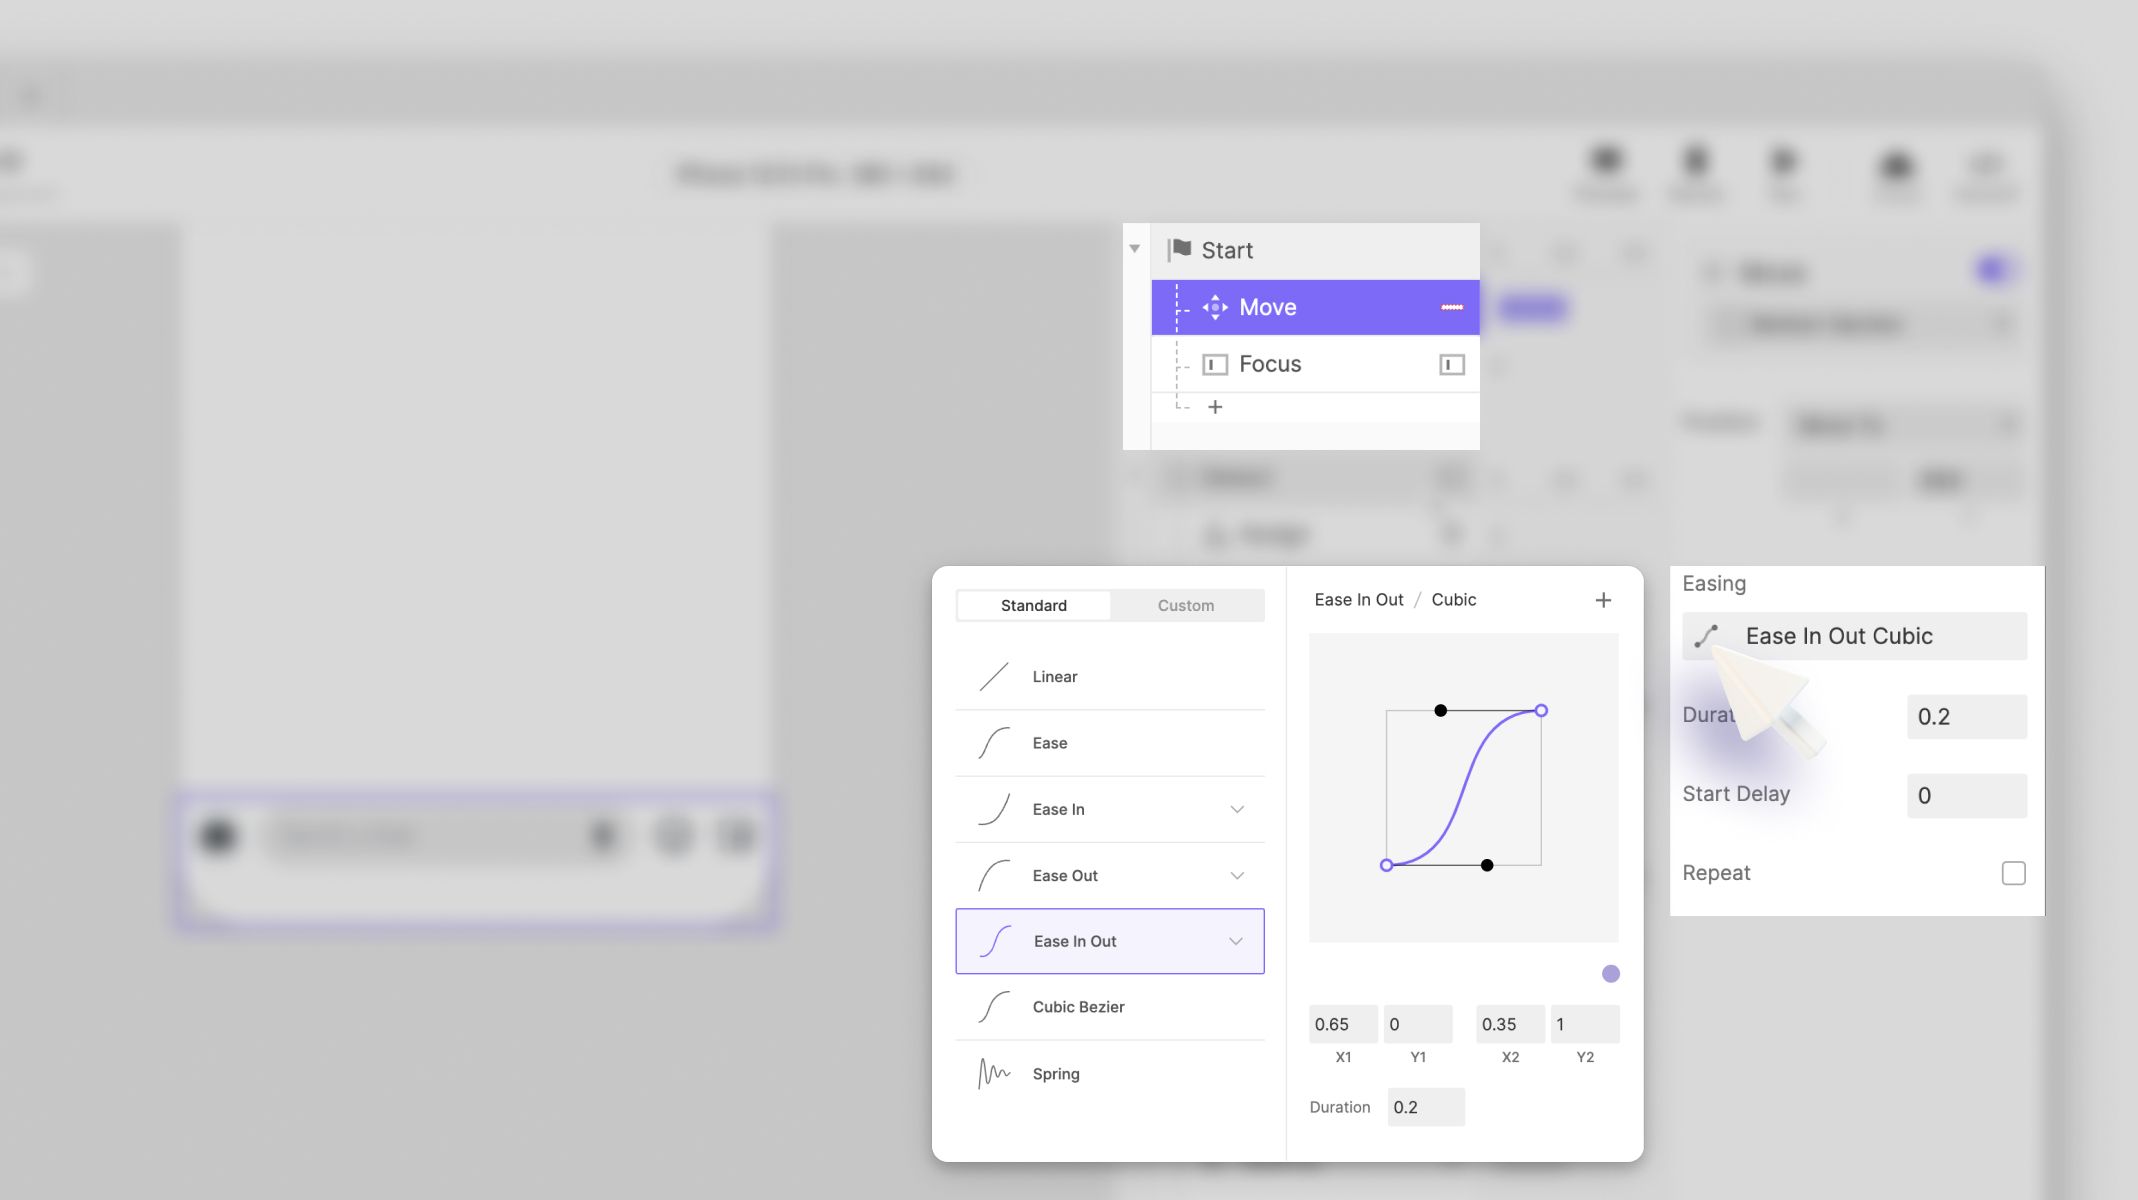
Custom presets.
With the Move transition animation done, the next response will be Focus.
If you check how Snapchat messages work, once you tap the Message icon on the first screen and move to the second screen, the text field is ready to send a message, with the input and phone keyboard activated. This is why we use Focus to achieve a similar result:

Focus response.
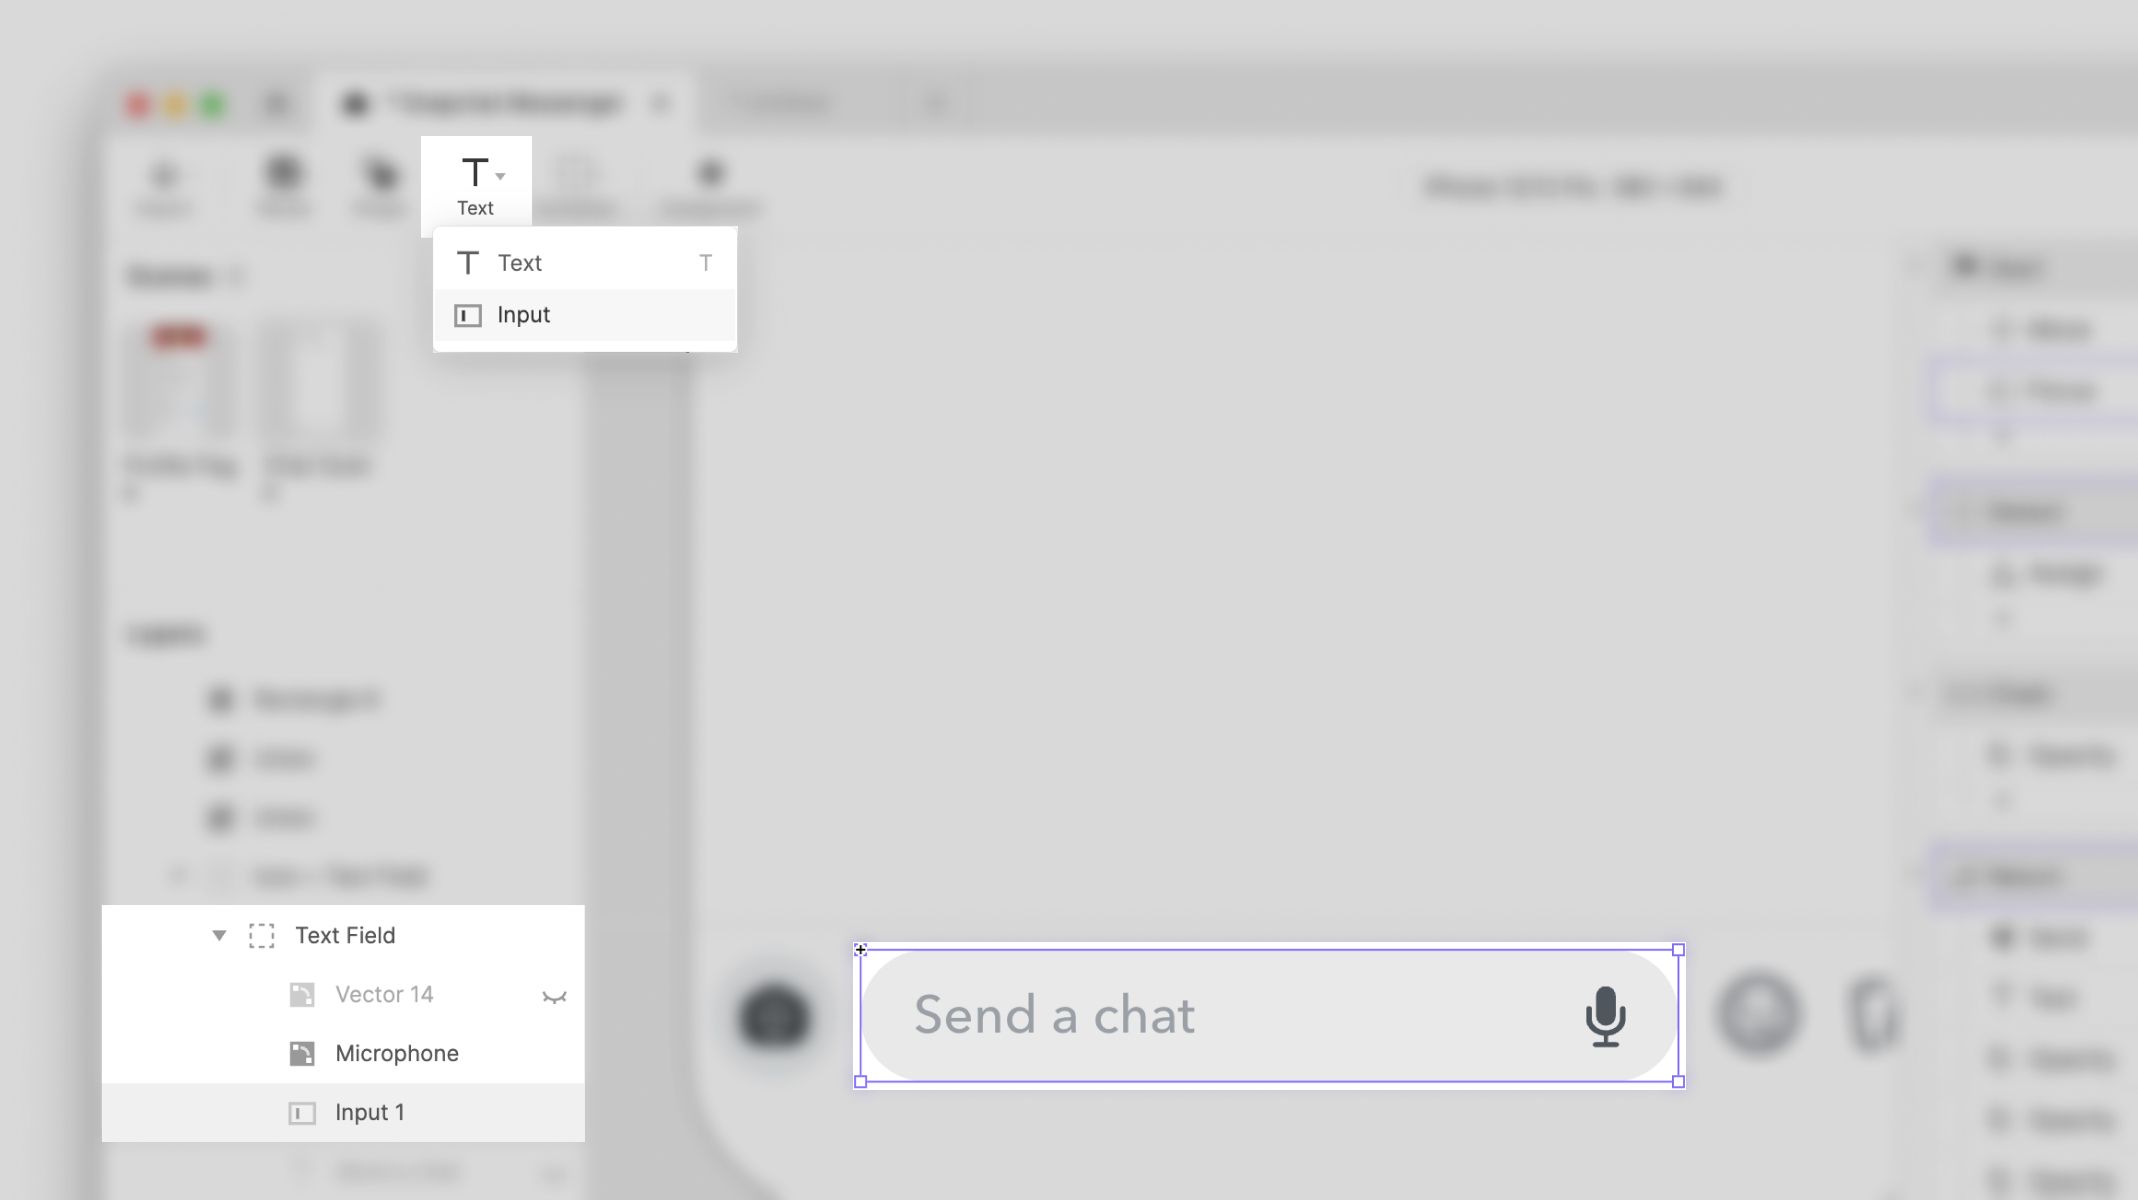
Input Layer.
Note: For Focus to work, you need to add an Input Layer inside the Text Field group. Go to Text → Input and draw a box to match the size of the Design. Adjust the design to match the Snapchat text field design.

Preview of Focus.
What's next? Now we’re going to send a message to another phone so that it can receive it. First, we should know what the message is, or in other words, what’s in the input, for that I’ll use a feature called Detect. Detect will monitor an object’s property of your choosing for changes, and any Responses you put under it will fire whenever that property changes.
Our Detect trigger here will monitor the text in the Input layer.
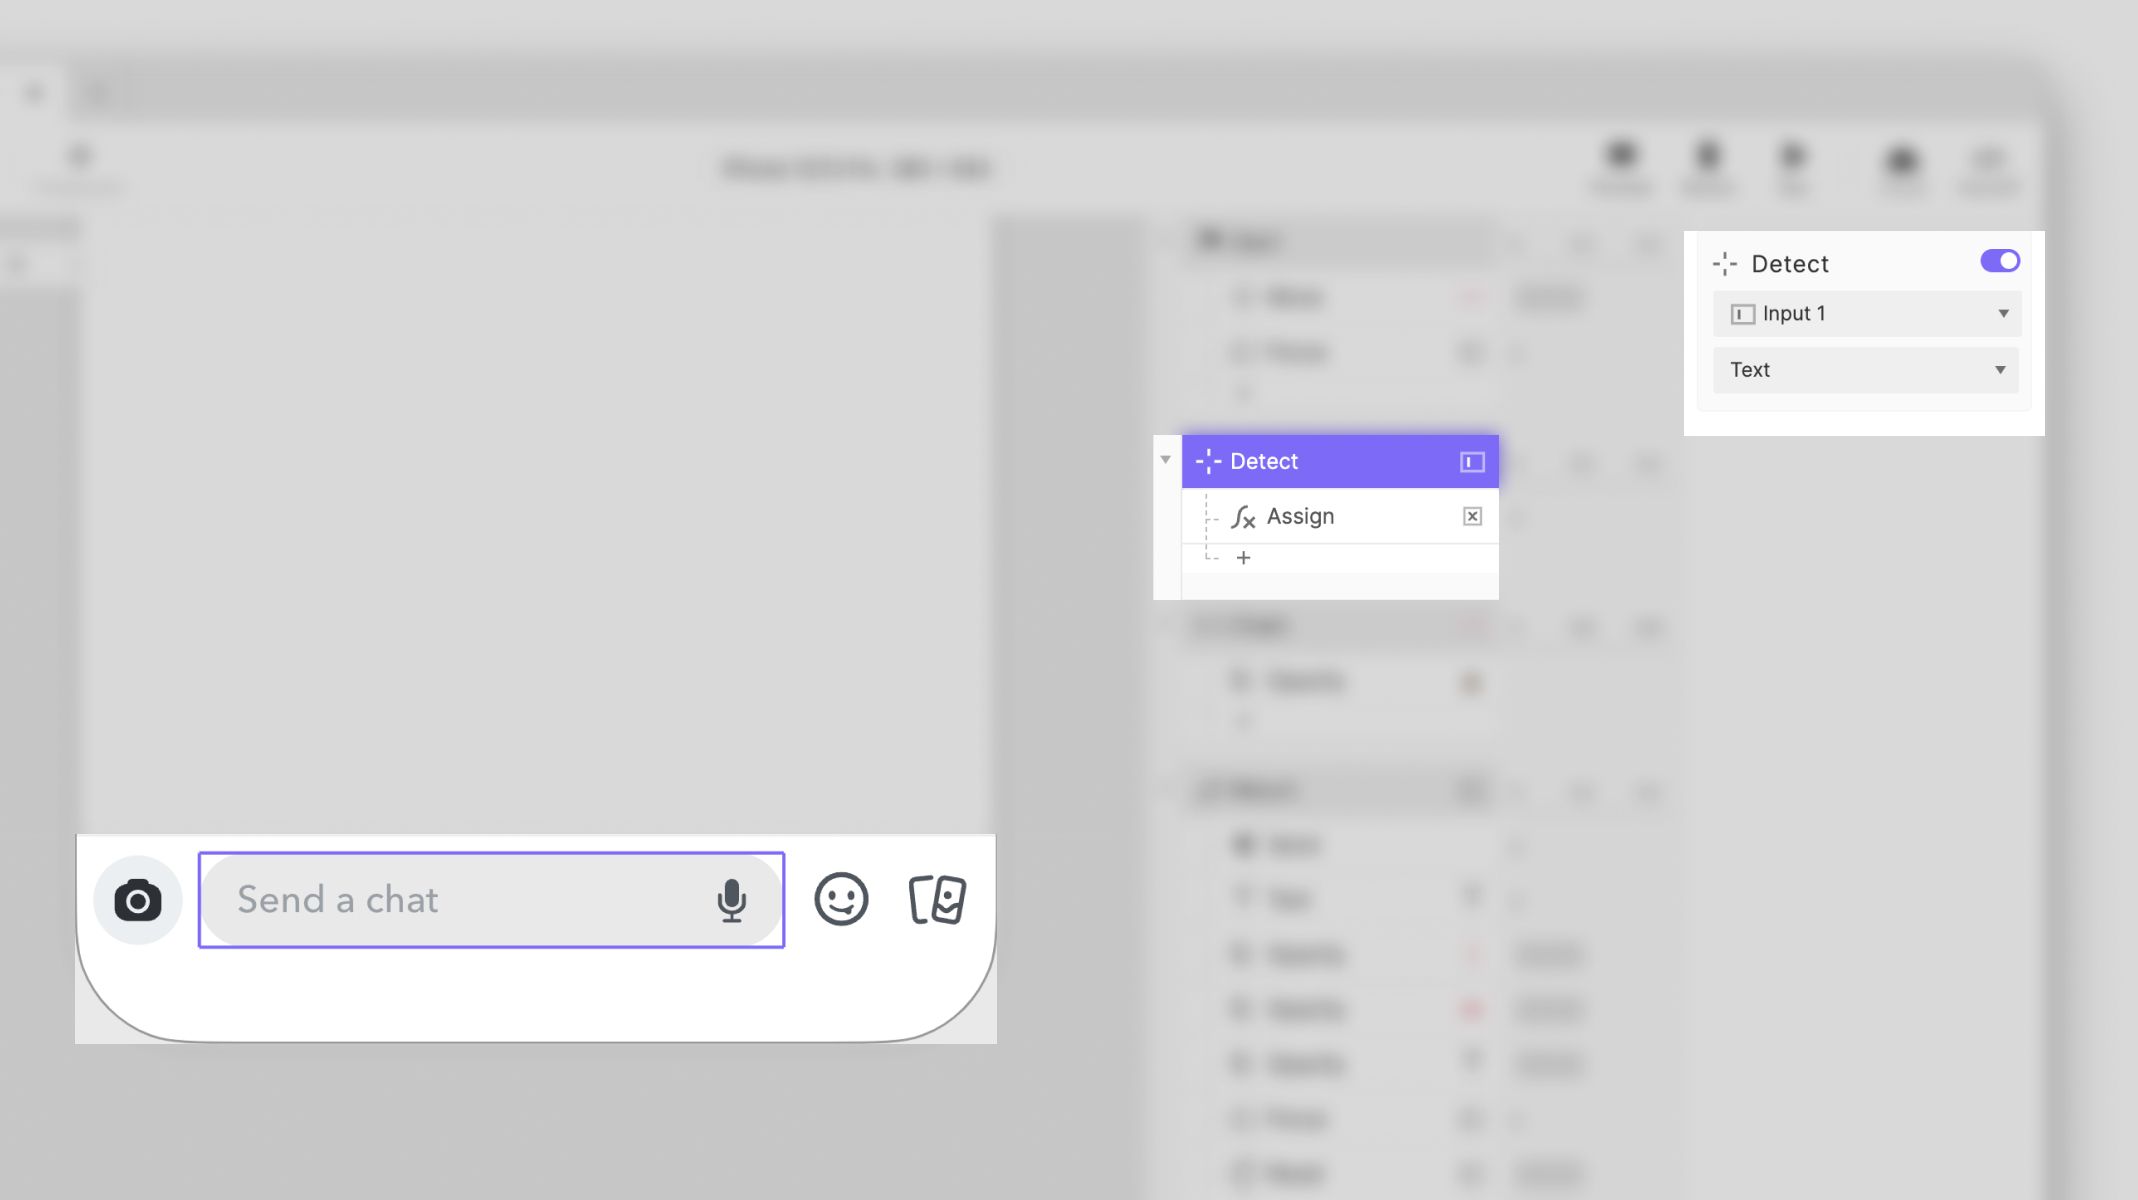
Detect trigger.
For this, we'll use a formula to Assign a text variable. Why? The text you'll type will be "stored" by the variable. This means that later, when you send the message, the text "stored" by the variable will be sent out.
On the bottom left of ProtoPie Studio, create a variable for this scene by tapping “+” next to Variables and make sure you choose the Text type. Under the Detect trigger, add an Assign response to your newly created variable. Use the formula 'Input 1'. text
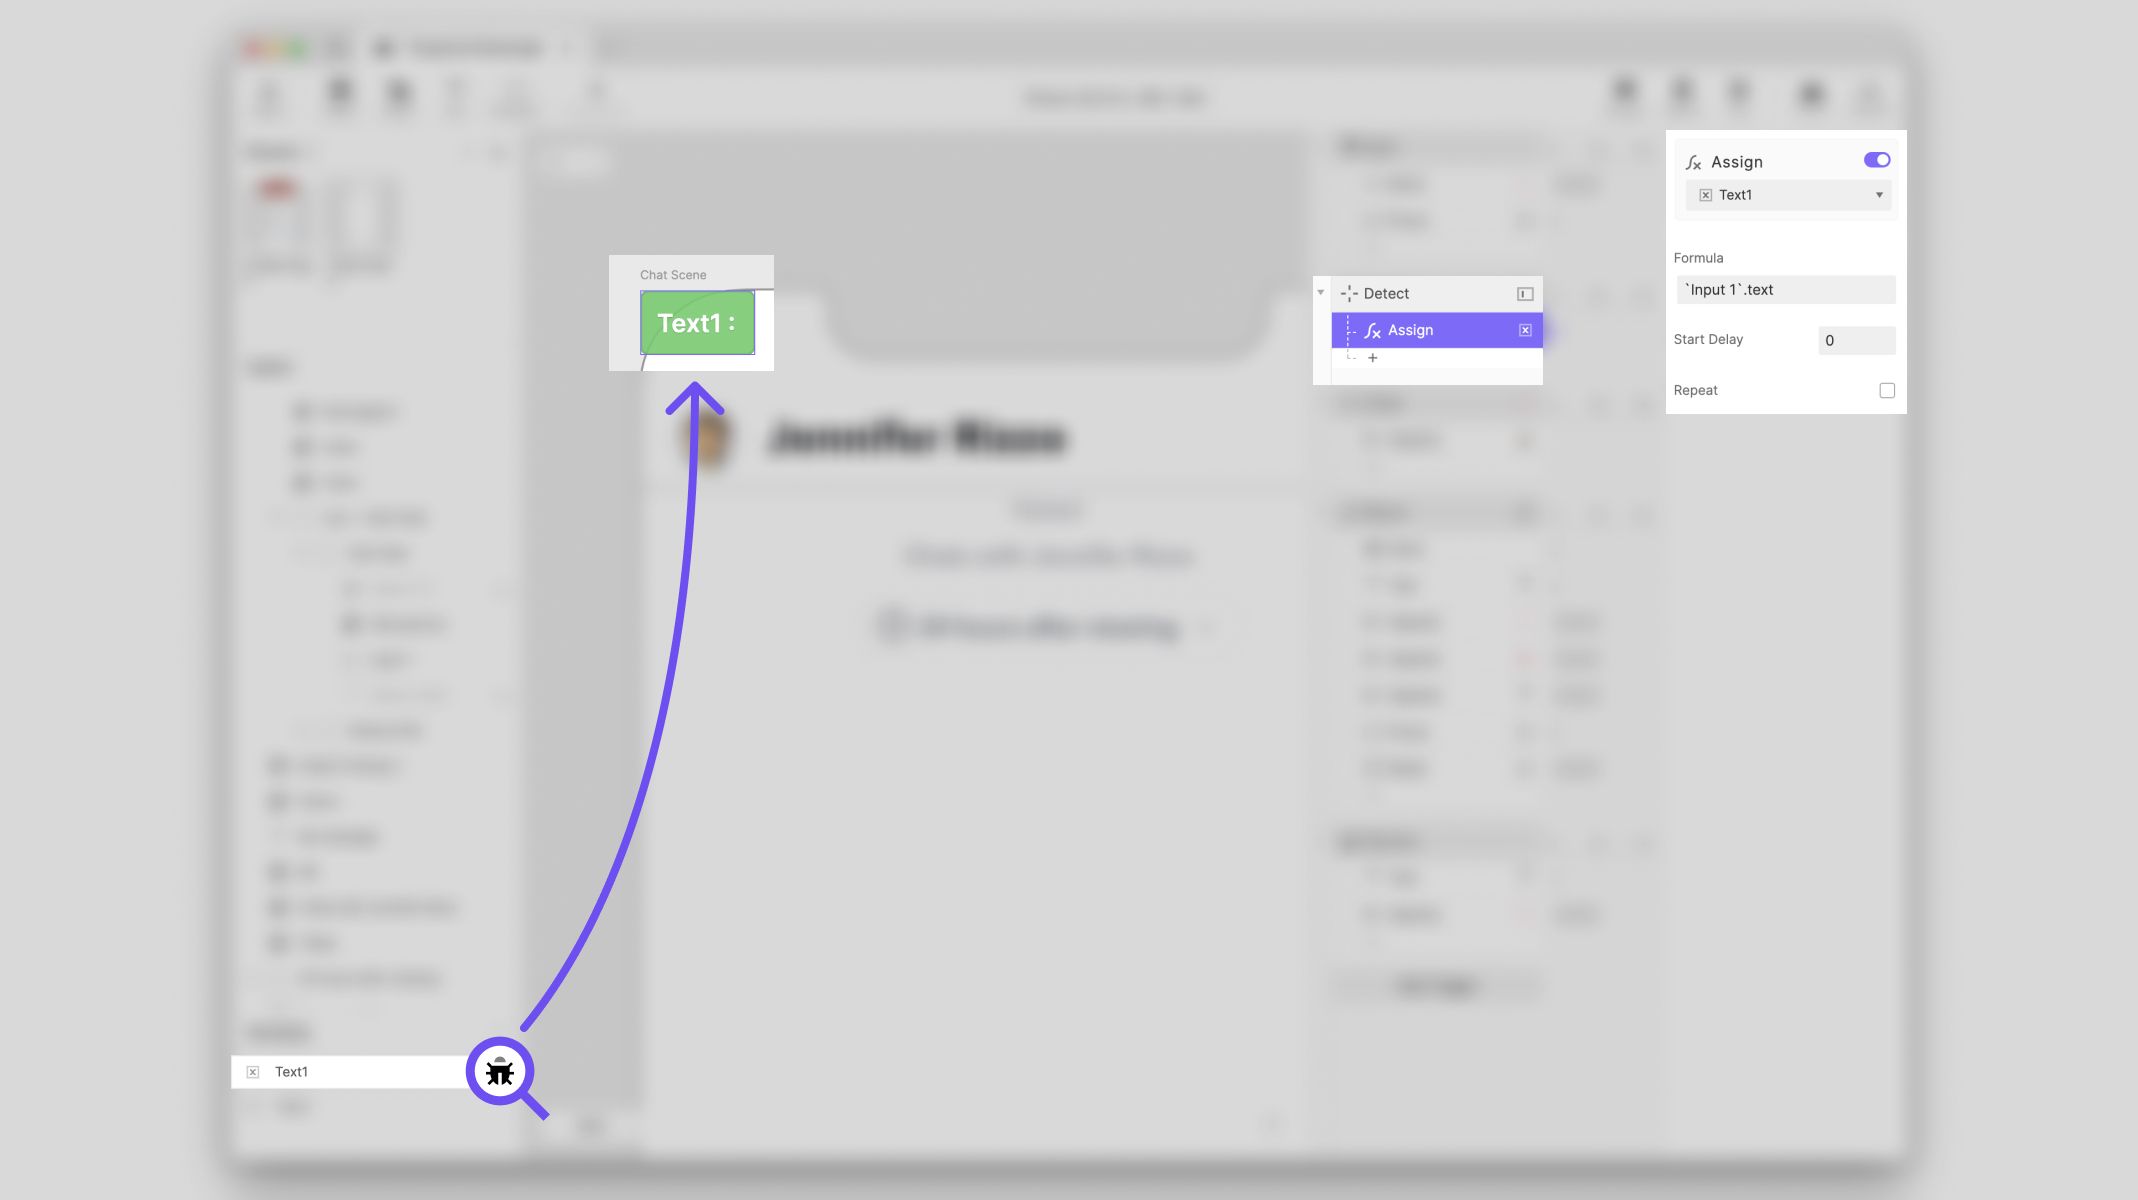
Assign response.
Here's a preview of how it works:

Messenger app preview.
The text is now ready to be sent. However, it will only be sent when you tap "send" on the keyboard after writing the message. Let's use the Return trigger for that.
Tapping "send" on the keyboard will trigger the following actions:
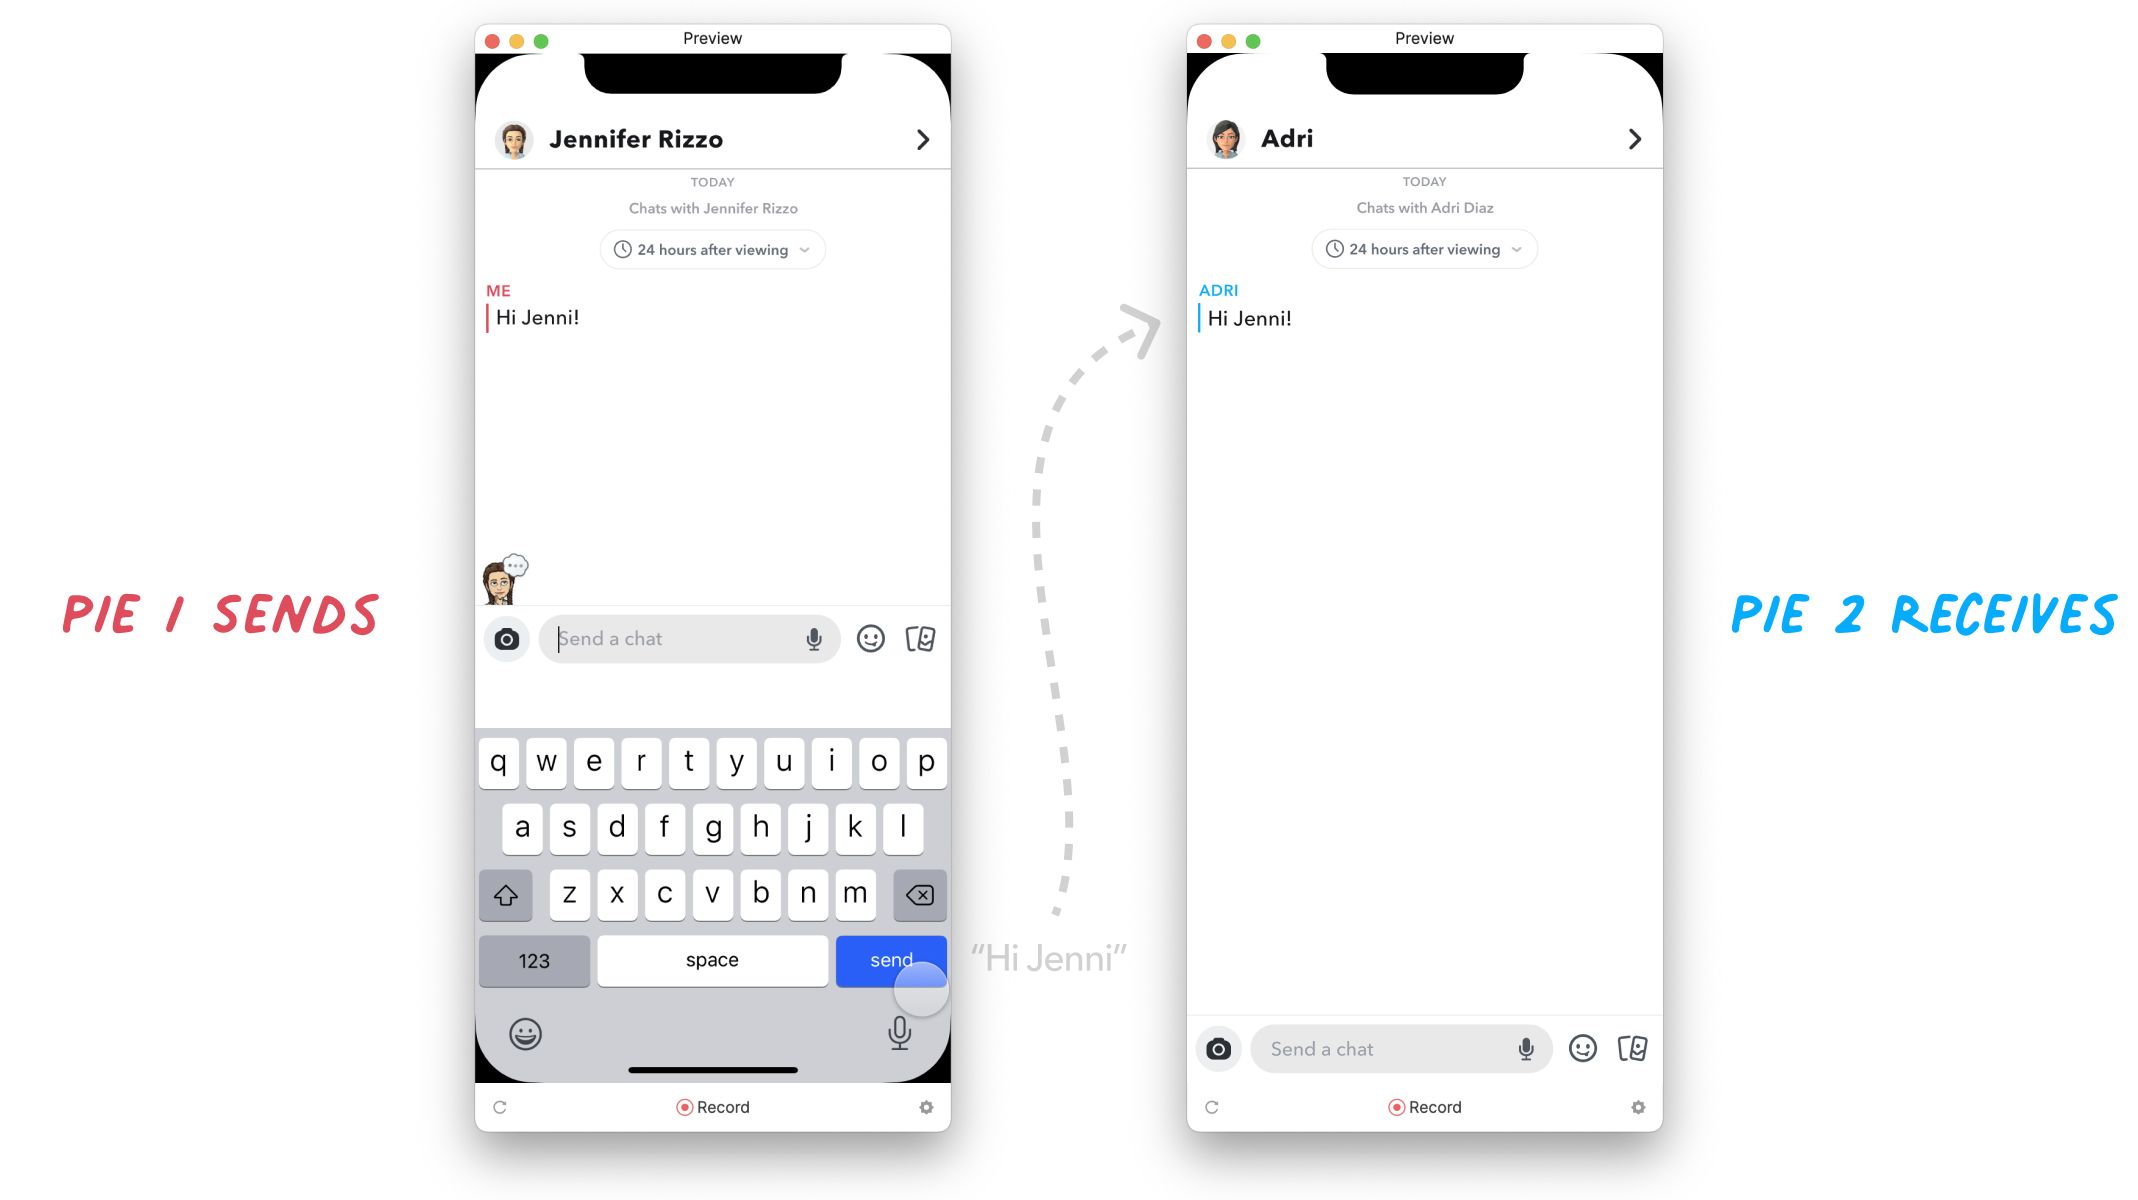
Sending and receiving Pie.
A "Send Response" will send the message later to be received on the other device.
A text will be visible on the screen with the message you sent. (We'll use the Text response for that.)
Together with the text, there's some UI showing up. We'll use a simple Opacity trigger to achieve the same effect as in the real app.
Another Focus trigger to make the input field editable again.
A Reset to delete the previously written text in the input field.
Another variable, "Text 2," was also created to receive the text from the 2nd Pie.
Text variable.
To finalize the edits on this Pie, we'll add a Text response to make the text that will be sent out from Pie 2 is visible in Pie 1, and an Opacity response set to 100%.
Step 4: On to the second Pie (receiving the message)
The second Pie follows the same principles as the previous ‘Screen 2’ of the first Pie.
In ProtoPie Studio, create a New Pie. Import the Screen titled “Adri” from Figma as you did for the previous Pie.
Again, the Start trigger will affect the UI, moving the bottom sheet to accommodate the keyboard and setting the input ready for text.
You'll need to create 2 variables again: "Text 1" and "Text 2" to match the first Pie.
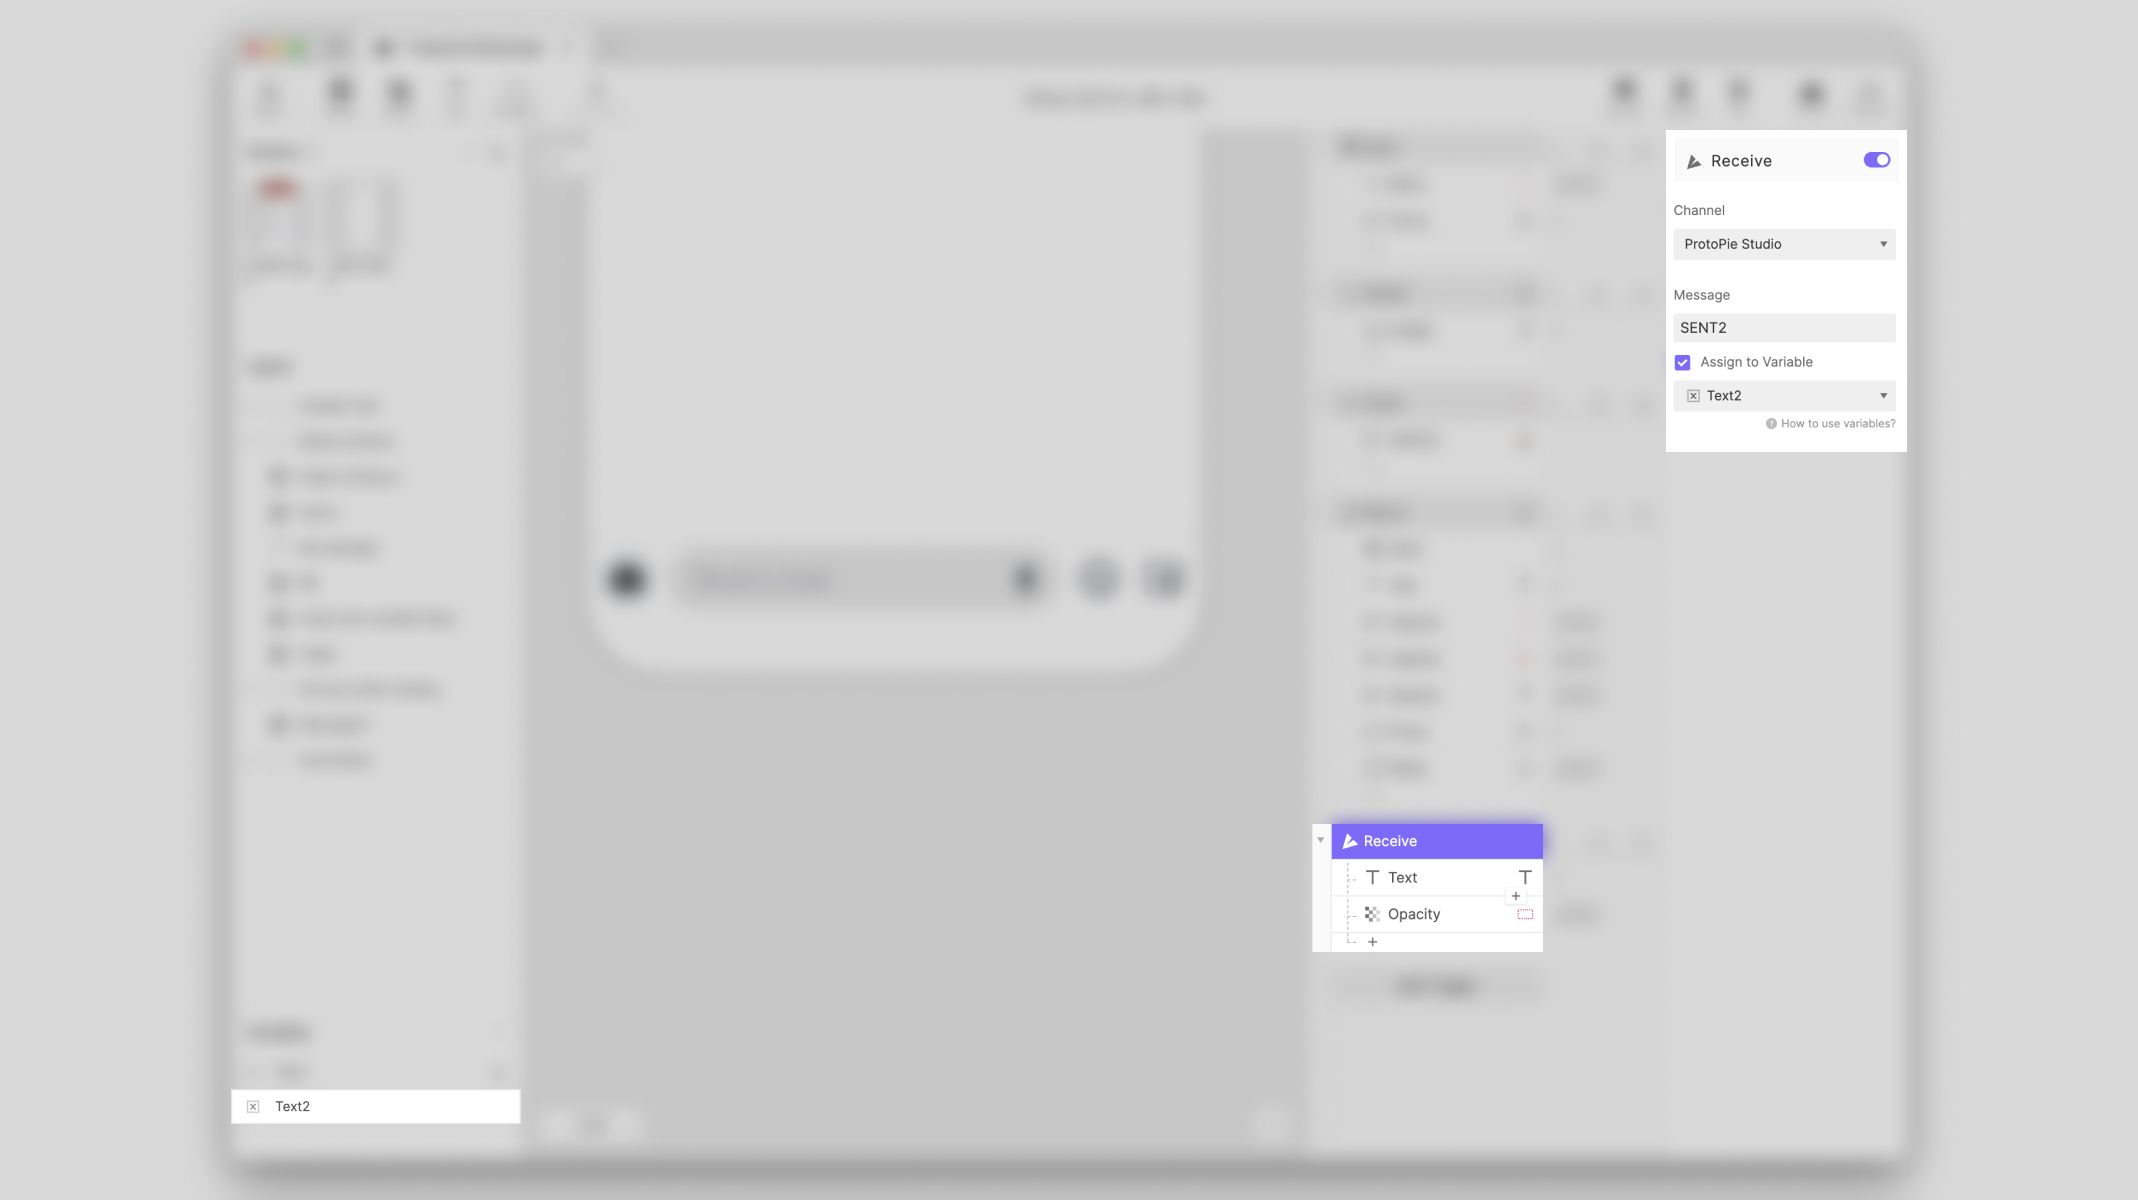
The Detect trigger will work with the Variable "Text 2" because it will store the information from Pie 2 to send to Pie 1, while the Variable "Text 1" does the opposite. If you follow the remaining triggers and responses of this Pie, you'll notice we did the same steps as the previous one.
IMPORTANT: Using Send and Receive will work with messages. These messages MUST match the messages from Pie 1.
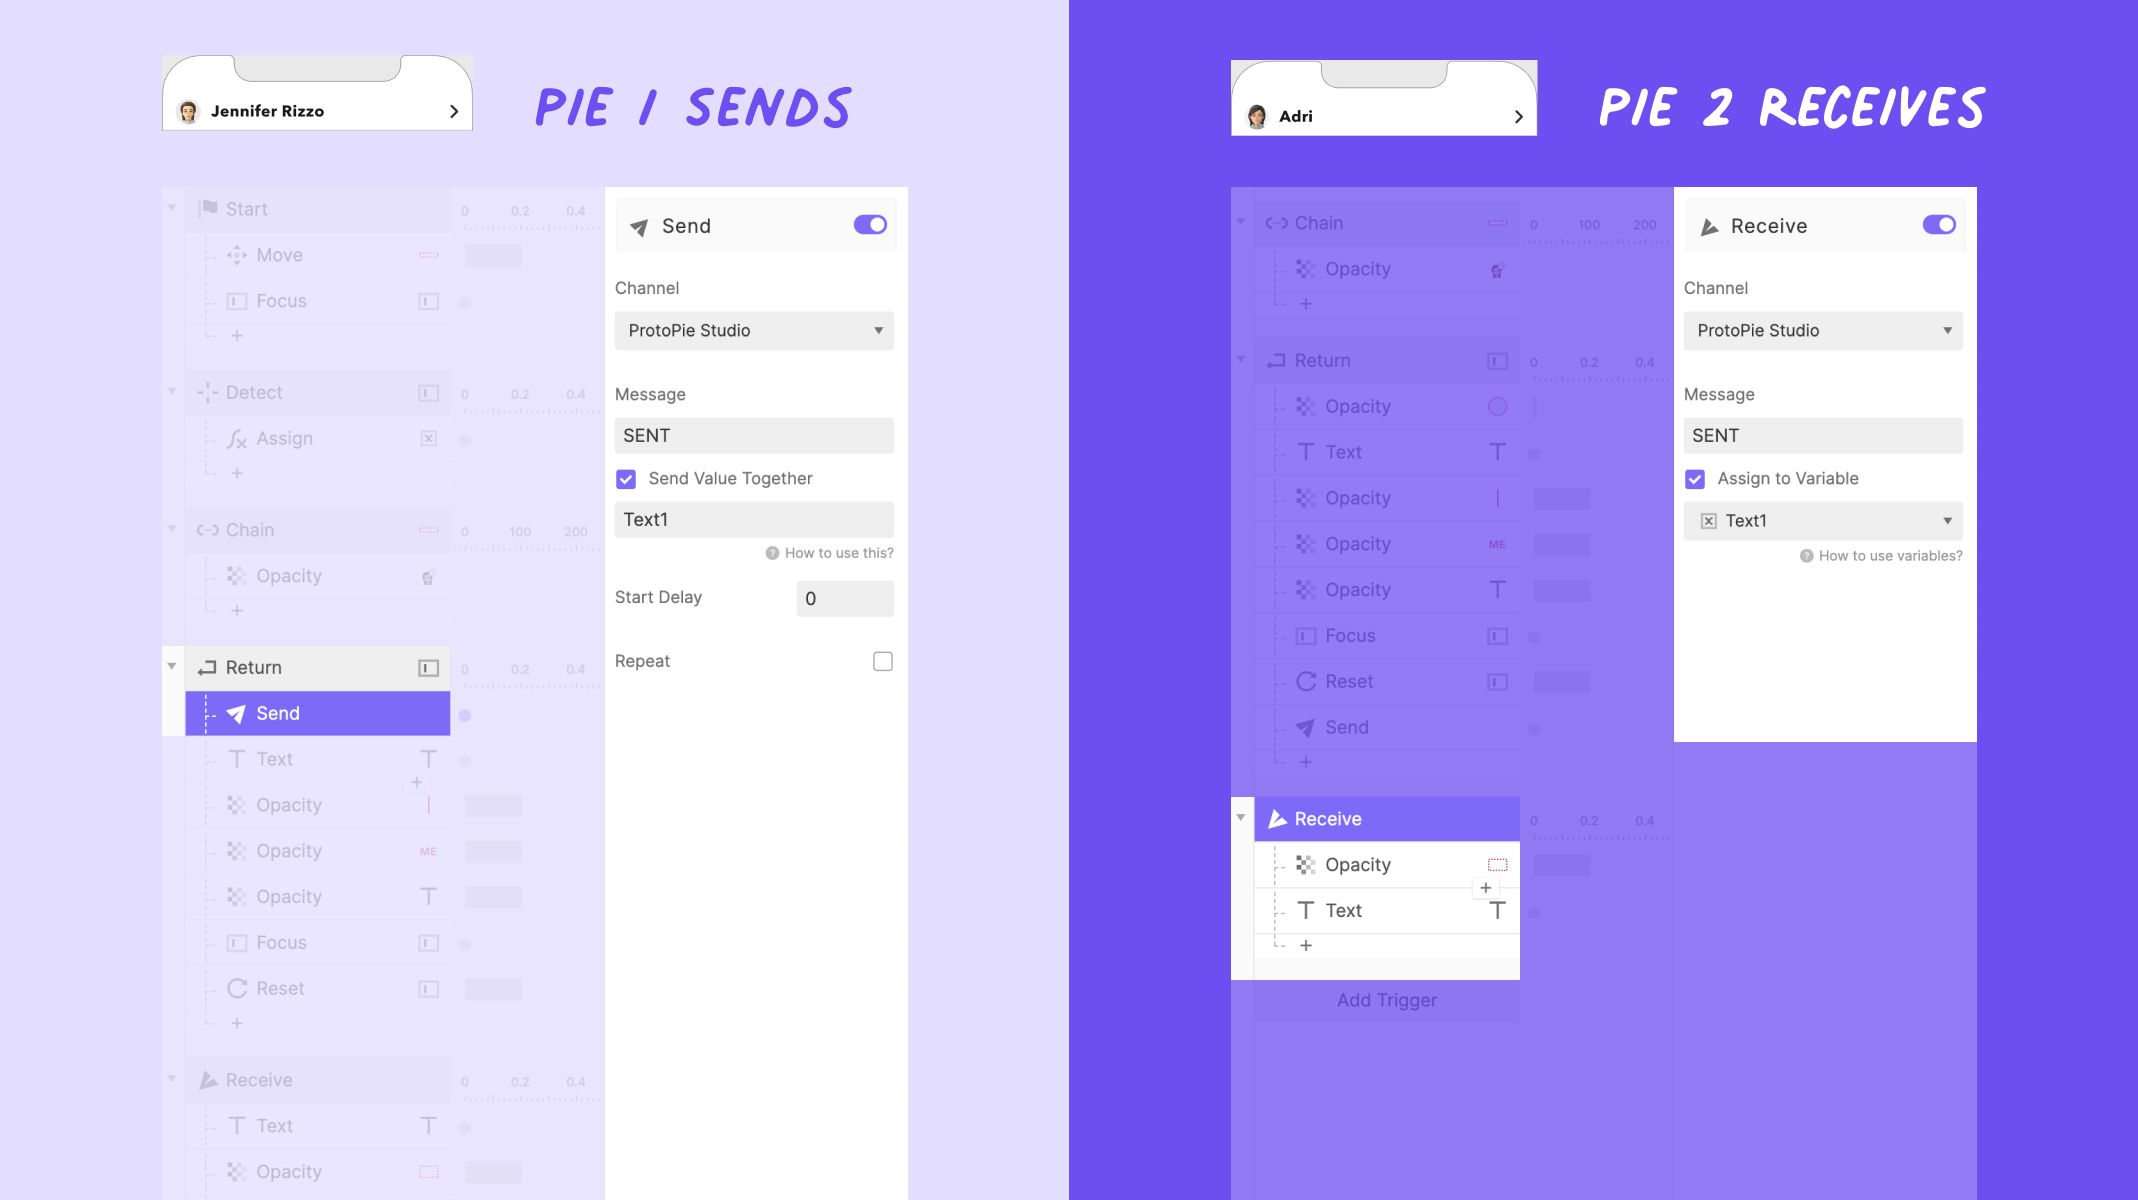
Pie 1 Sends, Pie 2 Receives- message "SENT". Channel: ProtoPie Studio
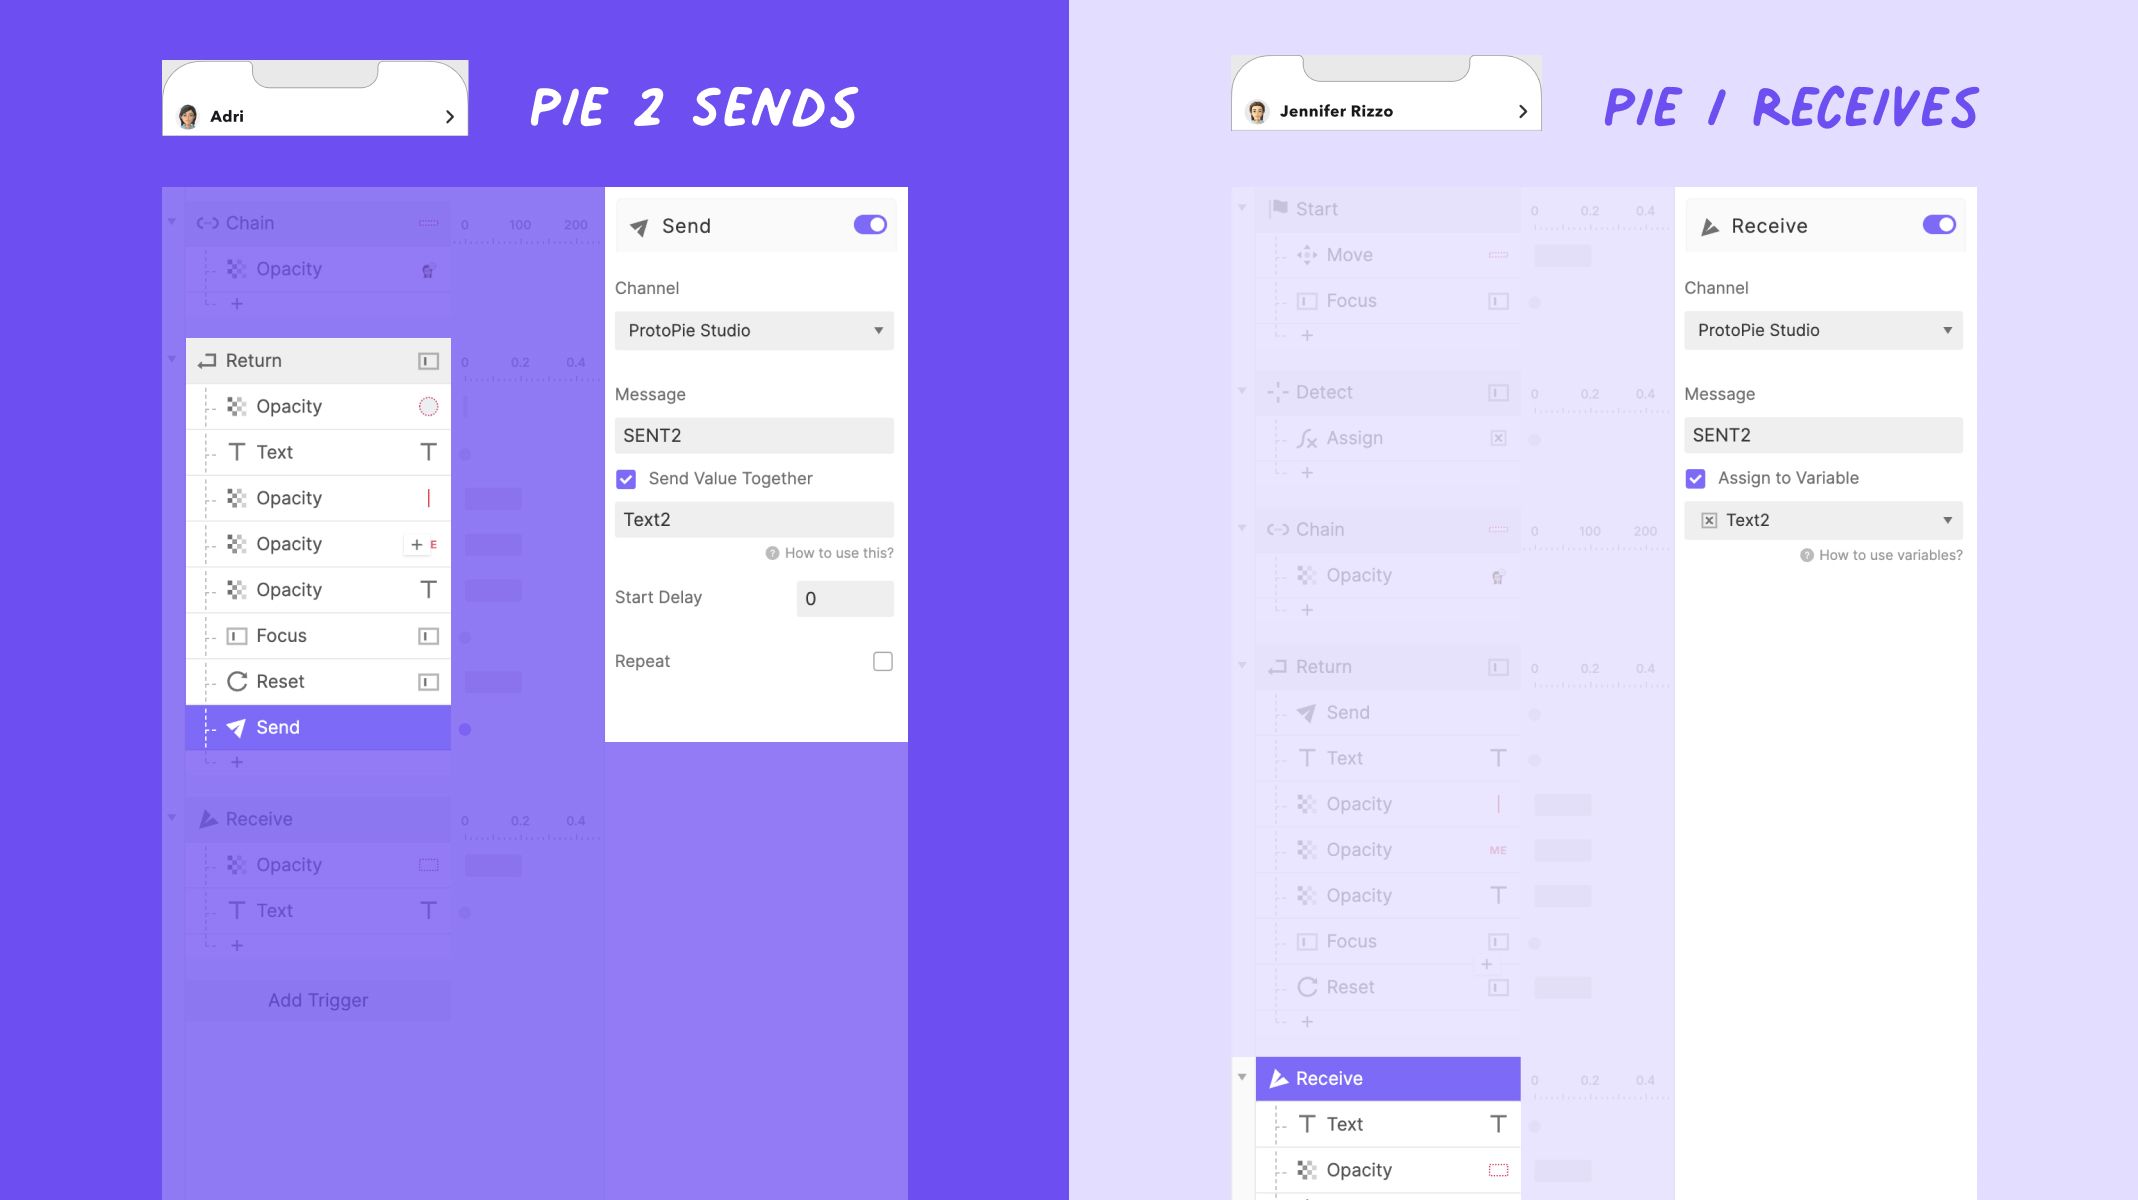
Pie 2 Sends, Pie 1 Receives - message “SENT 2”. Channel: ProtoPie Studio.
Step 5: Use ProtoPie Connect for cross-device communication
Now, it's time to test the cross-device experience. To do this, you’ll need to use ProtoPie Connect. This is what it looks like:
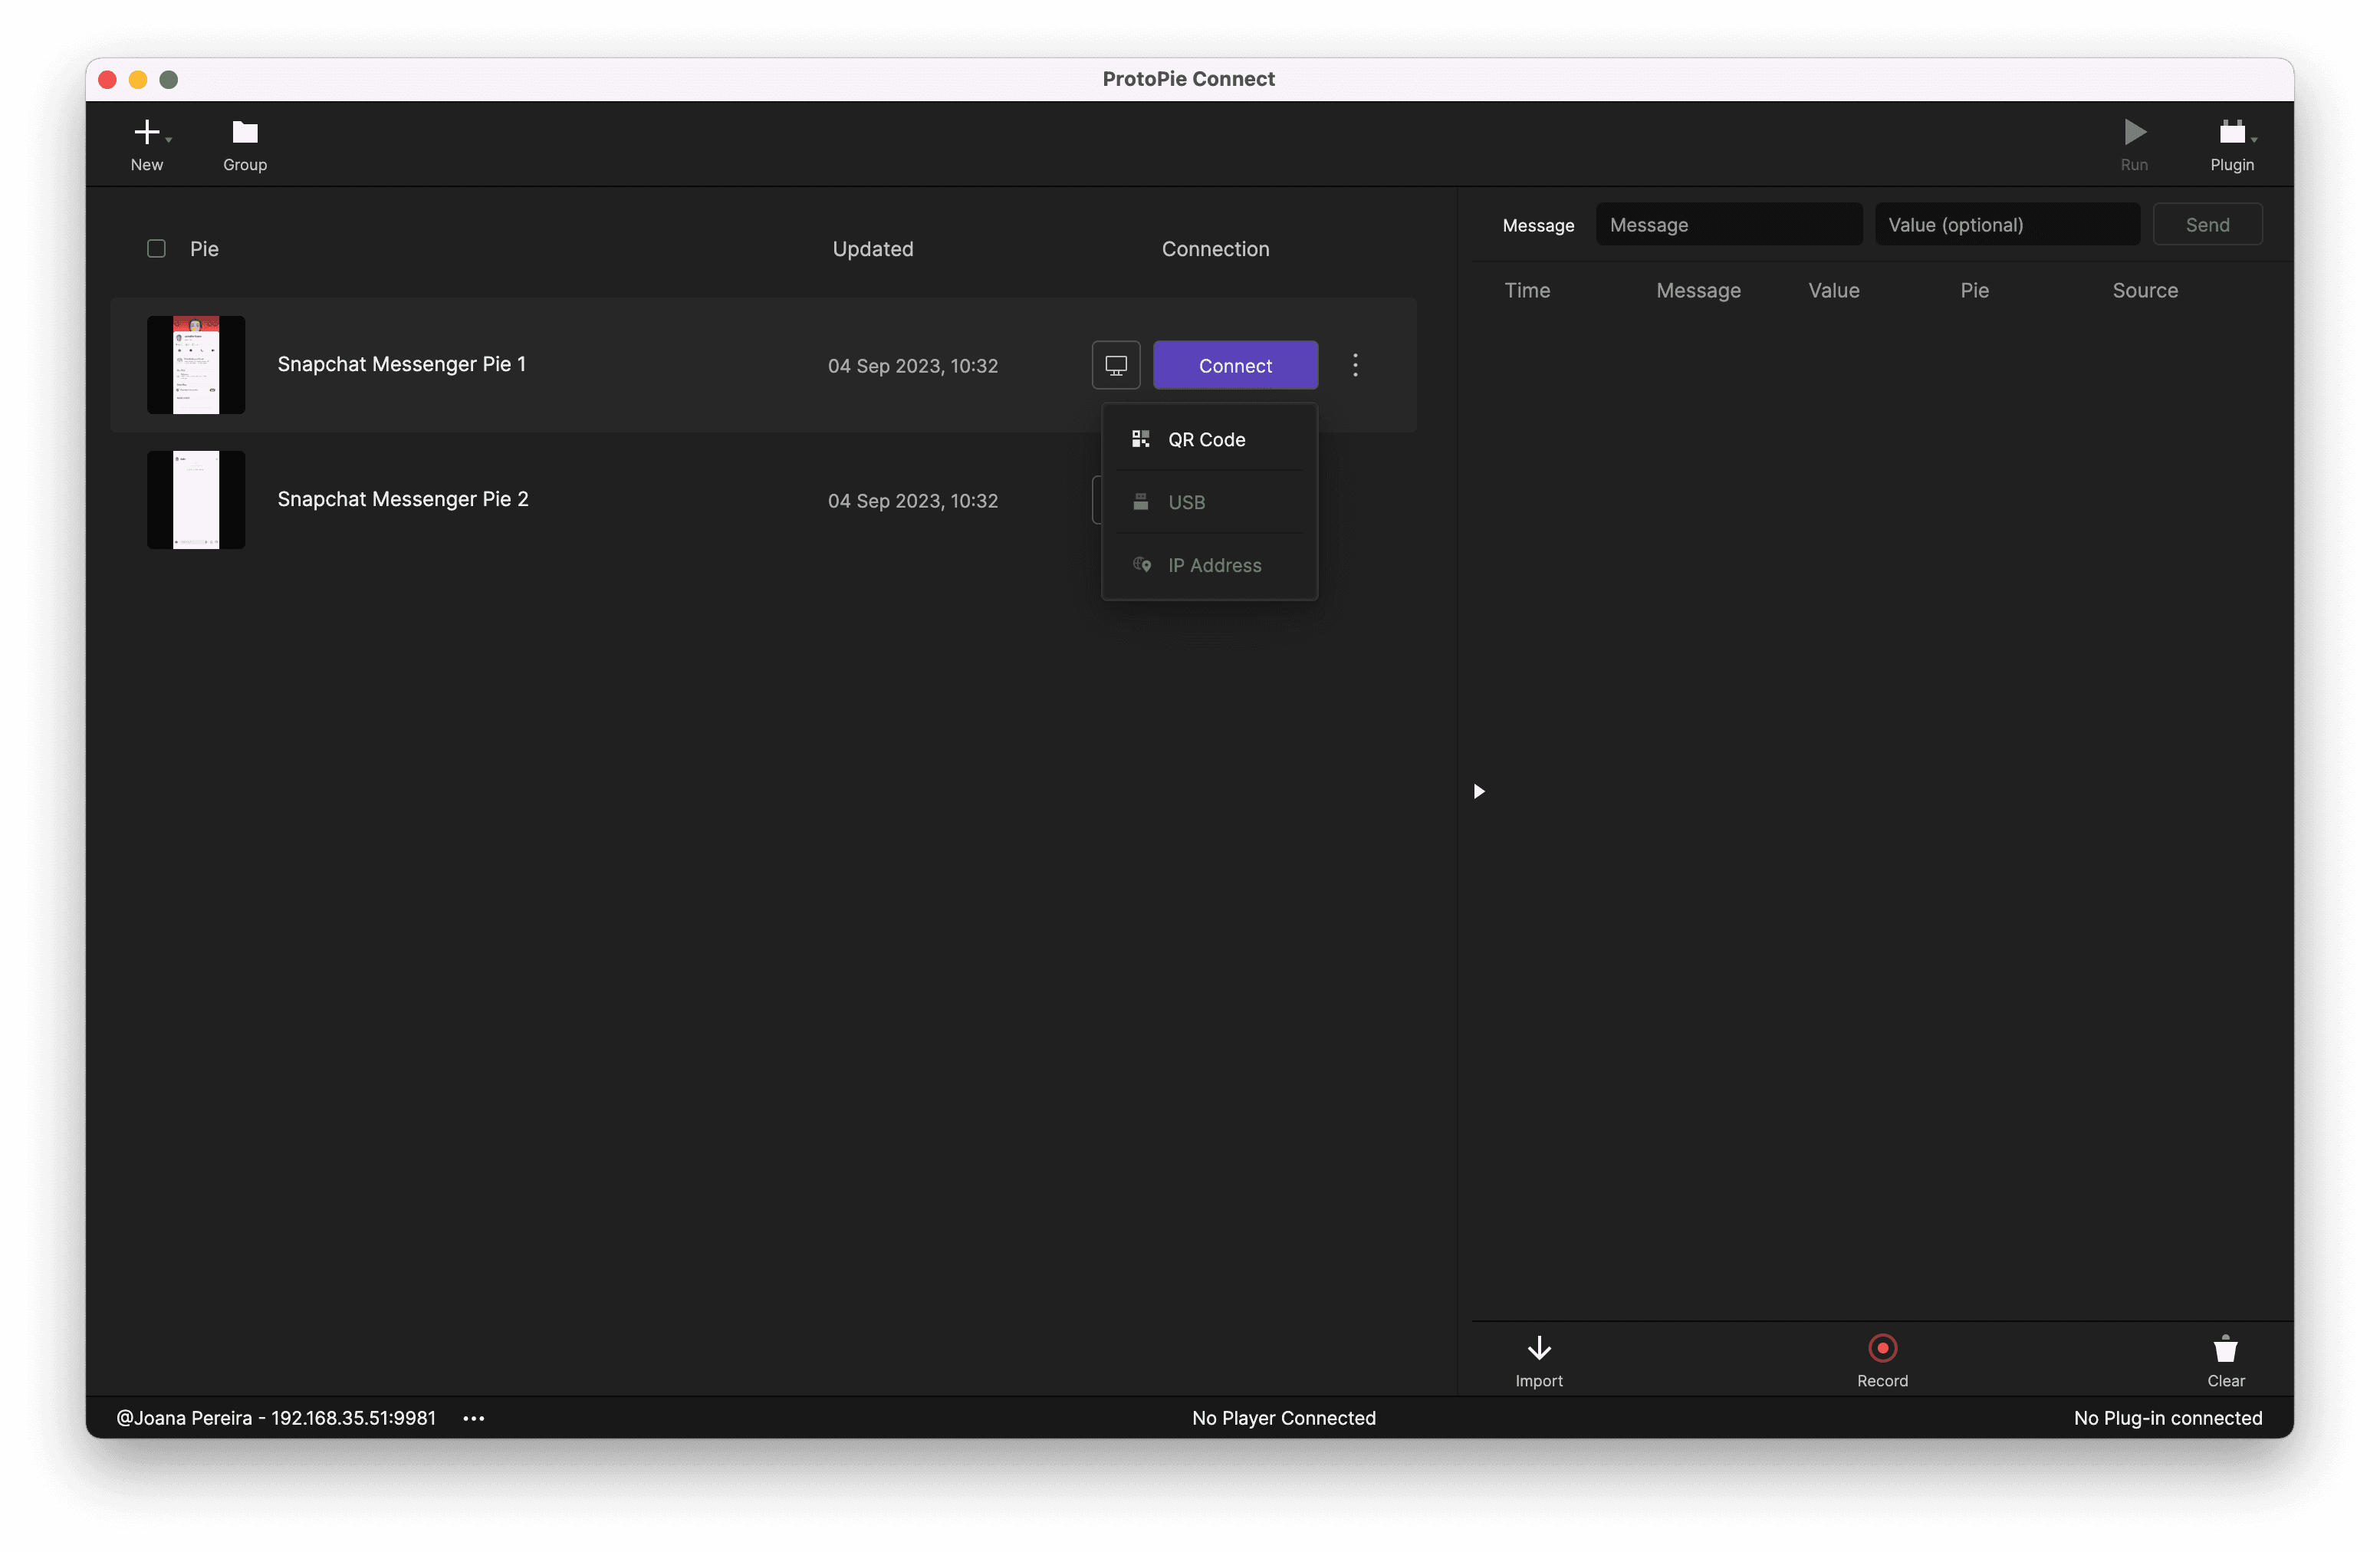
ProtoPie Connect.
You'll need to save the two prototypes in ProtoPie Cloud and download them if you're not using ProtoPie Enterprise. Afterward, upload the local prototypes to Connect to enable them to "communicate" with each other.
When the two Pies are uploaded, you can either use the device icon to open a preview, or Scan the QR codes in the ProtoPie Player App on your phone, you’ll need to Scan the QR codes with each device.
And that’s it. You prototyped a messenger app. Well done!
Please share your creations with us, and don't forget to use the tag #MadeWithProtoPie to be featured on our Gallery page and have a chance to be selected as the Pie of the Month.
Become a prototyping pro with ProtoPie
I hope you had fun prototyping this experience. The interactions you've learned here are great building blocks to explore further. You can enroll at ProtoPie school to learn more, or download ProtoPie for free and get started right away.


