Introduction
ProtoPie makes use of a messaging system called Send and Receive you can use to pass data around in your prototypes. You may already be familiar with using Send and Receive to pass commands and information back and forth between your scene and components.
But did you know you can use Send and Receive between prototypes? This is a unique killer feature that makes building multi-screen experiences a breeze!
Already Built-in With Studio
To a certain extent, this capability is already built right in to ProtoPie Studio. With Studio alone, it’s possible to have two separate Pies talking to each other, with the following limitations:
Studio must be running on your desktop
You can’t have more than two Pies interacting with each other.
It only works locally on your computer — not in the cloud.
Limited to Pie-to-Pie communication. Integration with physical devices isn’t possible with Studio alone.
It Gets Way Better with ProtoPie Connect!
When you throw ProtoPie Connect into the mix, all of these limitations evaporate. Want to use three or more Pies? Check! Want to use your laptop, your phone and your tablet all at once? Check! Want all of the Pies together on a single screen? Check! What to interact with physical hardware? Check! And if you’re an enterprise subscriber, you can have all of this work in the cloud too!
Sounds awesome, right? Yeah it does! Keep reading to learn how it all works.
What you'll learn
In this tutorial we’ll cover the following:
A refresher on Send and Receive
Your first two-screen experience using ProtoPie Studio
Add a third screen with ProtoPie Connect
Time to complete: ≤30 minutes
Send and Receive: ProtoPie’s cornerstone of communication
We’ll start with a refresher on Send and Receive. You might already be familiar with how it works, but stick with me. Fully understanding Send and Receive is crucial to building multi-screen experiences and subsequently working with Connect.
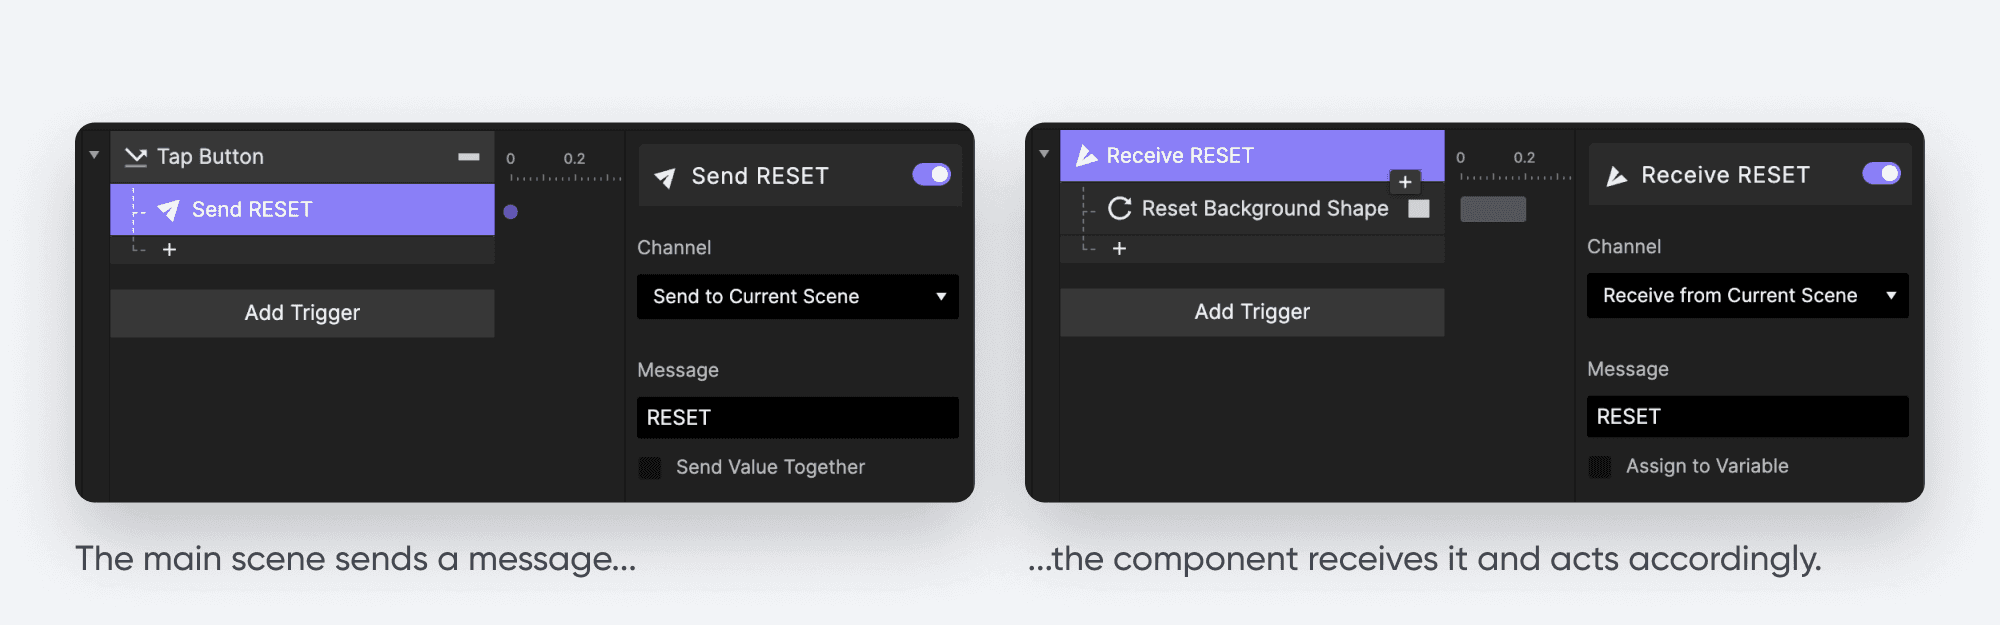
Send and Receive is very simple in concept. You use a Send Response to send any message you like. The message you send can optionally have a bit of information attached to it. Then you use a Receive Trigger somewhere else to listen for that message and respond accordingly.
For example, a common use for Send and Receive is to reset a component to its initial state. Since components are self-contained, they do not get fully reset if you simply use the Reset response in the main scene on the component copy — only their outer size, position, opacity, etc in the main scene will be reset, but layers inside the component are not. In order to work around this, you can set up your component to listen for a command that, when received, will execute a number of responses to return the component to its initial state.
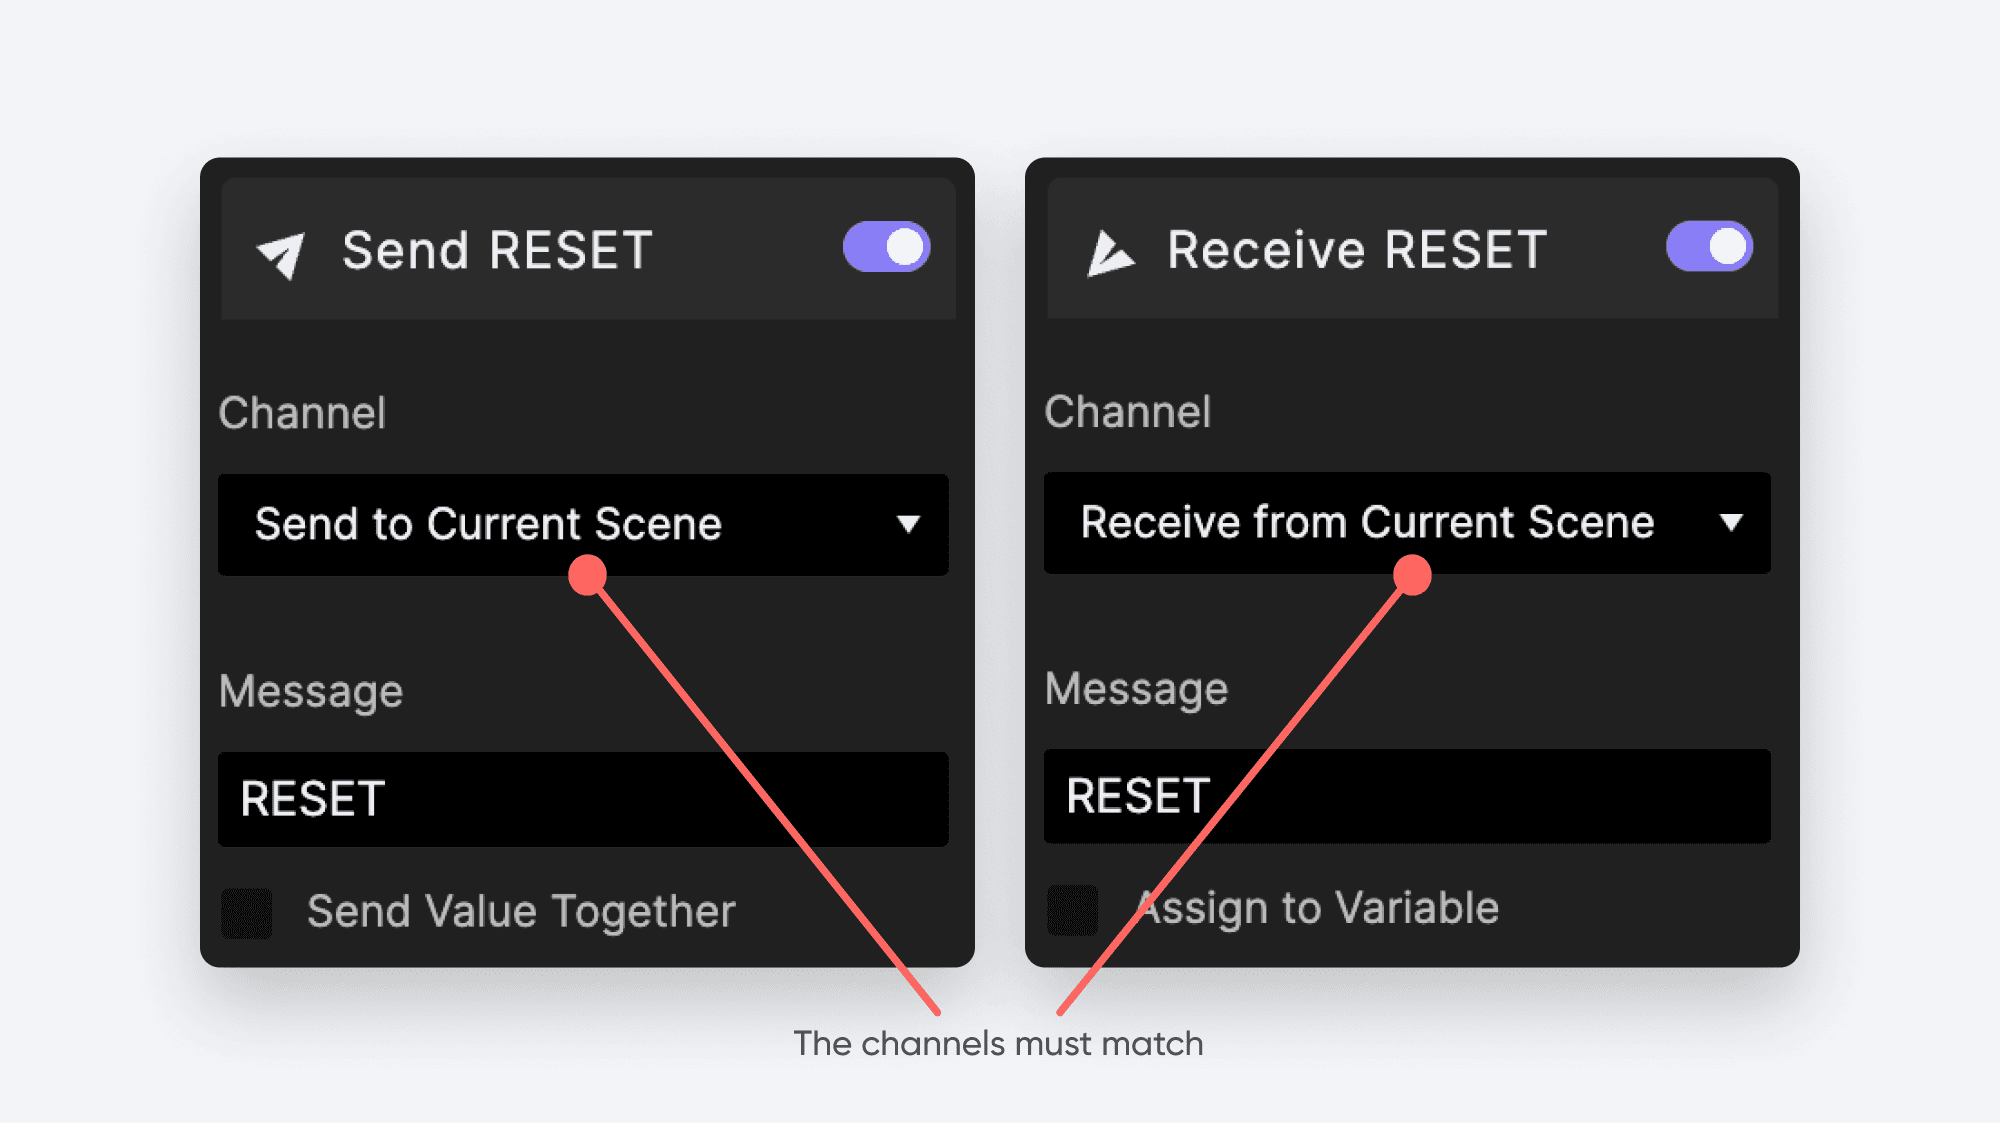
The channel matters
When you send a message, you send it through a particular channel. The Receive trigger configured to listen for that message must use the same channel. Otherwise, the message won’t be “heard.”
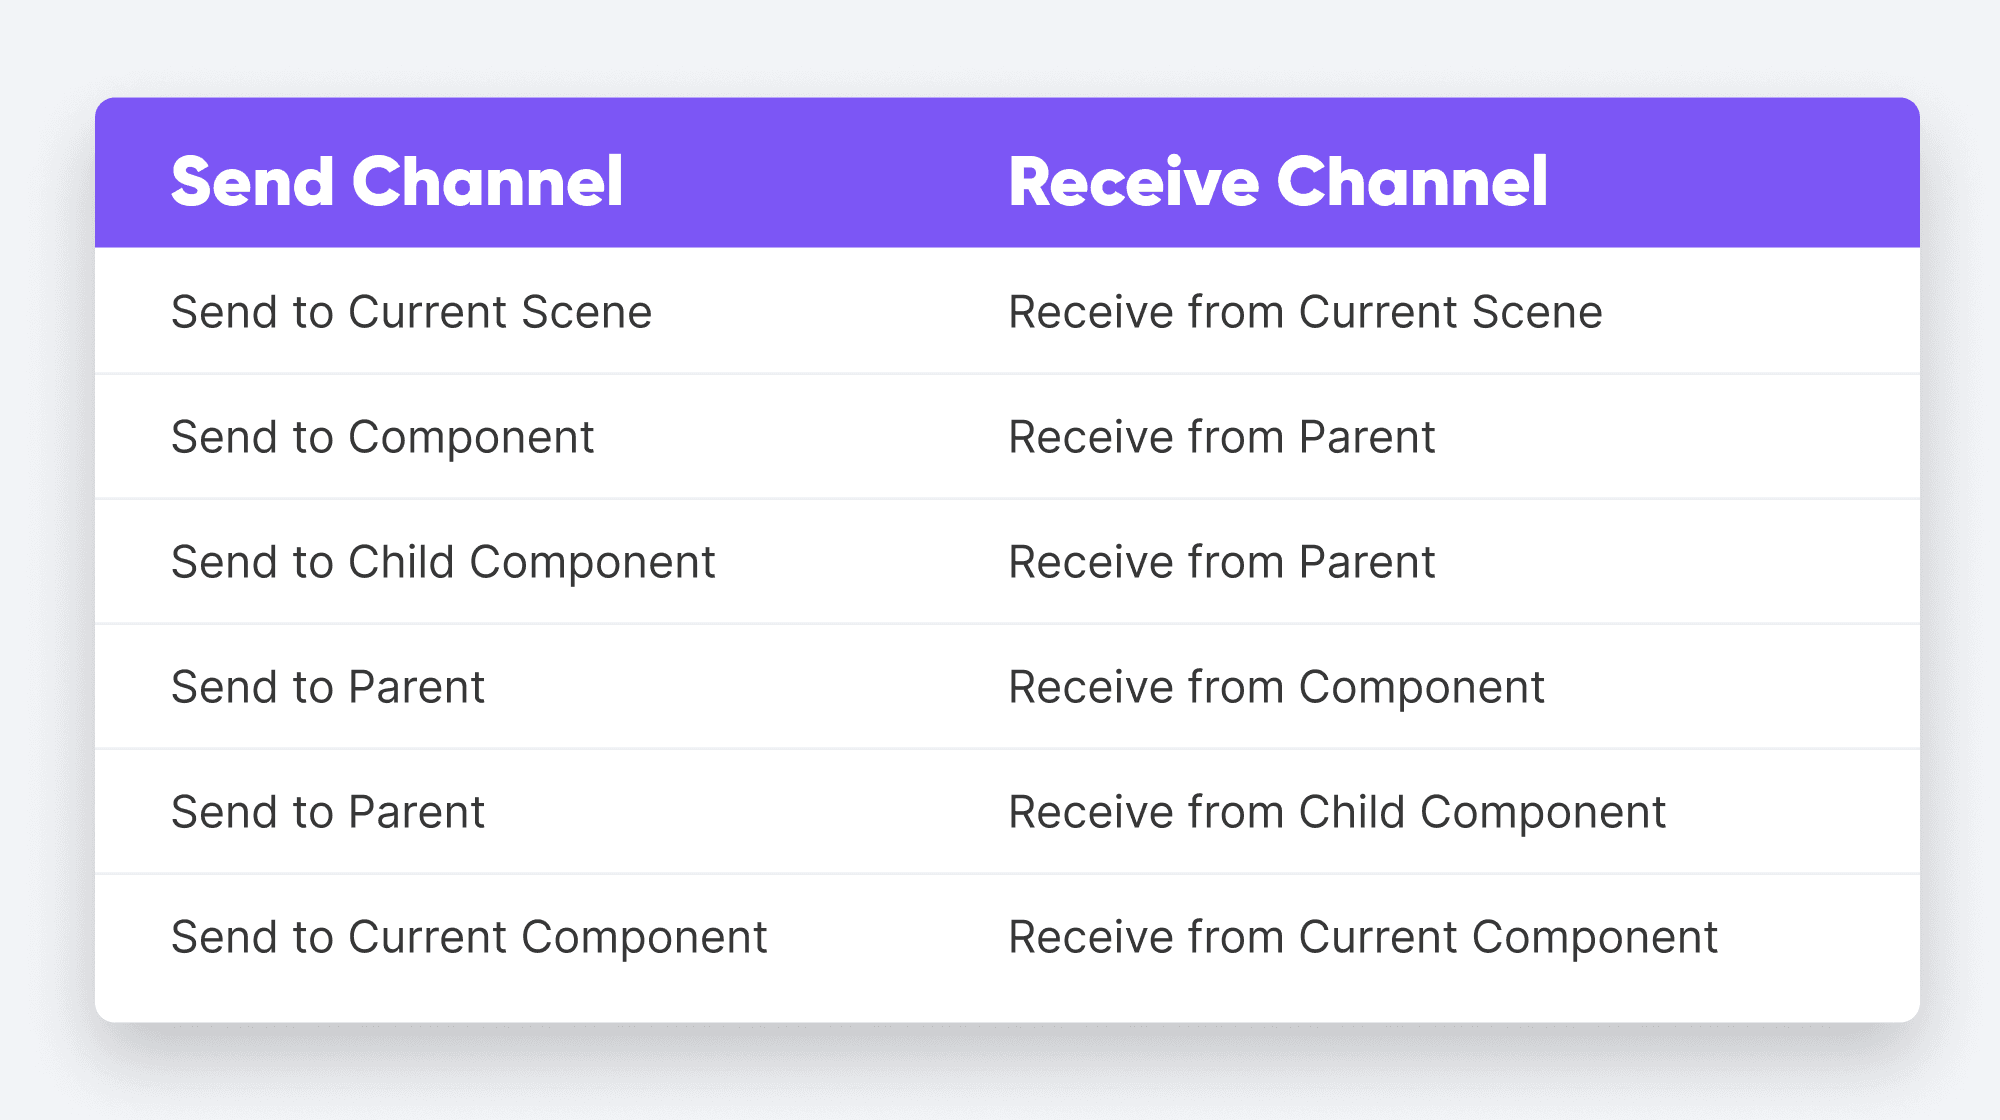
The following table shows the matching Receive channels for any given Send channel.
There is another channel I will be focusing on for the remainder of the tutorial — and it is the primary mechanism through which multiple Pie’s can communicate with each other. It’s called “ProtoPie Studio.”
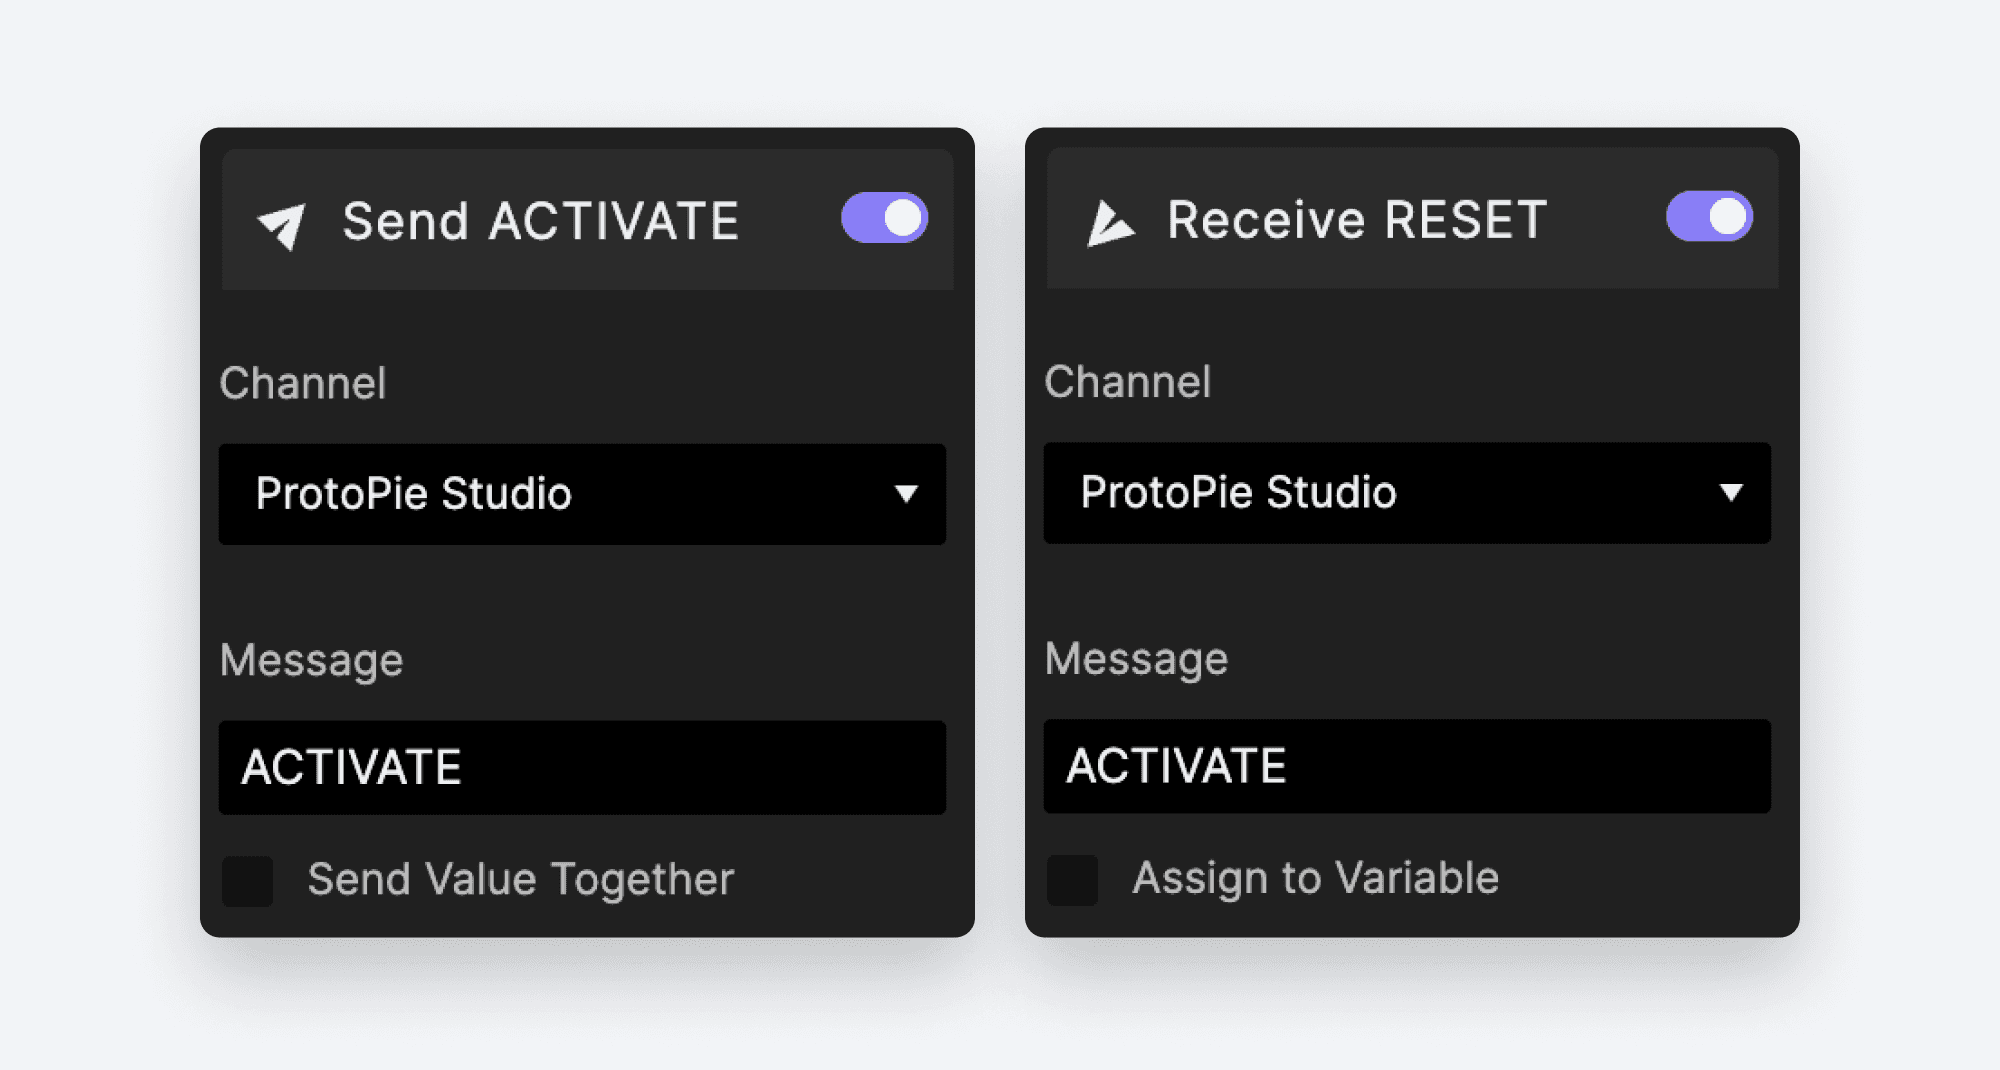
When you send a message through the “ProtoPie Studio” channel, another Pie can “hear” it and respond. When using ProtoPie Connect, these messages can be relayed to physical devices as well as other Pies in order to enable a fully immersive hardware/software experience.
Let’s see this in action!
A tale of two Pies
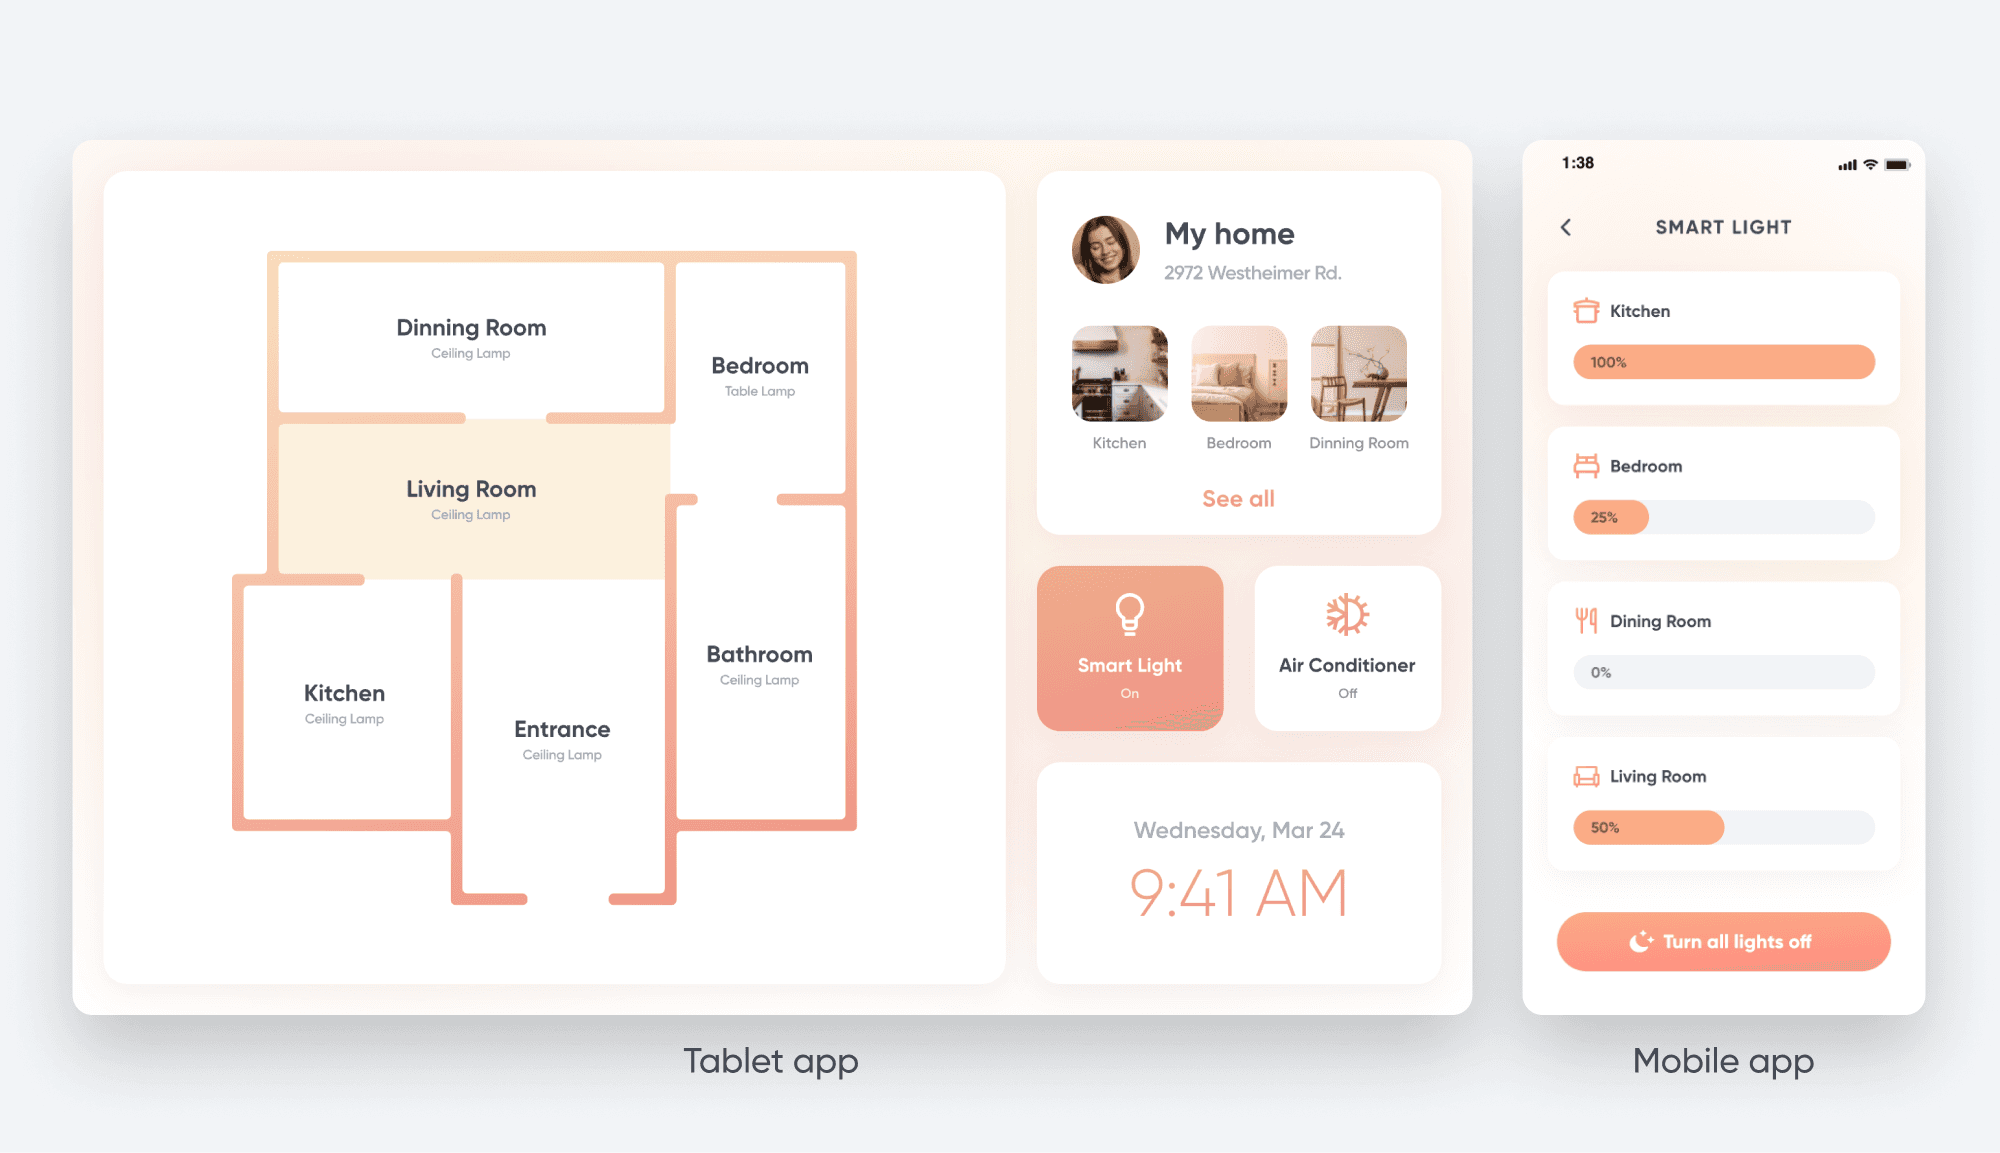
Our first example will show you can have two Pie’s communicate with each other without using ProtoPie Connect. We’ll be simulating a smart home experience, where we have, say, a tablet-based control panel with a floor plan, and we have a mobile app that simulates controlling the light levels.
Starting Pies
There are two Pies you’ll be working with. Download them both and open them in ProtoPie Studio:
[Table App Pie] [Mobile App Pie]
Tutorial
Follow along with the video below.
Now, with Connect!
Right now we can only run this experience with Studio running. If, however we load these two Pies in Connect, we can preview our experience in many different ways, and we can add more Pies to our experience.
For this demo, we’ll be continuing with the Pies we worked with above, and part-way through the demo we’ll add a third Pie into the mix. You can download it from here:
Follow along with the video below.
This is just the tip of the iceberg! Continue on to see how ProtoPie Connect can be used to integrate your Pies with all sorts of things in Intro to ProtoPie Connect 2 of 7: Your First Integration with IFTTT!
Finished Pies
Here are all the Pie files used in this tutorial in their finished state.