
Over the course of the past few months, I’ve been keen to try out ProtoPie and teach myself some useful techniques I can apply to my work in the future.
There have been many different prototype tools over the years and I’ve used a lot of them. All have many pros and cons, but I’ve been eager to find one with a relatively small learning curve (looking at you Framer) that could be super powerful in taking UX and UI designs to the next level.
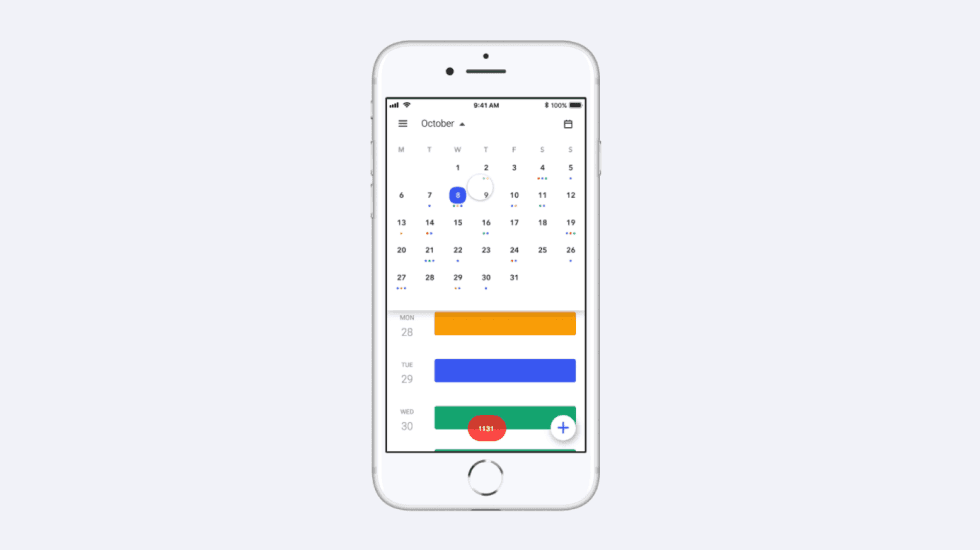
In this tutorial, we’ll go through creating a simple Calendar UI prototype using PrototPie. I would recommend downloading ProtoPie for free and this should take about 20mins to finish.
Calendar Tutorial with Parallax Images in ProtoPie
1. Set the scene
Basic ProtoPie file without the interactions
Create your vertical monthly blocks, I’m using heights of 532px for ease of demonstration, (can all vary if that's your thing) and a gap of 135px between these blocks.
Group the months into a vertical scroll
Add square background images and place them at the bottom of the Scene, with their top edge touching the bottom edge.
2. Creating the Calendar vertical scroll
As my 1st image will be on the Scene from loading I’ll follow a different pattern here, you can group all them together in a container in the layers to keep things tidy.
Image container
x = 0 / y= 532px
height = 375px / width = 375px
First image
x = 0 / y= 0
height = 375px / width = 375px
Second, 3rd, 4th image
x = 0 / y= 135px
height = 375px / width = 375px
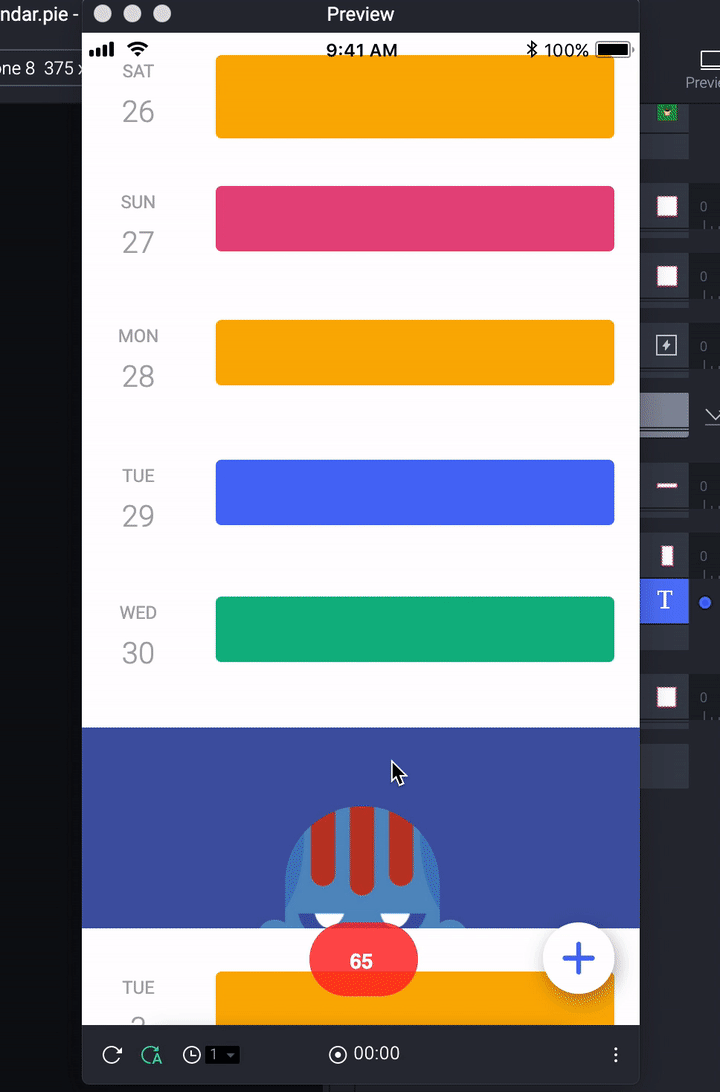
The number in the red roundel will display the scroll position of the scroll
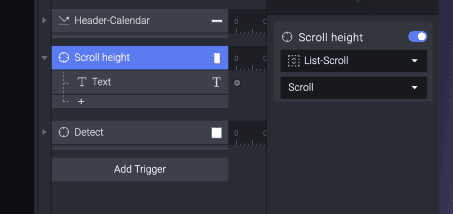
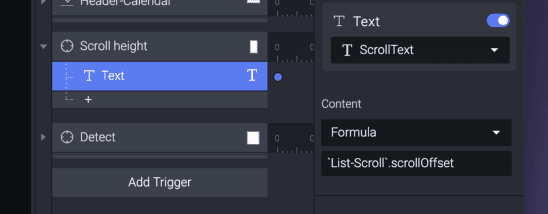
3. Display a scroll position display (Optional)
This will save you a lot of time and super easy to add to save time with finessing if things get complicated.
Add a Text layer
Add a Detect trigger to the vertical scroll and selecting Scroll from the dropdown
Select Formula from the Content dropdown and add your Scroll with the .scrollOffset
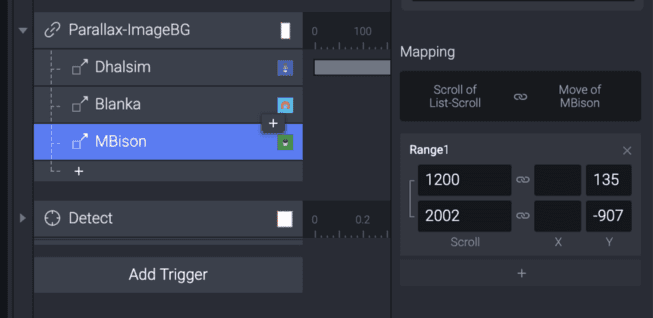
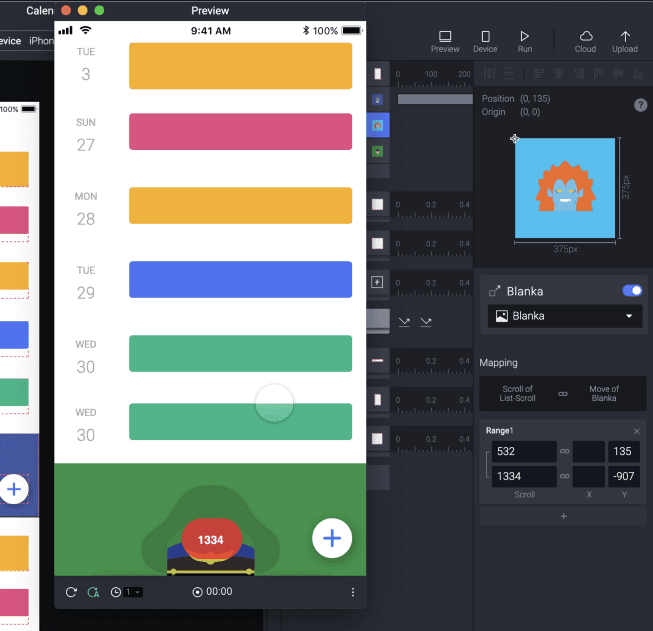
4. Parallax Monthly images
Add a Chain trigger to your vertical scroll and select Scroll from the dropdown.
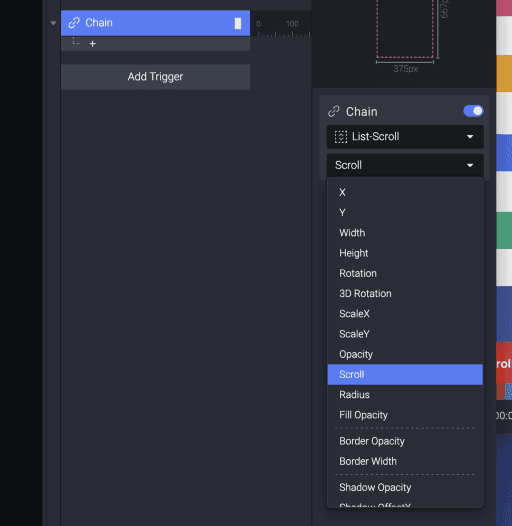
Add a Move response to this Chain and now we’ll add your images one-by-one.
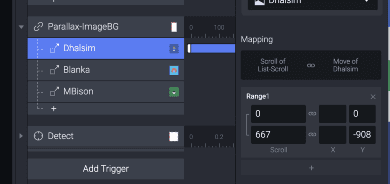
1st image
As this is placed on the Scene from load, this will follow a slightly different logic.
532px (list scroll position before image) = 135px (Y position of image at bottom of the scene)
1334px (list scroll position after image) = -908px (Y position of image of the top of the scene)
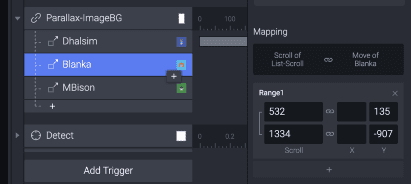
2nd image
What we need to add here, is to tell the Prototype the relationship between the positions of the list scroll and the image. This is what ProtoPie calls Range.
Scroll position Range
532px (list scroll position before image) = 135px (Y position of image at bottom of the scene)
1334px (list scroll position after image) = -908px (Y position of image of the top of the scene)
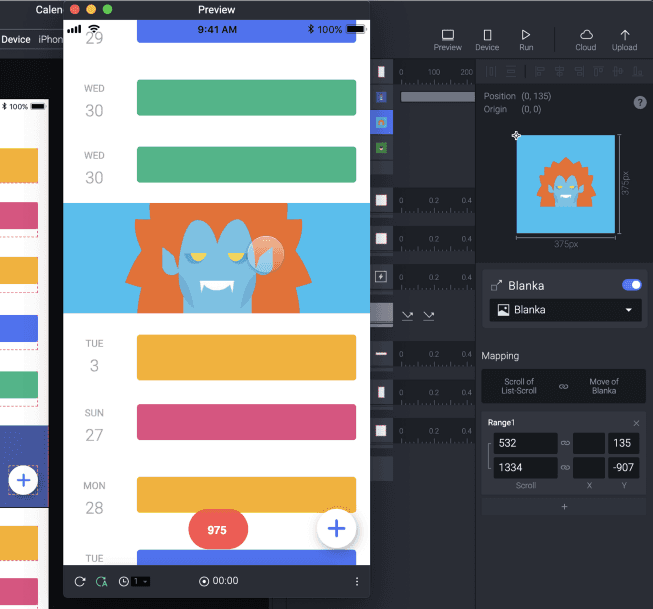
1334px is end position of the scroll and 132px is the ending Y position of the 2nd image

Final prototype
I hope you found this tutorial helpful. In the next coming weeks, I’ll cover the following.
Fab/Action Button
Burger Menu
Monthly horizontal scroll


