
This is the second part of the calendar tutorial. In the first part it guides you through setting up your workspace and adding parallax images. This second part, i’ll cover the horizontal calendar menu, adding a navigation drawer and the FAB (Floating Action Button).
This tutorial should take about 20–30 mins. To get started I will assume you have Downloaded the basic ProtoPie without the interactions.
1. Adding a horizontal calendar menu
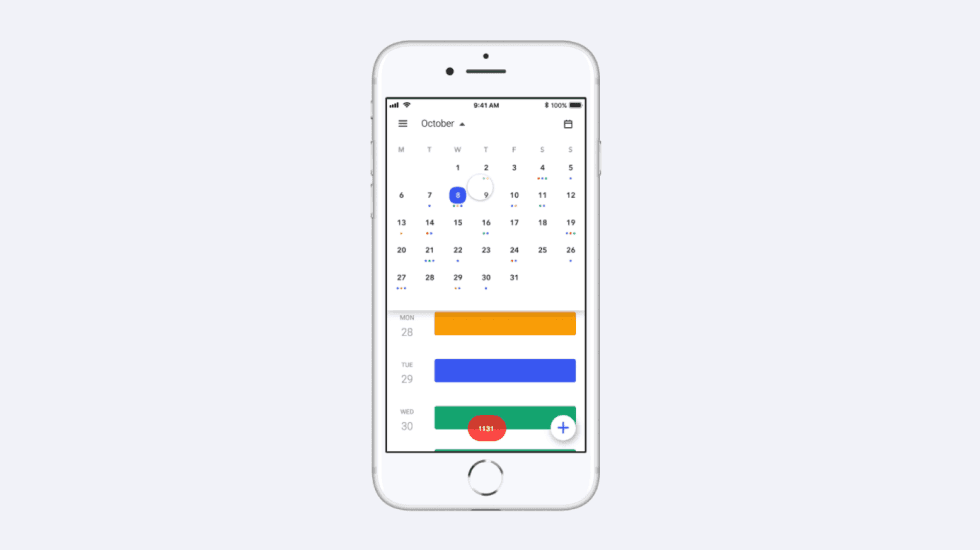
Our desired effect is for the user to tab on the header bar and vertically expand the area, allowing the user to horizontally scroll between months and tapping again to close.

Our desired outcome
Our desired outcome will follow the typical ProtoPie conceptual model
ProtoPie conceptual model
Header object + Tap trigger + Response (Scale height to 74px, Rotate arrow 180º, Opacity of calendar 100%)
Let’s first add the actions to vertically expand the header on tap, as we will want to also use the same action to vertically reduce the header we will need to add a Condition. This Condition will follow the rule of if header is equal to 74px (our closed state) expand the header height to 400px.
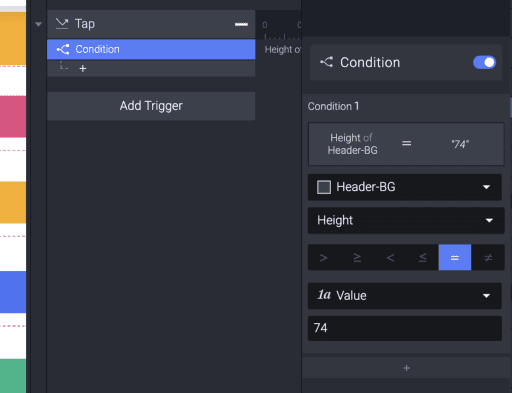
Add Tap and a Condition
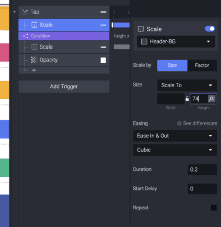
With the Header menu selected in the left-hand Layer panel, add a trigger of Tap and Response of Scale. Select the Header-BG layer and assign it a new height value of 400px.
Add a new Trigger of Opacity to the Calendar Container and assign it the opacity of 100%.
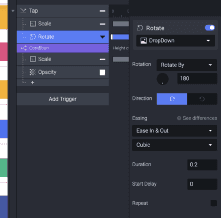
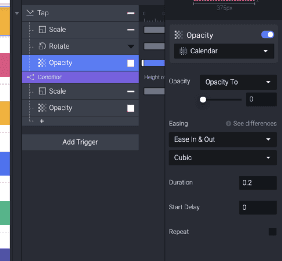
With the Header now opening up and displaying the scrollable horizontal calendar our next actions are to reverse these on tapping the Header. This is done with 3 Triggers (Scale, Rotate and Opacity) and listed above the Condition. See below.
Changing the header month title on scroll

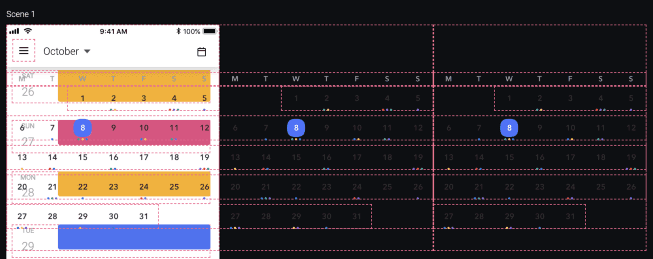
Your horizontal scrolling calendar will be structure like this. Nov starting at x=375px and Dec at x=750px
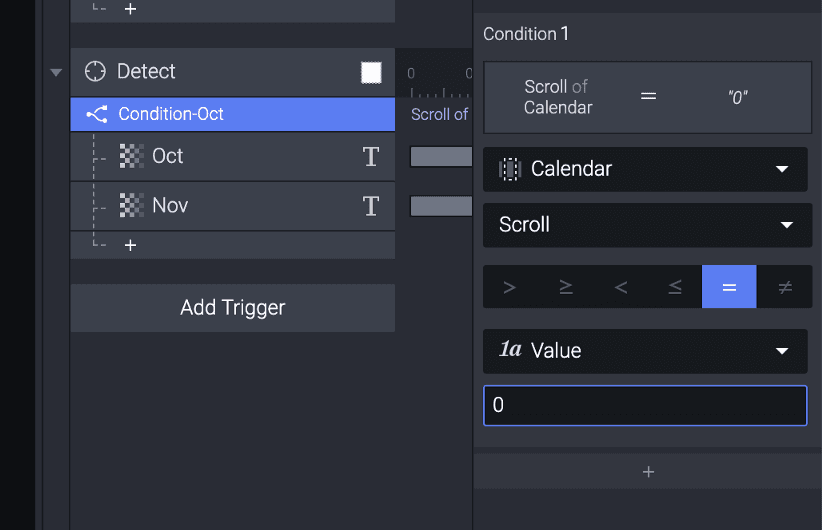
Add a Detect Trigger to your Calendar container selecting Scroll from the dropdown. Add the first condition and again select Scroll from the dropdown with the value of 0, we can then add our actions for what we want to display when the X position of the scroll is 0, in this case October.
Add two opacity actions, Oct (100% opacity) and Nov (0% opacity)
Repeat the same process for November, giving the condition the value of 375px and December with the value of 750px.
2. Adding a navigation drawer

Add a Tap trigger to your Burger container and give it its first response of Move, assign it to your NavigationDrawer container with a new X value of 0. This will allow the drawer to slide out on tap.
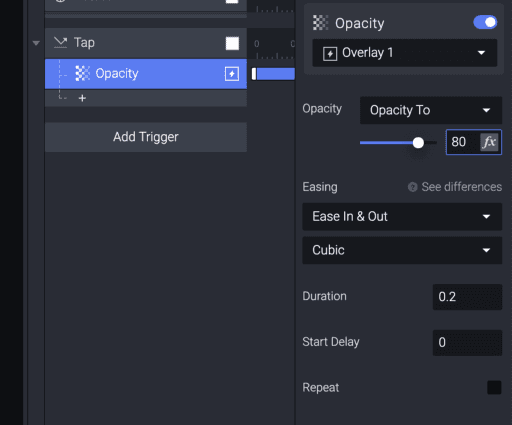
Add an Opacity trigger to the same Burger object and assign it to the Overlay, setting the opacity to 70%. This will give us the white overlay effect to give user visual focus on the drawer.
This should give you the follow, we’ll just need to reorder the layering of Overlay and Navigation Drawer to give us layered effect.

Reorder your Overlay and your NavigationDrawer layers with the Bring to front (3rd option).
Important to note, using Reorder and bringing more than one object to front the prototype will then follow the logic of performing from top down. See the example below, Reorder Overlay is performed first and Reorder NavigationDrawer second.
Closing the menu
Add a Tap trigger to your Overlay and add the response of Move assigned to your NavigationDrawer.
3. Adding a FAB button

i. Open FAB controls
Button placement
In this prototype we’re using two additional buttons that will move up from under the FAB when it’s pressed.
Add two Move actions (btn-2 and btn-3) to your Open-Fab trigger and give them the following ‘Move To’ Y inputs.
btn-2 = Y -36px
btn-3 = Y -98px
Fade in the buttons
Add 4 new Opacity responses and assign one to each of your buttons, all buttons should be set to 100% and the FAB set to 0%.
ii. Close FAB controls
Similar to opening the FAB controls, we just need to repeat each of these responses with the reversed effect. There’s no quick way to do this other than manually copy and paste the responses and change the action separately.
iii. Closing the FAB controls from tapping anywhere on screen
A simply step, copy the actions up-until Rotate from Close-Fab tap Trigger and paste them in a new Tap trigger for the overlay. This will allow the user to tap any on the screen to dismiss the FAB controls.
That’s it, its pretty simple and should give you a good foundation to build your own prototypes from or just to start playing around with learning the ProtoPie app. Any questions or comments please feel free to leave below or if you have an idea of what tutorial you’d like to see next, get in touch.


