

Prototyping user interfaces is crucial in the design process, enabling designers to test ideas and understand user behavior. ProtoPie simplifies this by allowing you to create high-fidelity UI animations and experiences using keyboard typing, camera input, voice interactions, conditions, multi-touch gestures, and Lottie animations, all without code.
In this tutorial, we’ll show you how to create a simple UI animation in a pet care app mockup using Lottie and ProtoPie, offering a playful experience for hiring a pet sitter.
Overview
1. Create the UI animation
2. Create the UI design & export to ProtoPie
3. Start prototyping
4. The final prototype
1. Create the UI animation
First, you need to have some UI animations ready to use in ProtoPie. You can download free animations from LottieFiles or even buy them from the marketplace. You can also create them yourself in Adobe After Effects. If you are unsure how to start, this tutorial might help you.
For this prototype, I’m going to rig a dog character and keyframe its walk cycle. You can also use popular After Effects plugins like Duik or RubberHose to speed up your workflow.

Walk cycle animation in After Effects.
When you’re happy with the animation, export it to a .json file using the LottieFiles plugin. Make sure to convert all expressions into keyframes in the export settings.
2. Create the UI design & export to ProtoPie
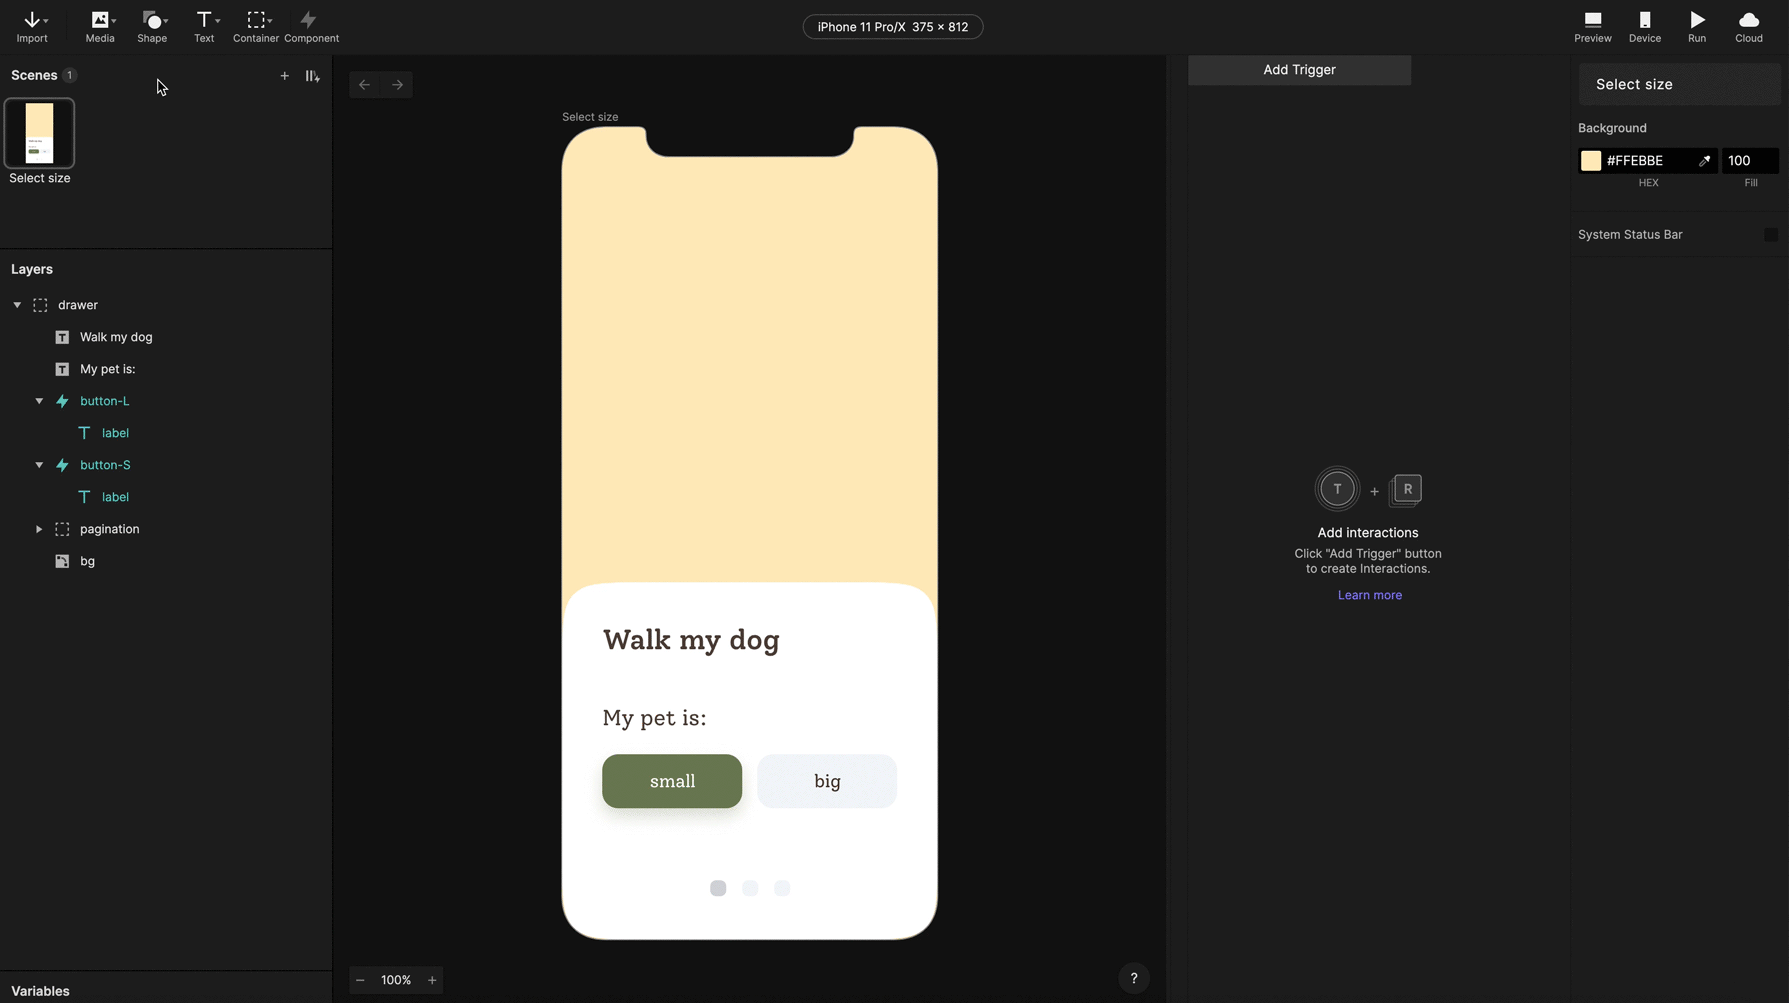
Next, we need some UI to stage our cute animations. You can design directly in ProtoPie. If you haven’t used it before, first you might want to check out this quick start guide: How to Make Interactive Inputs with Figma and ProtoPie.
Designs can also be imported from Figma, Sketch or Adobe XD. Just remember to name your layers properly to save yourself a hassle later.

User interface designed in Figma.
3. Start prototyping
Create a button component
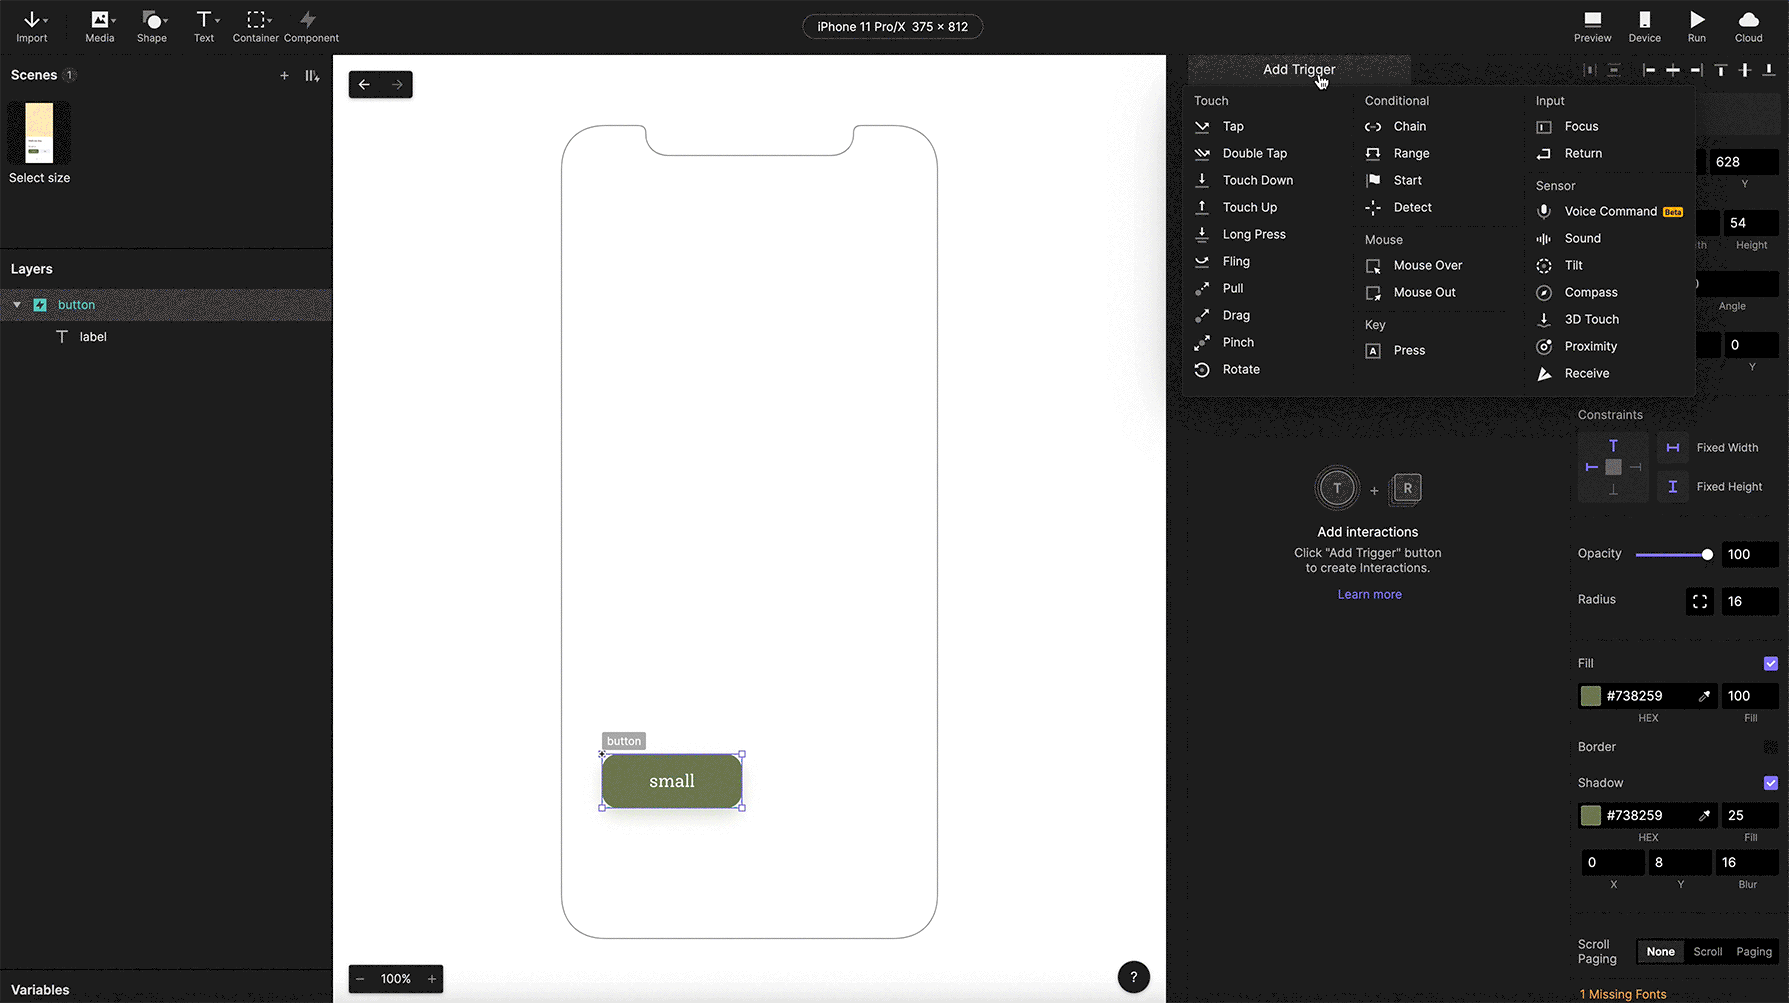
Our design has two buttons to pick the size of a dog. Creating a component makes it easier to set the custom behavior of your elements. To do this, select the button layer and click on the component icon in the top toolbar.

Creating components in ProtoPie Studio.
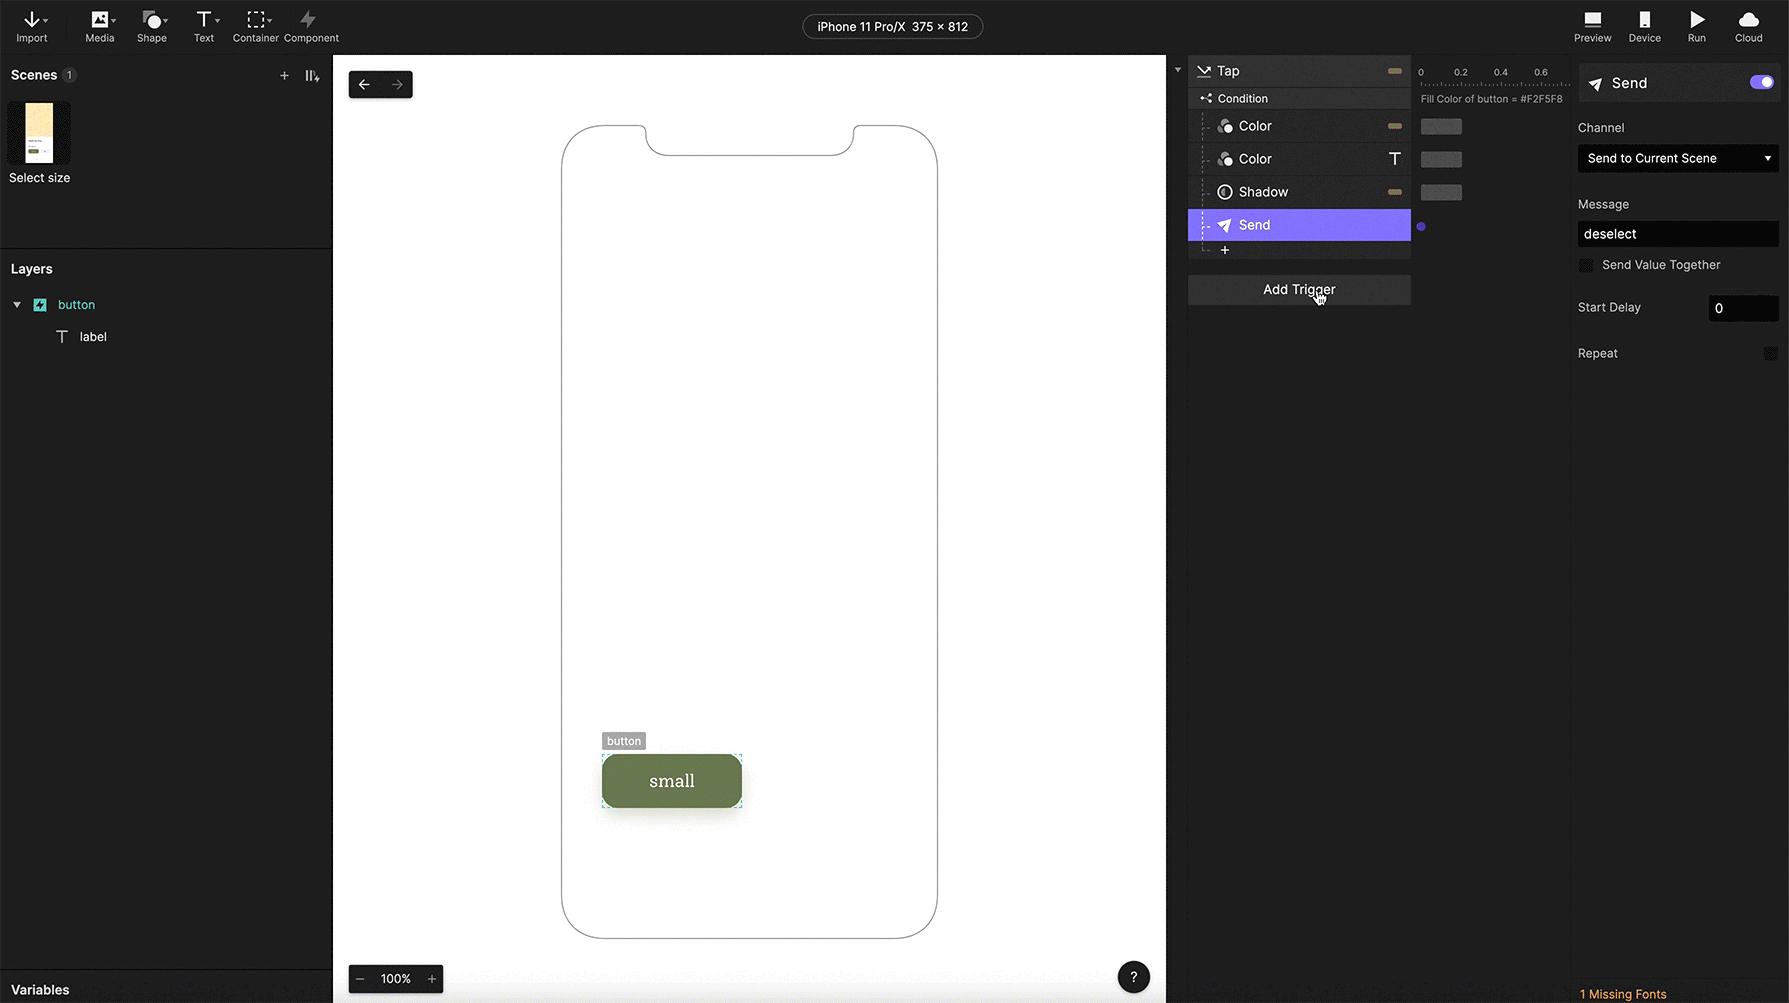
Selecting one button from the set deselects the other. To achieve this, you can use the Send response and the Receive trigger inside the component.
Add a Tap trigger to the button with a condition checking for the background color. When it’s grey, it means that the button is being selected. Change the background to green, the font color to white and show a drop shadow. Send the message to the current scene to deselect the other button.
Adding conditions and the Send response to the component.
Next, add the Receive trigger with the “deselect” message. When your component receives this message, the button will no longer be in the selected state. Then, change the styling to the deselected grey button.
You will notice that the logic here is a bit off for now. This is because both actions happen simultaneously. To make it work, add a 0.01 delay to the styling responses inside your condition.
Setting the Receive trigger.
Import the Lottie files
Once the buttons are set up, you can add your Lottie. Go to Media/Lottie and choose your .json files. Make sure to select the “Play automatically” and “Looping” options at the bottom of the right panel.
Importing Lottie files into ProtoPie.
Set Tap triggers
Lastly, connect the buttons with your animated characters. With the Tap trigger, you can move one animation out of the viewport and bring the other one into the view. Adjust the easing and duration of your microinteraction to your liking.

Adding Tap triggers to buttons.
4. The final prototype
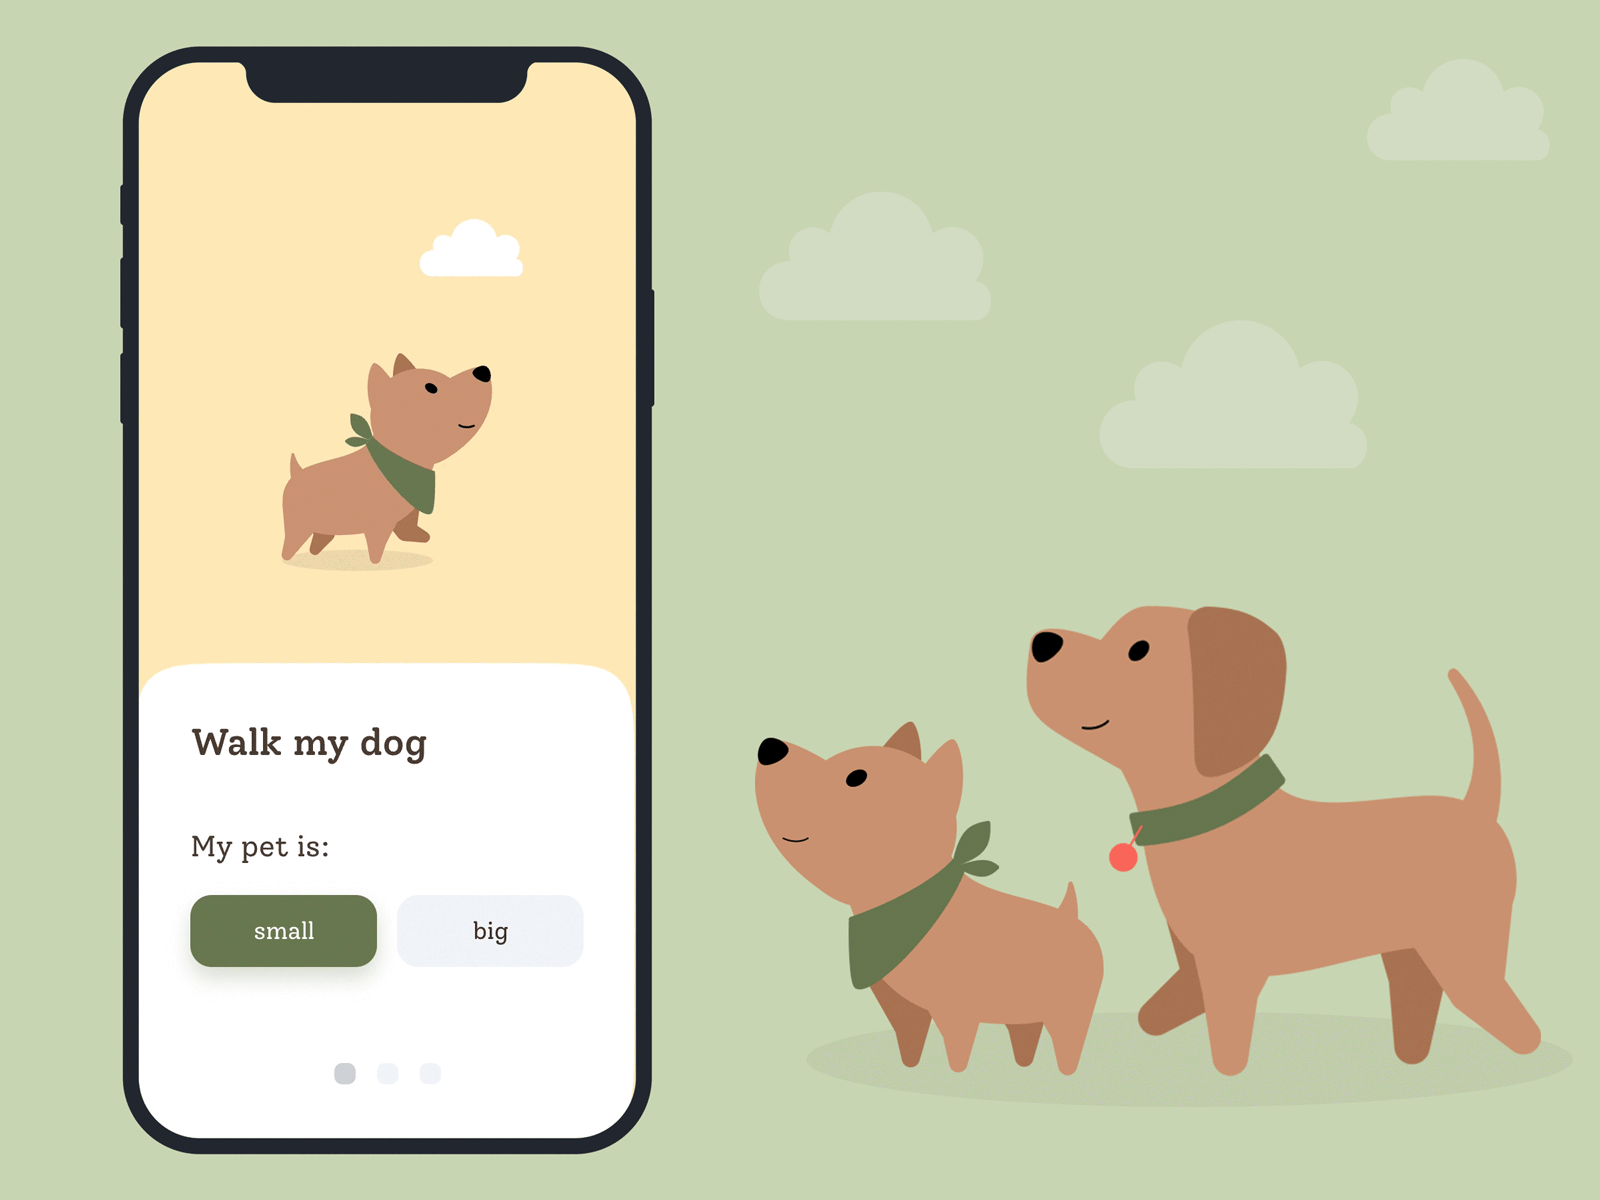
The finished microinteraction.
Check out the clickable prototype here.
ProtoPie helps designers bring their ideas to life in the form of high-fidelity interactive prototypes. Start building your own ultra-high-fidelity prototype without writing a single line of code today.


