

In Part 1 of the Variables lesson, we worked on a very simplistic demonstration of how variables work. Now let’s take this a step further.
What you’ll need
In order to follow along with this tutorial, download this sample pie and open it in Studio:
What you’ll learn
By the end of this tutorial, you’ll have learned:
The difference between “for this scene” and “for all scenes” when creating a variable
How to troubleshoot when things don’t work as you expect
Limitations of using variables
Time to complete: ≤15 minutes
Using the variable in another scene
Instead of just displaying the name when the user clicks Next, let’s Jump to the next scene, and give the user a proper greeting instead. Open the Pie file from your last saved progress.
Change the behavior of the Tap trigger. Remove the Text Response (click it and press Delete on your keyboard) and then add a Jump Response.
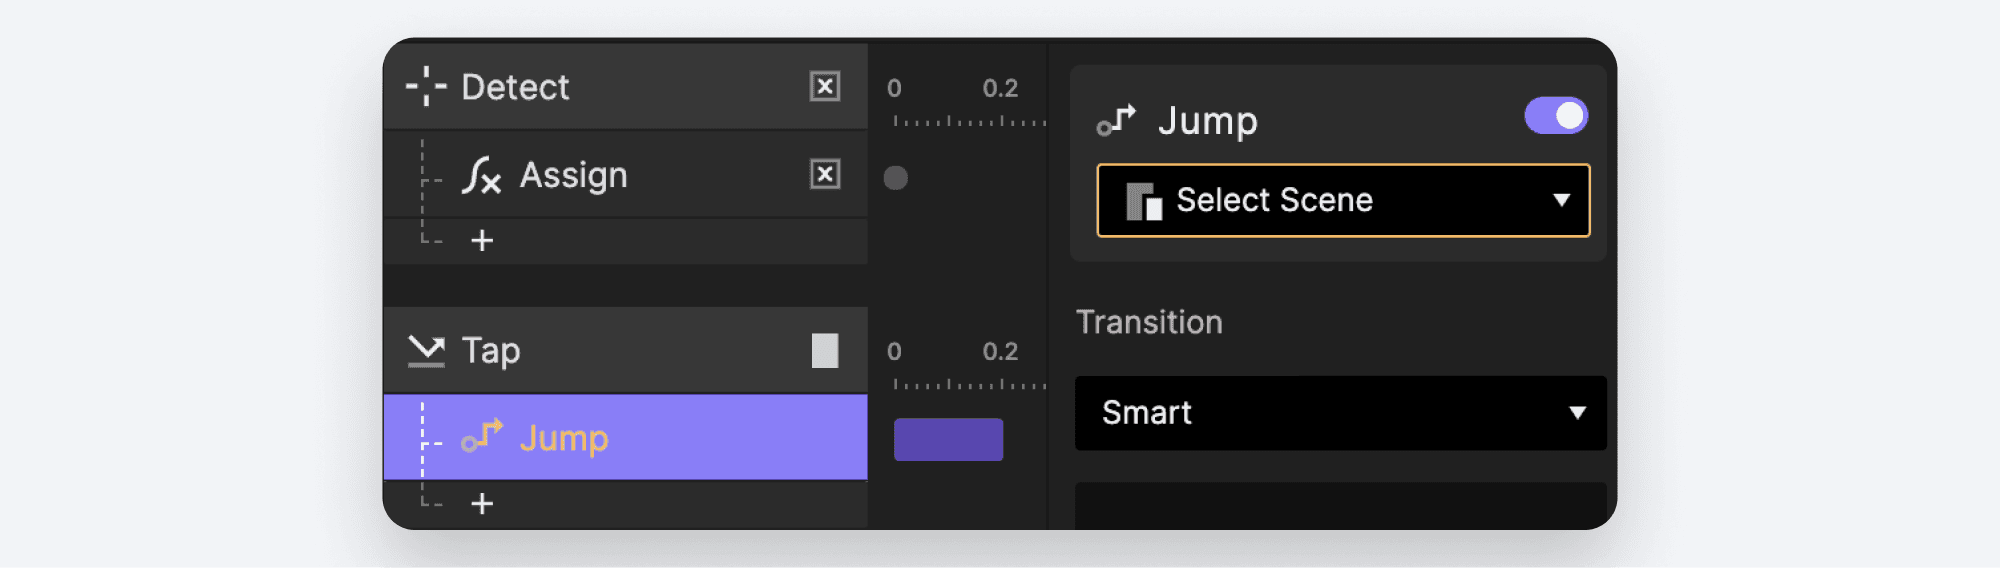
Choose the scene named protopie_welcome and configure the Jump with whichever transition you prefer. Why not try the brand new and fantastic Smart Jump transition? (See more examples
.)
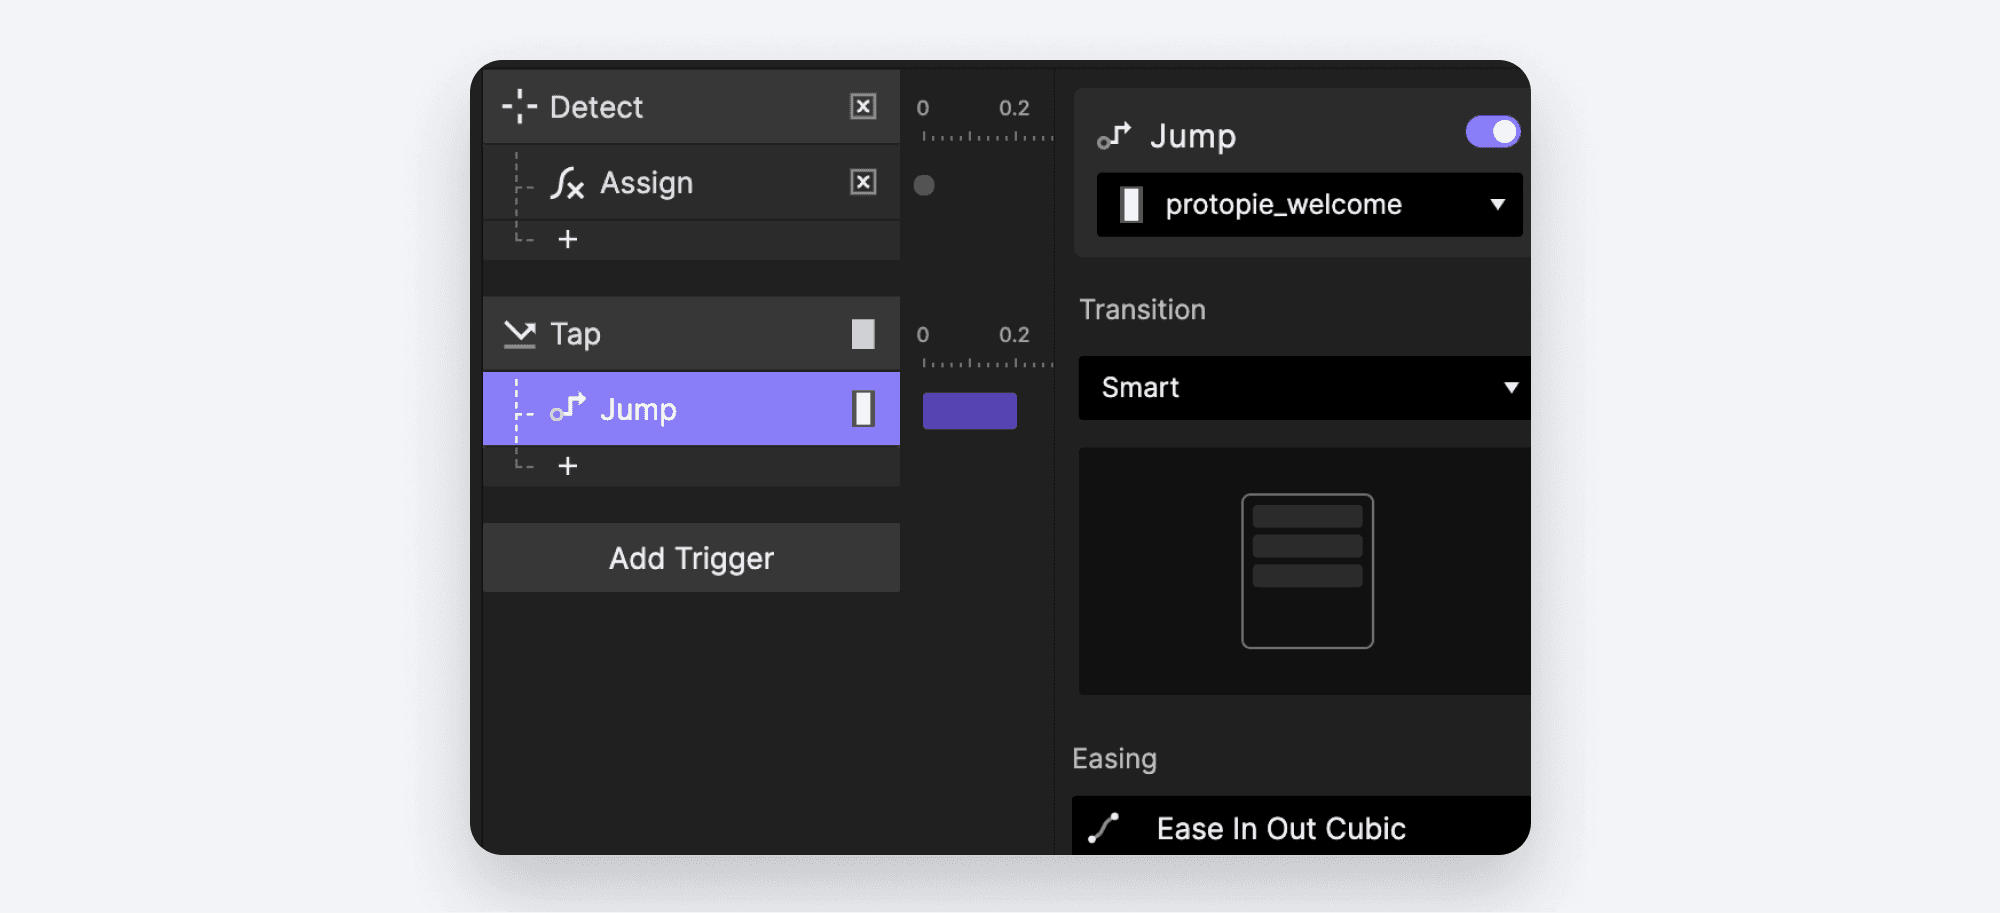
Click the protopie_welcome scene in the scenes palette to open it for editing.

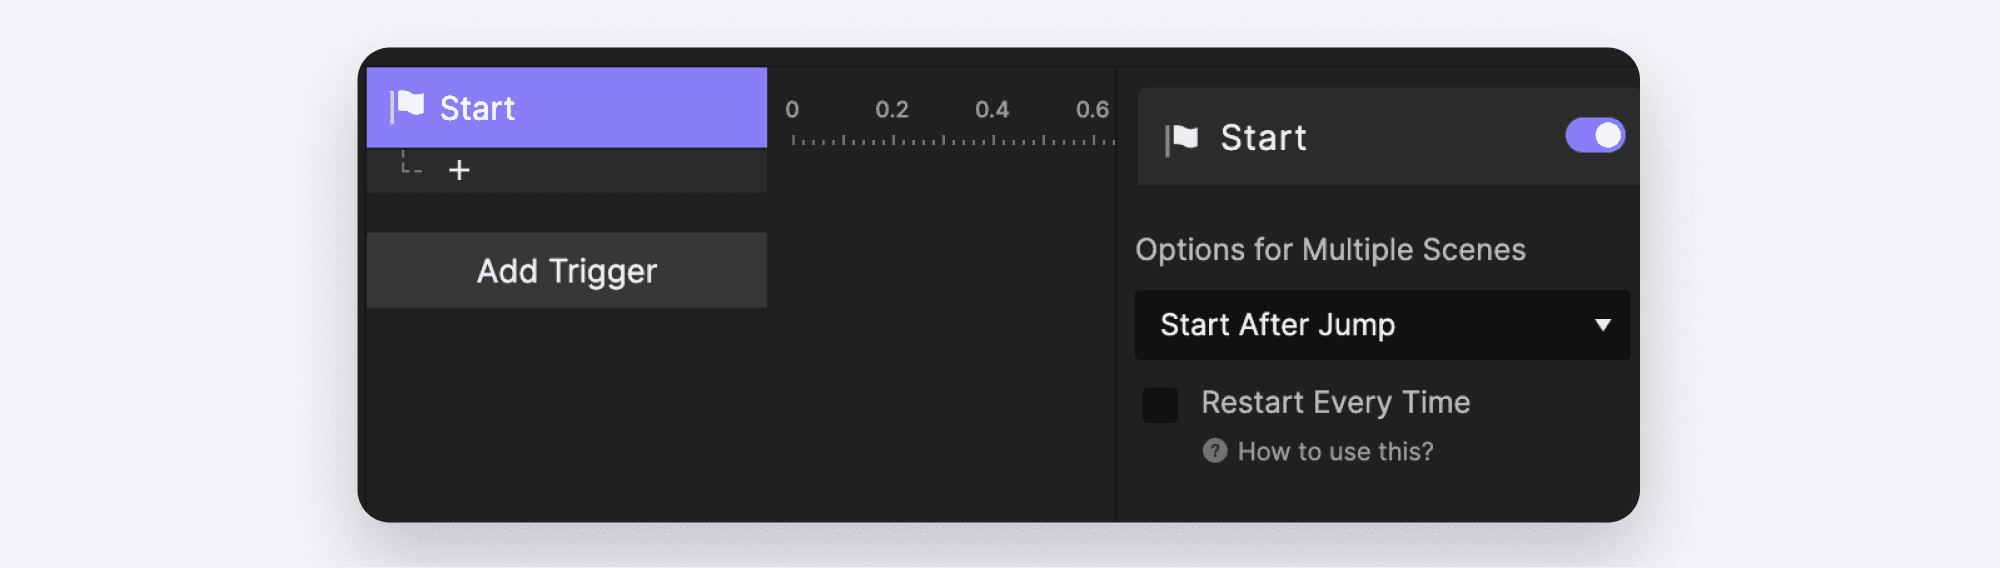
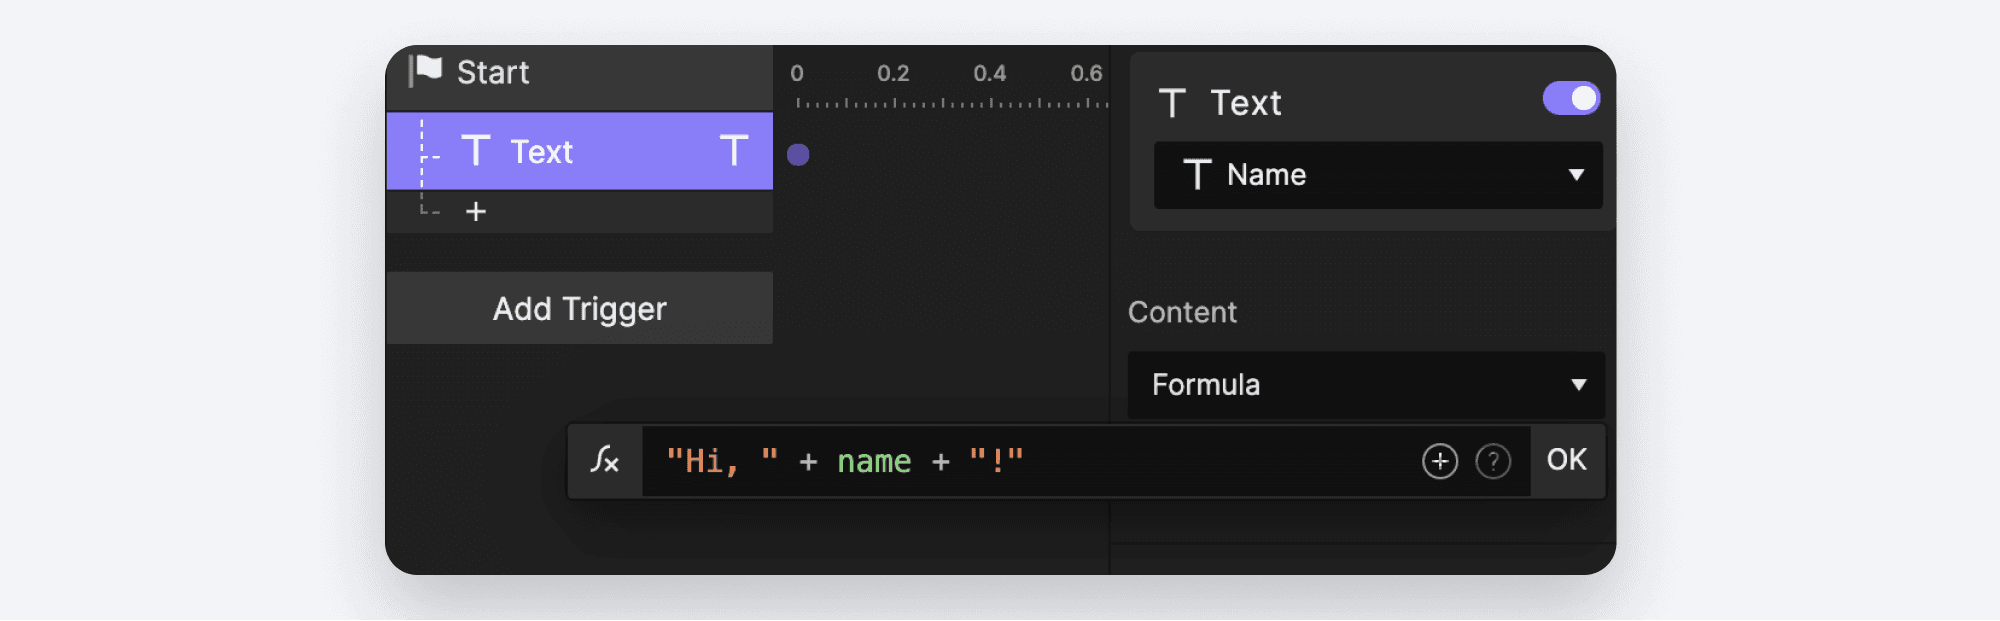
We want this screen to greet the user by name when the scene starts. Add a Start Trigger.
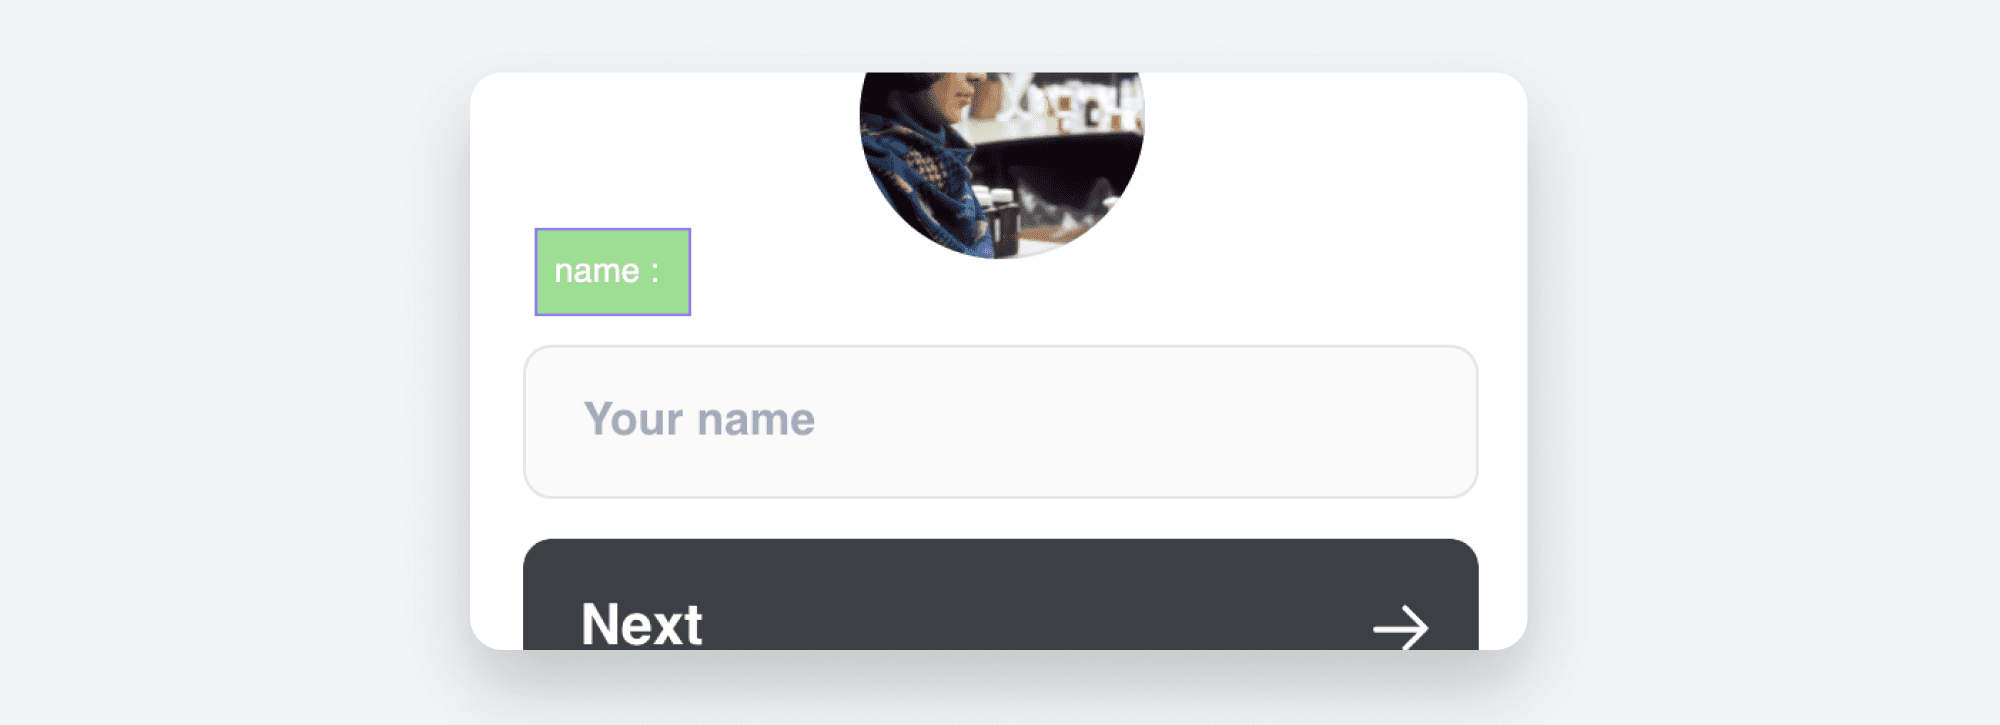
Add a Text Response to the layer called Name. Under Content, choose Formula. Click the box underneath Formula to reveal to ∫x icon and expand the Formula entry box.
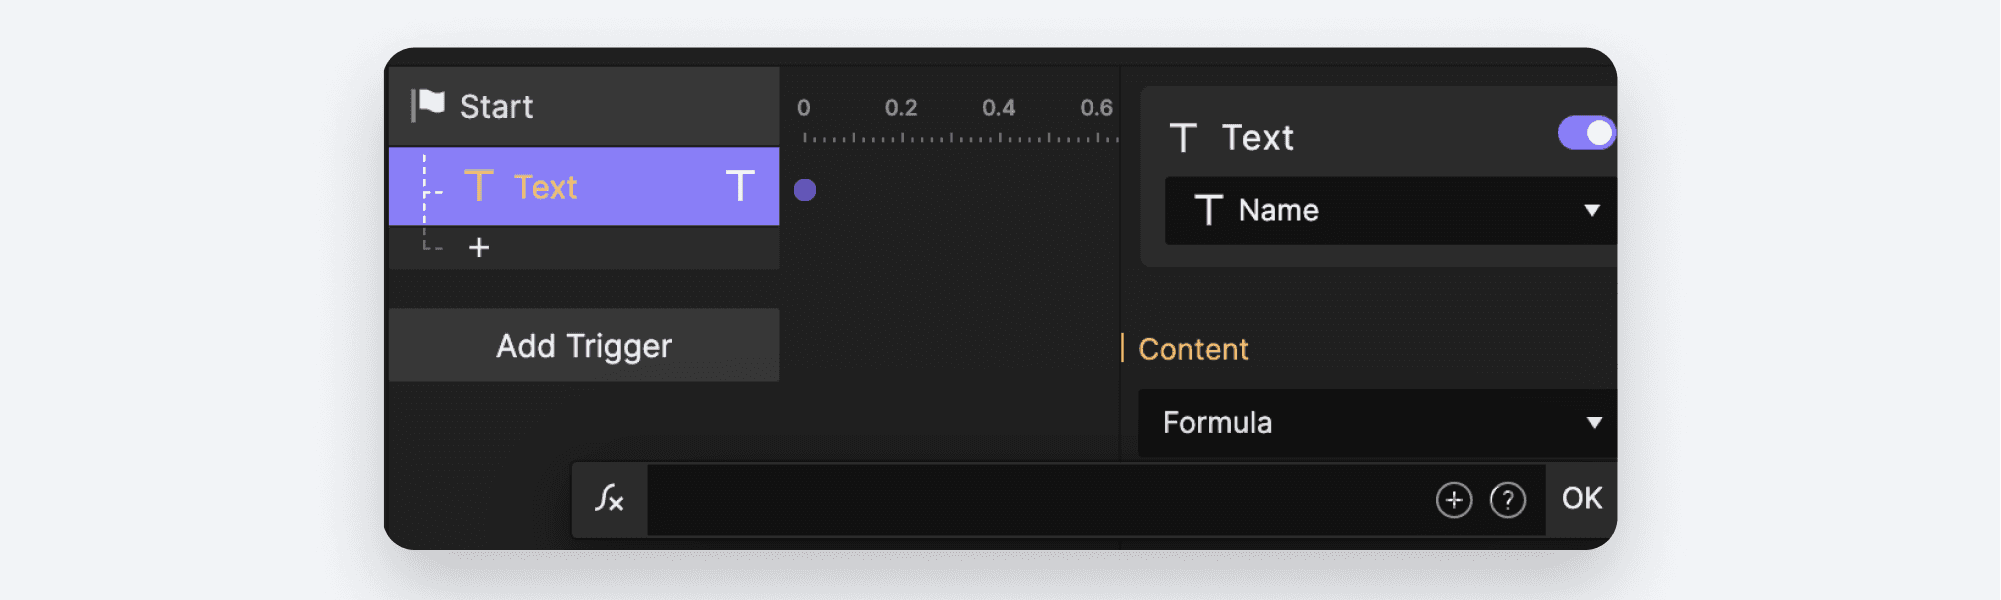
Type
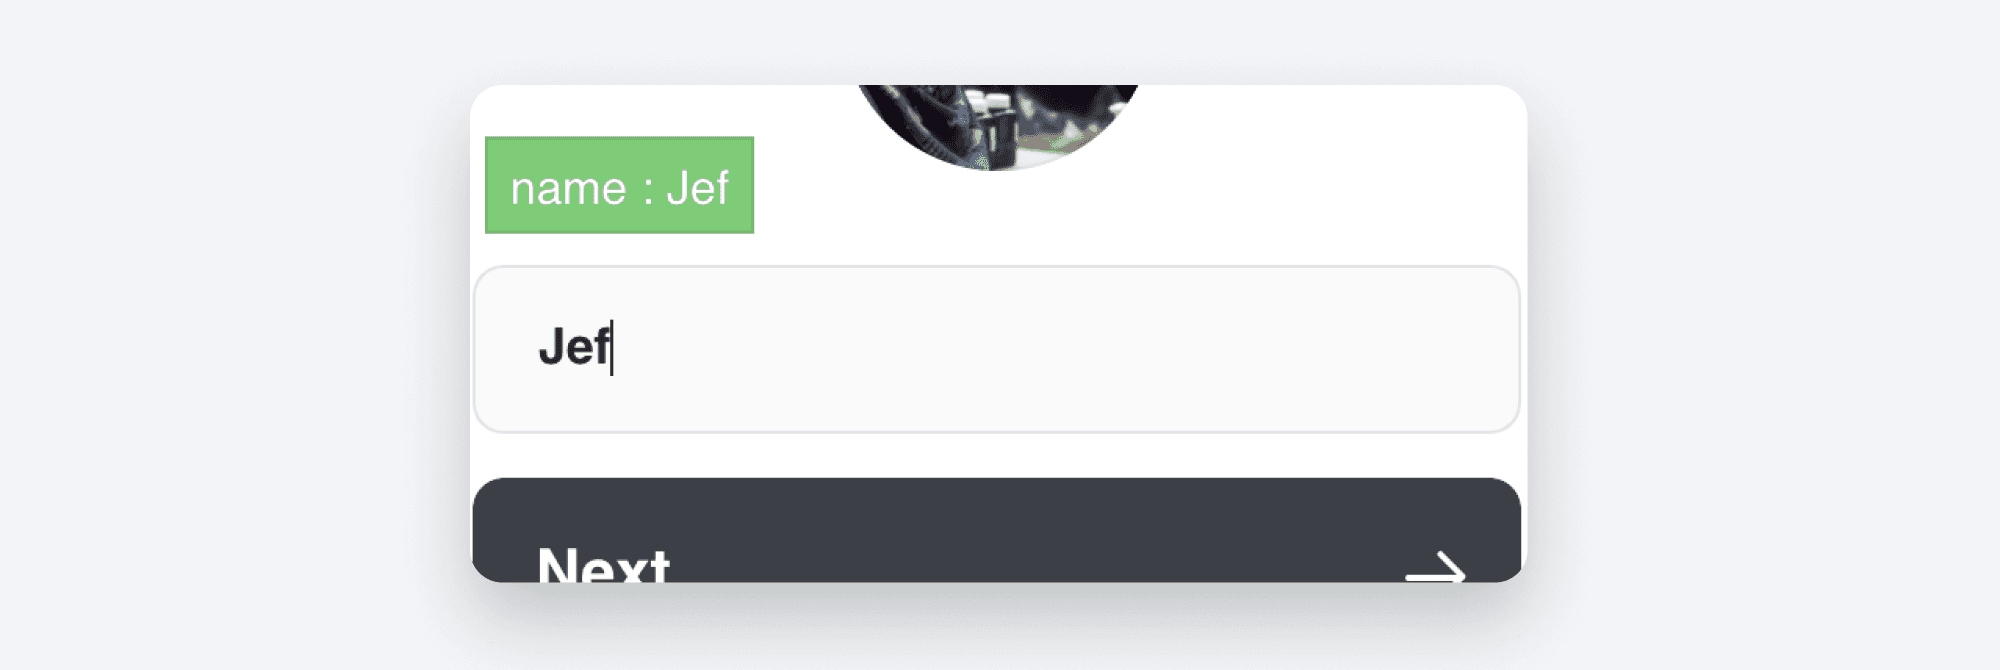
"Hi, " + name + "!"into the Formula box. You can insert variables using the same techniques we explored in the last lesson.
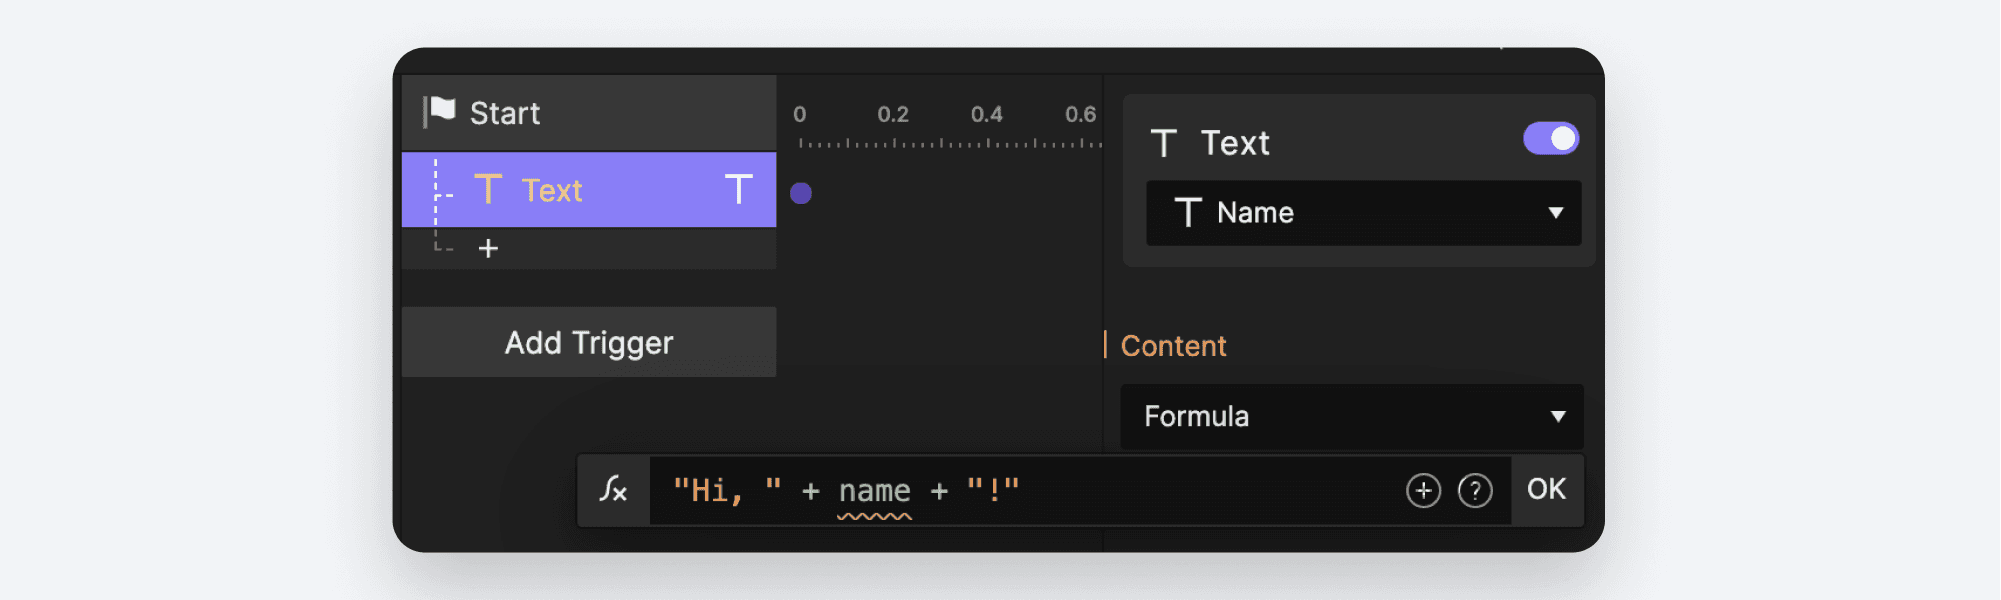
Notice how ProtoPie has underlined the word “name” with a red zigzag? This is because ProtoPie can’t find a variable called “name” available to this scene. The red zigzag is a really helpful tool when working with variables and formulas. This is your first indication that something needs fixing.
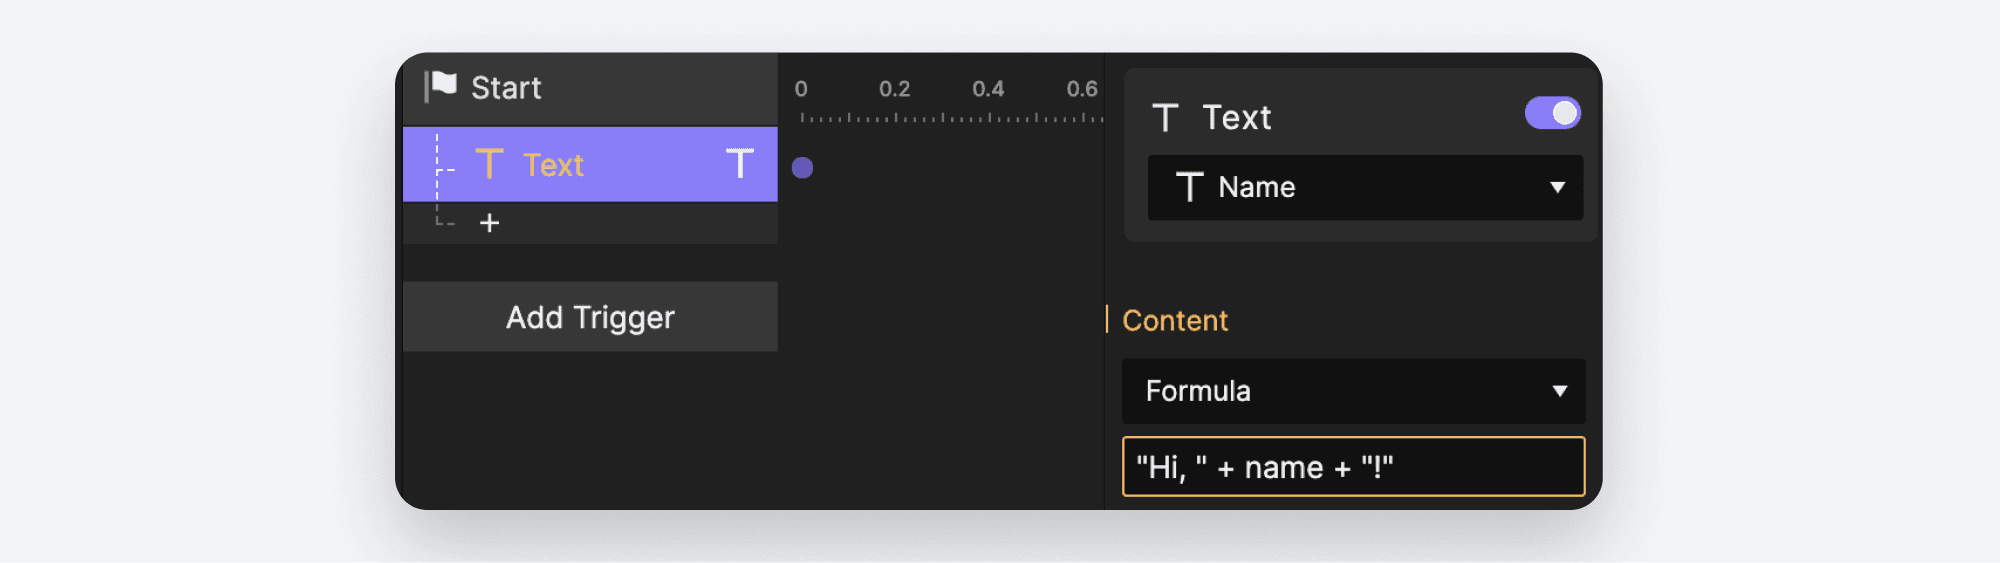
As you’ll soon see, our problem is elsewhere. So for now click OK to commit your formula. ProtoPie continues to highlight your Formula in amber to indicate there is a problem that needs fixing.
If you recall, in our first example we created a new variable and selected For This Scene.
This meant that the variable we created is only available to the scene in which we created it. We’d like to be able to re-use our variable across multiple scenes. So we should have chosen For All Scenes when we created our variable.
Let’s go back and fix that.
Click the input Scene in the Scenes panel to open it for editing. Then, click the name variable in the Variables panel in the bottom left. You’ll notice that there is no way to change the variable to a For All Scenes variable. You can only choose this option when creating the variable. We need to delete our variable and recreate it.
Click the
+control to create a new variable. This time pick **For All Scenes. **Once again rename the newly created variable to name.
💡 Pro-tip: Re-use the exact same name as you had before. Otherwise any Triggers and Responses that use the variable will be broken.
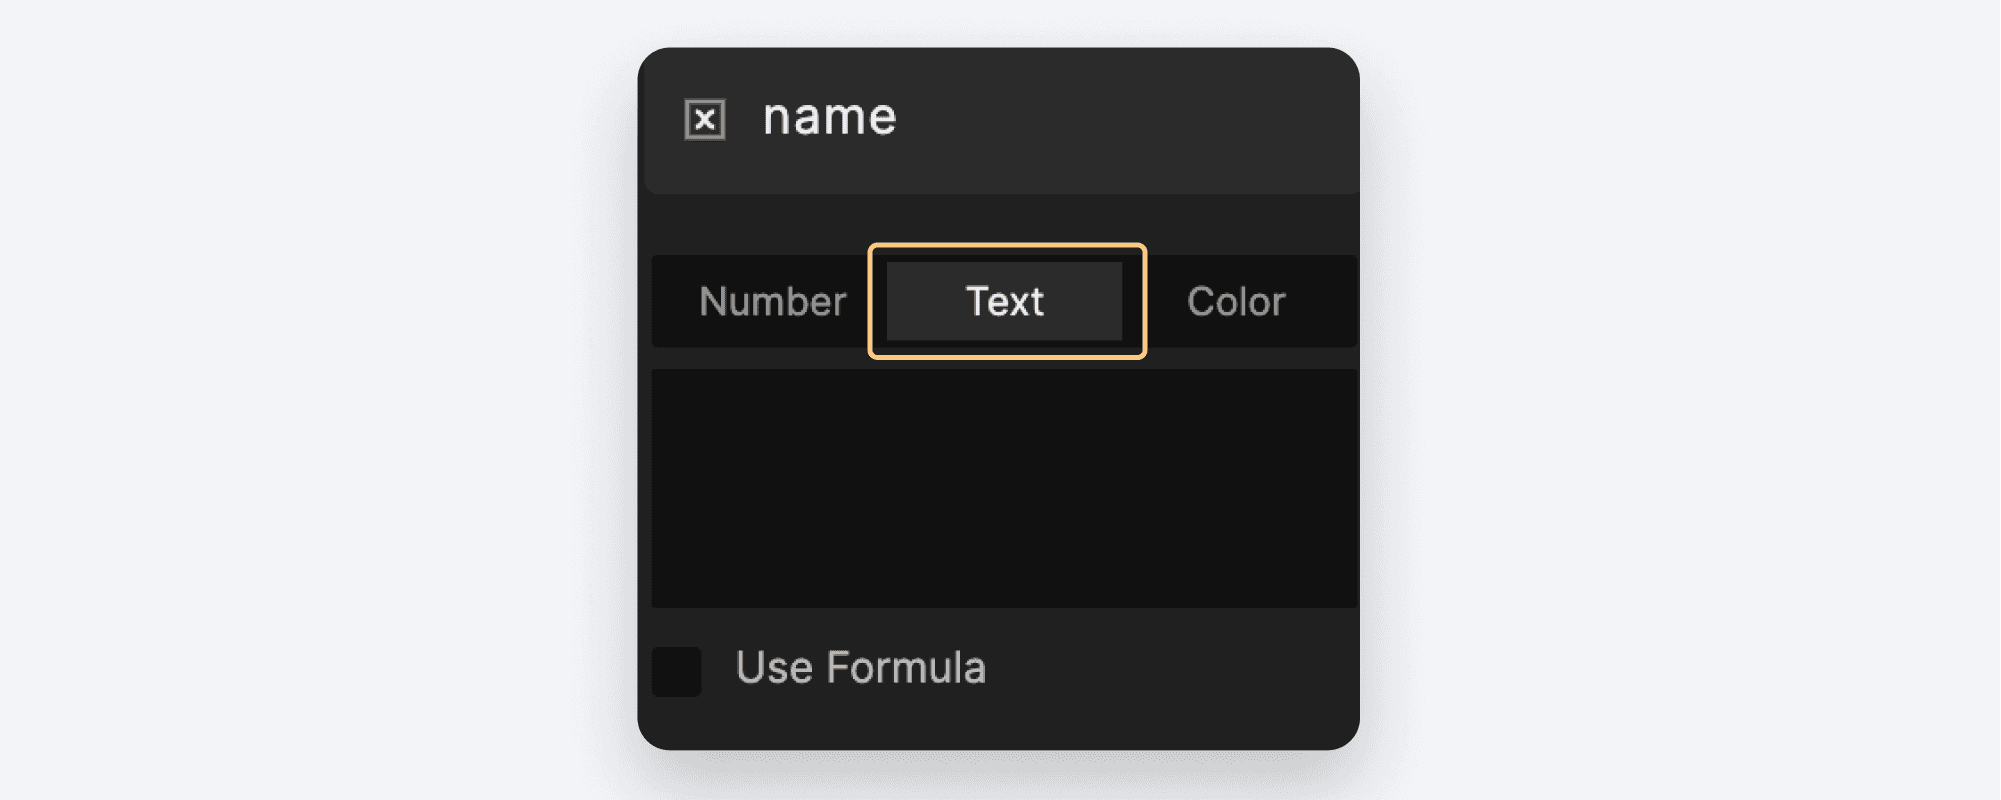
Configure the variable to be a Text type on the top right.
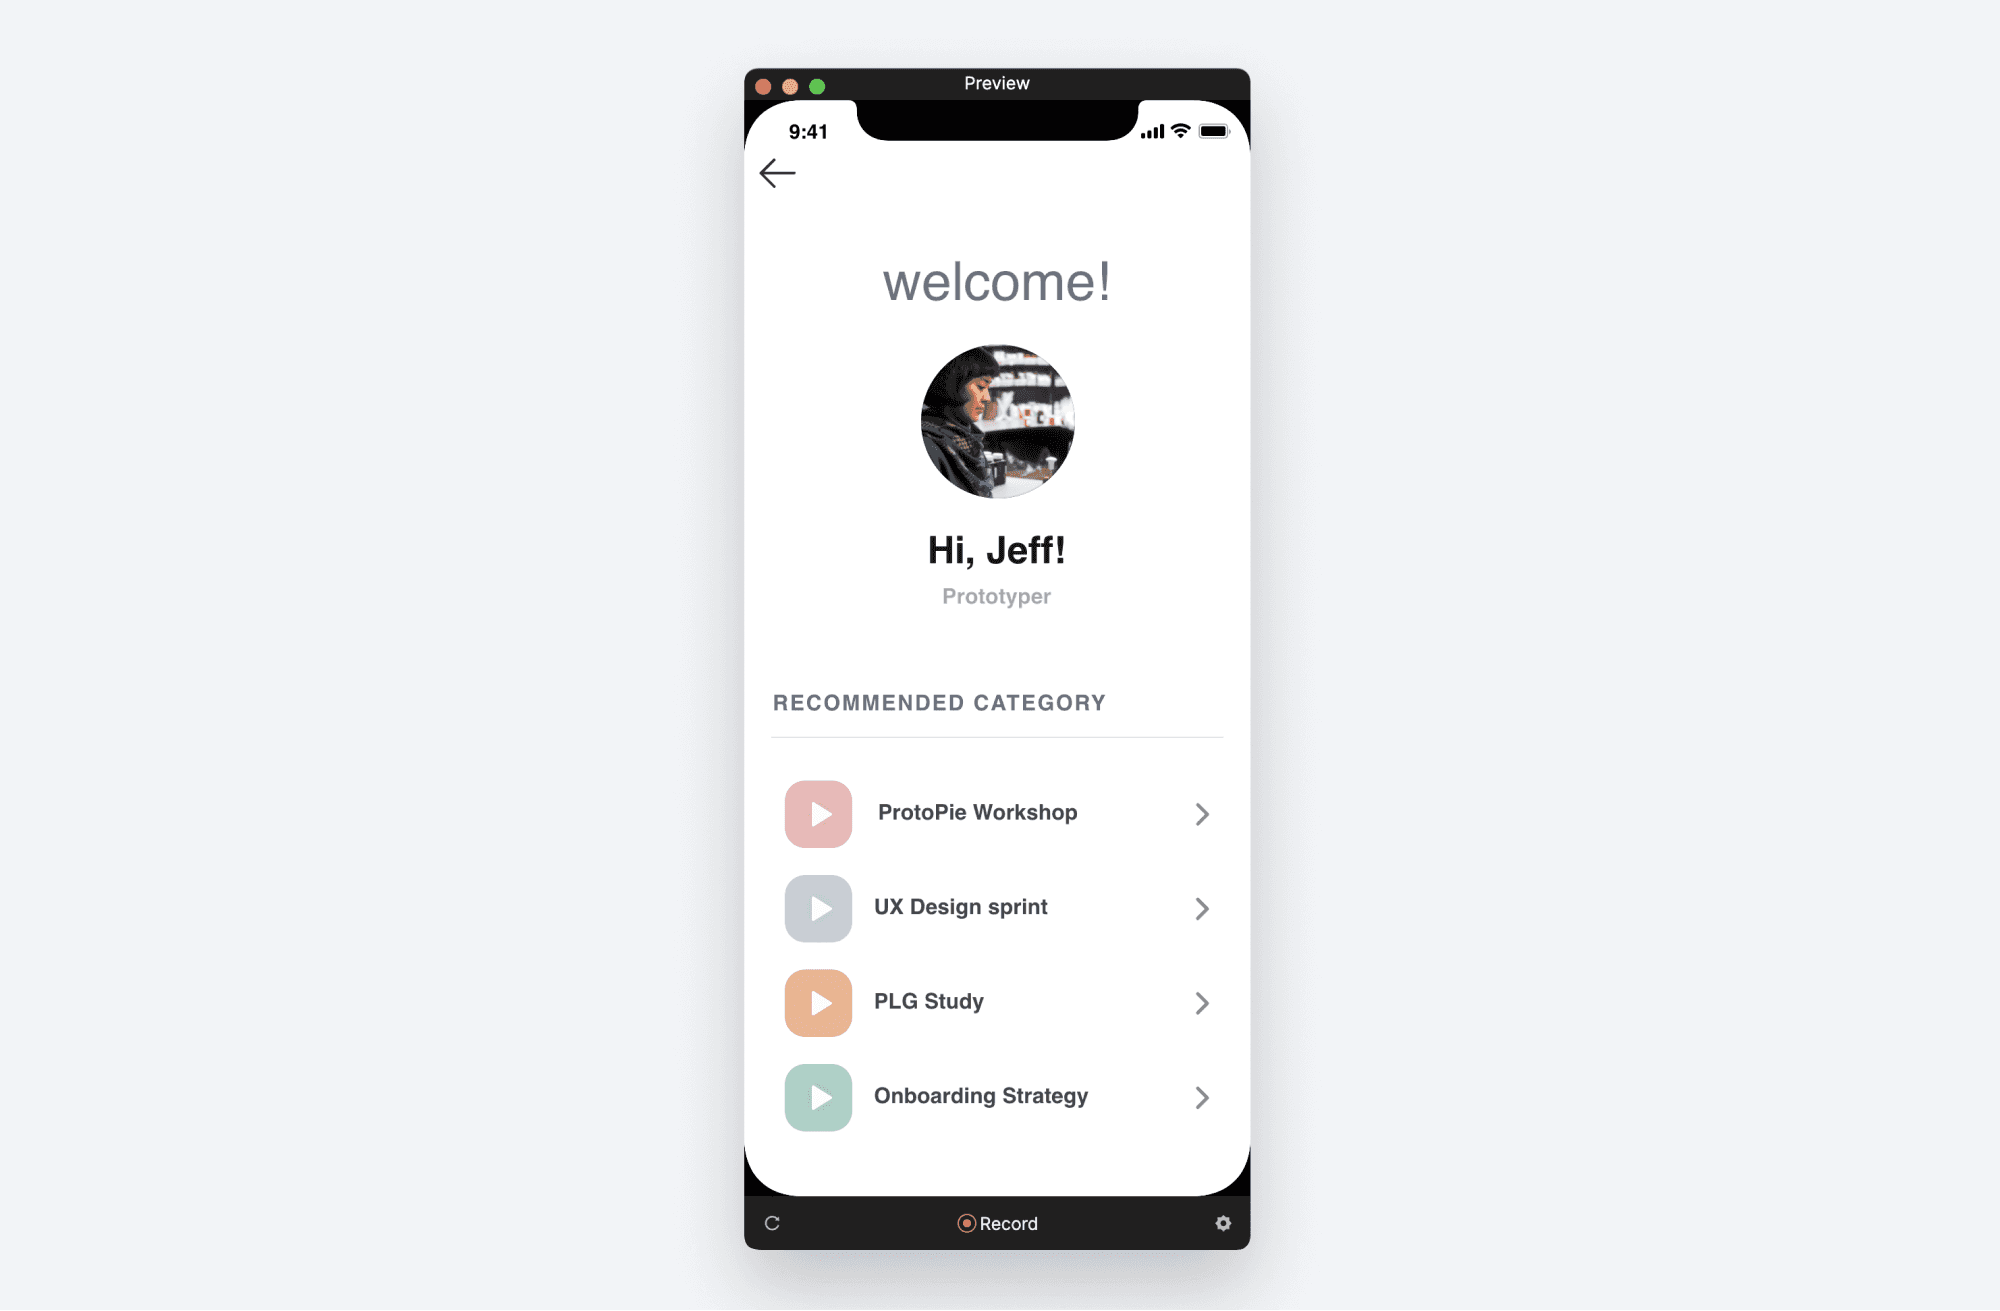
That should be all we need to do in order to make this work. Let’s preview our work again. Enter a name and tap Next. You should be greeted in the subsequent scene by name.
Troubleshooting
What if this isn’t working as above? Here are some steps you can take to try and pinpoint your issue.
Look for the amber highlight on Triggers and Responses as well as the red zigzag underline in your Formulas. These are clear indications that something needs fixing.

In this case, I’ve misspelt the name of my variable. ProtoPie underlines this because a variable named nme can’t be found.
Verify your variable is set to be used for all scenes. The icon beside the variable name is solid for
all-scenevariables, and outlined forthis-scenevariables. Alsoall-scenevariables will appear in the variables panel on all Scenes, whilethis-scenevariables will only appear in the Scene in which it was created.

If you’re not seeing the value you expected for your variable, you can turn on its debug feature. When you hover over the variable in the variables palette, a ladybug icon appears to its right. Click that and a green box will appear in your scene (click it again to turn it off). When you preview your Pie, this will show the current value of the variable.

You can drag the green debug box around your scene and position it somewhere convenient.
When you preview you should see that value of your variable update as you type.
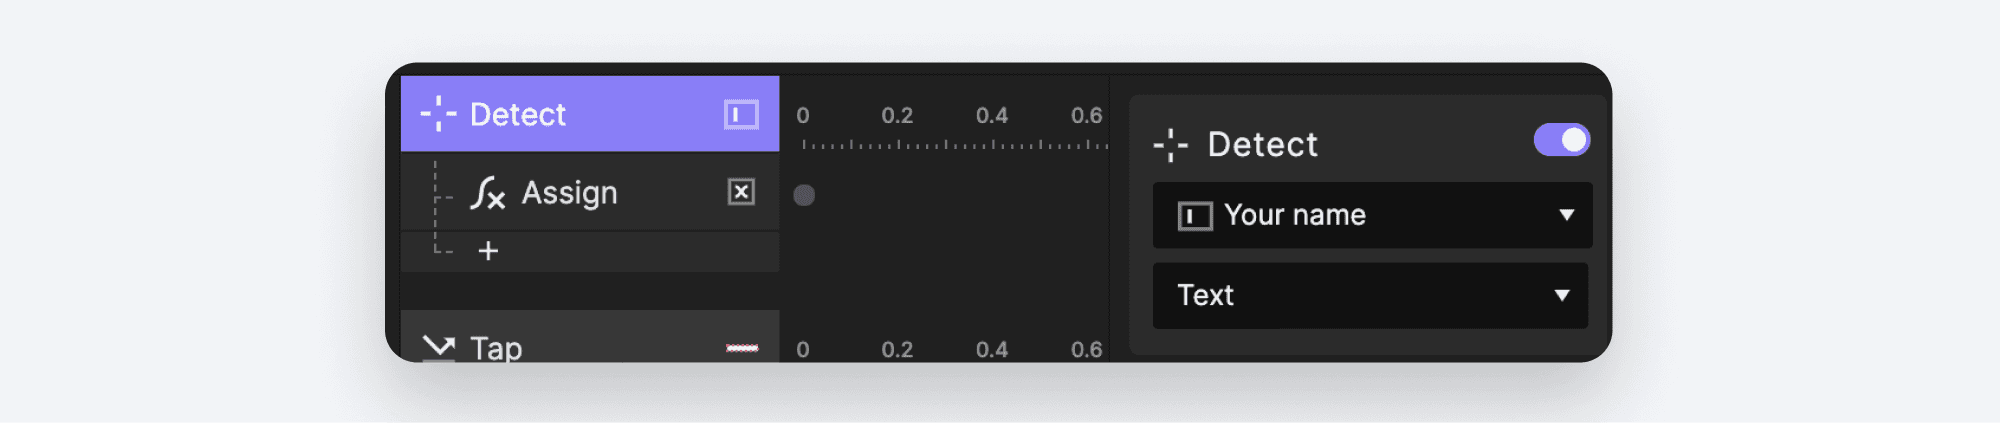
If the variable is not updating, check the Detect Trigger in the first Scene to ensure it is set to the text property of the Your name text layer.
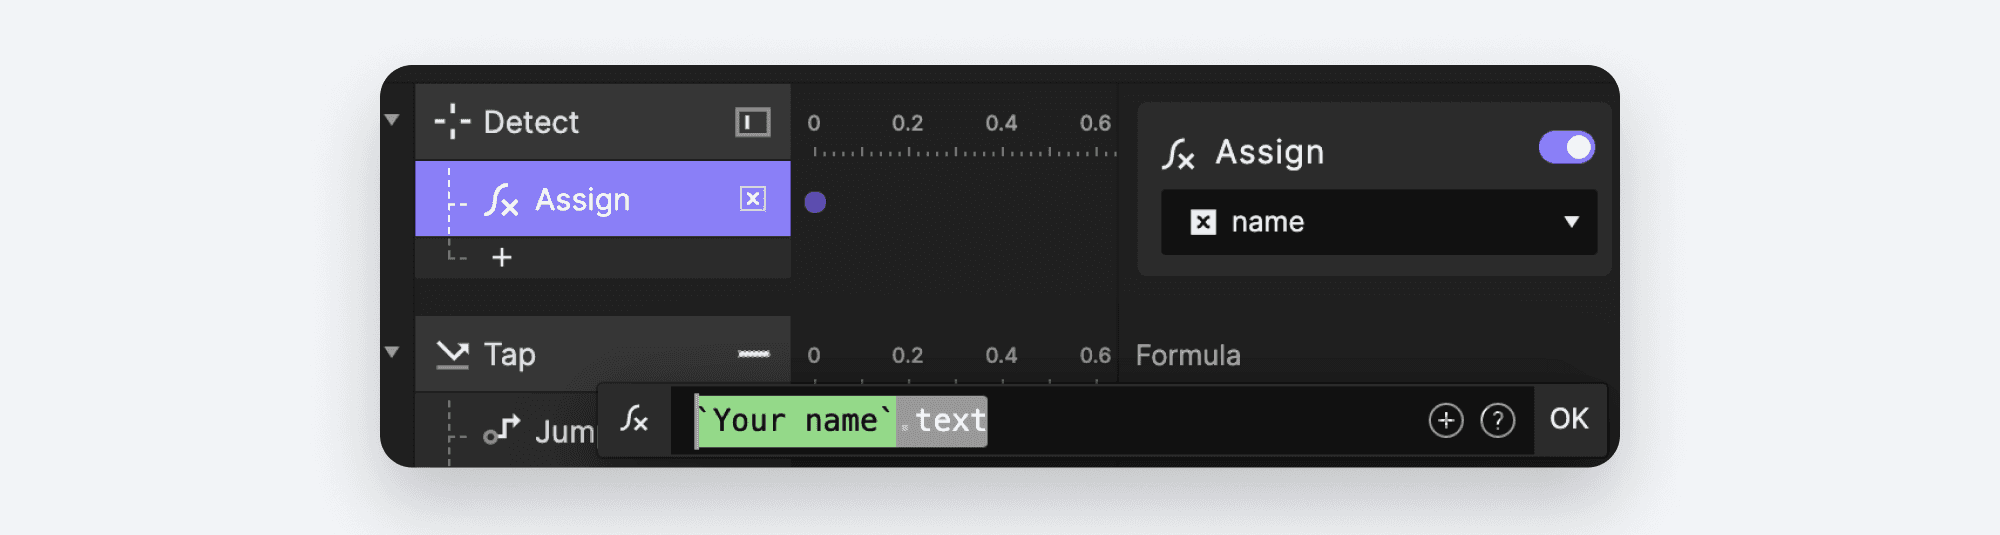
Also check the Assign Response to ensure it is configured as follows:
If all of the above is working, let’s switch to the
second sceneand make sure were are using our variable properly. You should have a Start Trigger with a Text Response configured as follows:
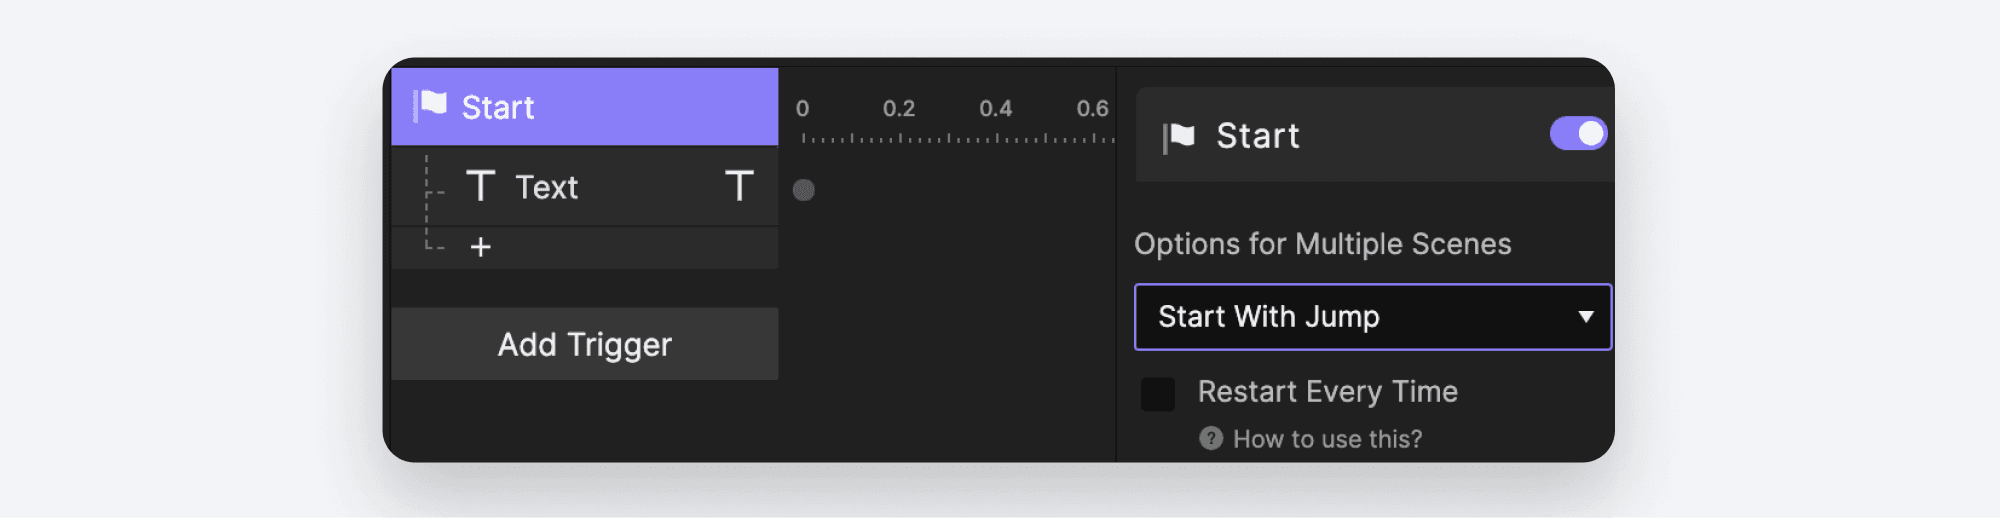
If you’re using an animated transition between the two scenes, you may notice a very short delay before you see the greeting reflected in the second scene. If you do, then take a look at the Start Trigger in the protopie_welcome Scene. If Options for Multiple Scenes is set to Start After Jump, change this to Start With Jump. This will make your Responses under the Start Trigger fire when the transition animation starts instead of after it completes.
Limitations on using variables
There are certain considerations you need to be aware of when using variables.
We already talked about setting the correct type. You will get unexpected results if the type is incompatible with the information you are trying to store in it.
We also talked about the importance of setting whether the variable is available for just one scene or for all scenes. As you cannot change this later, it’s important to know ahead of time how you plan to use your variable. If in doubt choose “For All Scenes” as this gives you the most flexibility.
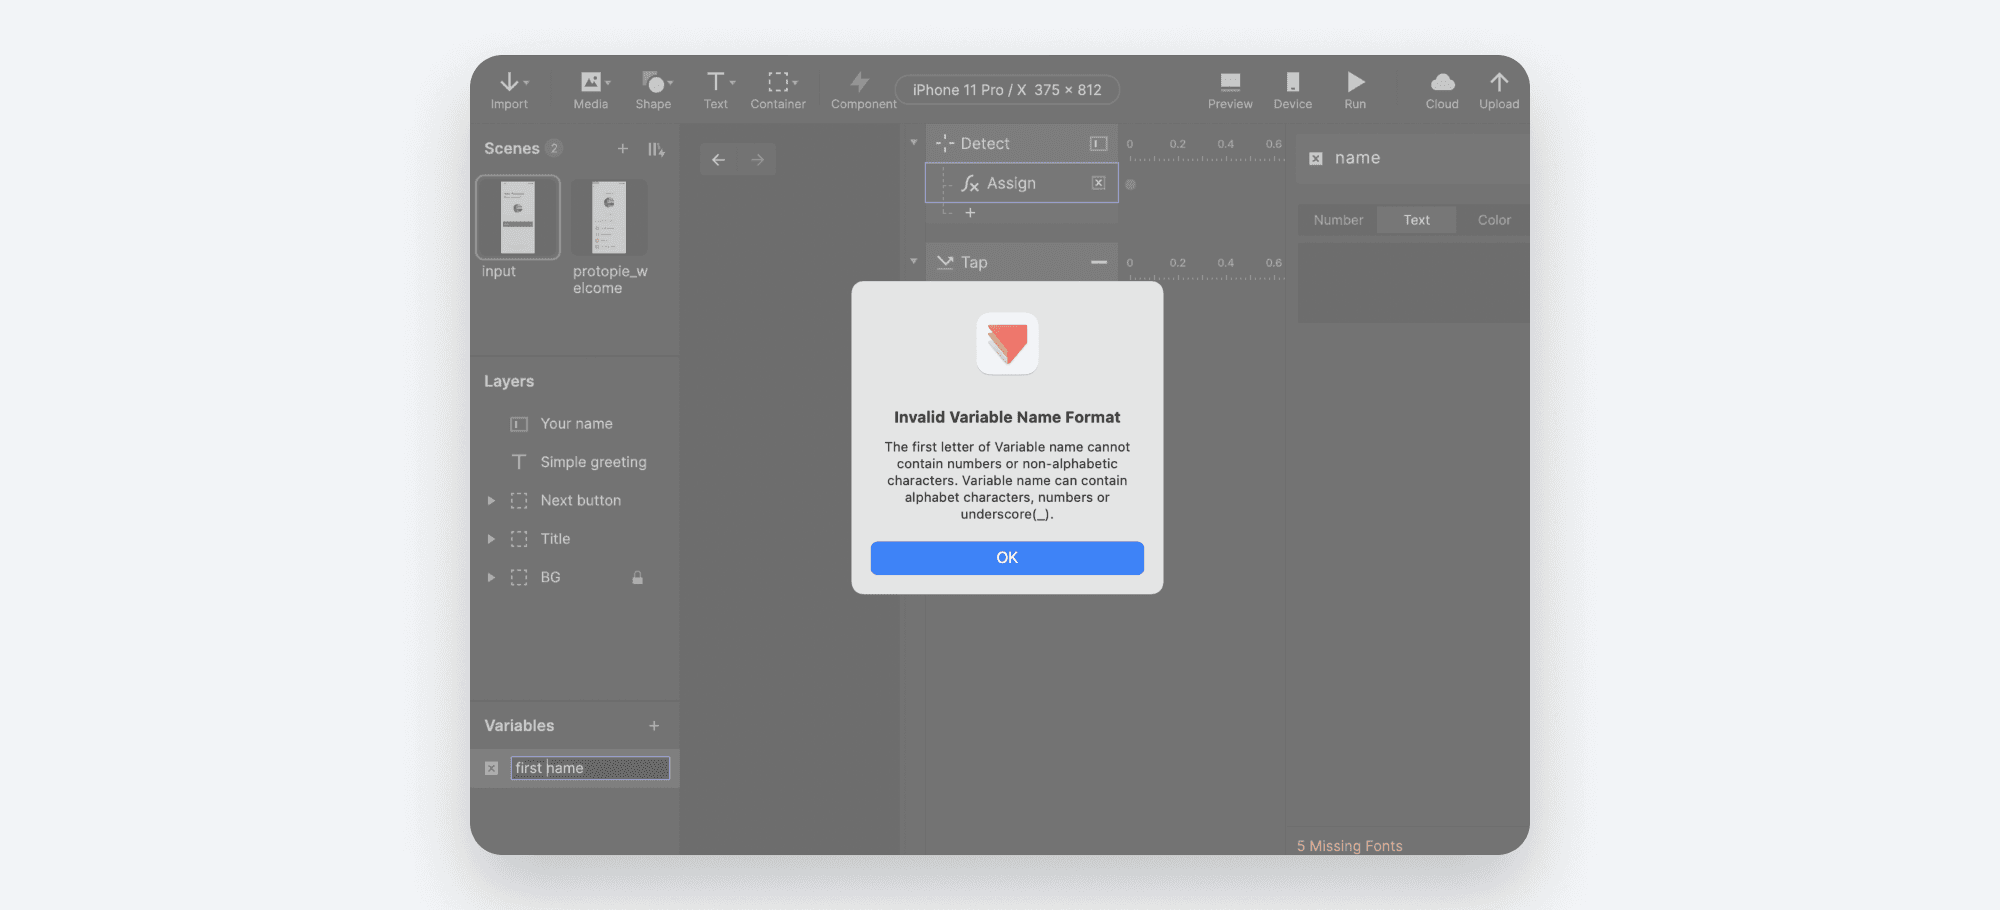
Variables cannot have spaces in their names. If you’ve got programming experience this may be obvious to you, but for the rest if us this is an important detail. ProtoPie will warn you if you try to give your variable an invalid name.
If you wish to use multiple words in your variable names to make then more descriptive, there are a couple of popular conventions you can use.
Separate multiple words with the underscore
-character. E.g.,first_name,shoe_lace_color. This is sometimes called snake case or pothole case.Capitalize the first letter of additional words. E.g.,
firstName,shoeLaceColor. This is commonly known as camel case.
“Easy as “ + type_of_pie + “ Pie!”
Now you know how to use variables to store a bit of information in your Pie. You’ve also learned how to use a variable across multiple scenes, and you’ve learned some valuable troubleshooting techniques to use when things don’t work as you expect.
Resources
In this tutorial video, you'll learn about the built-in variables available in ProtoPie such as $touchX, $touchY and how you can use them in your prototypes.
In this tutorial video, learn how to store information in a variable in one scene, then retrieve it for use in another.
Design a Circular Slider Using Masks and Chain By controlling a knob, users are able to change the value on a circular slider and see changes in a corresponding percentage value.
How to Create a Looping Scroll Carousel for Desktop Web Learn how to create a looping scroll carousel for the desktop web using the scroll trigger, variables, and conditions.
Calculating Total Payable Amount in the Shopping Cart Using Component In this lesson, you will learn how to use the stepper component for calculating the total payable amount in an e-commerce app.


