
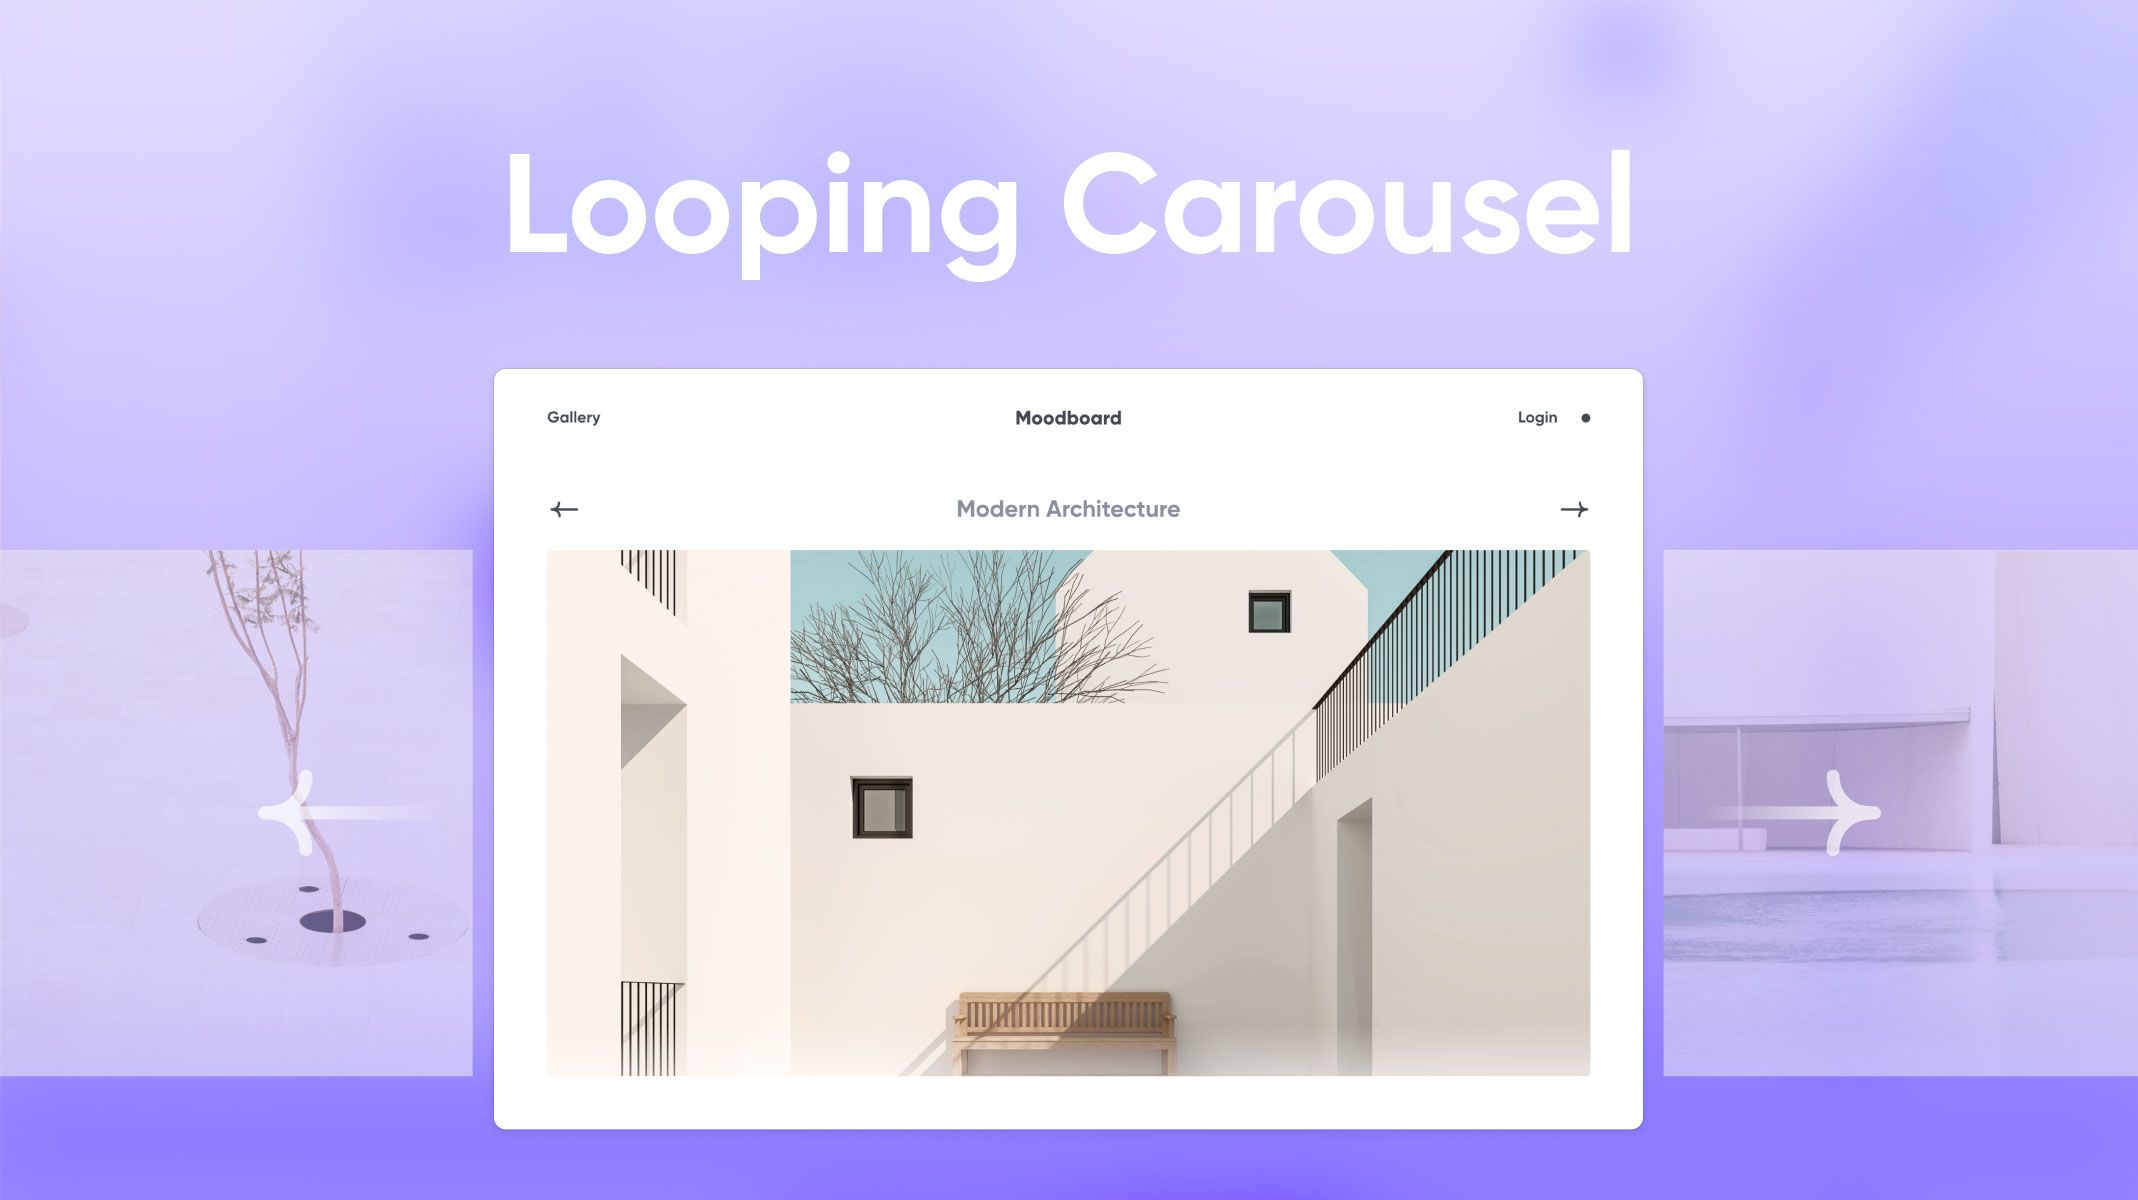
When we browse the internet, we can easily find websites with a looping scroll carousel. It is common practice to use it to showcase images or banners on the homepage. In this article, we'll learn how to prototype a looping scroll carousel for your website, which can be achieved using the scroll trigger, variables, and conditions.
Overview
What you will learn
Step by step: How to prototype a looping scroll carousel
1. Make a carousel view using the paging container.
2. Change image name based on the scroll offset
3. Make a looping scroll
Your carousel prototype is complete!
What you will learn
Prototype a carousel view using the Paging Container
Change image name based on the scroll offset (yay, variables!)
Make a looping scroll
In the end, you'll be able to make something like this!

[Starting Pie File] [Completed Pie File]
Step by step: How to prototype a looping scroll carousel
1. Make a carousel view using the paging container.
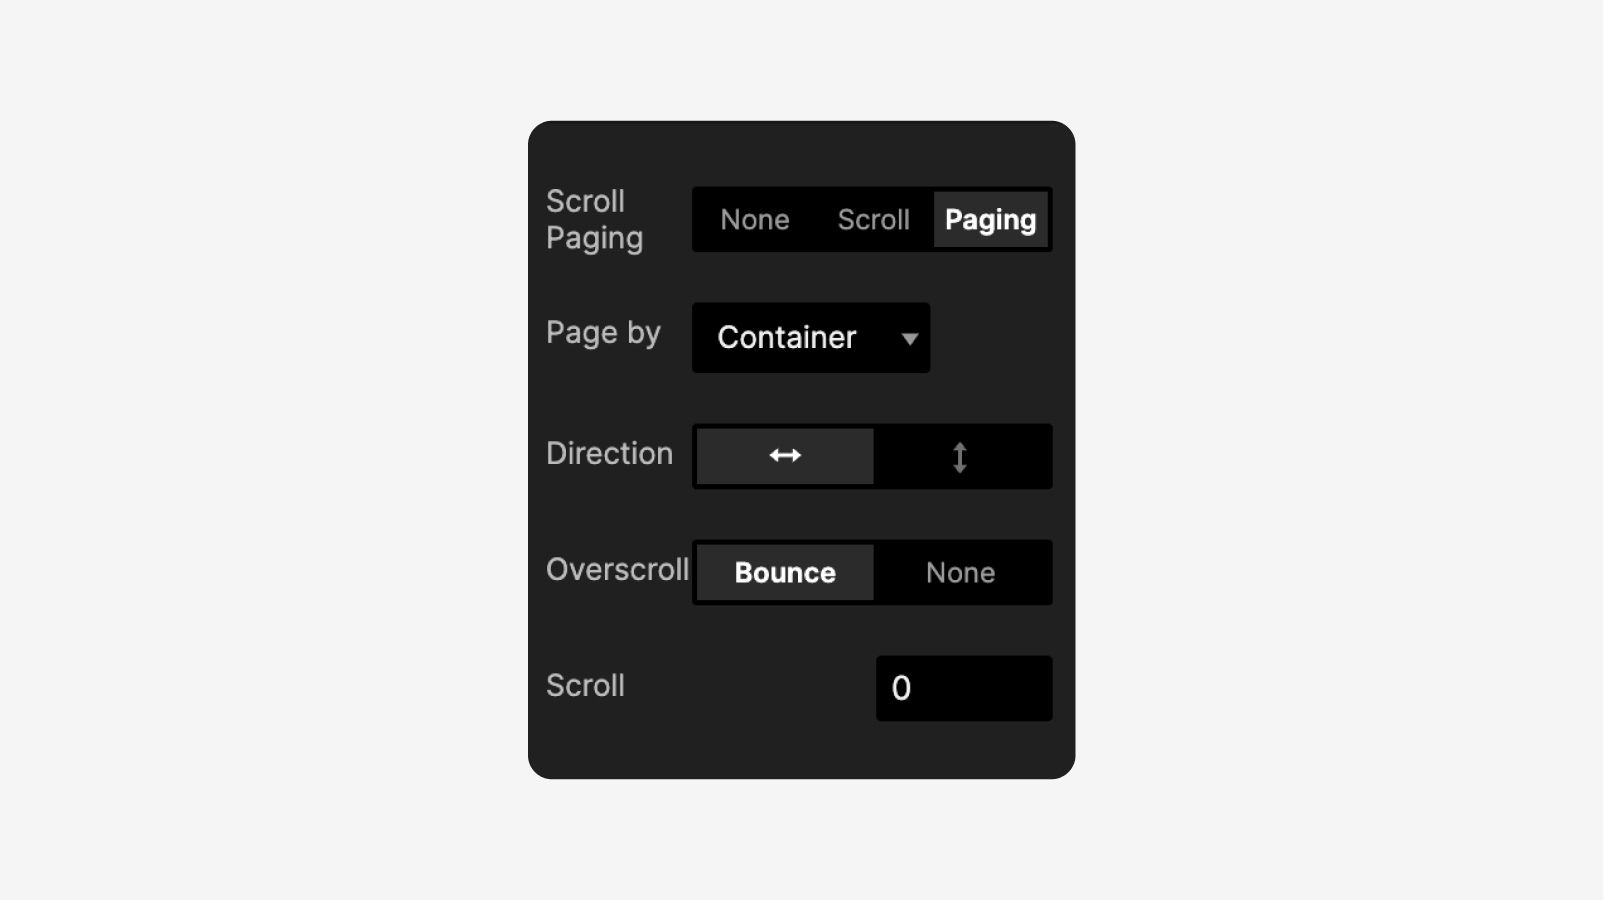
First, we need to group the images in a container. We need to use the paging property because we want the scrolling animation to "snap" to the image, unlike scroll, which is more flexible.
1.** Add a Paging Container** and set the width to be as wide as the screen and the height equal to the image height. Drag the elements that need to be scrolled into the container — IMG 1, IMG 2, and IMG 3.

2. In the Paging Container's property panel, set the scroll direction to** horizontal** because the images will move horizontally. Click on the left-right arrow. Let's rename this container to "Paging" so it's easier for us to refer to it.
3. If you want to disable the swiping interaction, you can set the height of the Paging Container to 0. The reason is that it is not natural to "swipe" using a mouse cursor. However, this is optional—if you feel like keeping the swipe interaction, feel free to do so!
4. If you decided to hide the swipe interaction, add a new container to clip the overflowing images. Set the width to be as wide as the screen and the height equal to the image height. Then, put the Paging Container to be inside the new container.
Go to the property panel on the right side, scroll down, and click on Clip Sublayers to hide the overflowing images. If you zoom out, you can see that the images that overflow on the left and right sides of the screen are now hidden.

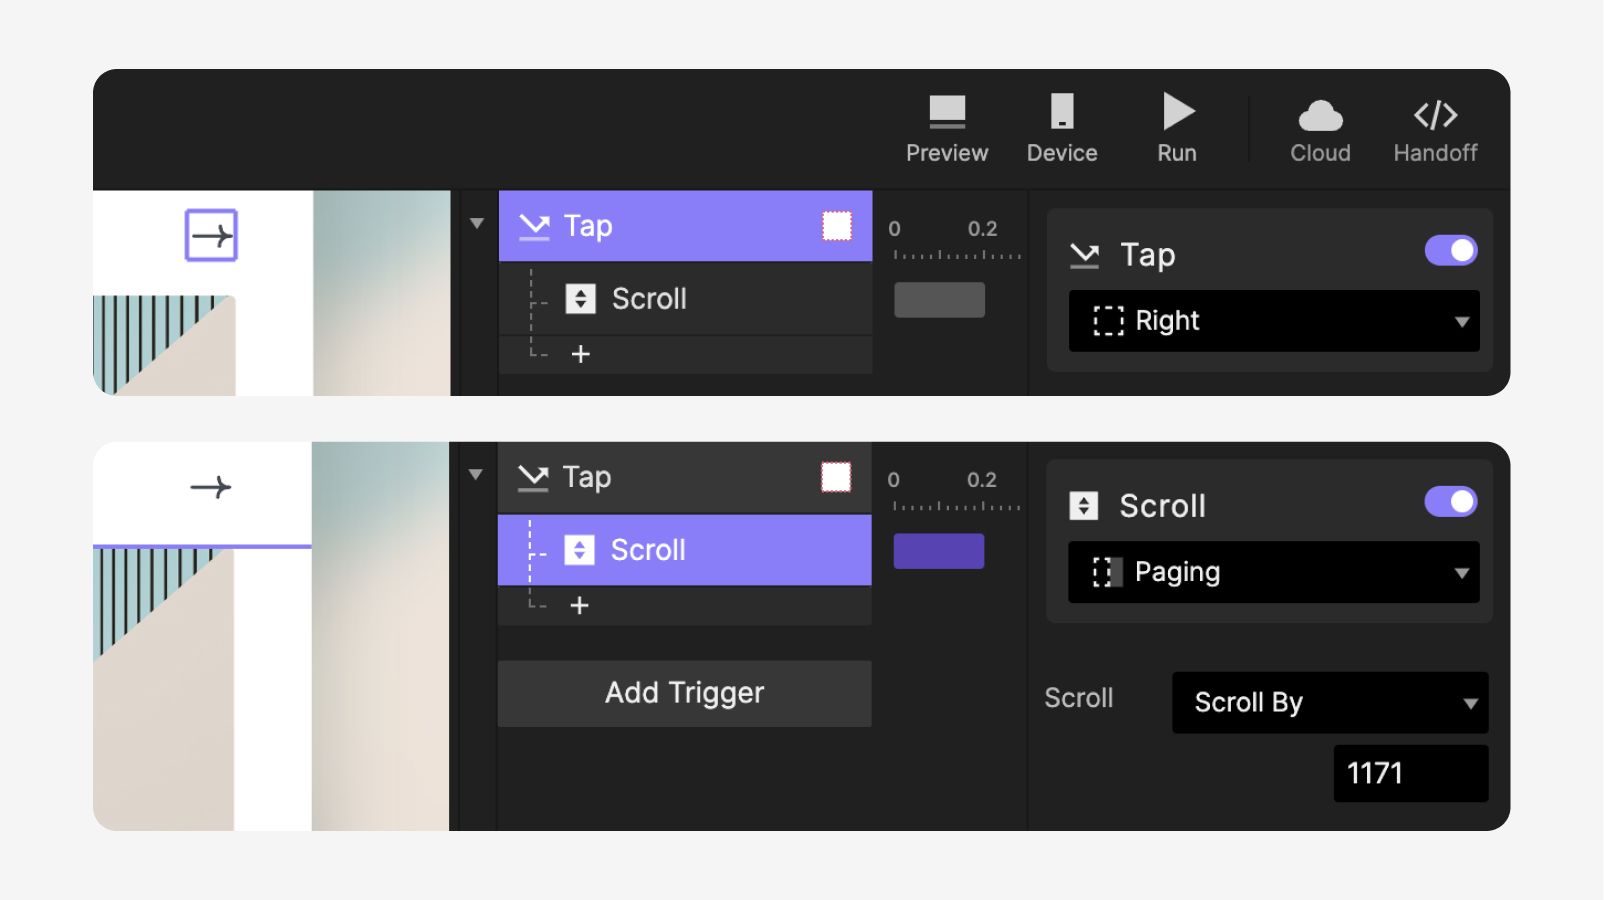
5. To make the right arrow icon clickable, add a** Tap trigger.** We will use the** Scroll By **property to move the scroll position of the Paging Container by 1171px.
💡 Why do we use "Scroll by" instead of "Scroll to"?
Because we want to move it by a distance and not set it to a fixed location. For example, if the current scroll position is at 0. Using the "Scroll to" logic, we would move the scroll position to 1171px. What happens if we tap the right arrow afterward? Nothing happens because it is already sitting at 1171.
That is why we want to use "Scroll by". Whatever happens, and wherever the scroll position is, if the user clicks on the right arrow, we will move the scroll by 1171px. If we click on the right arrow again, it will move again by 1171px.
💡 Okay, but why scroll by 1171?
Because 1171 is the width of the website that we have on the prototype.
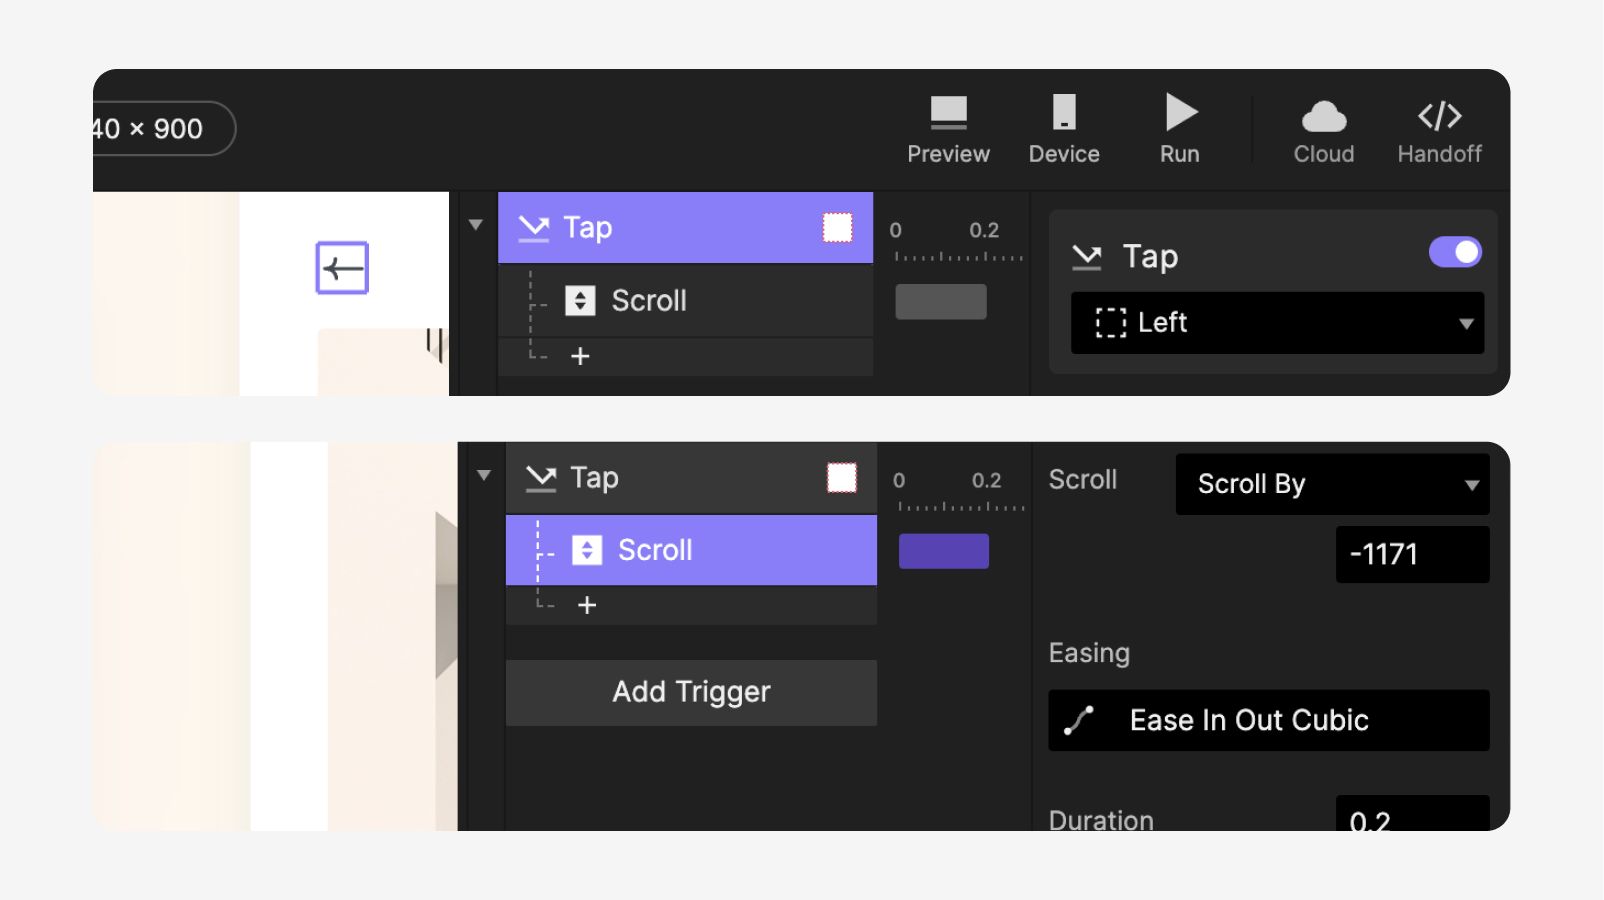
6. Make the interaction for the left icon using the same method. However, set the scroll by value to -1171.
💡 Tips & Tricks
To make further interactions, we need to know the scroll offset of the Paging Container. A quick way to get the scroll value is to use a variable to detect its value. Here's how to do it in a few steps:
1. Create a new variable.
2. In the property panel, click on the Use Formula checkbox to enable formula input. This formula will only be available for Variables For This Scene.
3. The formula we use here is "Paging".scrollOffset It returns the Paging Container's current scroll value.
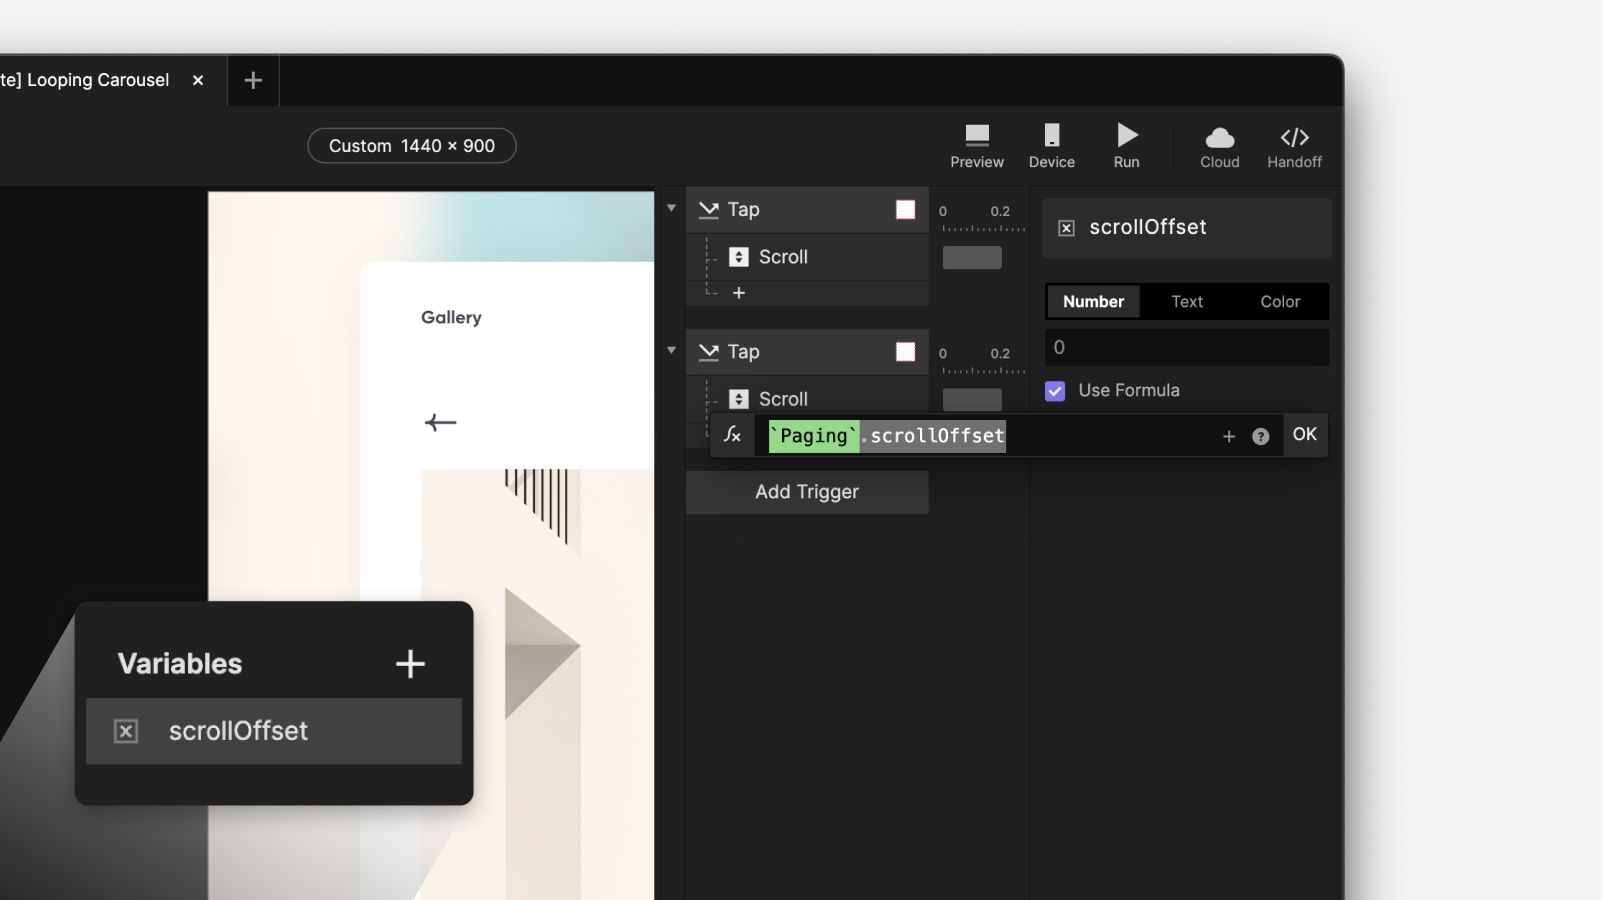
4. In the preview window, you will not be able to see anything yet. Hover on the variable you just made and click on the "bug" icon on the right side. Once you've done that, you can now see the current scroll value on the top left corner.

2. Change image name based on the scroll offset
Now that we can detect the scroll value, we can have a pointer that will help us know which image is currently visible. For example, we can show the correct name for the image that we are looking at. Let's do it!
1.** Add a Detect trigger to the Paging Container.** In the property panel, choose to detect its scroll value. What we are doing here is to "detect" the changes in the scroll value. Then, based on the value of the scroll, we can change the image title accordingly.
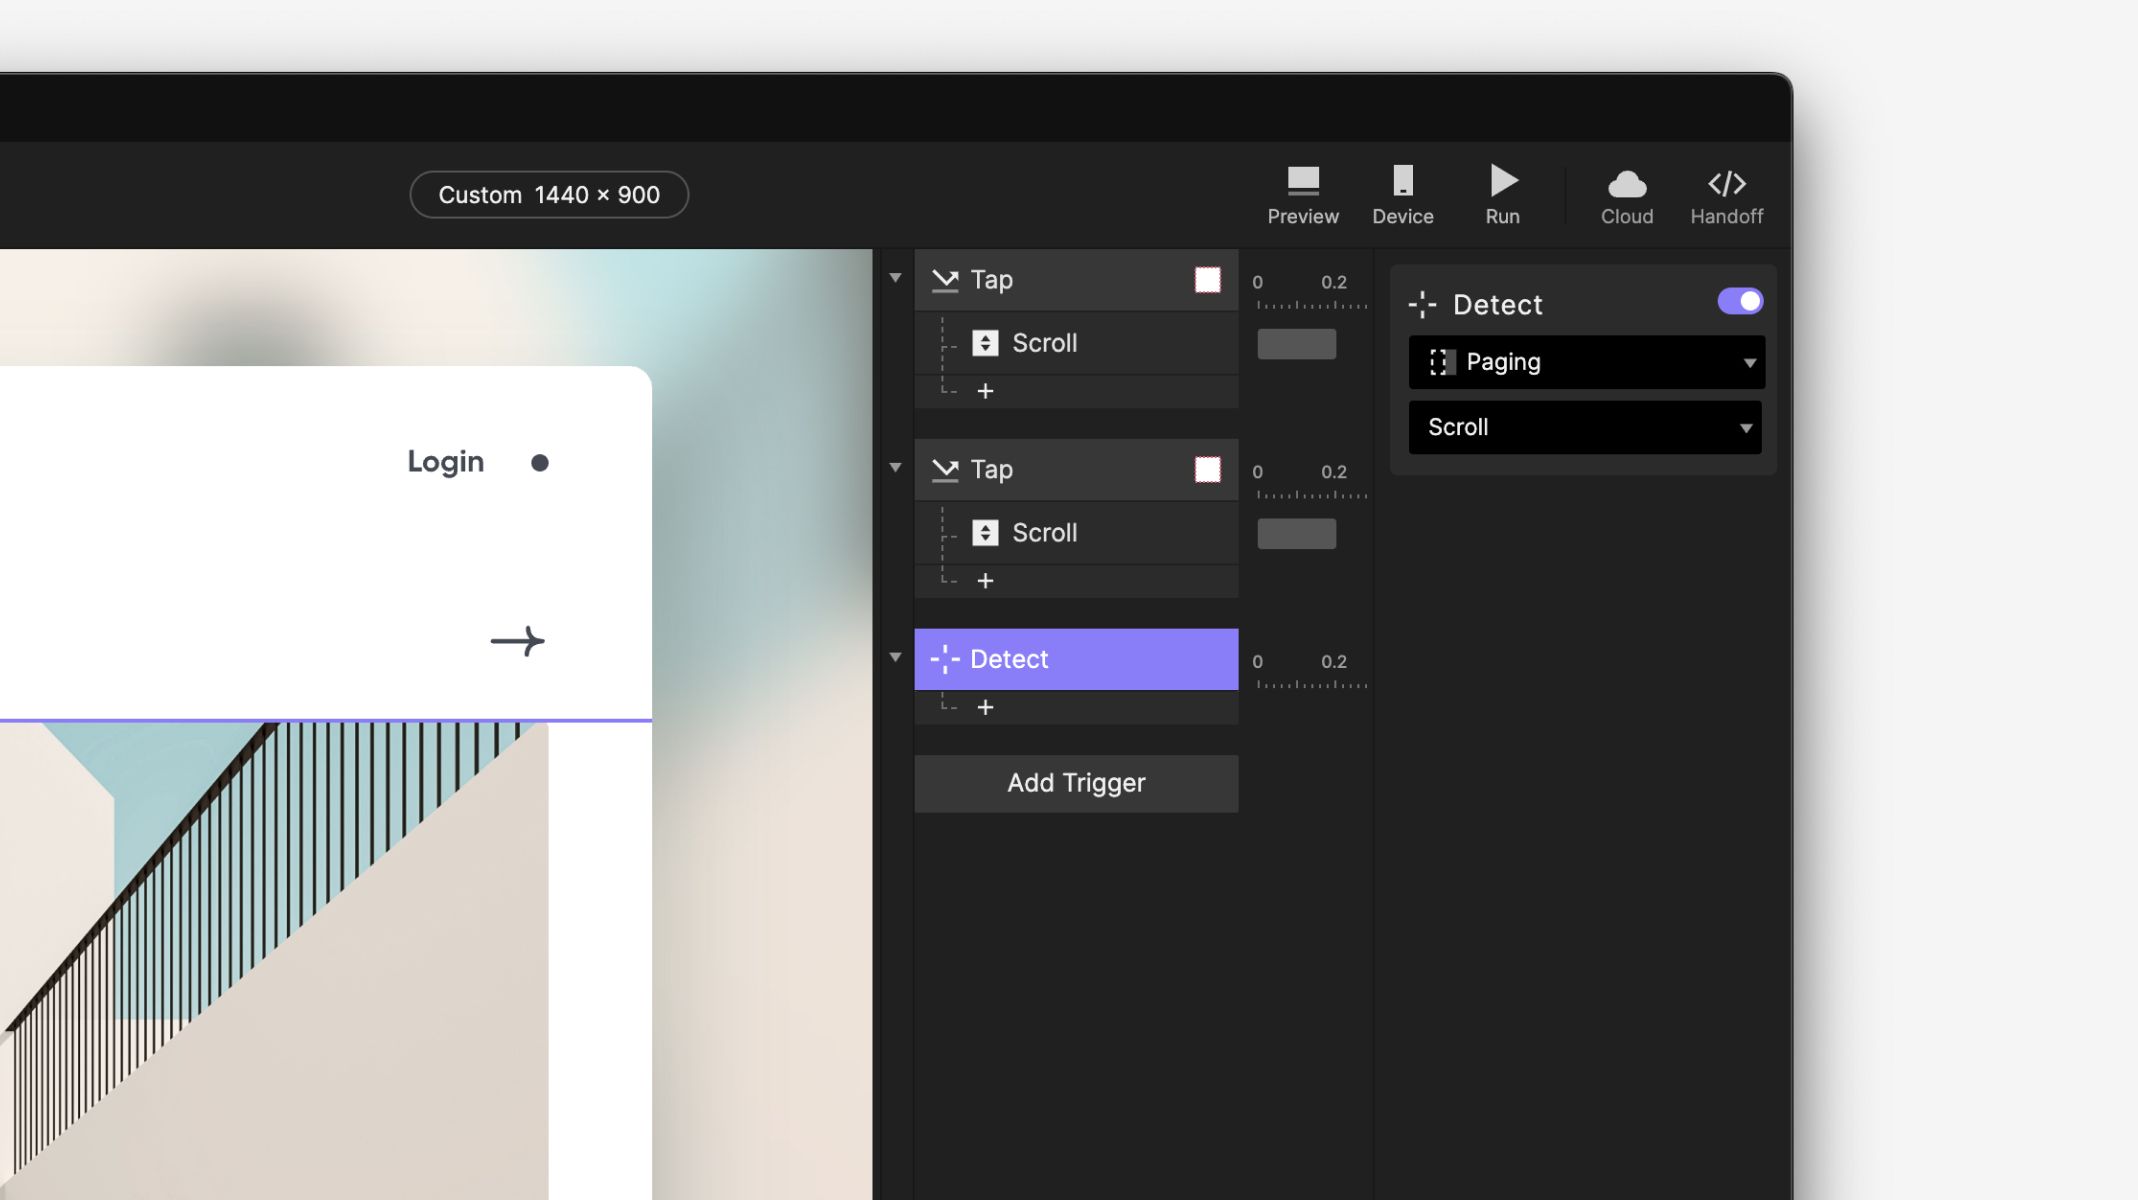
💡 What is detect trigger? A trigger that detects the changes from a layer property or variables. If a change is detected, the responses will be activated.
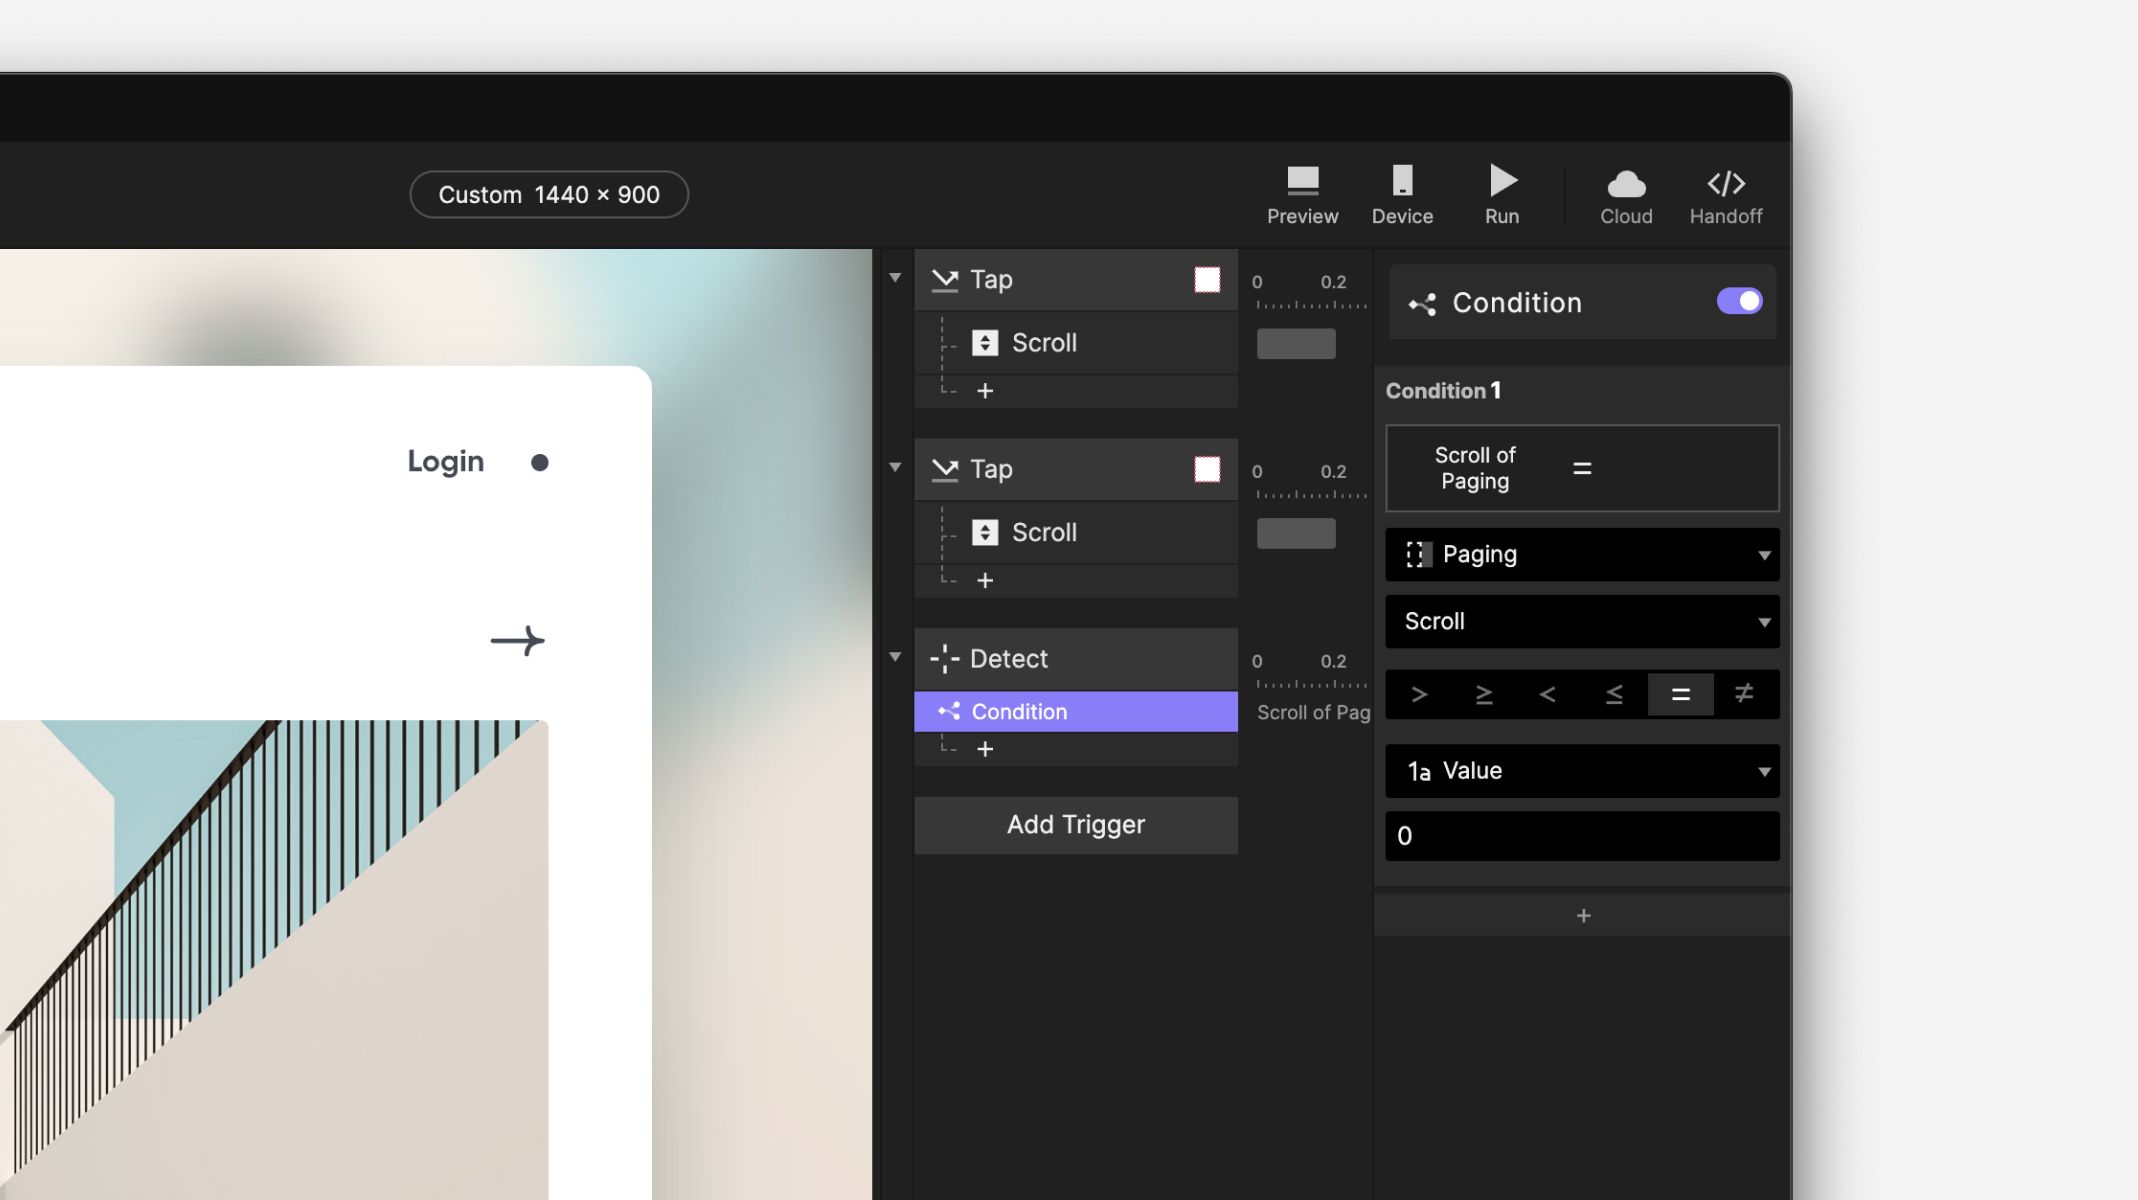
2. To get the names of the images correctly, we need to detect the scroll position of the Paging container. Add a condition when the Paging Container's scroll value is "0". Because we want to show the correct name for the image when the page is not yet scrolled (scroll position = 0).
3. When the scroll value is 0, add opacity responses to the titles. The values we use here are:
Modern Architecture: Opacity = 100
Museum: Opacity = 0
Minimal Plaza: Opacity = 0
You can also use a text response to change the text. In this case, you only need 1 title layer. However, opacity can give a smoother transition effect.
We'll also apply the same logic to the background images inside the "ct-bg" layer. These images are positioned behind a "Background Blur" layer created in ProtoPie. When "Modern Architecture" has an Opacity of 100, the corresponding image inside "ct-bg" named "Modern Architecture" should also have an Opacity of 100.
Apply the same rule to the other layers: if an image is visible in the carousel, the corresponding image inside "ct-bg" should have its Opacity set to 100, while the images that are not being shown should have their Opacity set to 0.
If you try the prototype now, you can see that Modern Architecture stays there no matter which image is showing. This is because we haven't set up the condition for the other titles. Next, we'll do the same thing for Museum and Minimal Plaza.

4. Using the same method to add responses when scroll values are 1171 and 2342
If value = 1171,
Modern Architecture: Opacity = 0
Museum: Opacity = 100
Minimal Plaza: Opacity = 0
If value = 2342,
Modern Architecture: Opacity = 0
Museum: Opacity = 0
Minimal Plaza: Opacity = 100

Let's check in the preview window. You now have a clickable scrolling banner with dynamic titles! But... something's still not right. Once you get to the end, the banner does not loop. Next, let's make it loop!

3. Make a looping scroll
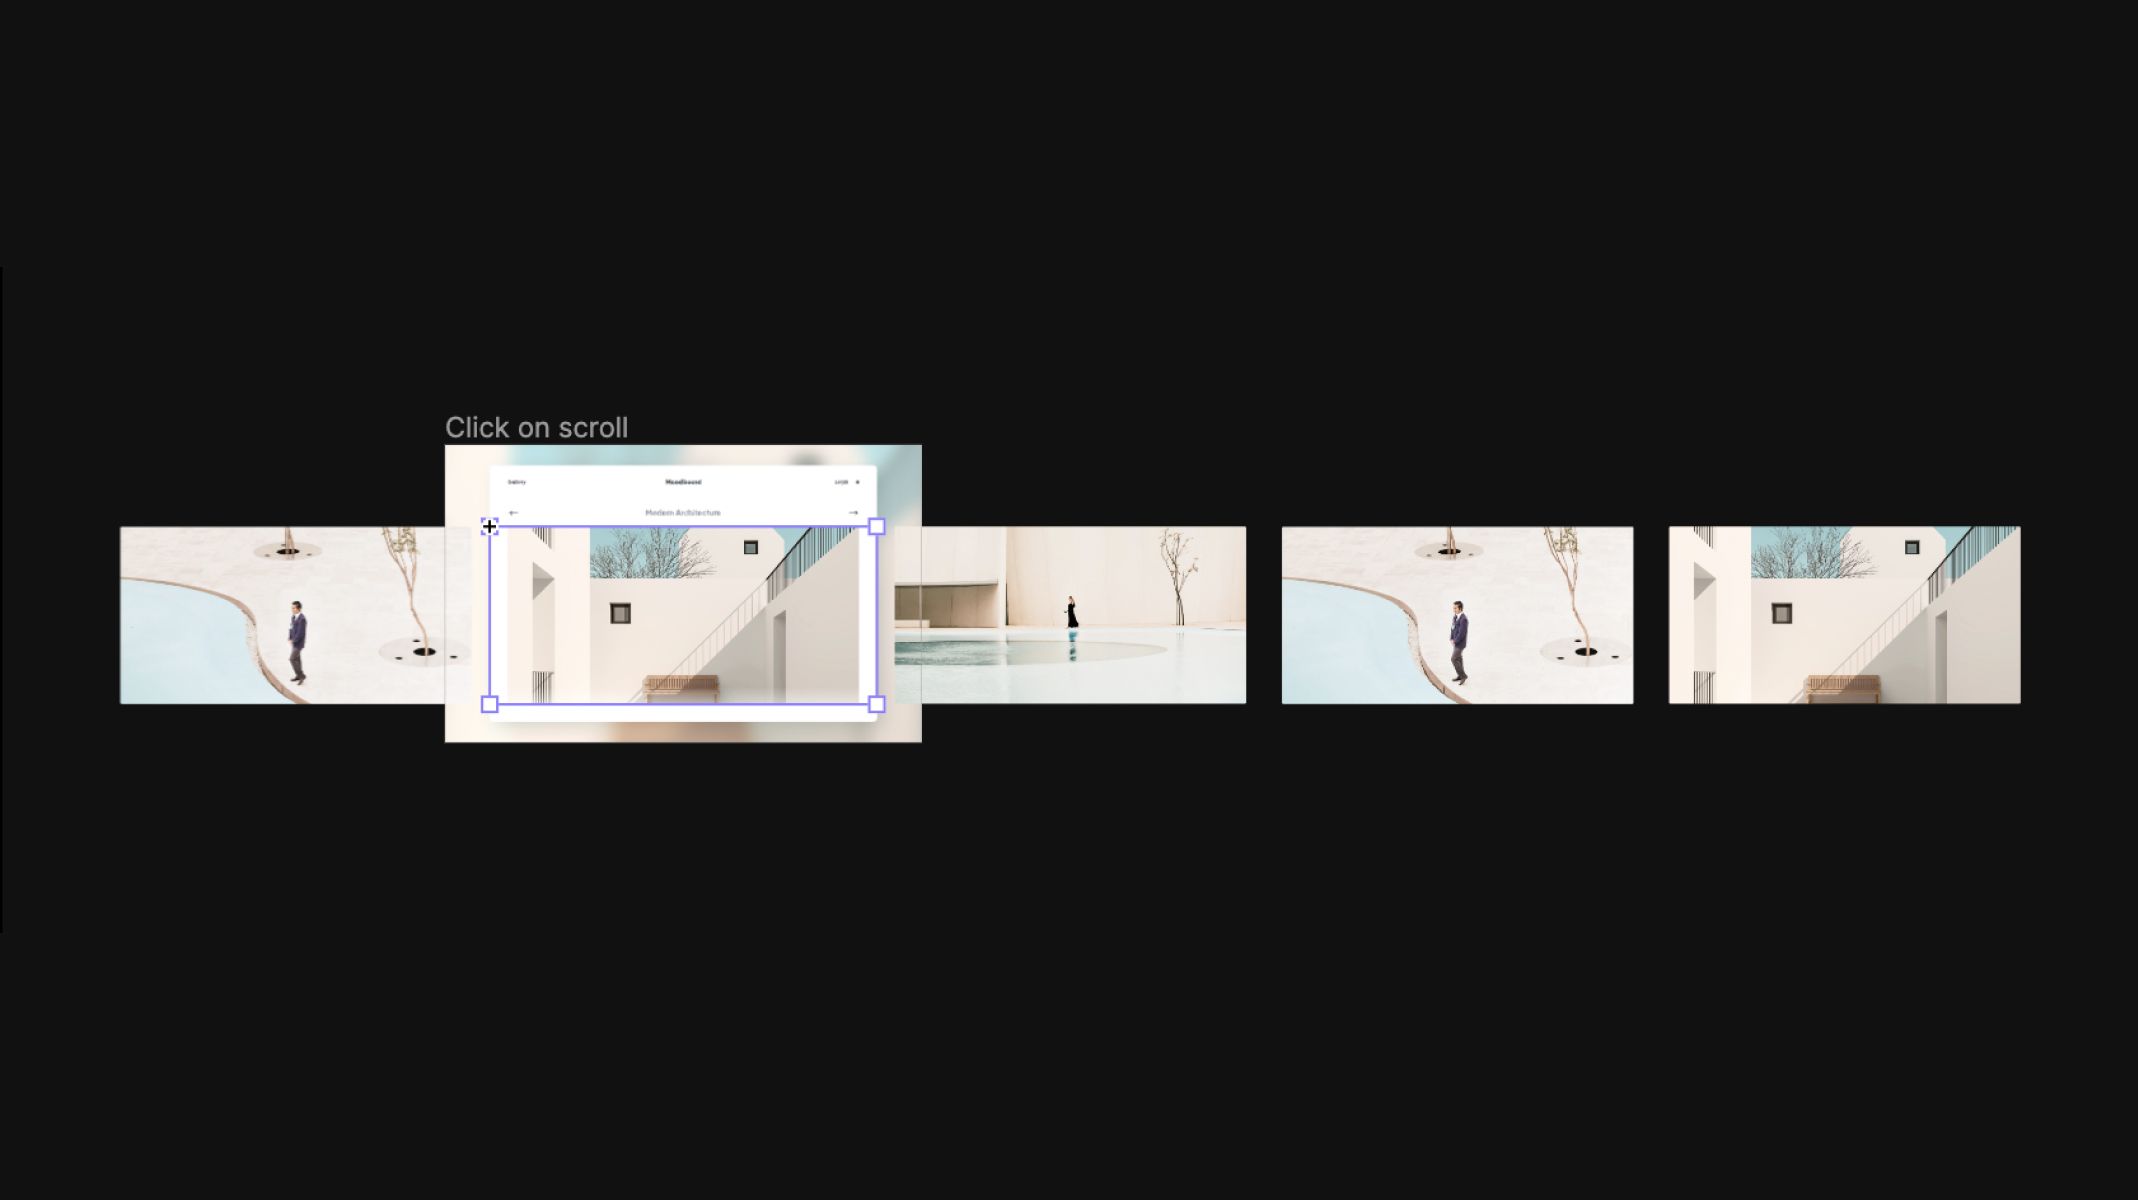
To make it "loop", we need to duplicate the first image and put it on the right. Also, duplicate the last image and put it on the left. These 2 images must also be inside the paging container.
Now that you've seen it, we are not actually looping the same image. Instead, we fake the loop and make it feel like it is looping in the prototype. Smart, right?
1. Add a condition in the detect trigger. We'll use the Paging Container's scroll value, set it to** -1171.**
2. Under this condition, add a scroll to the paging container to make it scroll to 2342. Set the duration to** **0.

This is the fake loop that we discussed just now. So every time the scroll value is -1171, the condition will immediately move it to 2342. The duration needs to be 0 because we don't want the user to see any changes in the visual. We want it to scroll to 2342 instantly.
3. Add one more condition. When the paging's scroll value is** 3513, scroll the paging container to 0**. Don't forget to set the** duration **to 0 because we want the scroll to be invisible and instant.
Let's check in the preview window... and you just made a looping scroll carousel!
Your carousel prototype is complete!
Play around with the carousel and look at how seamless the experience is! That was fun.
In this tutorial, you've implemented the scroll trigger, variables, and conditions. Not to mention the looping effect!
Try playing around with these learnings and you will be able to create even more interesting interactions! We would love to see your crazy experiments. Create your own prototypes with ProtoPie and share it on Twitter or Instagram with #MadeWithProtoPie


