

This API tutorial is designed to simplify your experience of integrating Google Maps seamlessly into your high-fidelity prototypes. By utilizing the Connect API plugin and self-hosted media features in ProtoPie, you can enhance your designs with authenticity and interactivity, all without the need for coding.
Whether you're an experienced designer or new to the world of UI/UX, this tutorial equips you with essential tools to bring real Google Maps into your prototypes. Join us on this exciting adventure to elevate your high-fidelity designs in ProtoPie.
How to prototype with Google Maps API without coding
As you might know, the Google Maps API offers a powerful suite of tools for developers, enabling them to seamlessly integrate maps and location-based features into applications and websites.
While these APIs cover a wide range of functionalities, such as mapping, geocoding, and directions, they are primarily designed for developers, making it challenging for designers to work with them.
If you’re a fellow designer, don't worry! With ProtoPie, you can effortlessly integrate maps into your prototypes without any coding. The key advantage? You can test and validate your designs in their early stages, just like a finished product, enriched with authentic, real-world data.
What you’ll learn
How to get an authentication key
Bonus: Get our example prototype
How to obtain information from the API
How to debug the API request
How to do a text search (using Places API)
How to display location photos (using Places API)
How to show static maps (using Maps Static API)
How to show customized maps (using Maps Static API)
1. How to get an authentication key
Now, the first step to working with Google Maps API is to sign up for an account and get the authentication key. Let's get you set up!
Begin by visiting the Google Maps Platform and click on the "Get Started" button to log in using your Google account.
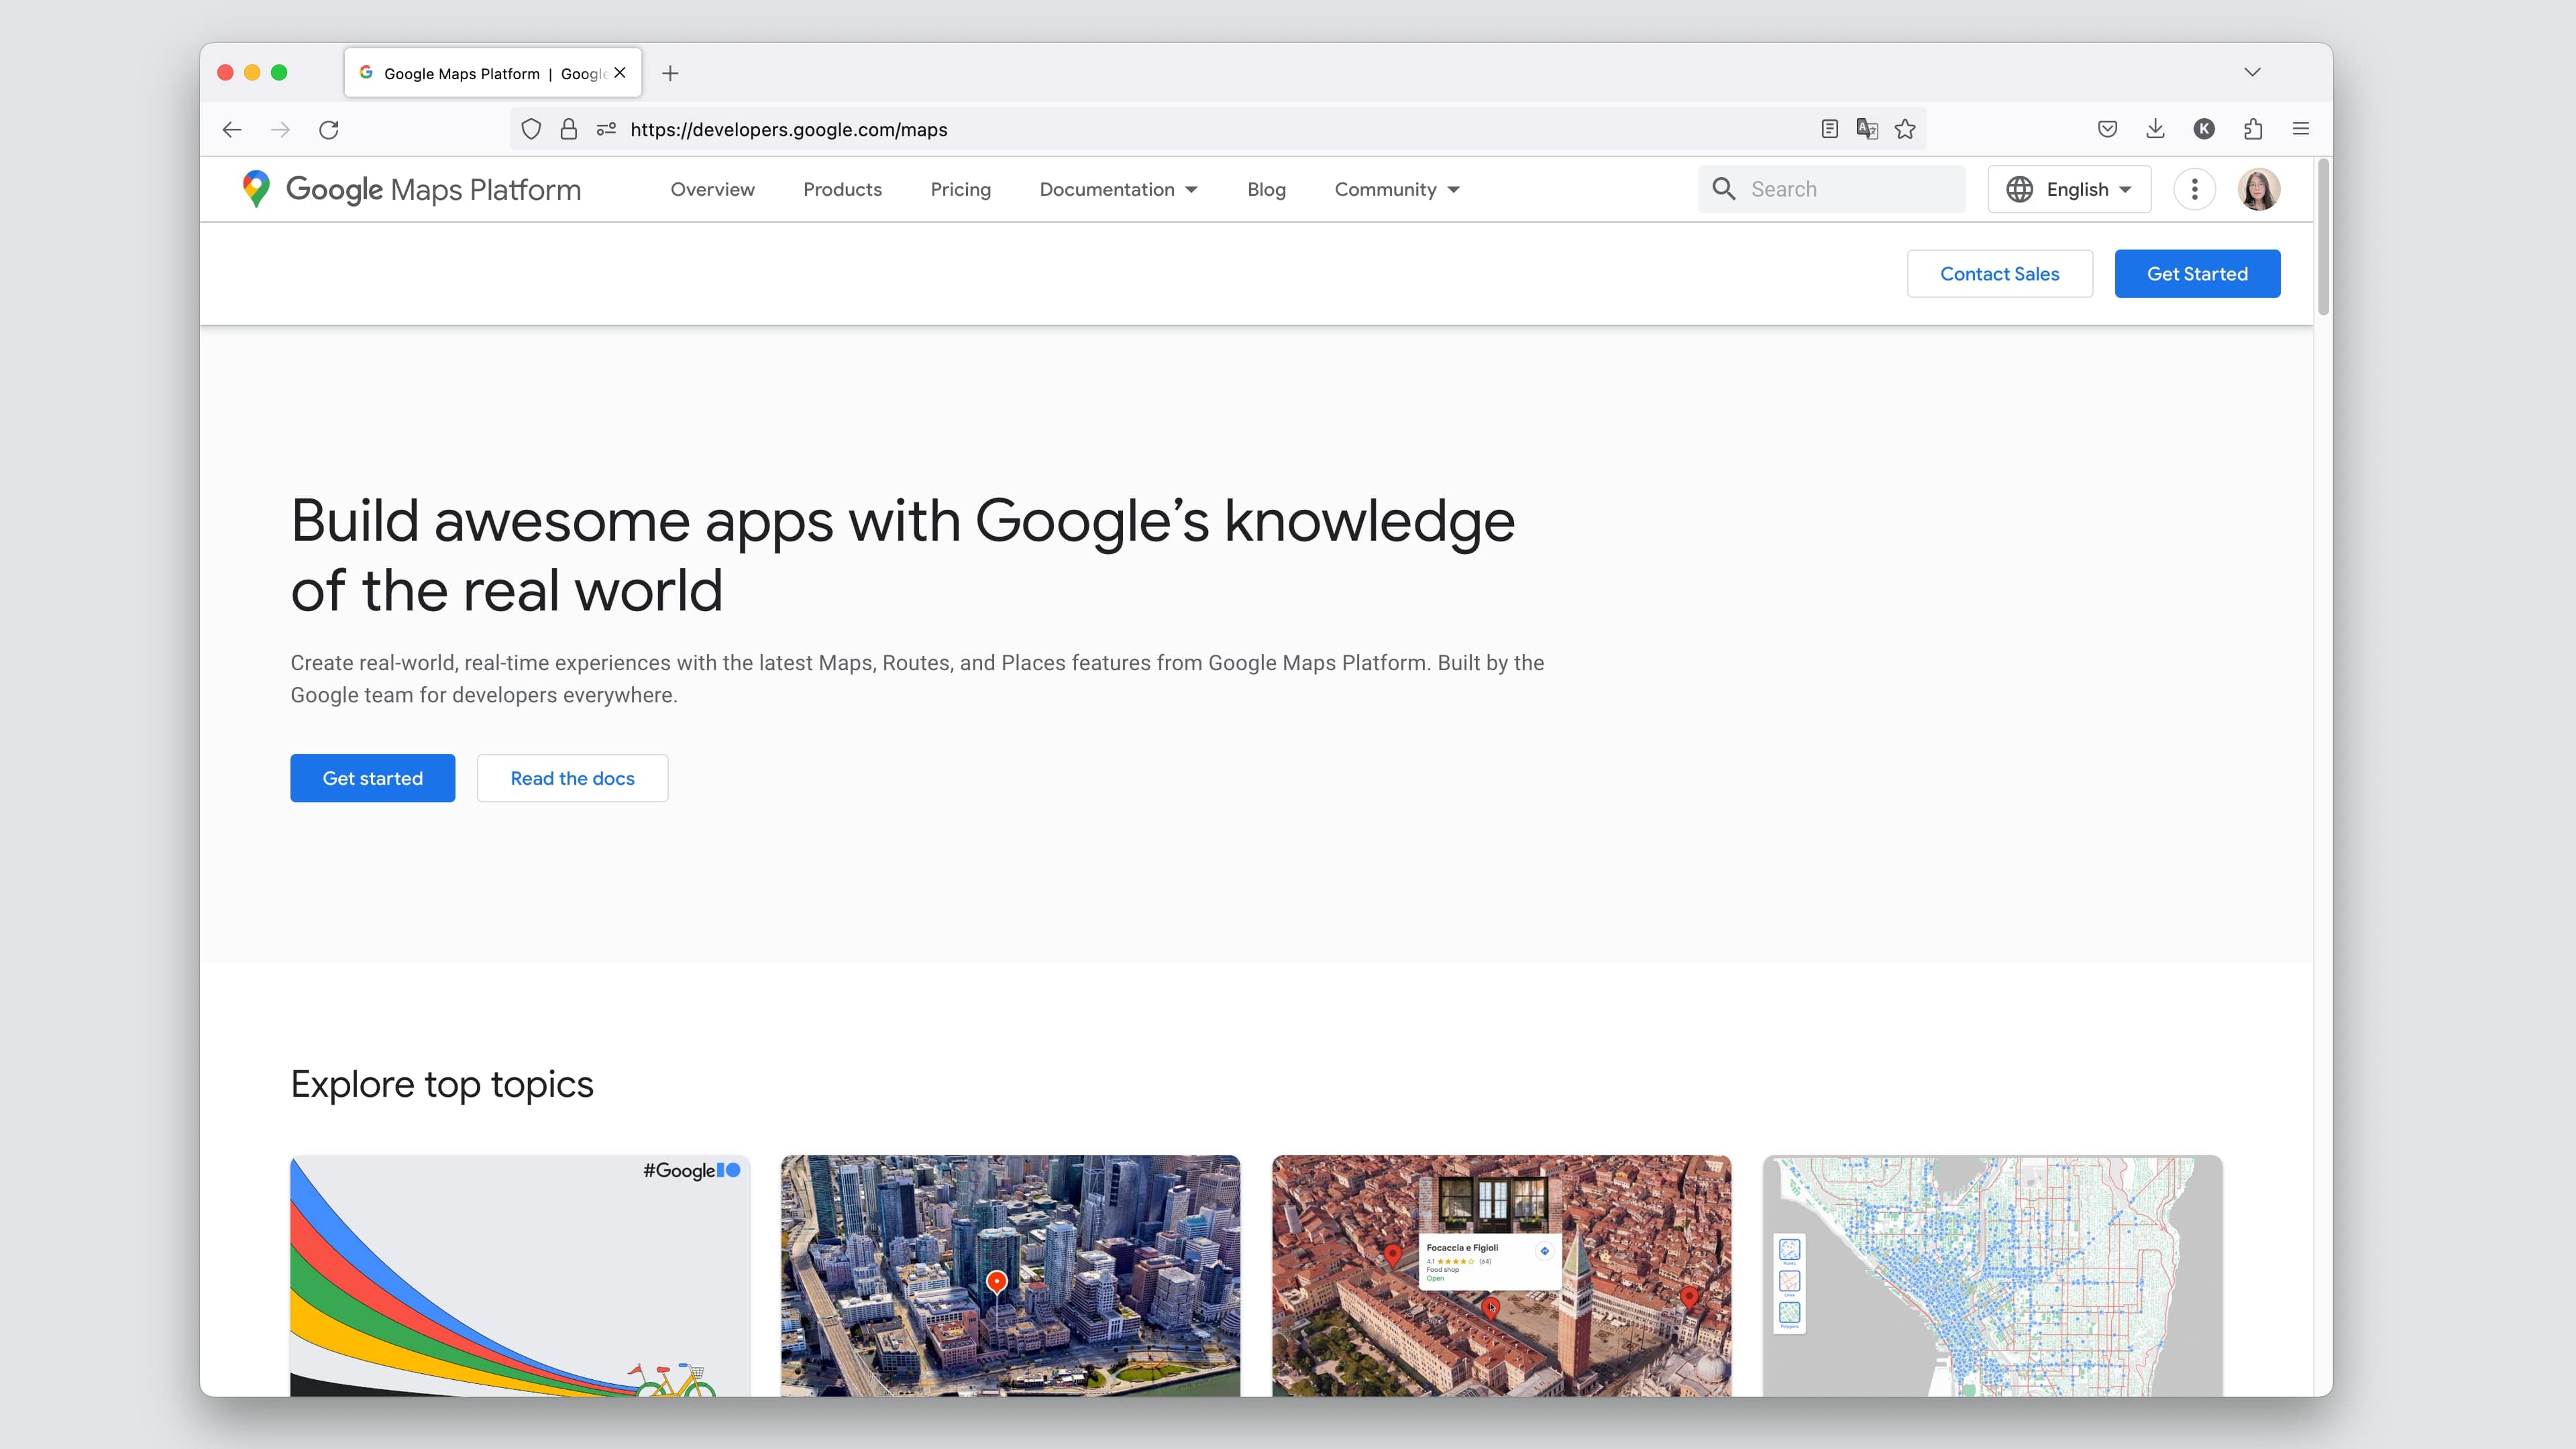
Google Maps Platform.
Once you've successfully signed in, head to the "Keys & Credentials" section located on the left sidebar of the platform.
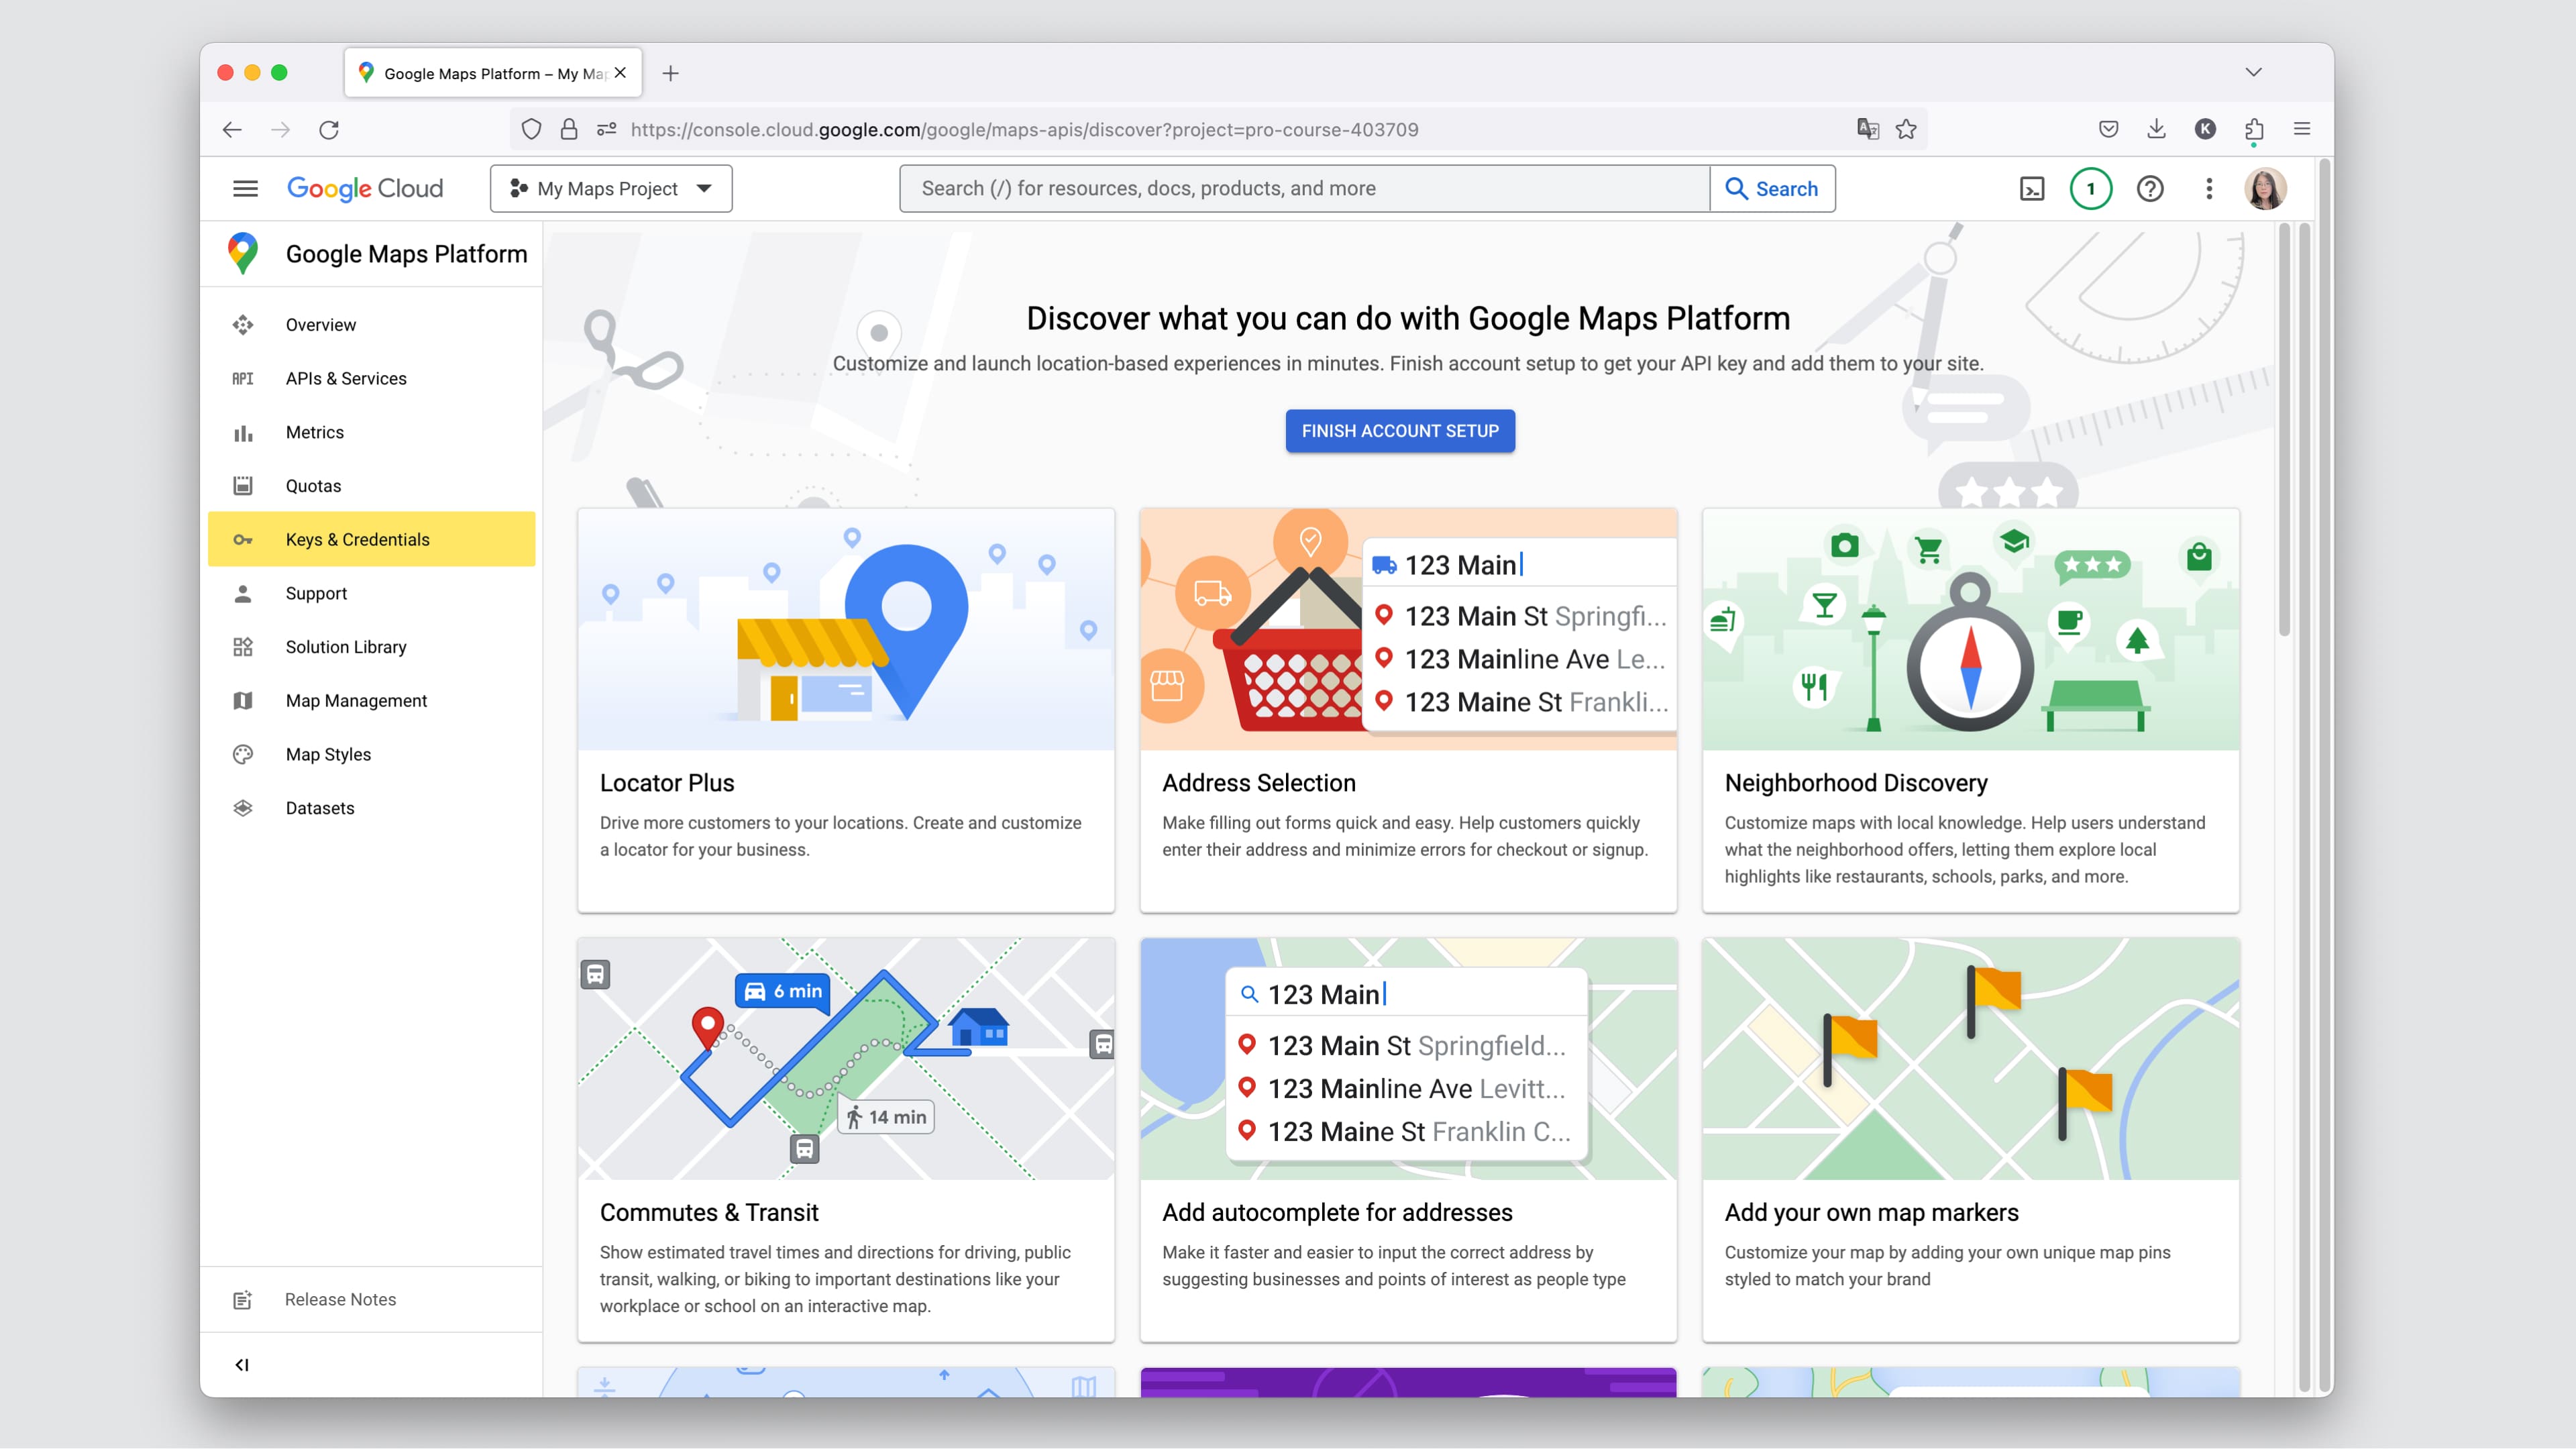
Go to Keys & Credentials tab.
If this is your first time using the Google Maps Platform, you'll be prompted to provide your personal details. Although it’s free to start with, you may need to input your payment information for verification purposes. Simply follow the on-screen prompts and instructions until you've completed the setup process.
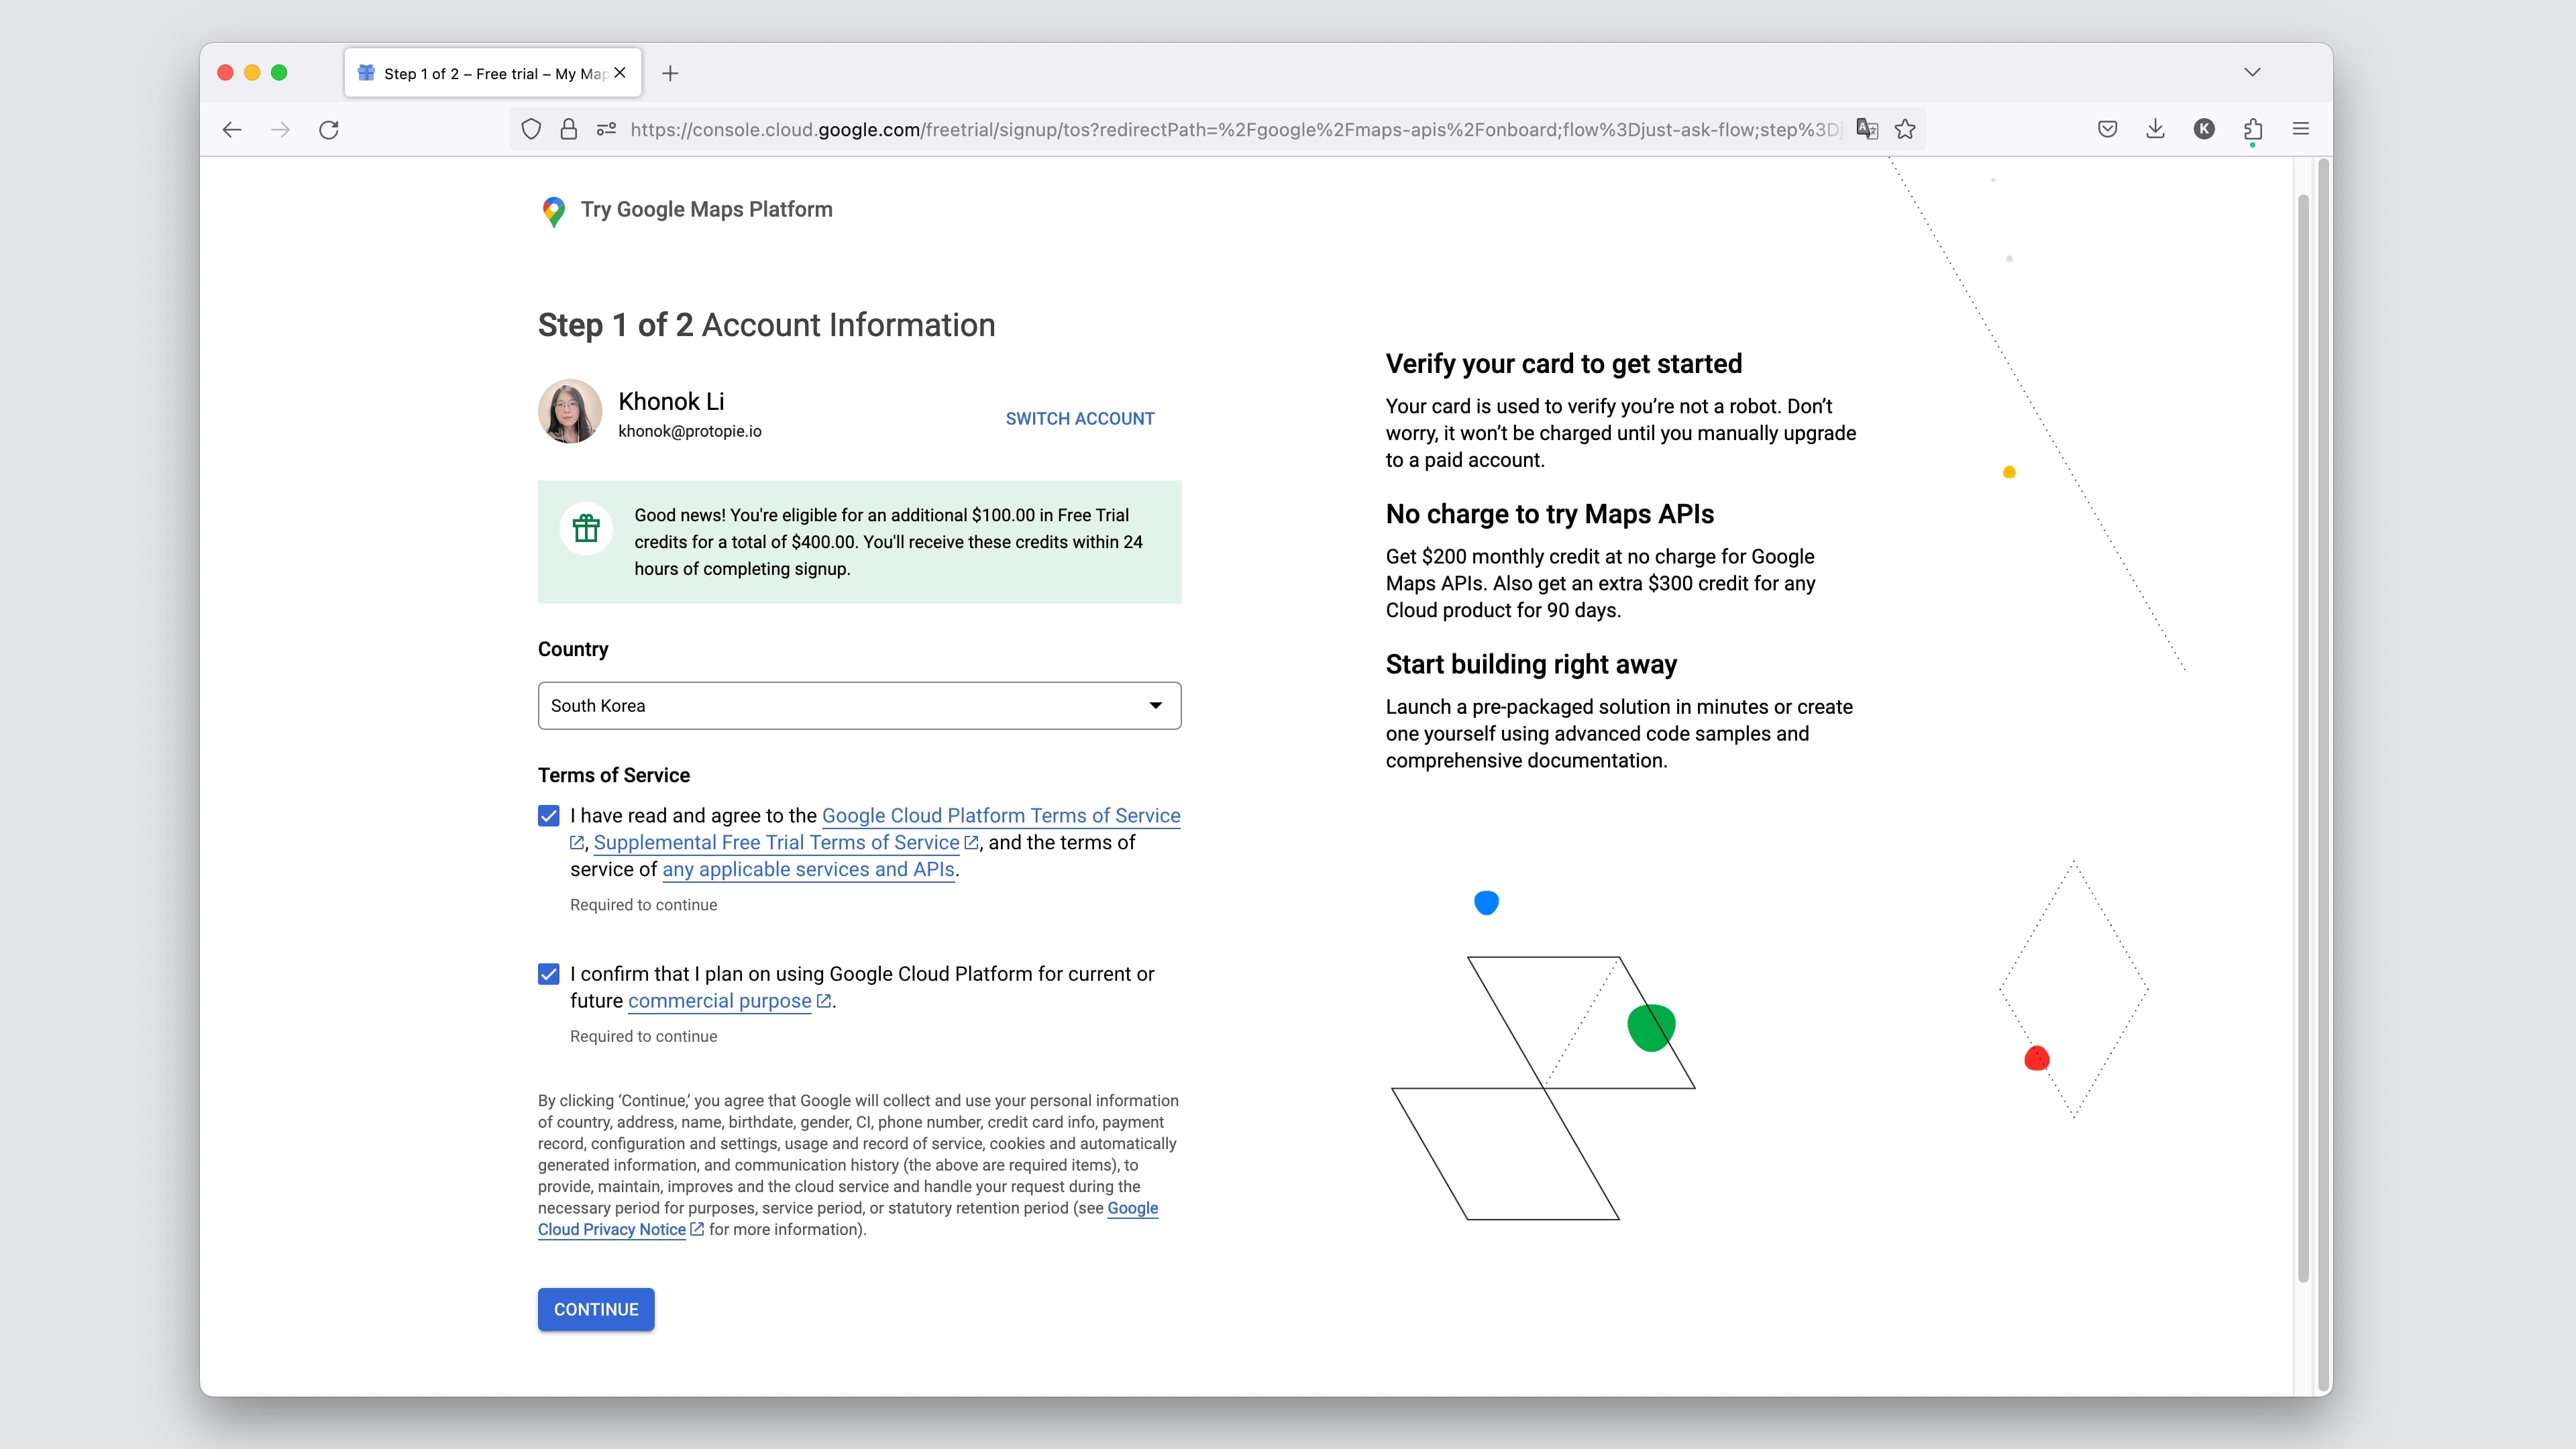
Set up your account information.
After completing the setup, your API Key will be displayed on your screen. It is strongly recommended that you copy this key to a notepad document or save it in a secure location as you'll need it for the upcoming steps.
Make sure to check the option to "Enable all Google Maps APIs for this project," and then proceed by clicking the "GO TO GOOGLE MAPS PLATFORM" button.
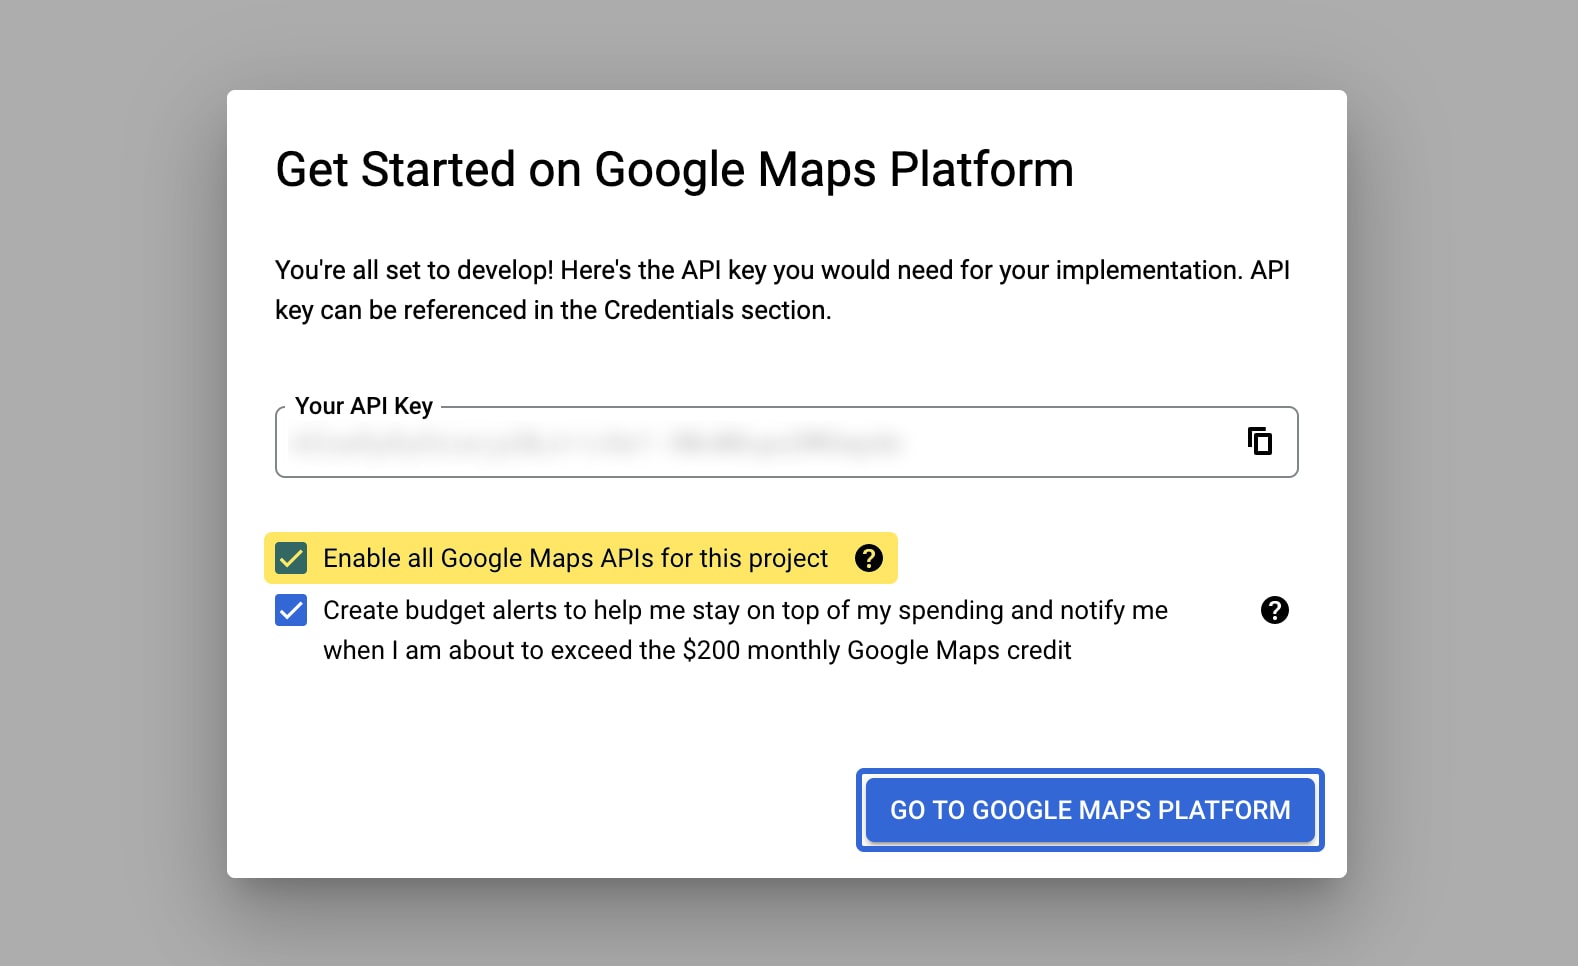
Your API key.
If you happen to forget your key or didn't copy it during the setup, you can always retrieve it on the "Keys & Credentials" page.
Remember, it's of utmost importance to keep your key private. Any inadvertent disclosure could result in unforeseen expenses and issues.
🌟 Bonus: Get our example prototype
Excited to give it a try? Now's the perfect time!
Once you have your API key in hand, you're all set to explore our example project. Grab the Pie file below and follow the steps below to set it up.
Both Pro and Enterprise users can run this prototype and achieve the same results by following these steps:
Save the prototype locally.
Sign up for your API key on the Google Maps Platform.
Insert your API key in the prototype file. You'll need to paste your API key in two places:
On the main scene, check the variable panel for a variable named "API_KEY" and paste your key there.
In the "POI Card" component, again, check the variable panel for a variable called "API_KEY" and paste your key there.
Save the project.
Drag the prototype into ProtoPie Connect.
Click the "Plugin" button to open the plugin panel. Configure the settings as follows:
Method:
GETLeave the URL, Header, and Body empty.
Message from Pie:
TEXT SEARCH REQUESTCheck the "override" checkbox and select the URL from the dropdown menu. This will use the value sent with your message to override the request URL.
Message to Pie:
TEXT SEARCH RESULTFinally, click the "Activate" button to run your API plugin.
Open the prototype in a web browser, and you're all set to explore.
Curious about how it all works? Let's embark on a comprehensive guide that delves deep into the process of working with the Google Maps API in your prototype!
2. How to obtain information from the API
With your API key in hand, let's take a moment to become familiar with the API we'll be using. Head over to the Places API document page, which is a well-written and comprehensive resource that contains all the information you need about this API.
Now, let's kick off our exploration with the first API we'll be using: Text Search. Just as the name suggests, it provides a list of places that match the text string you provide. The documentation may appear lengthy and daunting, but we'll concentrate on the essential information we need at this point.
The critical element to note is the request URL, which follows this structure:
https://maps.googleapis.com/maps/api/place/textsearch/output?parameters
Please focus on two aspects within this URL: output and parameters.
outputspecifies the format in which the API returns information. To use it in the Connect API plugin, we will usejsonas it works seamlessly.Concerning
parameters, if this is your first time working with this API, you may need to consult the documentation and become familiar with it. Typically, there are required parameters that you must include in the request URL for the API to function, along with optional parameters that allow you to customize how the API operates.The Text Search, in particular, has two required parameters
queryandradius.query— This is the text string you want to search for.radius— This parameter represents the distance, measured in meters, within which the API should return place results. However, in most cases, this parameter is automatically set to its maximum value, so you can usually skip setting it explicitly.Lastly, don't forget to include your API key as a parameter in the URL. For additional information on this, please refer to the guide on how to Use API Keys with Places API.
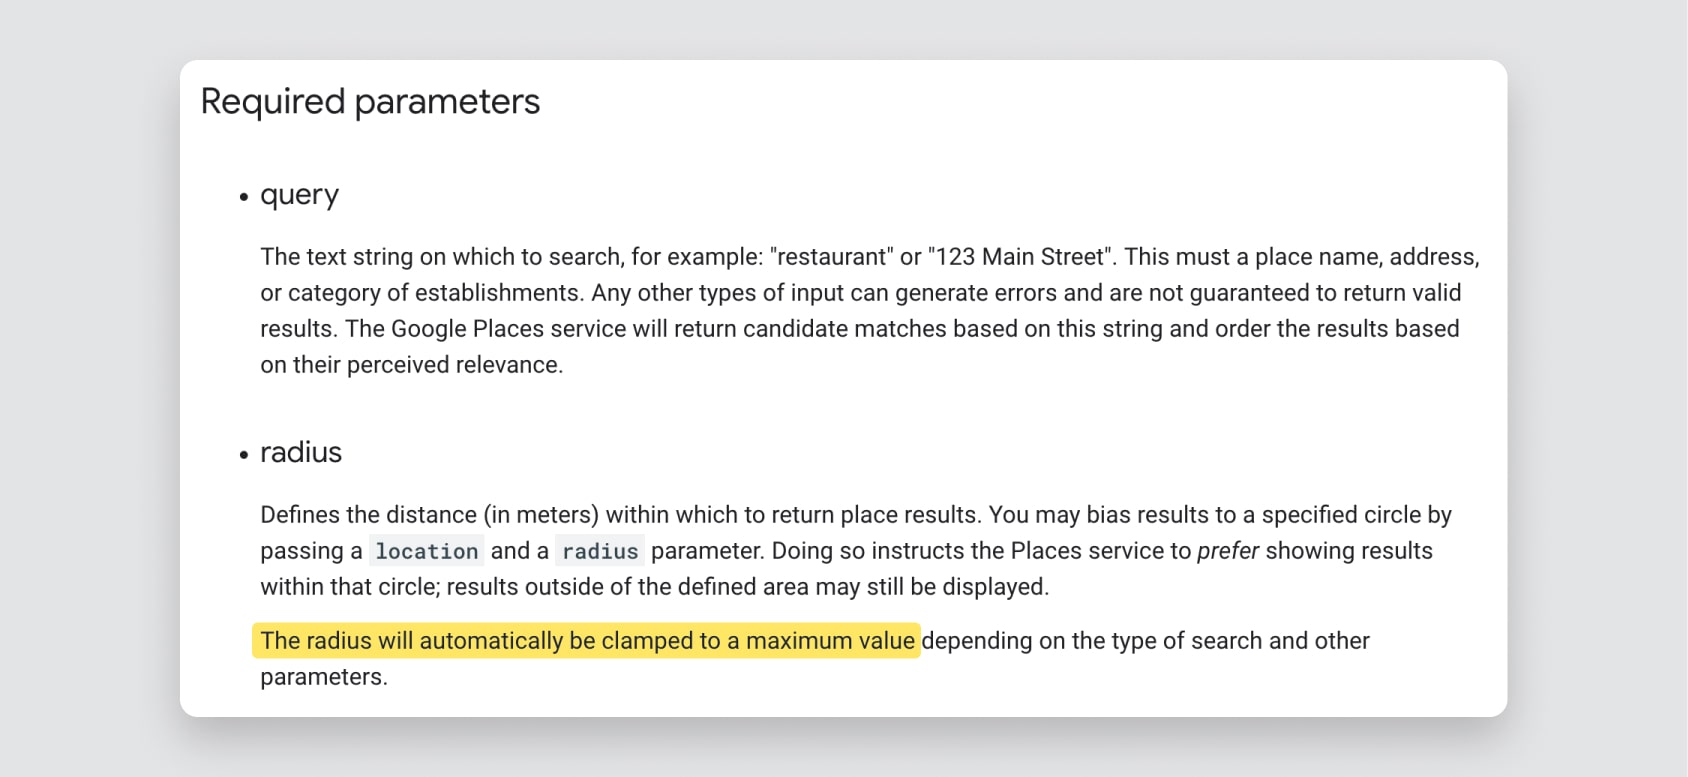
*Required parameters. *
With that in mind, let’s try to search “gym”. The URL will be:
https://maps.googleapis.com/maps/api/place/textsearch/json?query=gym&key=YOUR_API_KEY
Ensure you replace "YOUR_API_KEY" with the actual API key you obtained earlier.
3. How to debug the API request
A handy tool for debugging your API is Postman, and its free plan is more than enough to use.
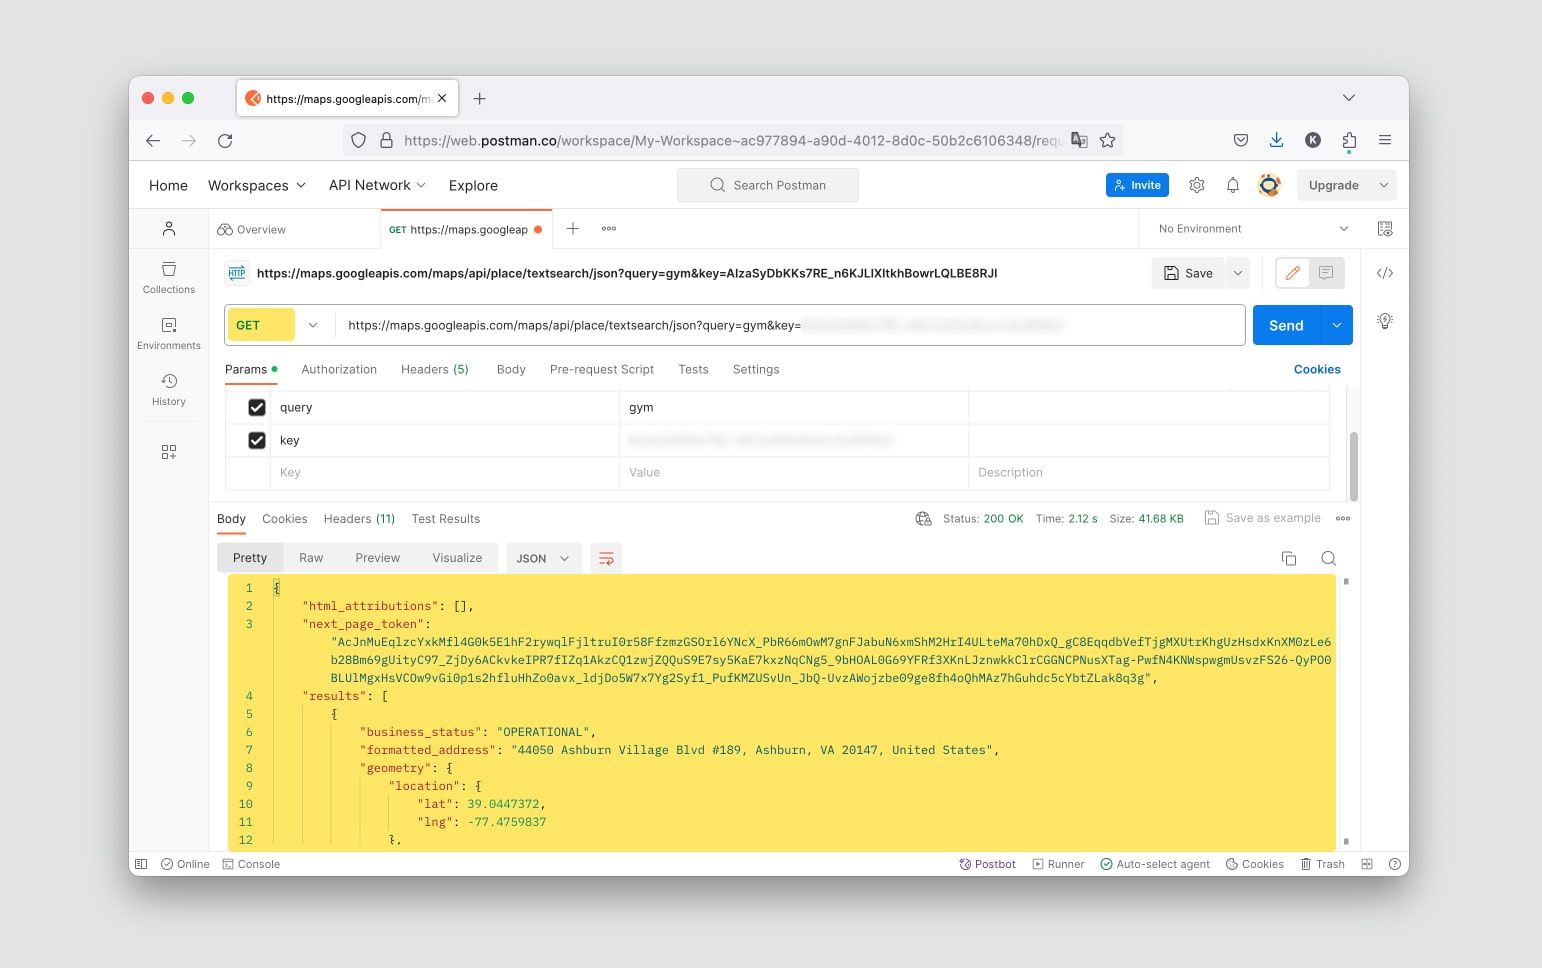
*Debug your API request using Postman. *
In this scenario, given that all the necessary parameters and authentication details are included in the URL, you can simply open this URL in your web browser.
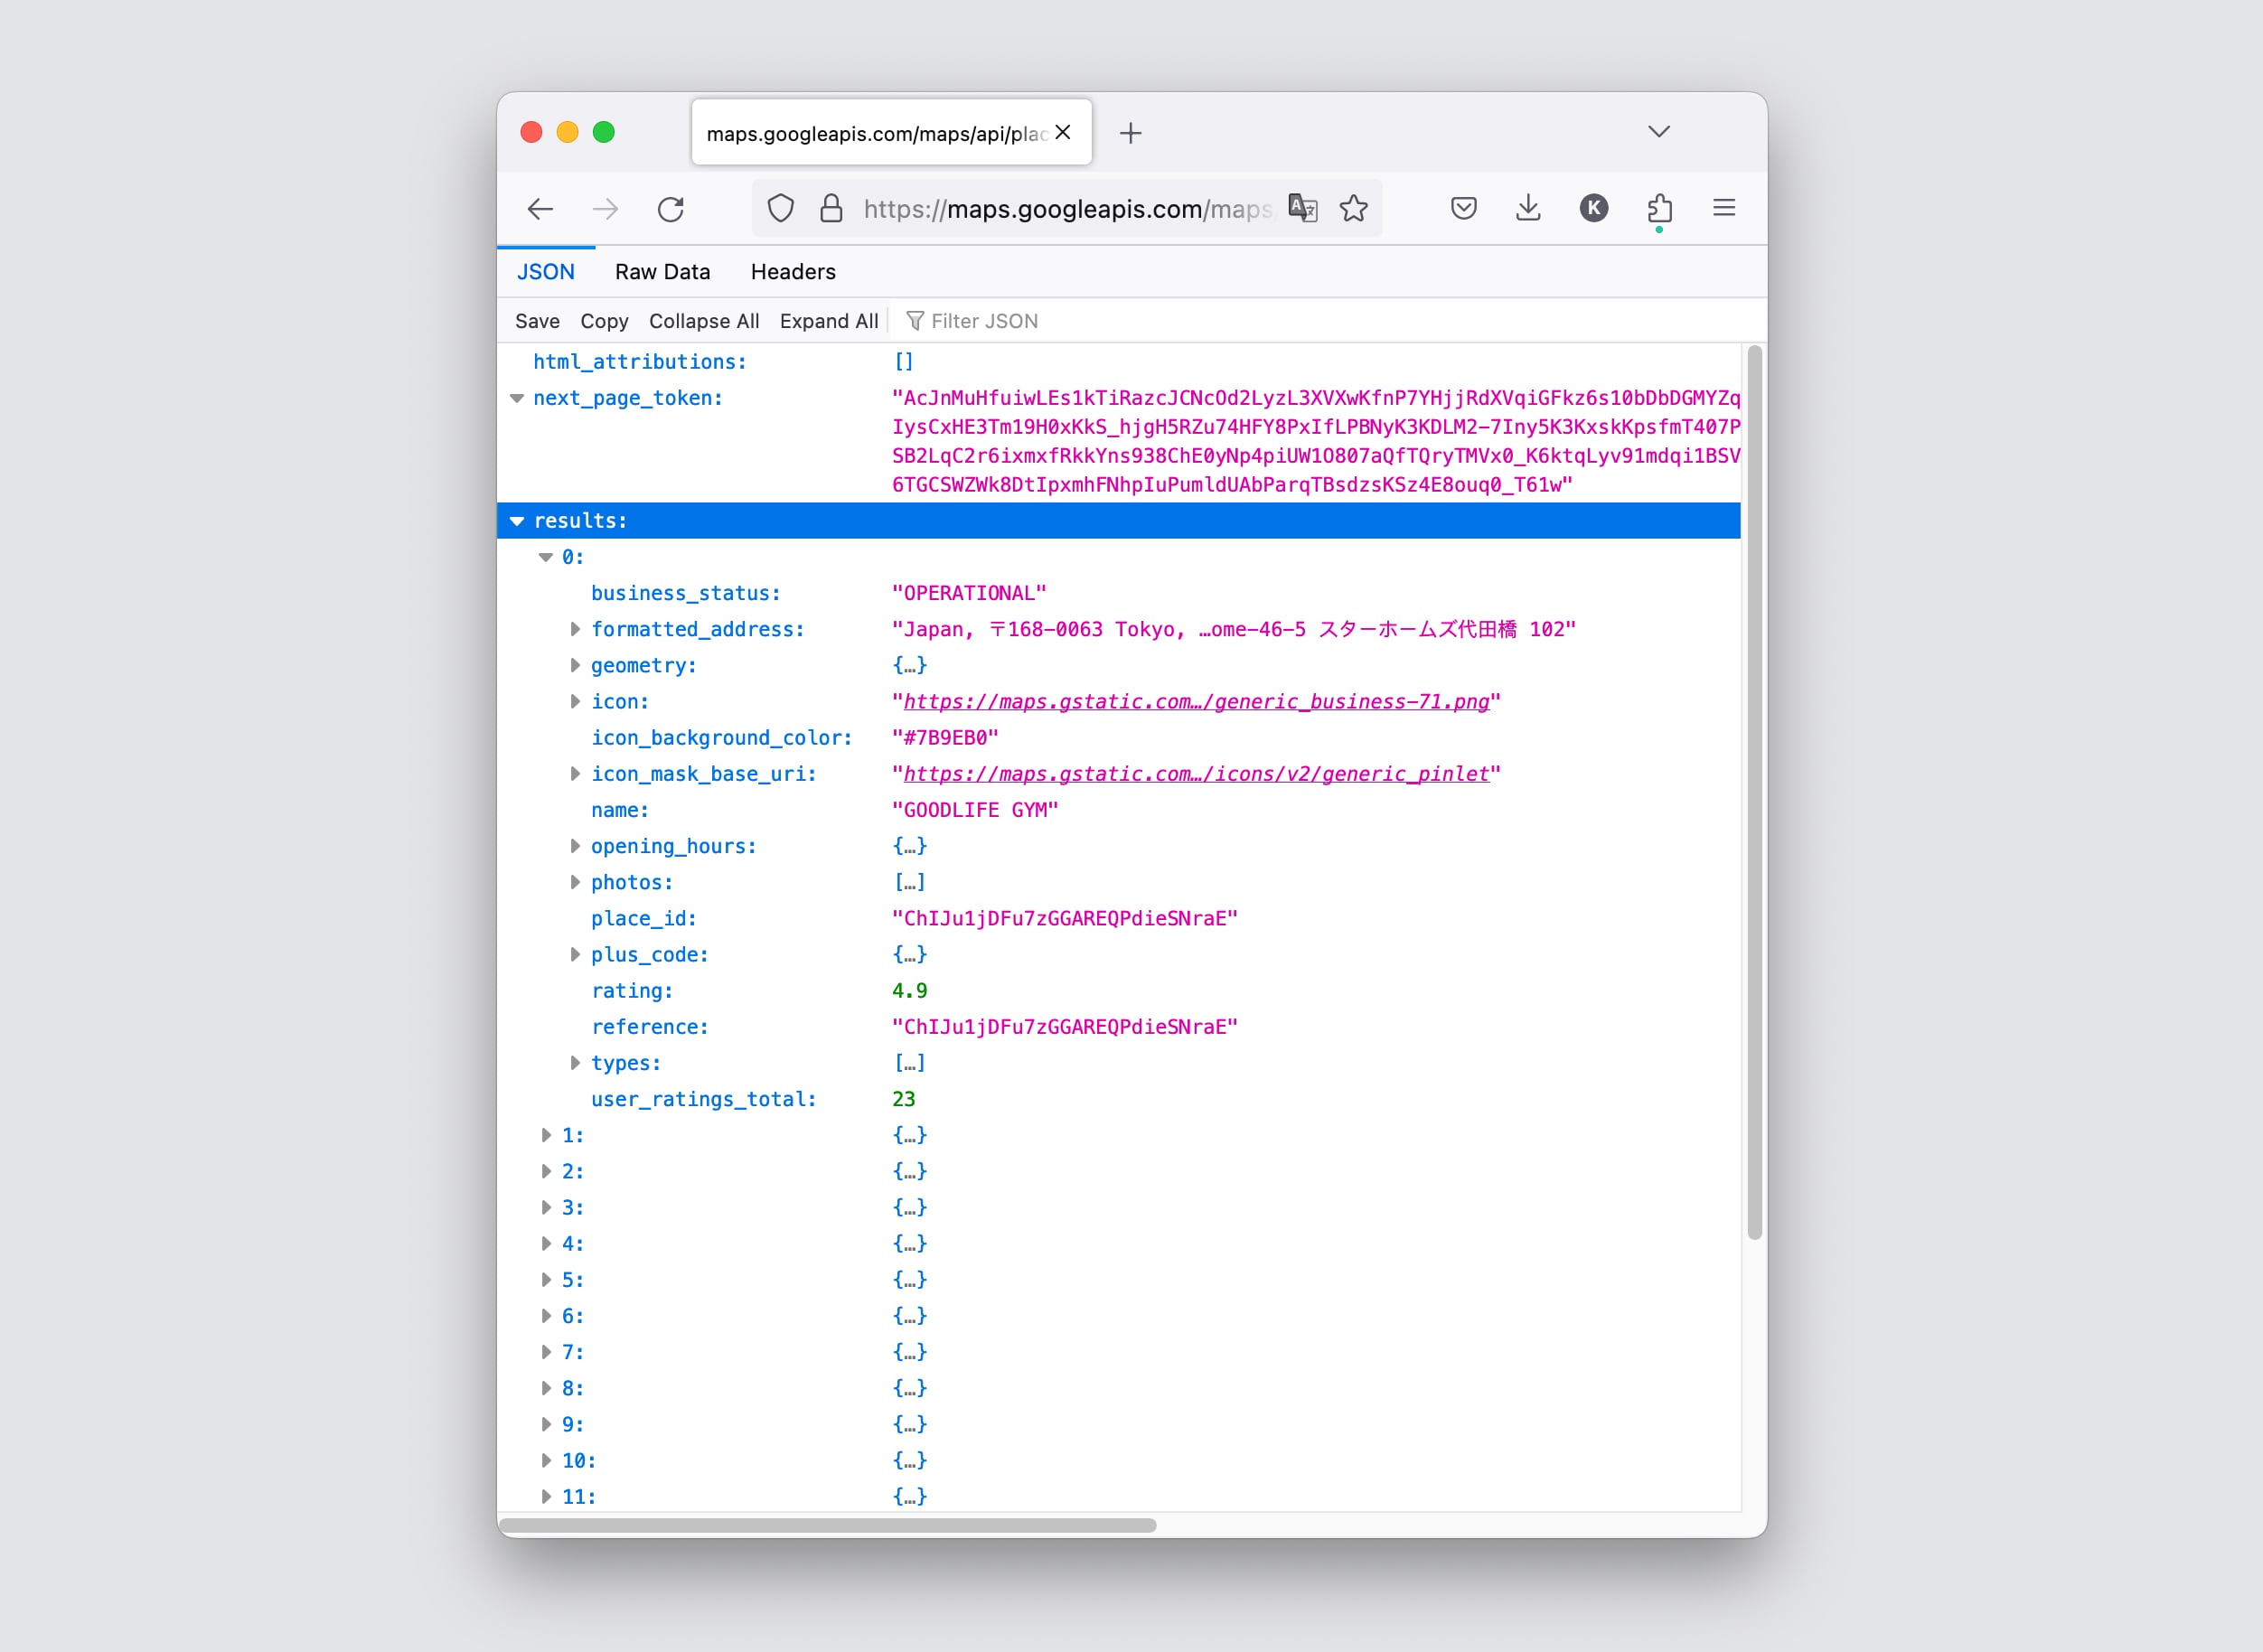
*Debug your API request using a browser. *
4. How to do a text search (using Places API)
Let’s move on to real use cases. For the initial step, our goal is to display the textual content of our search results.
Display the textual content of our search results.
Send the API request
Open our sample file, the search is triggered when we tap the “Search” button. This is the point we need to send the Text Search request. So I used a Send response under the Tap trigger.
For the Channel, select “ProtoPie Connect/Studio”
For the Message, you can use whatever you prefer, but make sure it makes sense to yourself. Here I used
TEXT SEARCH REQUEST
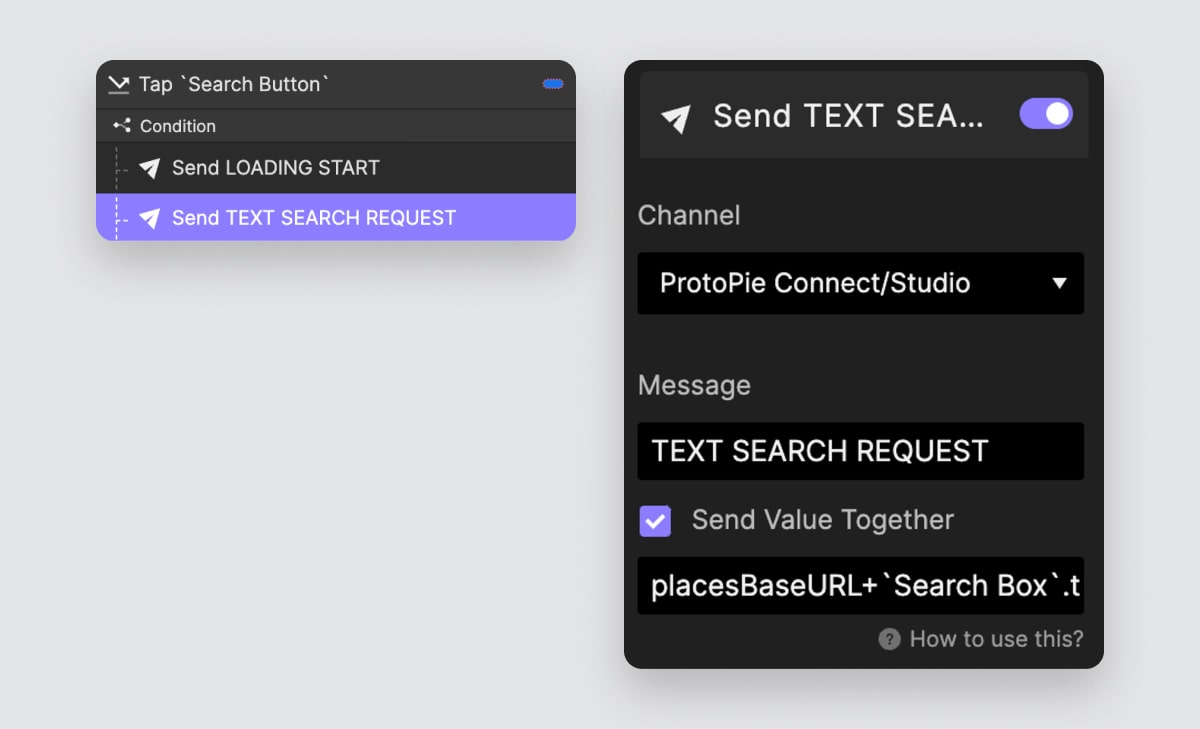
Text search request.
Then click “Send Value Together”. For the value, we will use a formula.

Formula.
placeBaseURLis a text variable that stores a portion of the URL to simplify the formula. It containshttps://maps.googleapis.com/maps/api/place/textsearch/json?query=``Search Box
.textretrieves the text property of the input box, which essentially represents what we've typed into the search box.“&key=”is simply a piece of text.API_KEYis a text variable that holds your API key.
In essence, this formula constructs our request URL, and when we send the message to Connect, we include the URL as its value.
Display textual content
Let's dive deeper into the text search response. The Text Search will look for places nearby by understanding your IP address. Within the JSON response, our point of interest is the "results" section, which holds the search results.
It's important to note that each page contains a maximum of 20 results, numbered from 0 to 19. (In many coding languages, the first item typically starts with 0.)
Within each result, you'll find additional information about the location, including details like the name, address, rating, and more.
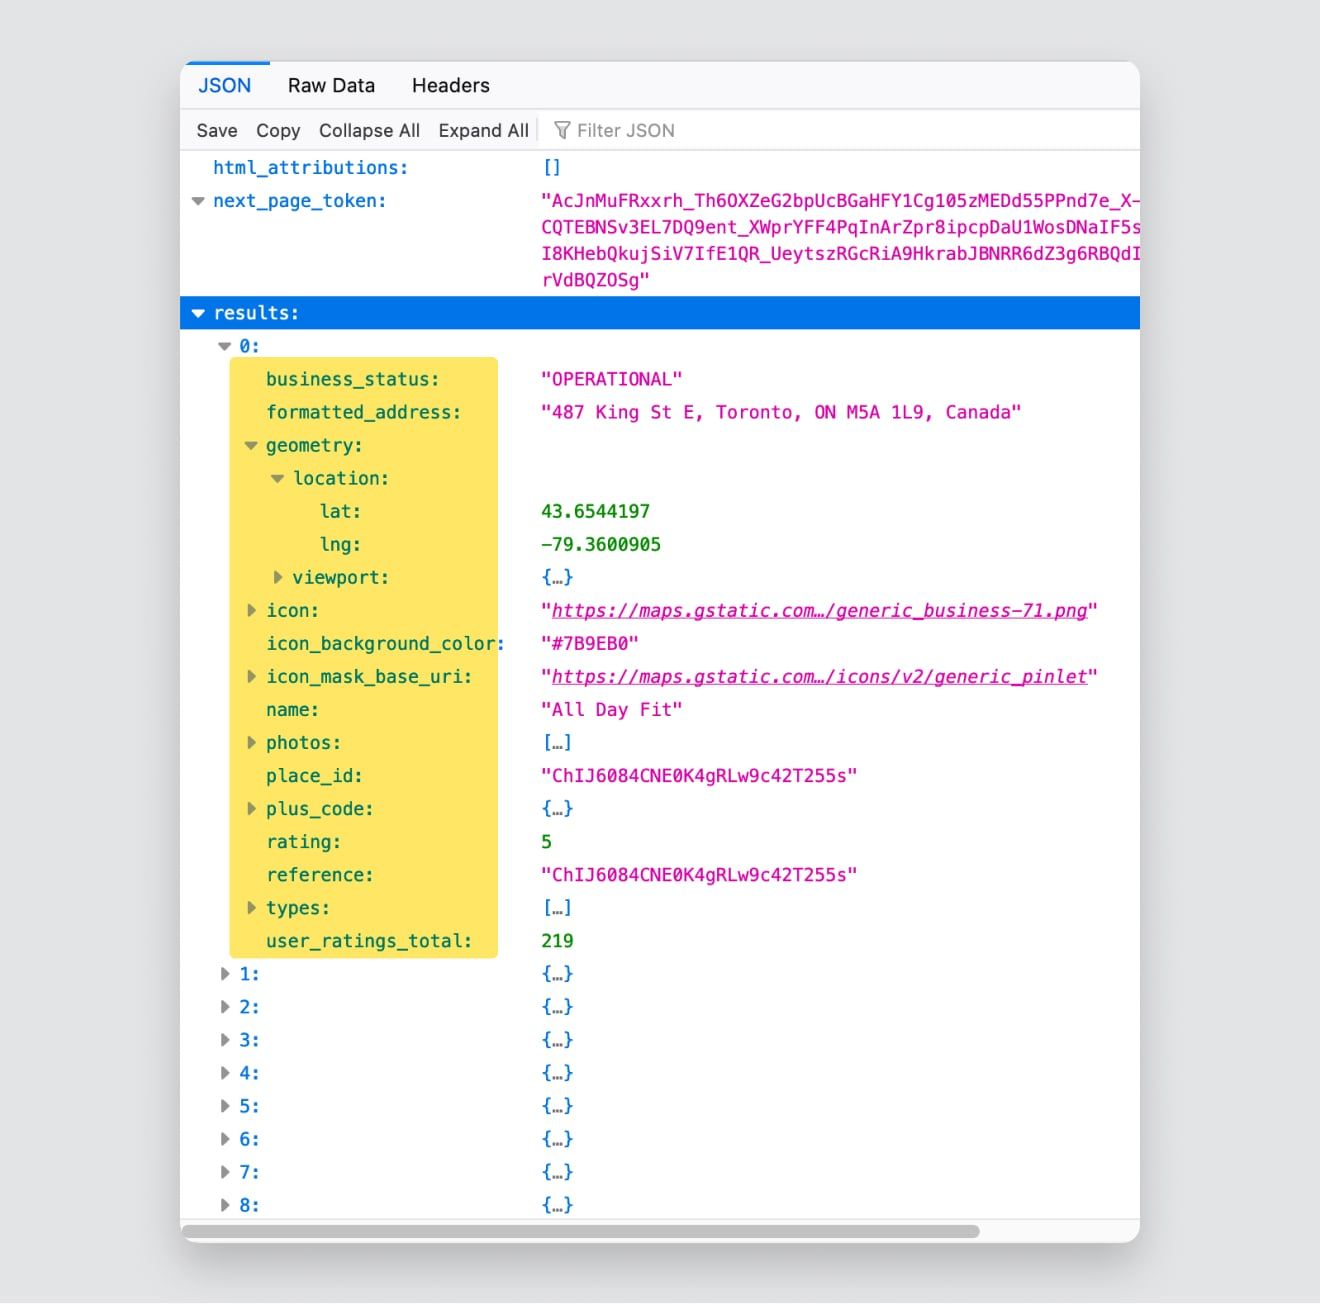
Text search response.
To incorporate this information into our prototype, we'll utilize the parseJson() function in ProtoPie. This function takes a JSON string as input and retrieves the corresponding value. For instance, to obtain the name of the first result, you can use parseJson(apiResponse, "results.0.name")
apiResponseis a text variable used to store the data returned by the API.“results.0.name”is a string representing a path or key sequence used to access a specific value within the JSON data. It tells the function to navigate the JSON data structure as follows:
Access the "results" key, which is an array.
Access the element at index 0 within that array.
Access the "name" key within that element.
Improvement ideas using more advanced features
Utilize the parseJson() function for text responses to extract and display textual content in the desired format. Beyond this, there's a world of possibilities to explore with the API data. Consider the following examples:
Showcase the names of the places in your search results with clarity and style.
Fetch detailed address information from the API response to provide users with location specifics.
Add a star rating for each place, offering a quick visual cue for quality.
Incorporate Open/Closed status for each result, and craft a user-friendly and visually appealing representation.
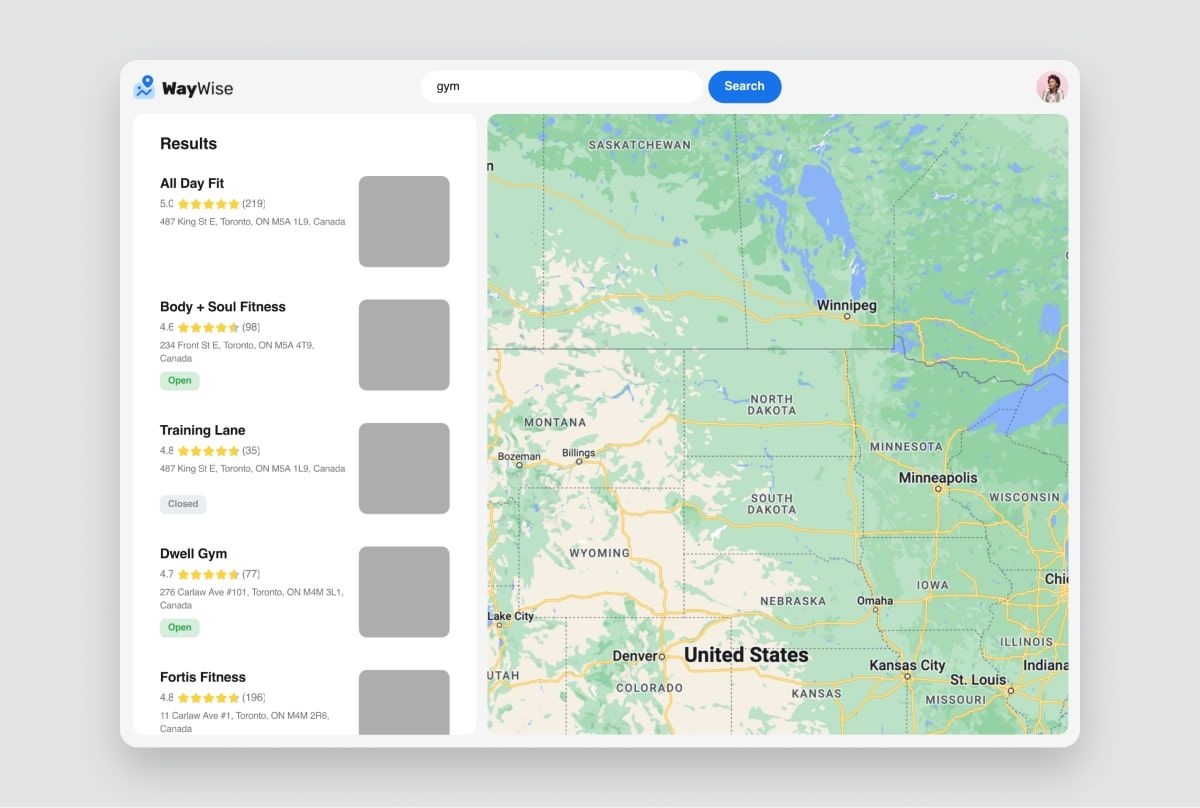
Display textual content.
Configure the API Plugin
Now let’s move on to ProtoPie Connect and configure the plugin. Click the Plugin button to open the plugin panel.
Method:
GETFor URL, Header, and Body, let’s leave them empty.
Message from Pie:
TEXT SEARCH REQUESTCheck the “override” checkbox and pick the URL in the dropdown menu. This will use the value sent along with your message to override the request URL.
Message to Pie:
TEXT SEARCH RESULTFinally, click the activate button to run your API plugin.
5. How to display location photos (using Places API)
The search results don't currently show location photos, but we're about to change that. Let's work on incorporating those photos into our search results.
Display location photos via the Places API.
In our Text Search response, pay attention to the "photos" section. If you explore it further, you'll come across a key labeled "photo_reference." This key is crucial for us to display a photo of the location.
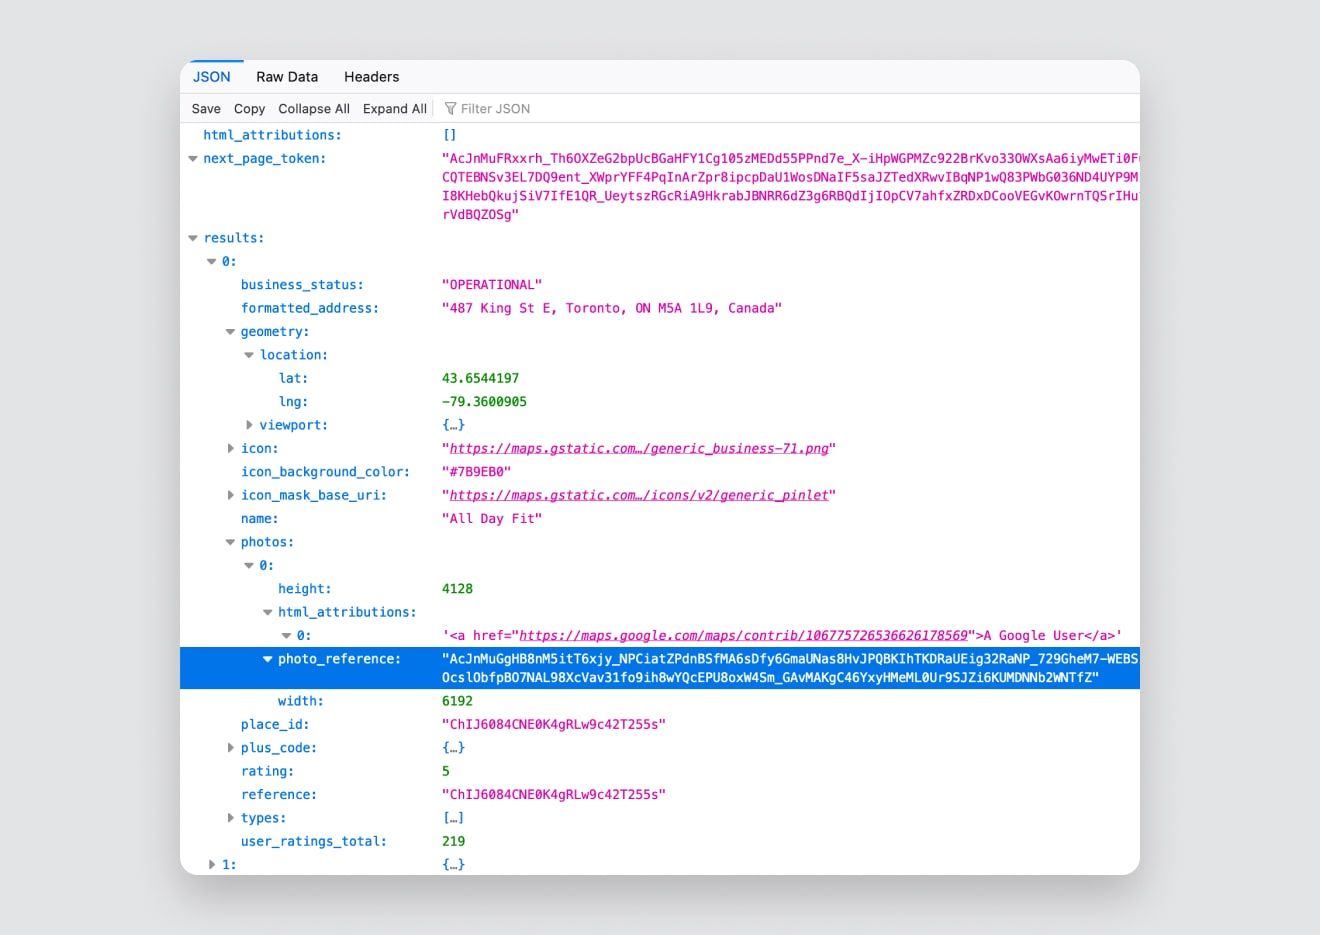
Key labeled "photo_reference."
To display photos, we'll be utilizing another service from the Places API called Place Photos. A Place Photos request has the following structure:
https://maps.googleapis.com/maps/api/place/photo?parameters
For the parameters, it is mandatory to include
photo_reference— This is what you can find in the above Text Search response.maxheight or maxwidth— This is used to specify the size of your photo.And, as always, remember to append your API key at the end of the URL.
So, for instance, if you wish to display the photo using the photo_reference shown in the previous screenshot, and you want it at a maximum width of 400 pixels, your URL should appear as follows:
https://maps.googleapis.com/maps/api/place/photo?maxwidth=400&photo_reference=AcJnMuGgHB8nM5itT6xjy_NPCiatZPdnBSfMA6sDfy6GmaUNas8HvJPQBKIhTKDRaUEig32RaNP_729GheM7-WEBSiP1Ck8-OcslObfpBO7NAL98XcVav31fo9ih8wYQcEPU8oxW4Sm_GAvMAKgC46YxyHMeML0Ur9SJZi6KUMDNNb2WNTfZ&key=YOUR_API_KEY
Ensure you replace "YOUR_API_KEY" with the actual API key you obtained earlier.
Once again, you can easily debug this by opening the URL in a web browser.
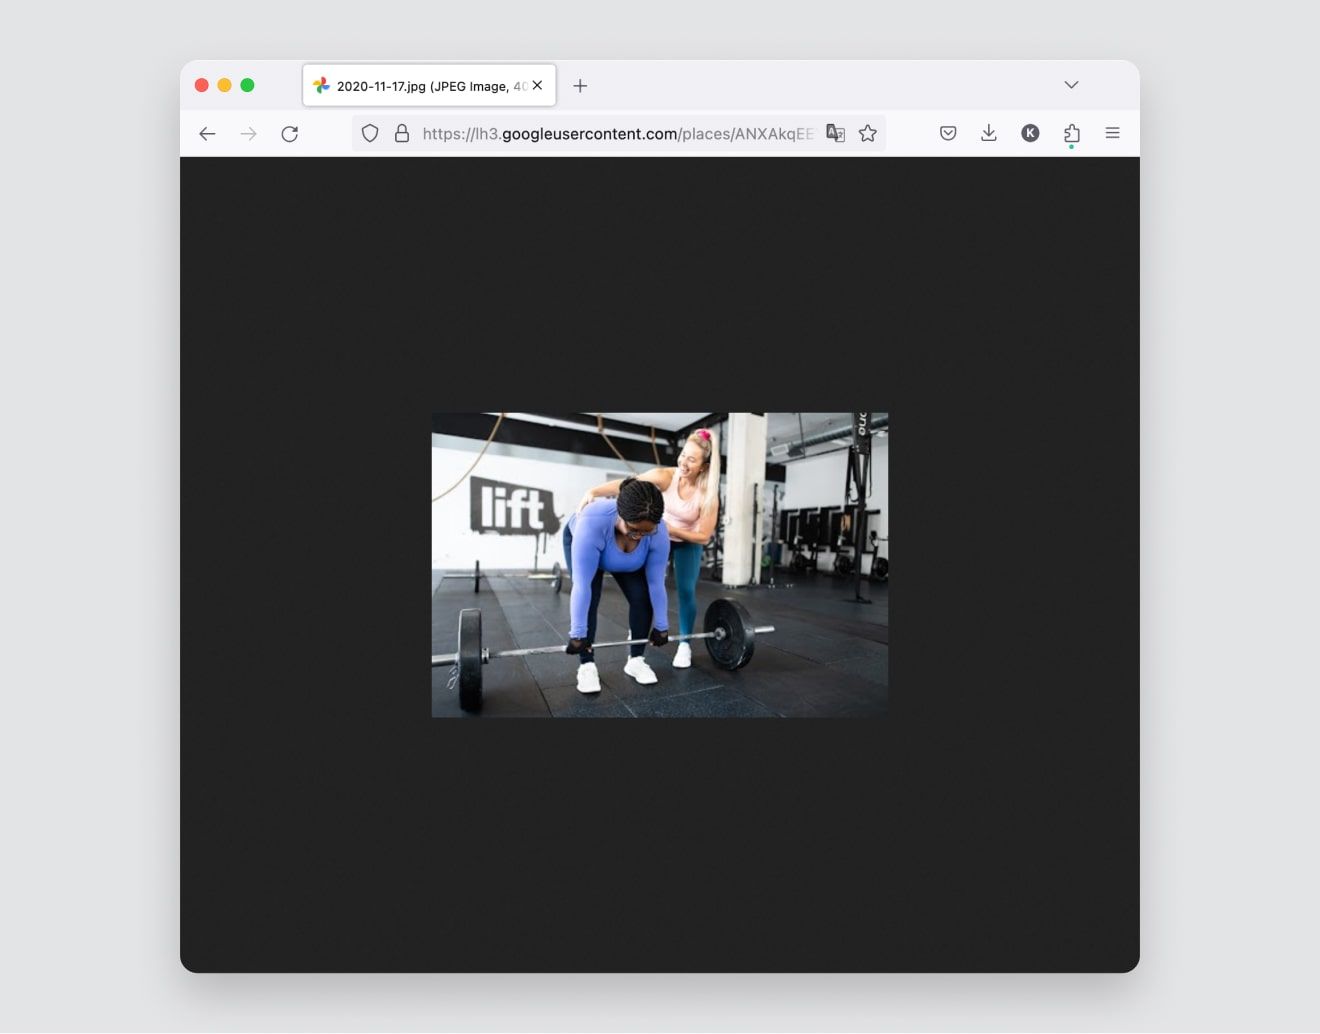
Text search response photo debug.
Now, you might be wondering how to incorporate this photo into our prototype. Do we need a second API plugin to do so? The answer is no. Thanks to the newly released self-hosted media feature in ProtoPie 7.9, you can effortlessly utilize the provided URL within a Media response.
To achieve this, all you need to do is apply a Media response to your image layer and use a formula. For the formula, let's utilize the following:

Formula.
The formula may appear a bit lengthy, but don't worry; we'll break it down step by step.
photoBaseURLis a text variable that contains a segment of the URL, making the formula more manageable. It holdshttps://maps.googleapis.com/maps/api/place/photo?maxwidth=400&"photo_reference=”is simply a piece of text.parseJson(apiResponse,"results.0.photos.0.photo_reference")— We're already familiar with theparseJson()function. It retrieves thephoto_referencefrom the API response of our Text Search result.“&key=”is another text element.API_KEYis a text variable storing your API key.
Together, these elements form the URL required to fetch the photo of our search result.
6. How to show static maps (using Maps Static API)
The Maps Static API is yet another service within the Google Maps Platform. It allows you to embed a Google Maps image. Our objective is to display a map of the selected location on the right-hand side when we click on any of our search results.

Display a map of the selected location.
Within our Text Search response, let's now focus on the "location" section, which includes the longitude and latitude of the location. This is another critical piece of information we can leverage for our prototype.
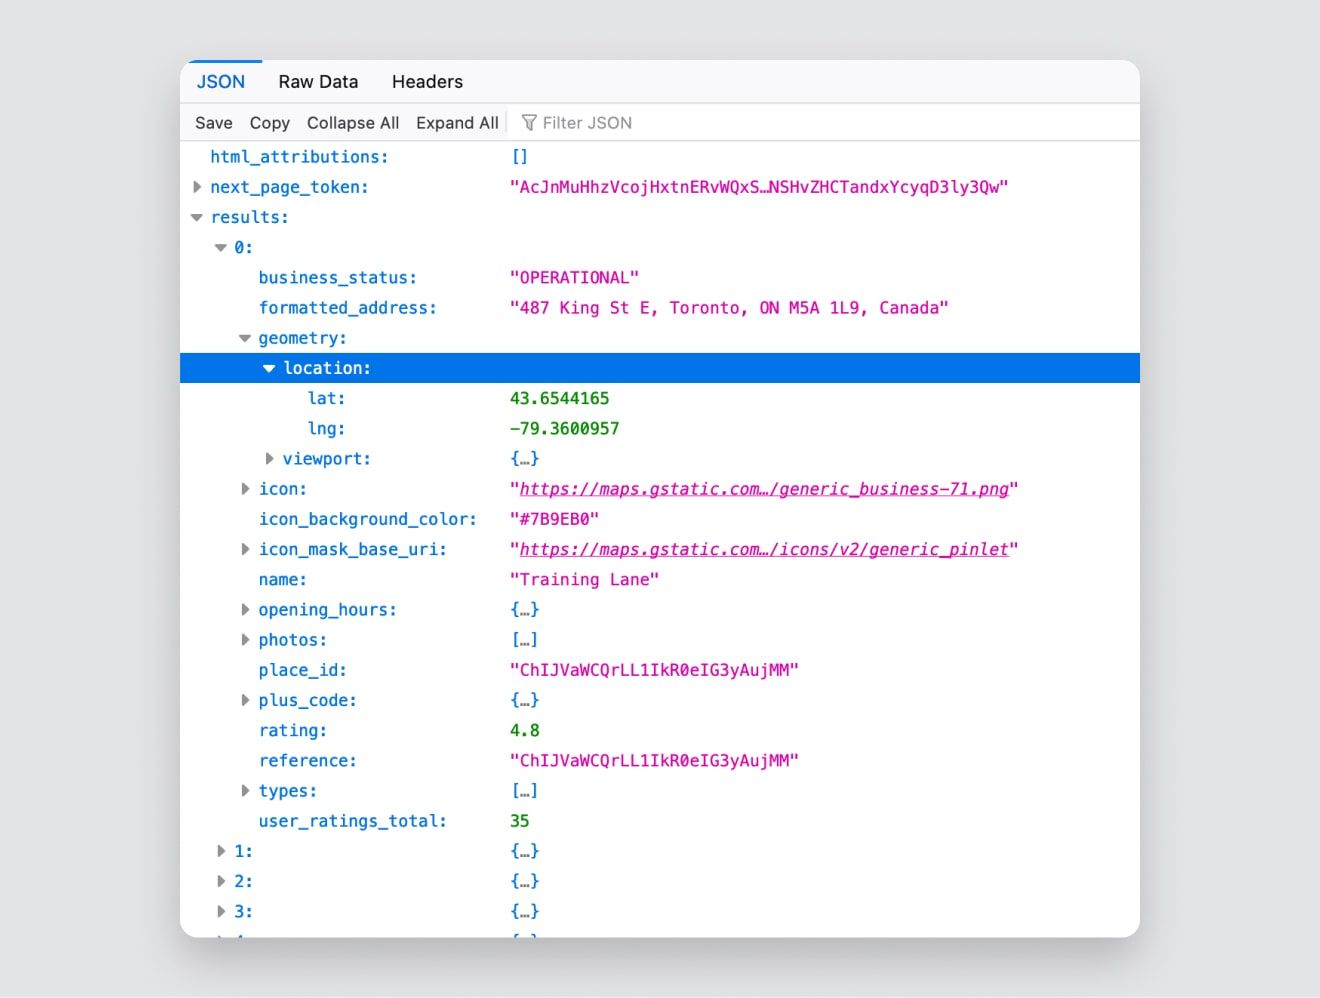
Text Search response
A Maps Static API URL has the following structure:
https://maps.googleapis.com/maps/api/staticmap?parameters
The required parameters are:
centerdefines the center of the map, equidistant from all edges of the map. You can provide it either as a pair of latitude and longitude values or a string address.zoomis the zoom level of the map. You can experiment and select the zoom level that suits your needs.sizedefines the rectangular dimensions of the map image.And once again, remember to append your API key at the end of the URL.
For instance, if you wish to obtain a map image of the location with the provided coordinates (latitude: 43.6544165, longitude: -79.3600957) at a zoom level of 12 and a size of 865 x 920 pixels, your URL should be structured like this:
https://maps.googleapis.com/maps/api/staticmap?center=43.6544165,-79.3600957&zoom=12&size=865x920&key=YOUR_API_KEY
Ensure you replace "YOUR_API_KEY" with the actual API key you obtained earlier.
And once again we can debug this in a browser.
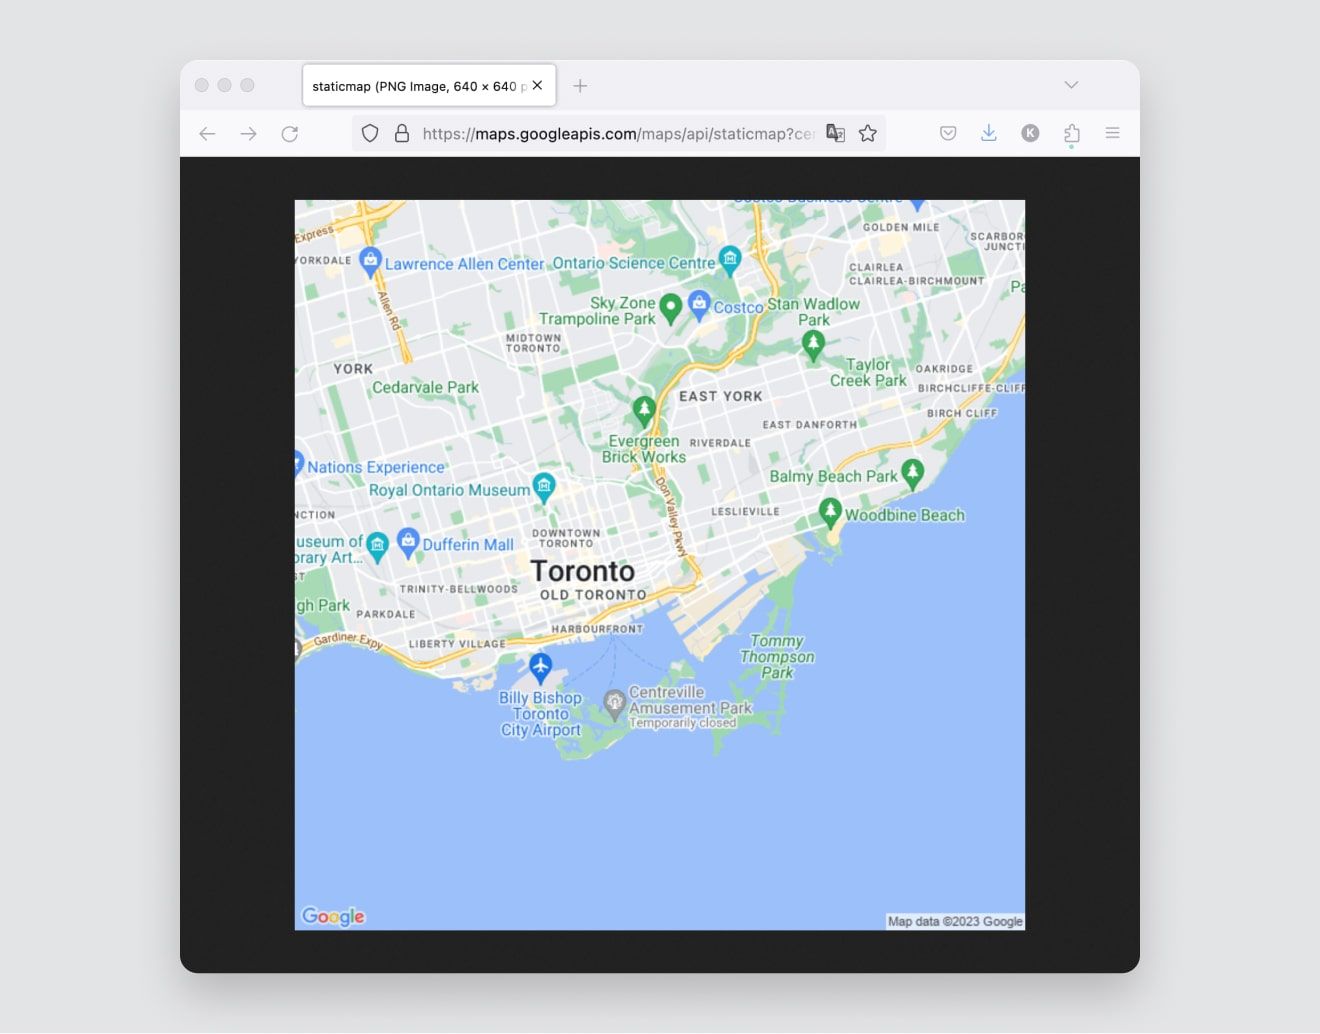
Text search response map debug.
To incorporate this image into your prototype, as you might have guessed, you can leverage the self-hosted media feature.
7. How to show customized maps (using Maps Static API)
Finally, for those of you who prefer not to rely on the default map colors offered by Google, we'll discuss how to apply custom styling to your map image in your prototype. This is supported by the Maps Static API as well, and you can find more details about it here.
Change Google Map colors.
In simple terms, to implement custom styling, all you have to do is generate a map ID for your design. You can achieve this by following these steps.
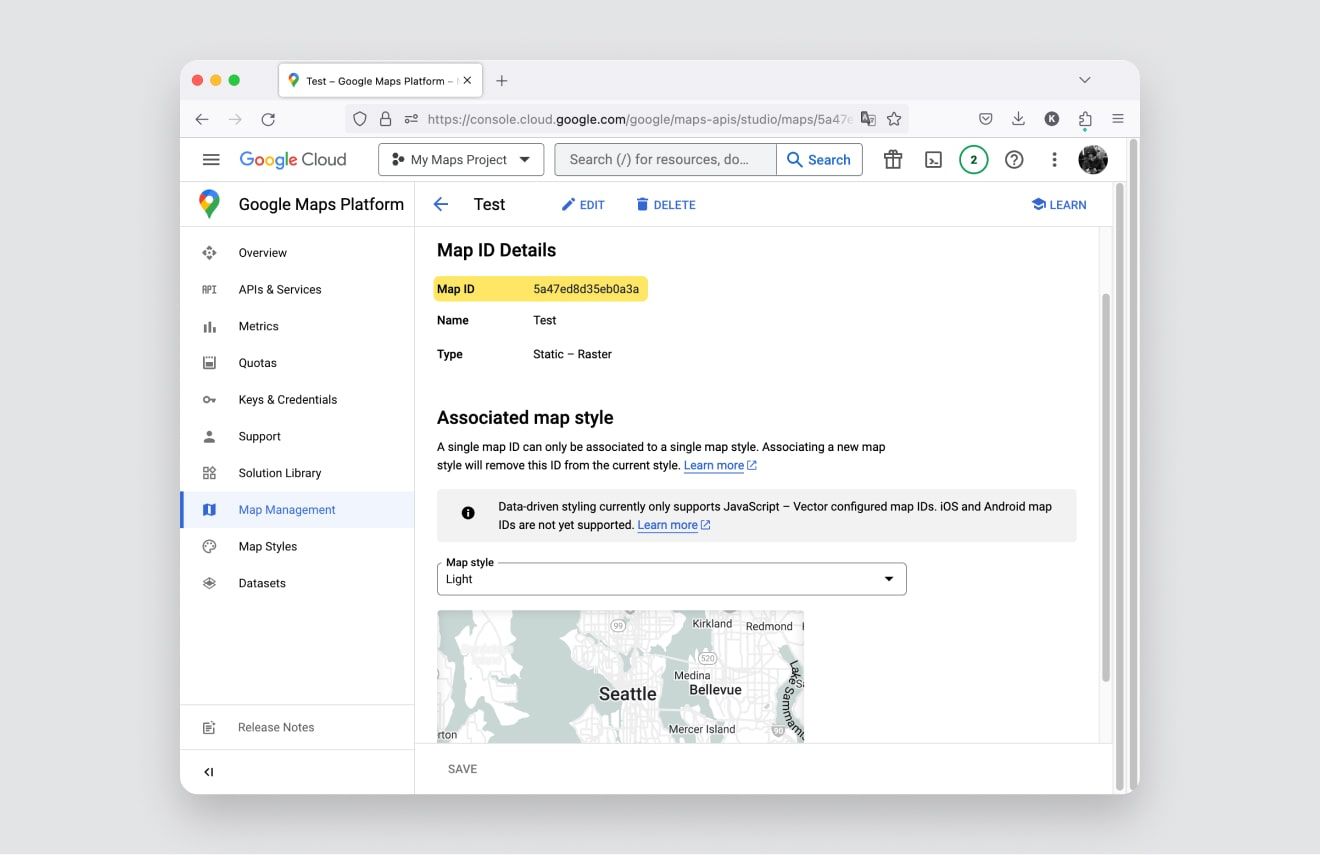
Generate a map ID for your design.
Then, include the map ID as a parameter within your URL, and you can seamlessly employ this URL in a Media response.
https://maps.googleapis.com/maps/api/staticmap?center=43.6544165,-79.3600957&zoom=12&size=865x920&map_id=YOUR_MAP_ID&key=YOUR_API_KEY
Google Maps integration with ProtoPie is possible!
In this tutorial, you've discovered the art of integrating Google Maps and location-based services into your UI/UX prototypes, all without the complexities of coding. Whether you're an experienced designer or embarking on your design journey, the Google Maps Platform, coupled with ProtoPie's innovative features, empowers you to craft high-fidelity designs that breathe life and authenticity.
With the ability to infuse your prototypes with genuine data, photos, and personalized map styles, you can captivate your audience and deliver a user experience that mirrors real-world interactions.
Now, armed with these newfound skills, you're ready to bring your design concepts to life, ensuring a journey filled with creativity and interactivity. Happy prototyping!


