
In the first part of this series, we learned about the API Plugin and the basics of how to use it. If you haven’t read it yet, it’s a good idea to check it out before continuing with this article. In this second part, we’ll look at some more practical examples.
Example 1: Customizing the Request Based on Interaction
The basic example we explored in the first article was simple. We sent a request to the same URL every time and used the response. However, you’ll often find that you’ll need to customize the request URL each time. In this example, we’ll create a dictionary look-up experience where you can type in any word and pass it off to an API to retrieve its definition.
We’ll be using the Free Dictionary API for this. The API request URL looks like this:
https://api.dictionaryapi.dev/api/v2/entries/en/<word>
Notice the part of the URL at the end labeled <word>. We replace this part with the actual word we’d like to look up.
For example, to look up the definition of the word “chicken,” we’d use this URL:
https://api.dictionaryapi.dev/api/v2/entries/en/chicken
To look up the definition of the word “little,” we’d use this URL:
https://api.dictionaryapi.dev/api/v2/entries/en/little
Essentially, each word has its own unique URL. Recall from the previous article that in the ProtoPie Connect API plugin, we could only configure a single URL. In this example, we’ll look at how to deal with this situation.
Configure the API Plugin
The ProtoPie Connect API Plugin allows you to override the request URL with one supplied by your Pie. This allows us to build the URL in Studio dynamically and supply it as the value of the message the Pie sends out to trigger the API request.
In ProtoPie Connect, we’ll configure our plugin in a similar manner as we did in the first example, but with one notable difference:
This time, leave the URL field blank. Instead, below the Message From Pie field, check the box beside Override. Leave the drop-down with the default URL.
Fill out the Message from Pie and Message to Pie fields with whatever messages you like. I’m using
DICTIONARY_REQUESTandDICTIONARY_RESPONSErespectively.Click Activate.
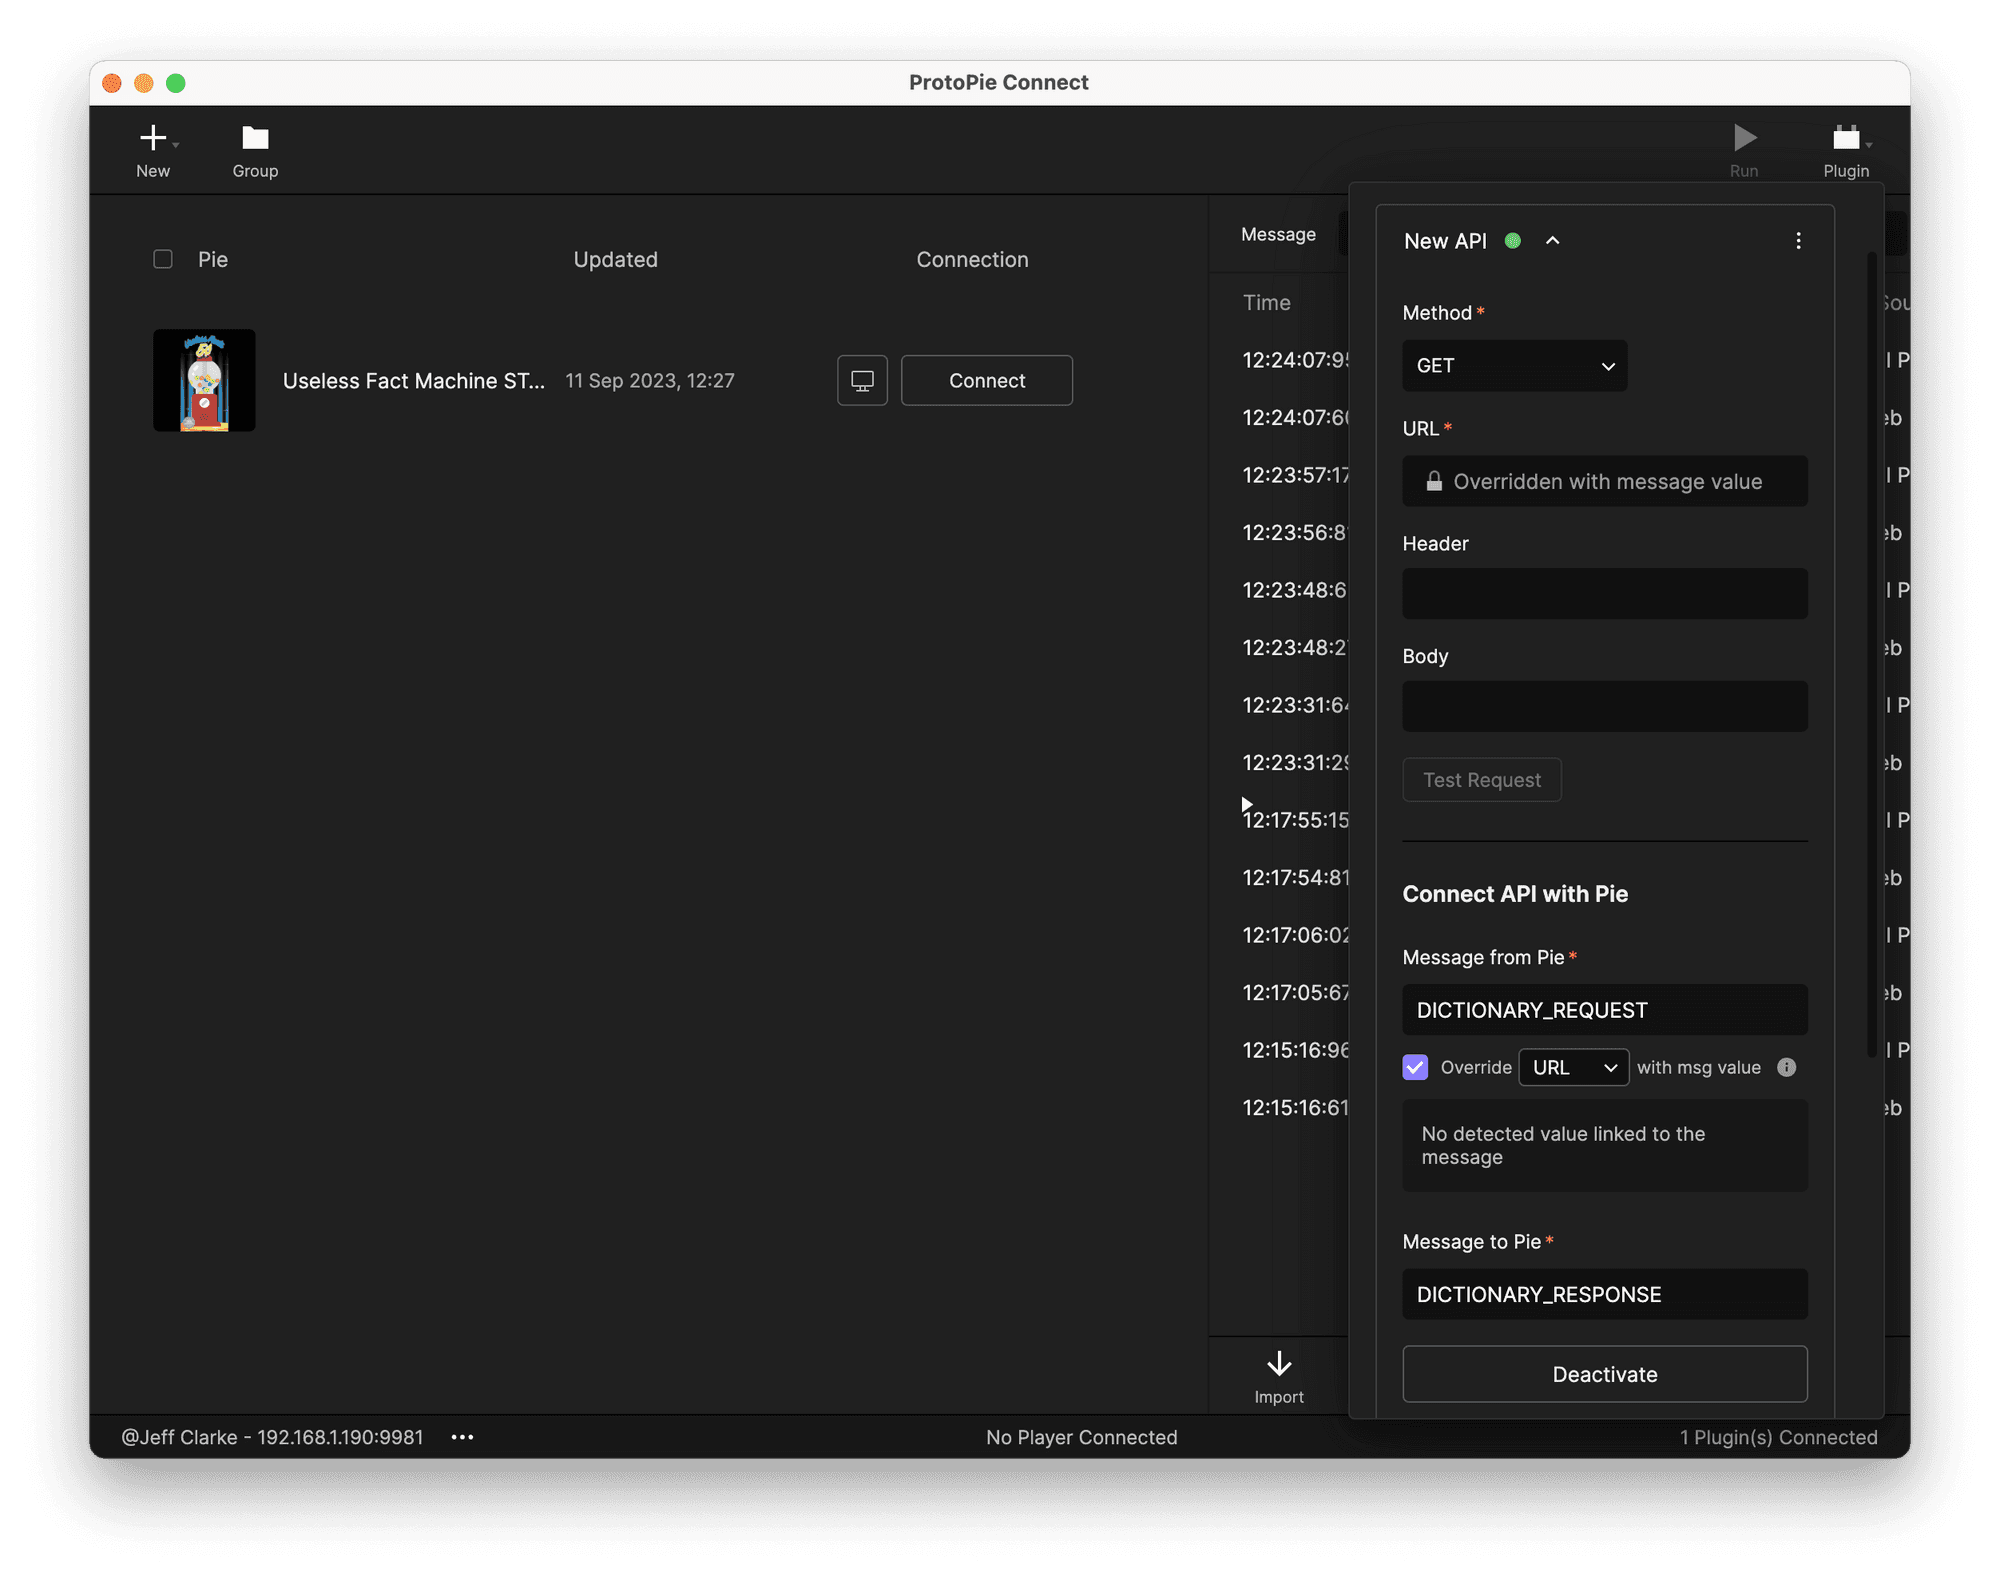
Configuring the API Plugin.
Note: You won’t be able to test the connection since the plugin does not currently know the URL to request.
Sign up for exclusive news and tips about API prototyping!
Author your Pie
Download the starting Pie for this example, and open it in Studio.
There are two Scenes in this Pie: “dictionary - home” and “dictionary - result.” We’ll do all the work in the “dictionary - result” Scene.
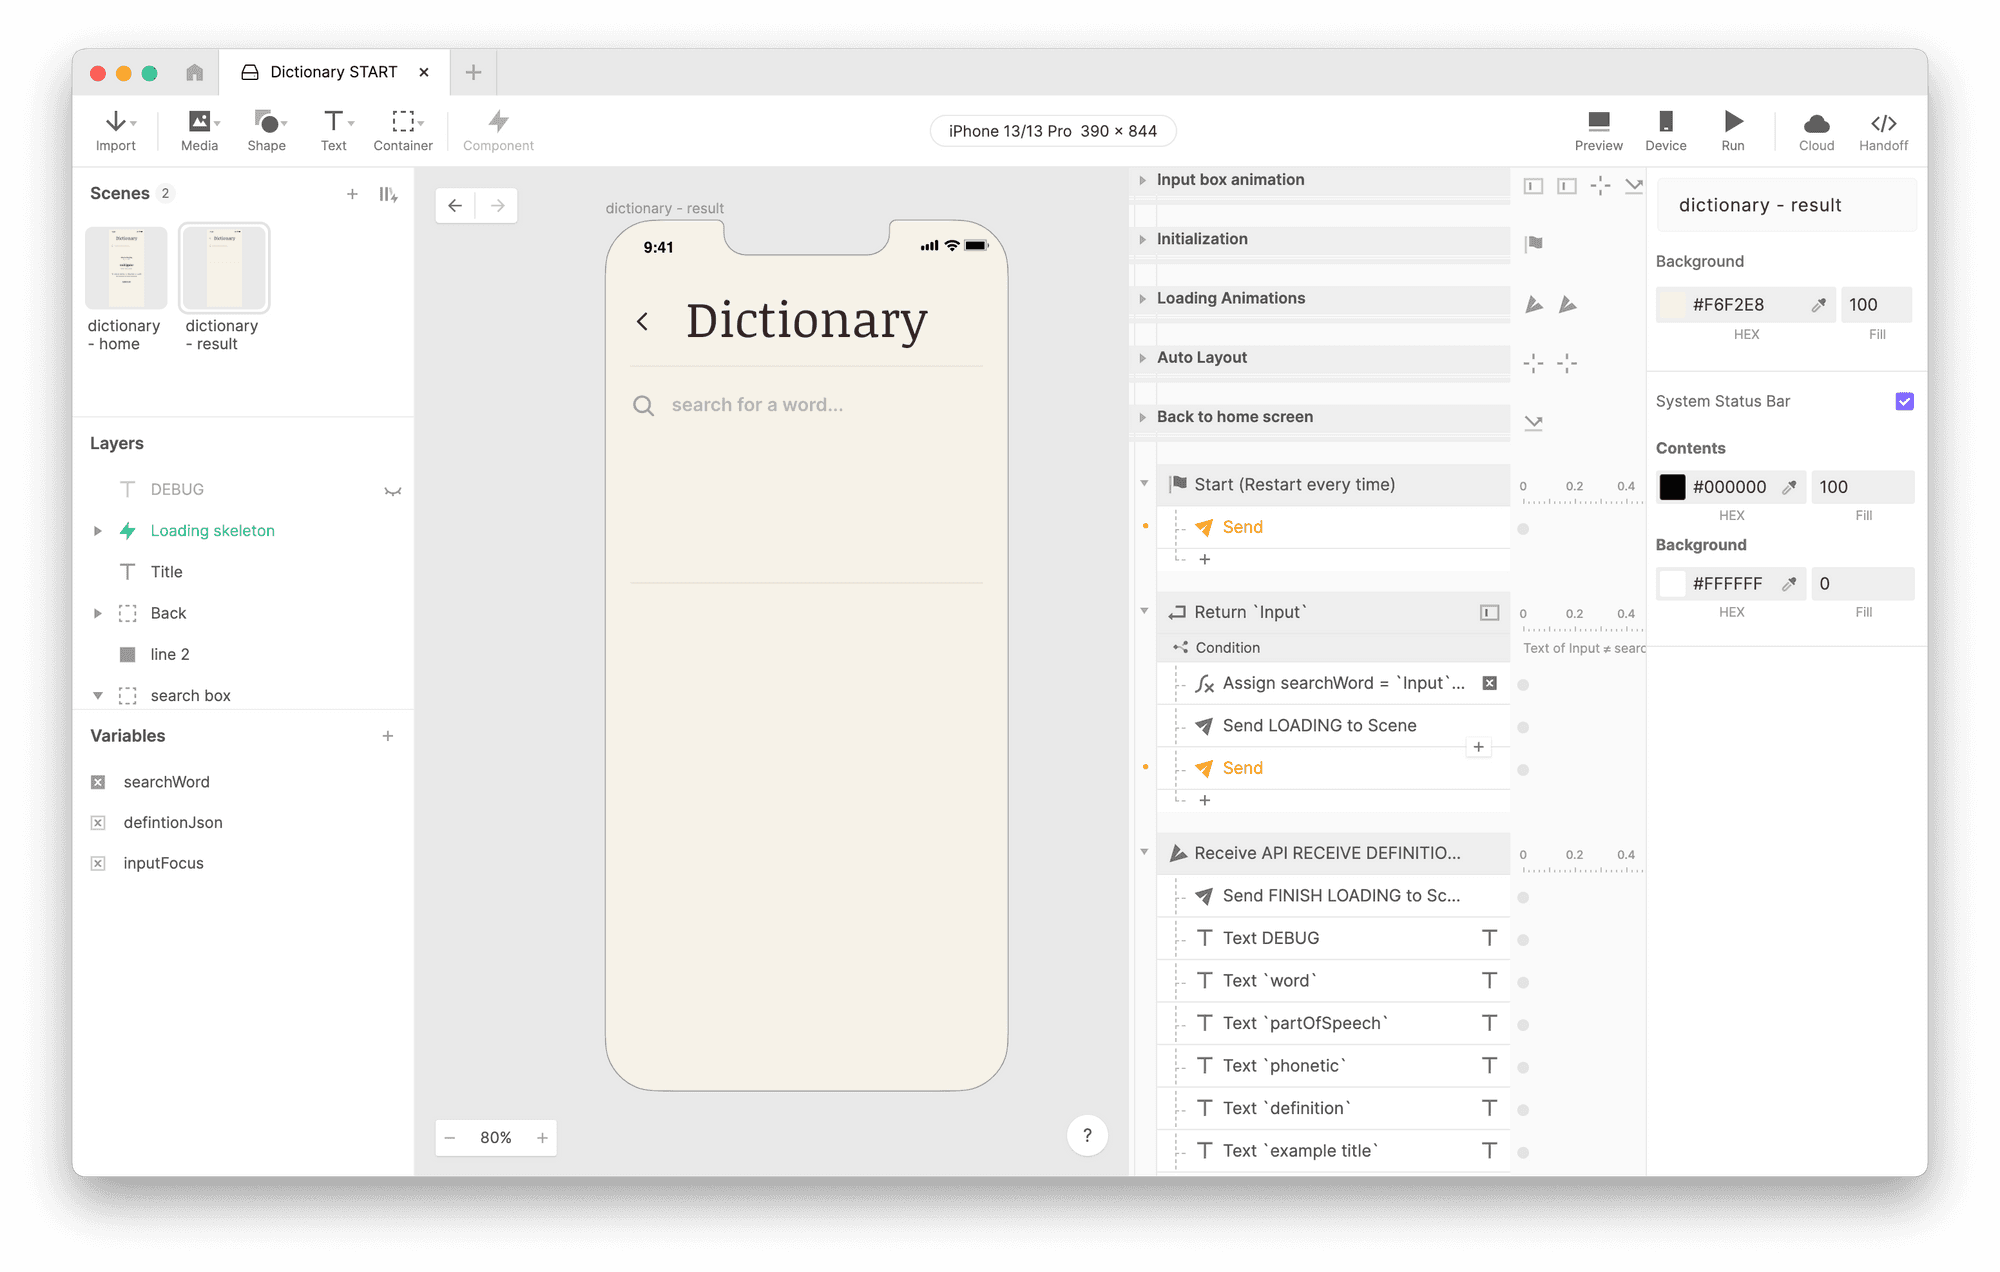
We’ll do all the work in the “dictionary - result” Scene.
Notice that much of the work has been done already, but pay attention to the two Send responses that are thus far unconfigured: one under a Start trigger and another under a Return trigger. Both of these will be the same, so we’ll configure one and copy it over to the other.
Configure the Send response under the Start trigger as follows:
Use the channel ProtoPie Studio.
Use the message you configured in the Message to Pie field in the plugin. In my case, the message I used was
DICTIONARY_REQUEST.
Here is the critical part: the value you pass along with this message will be the URL that gets used by the plugin.
Check the box beside Send Value Together.
In the formula field that appears, use the following formula:
"<https://api.dictionaryapi.dev/api/v2/entries/en/>" + searchWord
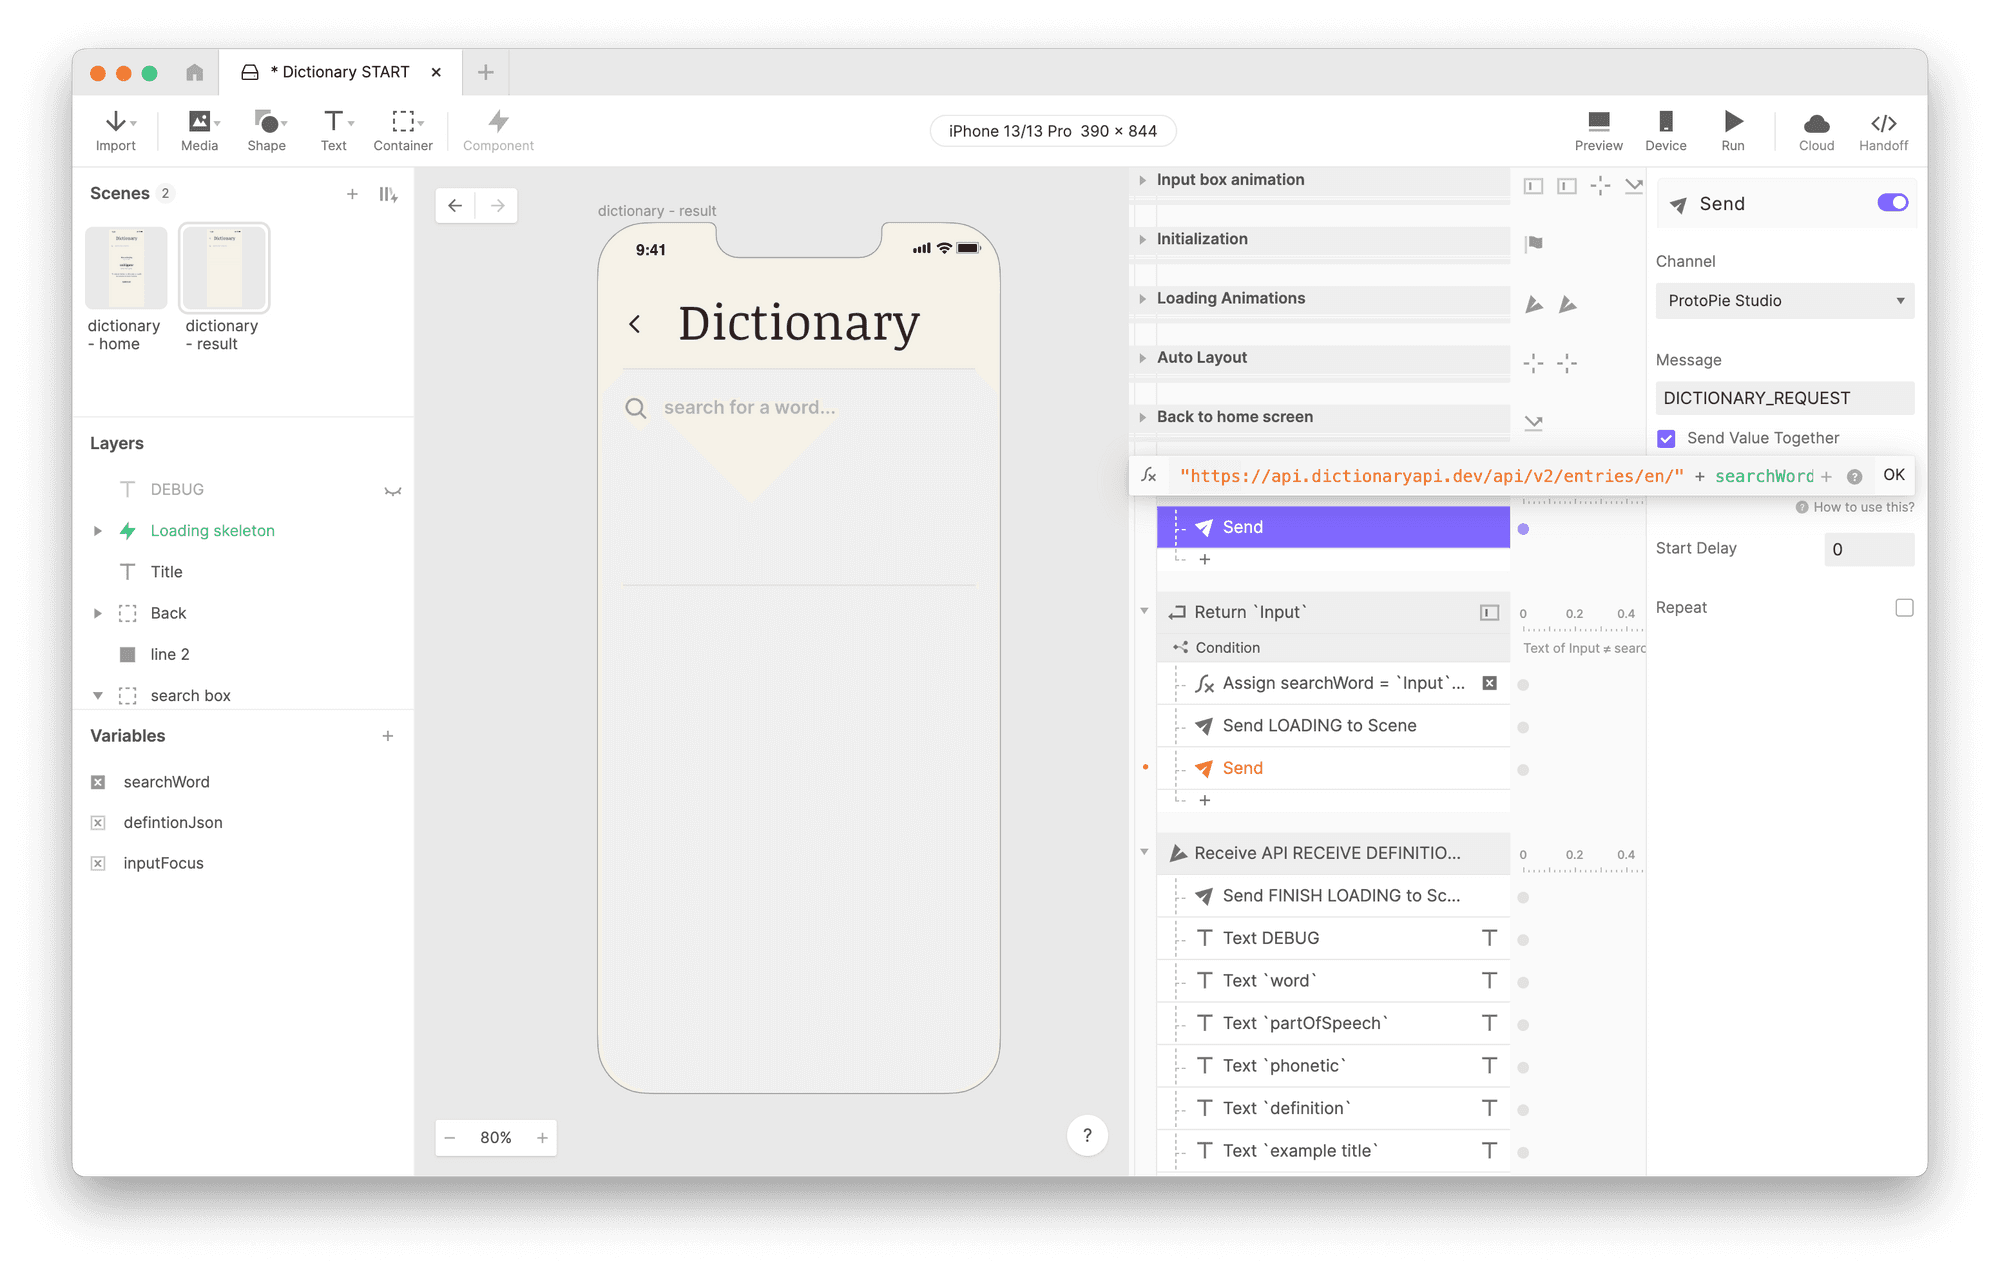
In the formula field that appears, use the indicated formula.
What did we just do?
The request URL is the same every time except for the final part, where we tack on the word we’d like to look up, which is stored in the variable searchWord. By building the URL in a formula like this, we can supply a dynamically generated URL to the plugin every single time we make a request.
We still have another unconfigured Send response in our Pie under the Return Trigger. You can configure that one the same way you did above, or you can copy the Send response you just made into the Return Trigger below. You can then delete the remaining unconfigured placeholder if you like.
Pro tip:* Make sure to paste the copied Send response below the “Assign searchWord = Input.text" response. Otherwise, your Pie will make the request to the API with the previous word.*
This Pie already has the Receive trigger set up to receive the response from the API and use it, so you won’t need to configure that part. But if you’re interested, take a look at the multiple Text responses that are used in that Trigger to fill in several Text layers with values from several keys in the JSON.
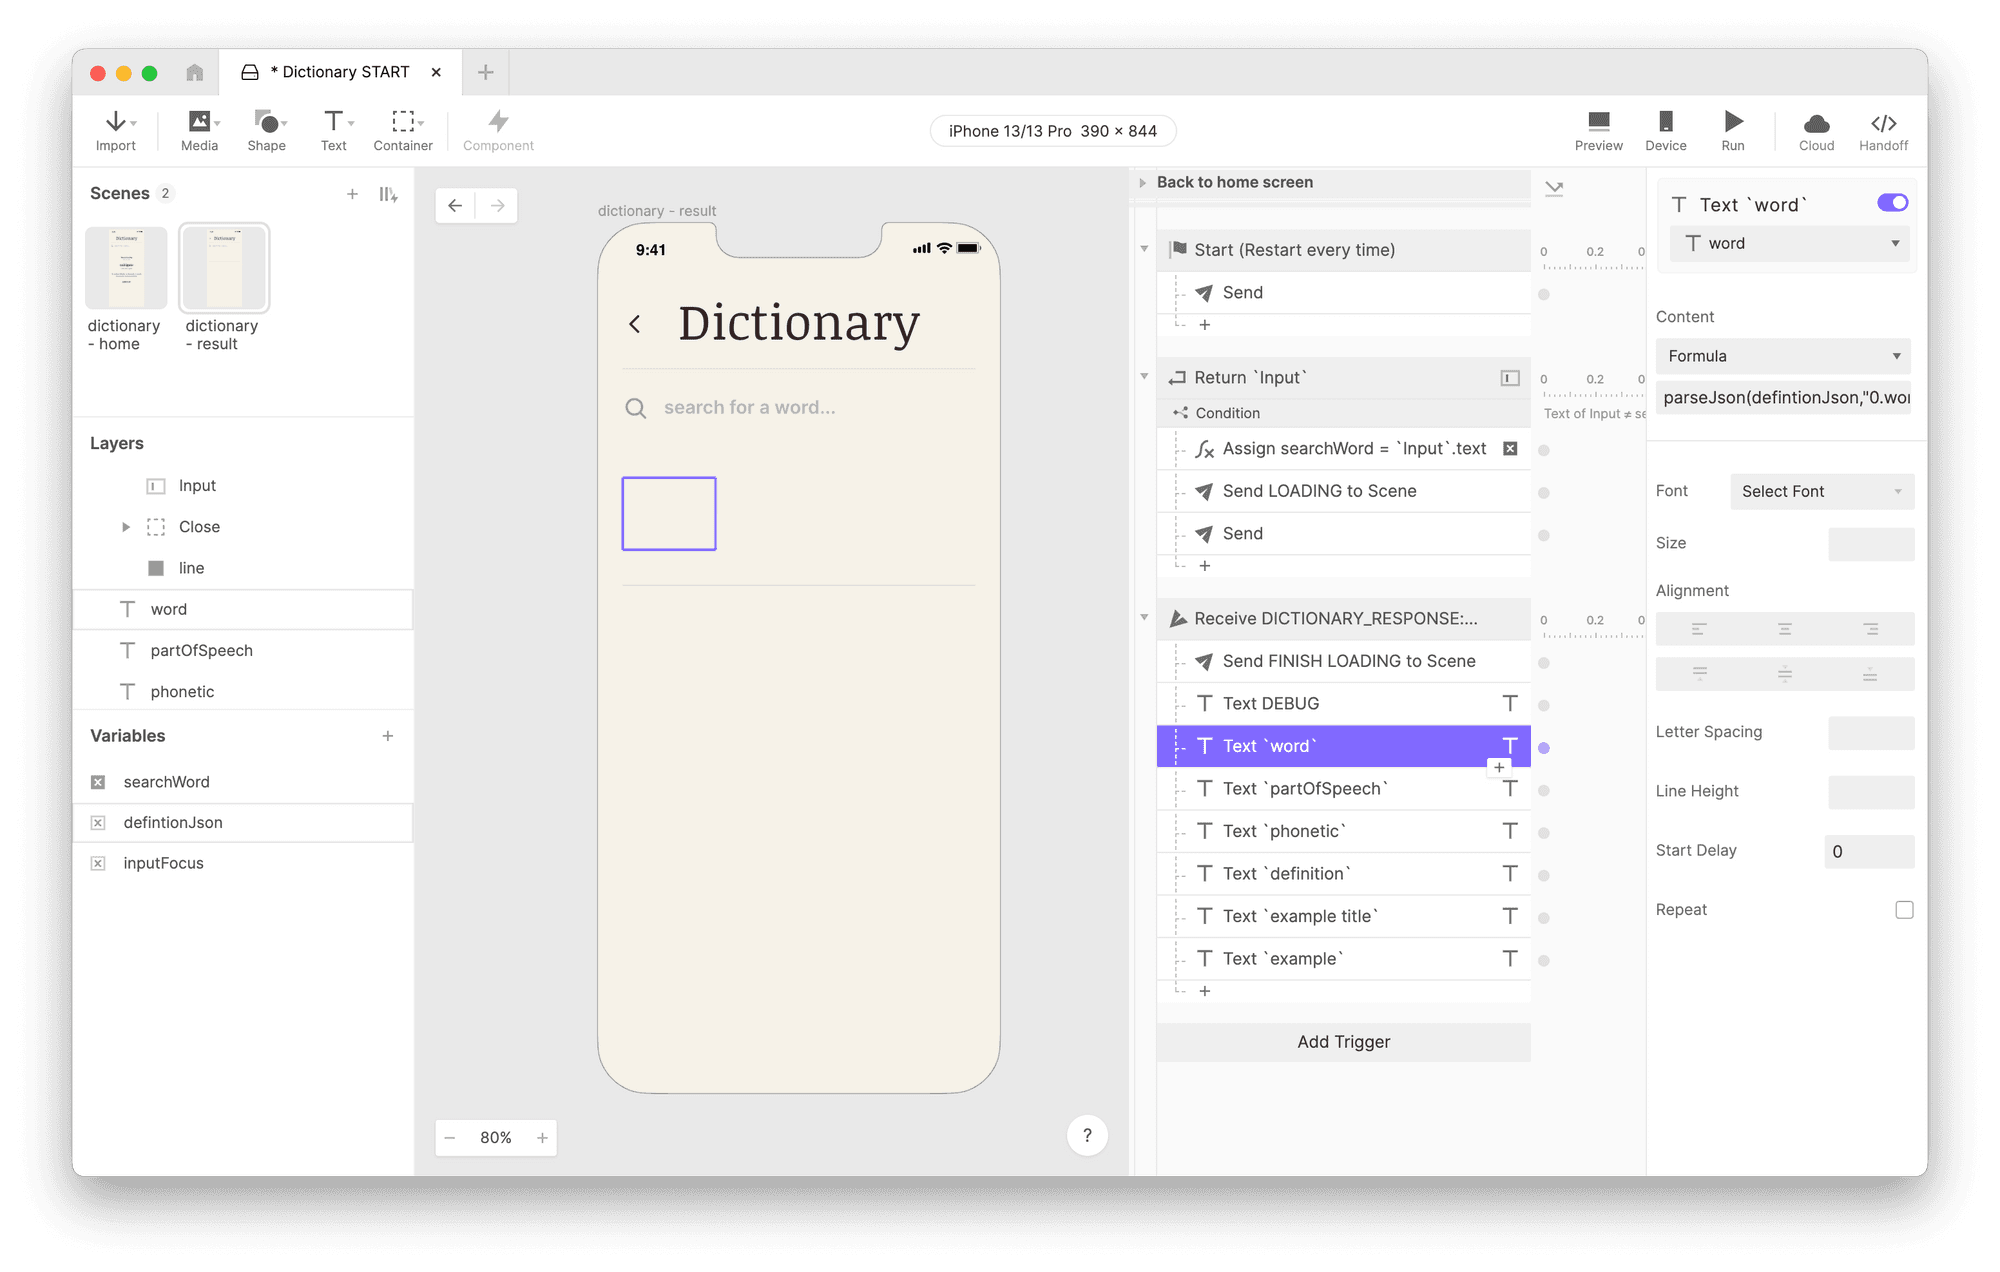
Multiple Text responses that are used in the trigger.
Run the Pie in ProtoPie Connect
Like in part 1, we’ll need to run the Pie in ProtoPie Connect to see our live data in action. Drag the Pie into Connect, preview it, and try it out for yourself!
NOTE: Remember to save your Pie before you run it!
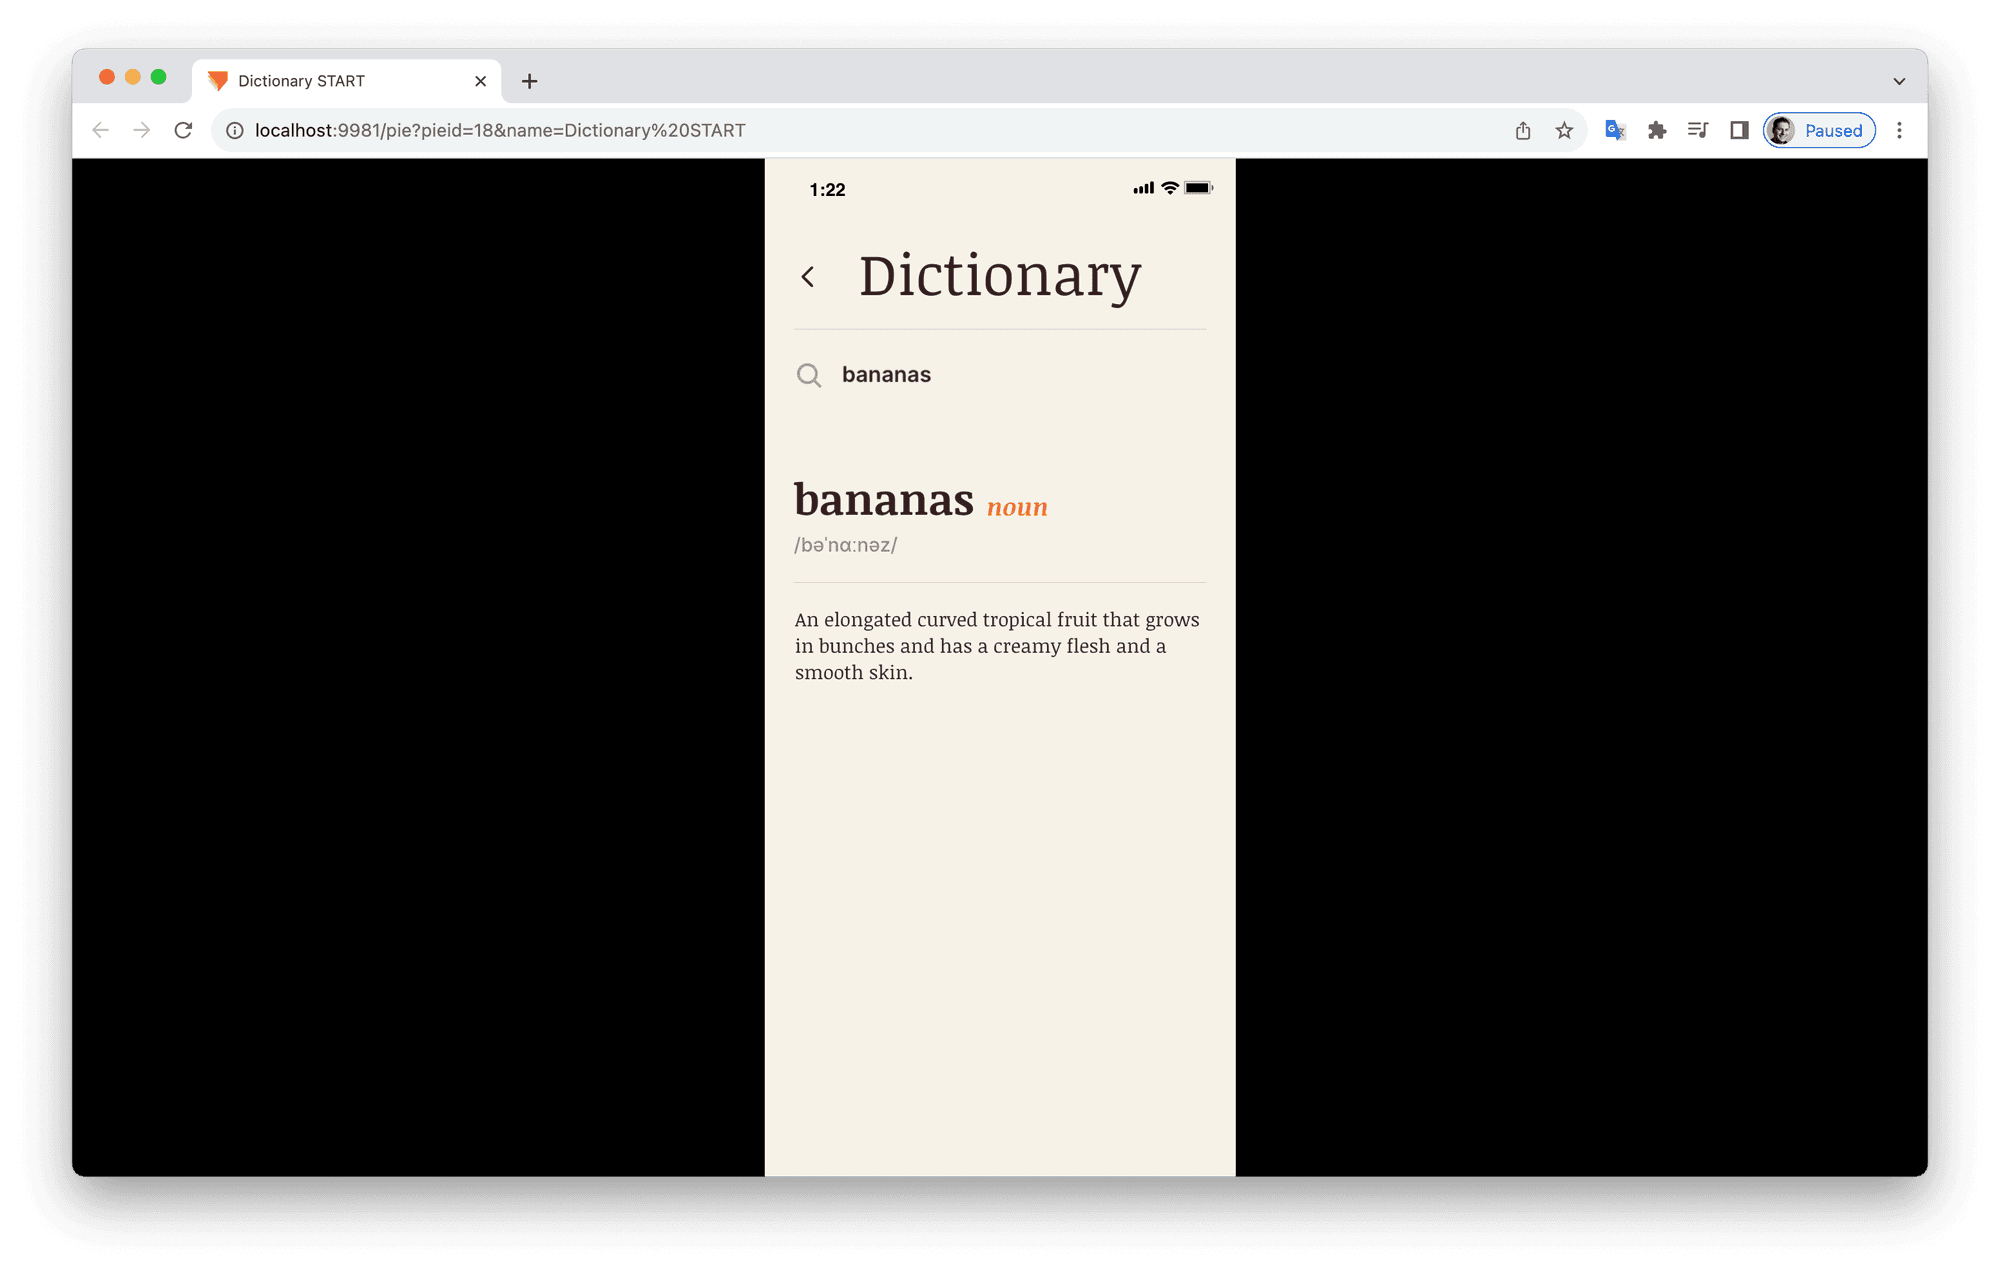
Running the Pie in ProtoPie Connect.
Handling an Error
NOTE: At the time of this writing, ProtoPie Connect 2.6.1 had not yet been released, so if you’re trying this out and the latest version you have is 2.6, this section won’t apply. Hang tight, as 2.6.1 should be released by the end of September 2023.
If you’ve tried this out, you might have encountered a situation where nothing gets returned to the Pie. This can happen if you type a word incorrectly or if you search for a word that doesn’t exist in the dictionary. The API is programmed to handle such an event, and it returns an error status code.
Here’s an example where I’ve misspelled the word “bananas.” Click on the following URL.
https://api.dictionaryapi.dev/api/v2/entries/en/bannas
Notice how the response you get is different than when you look up an actual word. If you right-click and inspect the page using Chrome’s developer tools, you’ll see that an error is reported. Specifically, it is returning the error code 404, which is the standard internet error code for “Not found.”
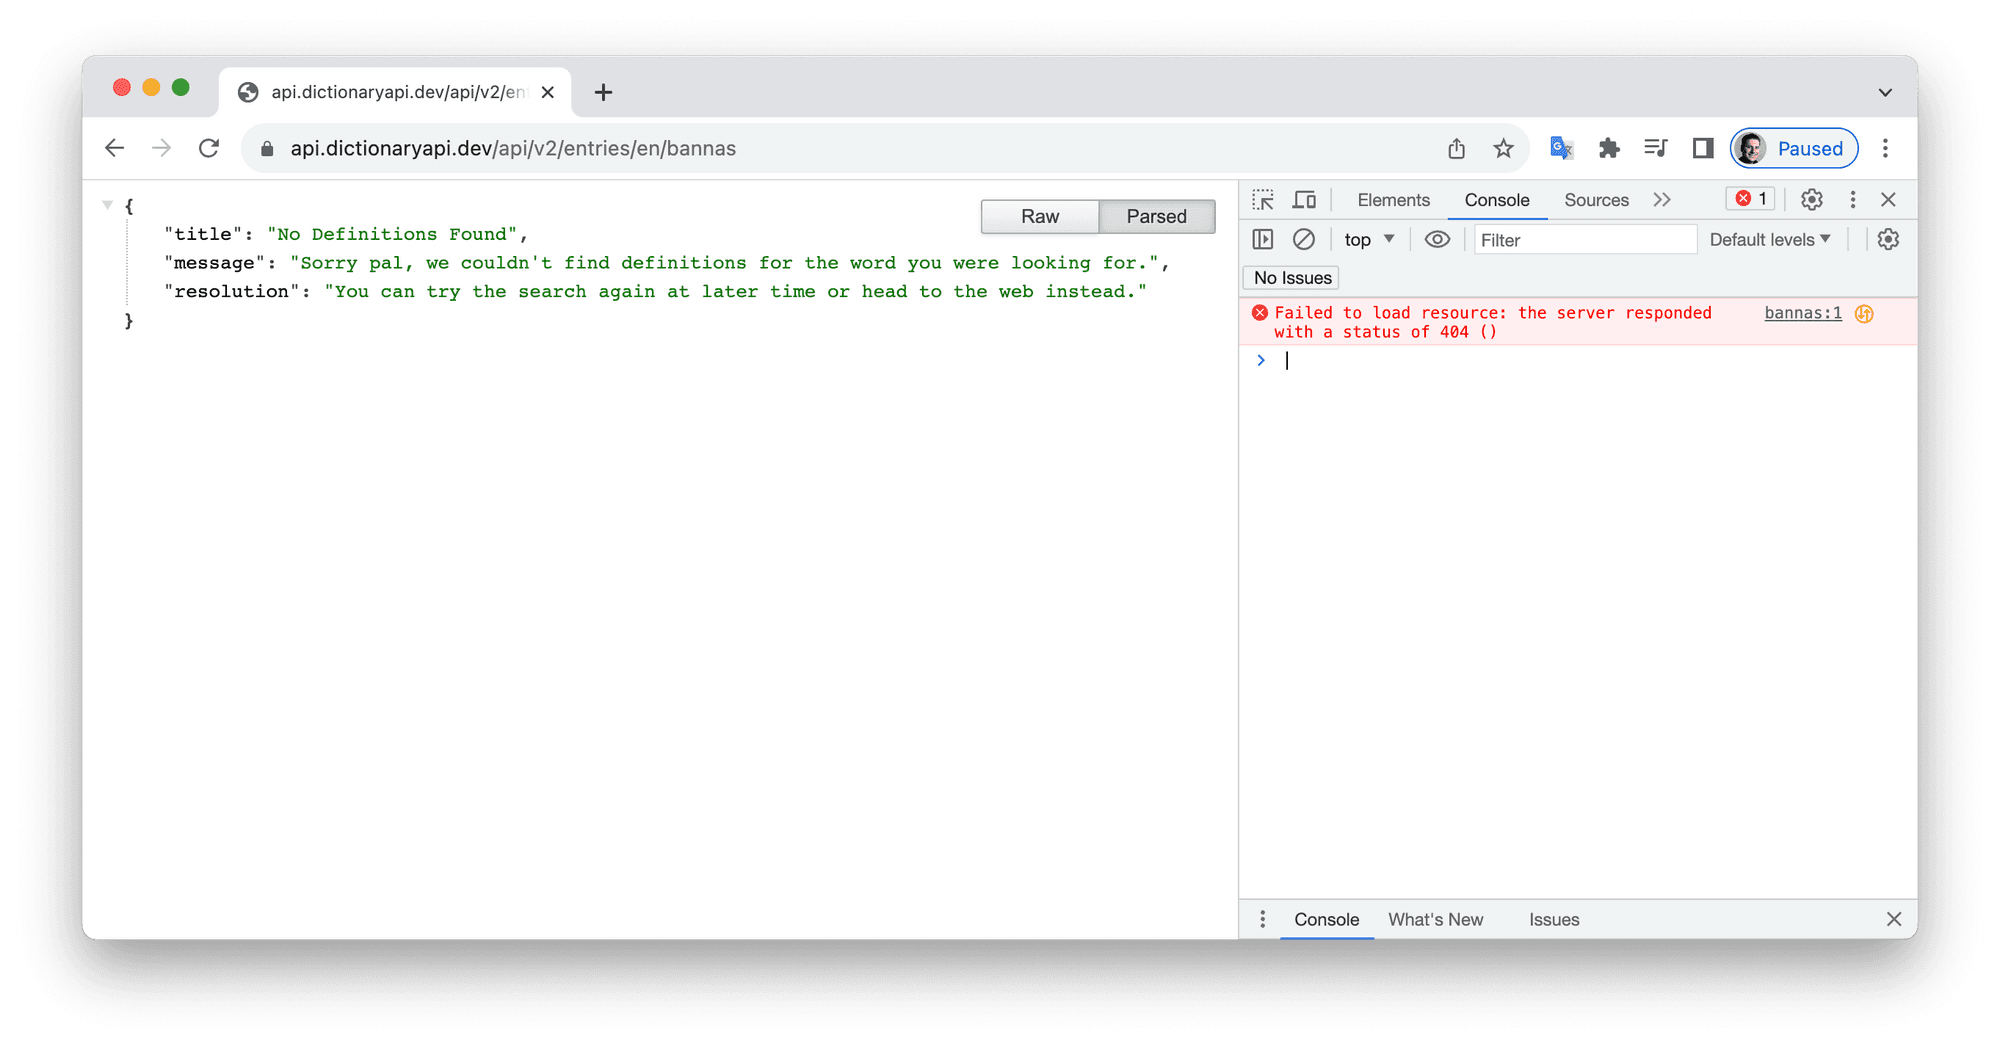
Error code 404 - standard internet error code for “Not found.”
The API Plugin recognizes this situation and provides different JSON back to the Pie. This is why the results come back blank. The Pie was expecting JSON formatted in a particular way, but the error JSON that is sent back doesn’t match that format.
The error JSON sent back from the plugin looks like this:
In our Pie, we can look for the presence of the "status" key and see if its value is “Error.” If so, we can take alternative action and display an appropriate message to the user.
In Studio, look for Trigger that Receives the message DICTIONARY_RESPONSE.
Add a Condition
Configure the condition as follows:
IF:
Formula:
parseJson(defintionJson, "status")EQUALS
Value:
“Error”
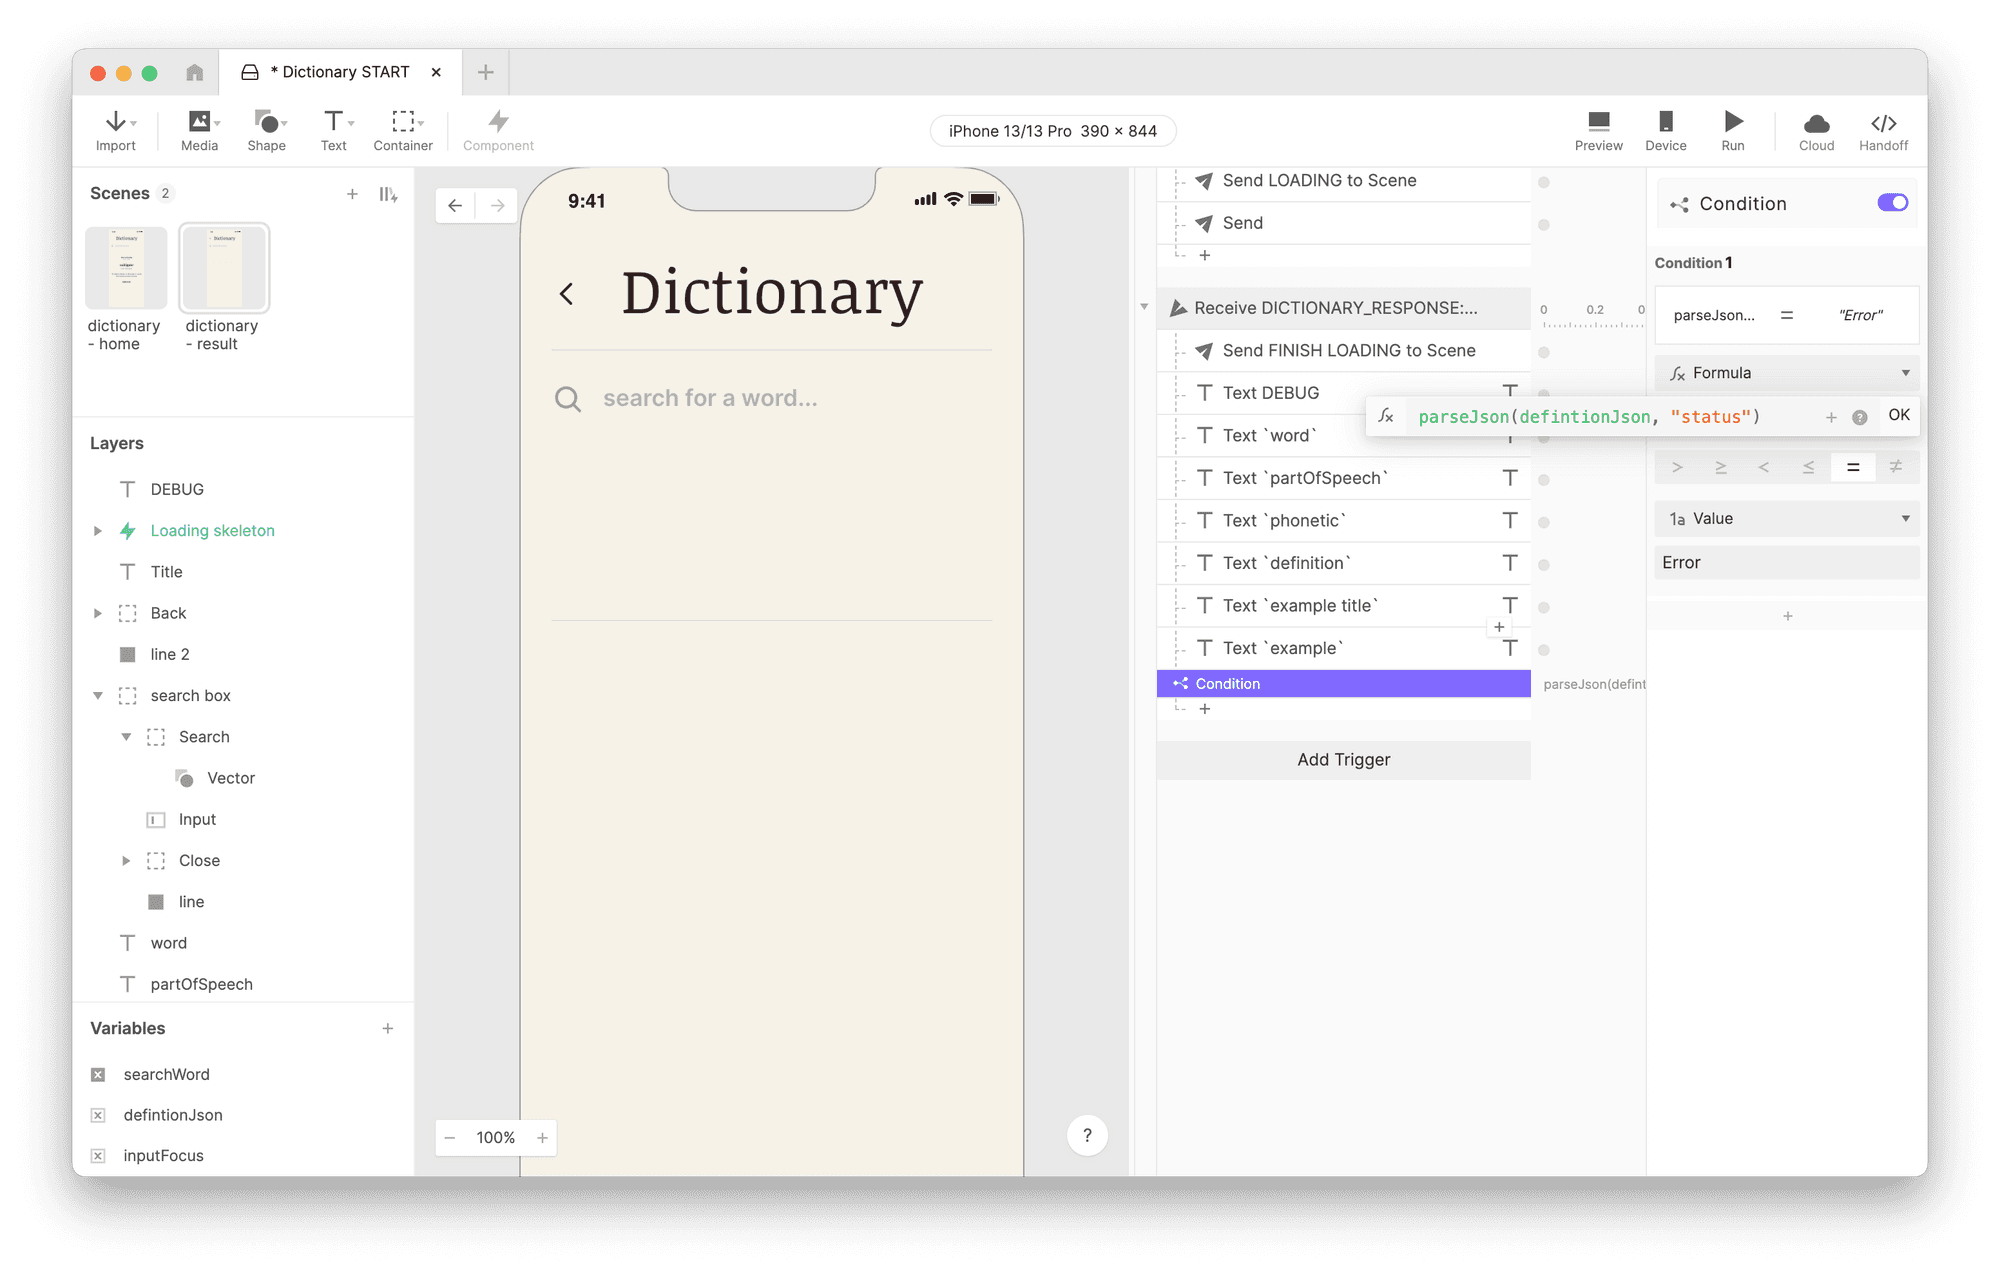
Adding the condition.
There is a layer group named “no results section” in this Pie. By default, it is hidden, but under this scenario, we’ll make it visible.
Add an Opacity response under the Condition you just created.
Set the Opacity of the “no result section” layer group to 100.
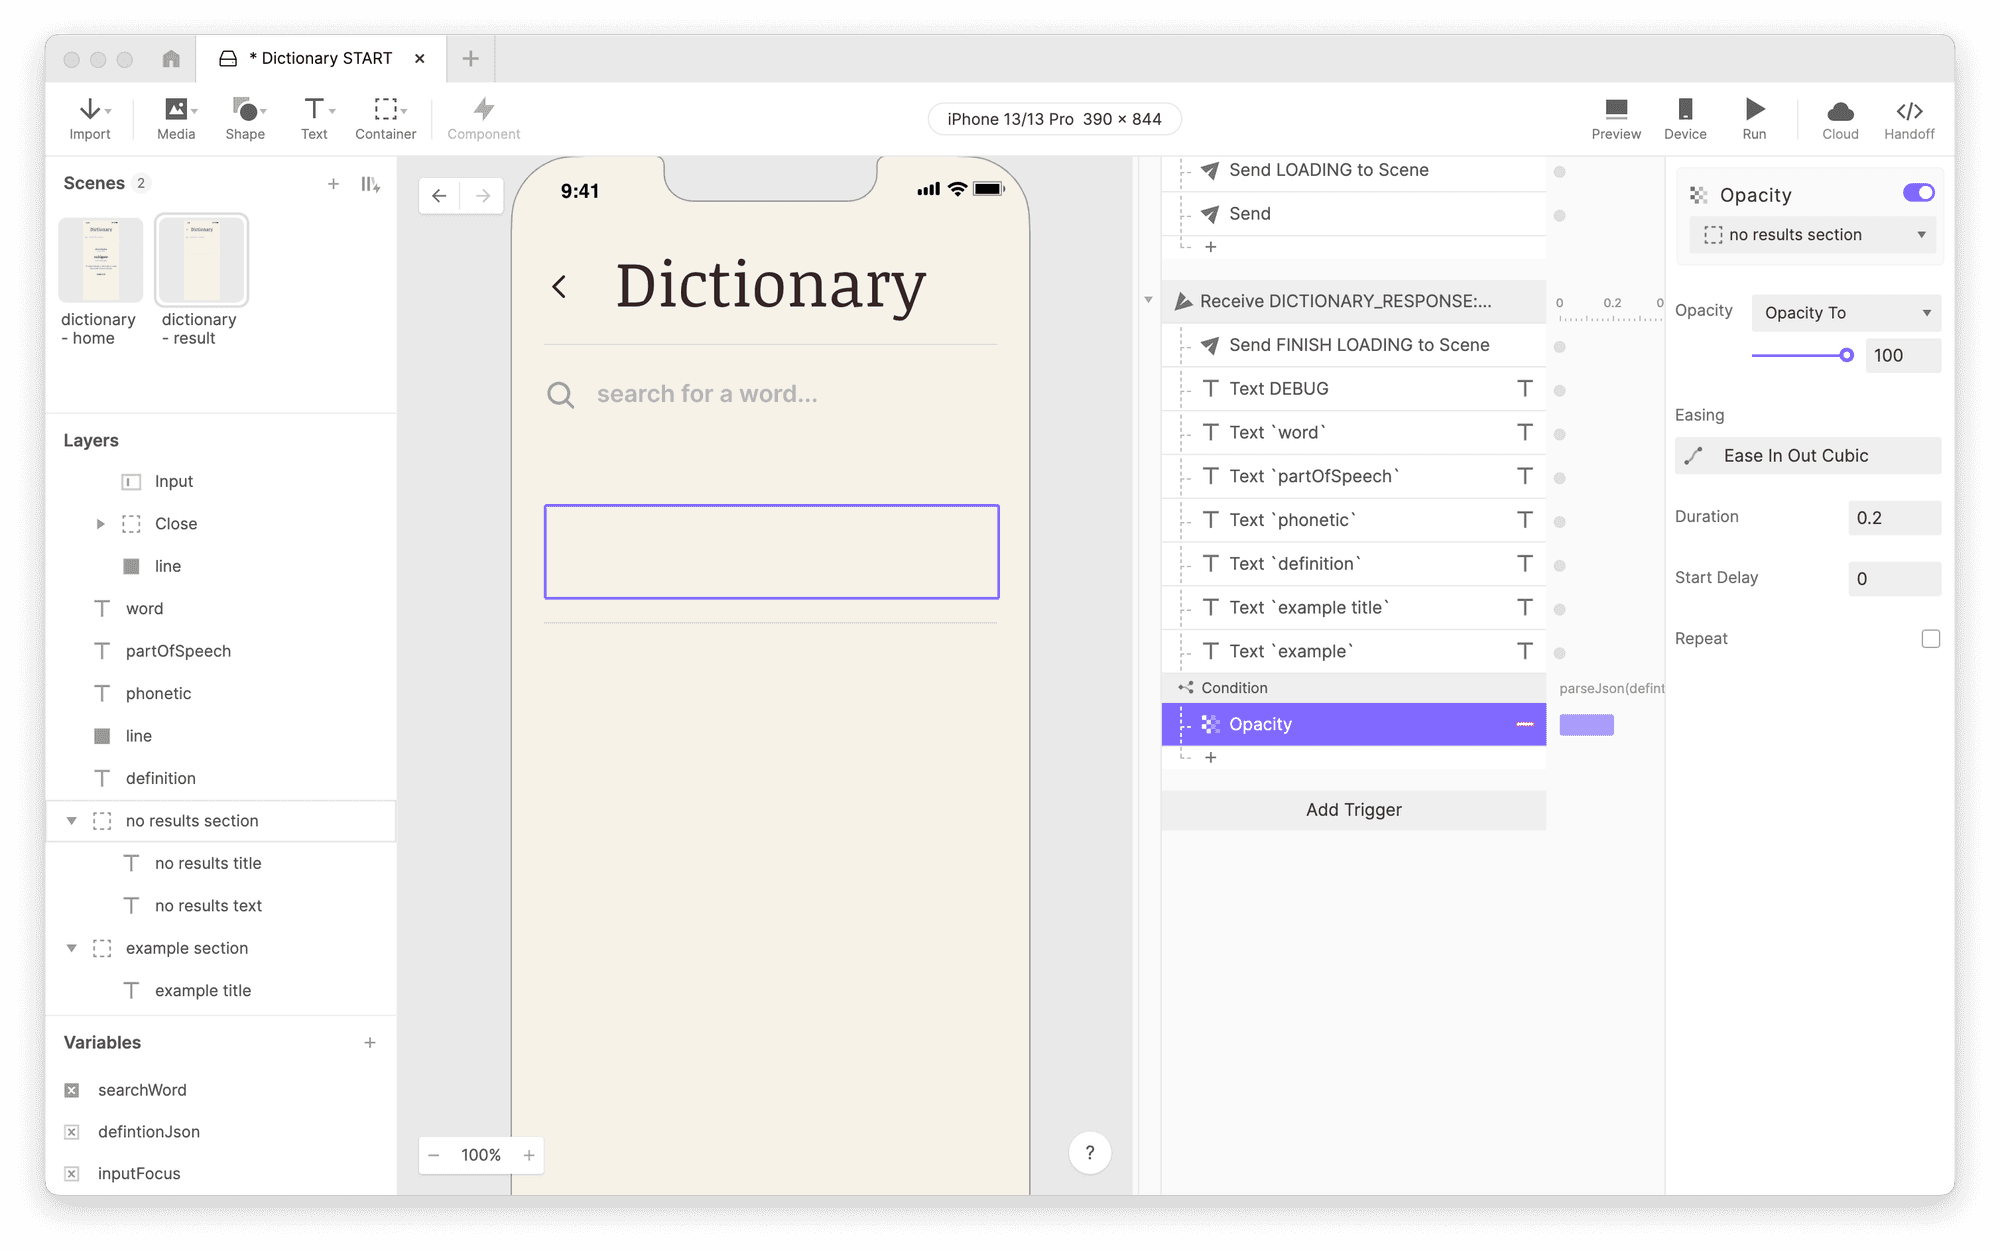
Set the Opacity of the “no result section” layer group to 100.
Save your work, and preview it again through ProtoPie Connect.
NOTE: When working with ProtoPie Connect and Studio simultaneously, Connect will recognize when the file has been saved and automatically reload the Pie in the web view. Just return to your browser and interact with it again.
Now when you search for something that the API can’t find, you’ll see the “No definitions found.” message.
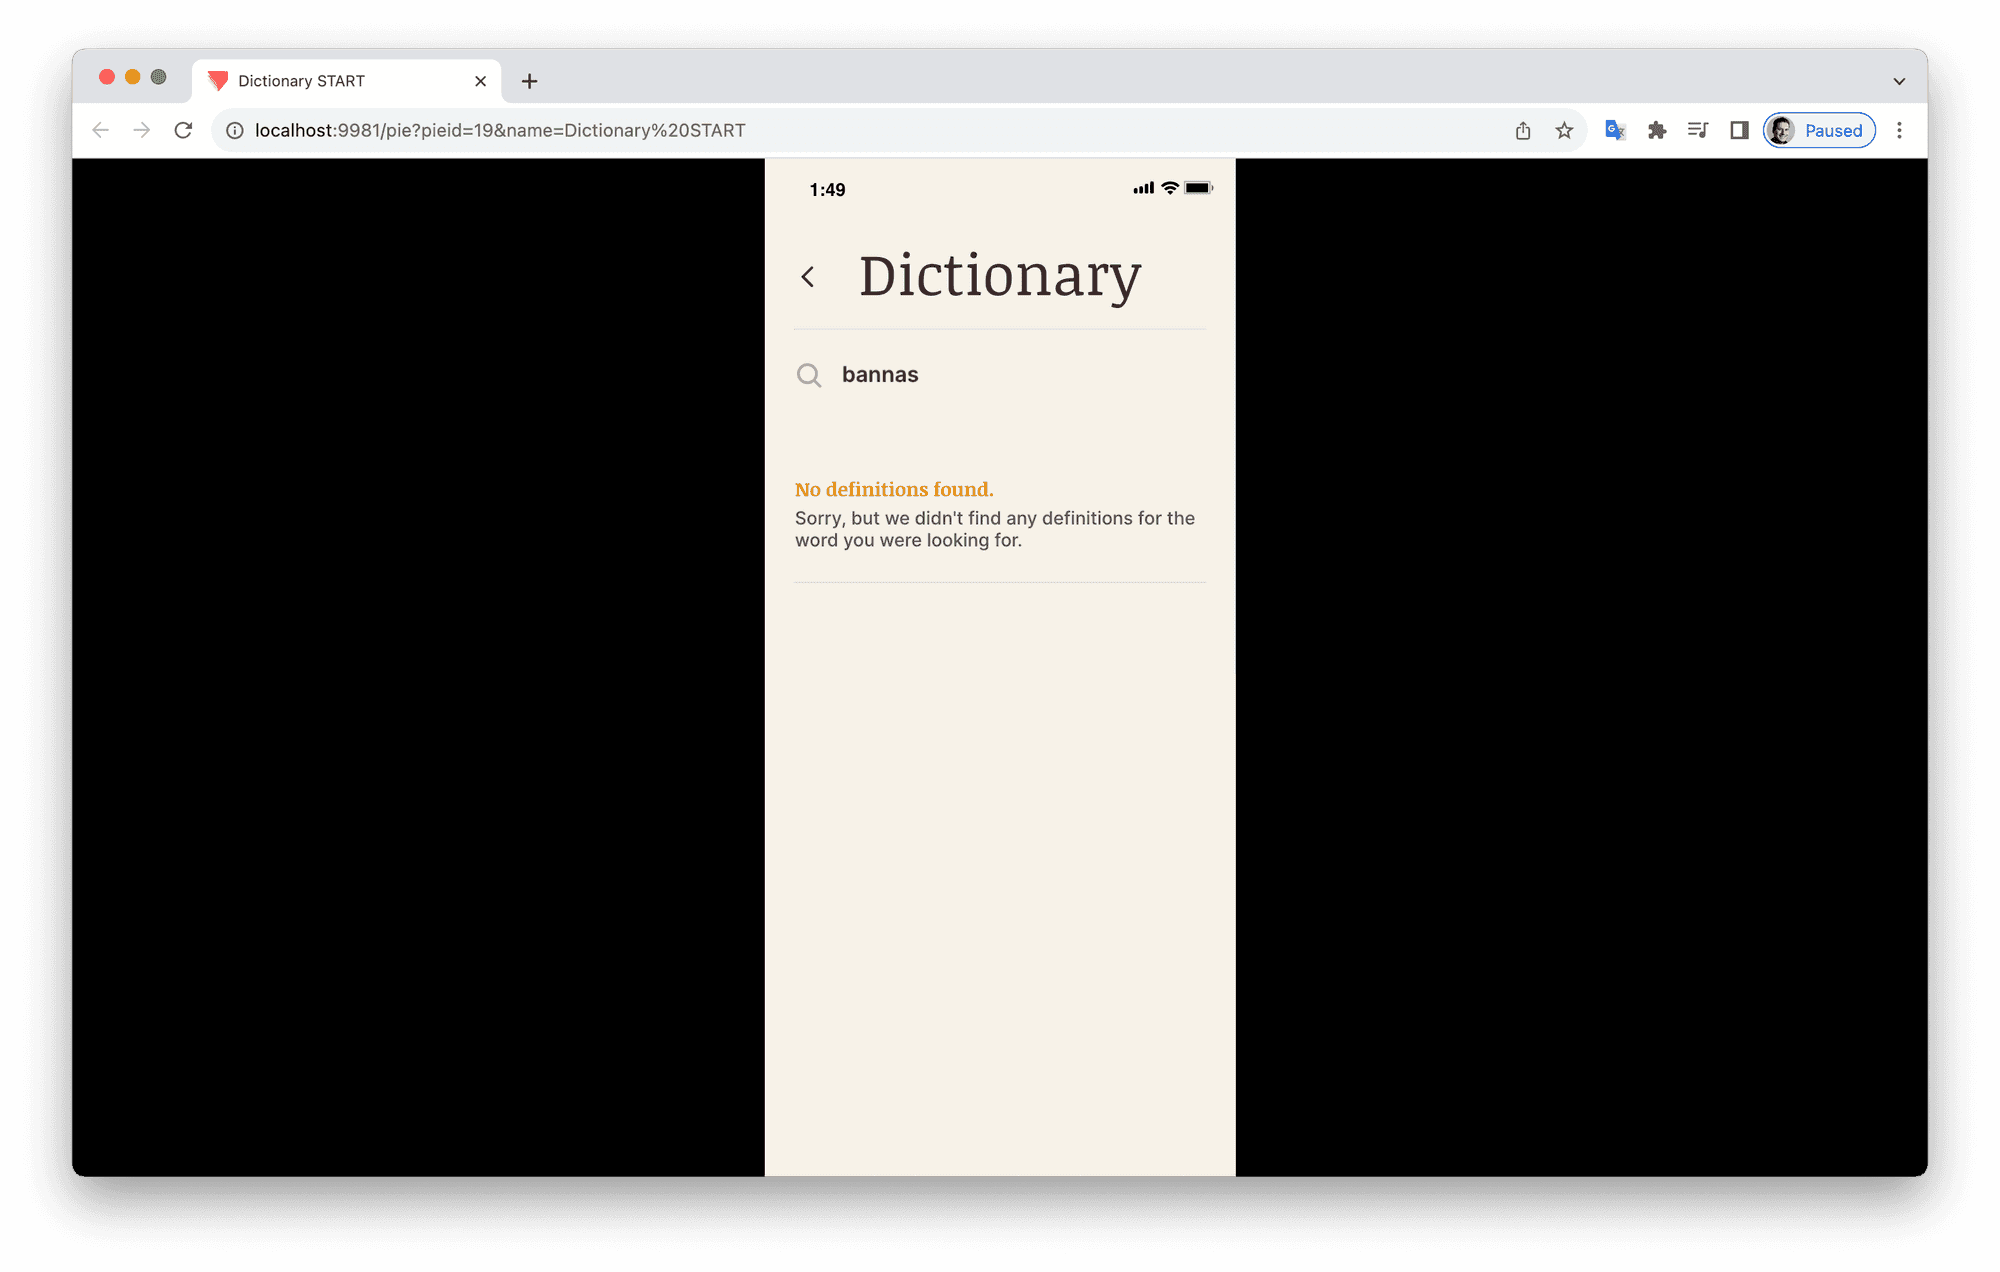
“No definitions found.” message.
Example 2: ChatGPT
I’m sure this is the example you all wanted to see! Yes, it is 100% possible to create a fully working experience with a conversational AI like ChatGPT in ProtoPie.
This is definitely an advanced example of how the API plugin can be used, so you’ll want to head over to the docs and familiarize yourself with how the ChatGPT API works. You’ll also need an API Key to authenticate yourself as you make requests to the API. Unfortunately, this is not free, but it is very inexpensive for exploratory uses such as this. Head over to the Open API’s pricing page to get started.
Configure the API Plugin
Like all of the previous examples, we start with setting up the ProtoPie Connect API Plugin. Configure the plugin as follows:
Method: POST
We haven’t touched this configuration before. RESTful APIs work with either GET or POST-type requests. It’s not important that you understand the difference — the docs for most APIs will tell you which one to use. A good rule of thumb is if you need to use the Body configuration in the plugin, you’ll likely need to use POST. Otherwise, GET will likely get the job done (see what I did there?).
URL:
https://api.openai.com/v1/chat/completionsHeader:
Here’s another configuration we haven’t used. Headers allow you to specify information about the request. All requests have a header, but in the previous examples, we’ve just used the defaults under the hood. This configuration gives you the opportunity to set some header values explicitly. In this case, we’ve specified that the request’s body will be in JSON format, and we’ve specified how to authorize the request.
Make sure to replace the part labeled
<YOUR API KEY>with your actual API Key as provided by OpenAI.Message from Pie:
ASK CHAT GPTCheck the box beside Override and this time select Body from the drop down — we’ll be formulating the body of the request in our Pie.
Message to Pie:
CHAT GPT ANSWERClick Activate
NOTE: If you click on Test Request, you’ll get an error. Currently, the request does not have a body, so the ChatGPT API has nothing to work with.
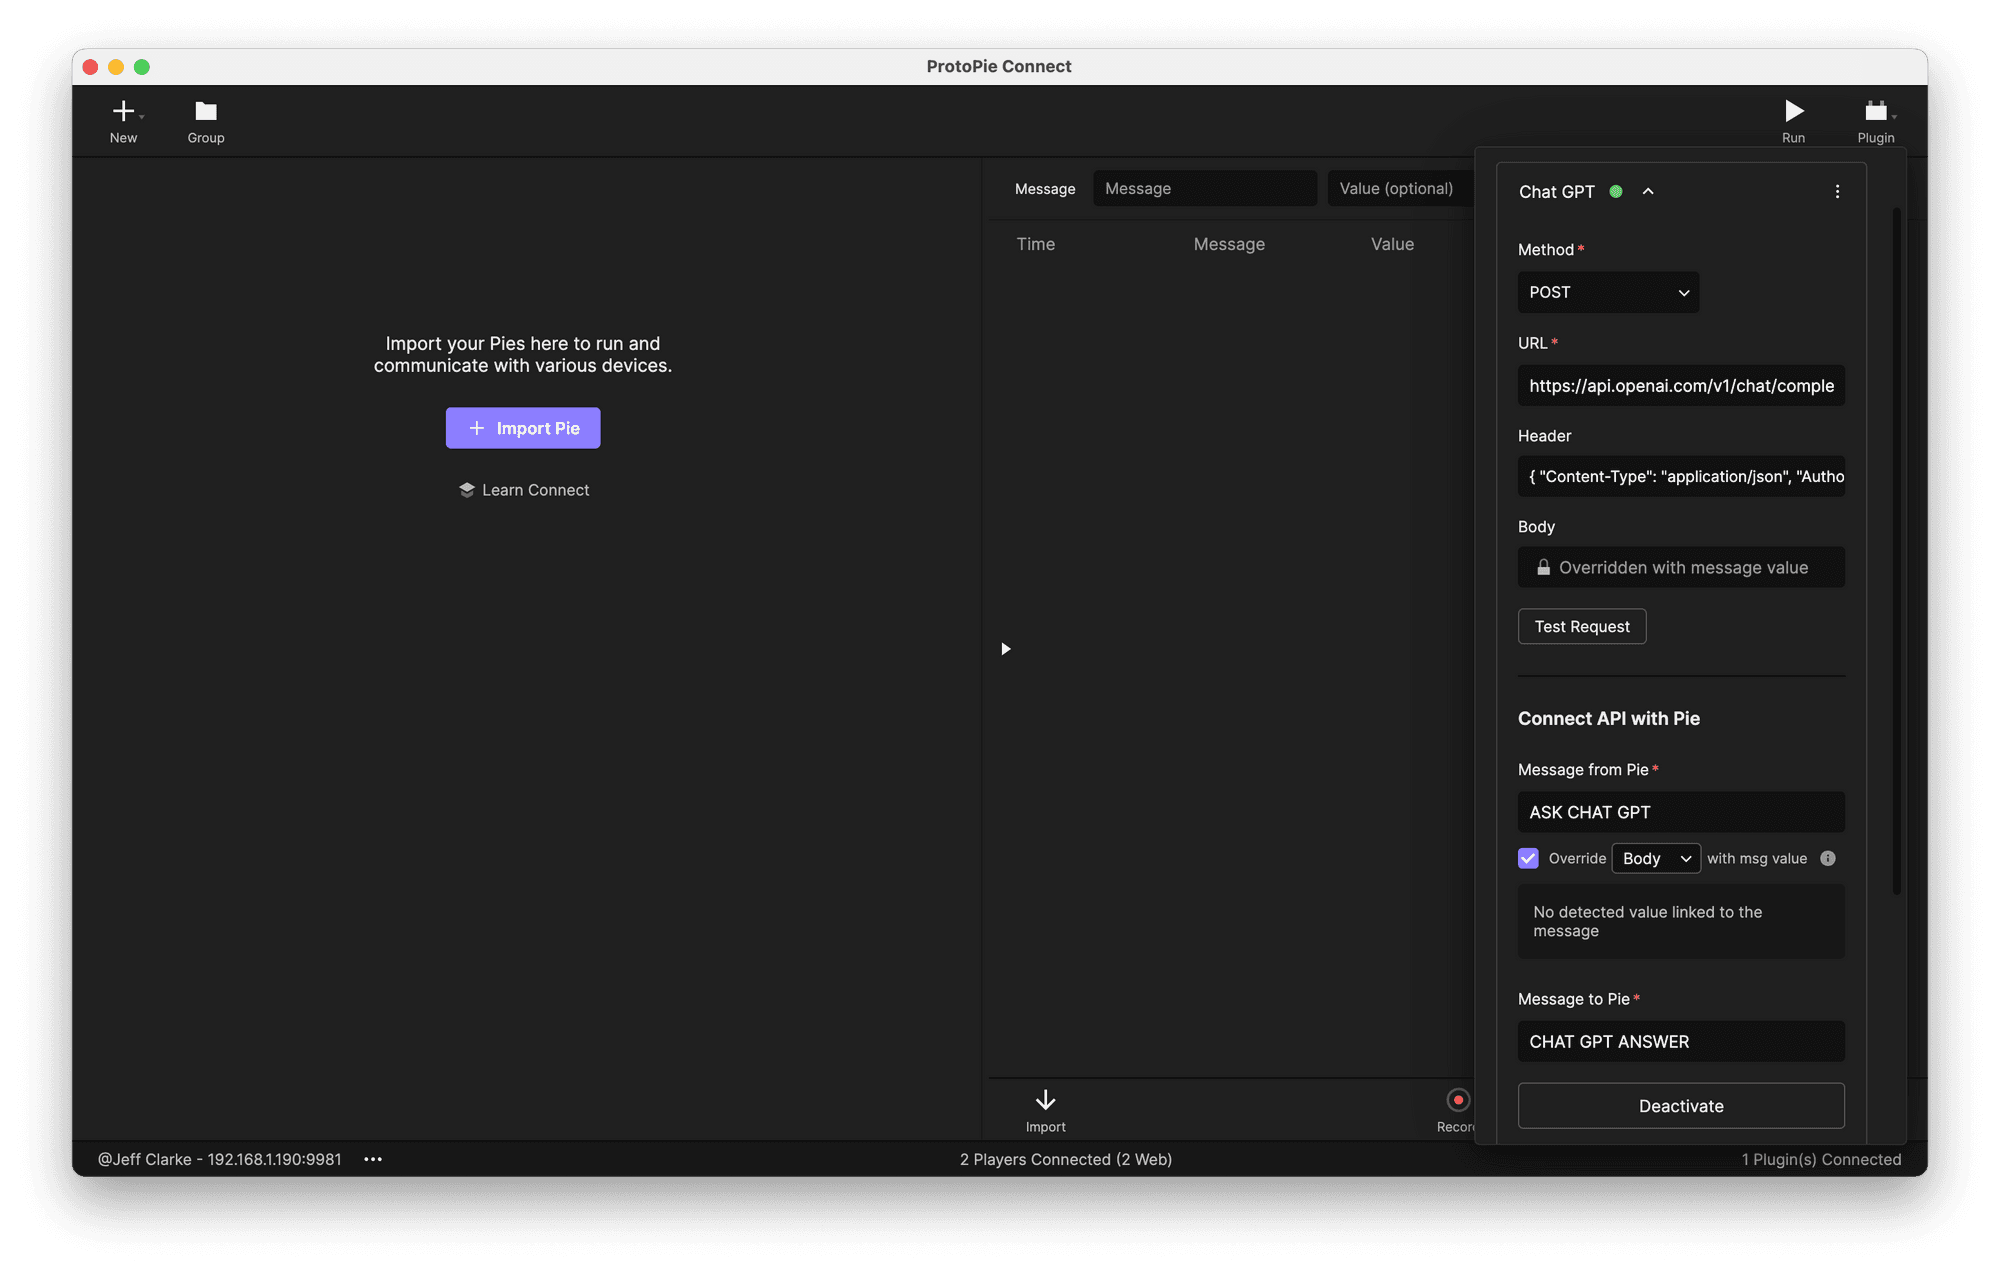
Configuring the API Plugin.
Author the Pie
Download the starting Pie below and open it in ProtoPie Studio.
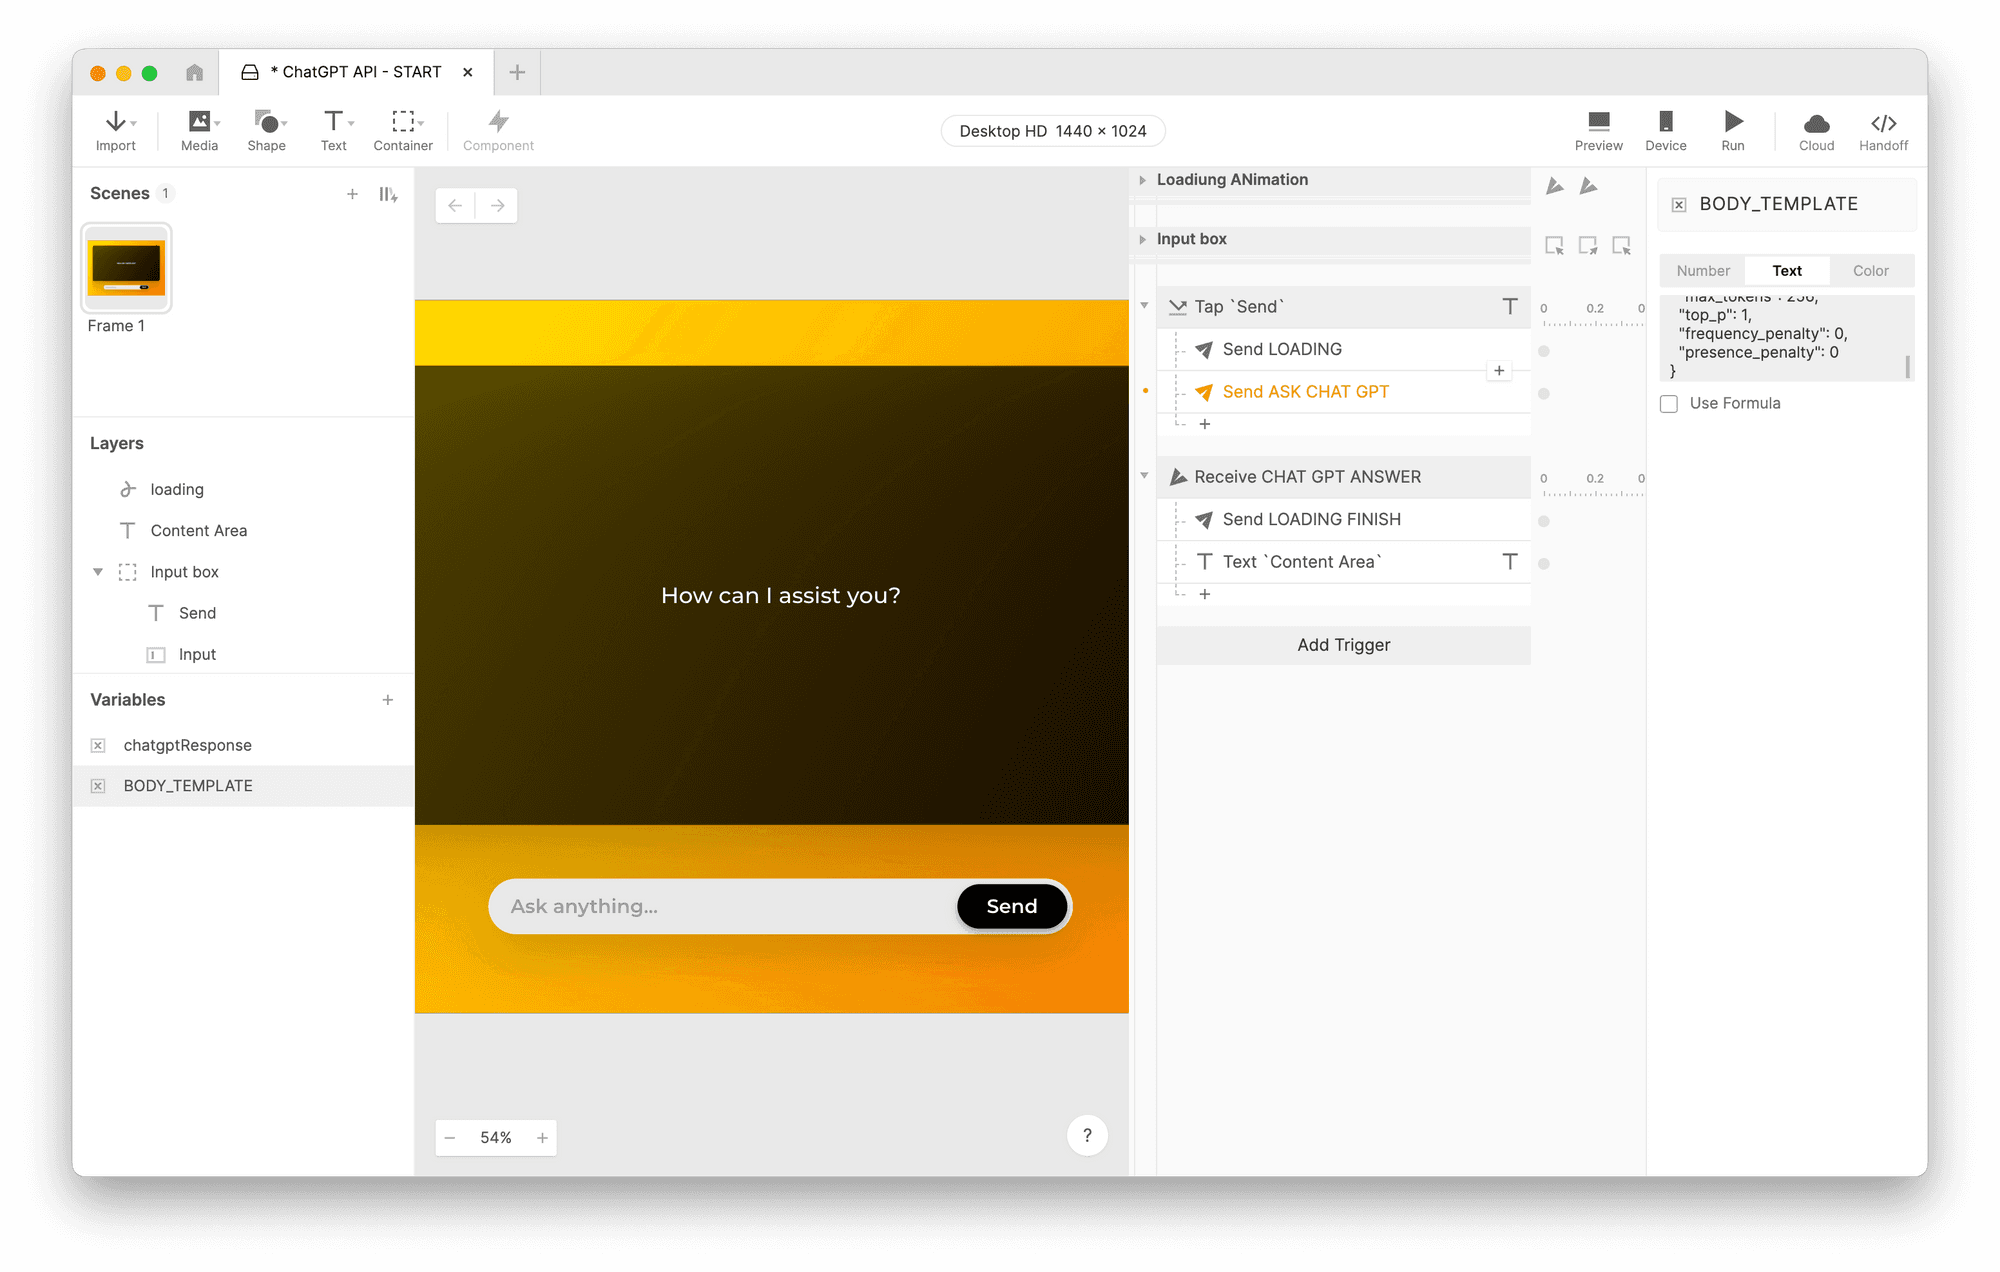
Once again, we have an unfinished Send response named Send ASK CHAT GPT under the Trigger named Tap Send. Let’s complete it.
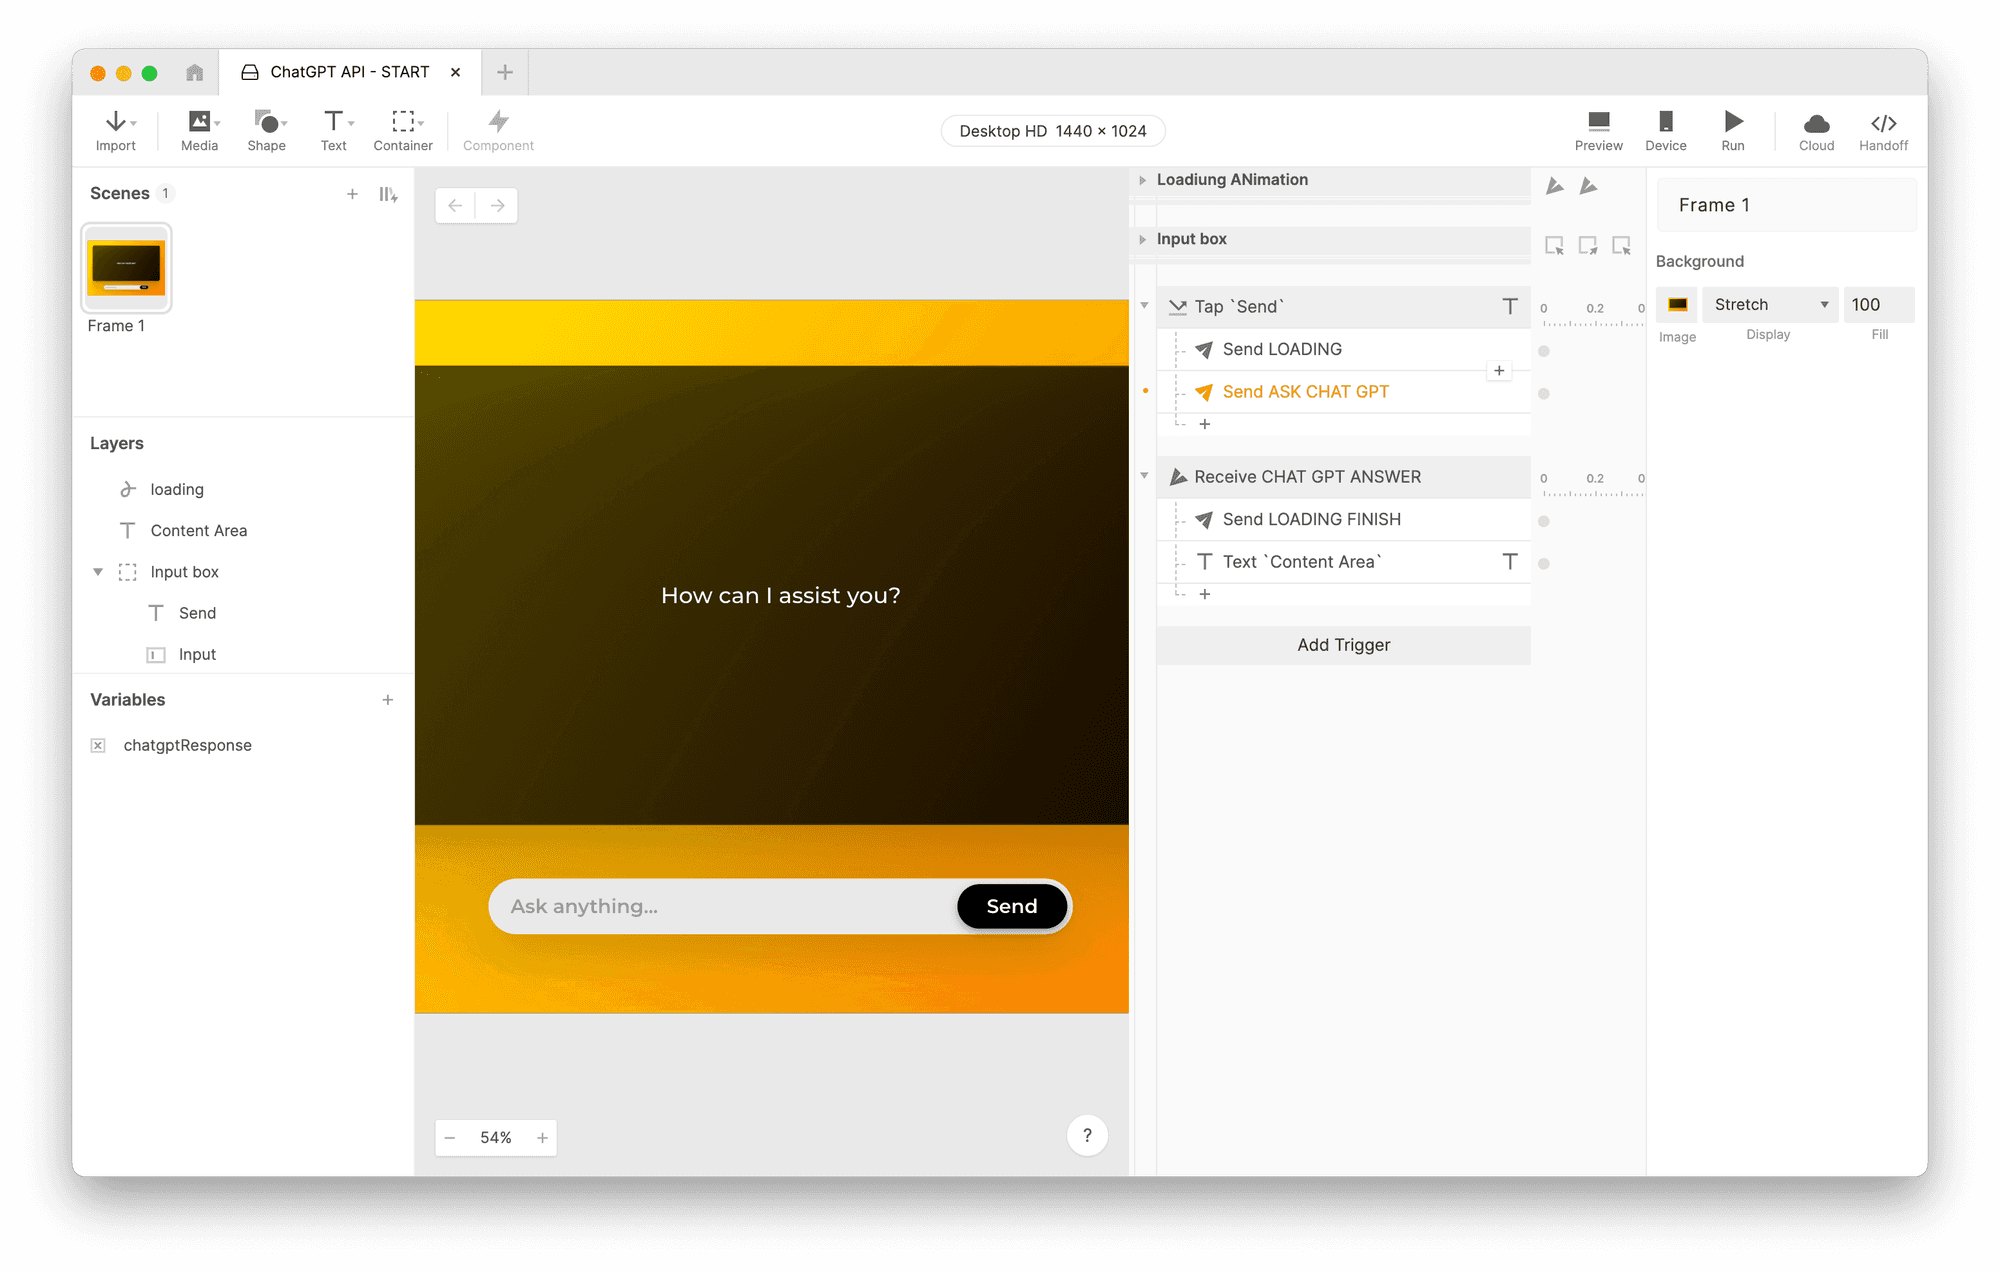
Setting up the Send response.
As always, use the Protopie Studio Channel.
Use the message
ASK CHAT GPTAs in the previous example, we want to include a value. This time, however, we will override the request’s body, not the URL.
Here’s one example of a properly formatted body parameter of a request to the Chat GPT API:
In our case, we want to replace the "content" key’s value with whatever question the user types into the input field. Essentially we’re going to make a template with a token for a bit of text that will be replaced. It can look something like this:
When we send the request, we’ll replace the section <<USER_QUERY>> with the actual question the user asked. Furthermore, let’s instruct ChatGPT on how we’d like our response. Let’s modify the template as follows:
This way, the user’s question will always start with “Reply in no more than 3 sentences,” followed by the actual question.
Now to create this as a template, we will create a text variable in Studio with the above content.
In the lower-left corner of ProtoPie Studio, click on the Variables tab to open the variables panel if it is not already open.
Create a variable. Name it
BODY_TEMPLATE.Make sure it is set as a Text type. In the top-right corner of Studio’s UI, choose Text in the variable’s properties
There is an empty text box right beneath where you selected Text type. Copy the template snippet from above and paste it into this text field. This sets the initial value of the variable.
Copy the template snippet from above and paste it into the text field.
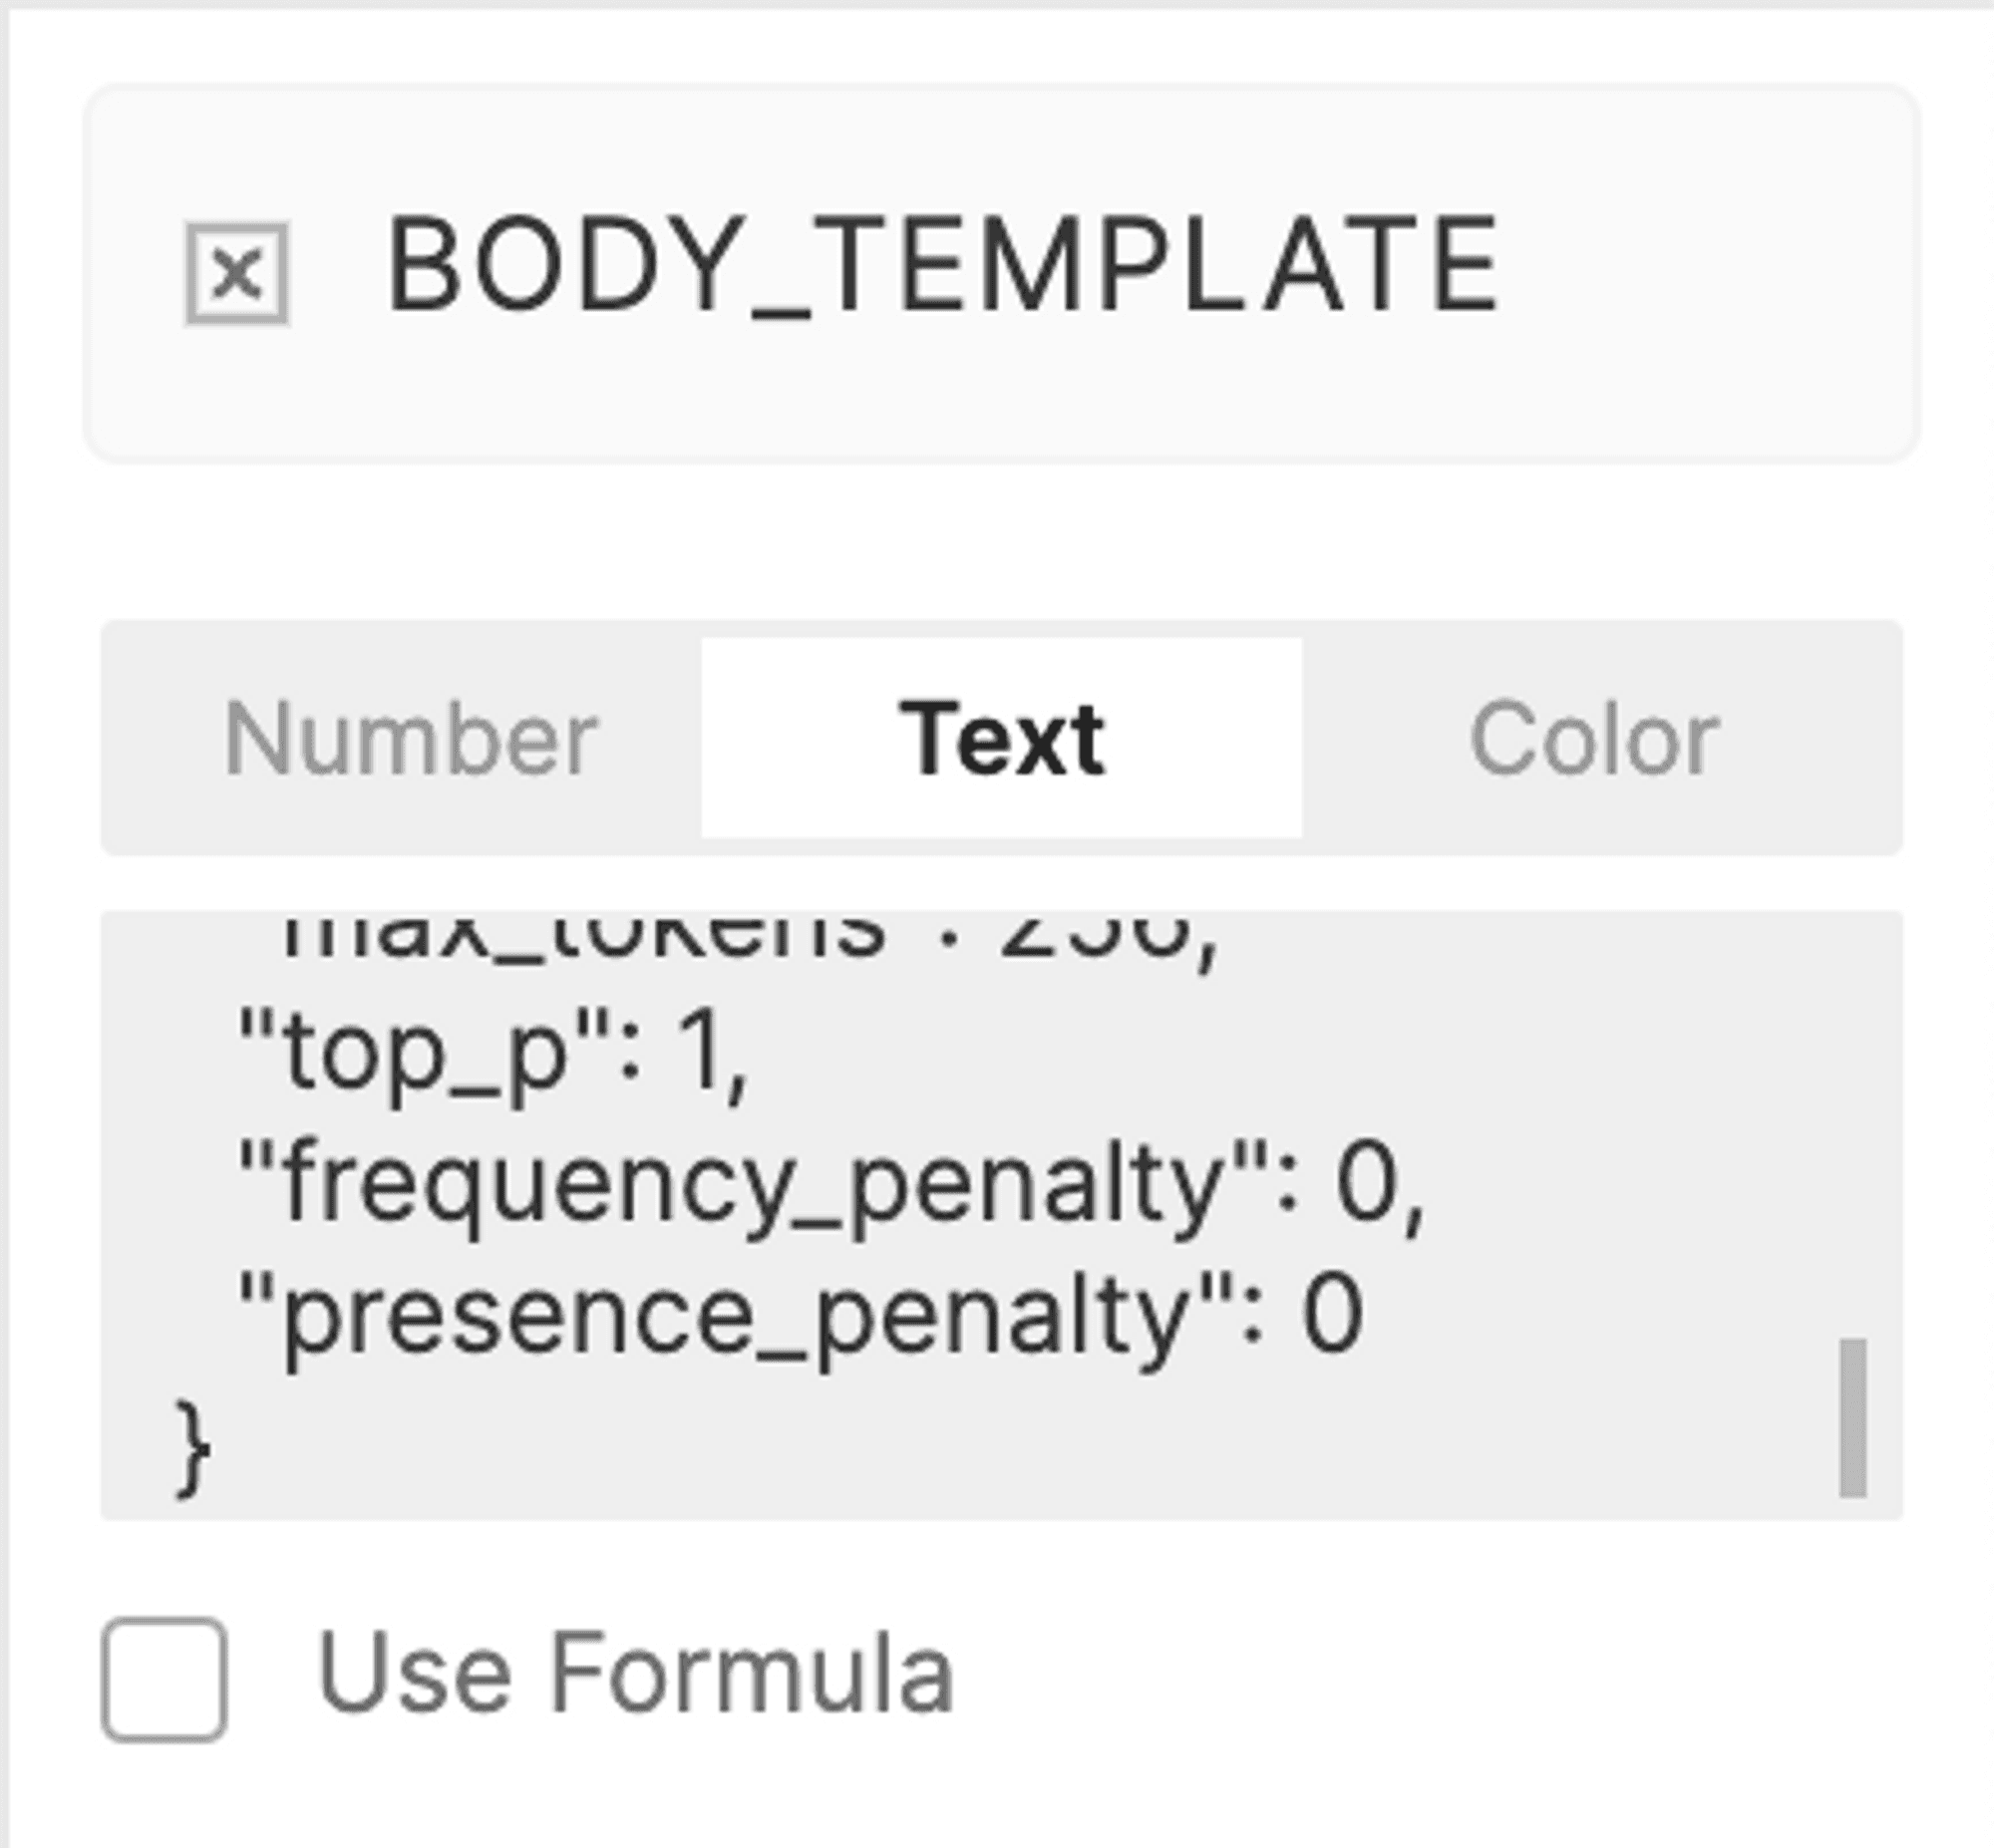
The box isn’t big enough to show the entire template body, but don’t worry. It’s all there.
Now return to the Send response.
Check the box beside Send Value Together
In the formula box that appears, use the following formula:
```replace(BODY_TEMPLATE, "<<USER_QUERY>>",
Input.text)`
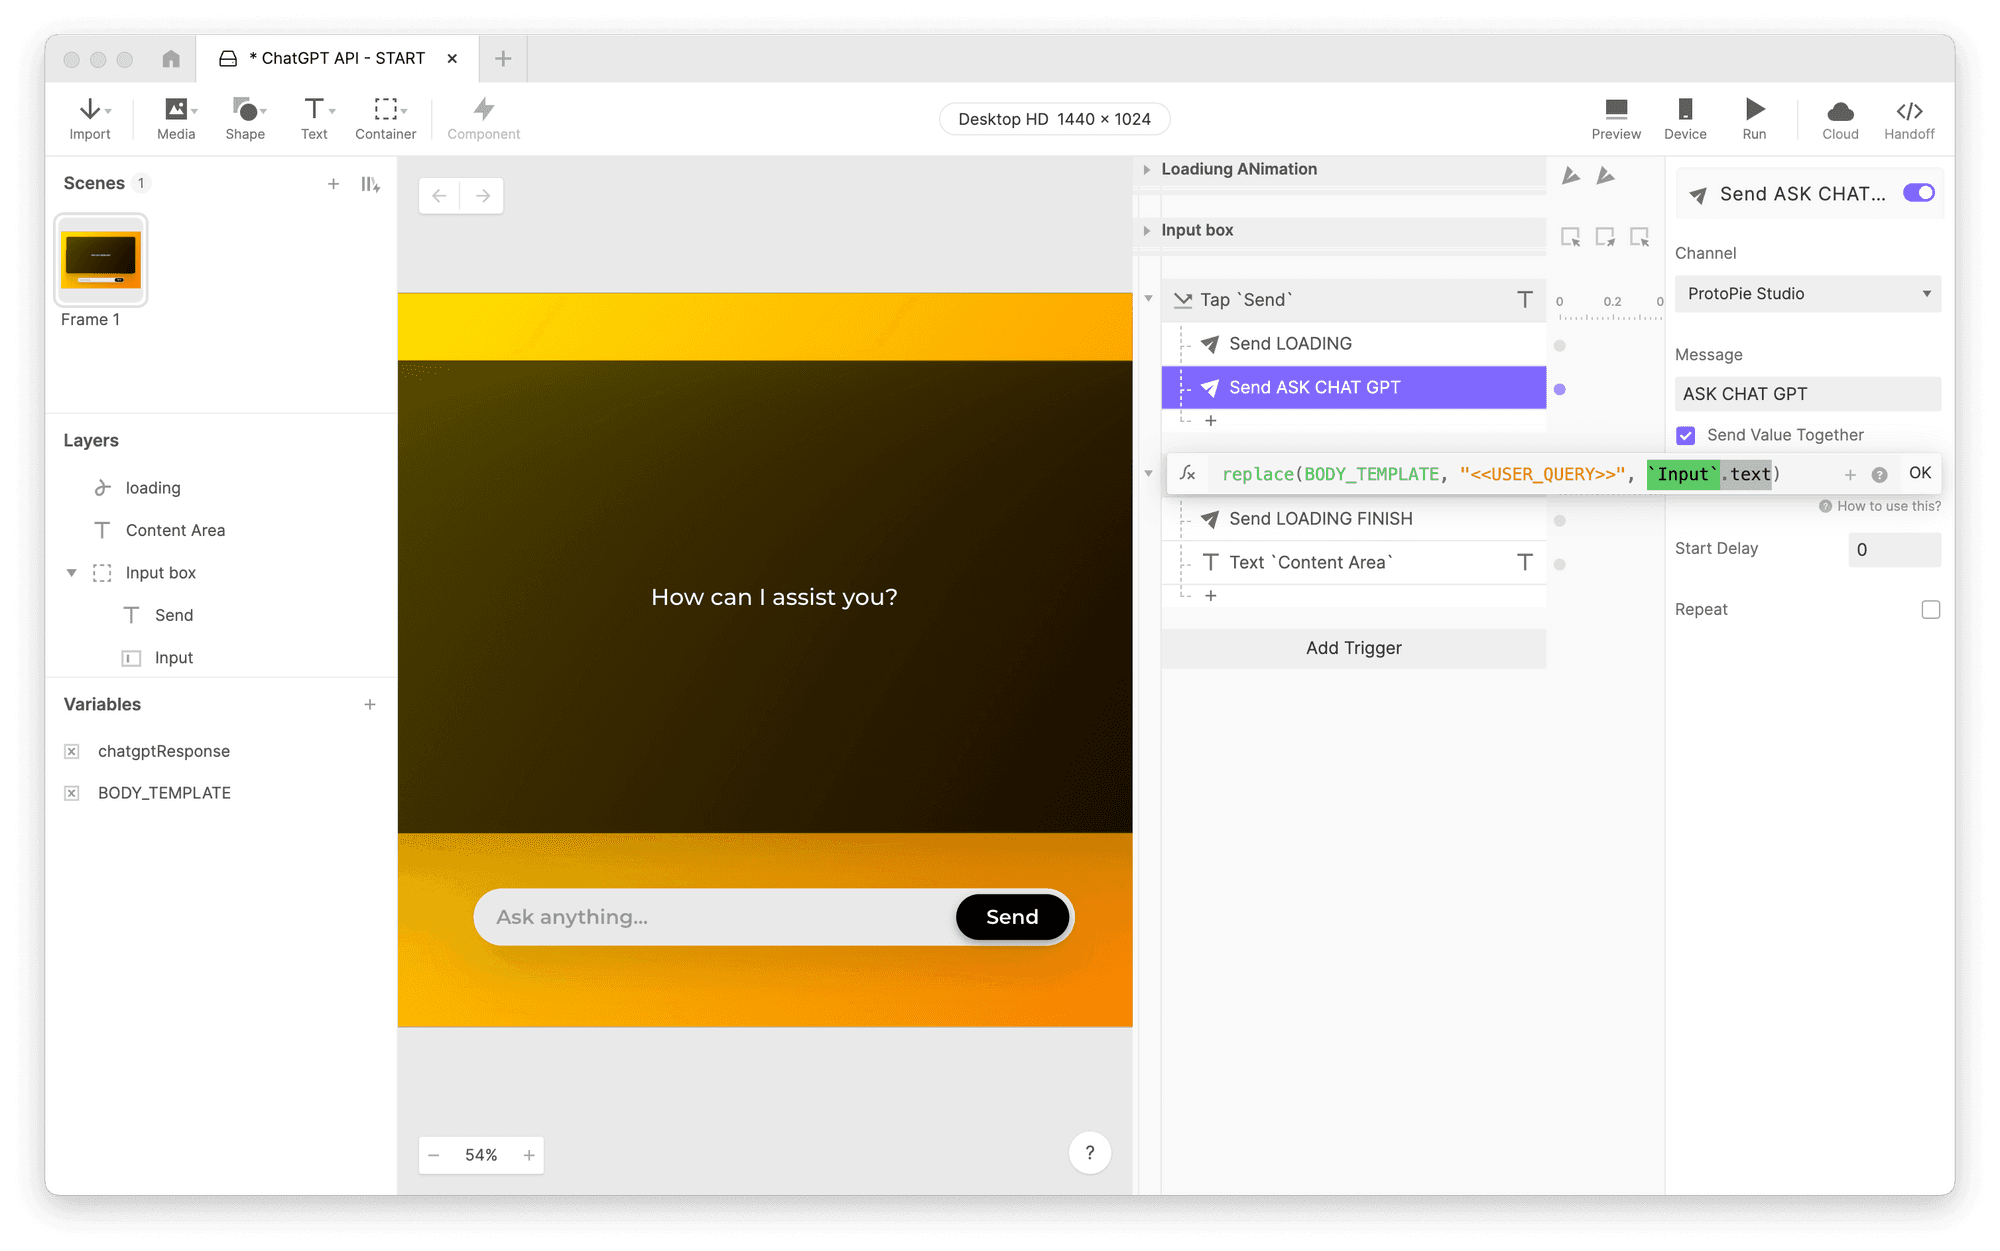
In the formula box that appears, use the indicated formula.
What did we just do?
We used ProtoPie’s replace() function (docs here) to take the text stored in the BODY_TEMPLATE variable, look for the exact text <<USER_QUERY>>, and replace it with whatever is in the input field. Keep in mind this doesn’t modify the variable BODY_TEMPLATE. The output from the replace() function is a new bit of Text. We’re just taking that output and passing that directly along as the value of the message.
Like the previous example, the Receive Trigger that works with the API’s response has already been created for you. Take a look if you like, but you’ll see that it is very similar to our previous examples. Save your Pie — we’re done in Studio!
Drag your finished Pie into ProtoPie Connect and run it. You should have a working ChatGPT experience!
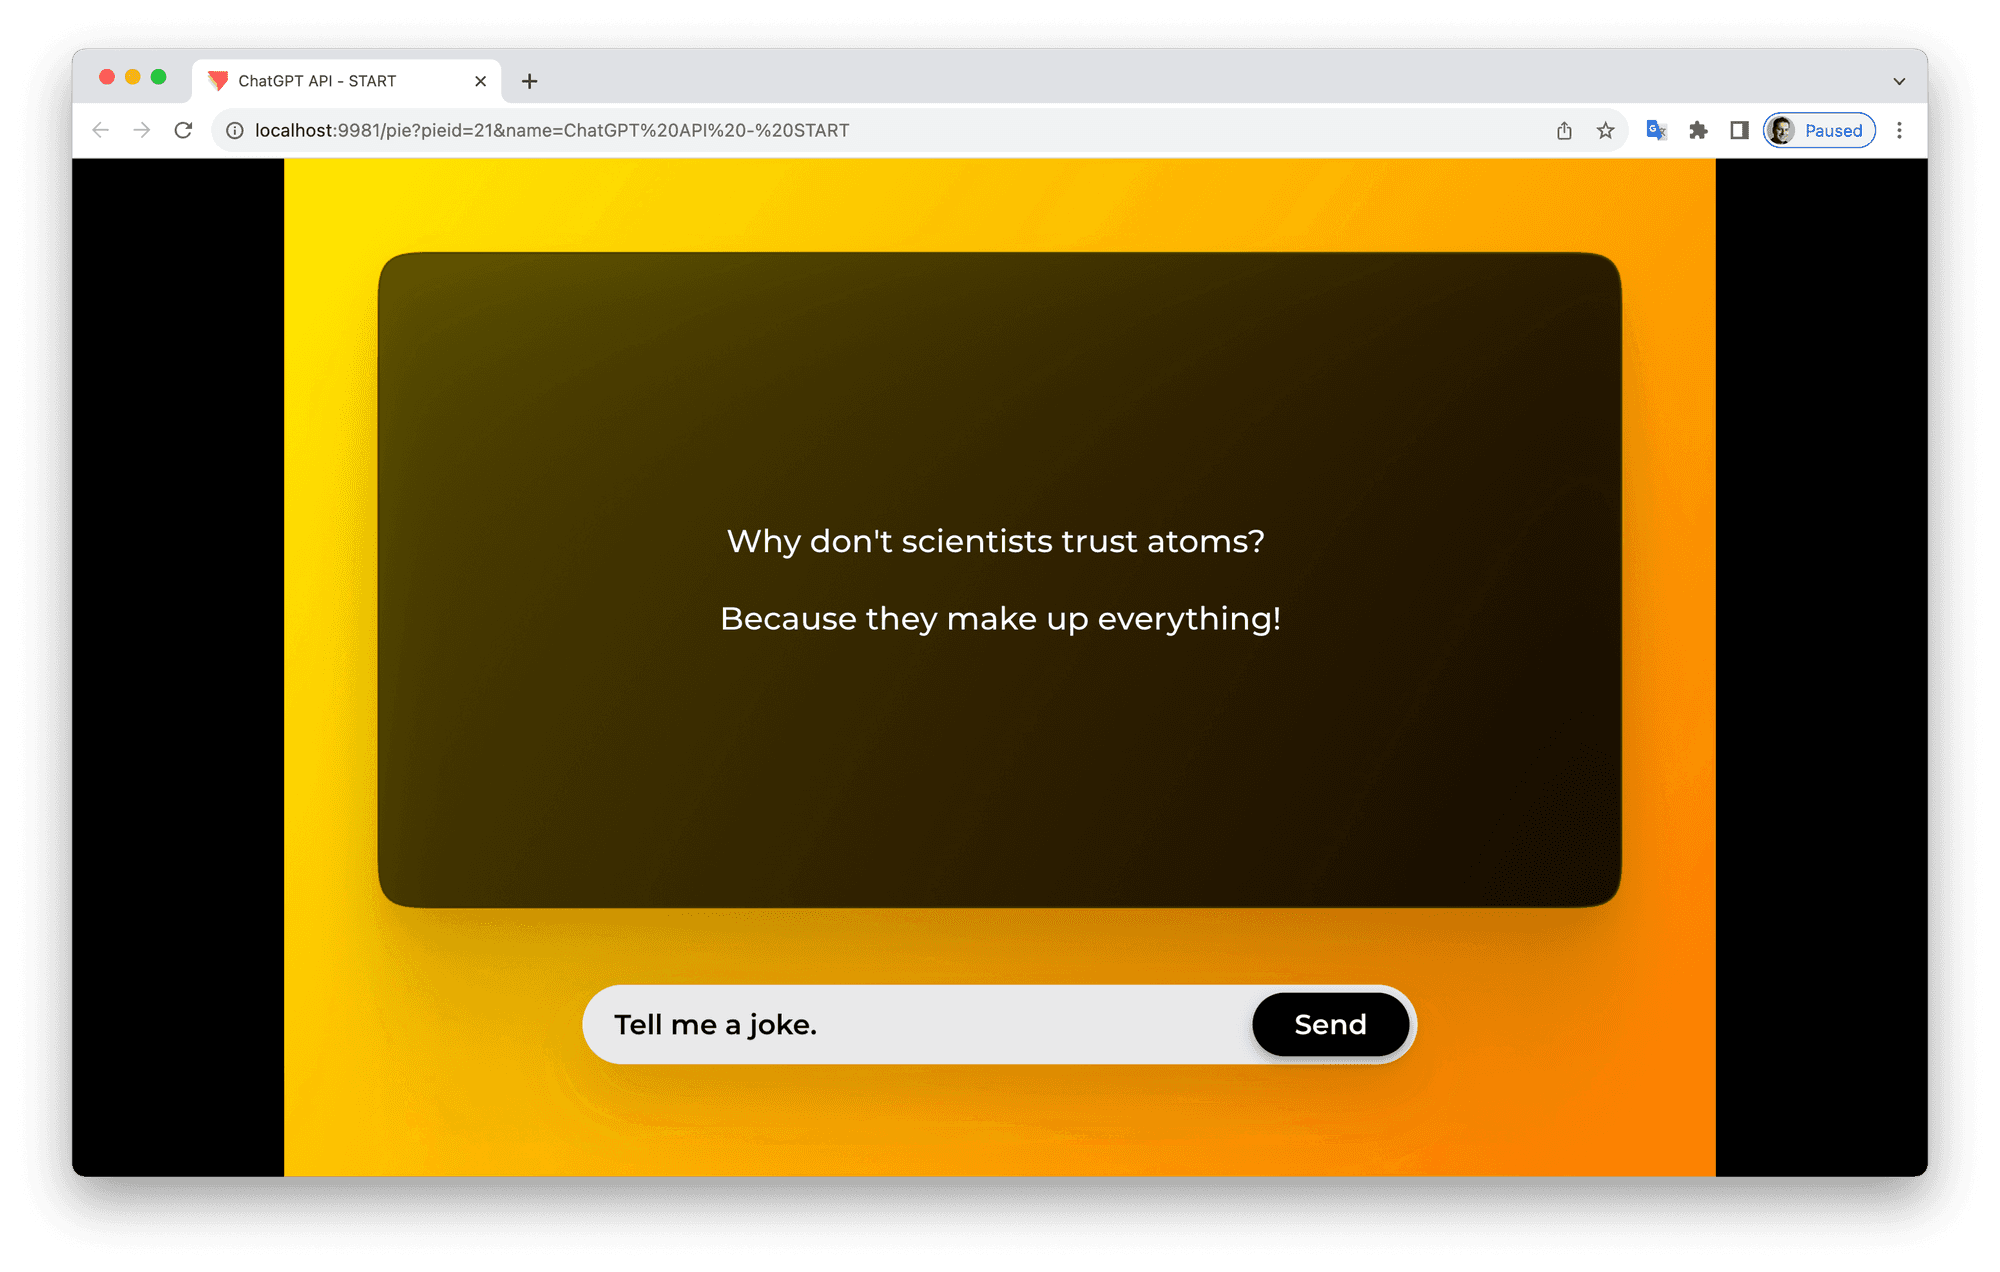
Why don't scientists trust atoms? Because they make up everything!
Completed Pies
Bring real data into your designs with the API plugin
The ProtoPie API Plugin enables you to inject real, dynamic data into your designs, elevating your prototypes to a new level of realism and functionality. Craft interactive and data-driven prototypes that authentically embody your vision.


