

Introduction
Images are powerful assets that are featured in most digital products today. In apps that highlight imagery, being able to organize photos is paramount to a user's experience. In this demonstration, you will be able to demonstrate how a user can select and deselect photos while maintaining a numerical order. This tutorial introduces a bit of sequential logic, which makes this one very intellectually engaging! By using components, variables, and formulas you'll be able to achieve a mastery of randomness and bring order to photos that can be selected and deselected.
ProtoPie makes this easier by using components so you are making changes that impact pieces that are the same throughout your design. Using components speed up your workflow! ProtoPie also uses variables, which carry values that when paired with formulas, can react to a user's interactions like selecting and deselecting.
What you will learn
Give each component instance a special number
Increase each checkbox number by 1 when an image is selected
Make the checkboxes develop a numerical order when they are selected
Decrease a checkbox number by 1 when deselected and reorder the selected photos
In the end, you’ll be able to make something like this!

[Starting Pie File] [Completed Pie File]
Before you start
You'll notice that we have prepared assets for you to get a jumpstart. We've turned all the image files into components and enabled the checkboxes to select and deselect with numbers. With that, let's go!
Step-by-step instructions
1. Give each component instance a unique ID
1. From your main scene view of the app, go to the image component. You will be making edits to this component, which will make changes throughout your app that are pre-populated with instances of this component.
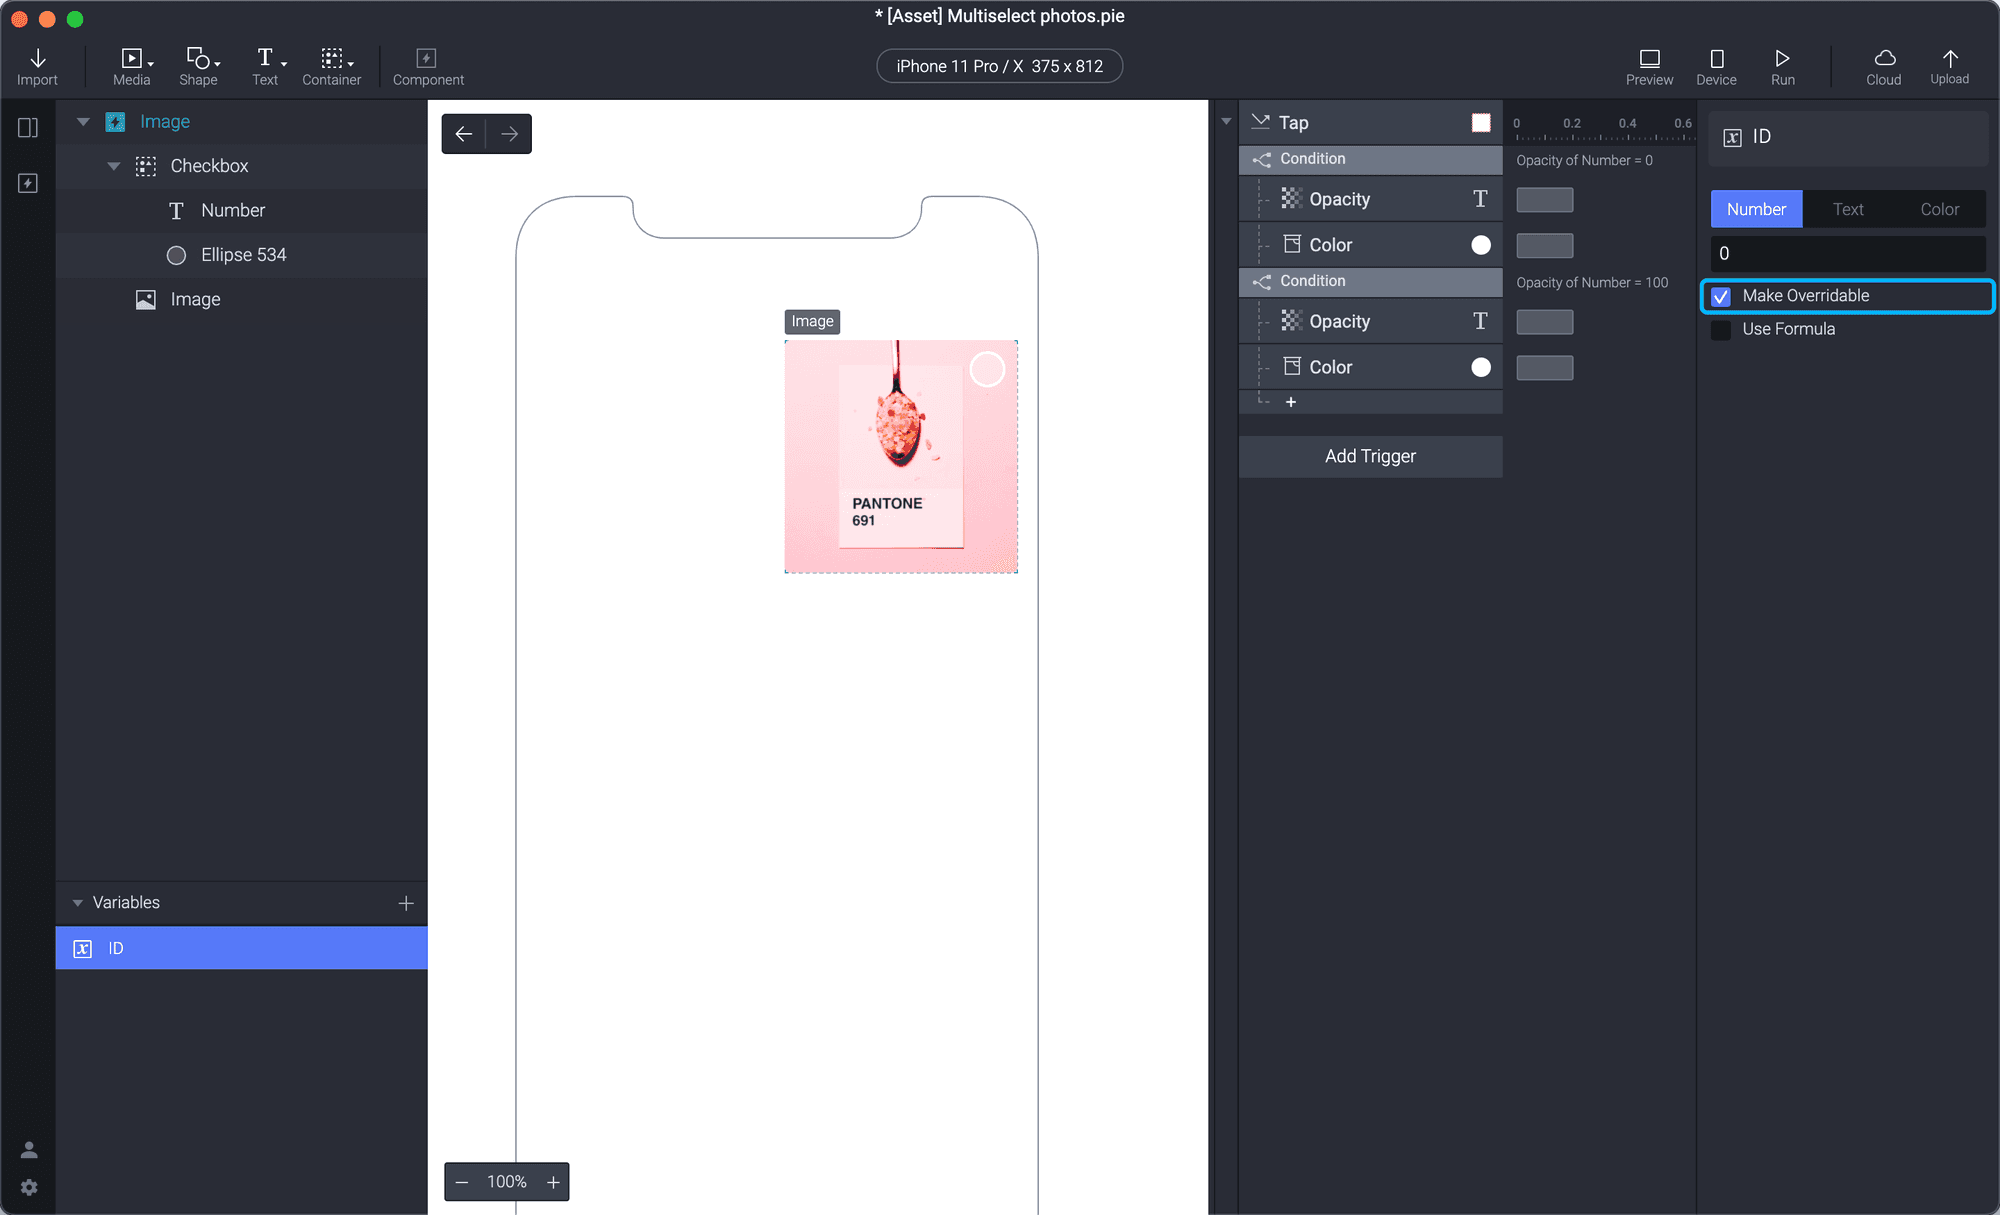
2. Create a new variable. You can call it "ID". You will want to give each component a unique identifier to keep track of which one each is and you can do this by checking the Make Overridable box.
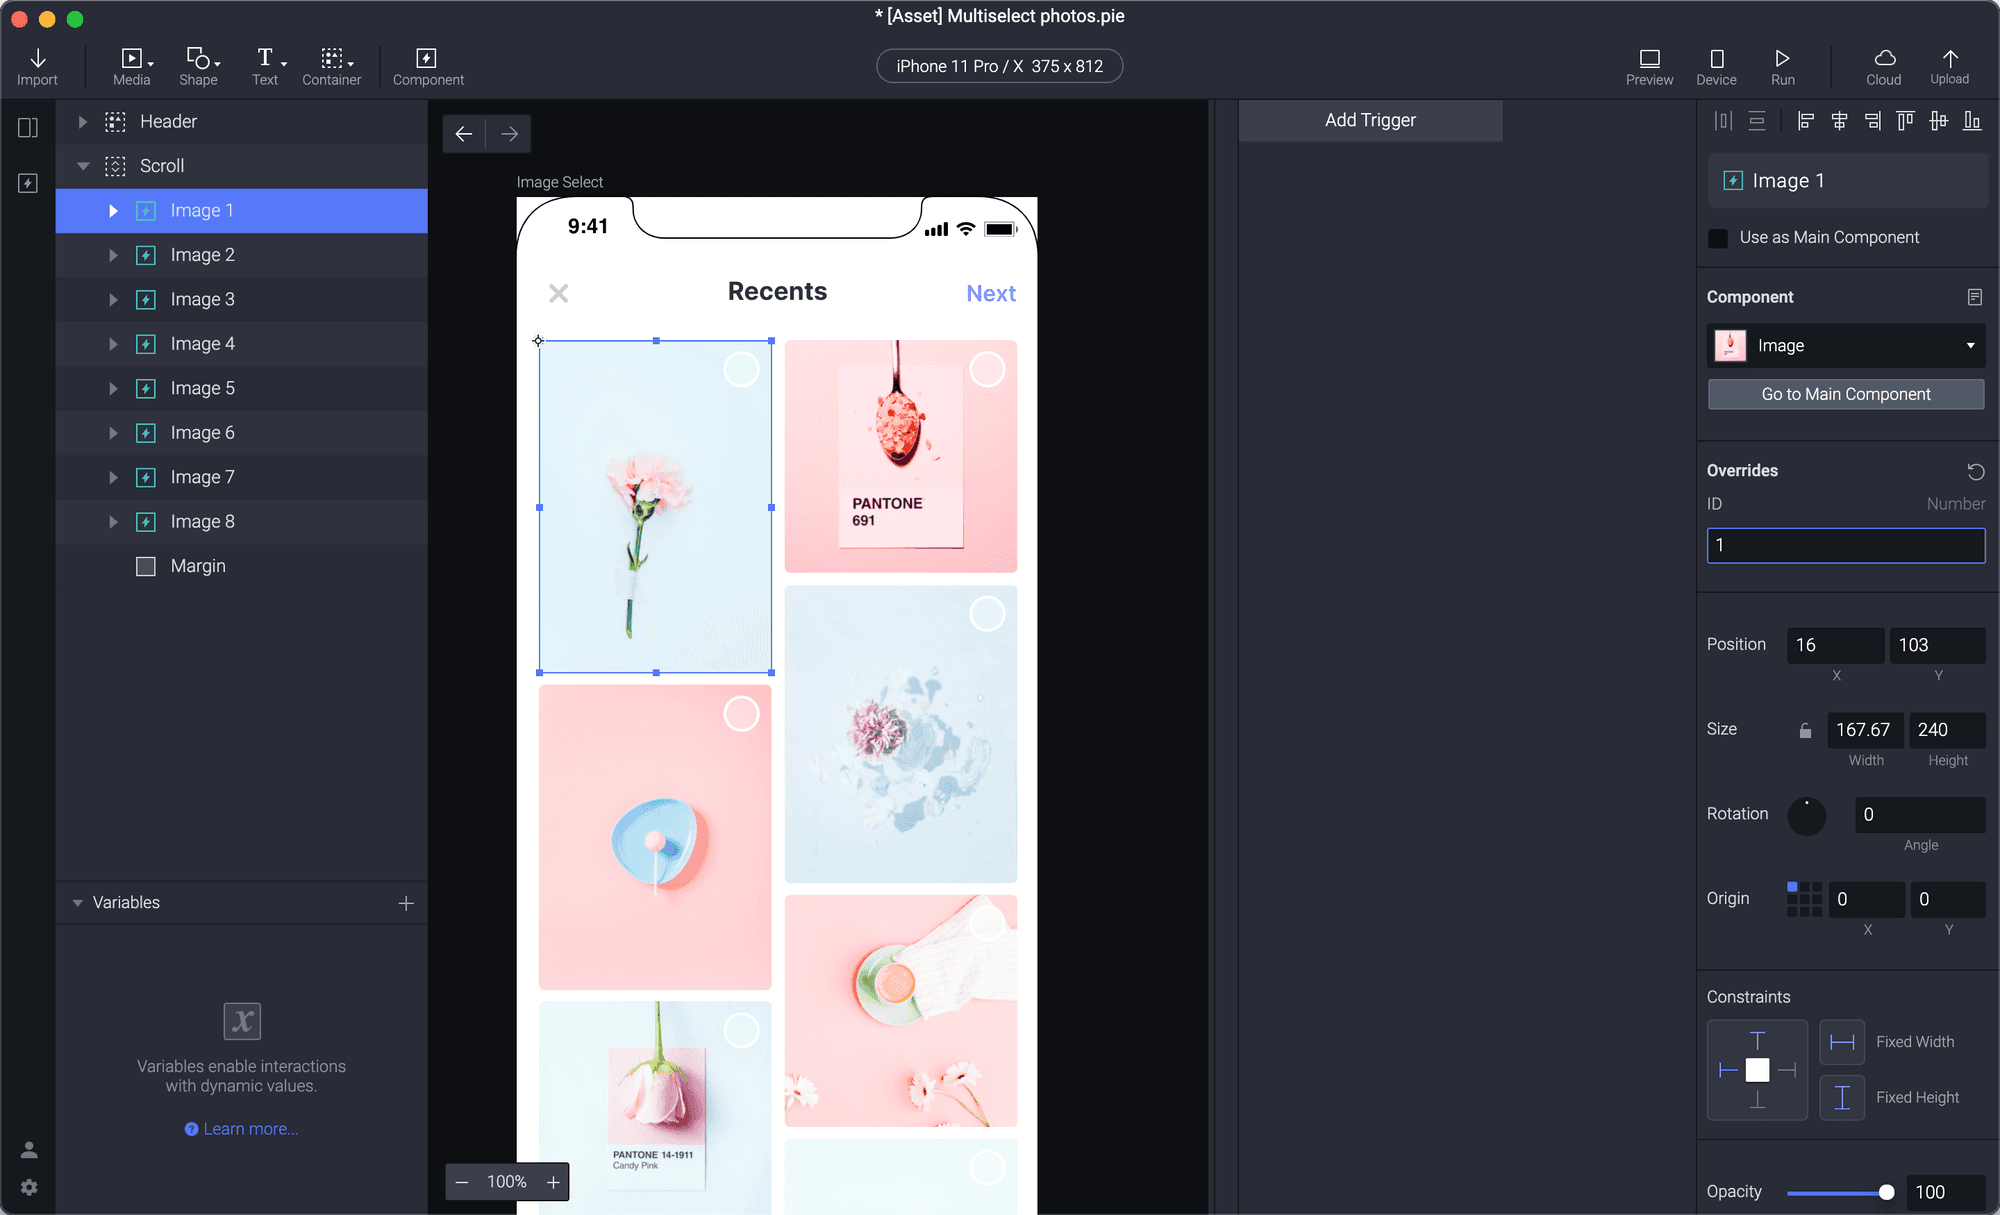
3. Go to the main scene and you will give each component a unique number (this is its unique identifier) by selecting a component and in the overrides box change the number by one (1 to 8). You can match the number with the image number if you like, but the only requirement is that the number is unique.
2. Increase each checkbox number by 1 when an image is selected
In this prototype, every time you select an image, you want the number to increase by +1. We will use variables to control the text that is featured in the checkboxes on the images.
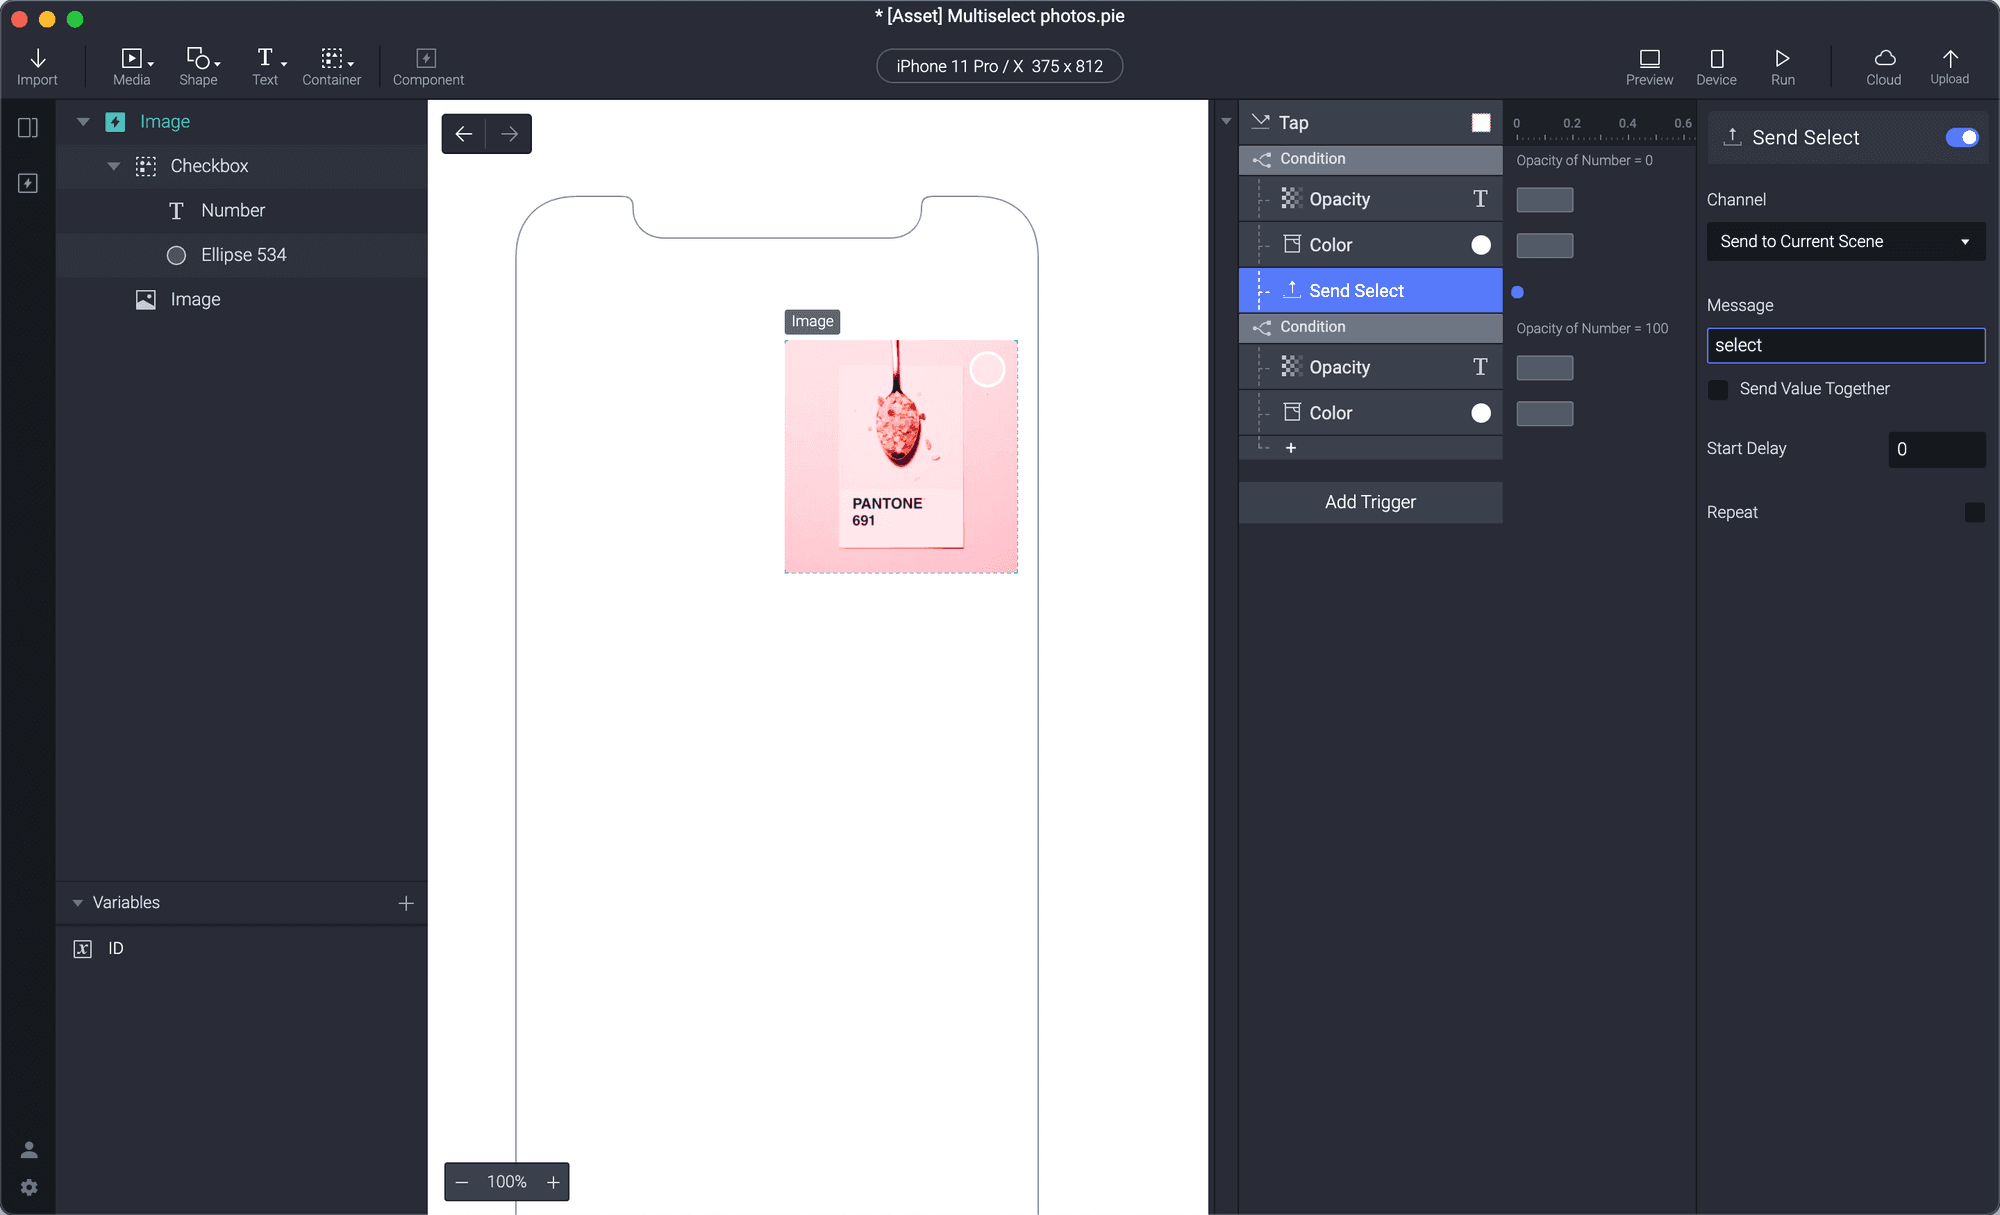
1. Go back to the component and under the first condition, create a Send response. In the message box, you can call it "select".
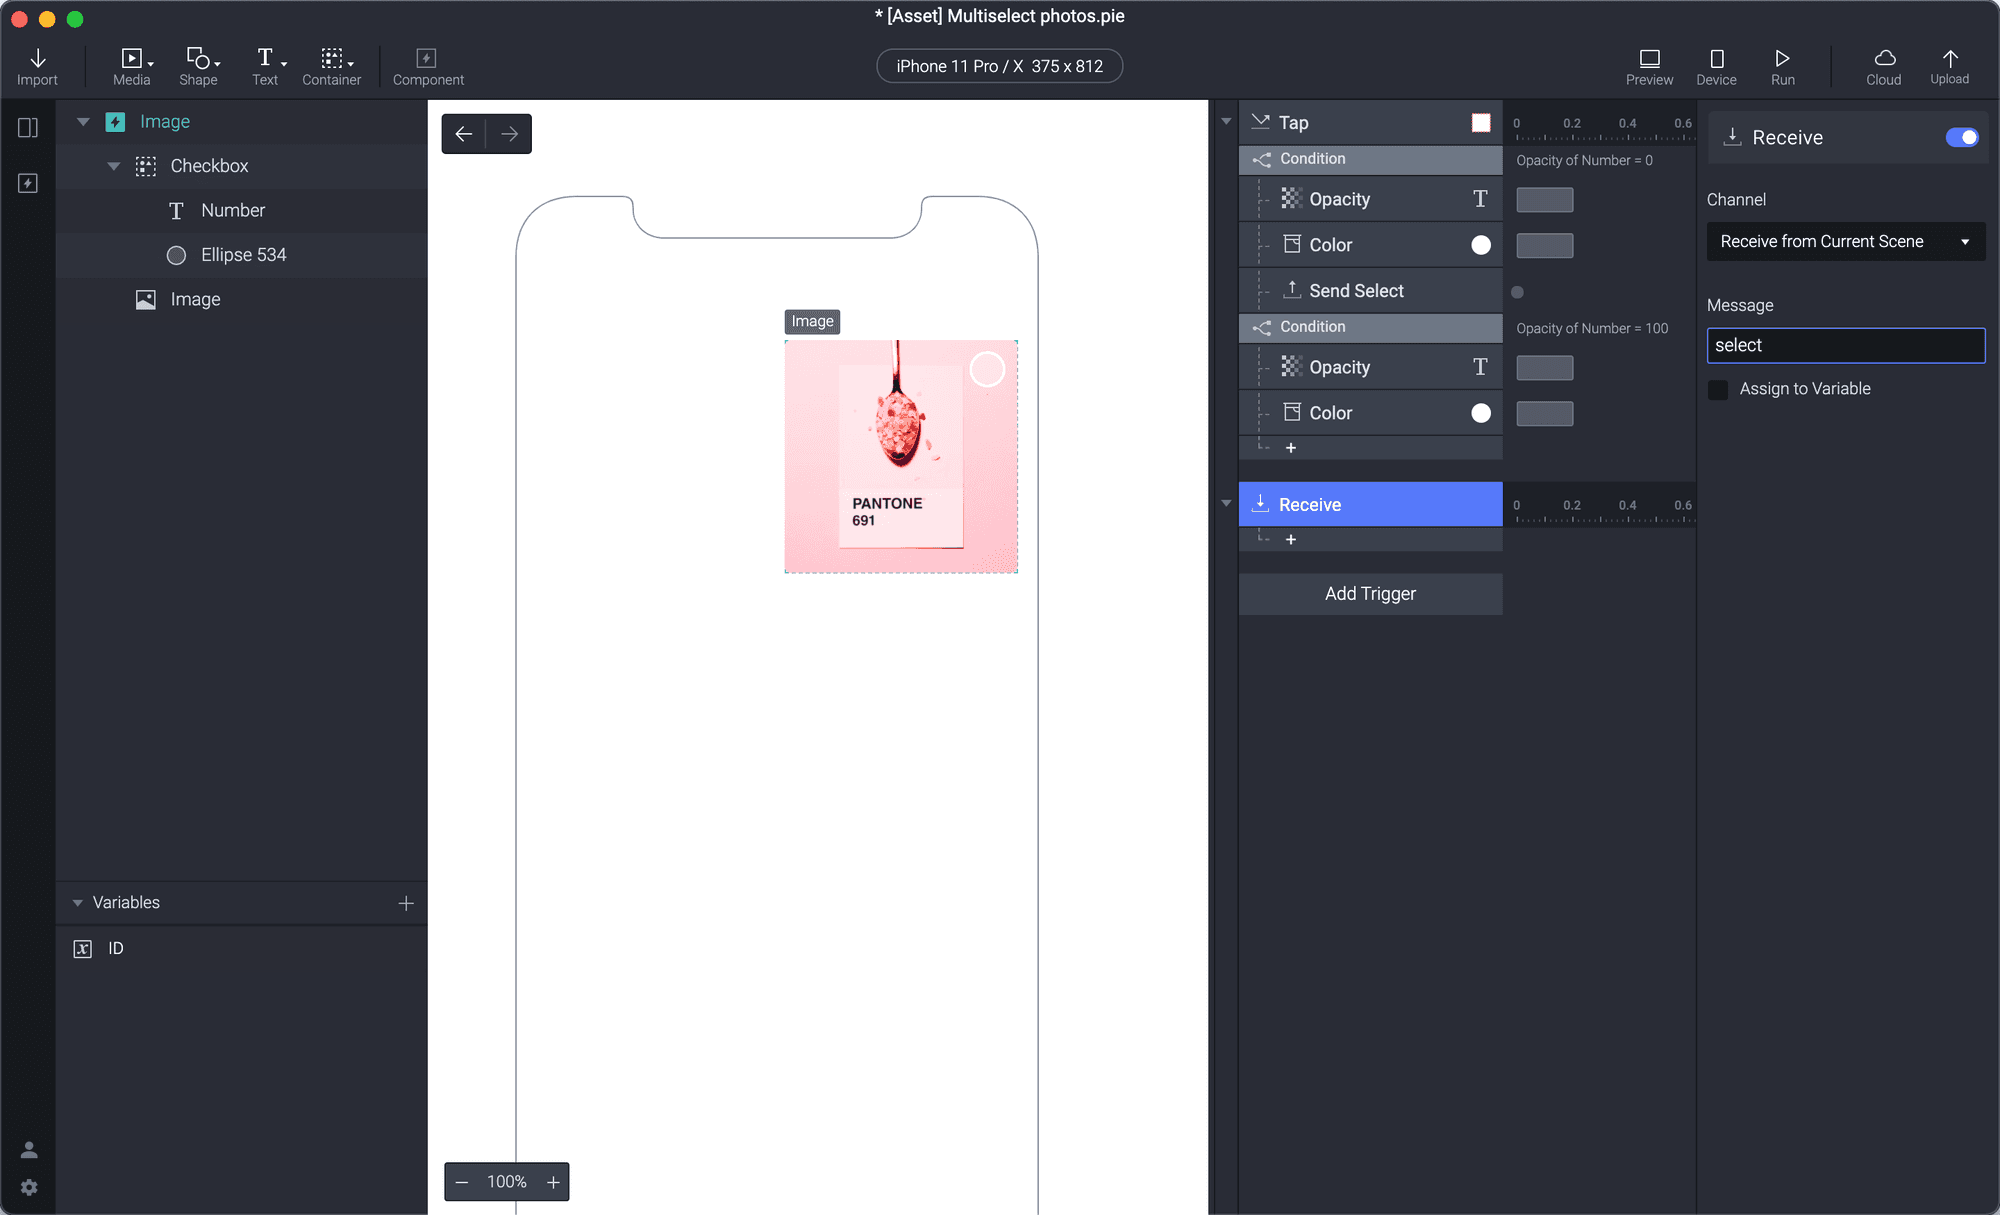
2. Add a Receive Trigger and choose the "select" message that you just created.
3. Create a new variable and name it "order_of_selection" to signify that this variable is used to control the number by which it is selected.

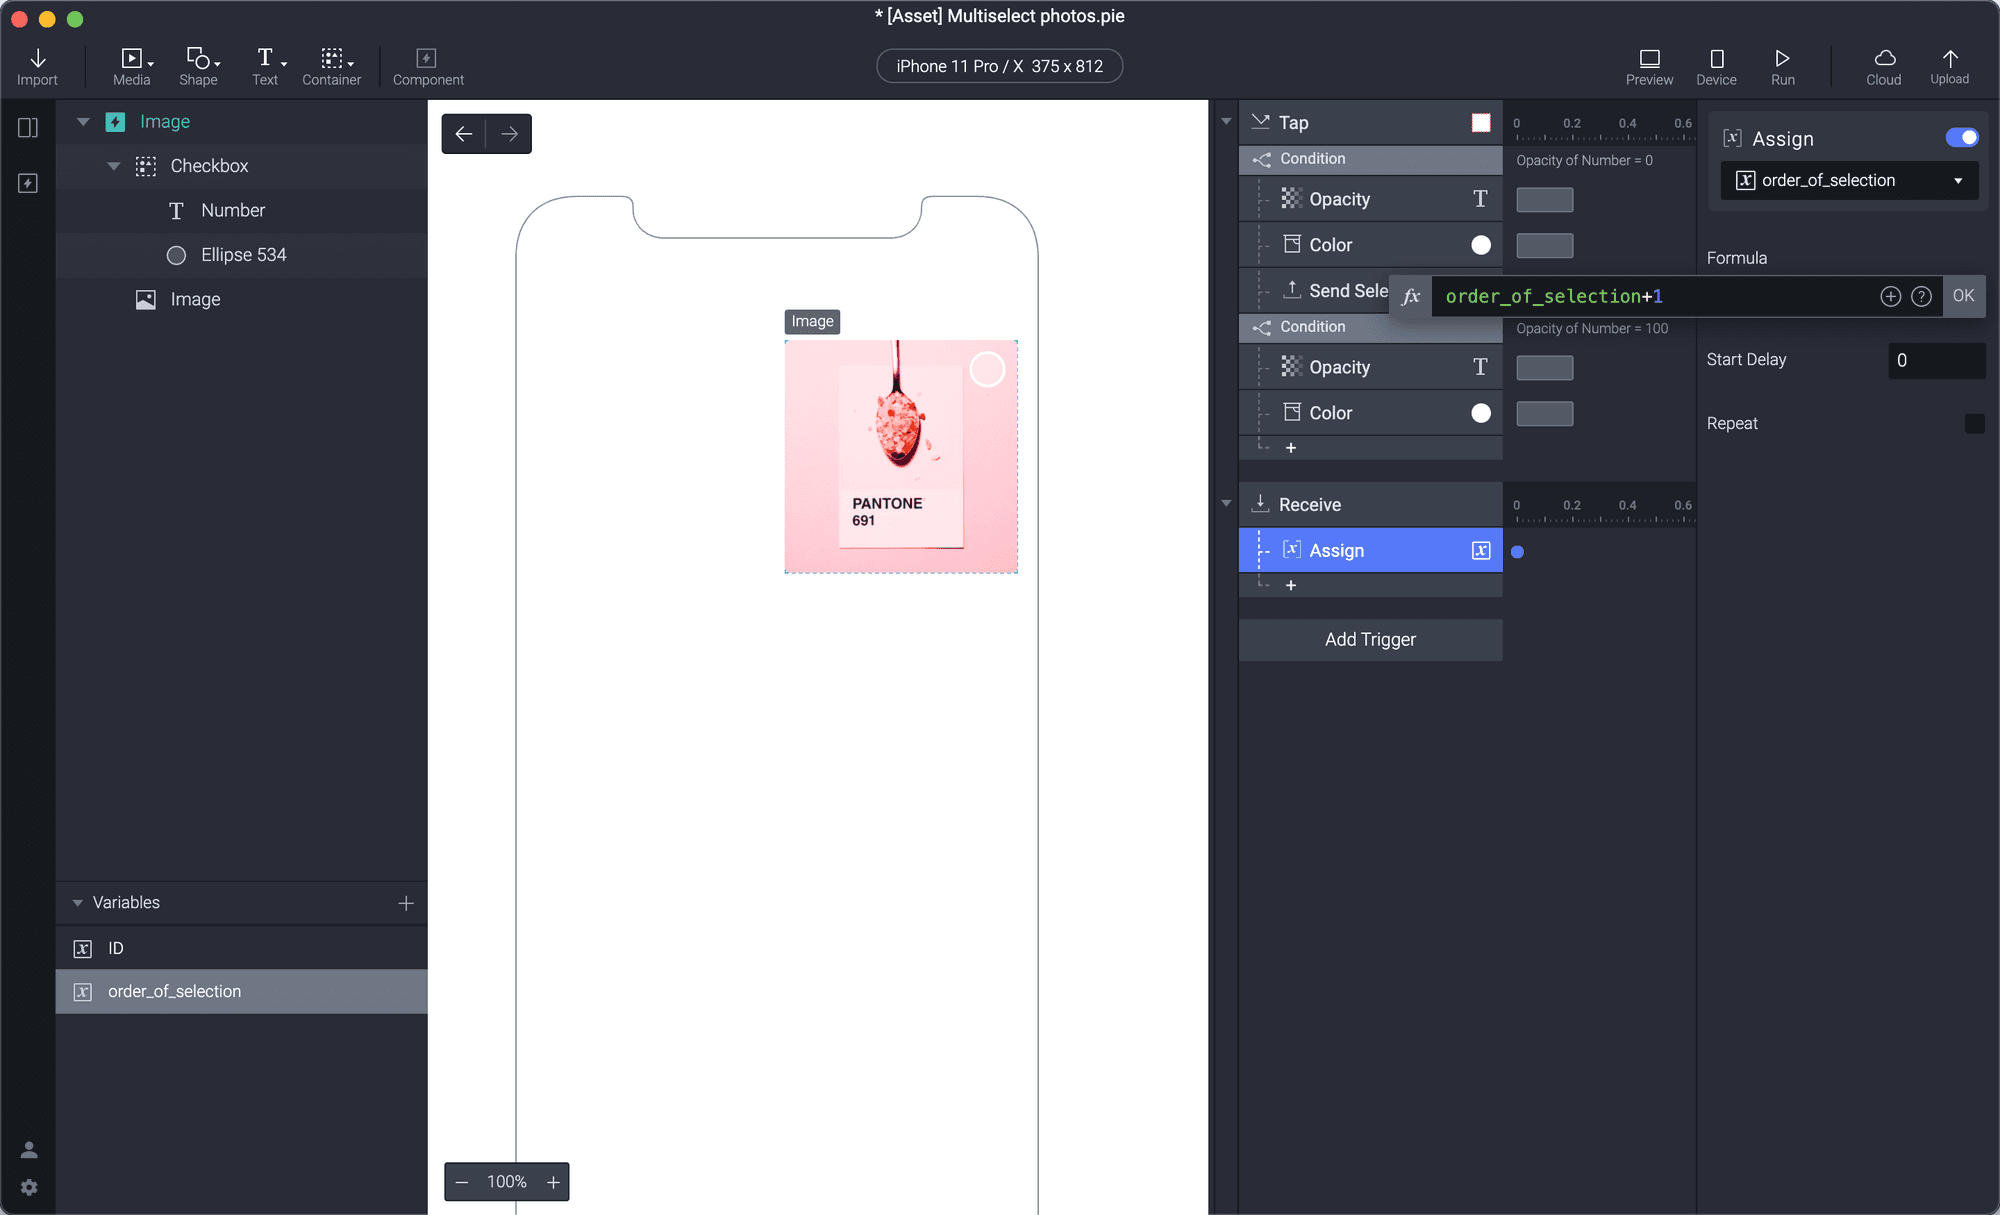
4. Under the Receive Trigger, create an Assign response that is linked to the new variable you created (order_of_selection). In the Formula, select the order_of_selection variable and add a "+1" to the end of the formula.
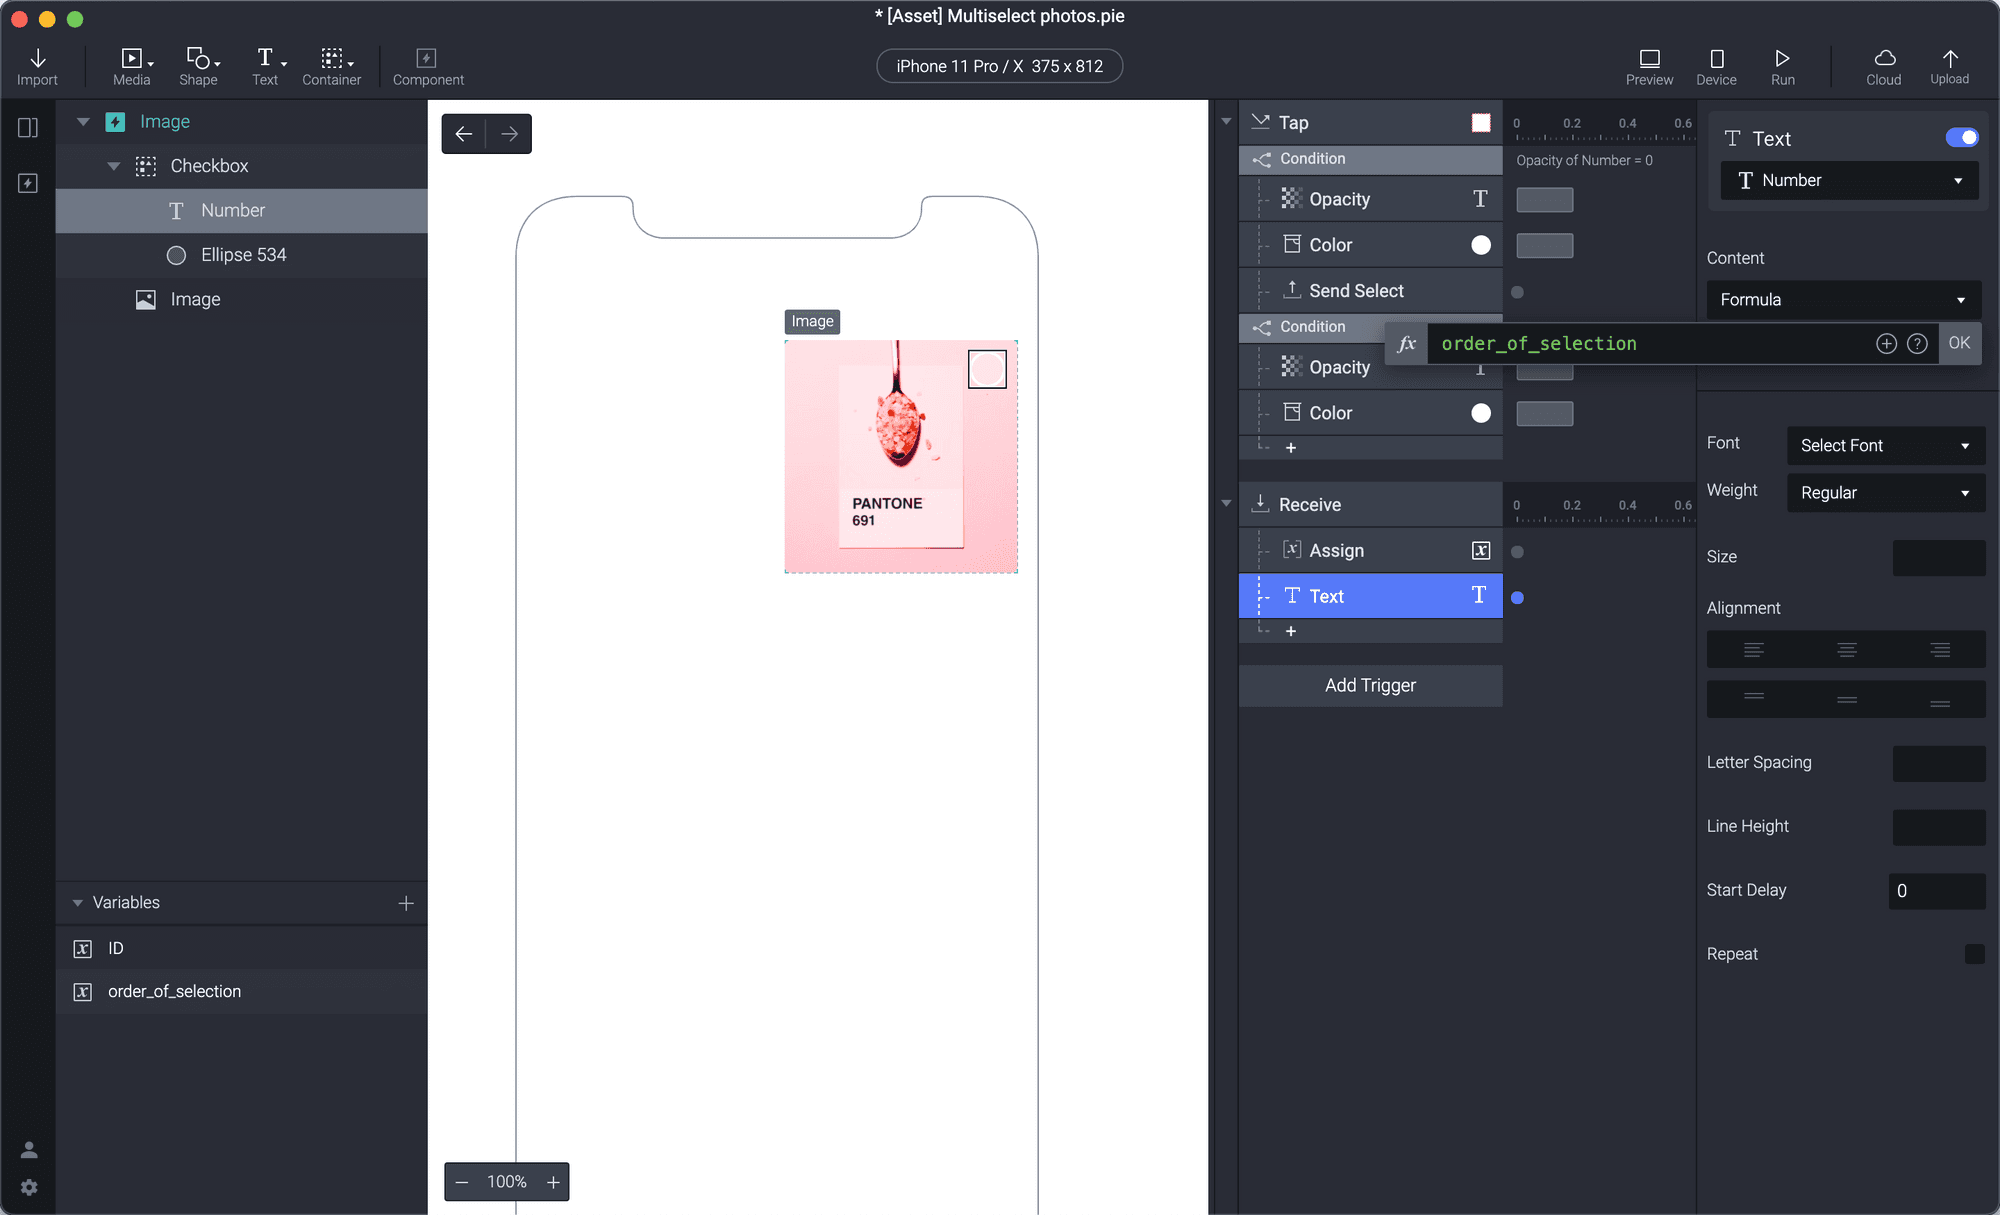
5. Add a Text response to the Receive trigger and assign it to the Number. Change the Content to a Formula and insert your "order_of_selection" variable.
6. Now, if you test your scene, you'll notice that each time you select a photo, every number of the checkboxes increases by one. In the next steps, we will correct this so each number reacts to additional selections.
3. Make the checkboxes develop a numerical order when they are selected
We need to send a bit of information to let the other instances of the components react to our selections.
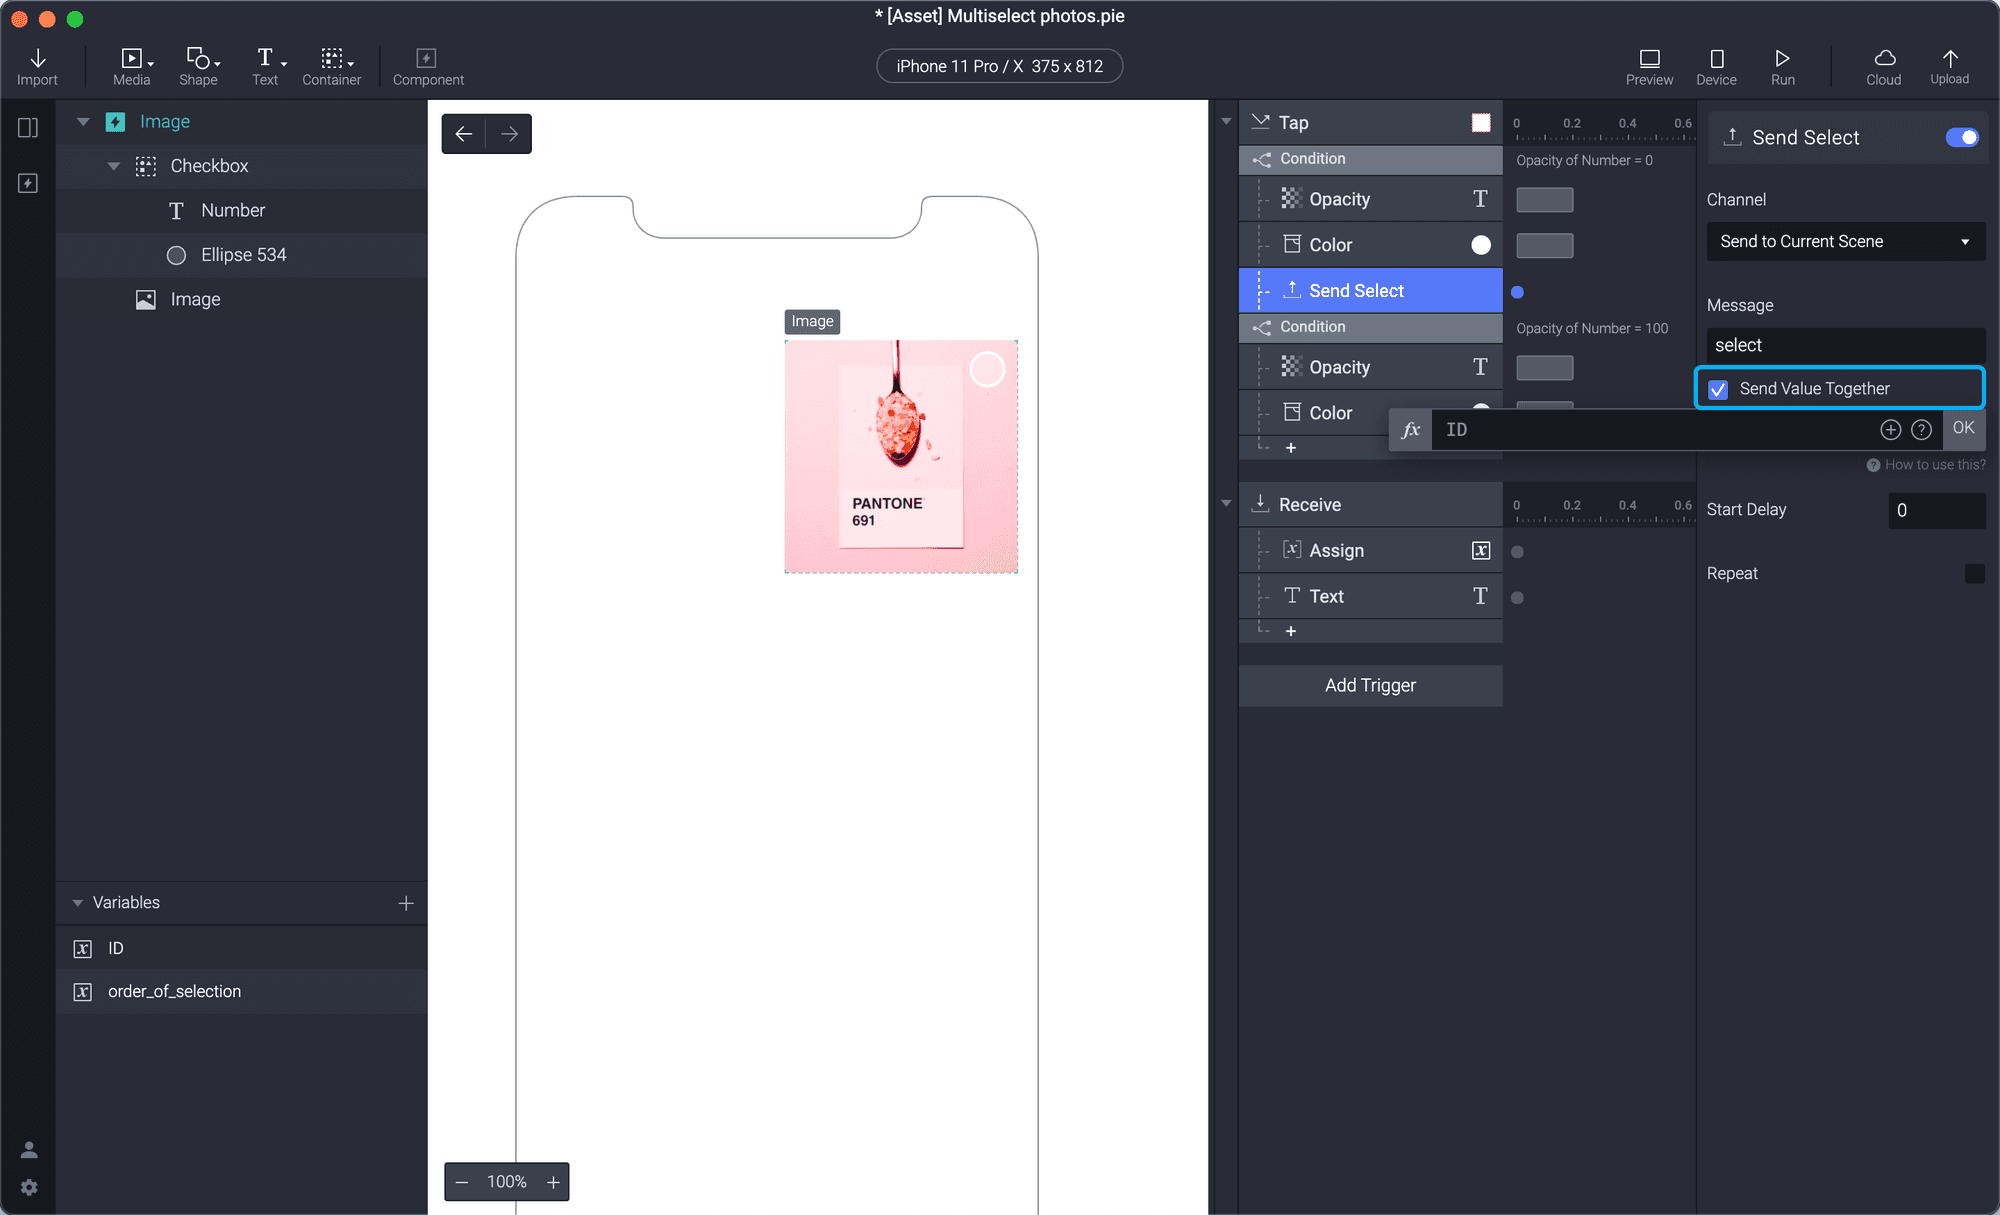
1. In the Send response under the Tap trigger, check the Send Value Together box and add the ID variable you created as the function.
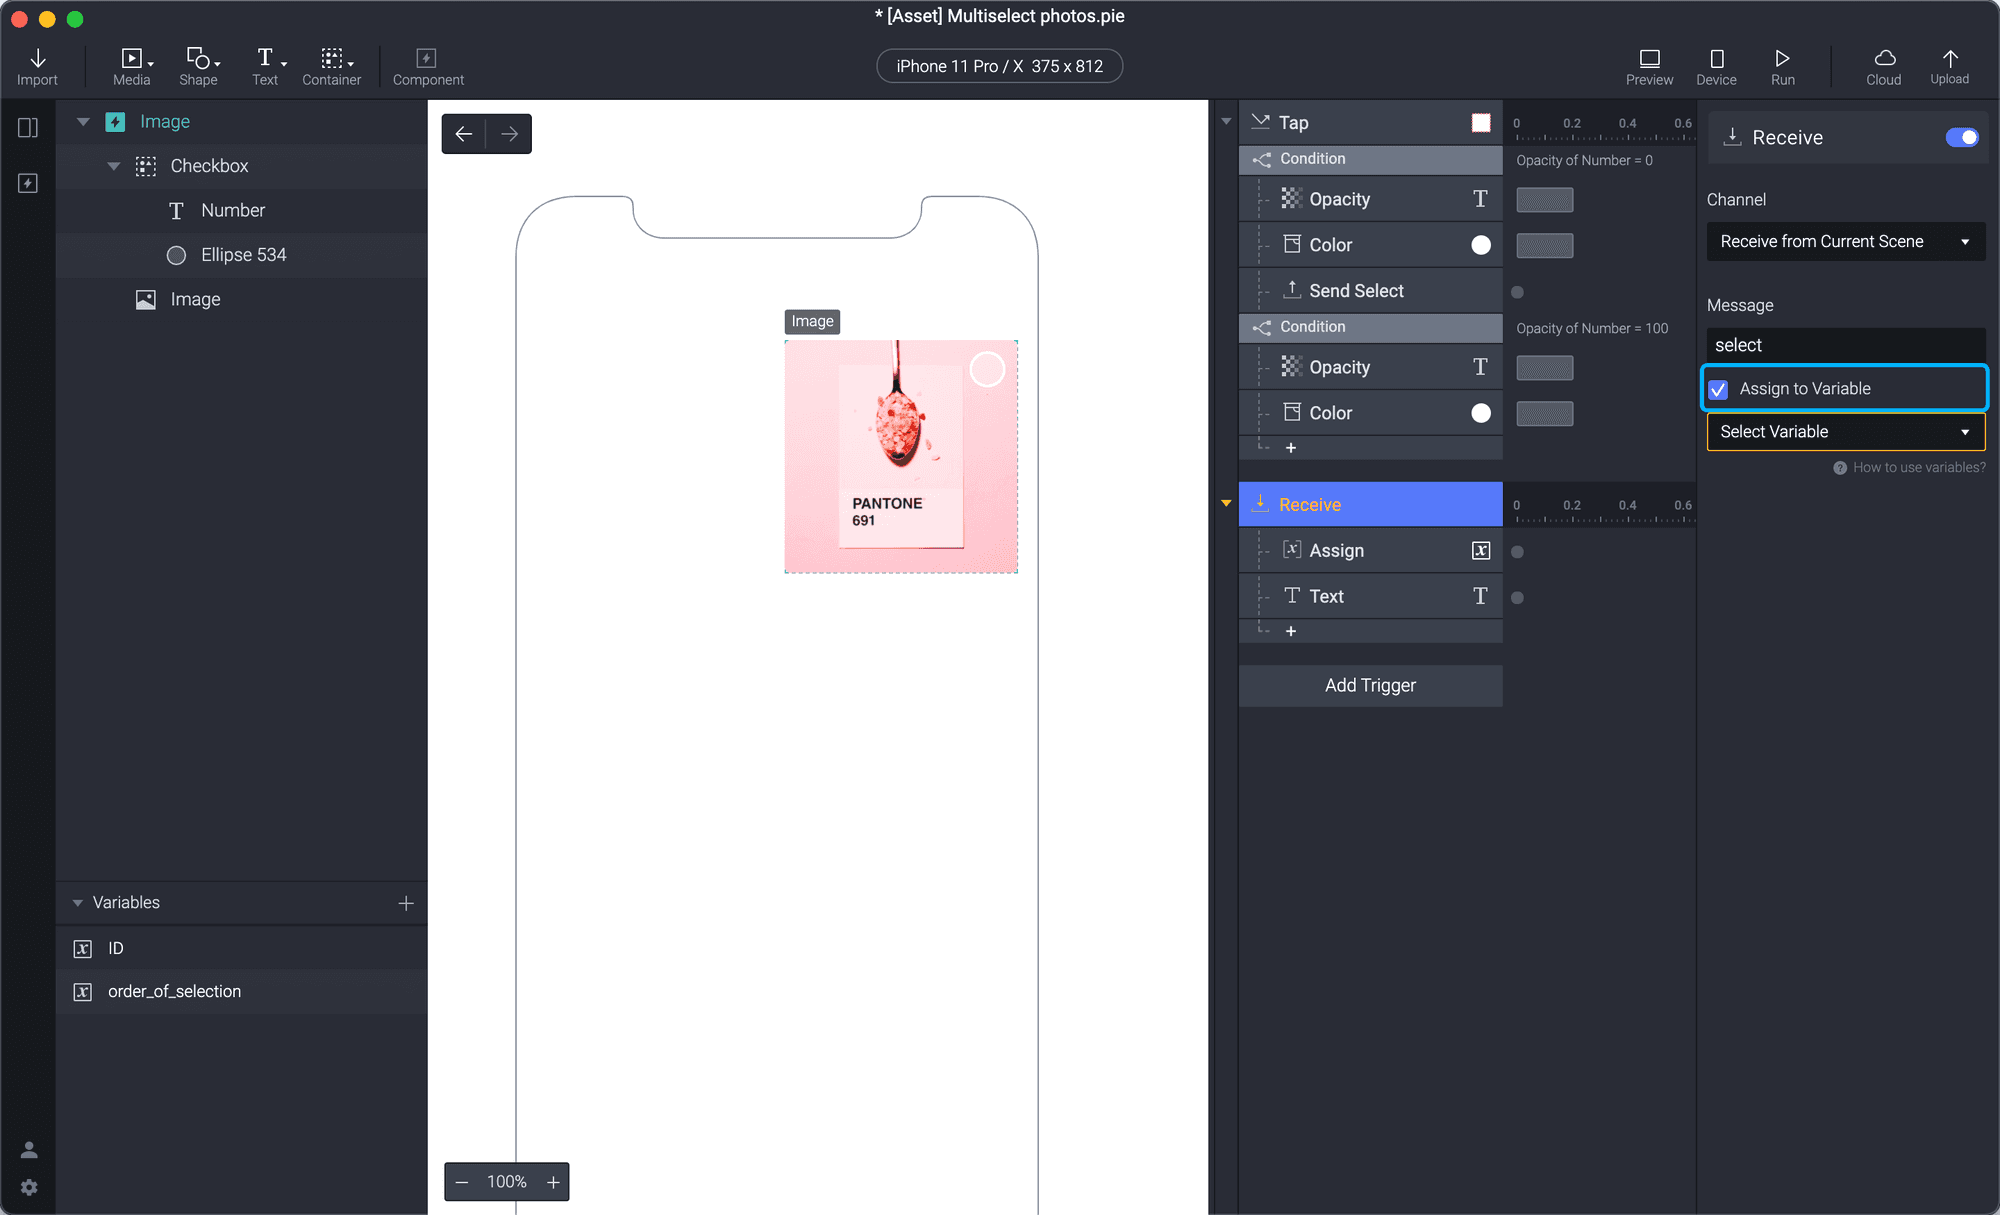
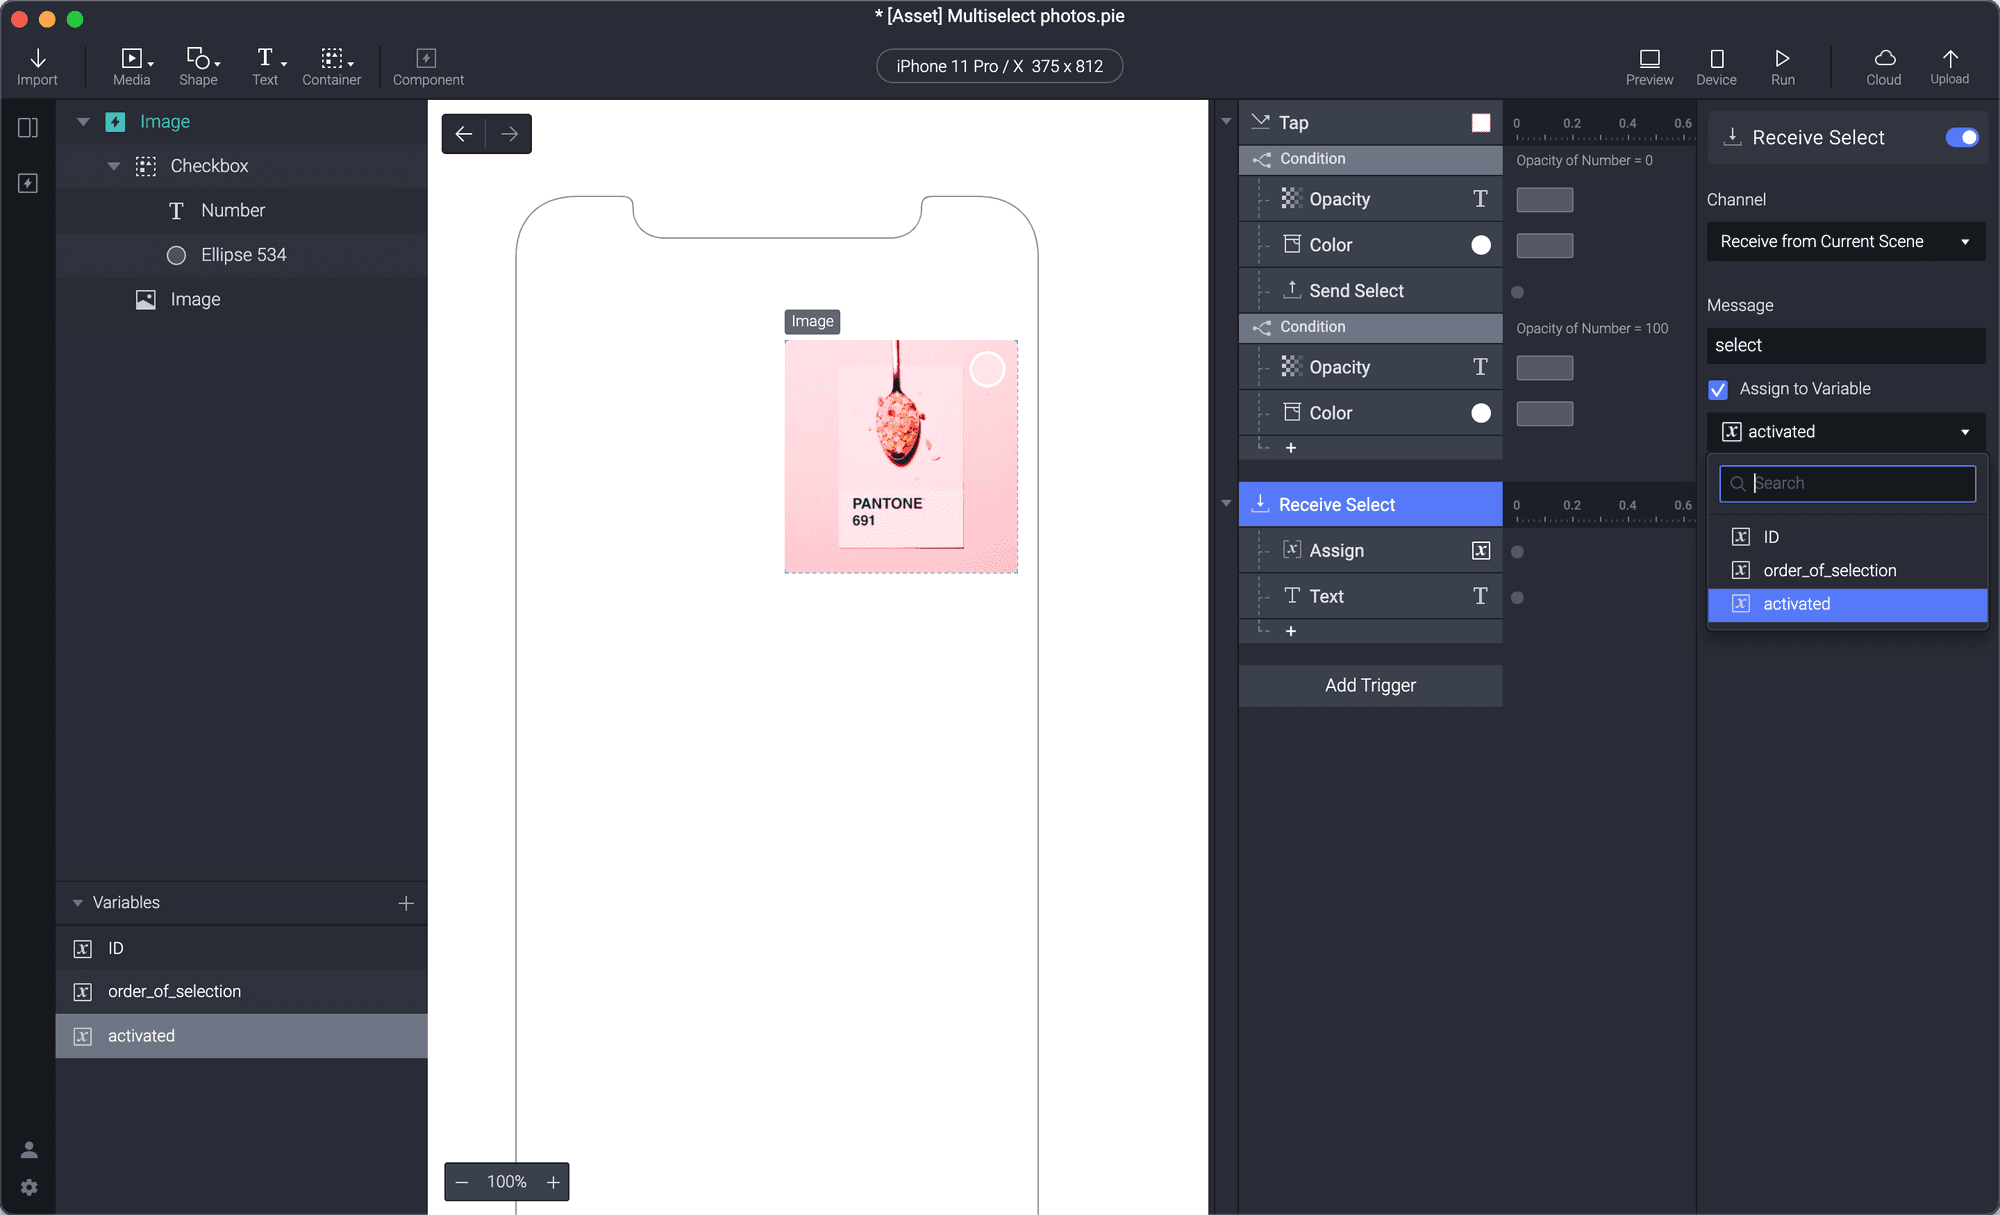
2. In the Receive trigger, check the Assign to Variable box. At this point, we need this to save to a new variable that we have not yet created.
3. Create a new variable and call it "activated". Because we have given all the instances of the component a unique ID, this variable allows ProtoPie to recognize when each unique component is activated.
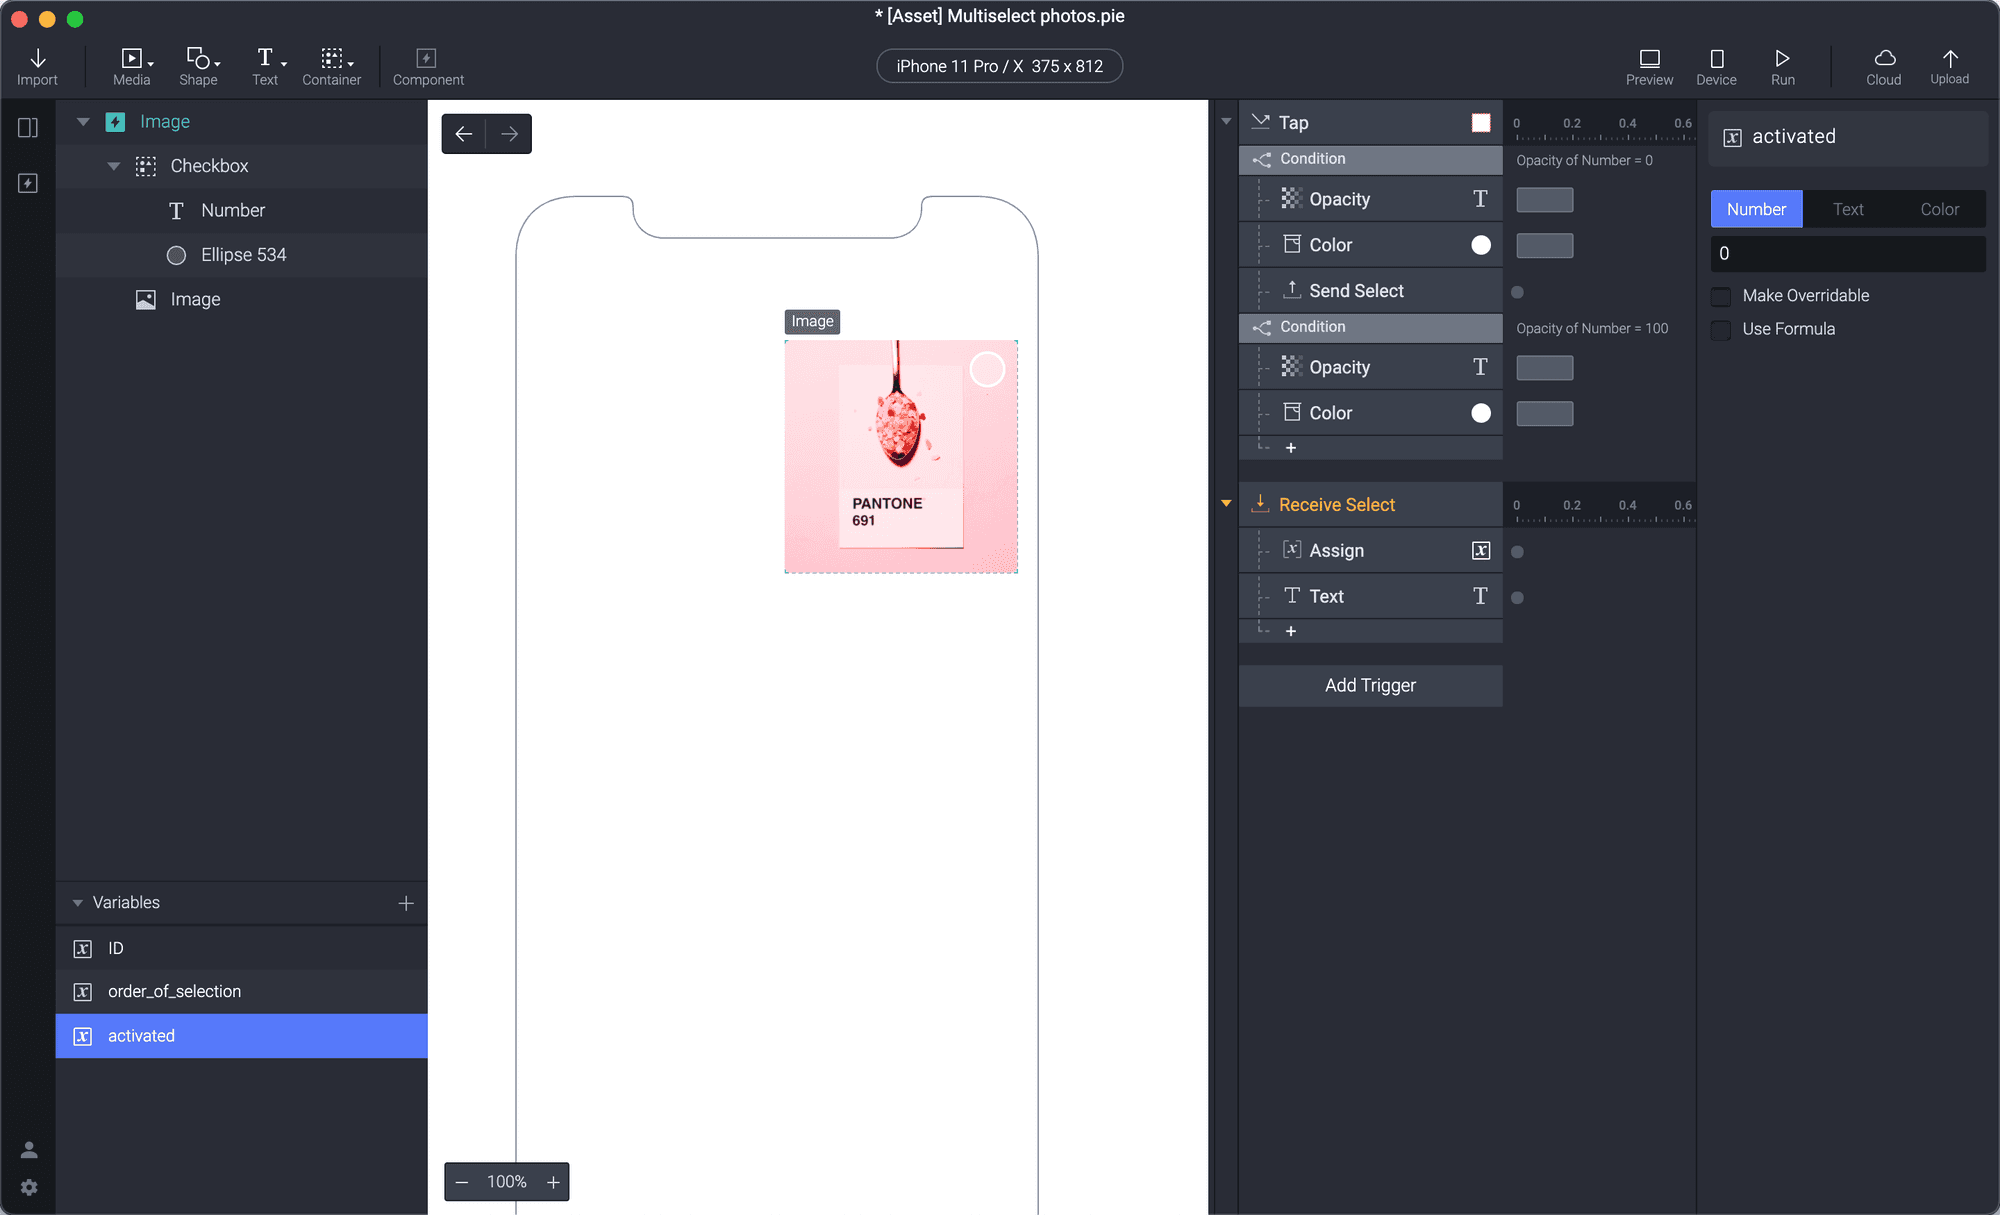
4. In the Receive trigger, change the Assign to Variable function to the "activated" variable you just created.
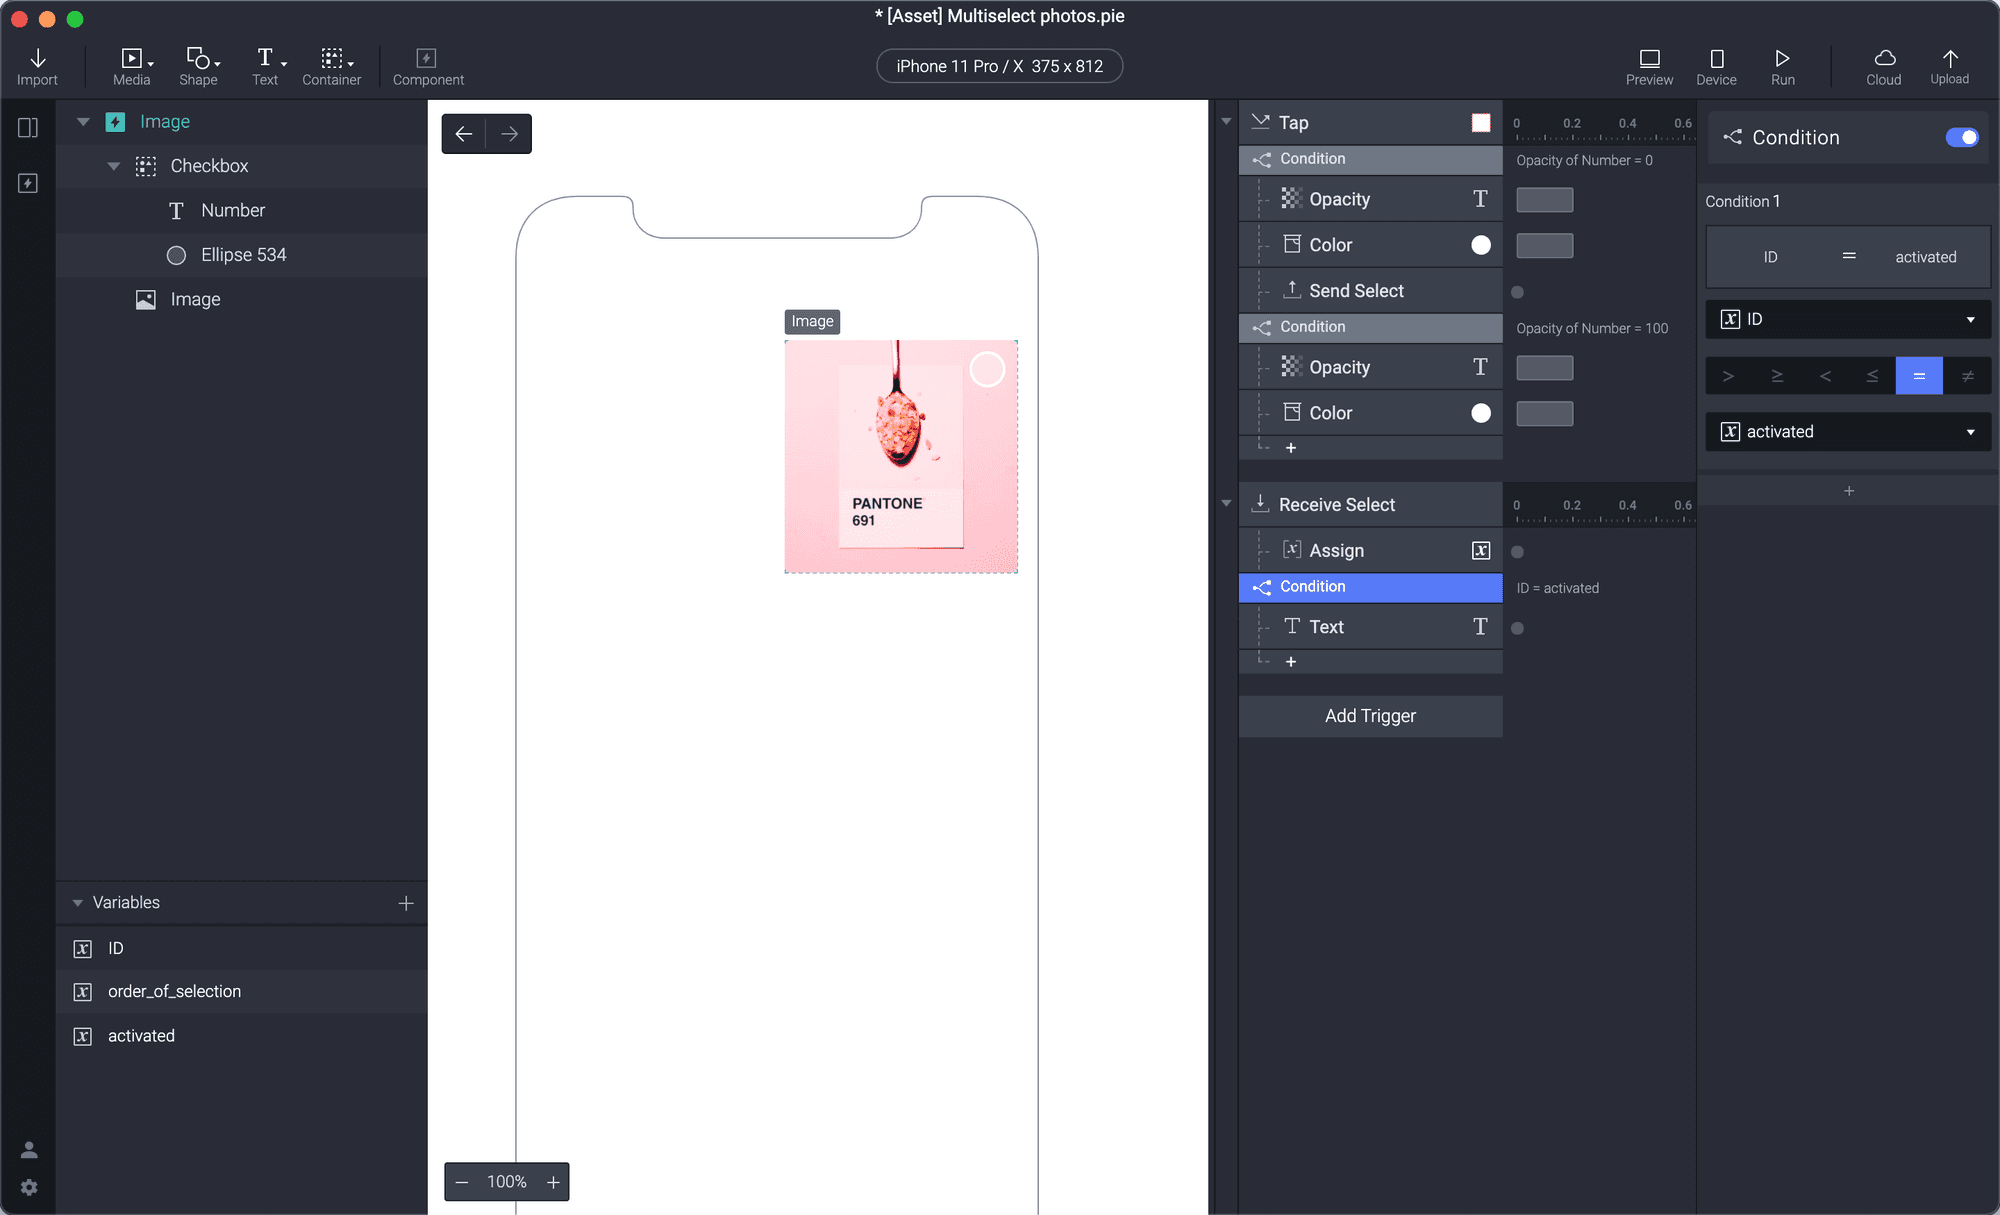
5. Under the Text response of the Receive trigger, add a new condition and make it read, ID = activated. Move the Text response underneath the new condition you just created.
💡 If you test your scene now, you can select a photo and it will increase by an order of one as you select. If you deselect a number and select another photo, the numbers will not react appropriately and will be out of sequence. We will fix this in the next step.
An Interlude to Discuss Sequential Logic
We need to pause to discuss a bit of logic about reordering numbers. Let's say you select five components at random. You will see these components' number-boxes increase in order 1,2,3,4,5. Upon deselection of any component, you want the rest of the numbers to respond by subtracting by one, but not at random. These numbers must keep the order of the sequence you selected them in.
If you select random components and the number-boxes go up to 1,2,3,4,5 and you deselect number 3, what will happen? 4 becomes 3 and 5 becomes 4, but components 1 and 2 remain the same.
It is a complexity that is obscured by the sleek user interface of this app design, but an idea is needed to understand what you are trying to achieve in the next steps. You are making the numbers decrease by 1 and making the component's numerical order reorganize in a logical sequence.
4. Decrease a checkbox number by 1 when deselected and reorder the selected photos
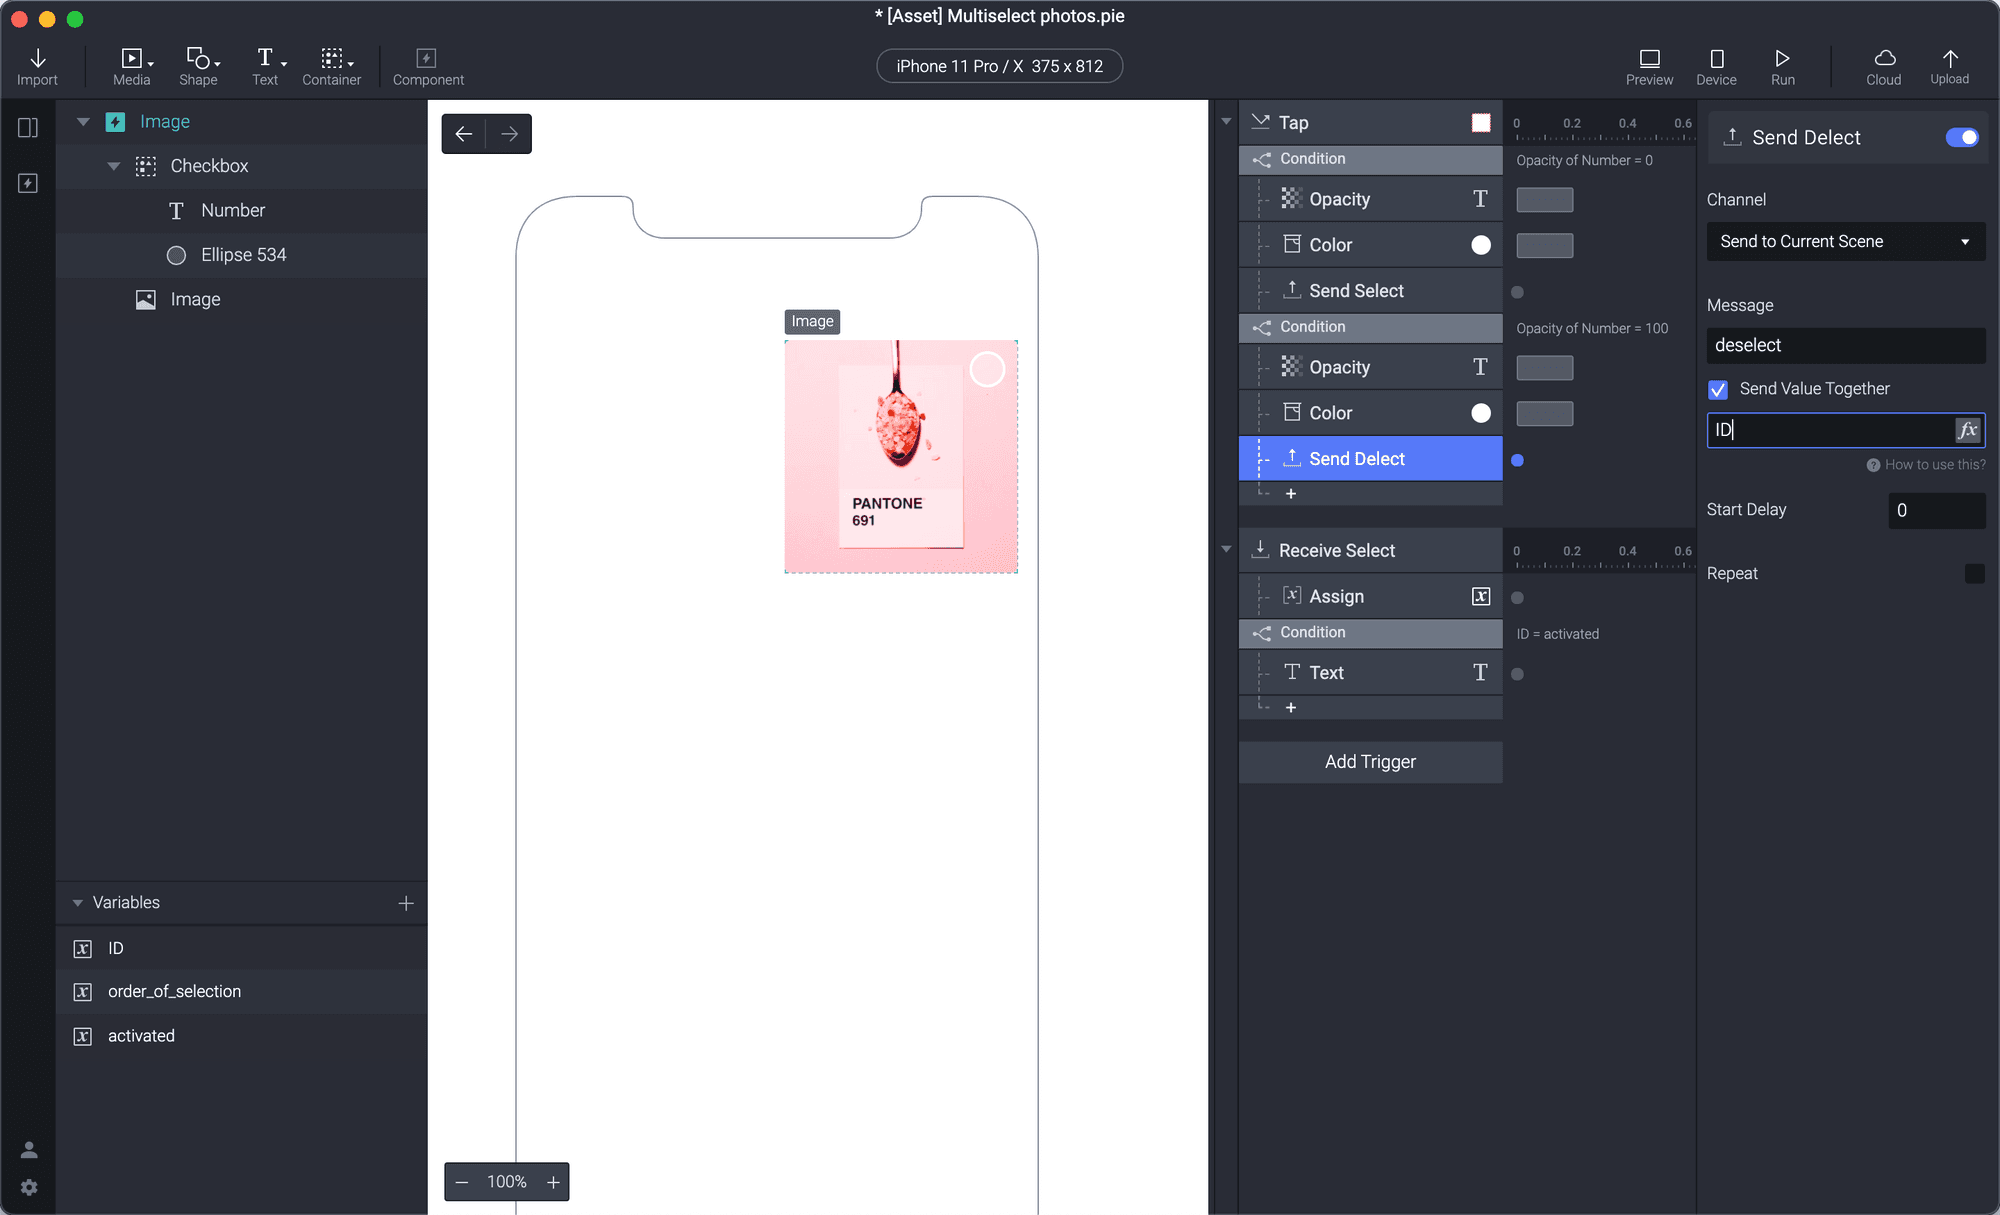
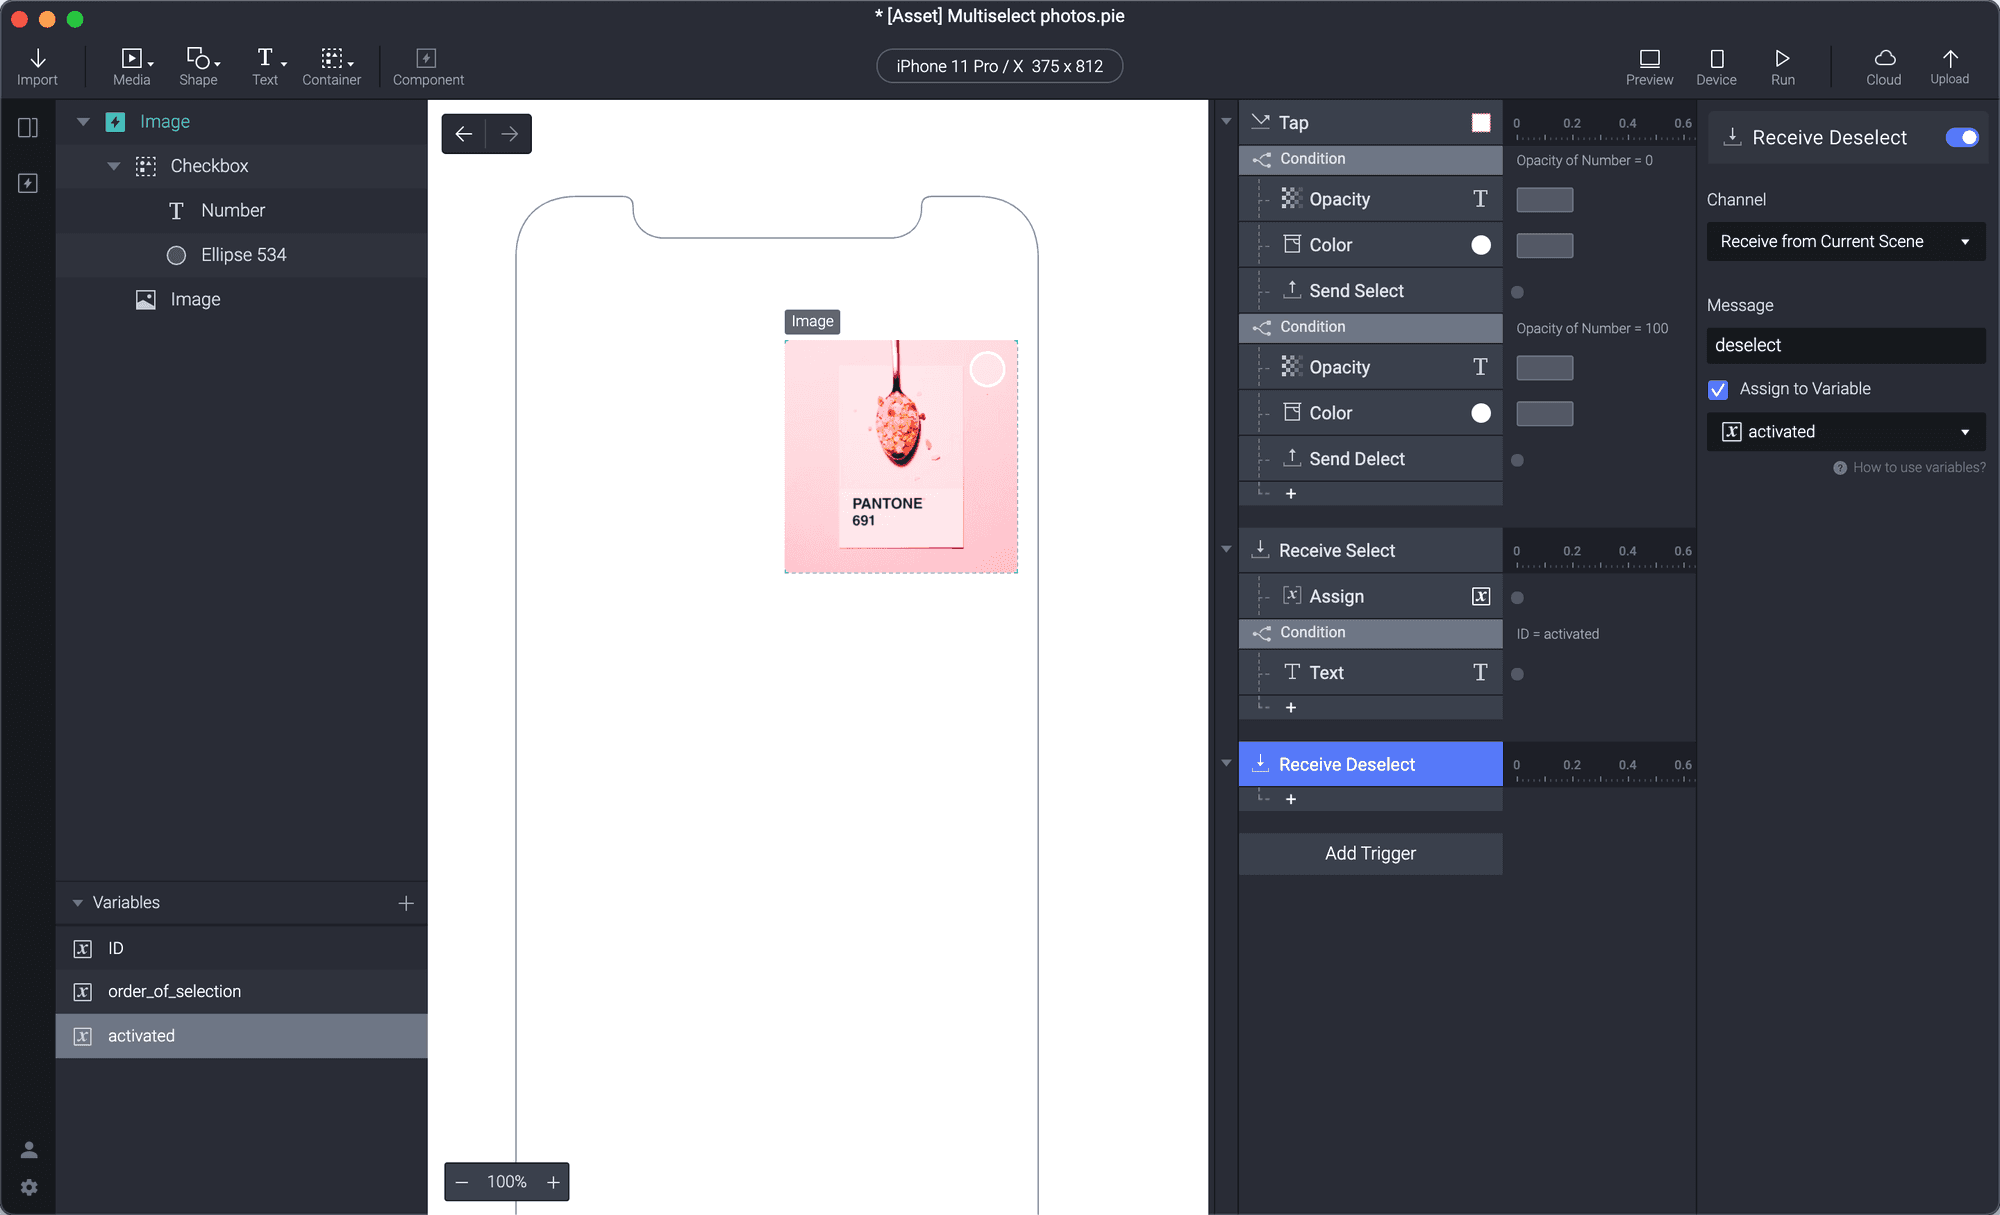
1. In your component, under the Tap trigger below the Color response, create a Send response. In the message, call it "deselect" and you'll want to check the Send Value Together and use the "ID" variable.
2. Create a new Receive trigger, change the message to the "deselect" message you created, and assign the variable to your "activated" variable.
3. Create an Assign response under your Receive trigger and make sure it is linked to your "order_of_selection" variable. In the formula, it will be order_of_selection -1.

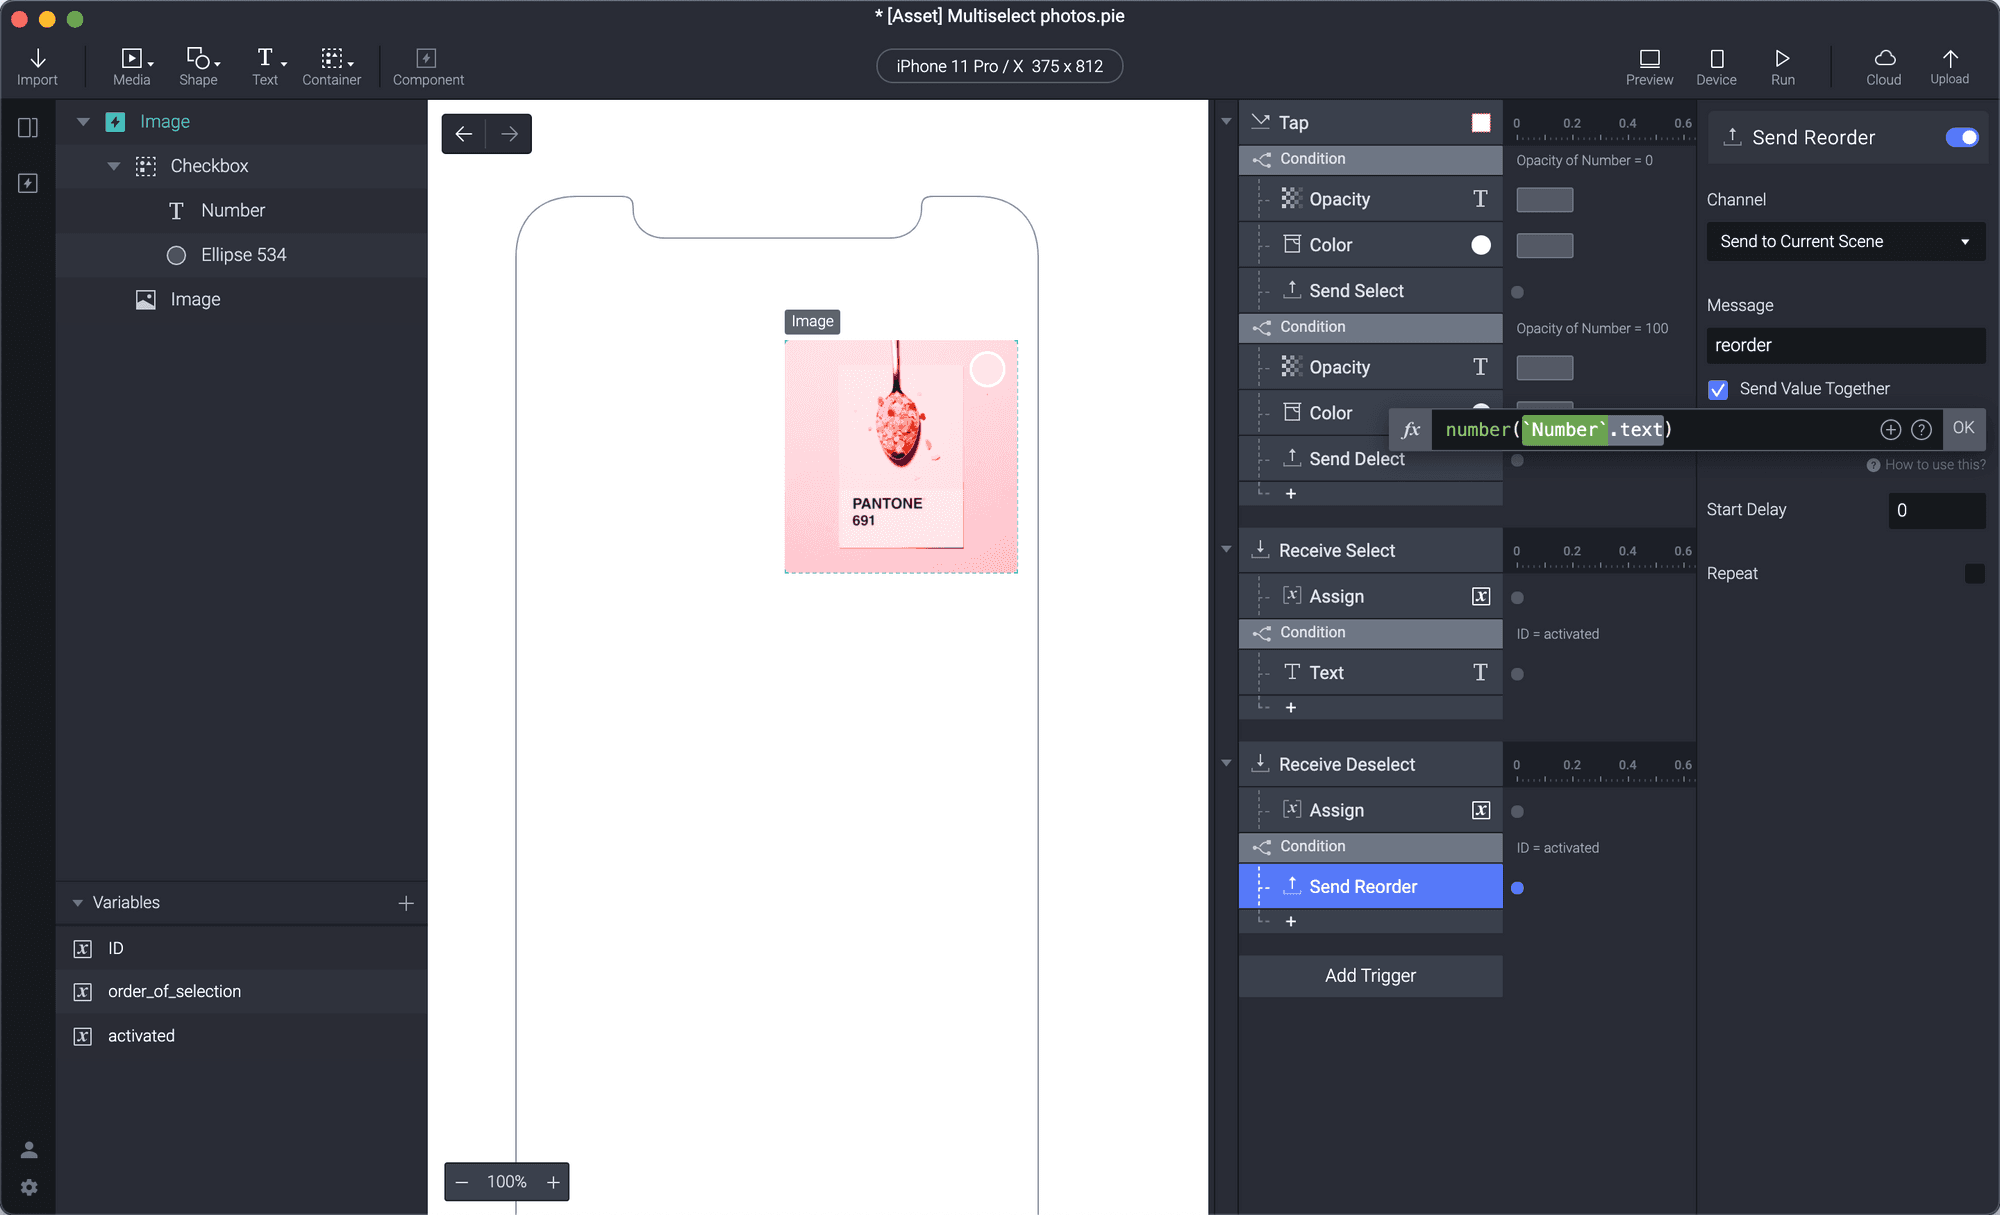
4. Copy the condition under the receive trigger and paste this under the receive trigger. Delete the Text response and replace it by adding a Send response. The message can be "reorder" and check the Send Value Together box. The full formula should read, number('Number'.text).
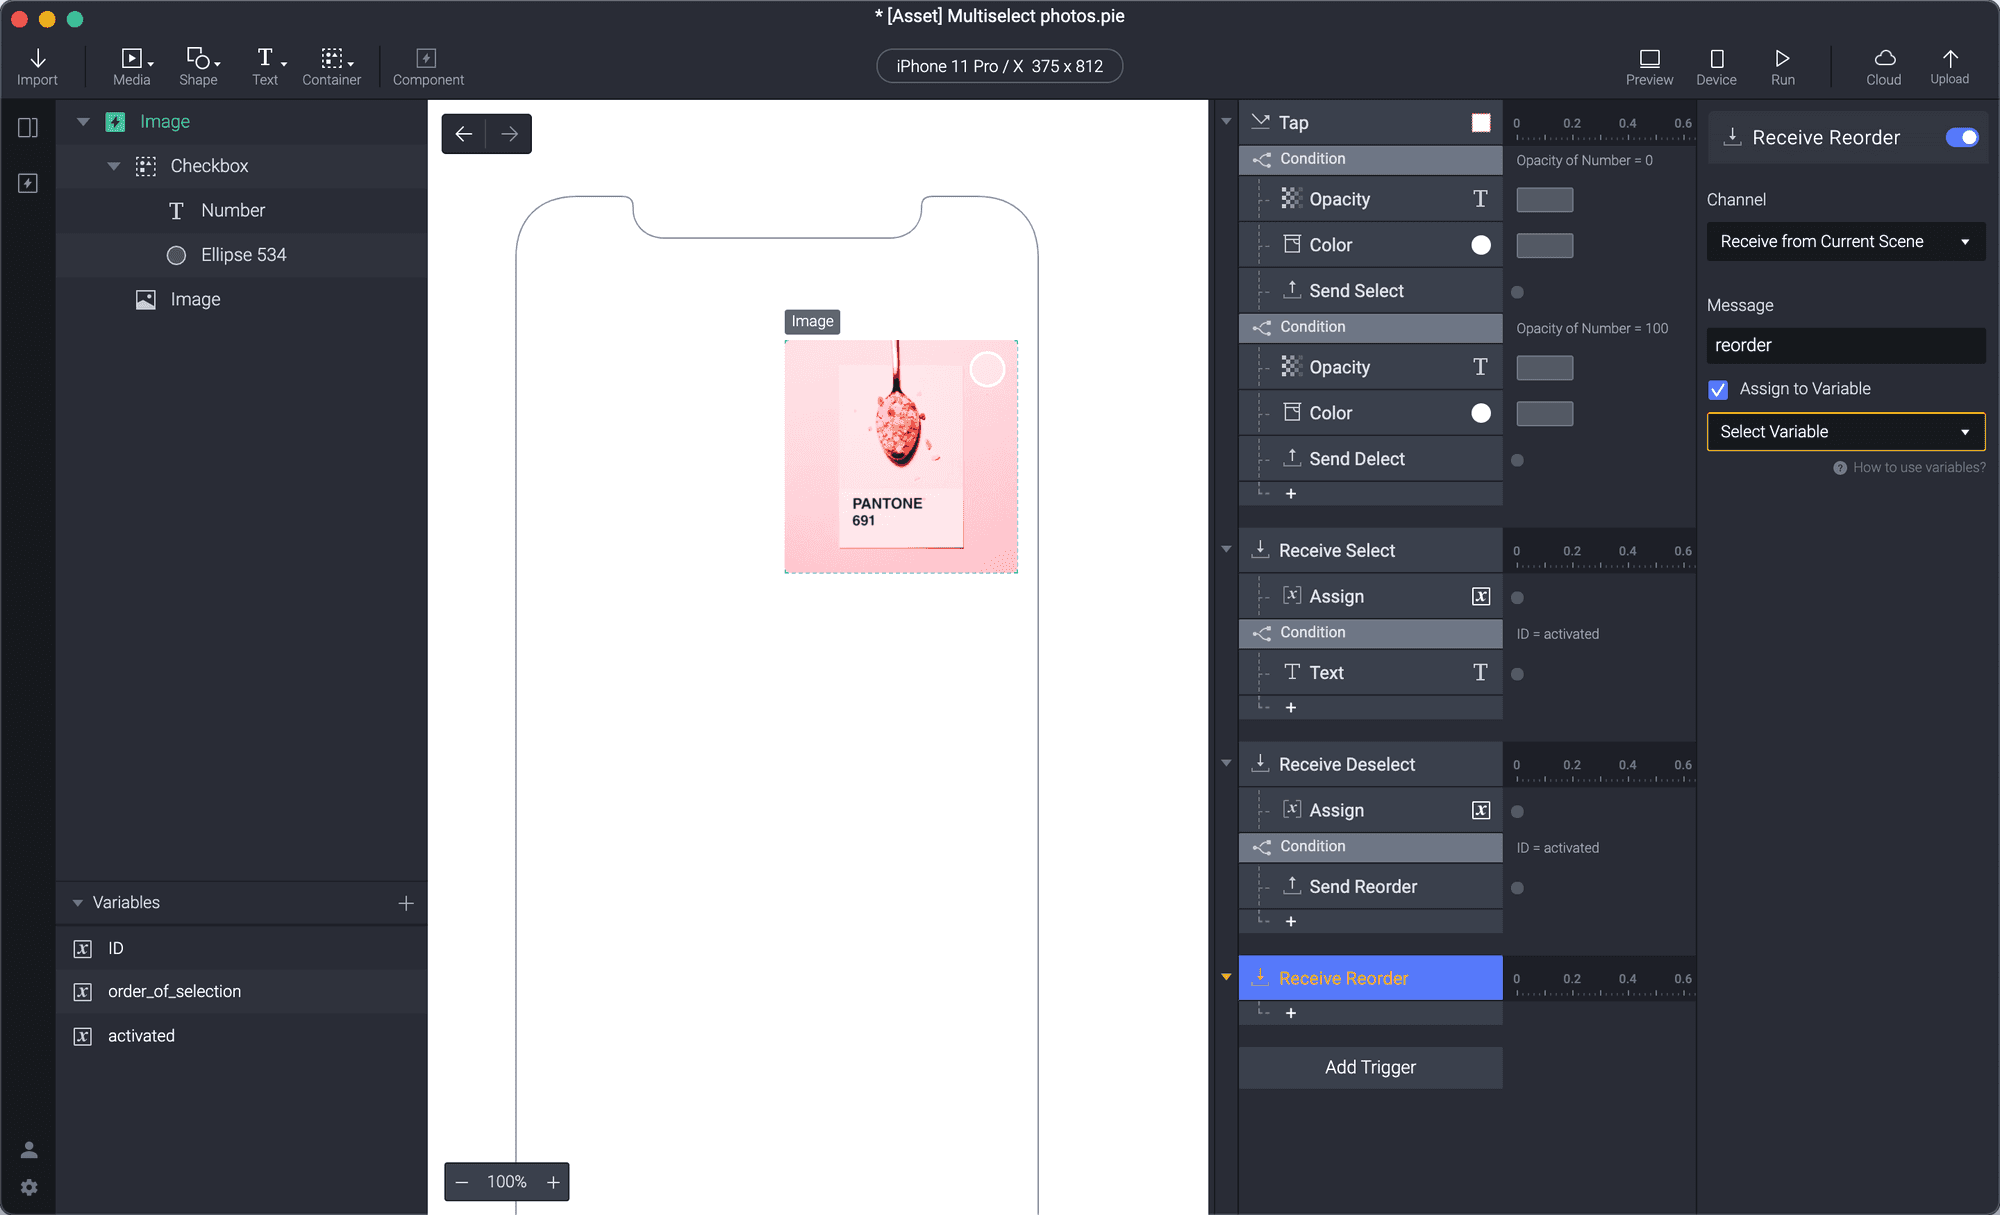
5. Add a Receive trigger and insert the "reorder" into the message box. Check the Assign to Variable box for another new variable we need to create.
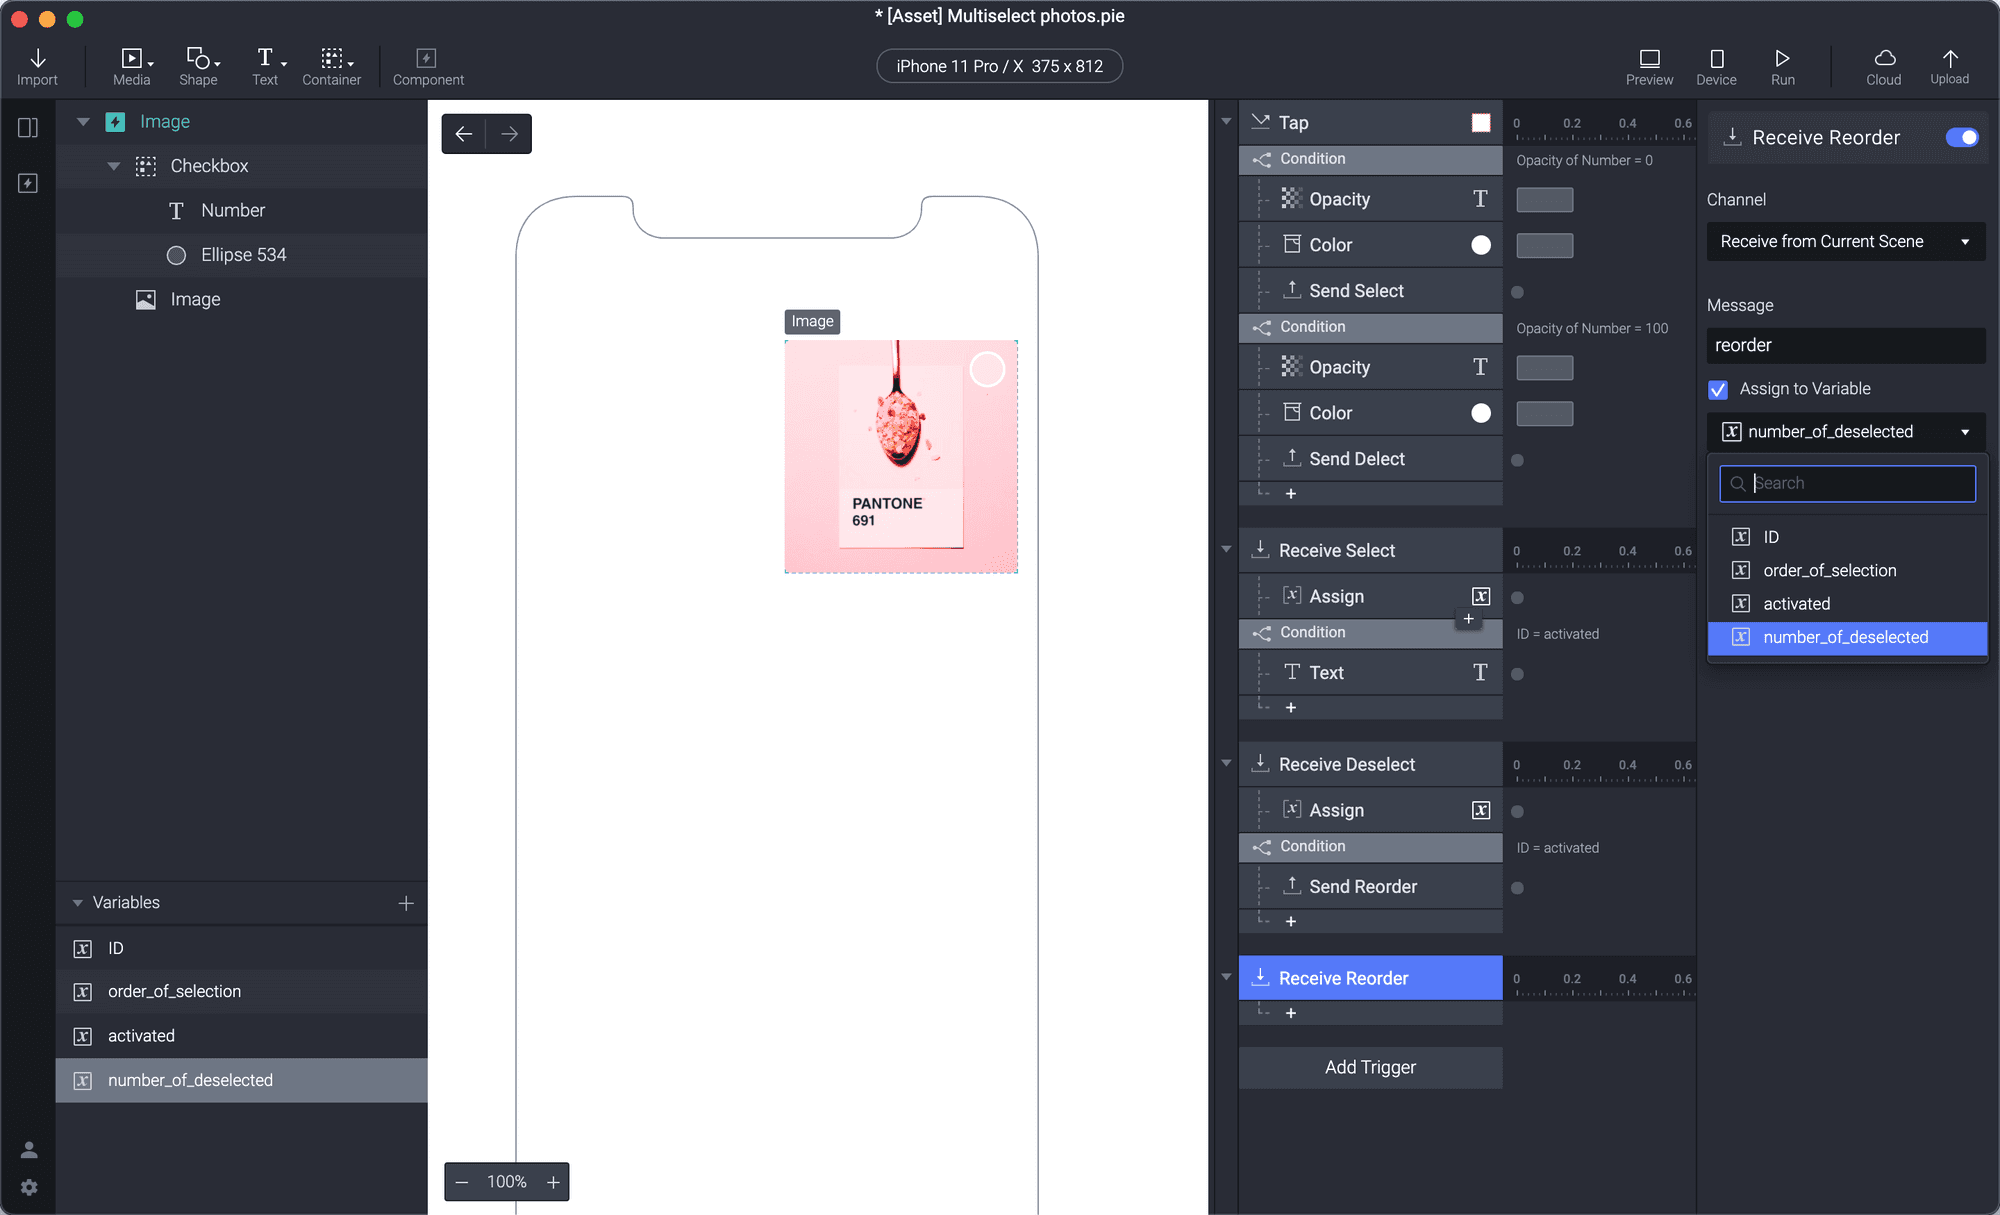
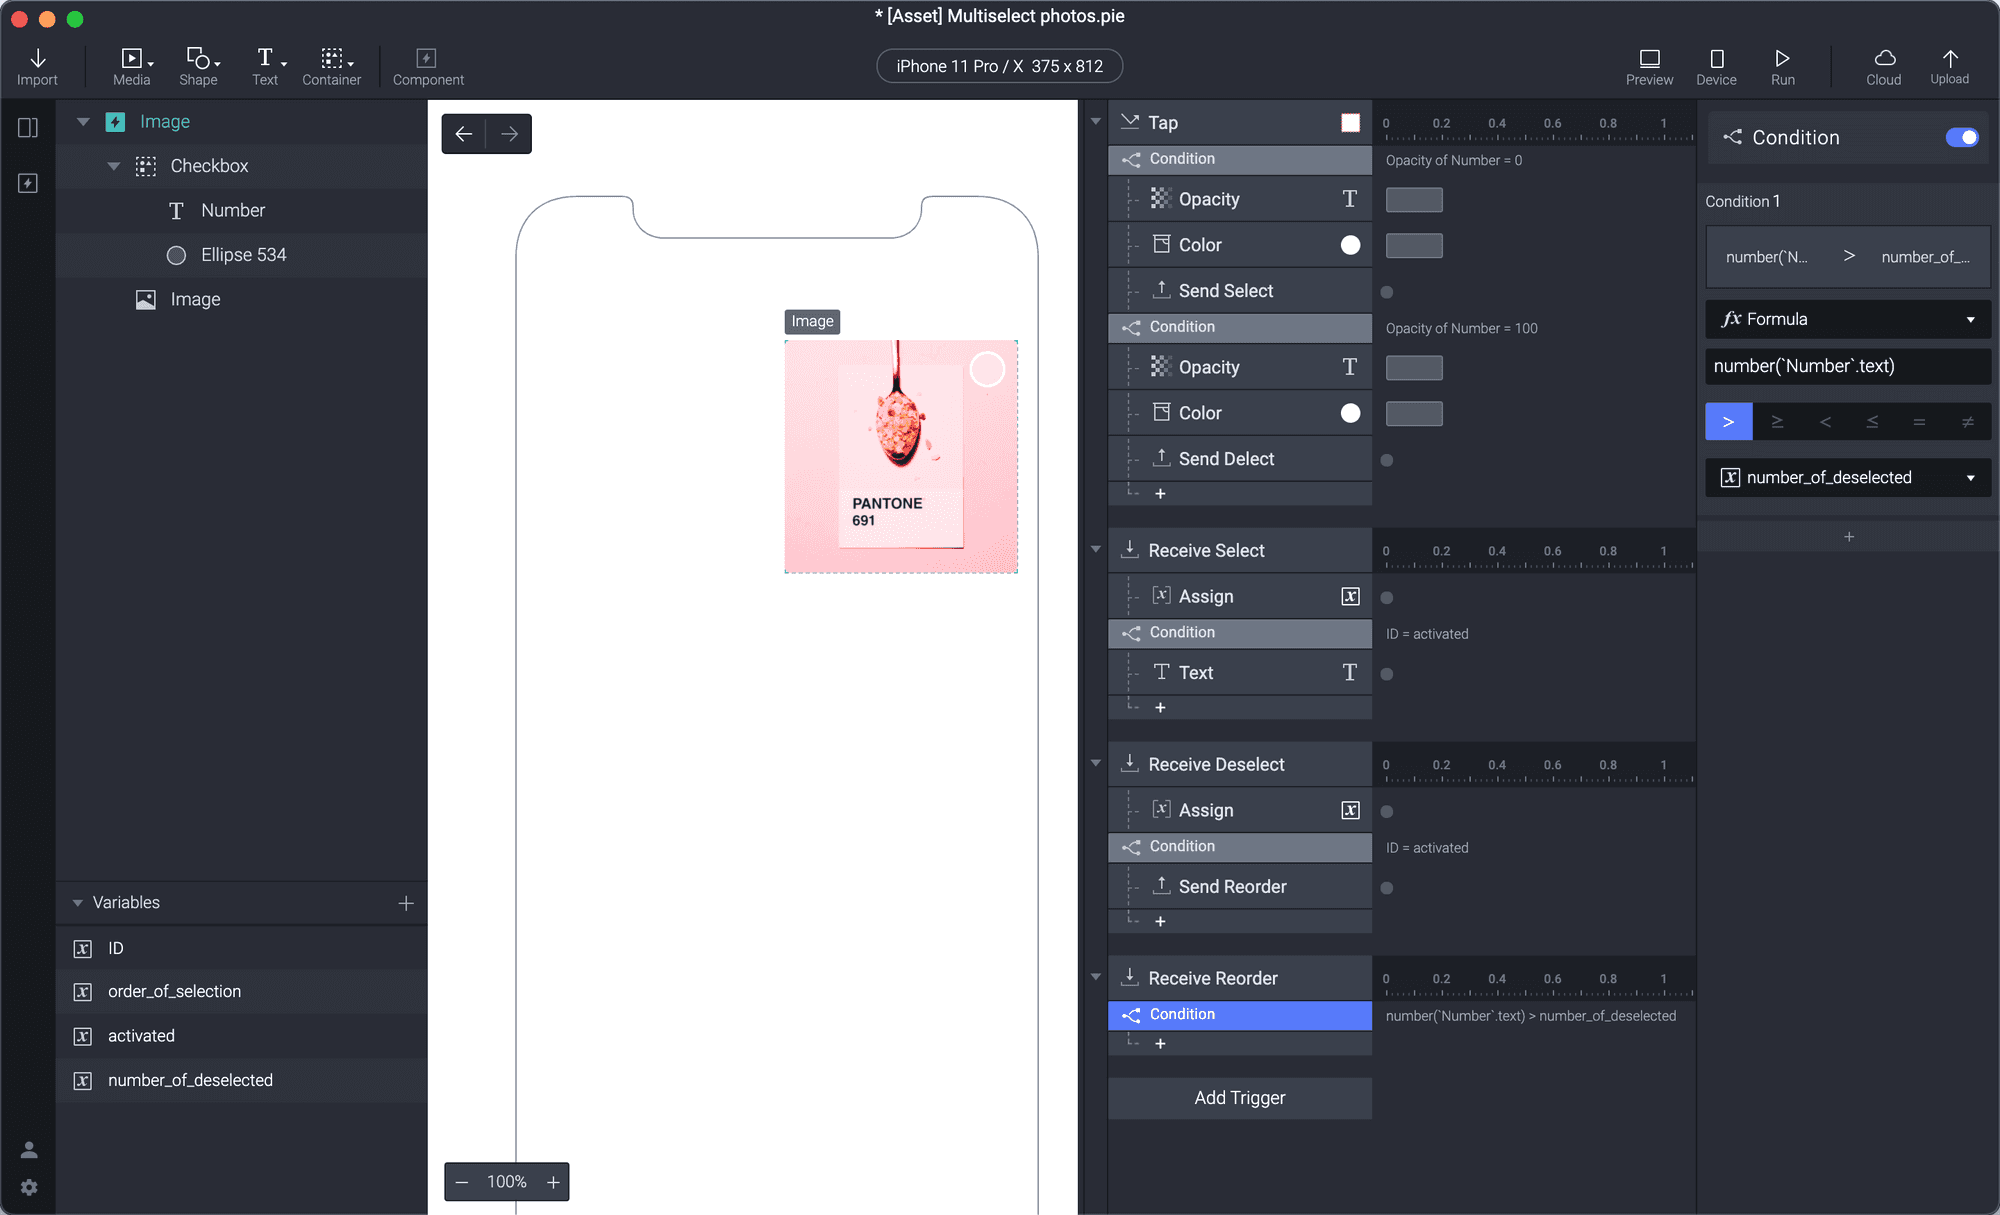
6. Create a new variable and call it "number_of_deselected". In the Receive trigger, you just created, change it to the "number_of_deselected".
7. Add a condition under this new Receive trigger. We will use the same formula we just used in the Send response, so copy and paste this formula to your new condition. Select the ">" value, and change the value to "number_of_deselected" variable. The condition will be number('Number'.text) > number_of_deselected.
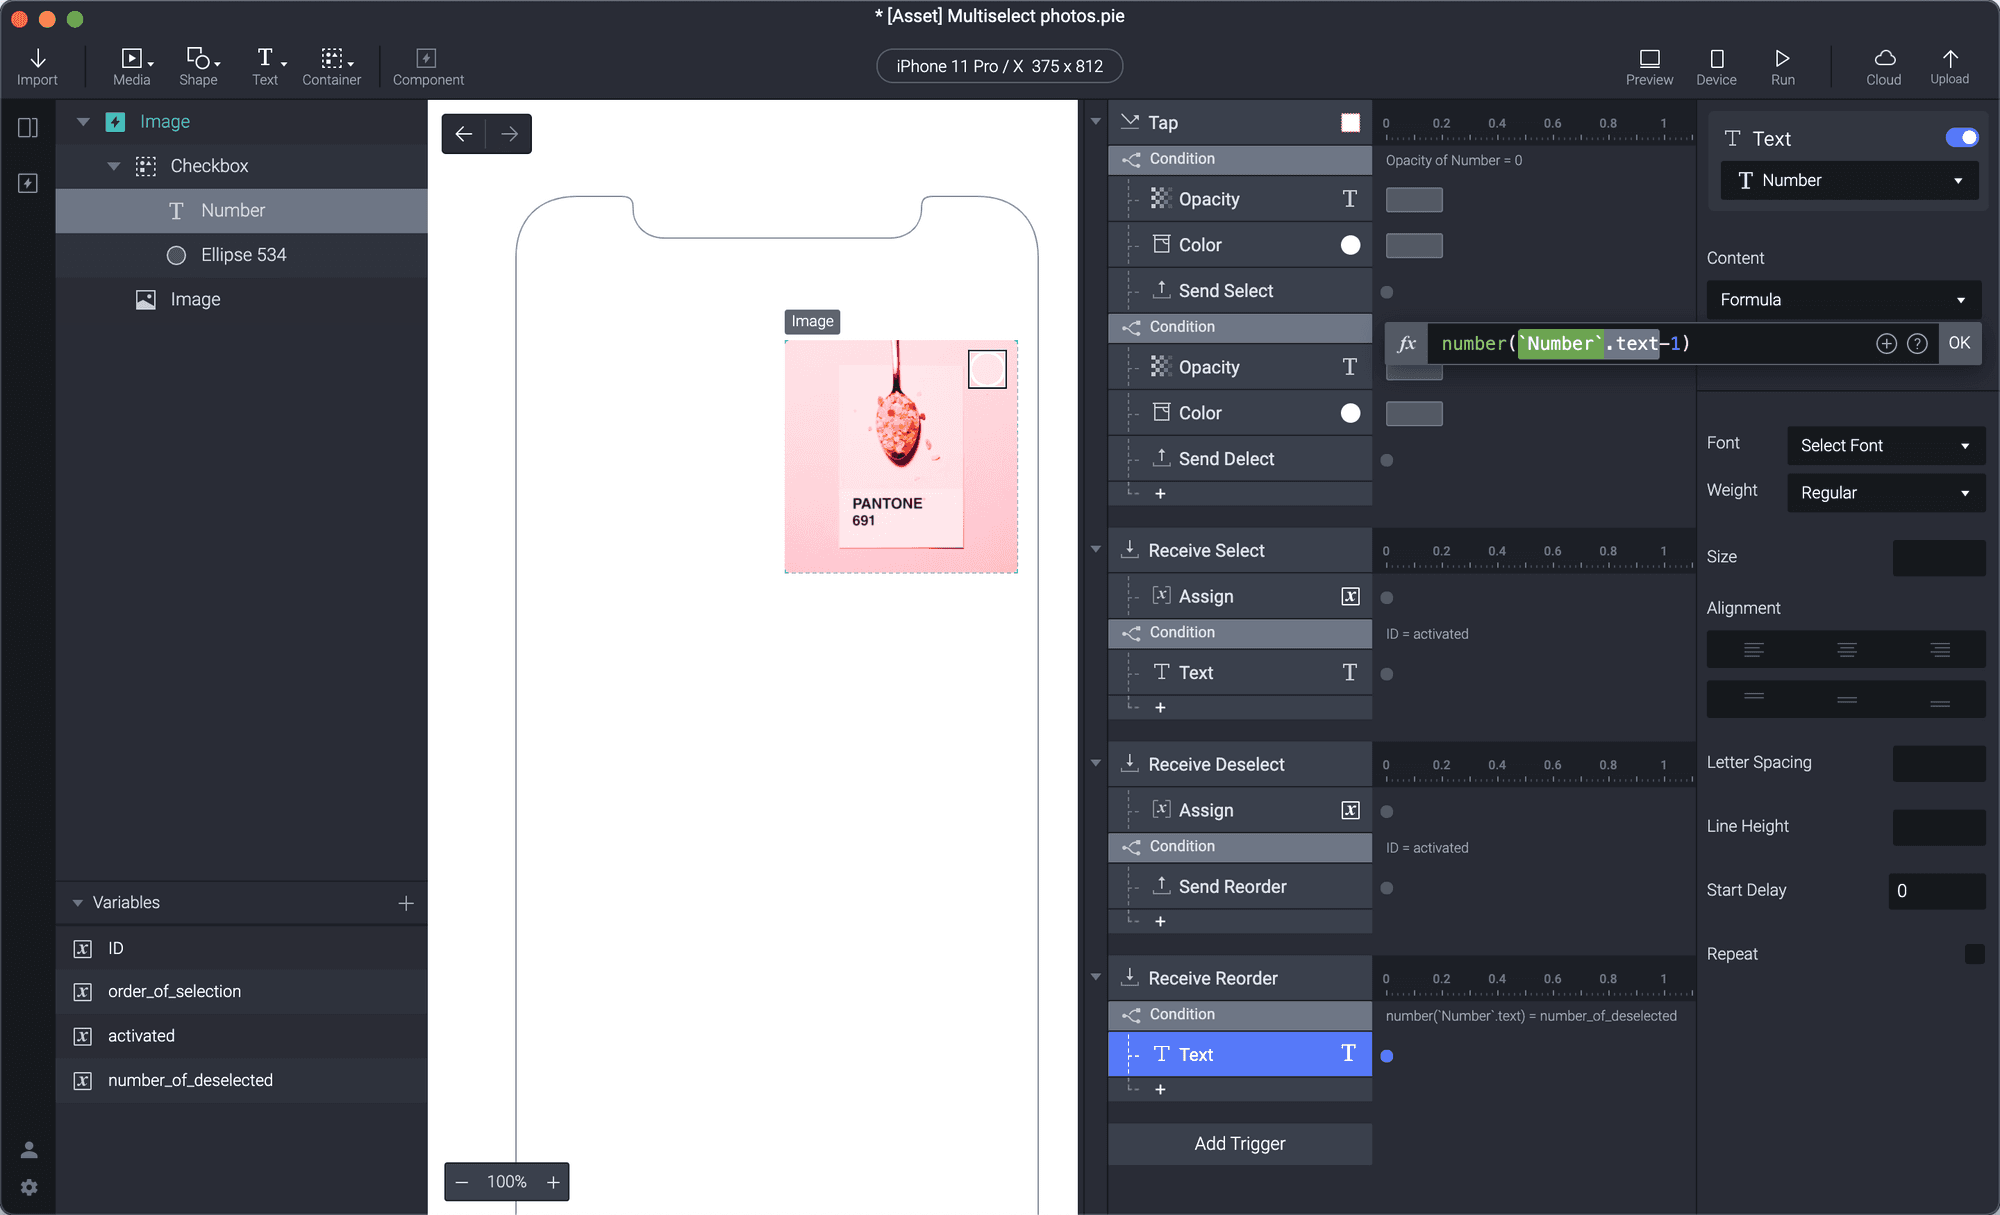
8. Under your new condition, add a Text response that is linked to the Number. Change the content to a formula. The full formula should read, number('Number'.text)-1.
Congratulations!
Seriously, that was not an easy one. You might need to go back through step four to fully grasp the tricks you just navigated, but it is a bit of logic magic that you can reapply in interesting ways. Go forth and create your own bit of ProtoPie wizardry (and don't forget to share)!


