
Introduction
Star rating is usually used to gain relevant feedback from users on how they engage with the app content. It acts as a visual review for your app. However, implementing the star rating function can be quite tedious. There are multiple ways to do it but some methods can be manually exhausting. With ProtoPie, you can build a star rating functionality within minutes without any hassle. This tutorial will cover how this effect can be achieved using components, variables, and send & receive.
What you'll learn
Give each component instance a special number to set its unique identity
Using the unique identity to light up the current and previous stars on tap
In the end, you’ll be able to make something like this!

[Starting Pie File] [Completed Pie File]
Step by step instructions
Give each component instance a special number to set its unique identity
1. Open the "Star" component.
Once you have created a star component, make 5 instances of it in your working scene. Once done, open your main Star component.
💡Why use components?
We use components when we have objects with similar behaviors. In this case, all 5 stars have similar behaviors. Using components may also avoid redundant and tedious work of adding triggers/ responses to your interactive objects over and over again.
2. Add a "number" variable for the "Star" component.
The next step is to add a number variable to the Star component. We'll make sure that the Make Overridable option is ticked for this variable. We do this so that we can set a unique identity to the individual Star child instances.
💡 What's make overridable?
Make overridable means every instance of a component can have a different initial value with the variable. In this case, we use it for setting a unique identity for every child component.
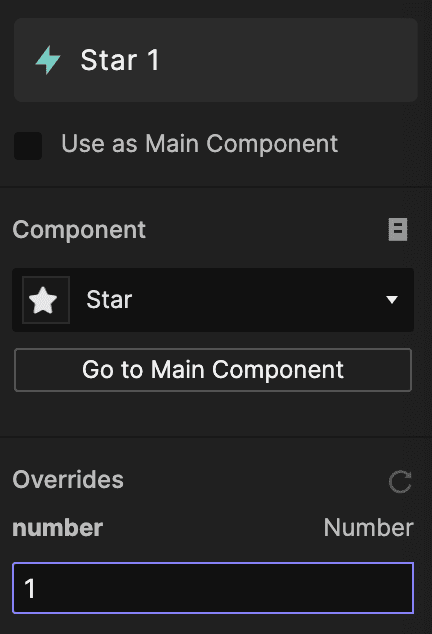
After ticking the Make Overridable option, go back to the main working scene and change the individual Star child instance numbers from (1 to 5) in an orderly manner. This sets a unique identity to each Star child instance.
Using the unique identity to light up the current and previous stars on tap
1. Add a Tap trigger and a Send response to the "Star" component.
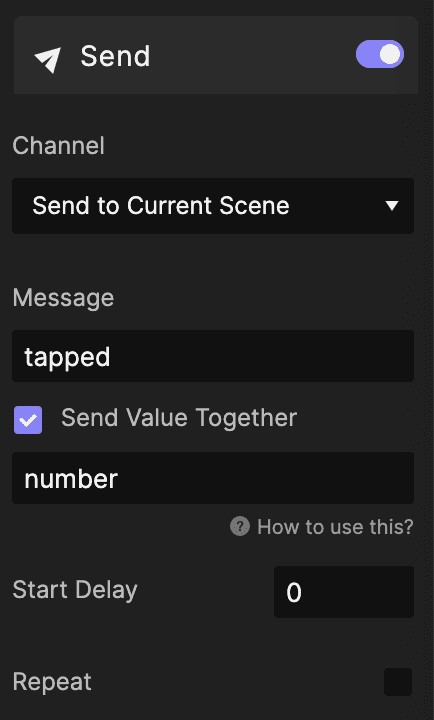
a. Now go back to the main Star component. We want a certain response once the stars are tapped. So we will add a Tap trigger. Under the Tap trigger, add a Send response.
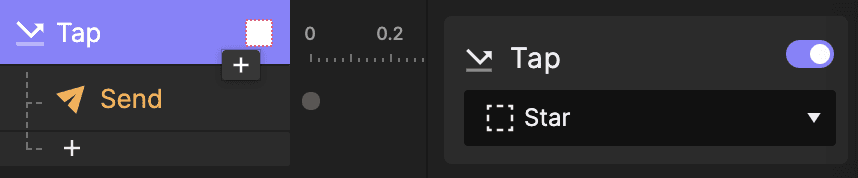
b. Set the message under response as "tapped". This indicates that the star instance is being tapped. We will tick the Send Value Together option and set the value as the "number" variable. Doing this will store the number of the Star child instance which is being tapped.
💡 Where is the message sent to?
The message is sent to all the "Star" instances in the main scene, including the tapped "Star" instance.
2. Add a Receive trigger to the Star component and create another variable called "tapped_number".
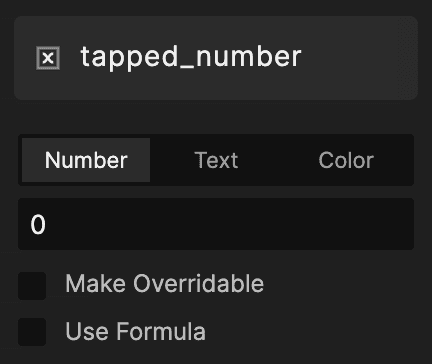
a. After setting up the Send response, we want to receive some response from the tapped Star instance. So let's create a variable first and name it "tapped_number".
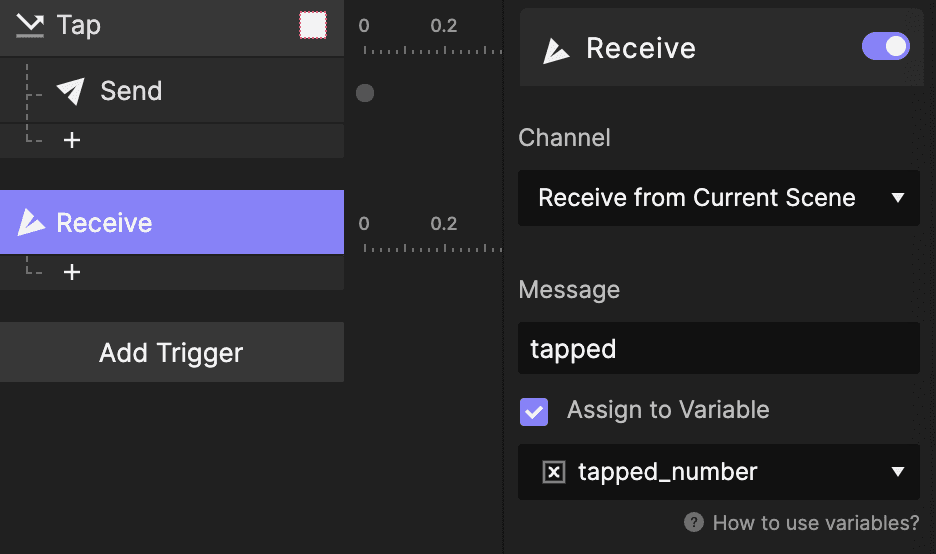
b. Add a Receive trigger and set the message as "tapped", and tick the Assign to Variable option. Choose the tapped_number as the variable to assign. This returns the value of the number of the Star instance in the main scene which is tapped.
3. Lighting up current and previous stars on tap.
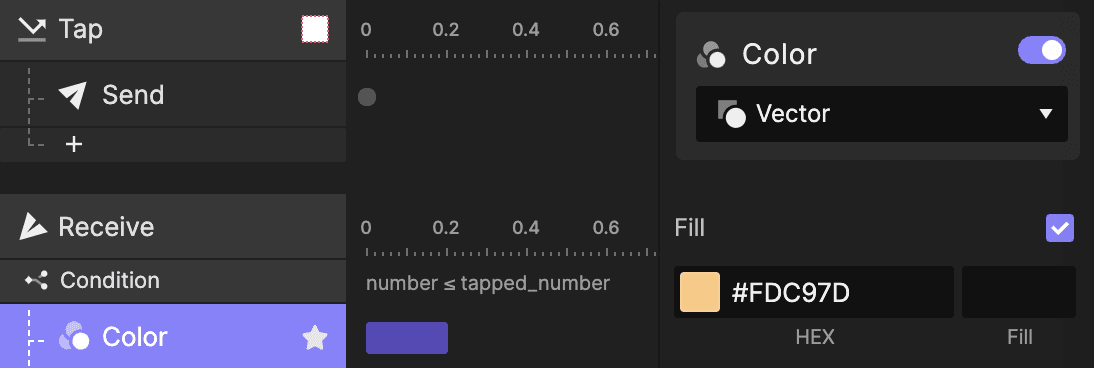
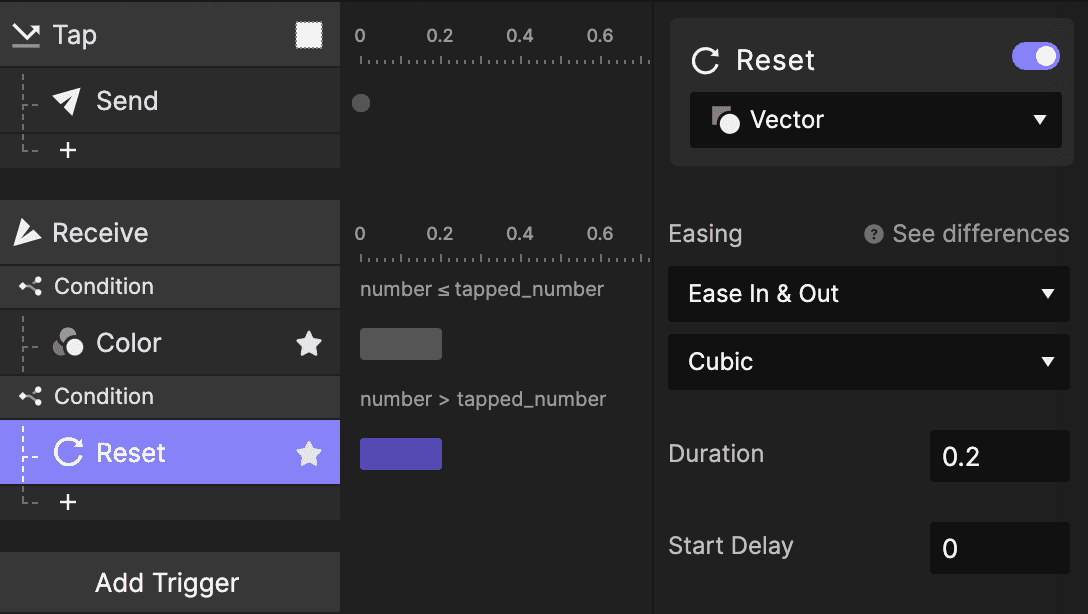
a. Add a condition under the Receive trigger. Set the condition as number ≤ tapped_number. Under the condition add a Color response on the Vector layer. Set the Fill of the color response to #FDC97D (the color may vary according to your prototype). This will ensure that the "Star" instances before the tapped "Star" instance change their color.
b. Add another condition under the Receive trigger. Set the condition as number > tapped_number. Add a Reset response on the Vector layer. This will ensure that the "Star" instances after the tapped "Star" instance don't change their color.
💡 How does it work?
While tapping a Star instance, the Star instance will send a message to update the other Star instances whether they should be lighted up or not.
Congratulations!
Good job on following through the steps. It's pretty simple and straightforward, right? Making a star rating with ProtoPie is like a piece of cake. Try it out for yourself.


