
[Starting Pie File] [Completed Pie File]
Introduction
Wondering how to create text fields in your prototype that can check if what the user entered was correct? We have a really simple tutorial to help you with that.
Before we get started, you'll need to know what input validation is and how it works. So, what exactly is input validation?
Input validation is a common feature in modern-day apps and web applications. This feature is used not only to guide users it also helps to verify that what the user has typed into the form field. For example, when you type in the wrong email format in an email field on many websites, you'll get a message telling you that the email format you used is incorrect. This means that the form has checked the input and detected that it's not correct.
ProtoPie makes creating these types of forms easy because it has two main triggers - Input and Detect that can perfectly imitate the behavior of a form field with validation. The Input feature allows you to type into text fields while the Detect feature checks what you have typed into the input field.
By combining these two triggers effectively in ProtoPie, you should be able to start creating your form fields with validation. We'll be using both triggers in this lesson.
What you'll learn
The general structure for creating text fields with input validation
How to make a required input field
How to check if the value of an input is wrong or correct
How to check the length of text or numerical characters of an input
How to specify characters inside an input field
Let's start off with the general structure for text validation on input fields
Generally, the method to validate the text entered into a text field in ProtoPie follows a similar structure with two main triggers: Focus and Detect.
A Focus(Focus out) is used to trigger an error message when the text doesn't meet the requirement.
A Detect is used to check/validate when the text meets the requirement so that the error messages disappear.
In each trigger, a Condition is used to check if the text meets the requirement.
To make different types of validation, we can only change the conditions under each trigger. The following use cases will show you how to reuse this structure for different validation cases.
How to create a required Input field
The required attribute of input specifies whether a form field needs to be filled in before the form can be submitted.
1. Add a Focus trigger to the input layer Input - First Name. Select **Focus Out **in the property panel.
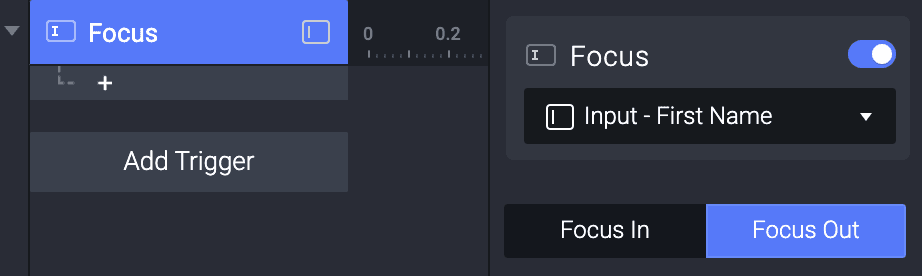
A Focus trigger activates a response when a focus in or out takes place at an input layer. A Focus Out is used in this case as validation needs to be triggered when the user finishes typing.
2. Under the Focus trigger, add a Condition to the input layer Input - First Name. Change only the second dropdown which usually shows X by default to Text.
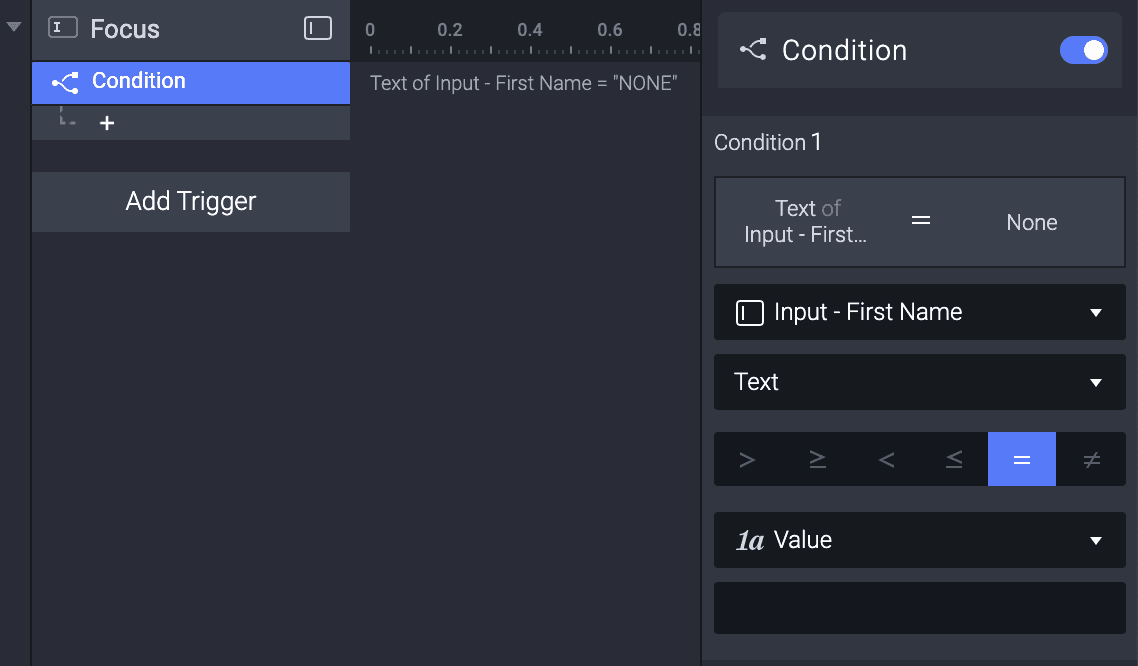
The condition should now show Text of Input - First Name = "NONE". This condition is used to specify if the input is filled or not. When the input is not filled, the responses under this condition will happen.
💡 Why did we leave the value empty?
The reason why the value is left empty or set to none is that the response we want to create in this trigger is a response that is shown when the input field is empty and the user has not entered anything in the text field. Hence the formula (Text of Input - First Name = "NONE")
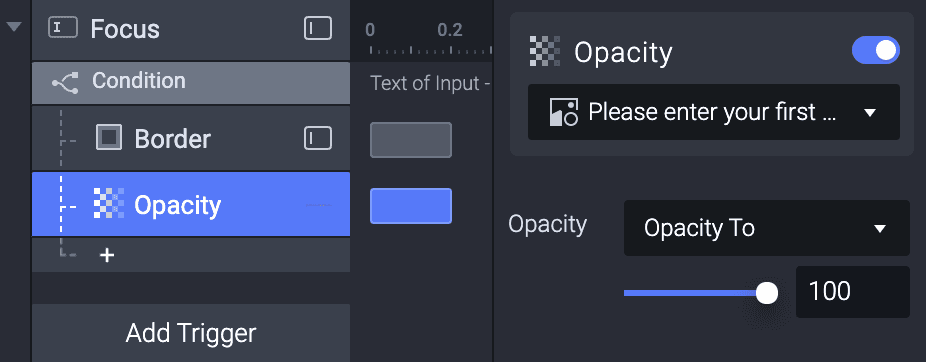
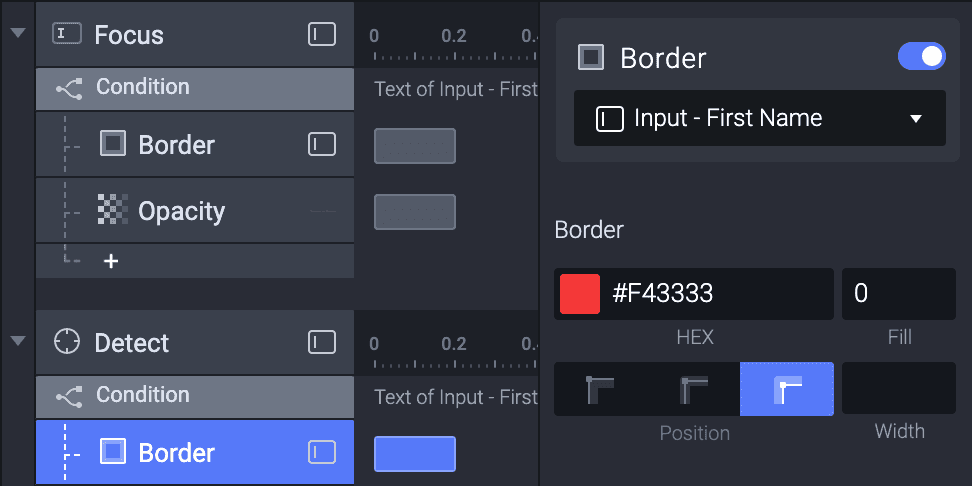
3. Add a Border response to the input under the condition just created. And set its property as shown below. This will highlight the border if the input field is empty.

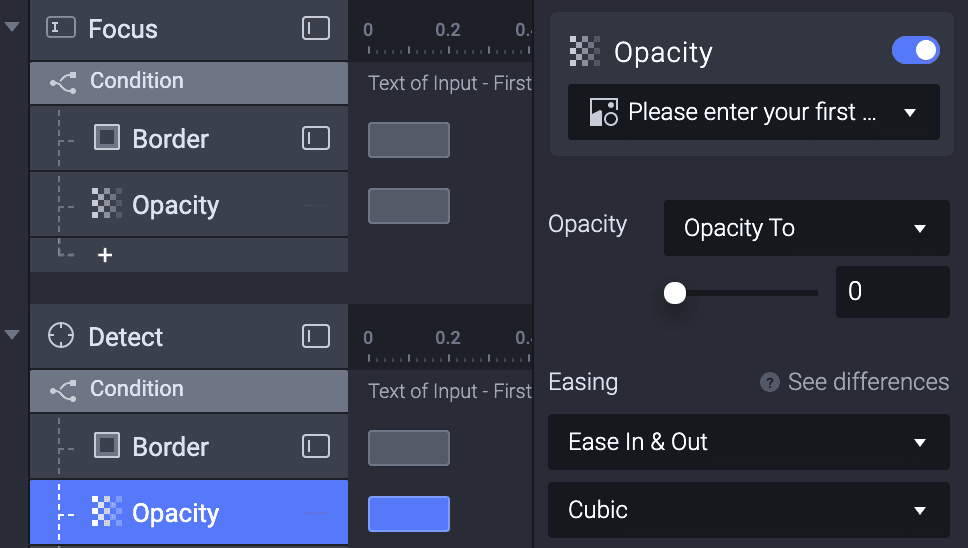
4. From the layers panel, select the error message (Please enter your first name.) then tap on the + icon and add an Opacity response to the error message. Now set the opacity to 100. This will show up the error message when it input field is empty.
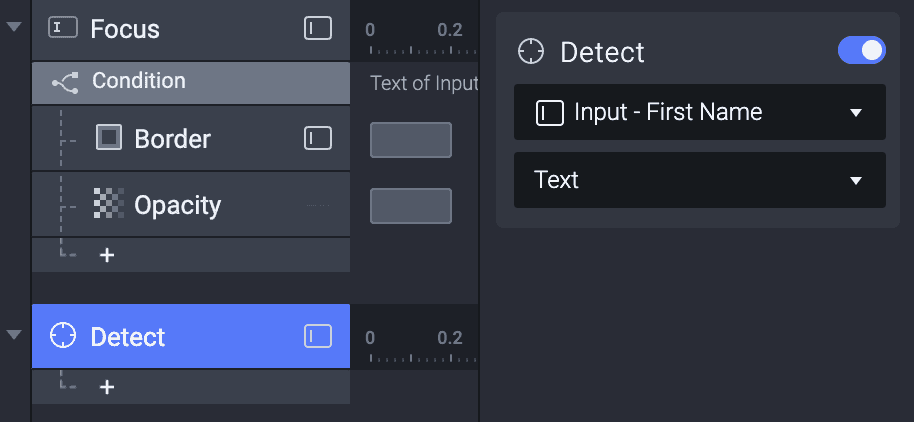
5. Now let's add a new trigger - Detect to Input - First Name. To do this, select the input field, Tap on add trigger and select the Detect trigger. A Detect will trigger responses when the input text is changed.
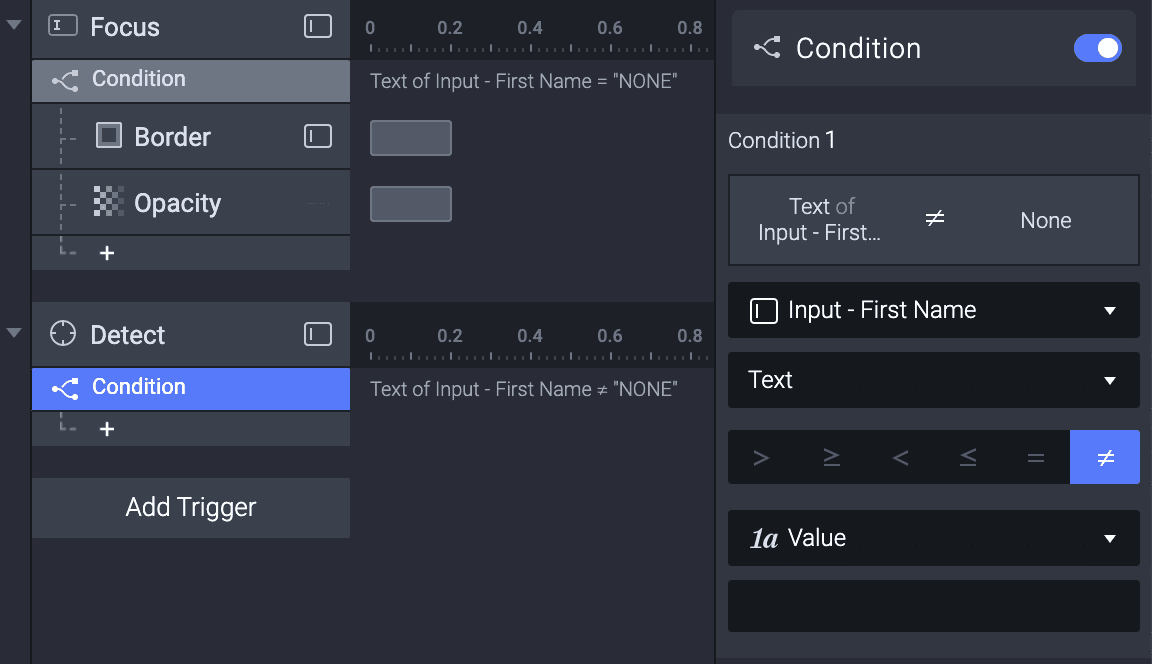
6. Just below the detect trigger, add a Condition for Text of Input - First Name ≠ "NONE". To do this repeat the steps in step 2. The only part you'll need to change is the = to ≠. When the input is filled, the responses under this condition will happen.
7. Under the condition, add a Border response to the input. And set its property as shown below. The border will disappear under this condition.
8. Also, add an Opacity response to the error message text (Please enter your first name.) Set the opacity to 0. This will make the error message disappear under this condition.
9. Awesome! You just created a required input field. Go ahead and check the interaction in the Preview Window.
How to validate the value of an input
The value attribute of input specifies the values of numerical input types.
In the above scenario, the value of the text should be either greater than or equal to 18.
We'll also need to use a formula in the conditions.
1. Create Two different triggers with conditions. One trigger is a Focus Trigger, the other Trigger is a Detect Trigger.
2. To switch to formula after we create a condition, change the selection on the dropdown from the input component to Formula.
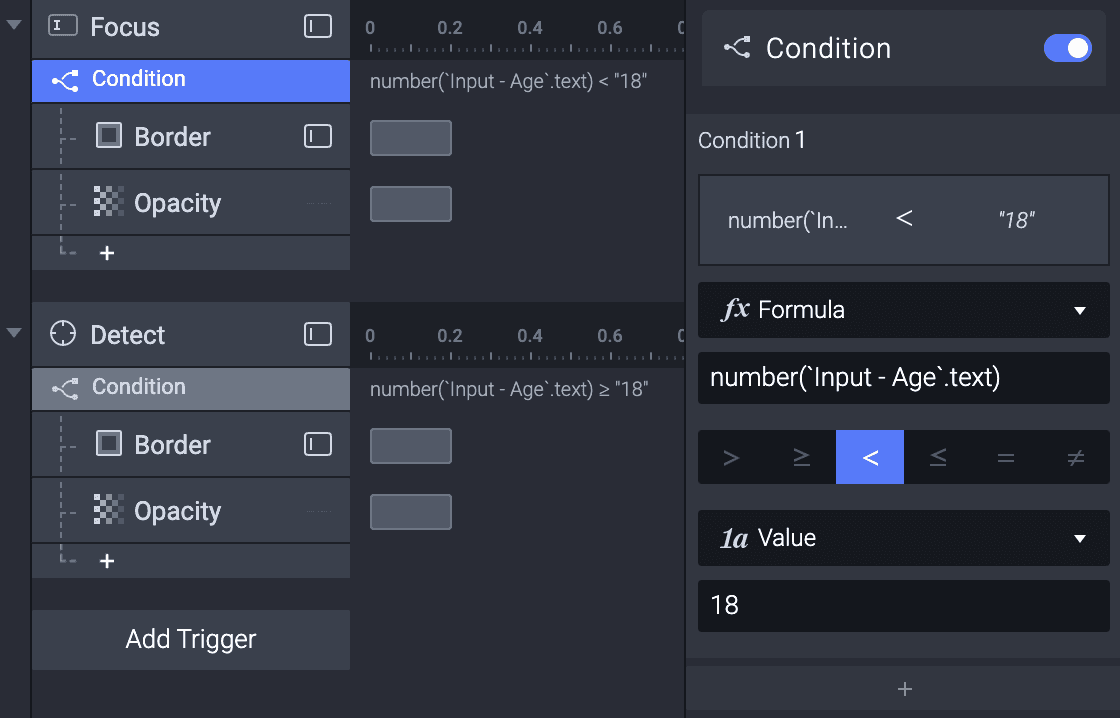
3. Once the formula is selected, copy and paste this formula right below the formula field - number('Input - Age'.text). This formula can convert a text to a number.
** 4. Under the Focus** trigger, the condition is set as number('Input - Age'.text) < "18". This means after pasting the formula, the conditional symbol would be < while the value would be 18.
5. Under the Detect trigger, the condition is set as number('Input - Age'.text) ≥ "18". This means after pasting the formula, the conditional symbol would be ≥ while the value would be 18.
See the image below for reference.
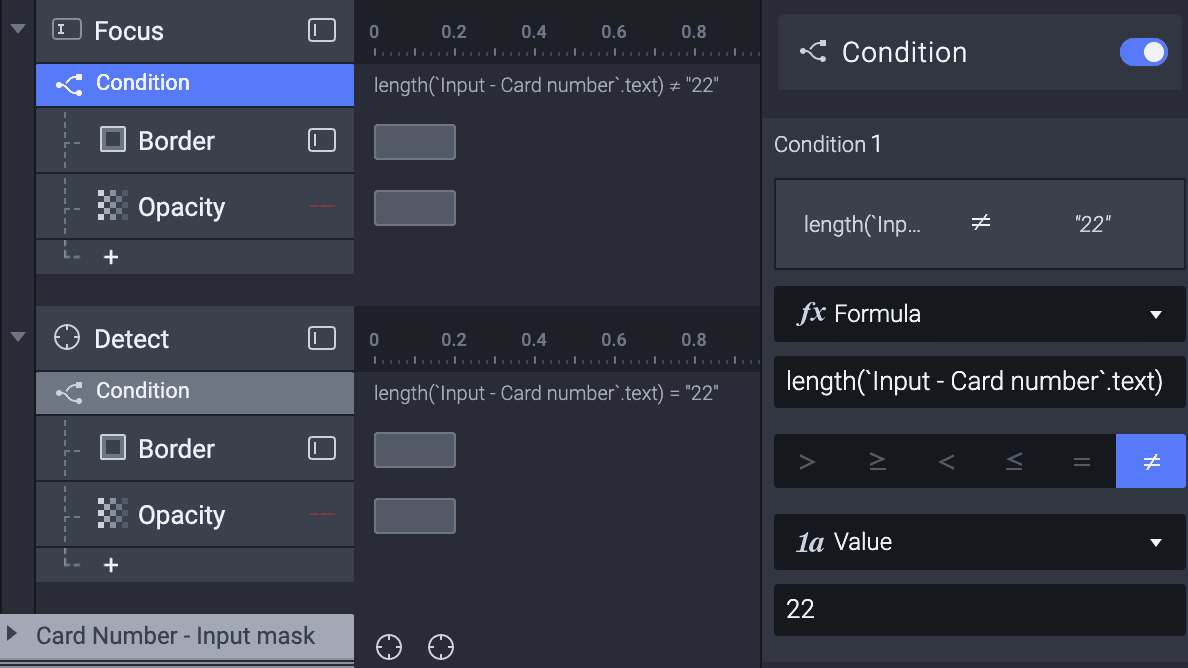
How to validate the length of an input
The length attribute specifies the length of textual data (strings).
In the above case, the length of the text is fixed. Otherwise, an error message will show up.
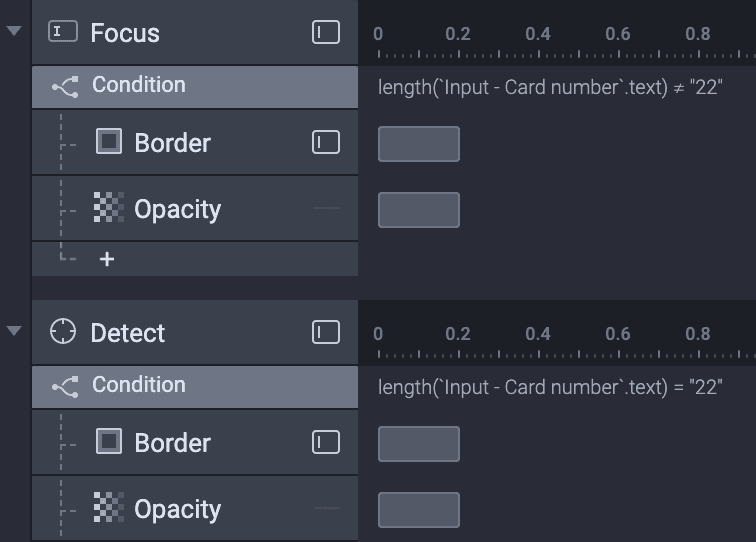
Just like the previous example, we'll use a formula in the conditions. The formula we use here is length('Input - Card number'.text). This formula counts the number of characters in a text.
Under the Focus trigger, the condition is set as length('Input - Card number'.text) ≠ "22"
Under the Detect trigger, the condition is set as length('Input - Card number'.text) = "22"
Want to know how to prototype an auto-formatted input field in the above case? Check this tutorial to learn more.
This method can also be applied in more cases
Password (at least 8 characters)
Making a character counter for multi-line input
Download the completed pie file to check these demos.
How to specify characters inside an input field
Specifies whether the data needs to be a number, an email address, or some other specific preset type.
In the above case, the input needs to be an e-mail address. Otherwise, an error message will show up. The way to validate e-mail in ProtoPie is to check if the input text includes both "." and "@"
We need 2 conditions for each trigger. The formulas we use here are indexOf('Input - Email'.text,".") and indexOf('Input - Email'.text,"@")
💡 **indexOf(): **Find the starting position of a keyword in a text. If the keyword isn't present in the text, the returned value is -1.
indexOf(source:TEXT,searchValue:TEXT)→ NUMBER
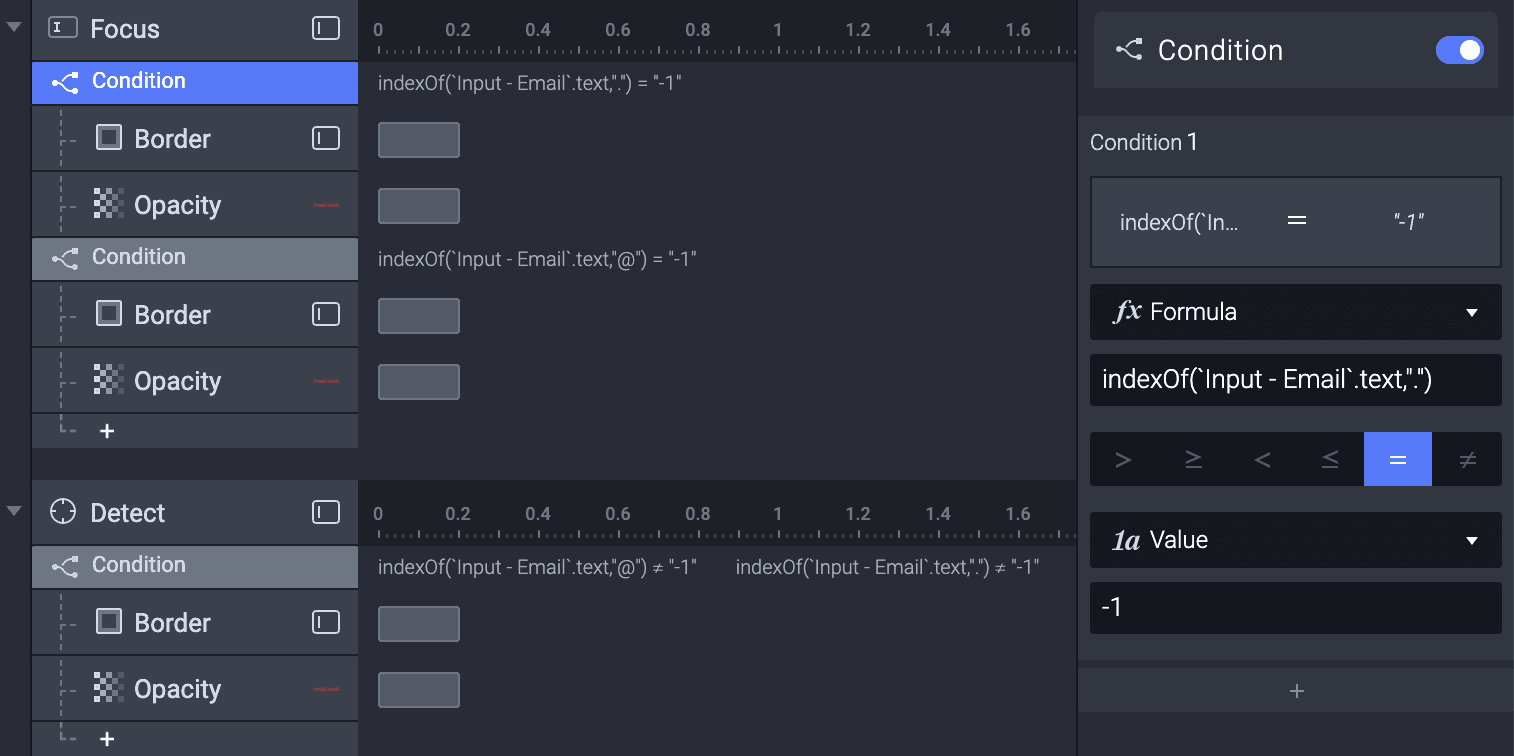
1. Under the Focus trigger, the condition is set as: indexOf('Input - Email'.text,".") = "-1" and indexOf'(Input - Email'.text,"@") = "-1". We need to put these formulas into 2 conditions.
The first condition: indexOf('Input - Email'.text,".") = "-1" checks if a dot is present in the user's input. It moves on to the next condition which is defined with the formula indexOf('Input - Email'.text,"@") = "-1" to confirm if there's an at symbol in the input.
Note that the at symbol and dot come after 'Email'.text which is the prefix for the user's email address and is also part of both conditions. So if your email address is michaelajah@example.com your @ and dot would have to come after michaelajah.
2. Under the Detect trigger, the condition is set as: indexOf('Input - Email'.text,".") ≠ "-1" and indexOf('Input - Email'.text,"@") ≠ "-1" We can put these formulas into 1 condition. In the focus trigger, we had assigned the value of the input if both conditions were true to -1. The conditions in this detect trigger check the input value to check if any of the values are not equal to -1.
💡 Why did we use 2 separate conditions under the Focus trigger?
This is because that we want the error message to show up when any of these conditions is fulfilled.
💡 Why did we use only 1 condition under the Detect trigger?
This is because that we want the error message to disappear when all of these conditions are fulfilled.
This method can also be applied in more cases
URL Validation
Username (no space allowed)
Download the completed pie file to check these demos.
It's a wrap
Good Job! You've learned how to create a text field that validates if what the user entered was correct. You've also learned how to use conditions and formulas to detect and validate input fields!
Spend more time playing around with these tutorials and you can become a ProtoPie Pro in no time. We would love to see your crazy experiments. Create your own prototype and share it on Twitter or Instagram with #MadeWithProtoPie


