
Introduction
Scrolling is a common UI technique that helps to concise the information into one single page. This minimizes user clicks and boosts the UI performance. In ProtoPie, scrolling can be easily achieved using scroll containers. Today we'll be working on how to scroll information horizontally and vertically. We'll also learn tips on achieving this effect seamlessly.
What you'll learn
How to make a horizontal scroll view
How to make a vertical scroll view
How to add a margin in the scroll view to maintain UI consistency
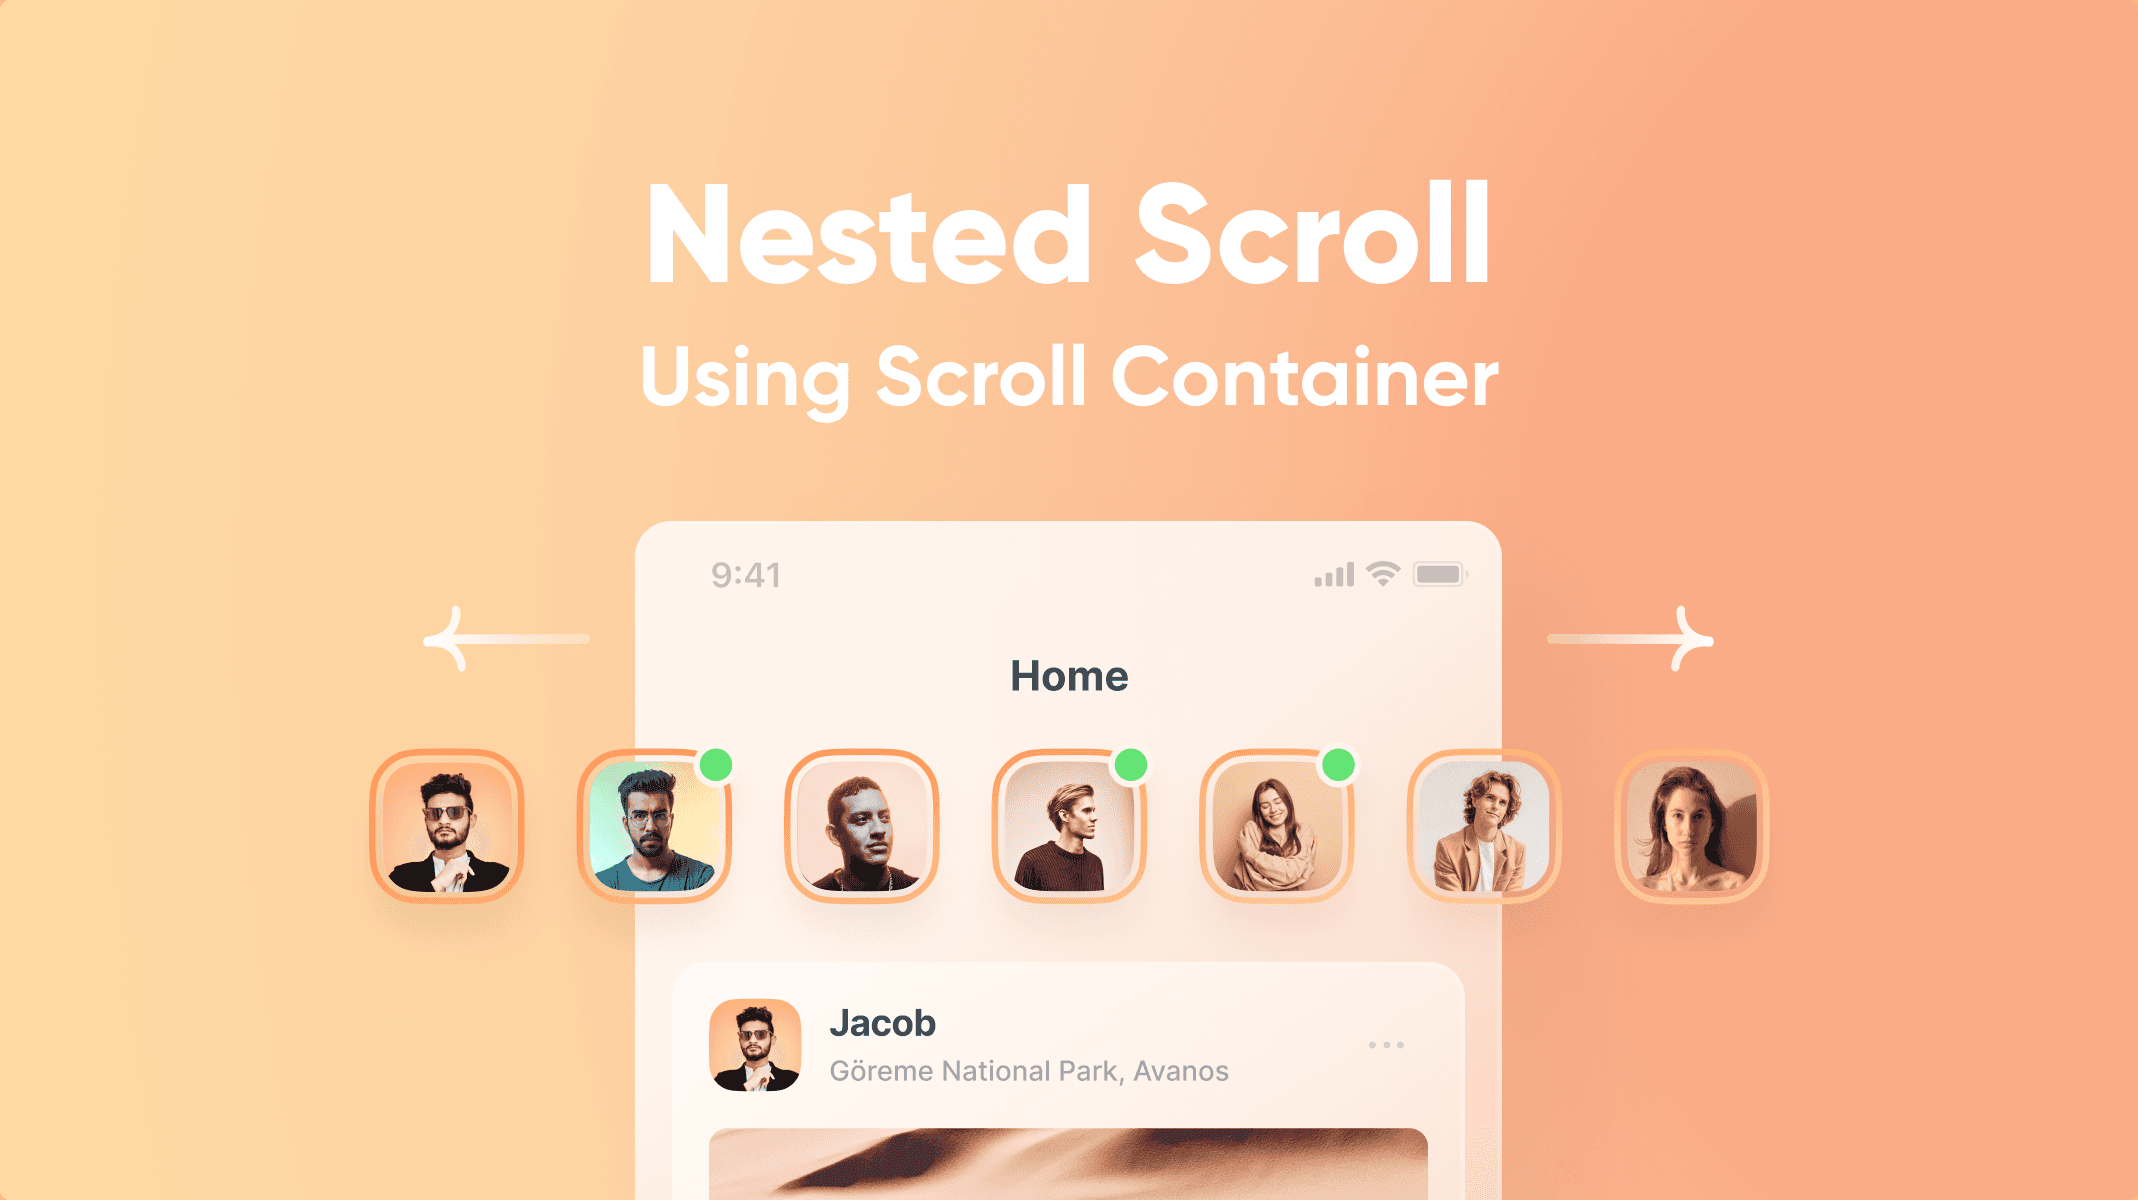
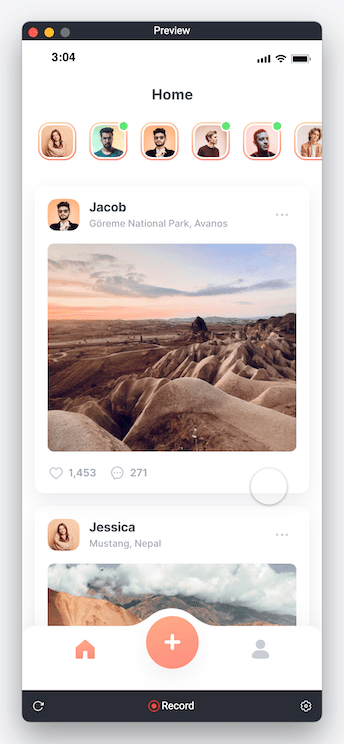
In the end, you’ll be able to make something like this!
[Starting Pie File] [Completed Pie File]
Step-by-step instructions
1. Make the horizontal scroll view
1. Create a Scroll Container and set its width to the screen width we are working with (375 in this case), and its height to the height of the Story List layer.

💡 How does a scroll container work?
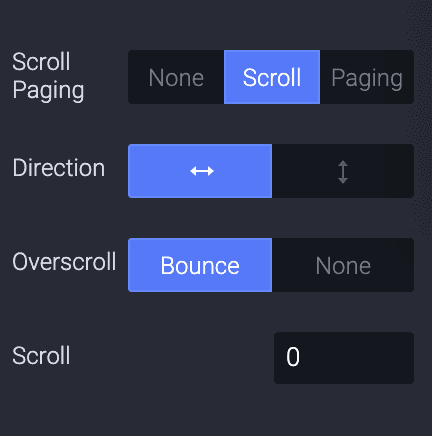
To make a scroll container work, we have to adjust the width of the container for a horizontal scroll and the height of the container for a vertical scroll. In this case, we adjust the container's width to the screen width (375), as we can only see the content within the screen width limit. To make the horizontal scroll work we have to ensure that the content flows horizontally beyond the container limit so that we can scroll the content within and beyond the container horizontally.
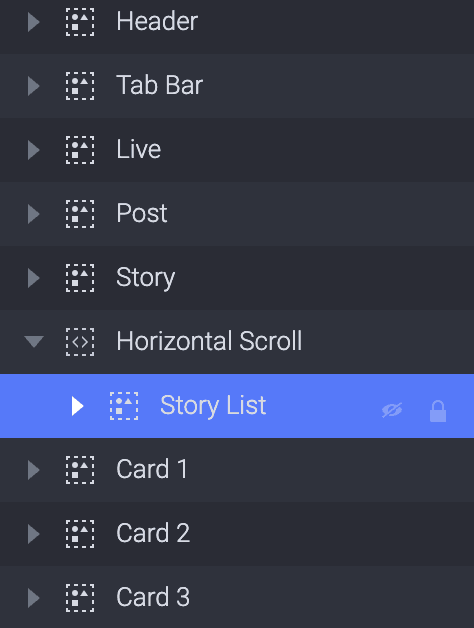
2. Drag the Story List layer into the Container which we have just created. And rename this container to Horizontal Scroll.
💡 Note:
A scroll container would make what's inside it scrollable.
Naming is important, especially when the project gets large and complicated
3. In the **Horizontal Scroll‘s property panel, **change the direction to horizontal because we want the content inside the container to flow horizontally (the default selected direction of the scroll is: vertical.)
4. Now we should have something like this (Horizontal scroll):

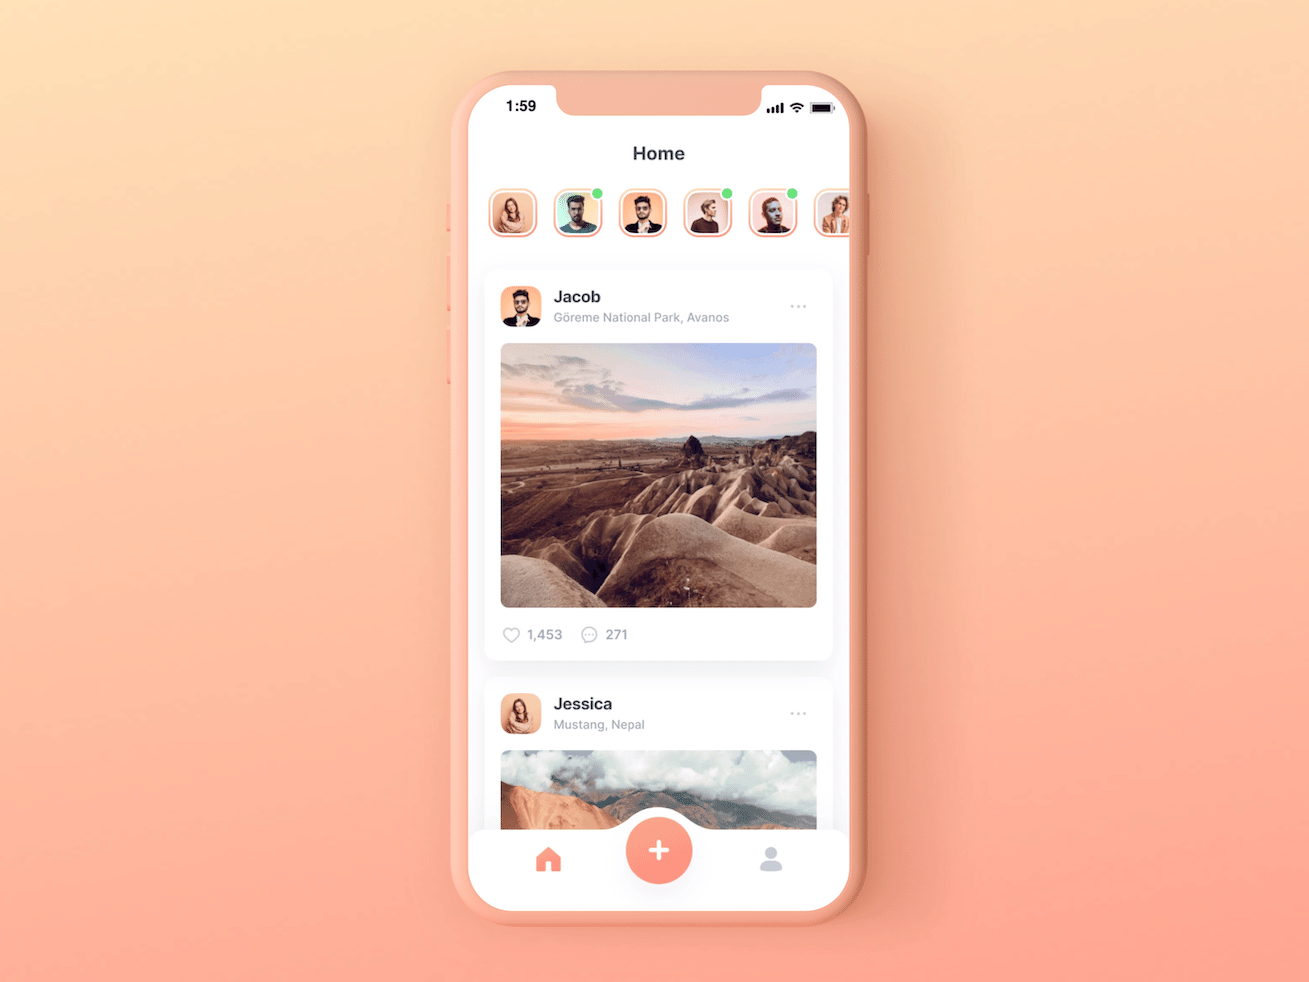
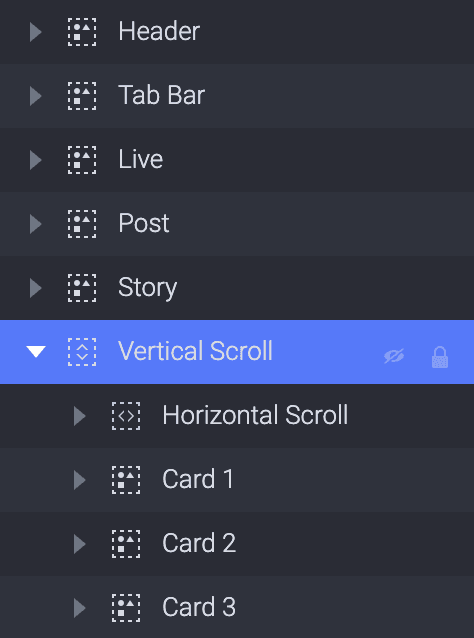
2. Make the Vertical scroll view (Nested scroll)
1. Create a scroll container that covers the entire screen. And rename it to "Vertical Scroll". We'll be using the contents under this scroll to be moved vertically.
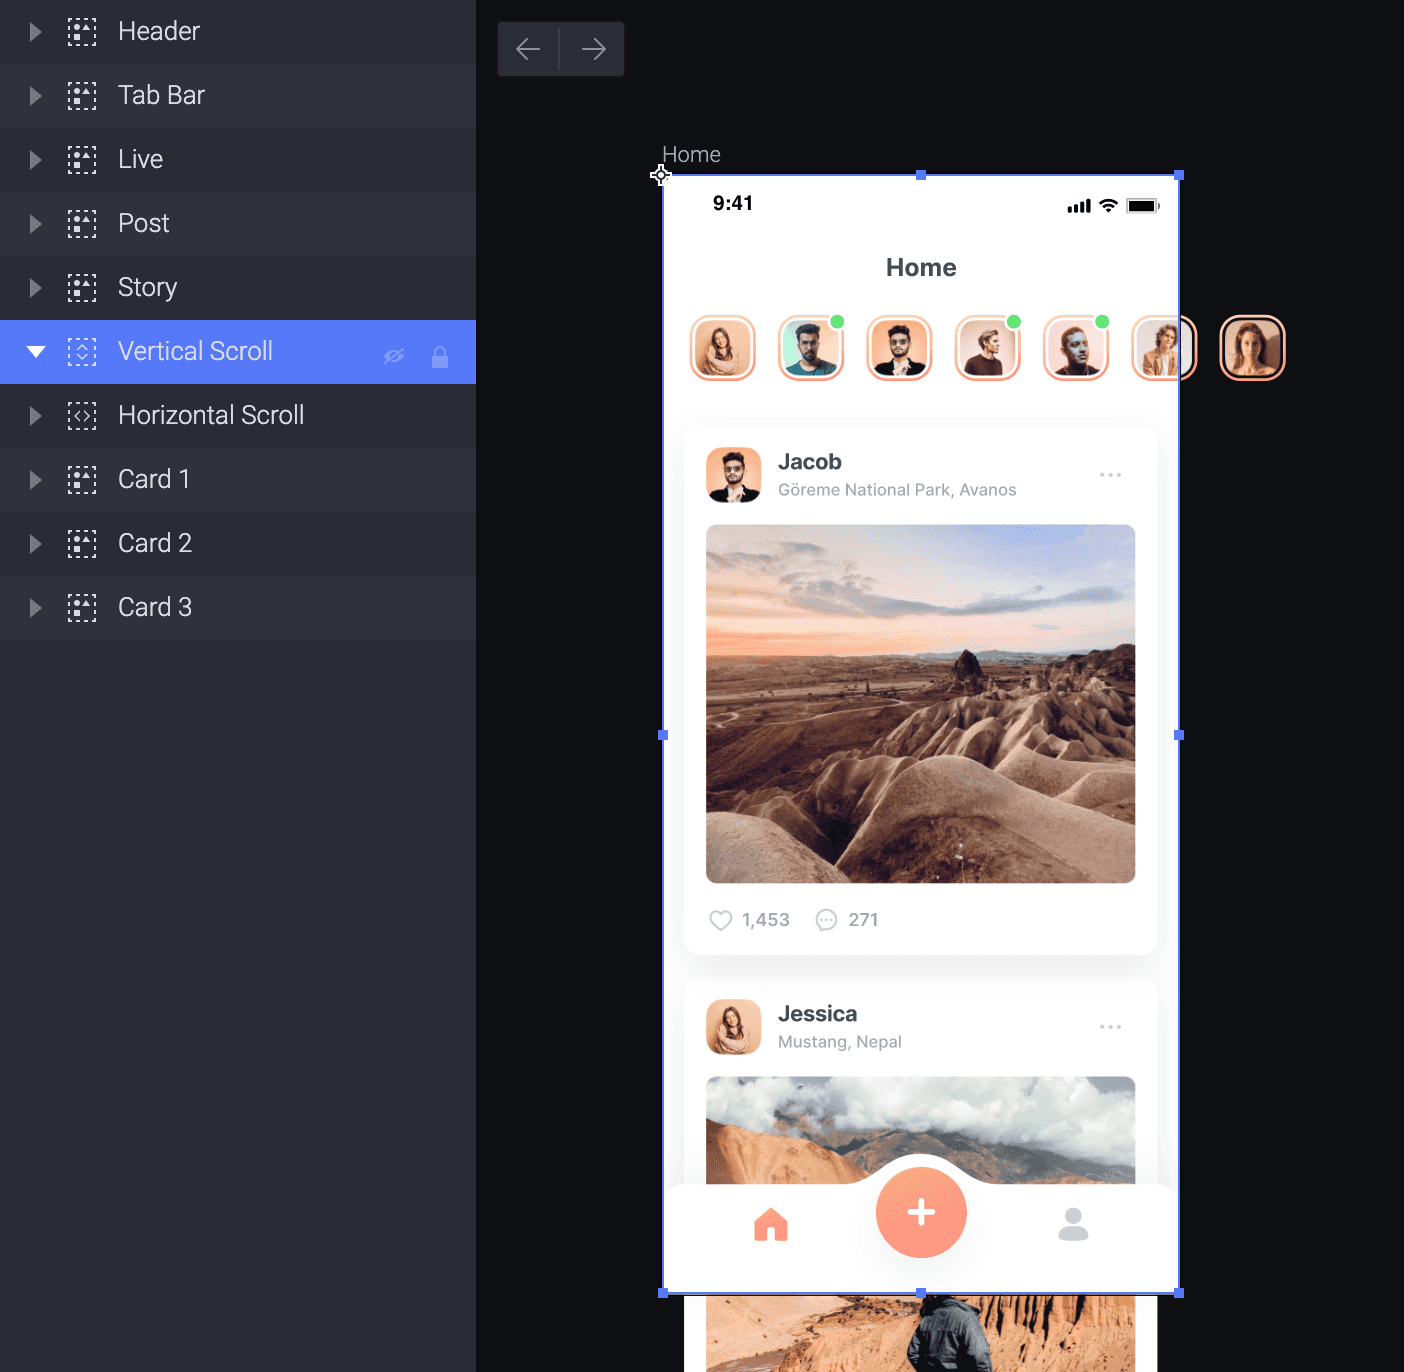
2. Drag Horizontal Scroll, Card1, Card2, Card3 into the Vertical Scroll as we only want those contents to be scrolled vertically.
💡 Note: Make sure that the header and the bottom navigation bar are placed outside the container items as we want them to be fixed on our prototype. Also, make sure that these elements are placed at the top of all the layers. We do this to avoid any overlapping of content over the header and the navigation bar.
3. Now we should have something like this (Vertical scroll):

3. Add a margin to both scroll views
💡 What's the logic for adding a margin in the Scroll Container?
Why do we need to add a margin? Simply, because we want to make the content appear more readable as well as to improve the accessibility and consistency of the UI.
When we want to add some margin at the end of a scroll container, we just need to adjust the size of the content inside the scroll container(width of content for a horizontal scroll container and height of content for a vertical scroll container). In other words, we'll add some white/negative space to the content inside the scroll container. There are two ways to achieve this:
Resize the child layer's container - In this method, make sure the constraints are set correctly
Add a rectangle at the end of the list within the container and set its opacity to 0
We'll use the first method for the Horizontal Scroll and the second method for the Vertical Scroll.
Add a margin to the Horizontal Scroll (by resizing the child layer's container)
1. Change the width of the Story List layer (inside the Horizontal Scroll layer) from 432 to 448.
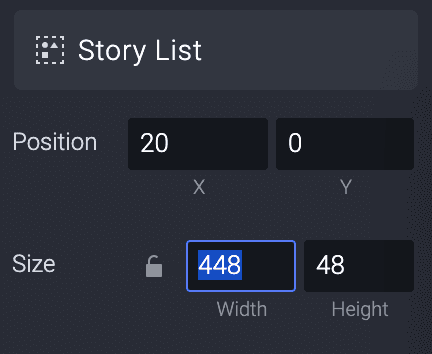
💡 Why change the value from 432 to 448?
The difference between the two numbers is 16, which is also the difference between two stories in the story list layer. Hence, we add 16 to the end of the original container layer to maintain consistency in the difference. This number may vary according to your prototype.
2. Now we should have something like this (Horizontal scroll with a margin of 16):

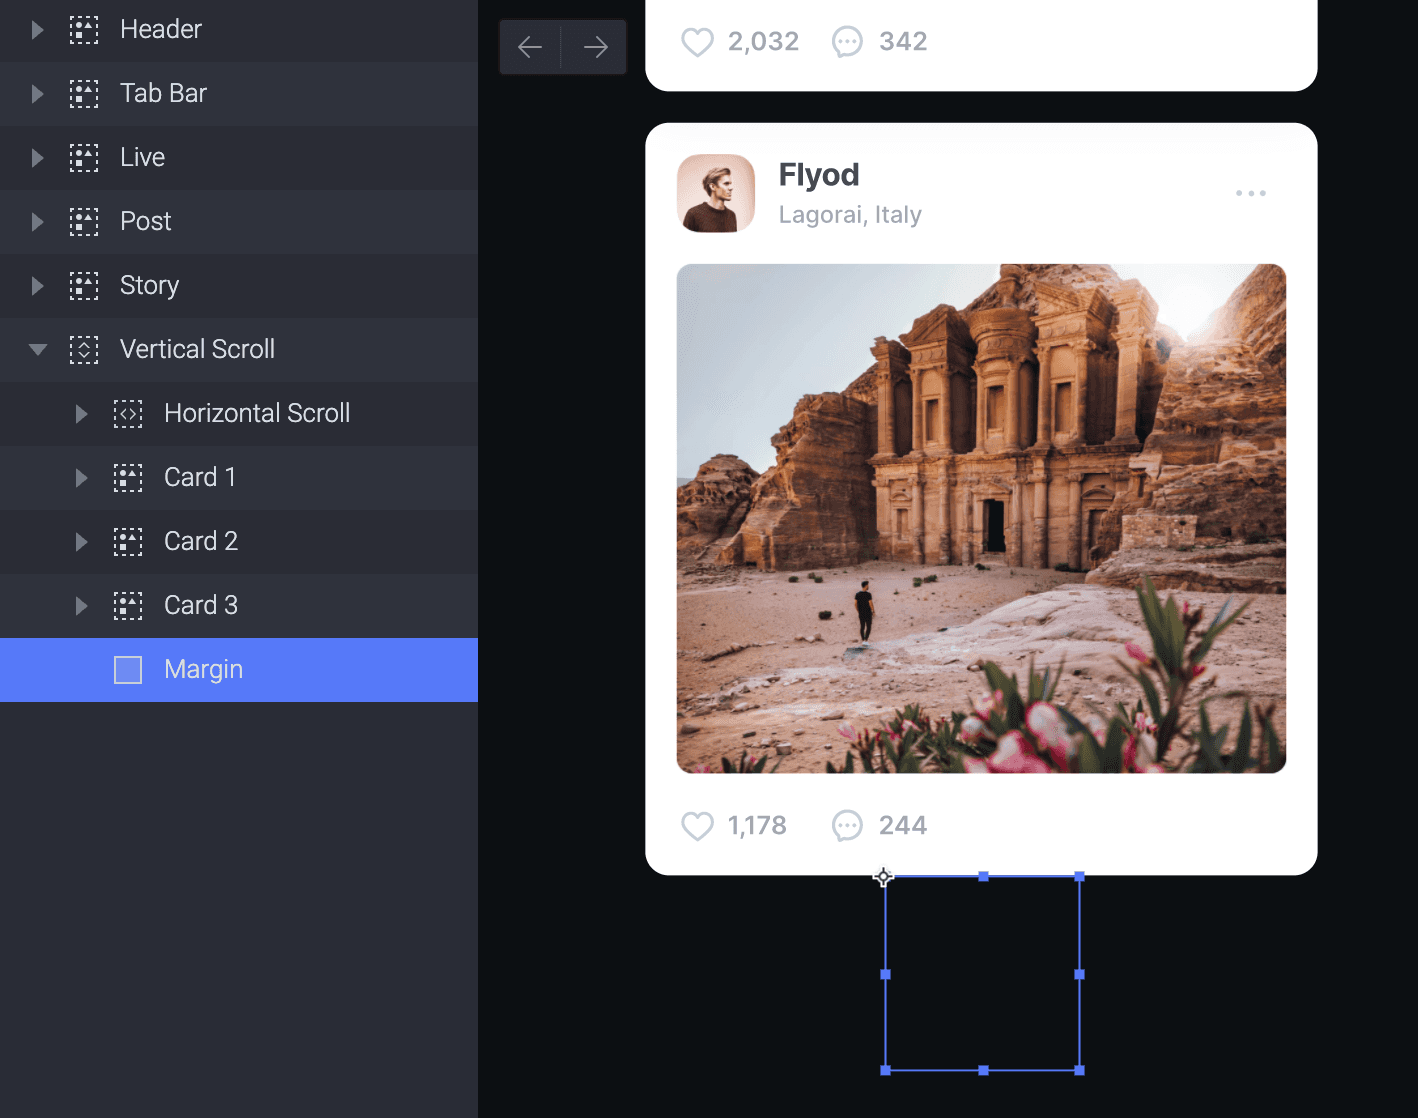
Add a margin to the Vertical Scroll (using an invisible rectangle)
1. Create a rectangle inside the Vertical Scroll layer and rename it to Margin. And Move its position to the bottom of the Card3 layer (We have to ensure that the rectangle is at the end of the vertical container).
💡 Why a rectangle?
The idea of adding a rectangle is to add some space at the end of the container without having to resize the container itself. It's just because a rectangle is easy to create. It can also be any other object, like a circle or picture.
2. Set the height of the Margin object to a value like 100. Finally, set the rectangle's opacity to 0 as we don't want the rectangle to be visible in our prototype.
💡 Why 100?
This number may vary according to your Prototype. You may resize the rectangle to a higher/ lower value according to the space you want to add.
3. Now we should have something like this (Vertical scroll margin without resizing the original container):
Congratulations!
Finally, we learned how to nest scroll containers and how to set margins to scroll containers. We also learned some useful tips and tricks to achieve this effect in ProtoPie. Great work, you made it to the end of this tutorial!
Try playing around with these learnings and you will be able to create even more interesting interactions! We would love to see your crazy experiments. Create your own prototype and share it on Twitter or Instagram with #MadeWithProtoPie.


