

Static mockups are fine - until they aren’t. Especially in FinTech, where real-time insights matter, a simple image won’t cut it. To create a truly immersive and realistic user experience, you need dynamic, live data. Imagine your prototype's expense charts and financial data updating in real-time, just like a finished product.
In this tutorial, we'll walk you through a step-by-step guide on how to integrate Google Sheets with your ProtoPie prototypes. This guide will show you how to pull data directly from a spreadsheet to create powerful, data-driven prototypes.
Part 1: Retrieving Your Google Sheets Data
The first step is to get your data from Google Sheets into ProtoPie. We'll use ProtoPie Connect and its built-in API plugin to make this happen.
Step 1: Set Up the API Request in ProtoPie Connect
In the ProtoPie Connect API plugin, you'll need to create a new request with the following details:
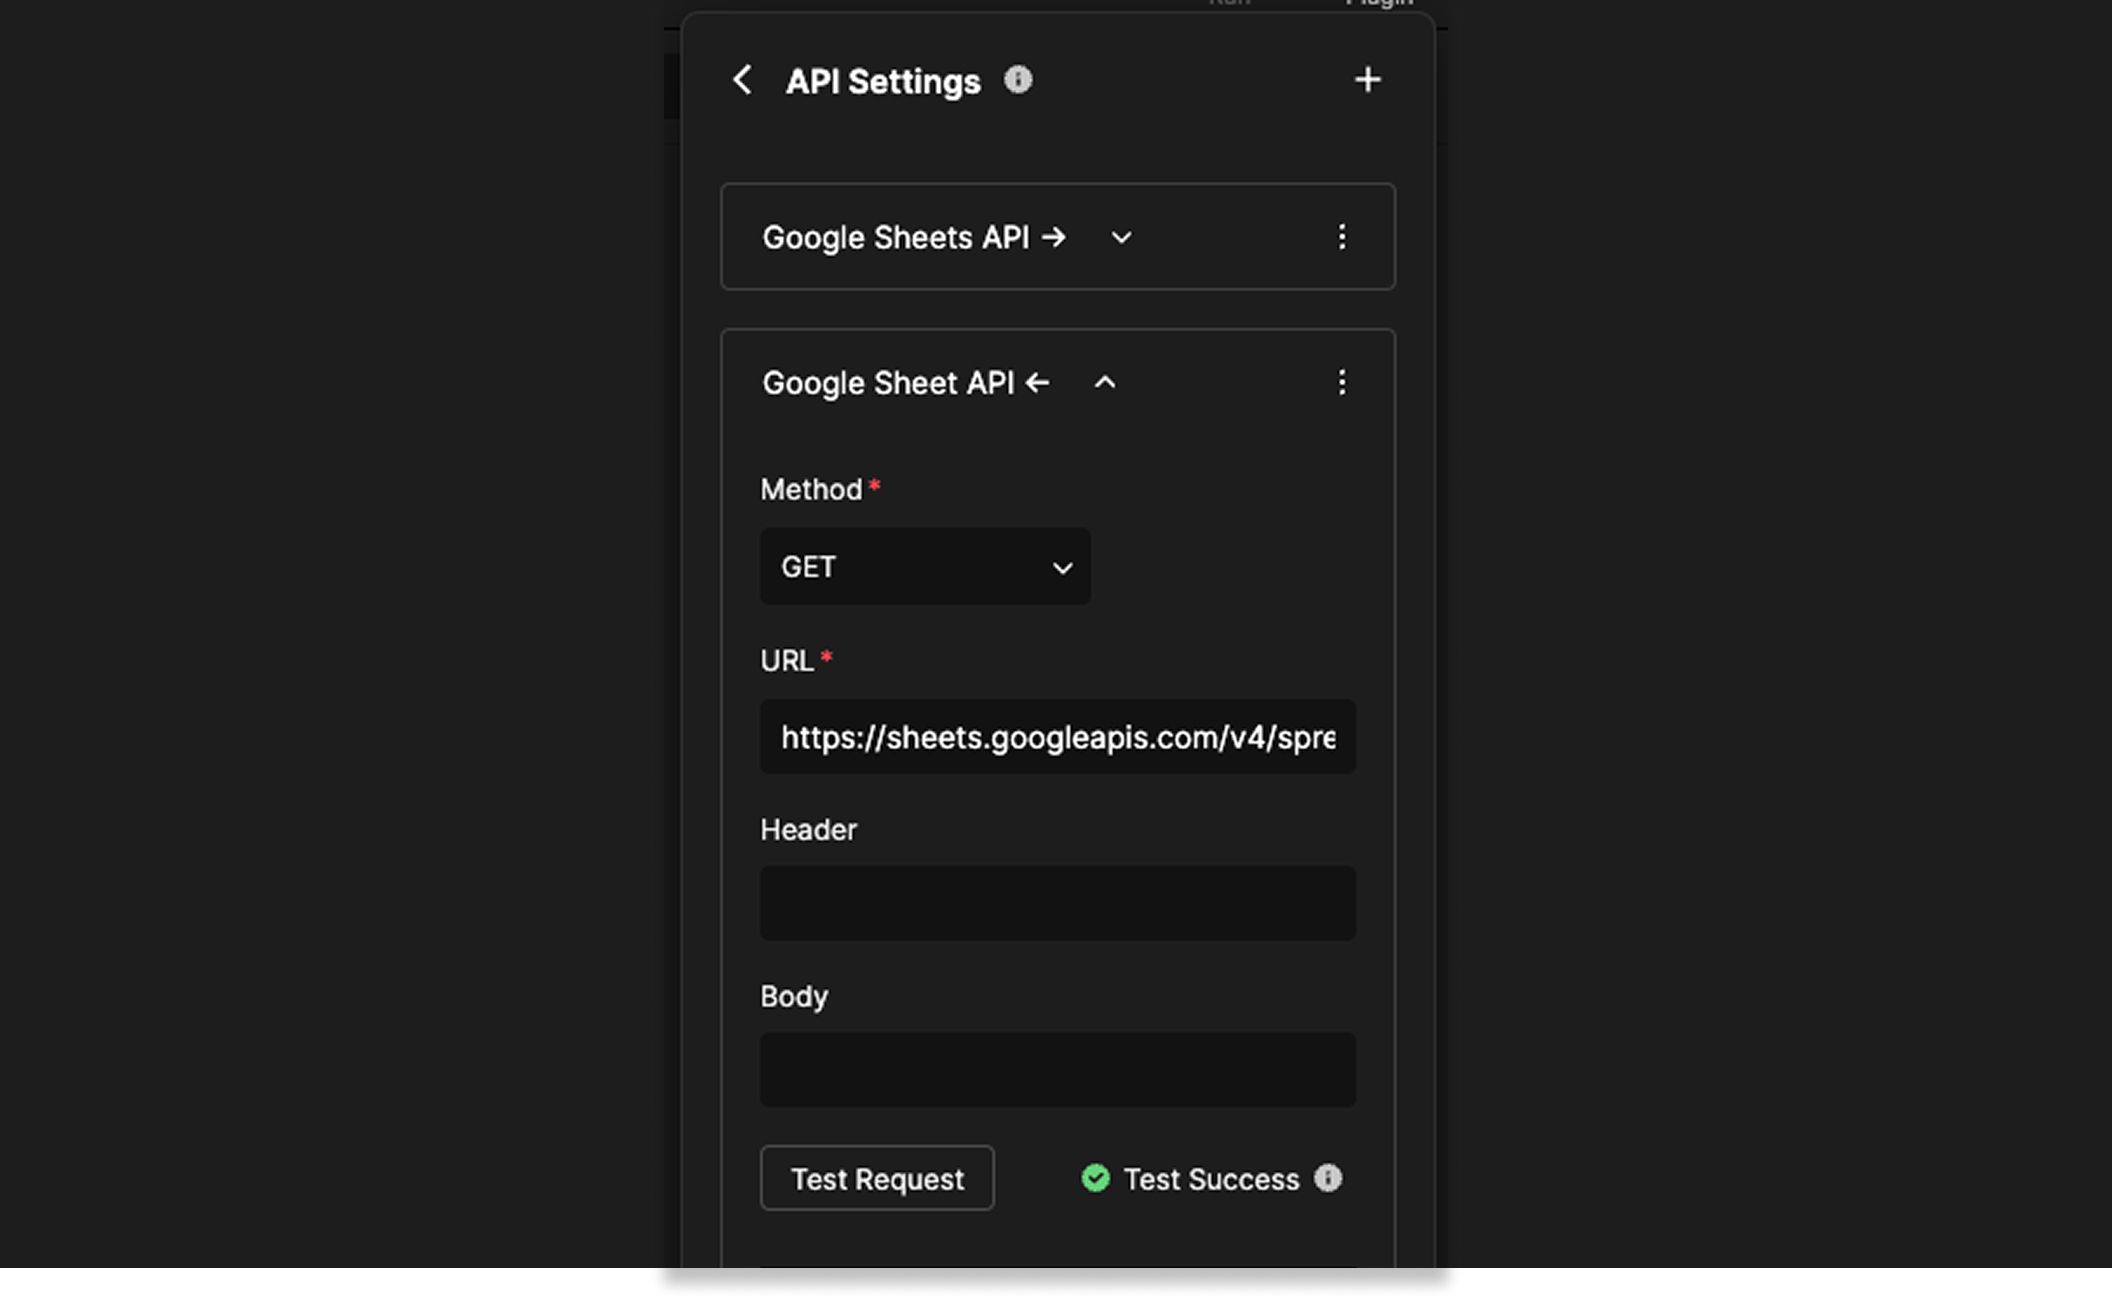
Method: GET
URL: The URL is a combination of your Spreadsheet ID, the data range you want to import, and your unique Google API key.

Header: None
Body: None
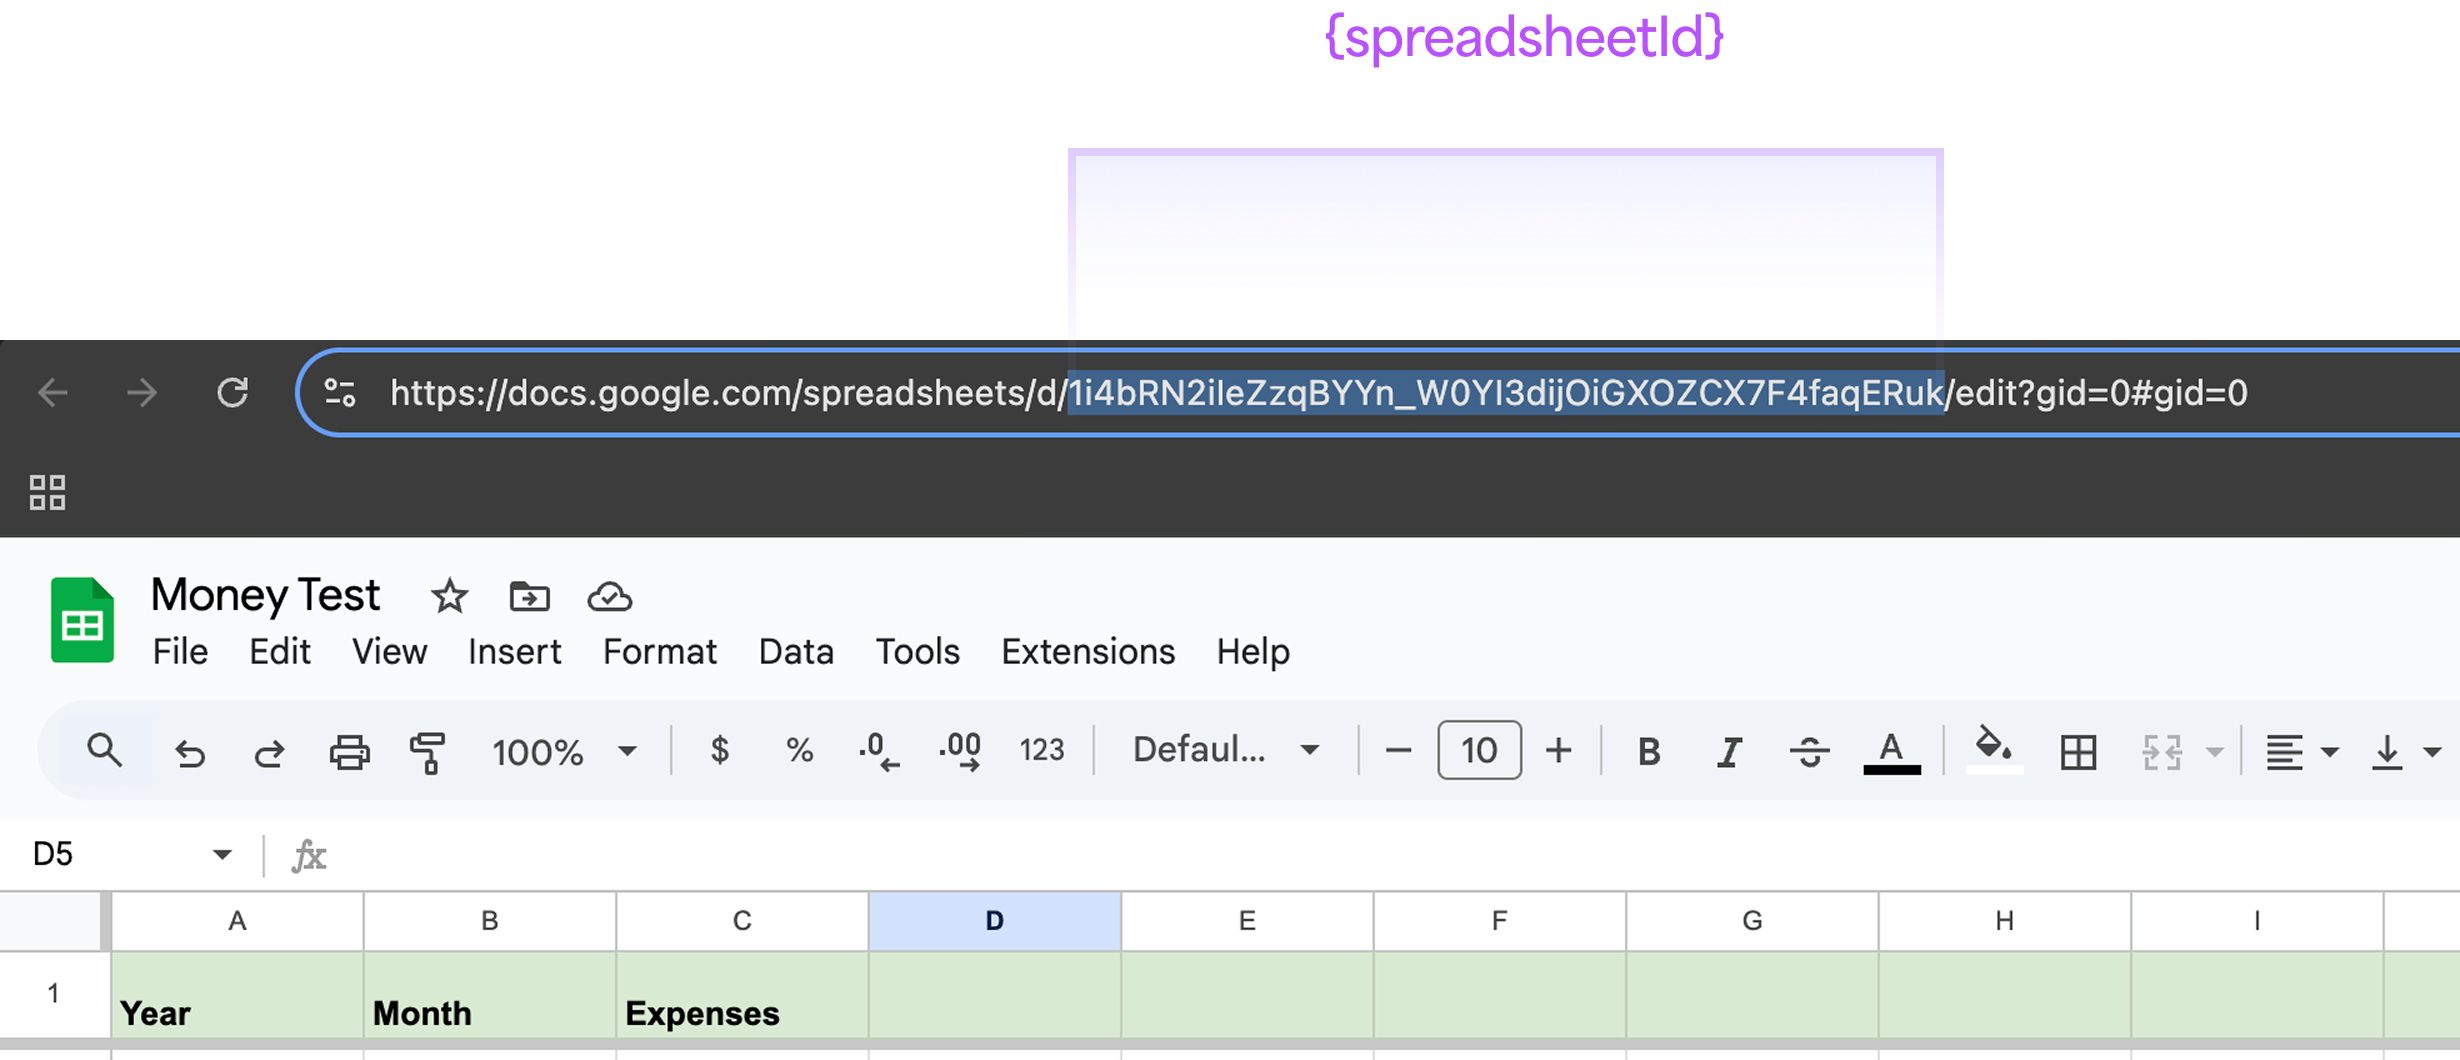
Step 2: Find Your Spreadsheet ID
The Spreadsheet ID is the unique identifier for your Google Sheet.
You can find it directly in your Google Sheet's URL. It's the long string of characters located between /d/ and /edit.
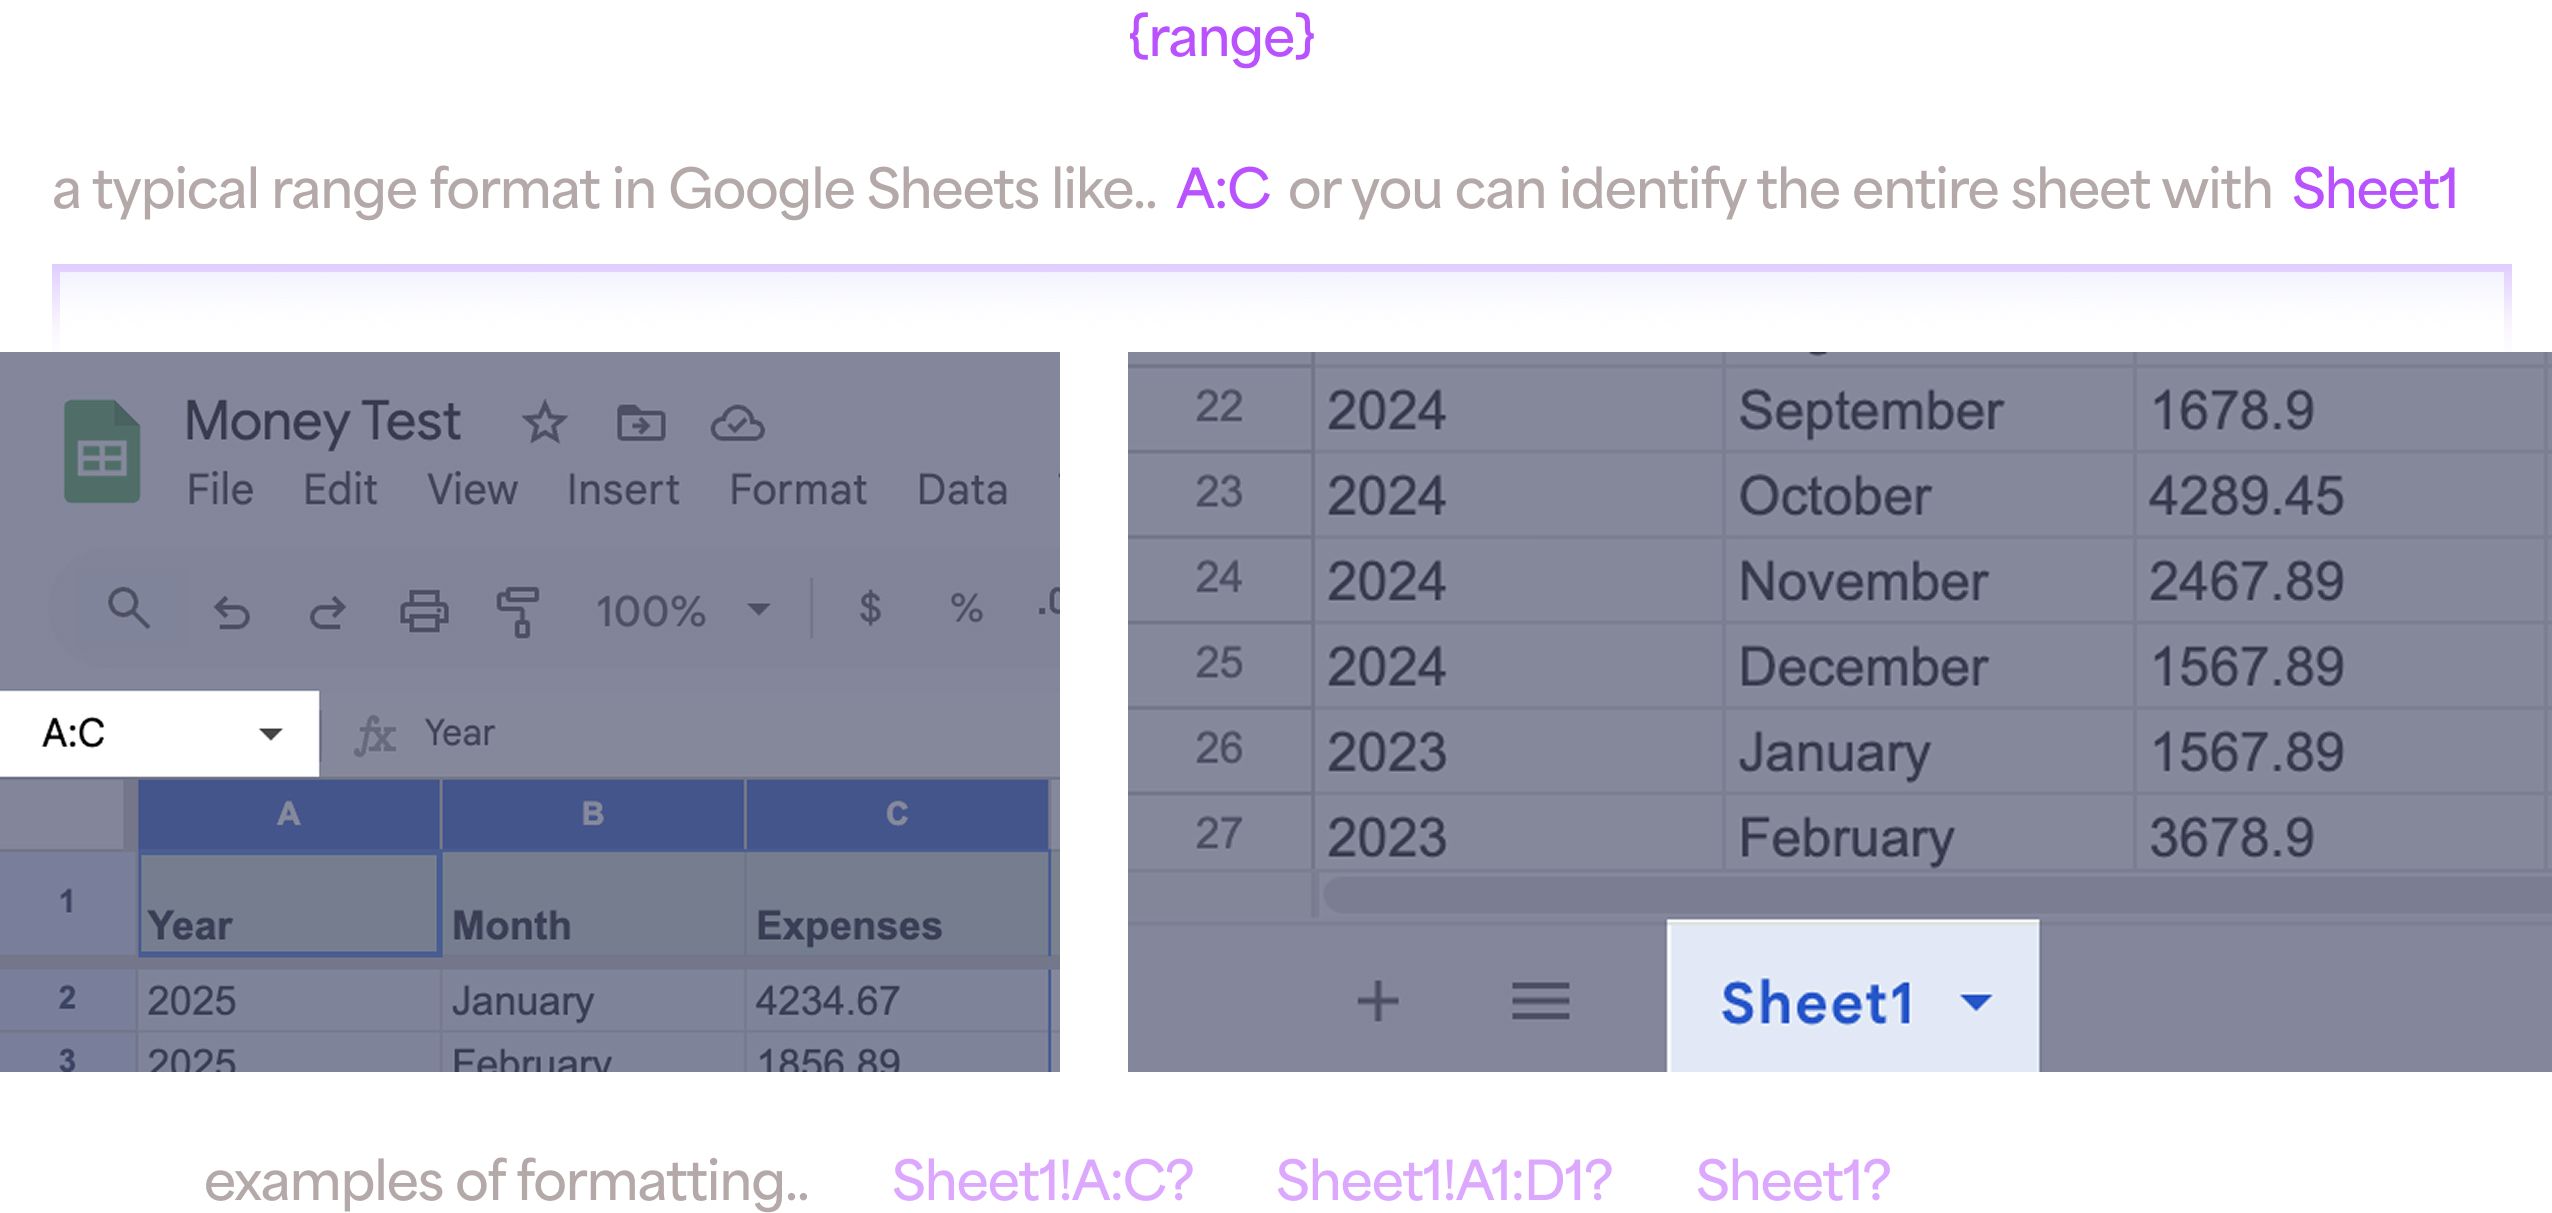
Step 3: Define the Data Range
Next, you need to tell ProtoPie which data to grab. The range specifies the cells you want to import.
This can be a set of columns (e.g., A:C) or the entire sheet.
You can specify the sheet name and range using formats like Sheet1!A1:D1 or just list the sheet name to import all its data.
Step 4: Generate Your Google Sheets API Key
This key authorizes ProtoPie to access your sheet data.
Navigate to the Google Cloud Console.
Create a New Project from the top menu.
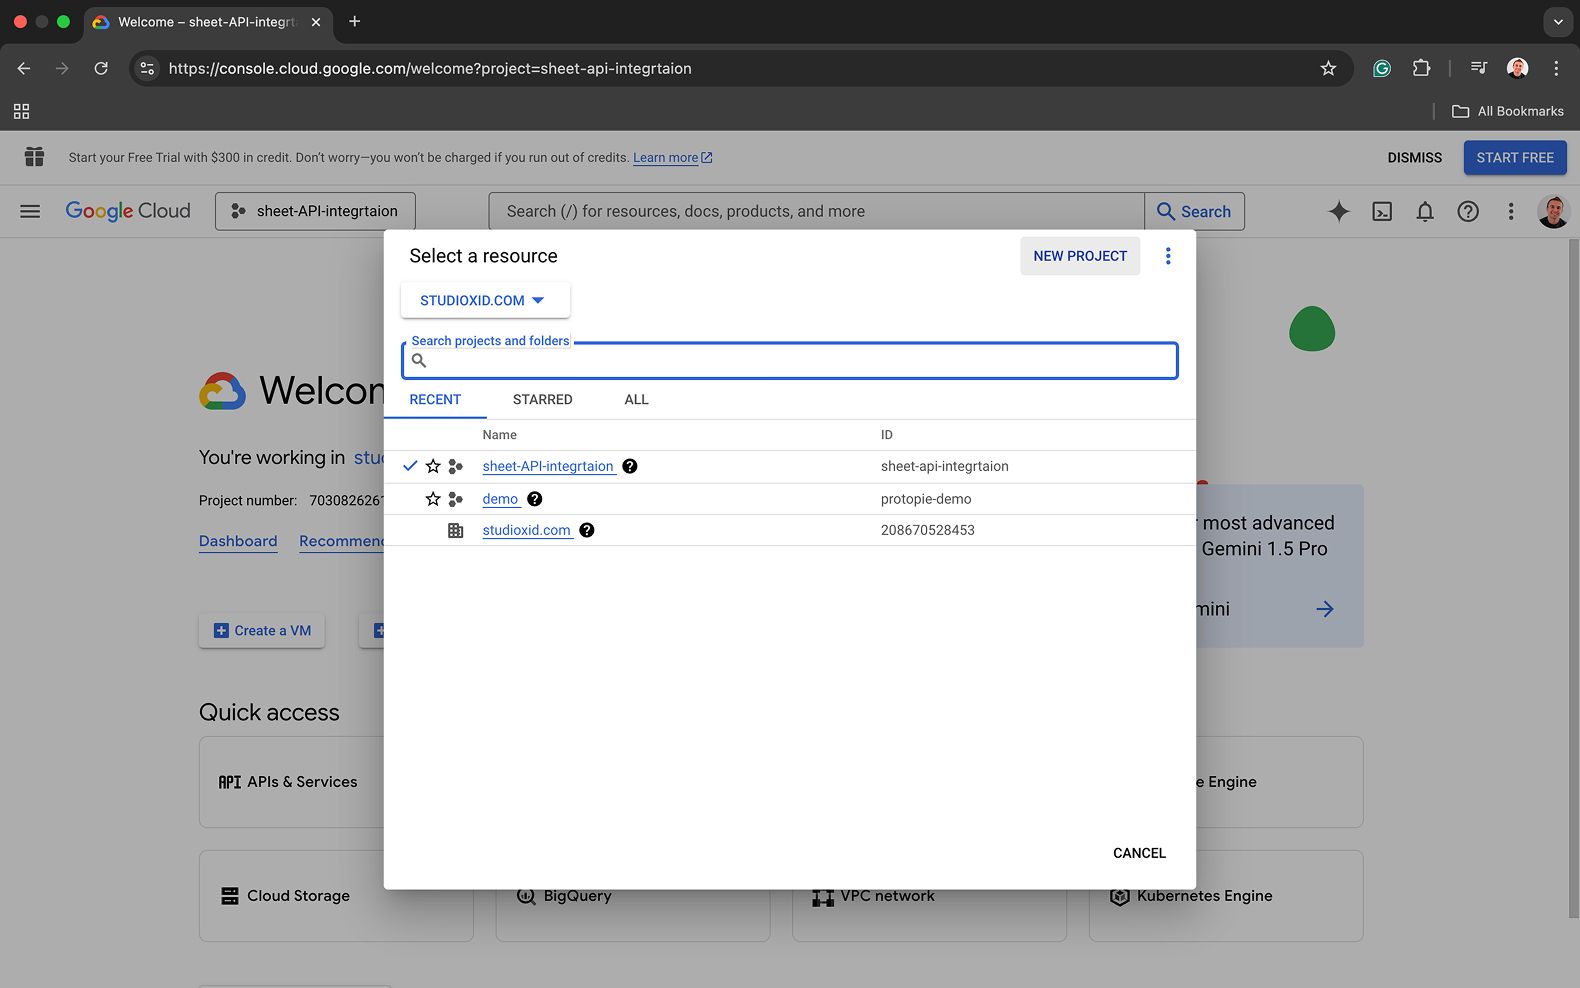
In the search bar, look for the "Google Sheets API" and Enable it for your project.
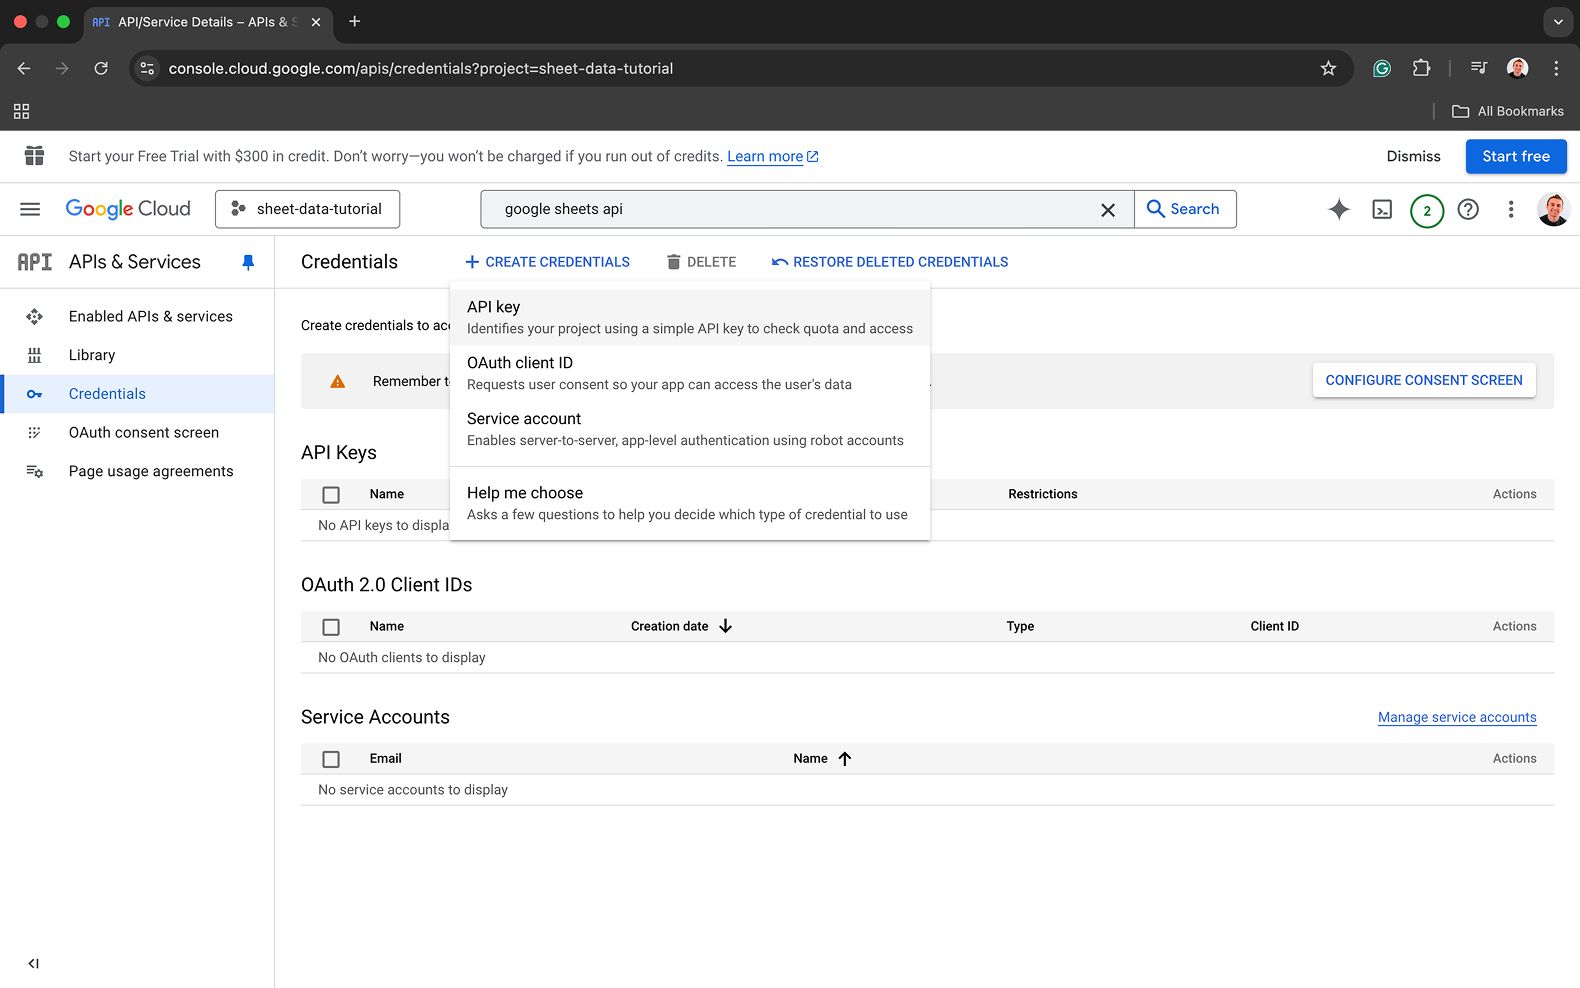
Navigate to the Credentials tab on the left.
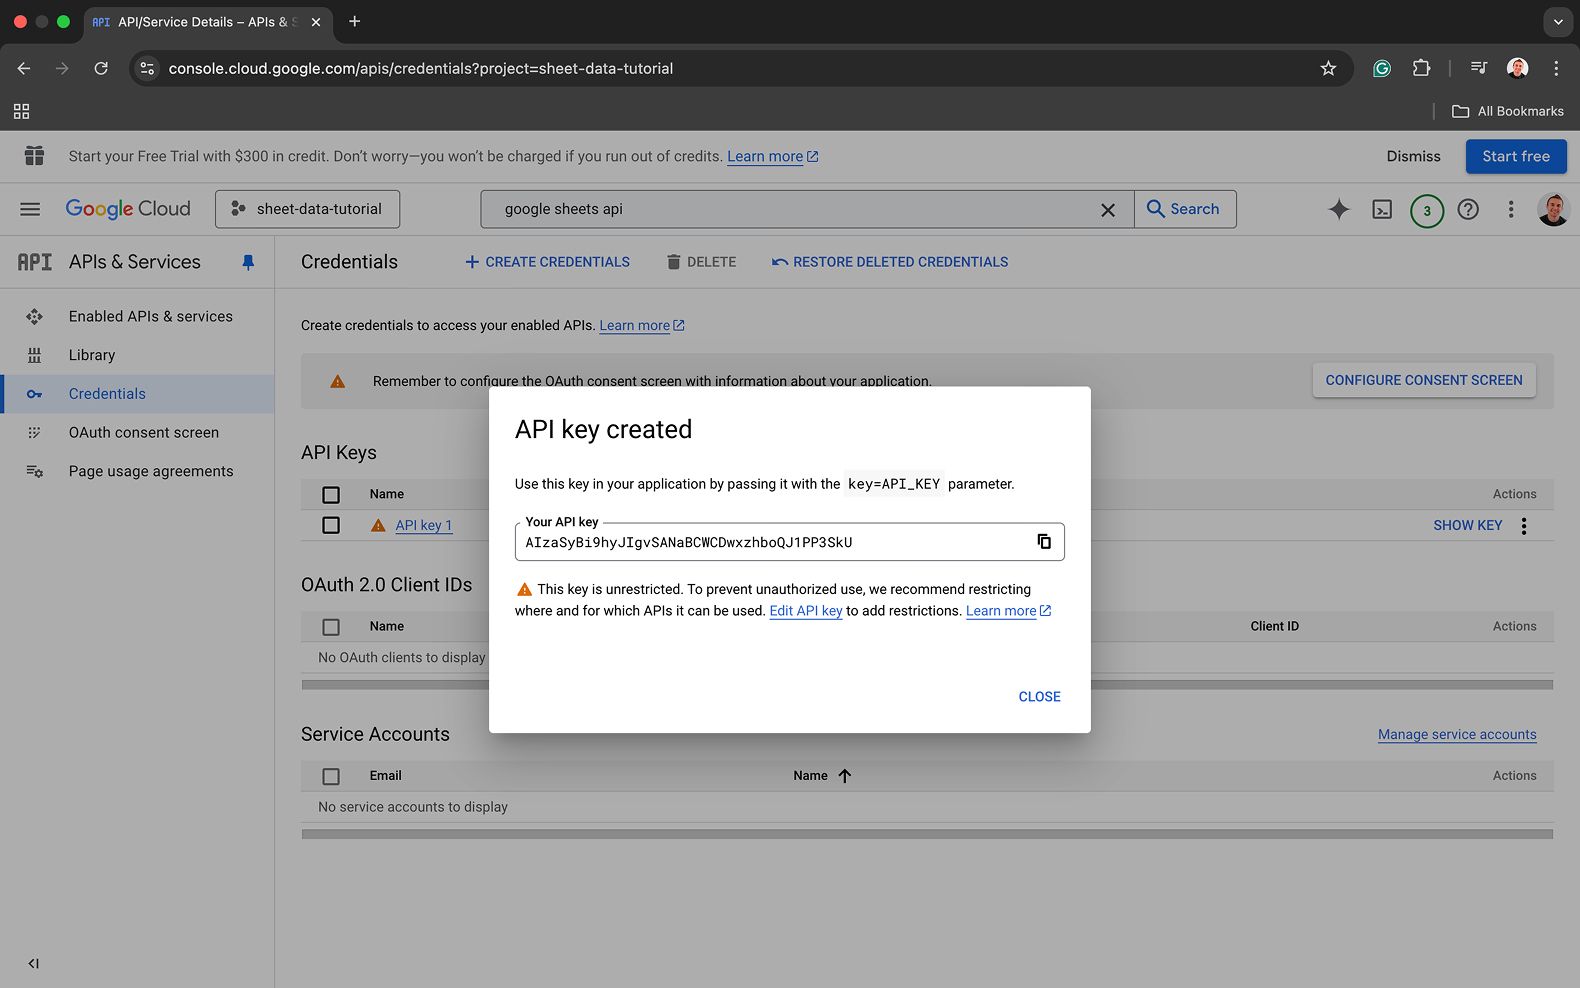
Click Create Credentials and select API key.
Your key will be generated. Copy it and add it to your URL in ProtoPie Connect.
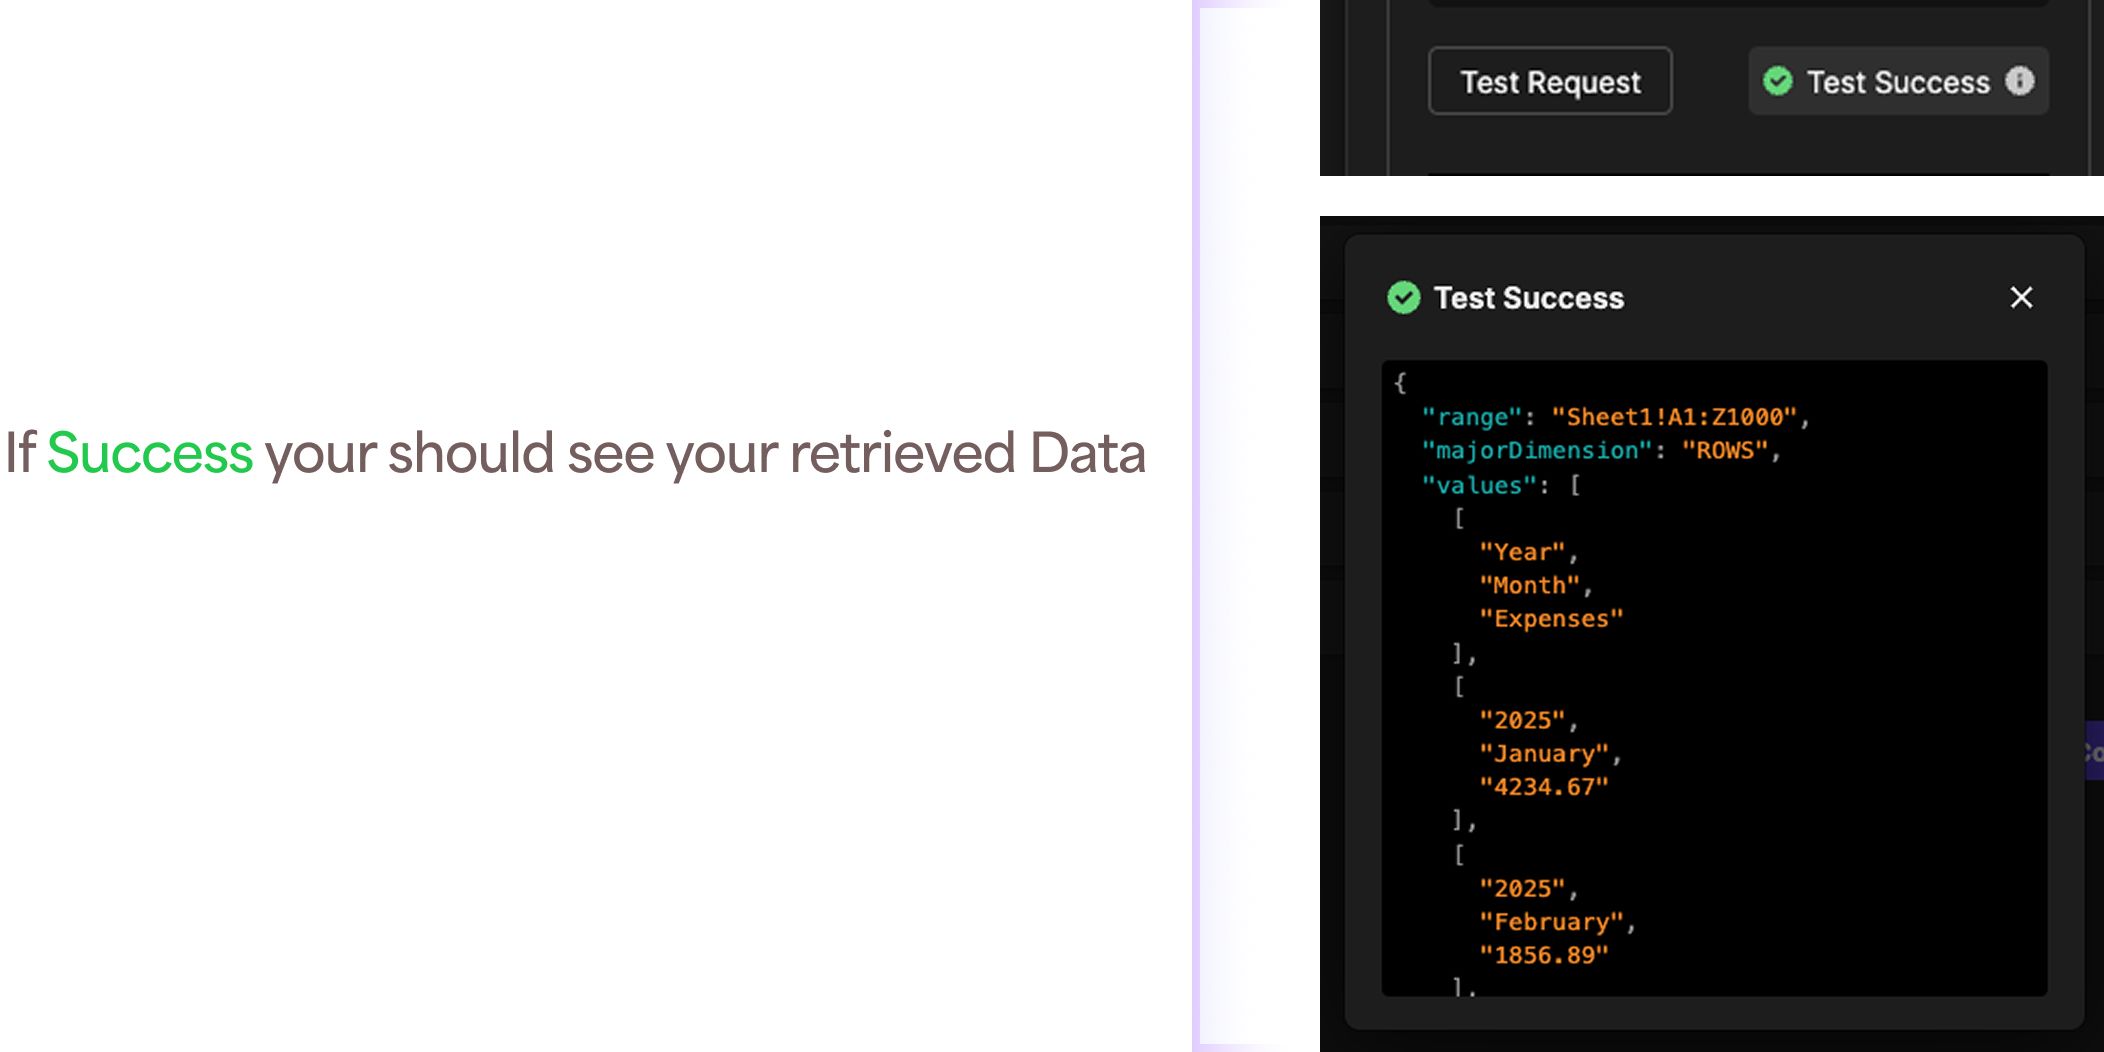
Step 5: Test and Troubleshoot
Once you've put together your URL, test the request in ProtoPie Connect. If you get an error, the most common issue is the sharing permission on your Google Sheet.
Crucial Tip: Make sure your Google Sheet's sharing setting is changed from "Restricted" to "Anyone with the link." A restricted sheet requires an OAuth authorization, which could be used if you want to keep your data restricted but still use it in your prototype. Though that type of authorization will not be covered in this tutorial.
Part 2: Parsing the Data in ProtoPie
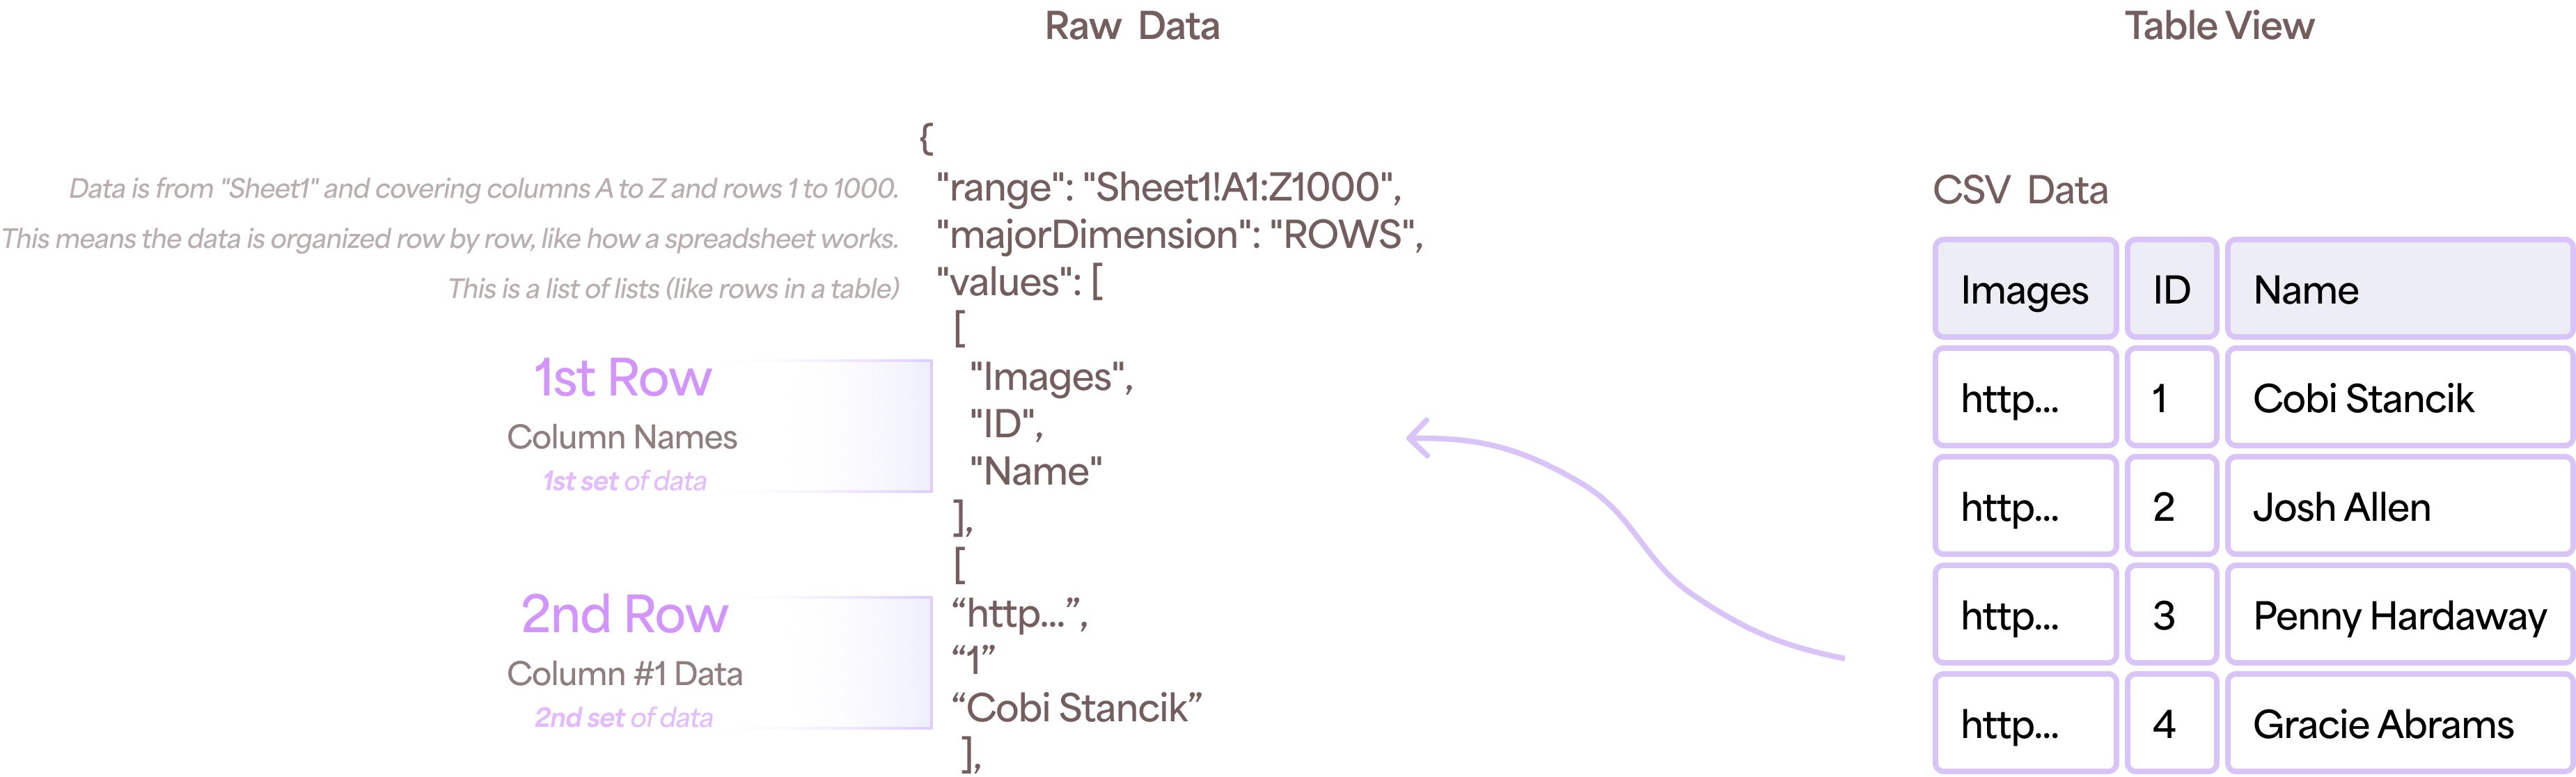
Once the API request is successful, ProtoPie receives a long string of raw data from your sheet. Now, we need to parse this data (break it apart) so we can use it in our prototype.
The data from Google Sheets is organized into "values," which represent the rows in your spreadsheet. The first row typically contains your column titles (e.g., "Name," "Date," "Amount"), and the subsequent rows contain the actual data.
Step 1: Parsing Basic Data with parseJson
The parseJson() formula is the key to accessing specific pieces of information. Let's look at a basic example for retrieving metadata:
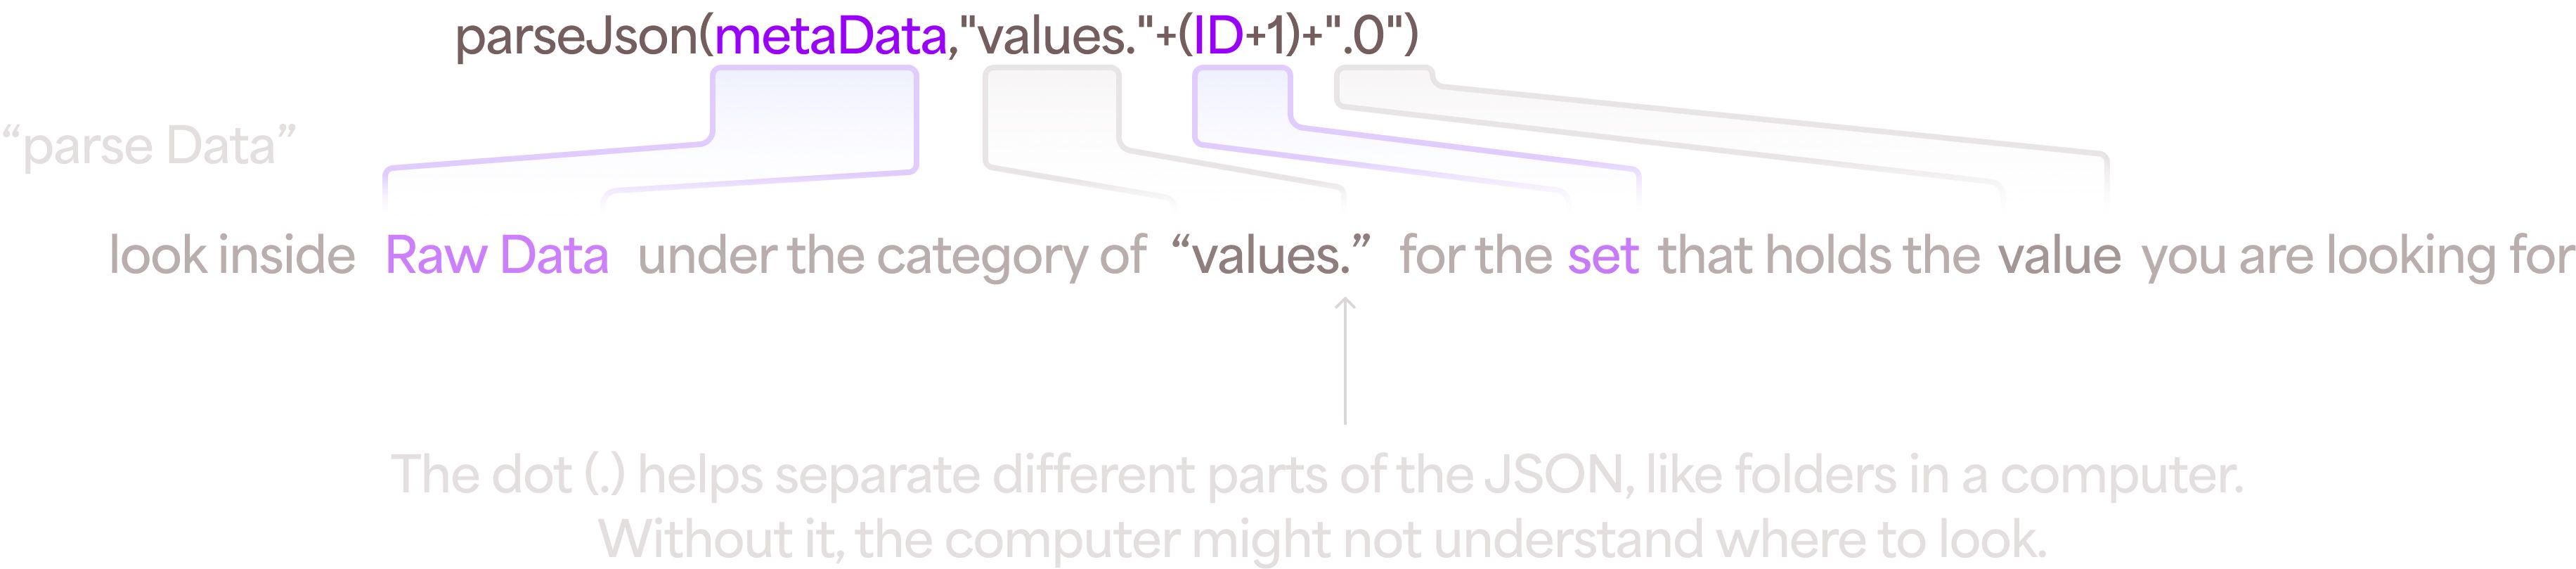
Formula: parseJson(metaData "values."+ (ID+1)+".0")
metaData: This is the variable where you assigned to store the raw data from the API call.
"Values.": This tells the formula to look inside the "values" section of the data.
(ID+1): This selects the row you want. We use +1 because the first row (row 0) is usually the titles, and we want to access the actual data rows that follow. So, to get data from the first data row (which is the second row in the sheet), you look in the second set.
".0": This selects the specific item within the row. Data items in each row are indexed starting from 0. So, .0 gets the first item, .1 gets the second, and so on.
Step 2: An Advanced Example for Dynamic Chart Data
Sometimes, the data structure from Google Sheets isn't ideal for direct parsing. For instance, if you have monthly expenses listed year by year, finding a specific month's expense requires a workaround.
Formula: parseJson(googleSheet,"values."+((year*12)+ monthID +1)+".2")
This formula might look complex, but it's just using math to pinpoint the exact data we need.
We use variables for the desired year and monthID.
(year*12): This part does the heavy lifting. If your data has 12 months for each year, this calculation skips down the rows in blocks of 12 to get to the correct year.
+ monthID: After finding the right year, this adds the month's number to find the right row.
+1: This again accounts for the title row.
".2": This would grab the third piece of data in that row (e.g., the expense amount).

That’s a Wrap!
And there you have it! By connecting Google Sheets to ProtoPie, you can move beyond static designs and build prototypes that are as dynamic and responsive as the real thing. You can now pull live data to power charts, lists, and other components, creating a richer, more convincing user test.

Now it's your turn to try it out. Remember to generate your own Google API key and set your sheet's permissions correctly. Happy prototyping!


