

I recently set out to generate a 3D, or more precisely, a 360° view of a 3D object in ProtoPie, allowing me to manipulate it effortlessly by swiping or using buttons.
While the process turned out to be simpler than I initially anticipated, it did take me some time to determine the most effective approach to achieve this effect in ProtoPie. Although it may seem like a lengthy series of steps, I can assure you that it’s simpler than you might imagine.
Here’s a step-by-step guide for you to follow. However, like any good recipe, we’ll need some essential ingredients first to create our Pie.

The final result of this tutorial.
Step 01: The ingredient
Since it’s currently not possible to directly integrate real 3D objects into ProtoPie Studio, we’re simulating this effect by generating 24 images or frames from our 3D object.
Note: with the release of Connect 2.7, you can integrate 3D objects in ProtoPie Connect.
In any 3D software, create a camera that revolves 360° around our object. Next, configure your rendering settings for 24 frames, and voila! There you have your static frames.
Step 02: Set up your oven
In ProtoPie Studio, our first step is to create a new project and to import all of our rendered images. Align these images so they overlap perfectly and then group them together. This group will be labeled as “frames”. Make sure the opacity of each frame in our group is turned to 0 with only frame 1 turned all the way to 100.
Following that, we will create a new variable under variables and give it the name “xPos_var.”
Step 03: Turn up the heat
To begin, let’s create a Chain from our Triggers menu and link it to our “xPos_var” variable.
Next, we incorporate an Opacity response into our chain and assign it the name of our initial frame. We continue this process, adding these responses for each frame until we’ve included all of our frames in our Chain trigger. I duplicated the first frame and created a new layer with each duplicate.

Use the Chain trigger and Opacity responses for each frame from our 3D render.
Step 04: What is our position?
Now, we’ll temporarily set our chain aside and revisit it later in this tutorial.
First, we must determine our current position. To begin, create a rectangle and name it “xPos Dot”, placing it somewhere on the left side of the screen. I’ve given it a bright color to make it easily identifiable.
Lastly, we group this “xPos Dot”. Why? We do this to establish the starting position of this rectangle at x = 0 and y = 0. This simplifies the process for us.

Create a tracking dot on the X-axis to track our location in the panorama.
Step 05: Let’s drag it out.
Our objective here is to link the position of the rectangle to our mouse/touch position and then translate that position back to our chain. This will give us a genuine feeling of rotating the object.
Let’s go!
We add a Drag trigger and put the drag on our frames group.
Next we add a Move response and add our xPos Dot to it. We change the direction to both directions and limit to custom min = 0 and max = 1201.

Use a Drag trigger allows us to move our xPos Dot around the screen.
Step 06: Perfecting our position
We can now move our xPos Dot but we need to detect it’s location.
Start by adding a Detect trigger and set it to our xPos Dot = x.
Next we add a Assign response and assign it to our variable (xPos_var) we made earlier in step 2.
In the formula section of this assign trigger we add our xPos Dot and add .x after it. It should look something like this “xPos Dot.x”

We track our xPos dot to later assign that value to our Chain trigger.
After you press preview, you can now move our bright coloured rectangle.
Step 07: Let’s Chain our main ingredient
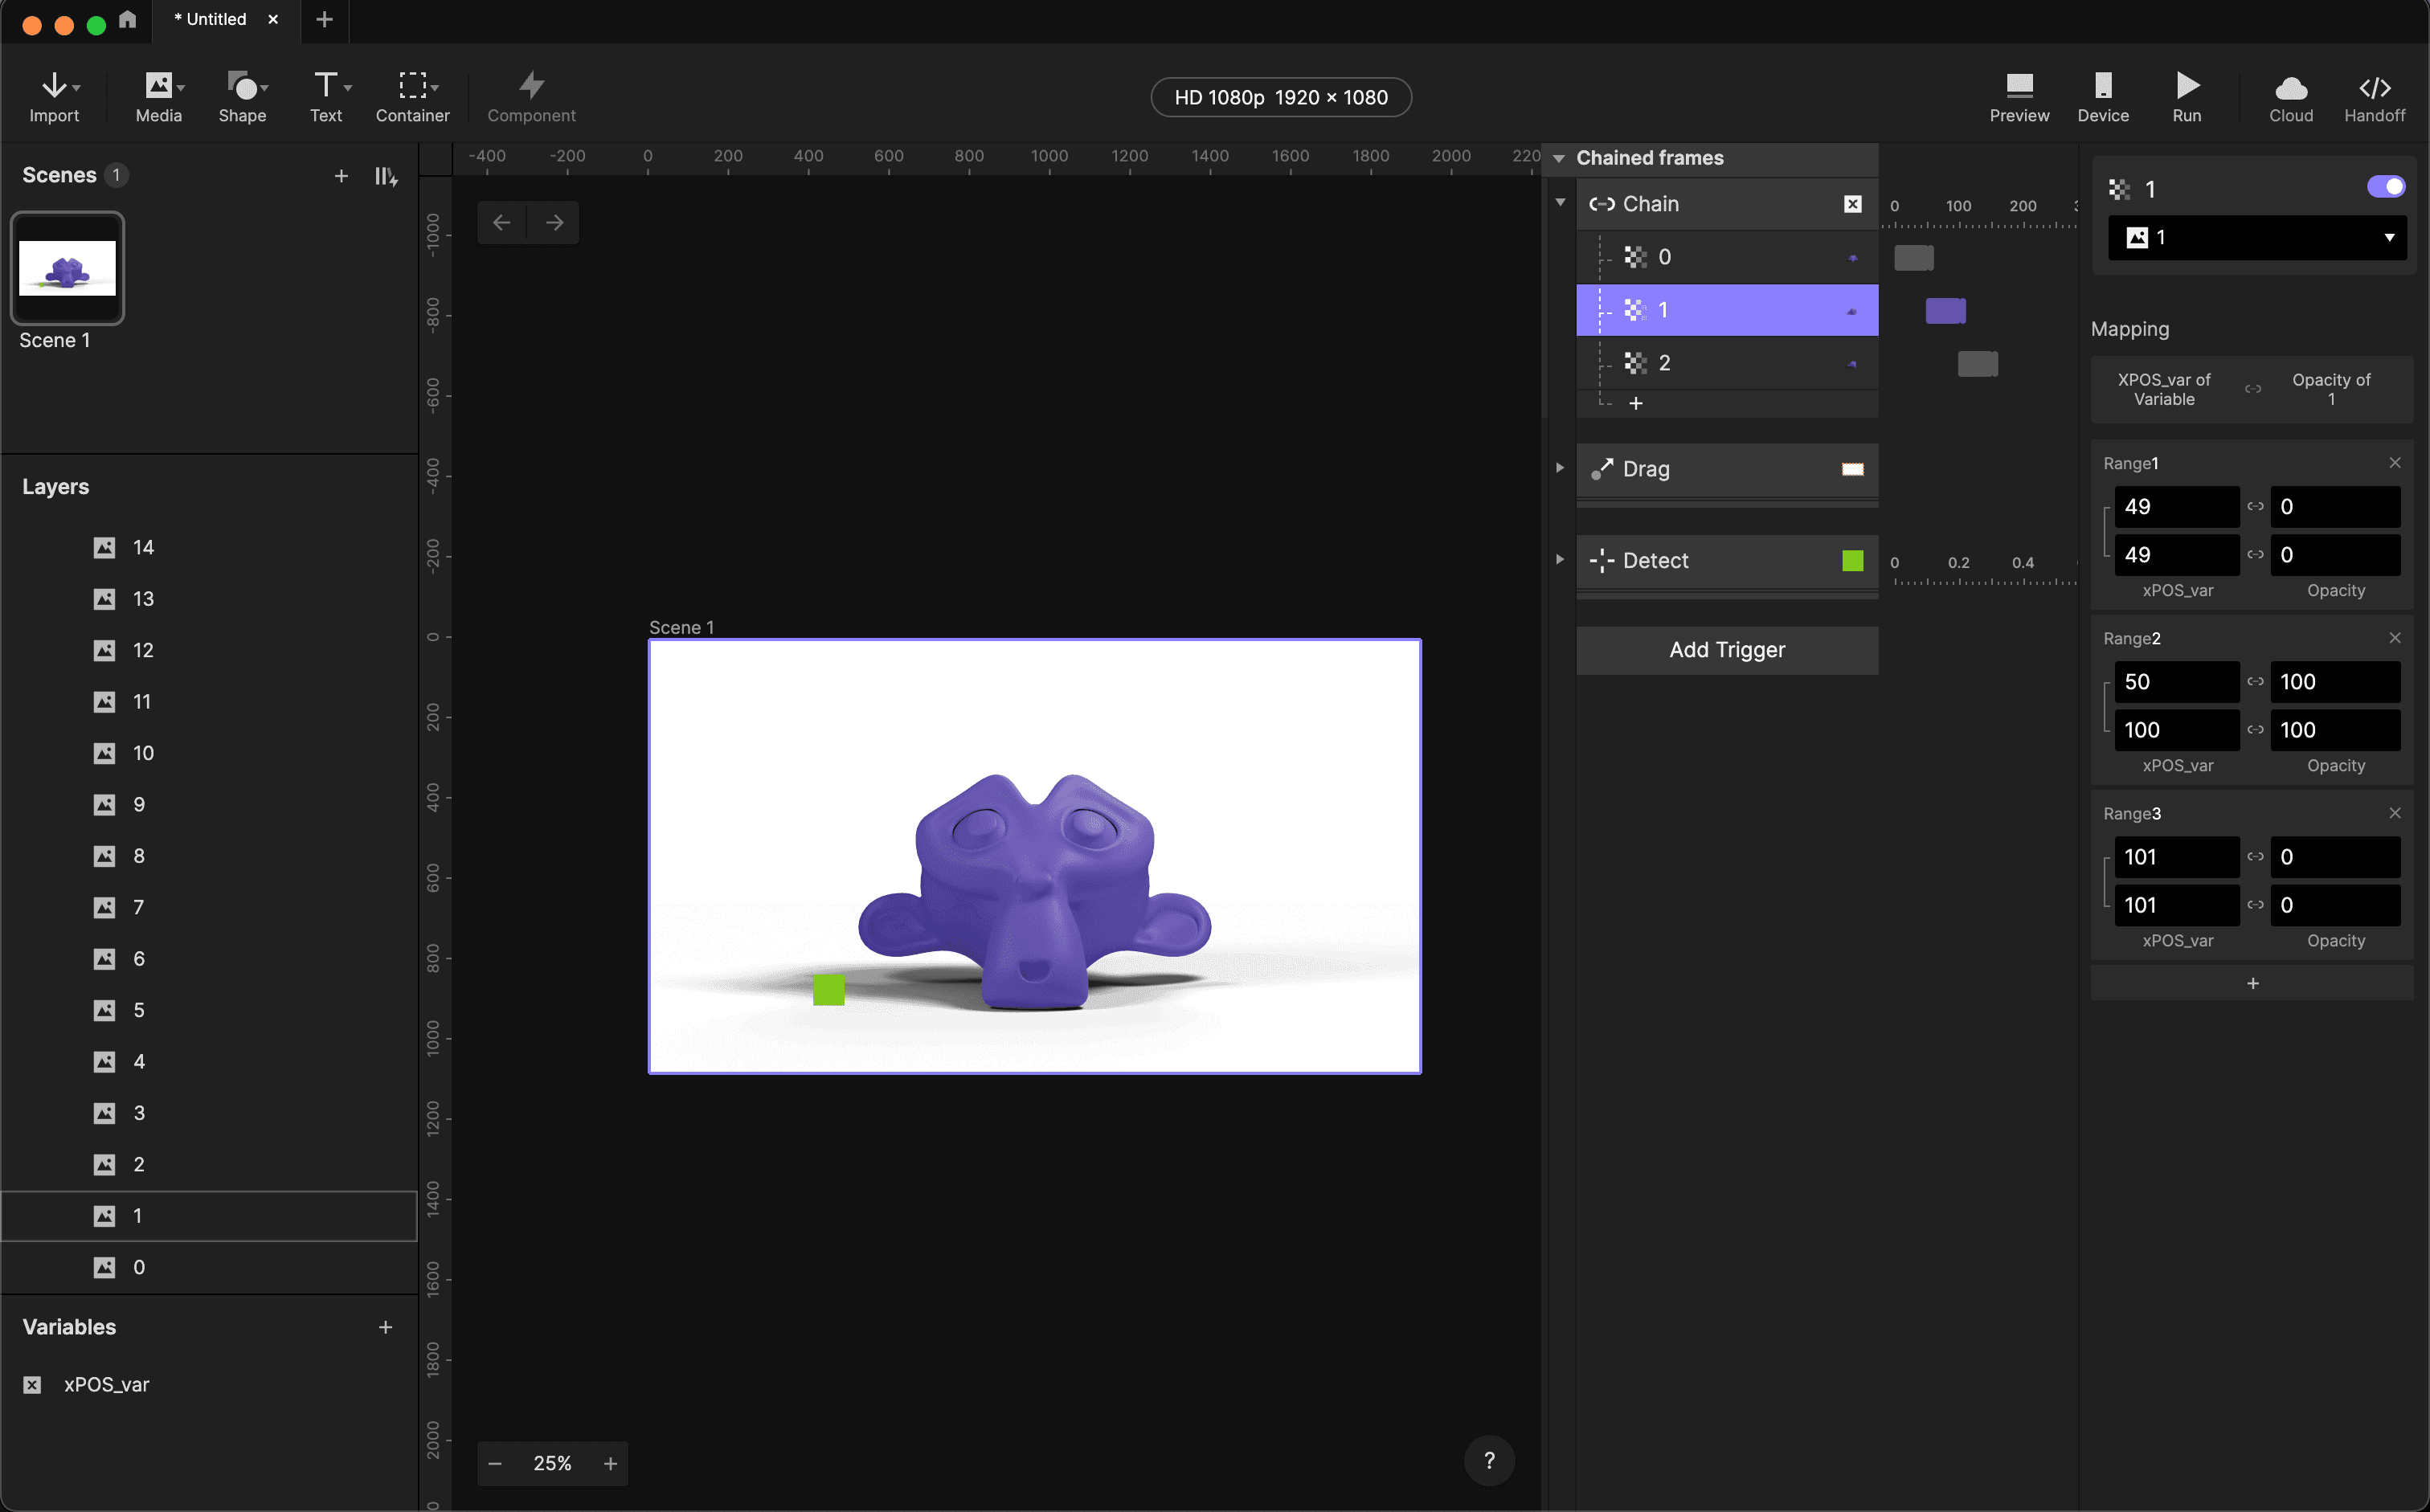
Our goal is to instruct our chain on how to use the information from the “xPos Dot” location we tracked in our variable. To achieve this, access the Chain trigger created earlier and choose the 1st opacity layer.
Here we need to add adjust the range.
First we add range: 0 = opacity: 100 and range: 50 = 100
This effectively tells our chain that when our xPos Dot is within range of value 0 to 50 we need our first frame to show.
We will need add a secondary range here. This one we will set to 51 = 0 and 51 = 0.
This tells our chain to hide this frame when our xPos Dot is over the range of 51.

Telling our chain when to show each frame in our panorama
Step 08: The final bake-off
This next step is the most work you will have in this Pie. As it is very repetitive but the results are awesome!
Now, we must replicate the previous step for every frame, while simultaneously introducing a third range to each of them.
Increment the range by 50 each time, with the value -1 from the first range and +1 to the value of the third range. This instructs the chain to hide the frame above or below a specific value.
Not all frames are created equally, we need to pay close attention to range of each frame.
Note: the value for frame 2 would be 100 to 150, frame 3 = 150 to 200 and so on.
Our Pie is ready to eat!
Once you’ve incorporated these values for each frame, your rotation is essentially complete! Adjust the opacity of “xPos Dot” to 0 to hide it, and you’re finished!
Note: To enable a manual rotation via buttons, you can include a Tap trigger and a Move response for the “xPos Dot, ” shifting it by 101 with each tap.
Thanks for reading!
Start prototyping with 3D objects in ProtoPie
Begin your prototyping journey with ProtoPie, where you can introduce dynamic 3D objects into your designs, expanding your creative horizons and enhancing user engagement with immersive interactive experiences.
About the author:
Evert Martin, an award-winning Senior HMI Designer at Inert and Toyota, is renowned for his expertise in crafting immersive user interfaces. Leading a global prototyping initiative for vehicles and applications, he seamlessly integrates innovation with practicality. Recognized for his dedication, Evert excels in award-winning accessibility design and reshaping automotive user engagement.


