
When you sign up or log in to a website or an app, most sites mask (or hide) the password to keep it hidden from prying eyes. But to avoid mistyping, a good UX practice for password fields is to have a show/hide button — so users can see what they're writing.
In this tutorial, we will learn how to create that button to show and hide a password in our designs. ProtoPie makes this easy by using an Input field and the Detect trigger.
Overview
What you will learn
Before you start
How to show and hide passwords in your prototypes
1. Preparing the input fields
2. Reorder the input fields on pressing hide/show
3. Sync the text within the different input fields
That's it! You can now show and hide the password
Level up as a designer with ProtoPie
What you will learn
In this lesson, you'll learn how to
Prepare the Input fields
Reorder the Input fields on pressing hide/show
Sync the text within the different input fields
In the end, you'll be able to make something like this!
[Starting Pie File] [Completed Pie File]
Before you start
To jumpstart the process, we've already prepared a Pie file with a show/hide button. This works using Conditions.
Learn How to Make a Toggle Button using Conditions.
How to show and hide passwords in your prototypes
1. Preparing the Input fields
1. In these steps, we will set the stage by creating a masked Text Password field, and a normal Text field.
We're using two text** Input** fields — one will contain the masked password text, and the other will contain the visible one.
2. Select the Hide Input field, and in the properties panel, look for Keyboard Options. Change the Type to Text Password. This will automatically mask all the text being input in the Hide field.

3. Go ahead and preview the prototype. You should be seeing the Hide Input field in action, with masked text.
2. Reorder the input fields on pressing hide/show
In these steps, we will make the hide/show button switch between the Hide and Show Input layers by using the Reorder response.
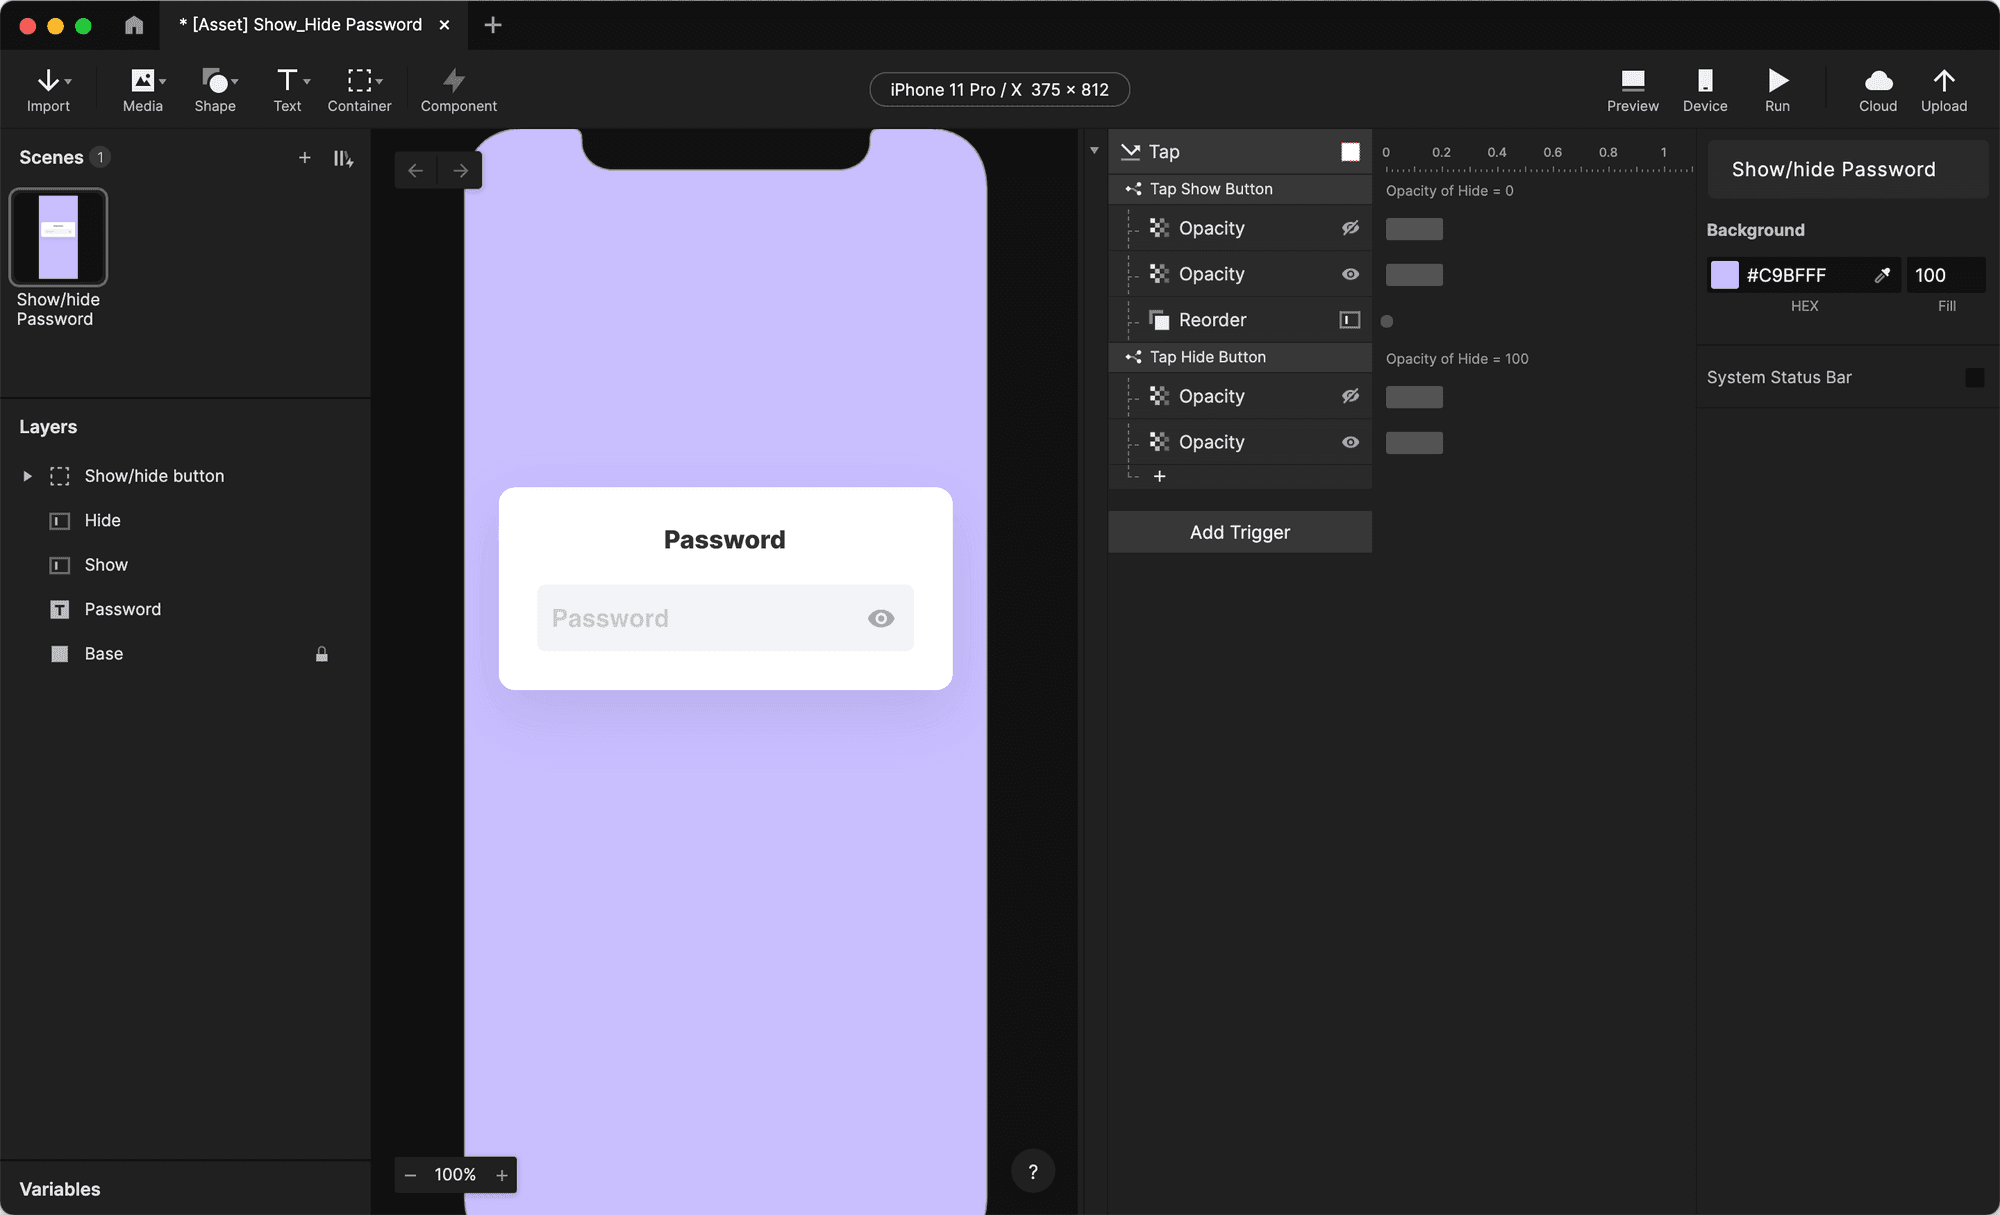
1. Select the Show Input layer. In the existing Tap interaction, Click +, and add a Reorder response. The Reorder response can change the order of layers. In our case, we want to bring Show in front of Hide to make it visible.
2. Make sure the Reorder response is set to Bring Forward. This property moves the Show layer forward by one layer, i.e. right in front of Hide.
3. Move the Reorder response under the first Condition, i.e. the one with the title "Tap Show button". Now, when the show button is tapped, the Reorder response will move the Show layer above the Hide layer.
4. Let's repeat the same steps for the Hide layer. Start by selecting the Hide input layer, and add a Reorder response. Once again, make sure that the Reorder is set to Bring Forward. This time, the Reorder response should apply to the second Condition, i.e. "Tap Hide Button". So make sure it is under the second Condition.
Now, when the hide button is tapped, the Reorder response will move the Hide layer above the Show layer.
💡 Why did we use the Reorder response? Couldn't we just have used Opacity to hide the "Hide" and "Show" layers?
Well yes! That would work too. However, this is a quicker method, requiring only one response per layer, rather than setting an Opacity value for both layers every time.
5. Go ahead and Preview your progress. You will notice that at first, the password field is masked. Pressing the hide/show button takes away the masked field, but it seems to be bringing an empty Show field. We want it to show the text we had entered, so let's address that in the next steps.

3. Sync the text within the different input fields
In these steps, we will synchronize the text between the Hide and Show input layers by using the Detect trigger.
Learn more about triggers.
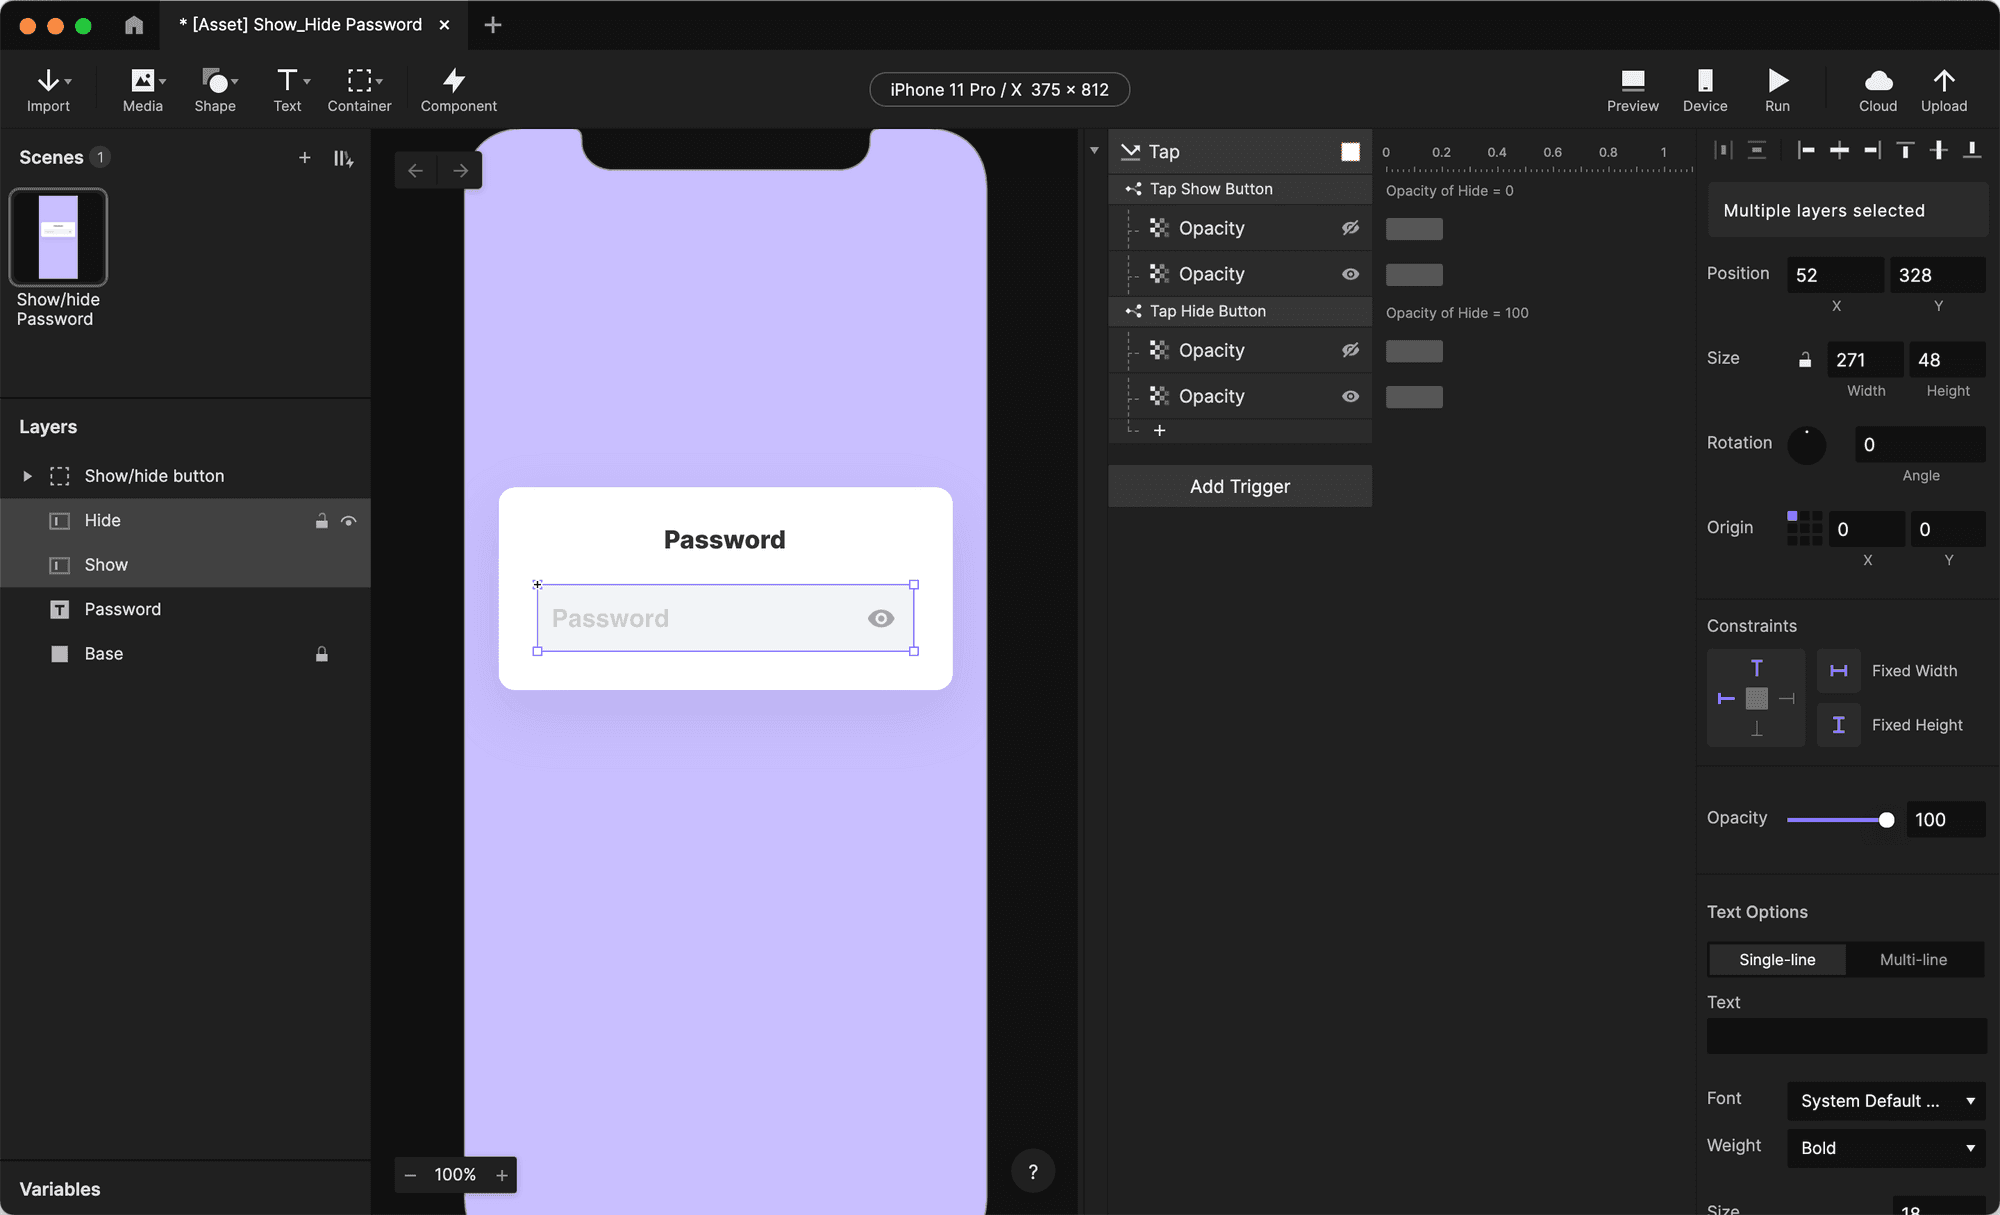
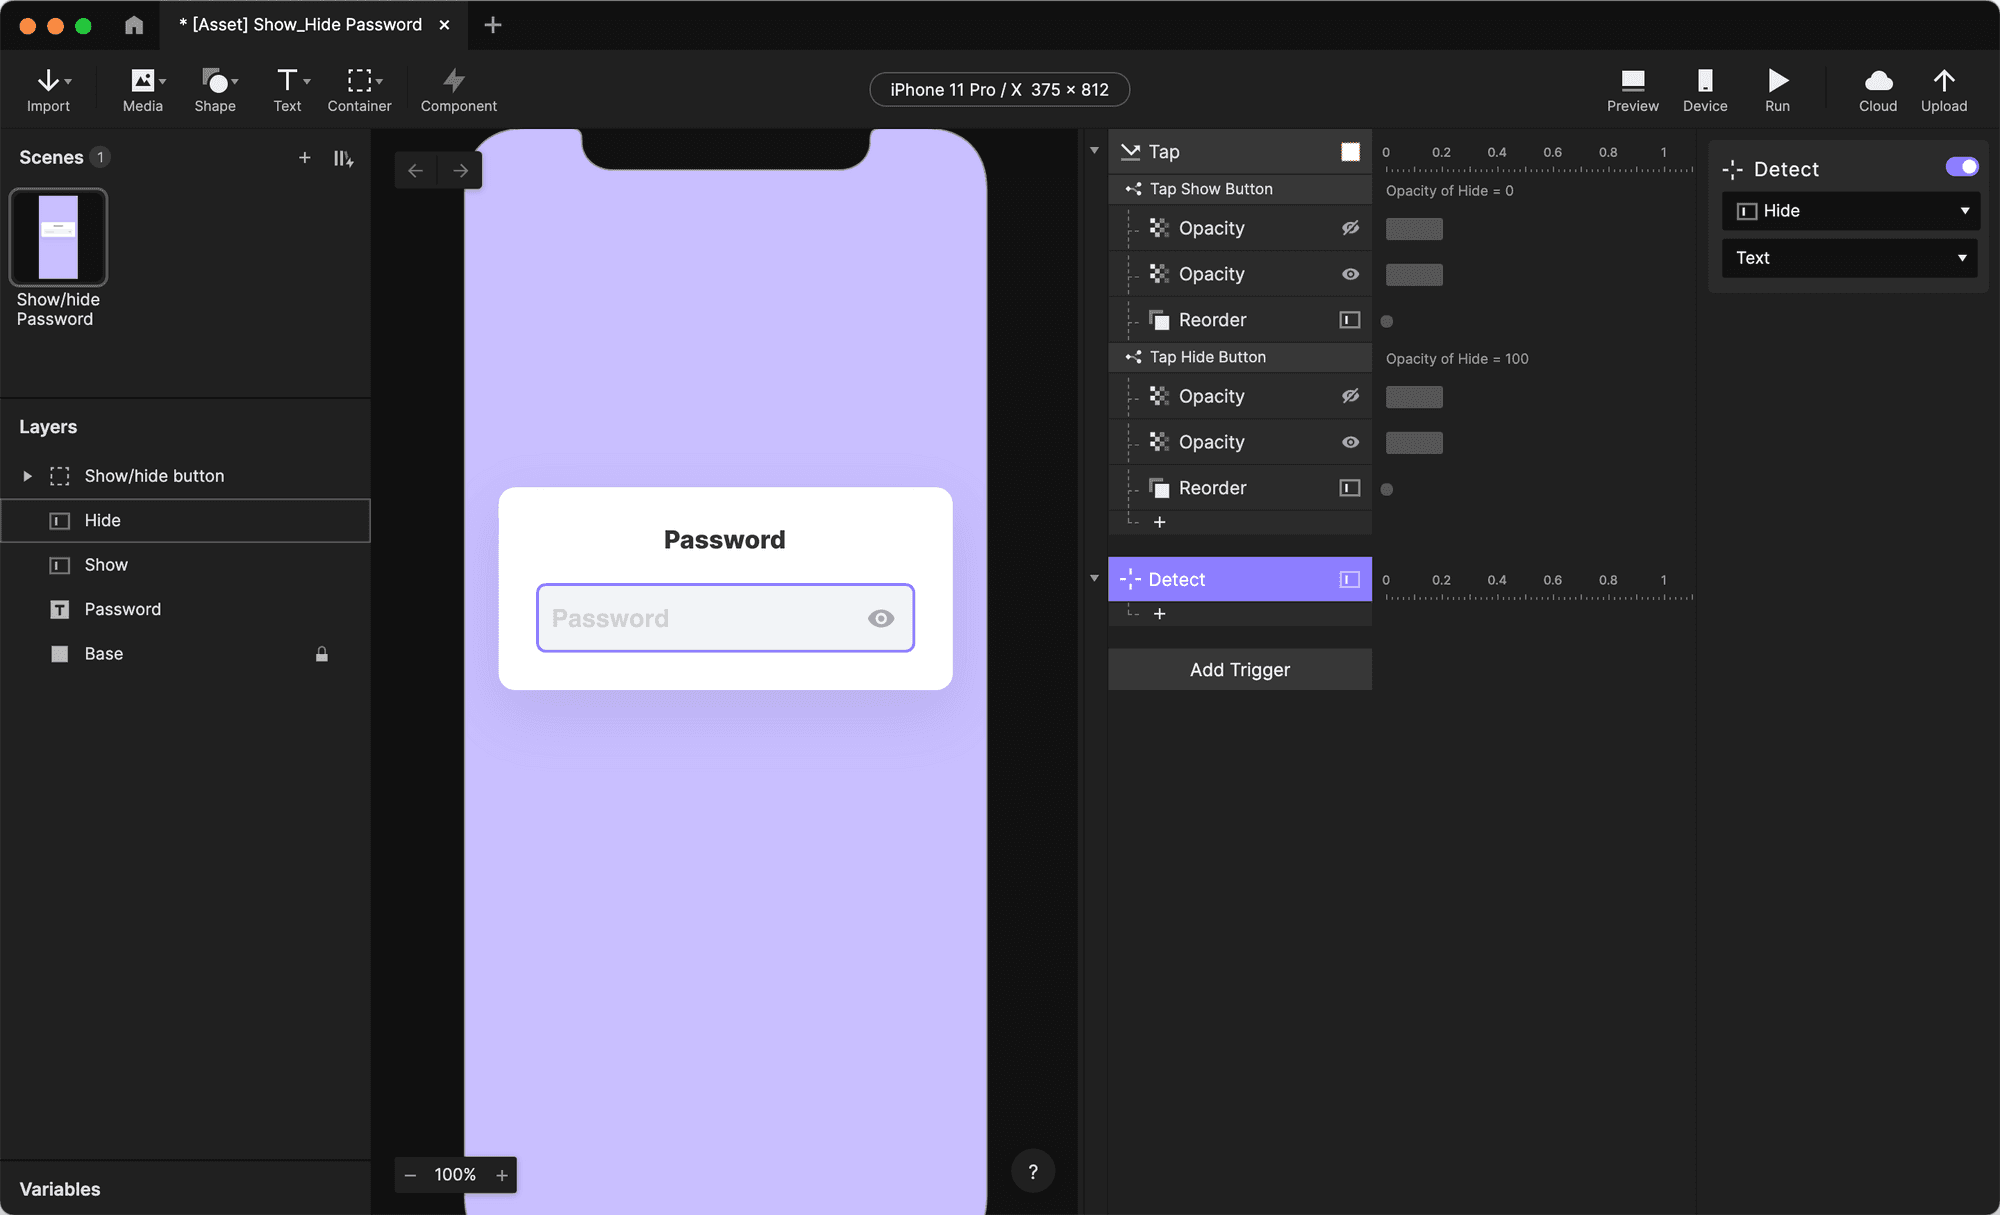
1. Select the Hide input layer. Press the Add Trigger button, and add a Detect trigger. Change the Detect value to Text. The Detect trigger checks for any changes on the specified layer, based on the selected value.
In our case, we've selected Text, so this trigger will be activated every time there is a change to the input text.
2. In this Detect trigger, add a Text response. Make sure this Text response is set to the Show layer.
3. Change the Content to Formula. Use the following formula: ``Hide.text. This formula is telling the Text response to mirror the text being entered in the Hide layer.
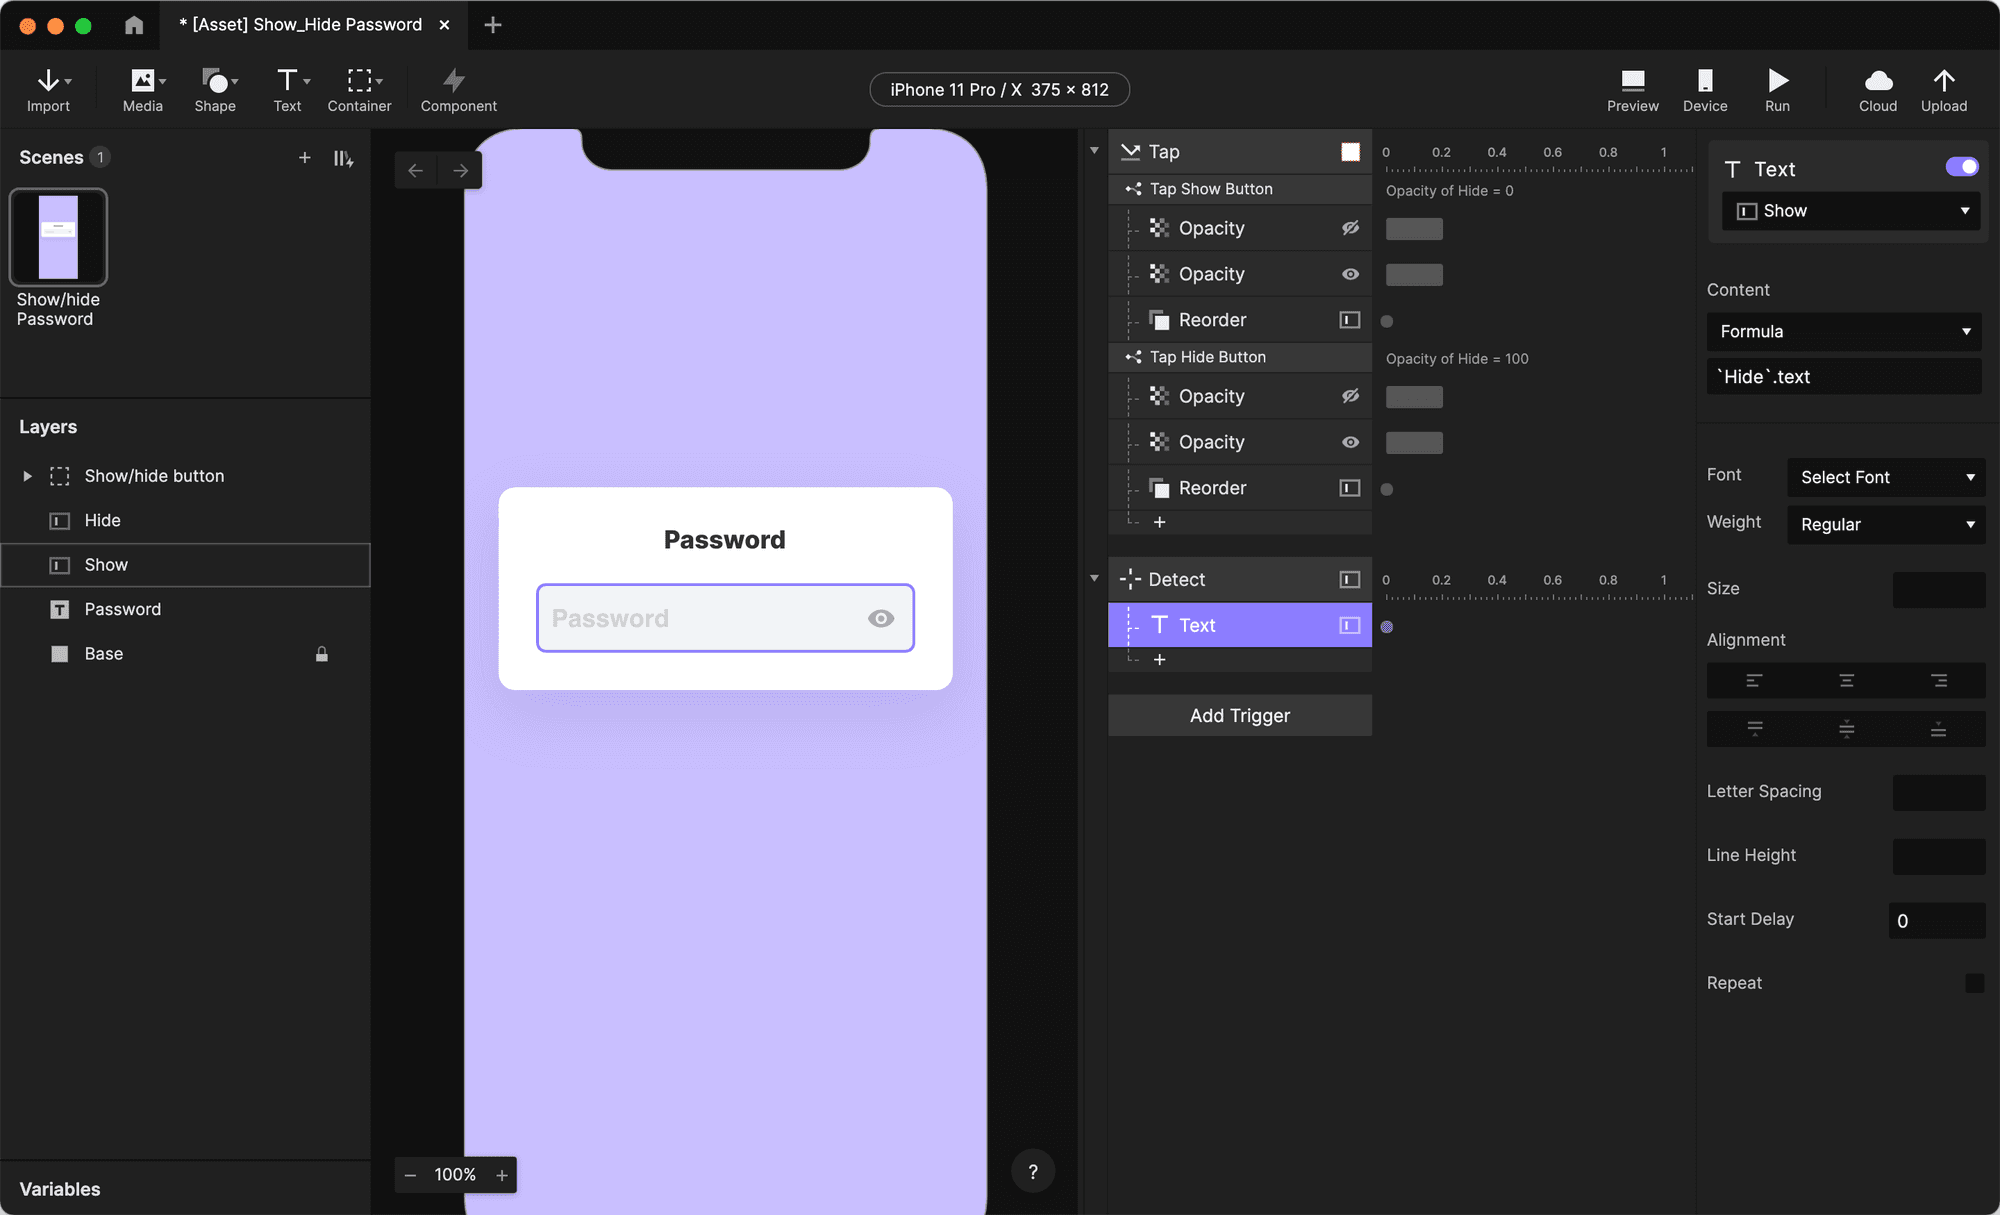
Now, every time text is entered in the Hide layer, the same text will automatically be copied into the Show layer. However, this should work vice versa. So…
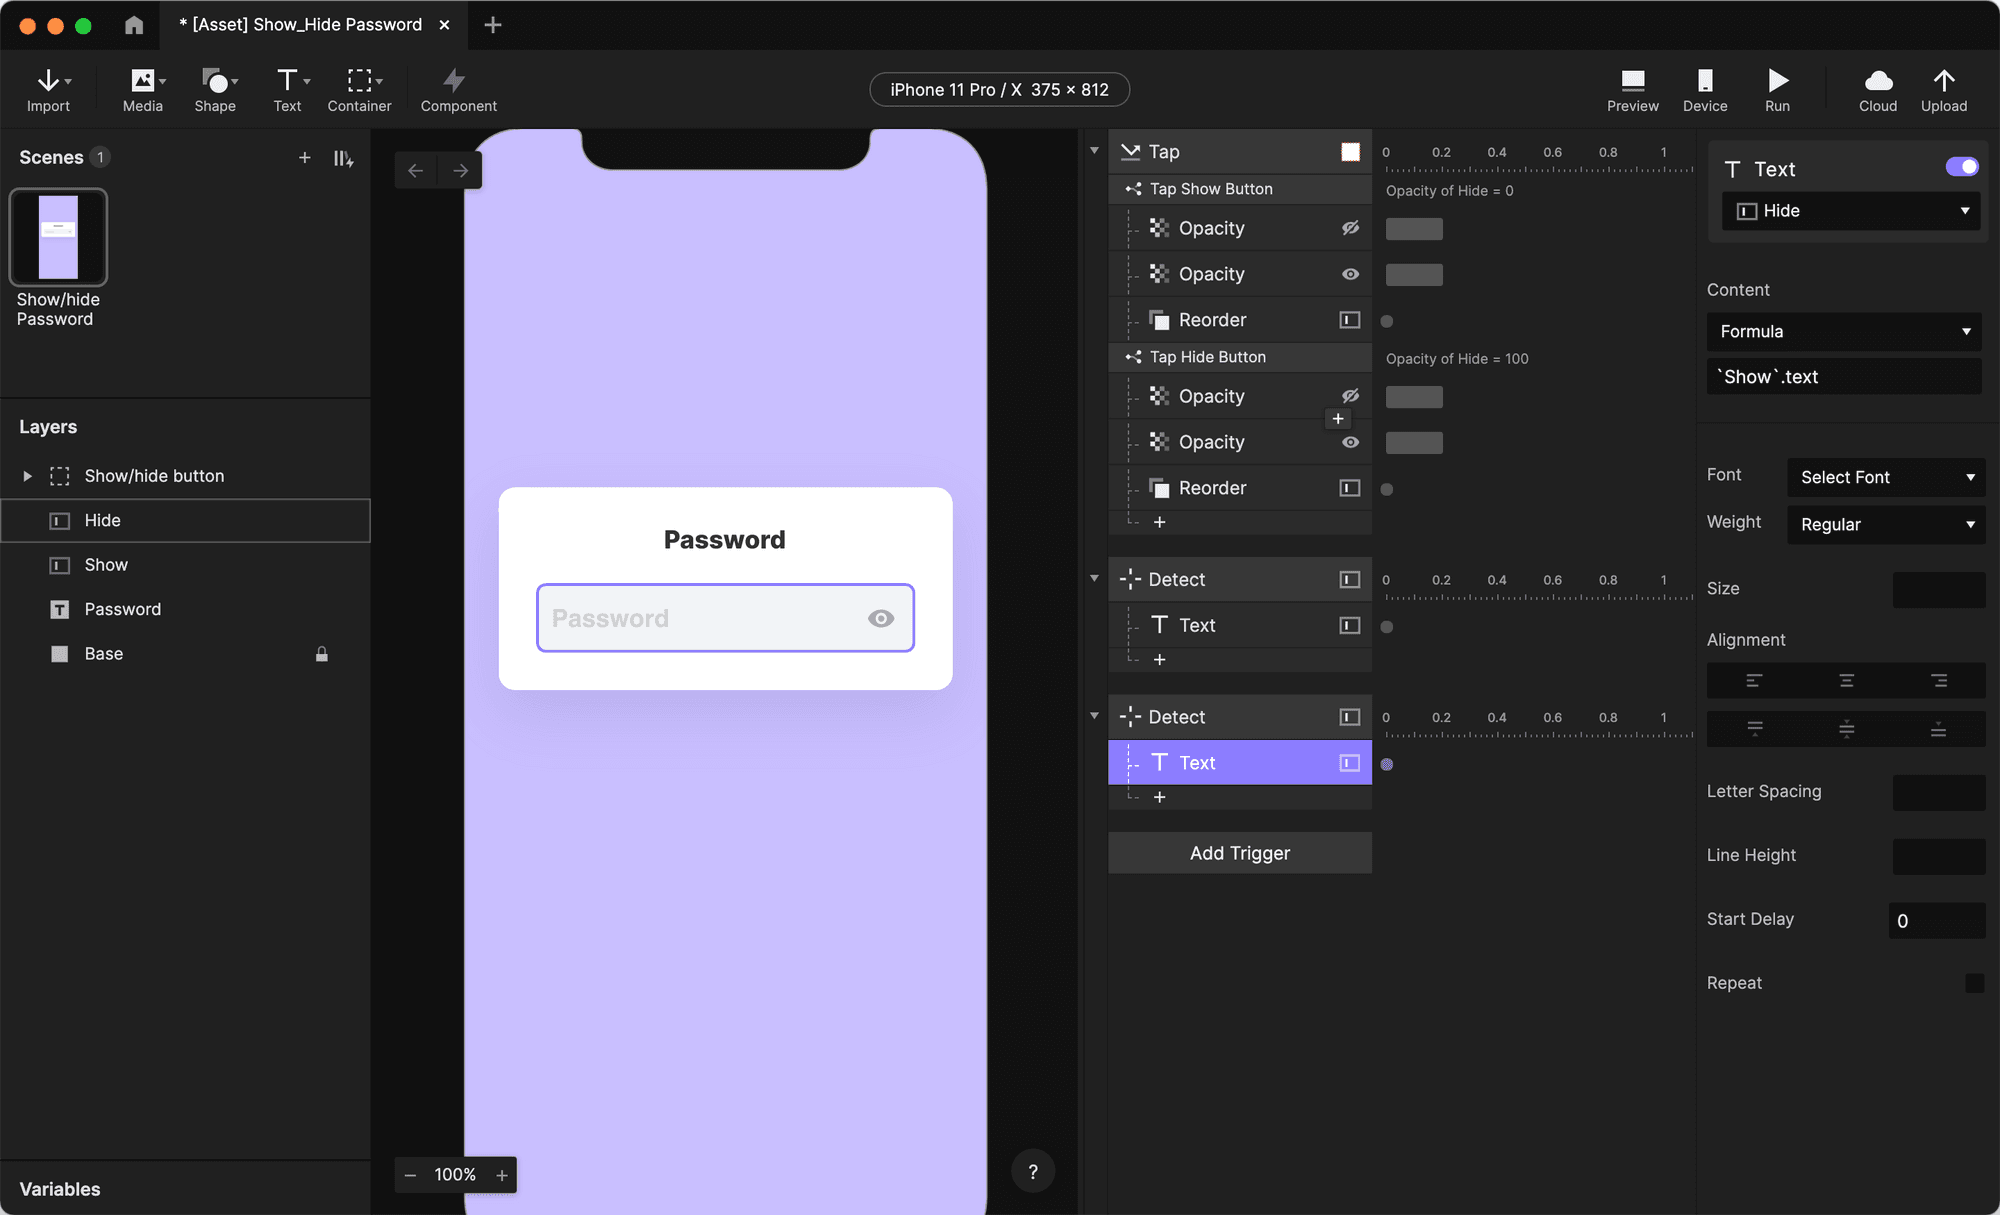
4. Let's repeat the same for the Show layer. Start by selecting the Show layer, and add a Detect trigger. Change the Detect value to Text.
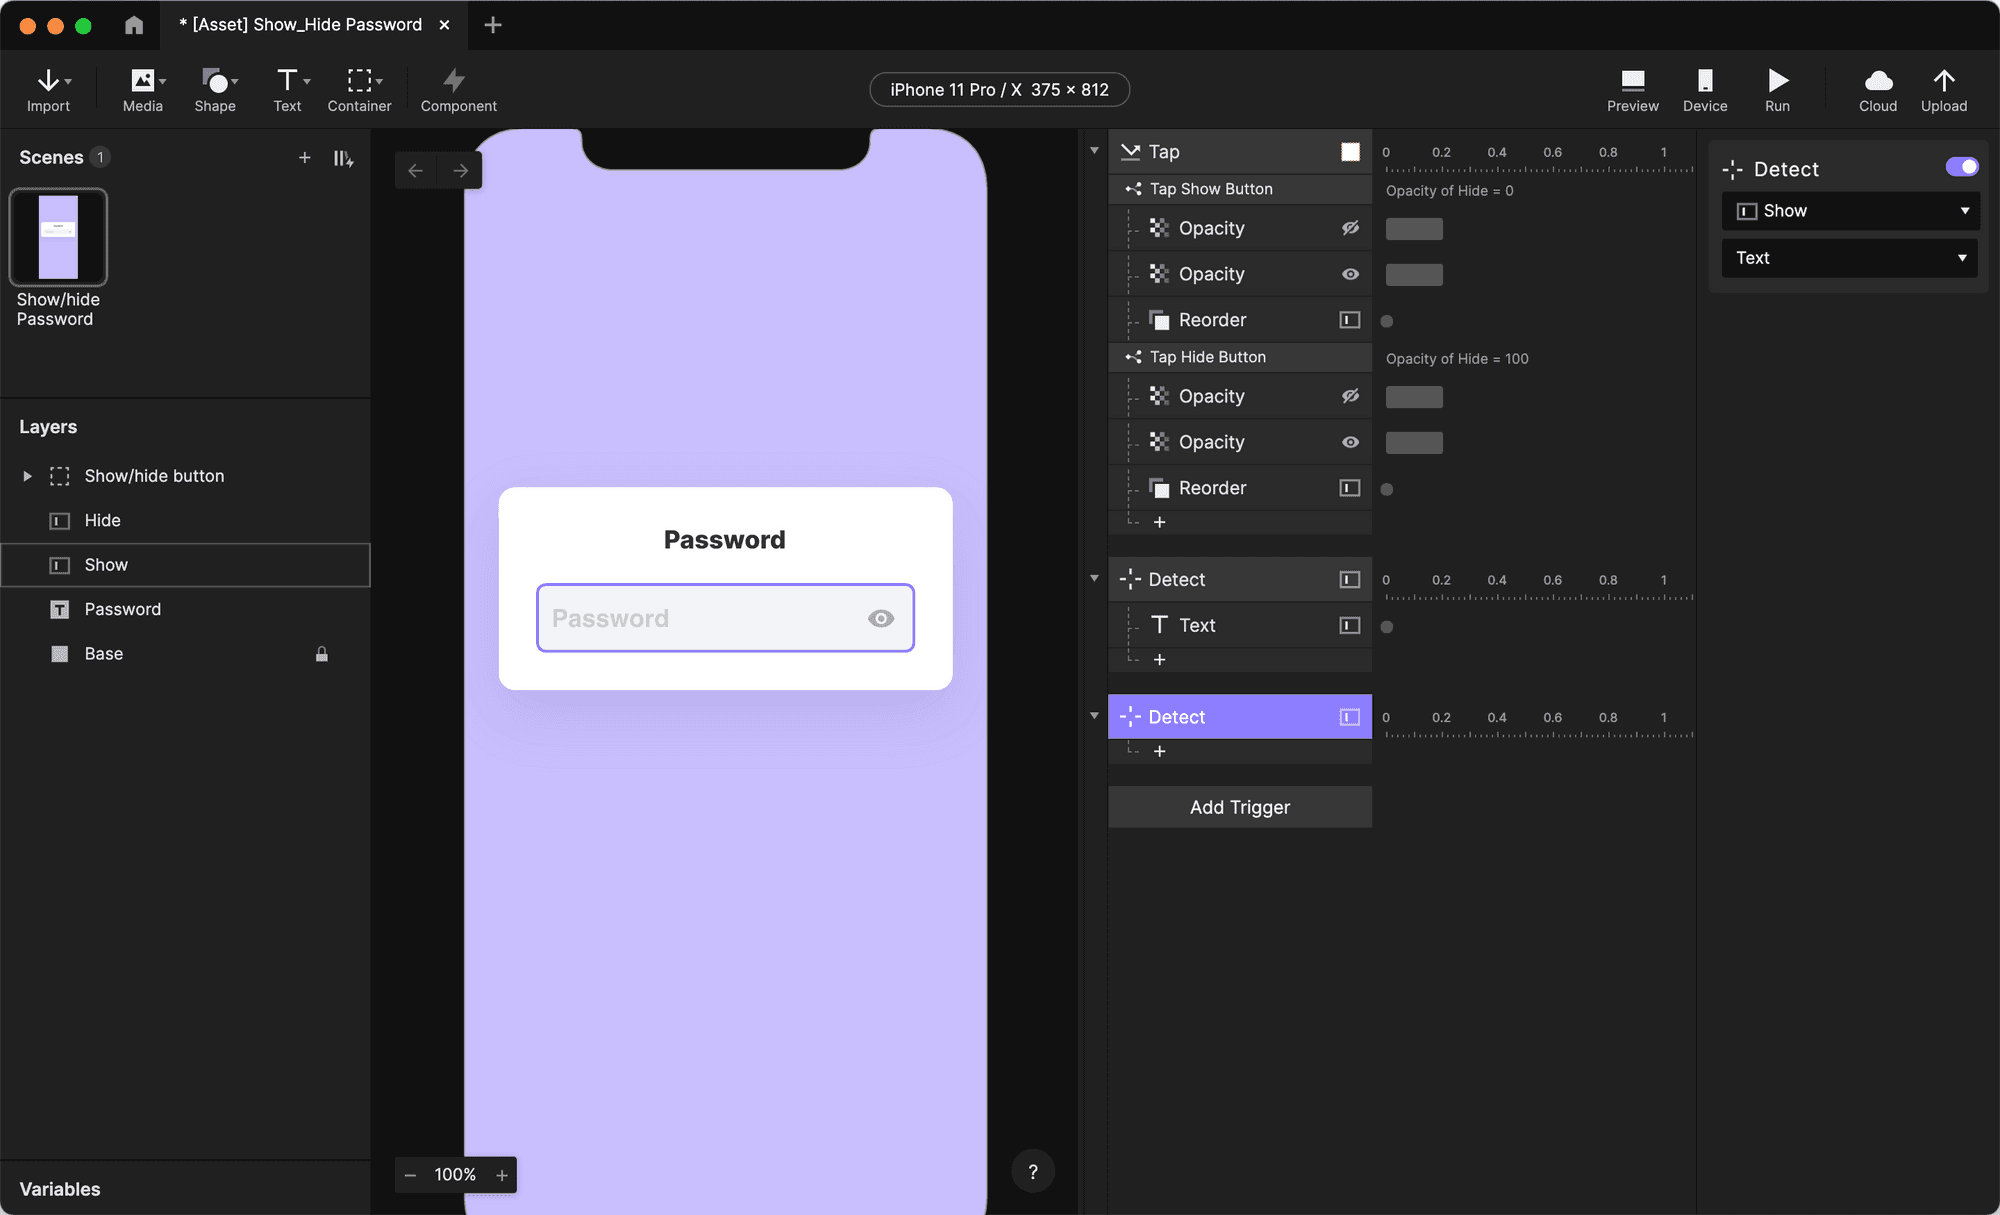
5. Add a Text response to this Detect trigger, and make sure it is set to the Hide layer.
6. Change its Content to Formula, once again. This time, use the formula ``Show.text. Now, this formula is telling the Text response to mirror the text being entered in the Show layer.
Now, every time text is entered in either of the Hide or Show layers, the text will be copied to the Show and Hide layers respectively.
That's it! You can now show and hide the password
That was great! You've learned how to create a masked Password Text field, and mirror its text to another layer by using the Detect trigger, the Text response, and a super easy, in-built formula. You've also learned how to toggle between the visibility of two layers by using the Reorder response.
Level up as a designer with ProtoPie
ProtoPie empowers designers to create interactive and lifelike prototypes which enable clear communication with stakeholders and streamlined testing, all without the need for development.
Let us teach you how you can take your designs to the next level!


