

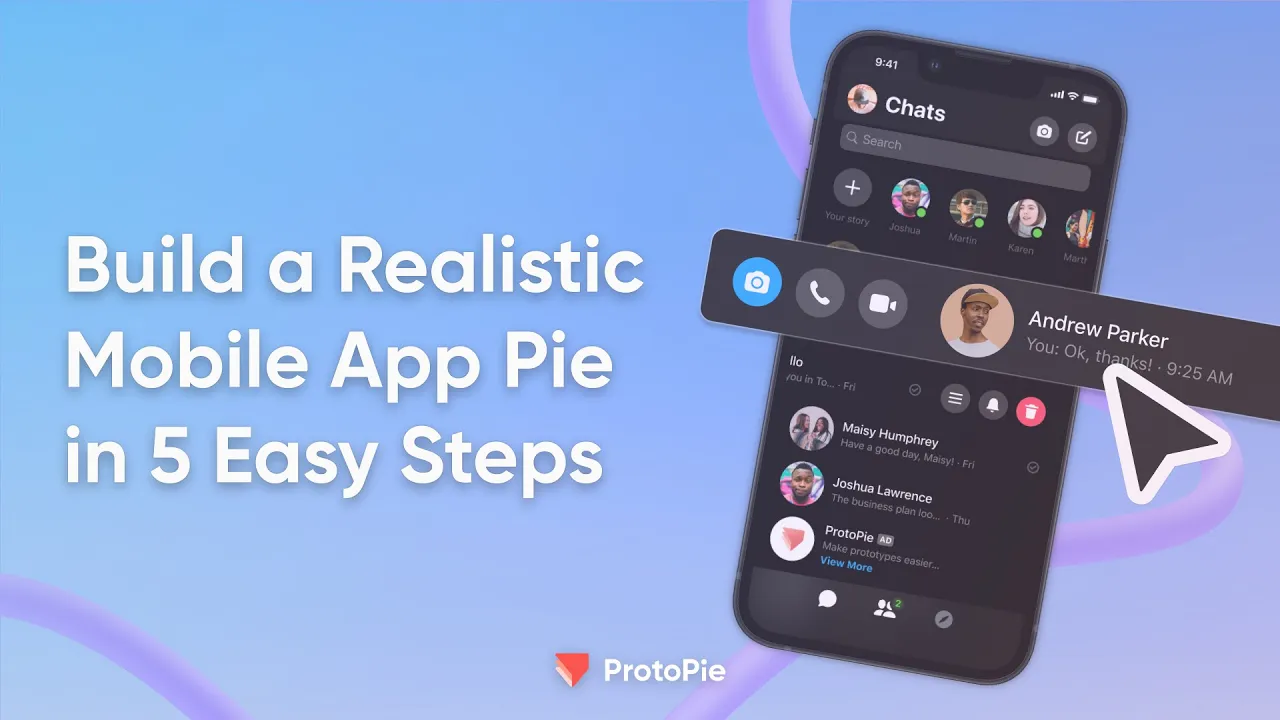
Summary
What you'll learn: Create a high-fidelity mobile app prototype using ProtoPie, from Figma import to developer handoff
Who it's for: UI/UX designers, product designers, and teams building interactive mobile apps
Tools used: Figma, ProtoPie Studio
Skills covered: Mobile app prototyping, UI prototyping, Mobile App design, gesture-based interactions, responsive UI design, multi-scene navigation
What you'll build: A social media–style mobile app with swipe gestures, stories, calls, sounds, and a responsive chat interface
Format: 5-step written guide + short YouTube video series
No code required: Yes
Getting Started
In UI/UX design, bringing static mockups to life with interactive prototypes is no longer a luxury, it's essential. ProtoPie is a powerful yet user-friendly tool that lets designers create hi-fi prototypes without writing a single line of code.
If you want to build a social media-style app prototype with dynamic interactions, responsive elements, and sound, you're in the right place.
This guide breaks down how to create a mobile app mockup into five simple steps. Watch our YouTube video series, or read on for a quick overview.
Begin by downloading the Figma assets here and Pie file here.
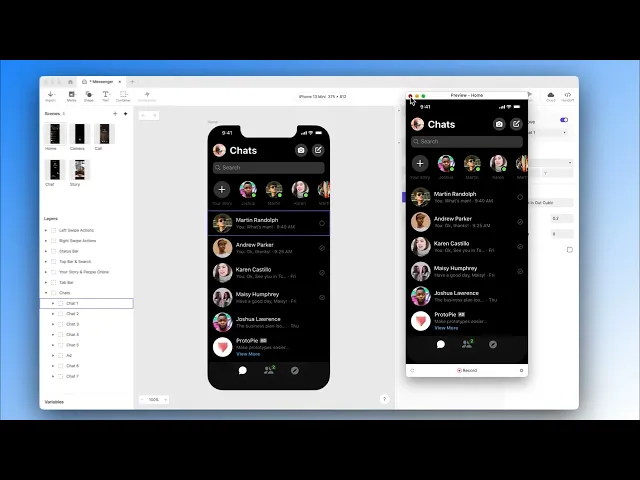
Step 1: How To Import Figma UI Components Into ProtoPie
A great Pie starts with a strong foundation. Begin by importing your UI components from Figma directly into ProtoPie Studio.
Using the dedicated Figma to ProtoPie plugin, you can transfer your artboards and layers, ensuring all design elements are ready for interaction.
Once imported, open ProtoPie Studio to build dynamic experiences. Here, we will create a chat list where users can swipe to reveal hidden buttons with a satisfying snap effect.
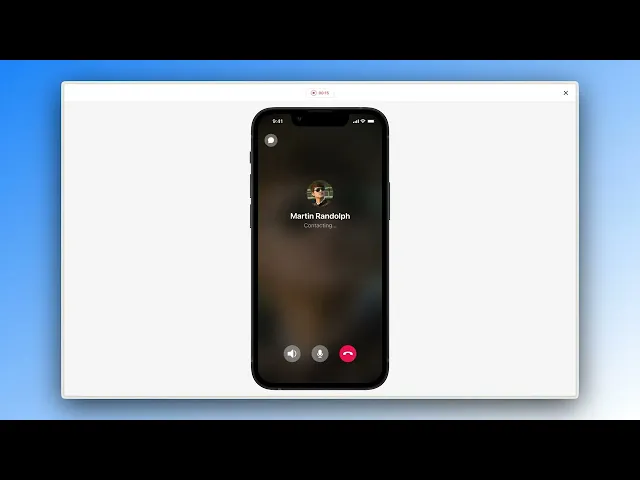
We will also build a call interface where they can "make" and "hang up" calls.
Step 2: How To Create Drag, Move, and Chain Reactions in UI Prototyping
With your components in place, it is time to bring them to life with gestures.
This step builds a "swipe-to-reveal" chat interaction, a staple in Mobile app prototyping and mobile apps.
Using Drag and Move triggers, we are able to define precise horizontal movement with custom limits.
The magic happens with Conditions. Combining a Touch Up trigger with Conditions , you can make your chat item "snap" into place, either revealing hidden icons or resetting based on swipe distance.
Use Chain triggers with Opacity responses to make hidden icons fade in or out as the chat slides, creating a smooth, professional feel.
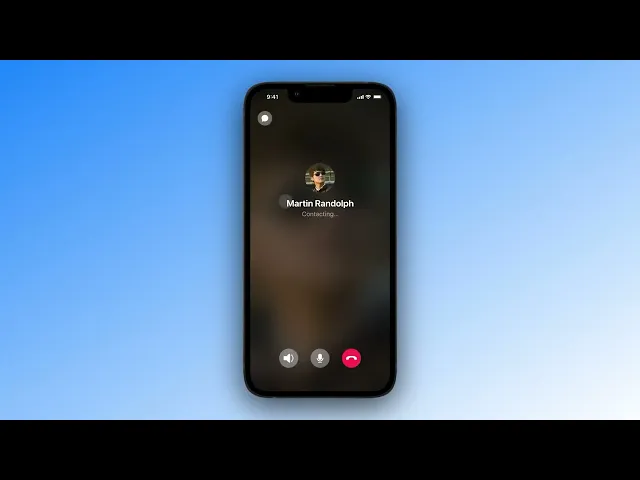
Step 3: How To Build Multi-Scene Interactions Like Stories, Calls, and Sounds
When it comes to high fidelity app prototyping, seamless navigation between screens is essential.
Let’s see how to add multi-scene logic for features like social media stories and interactive calls.
Using Tap triggers with Jump responses, we can navigate between different "scenes" in your Pie, like jumping from a user icon to their story.
Now, add an animated loading bar for stories using Start and Scale triggers. Make closing scenes intuitive with the Fling trigger, letting users swipe down to return home.
Apply these same principles to create a fully functional call interaction, adding Playback responses for realistic dialing and hang-up sounds.
This transforms your prototype from separate screens into a connected, immersive experience.
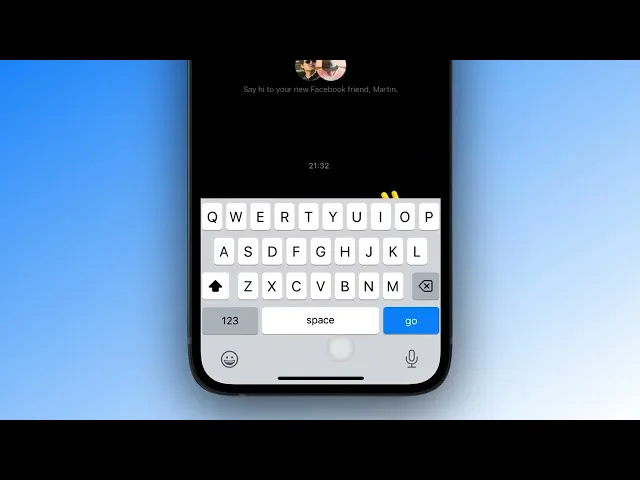
Step 4: How To Design a Responsive Mobile UI That Adapts to the Keyboard
One of the biggest challenges in mobile prototyping is handling the device keyboard gracefully.
This step ensures your UI responds intelligently when users start typing, eliminating any UI bugs.
Focus trigger detects when an input field is activated or deactivated, automatically bringing up the keyboard.
By using Opacity and Scale responses, you can make icons appear or disappear and expand or shrink the message input container.
The game-changer is ProtoPie's predefined keyboardHeight variable.
Combining a Move response with this variable, we are able to automatically adjust your chat content container upward by the keyboard's exact height, preventing it from being hidden.
This makes your chat interface not just interactive, but truly responsive and user-friendly.
Step 5: How To Share, Test, and Handoff a Mobile App Prototype to Stakeholders
Finally, your Pie is baked! High fidelity app prototyping has never been so easy!
Now it’s time to share it with the world. This final step covers collaboration, testing, and developer handoff.
Click the Cloud button to upload your ProtoPie project to your personal or team space. This generates a unique link, letting you instantly share your interactive prototype for review and feedback.
ProtoPie's Handoff feature gives developers all the interaction details, timings, triggers, responses, and values, bridging the gap between design and development.
Every detail you've crafted will be understood and faithfully implemented.
When it comes to Mobile app prototyping, sharing with stakeholders or clients is essential, and the Cloud space might be able to-do it, but the Handoff feature puts you one step ahead.
By mastering these five steps, you're not just creating prototypes, you're crafting immersive, realistic experiences that streamline your design workflow and empower effective communication across your team.
Next Steps
Ready to get started?
Get the Figma and Pie files/assets at the beginning of this blog, and follow the steps below:
If you already have a ProtoPie account, go straight to Step 2.


