
Introduction
A ripple effect is a design technique that enhances the aesthetic appeal of UI by giving buttons a pressing button effect. The animation applied to this effect changes according to which button is clicked. This effect is widely used in Google’s material design language and implemented on many websites. Although it might sound challenging, you can easily achieve this effect in ProtoPie using predefined variables like $touchX & $touchY and applying formulas like toLayerX & toLayerY. So let’s get started.
What you’ll learn in this lesson
Understanding the predefined variables:
$touchXand$touchYUnderstanding the formulas:
toLayerXandtoLayerYMaking the ripple effect
Converting the button to a component for future use
[Starting Pie File] [Completed Pie File]
Before you start
Before moving on to the tutorial, let’s understand the predefined variables “$touchX/$touchY” and the formulas “toLayerX/toLayerY”.
“$touchX” reflects the x-coordinate of where a touch is registered. Similarly, “$touchY” reflects the y-coordinate of where a touch is registered.
In our lesson, we use “$touchX/$touchY” to trigger the ripple effect where the button is clicked on the x & y coordinates.
“toLayerX” returns the x-coordinate relative to a container or component. Similarly, “toLayerY” returns the y-coordinate relative to a container or component.
Layers within a container or component restrict the coordinates relative to the container or component they are in.
toLayerX(containerName:LAYER,x:NUMBER,y:NUMBER)→ NUMBERtoLayerY(containerName:LAYER,x:NUMBER,y:NUMBER)→ NUMBER
Play around with these examples yourself to understand how it works.
toLayerX(Container 1, 100, 200)→ x-coordinate relative to Container 1 based on the x-coordinate of 100 that is relative to the screentoLayerY("Container 1", 100, 200)→ y-coordinate relative to Container 1 based on the y-coordinate of 200 that is relative to the screen
Understanding that the element position in ProtoPie is relative to its parent container. If there is no parent container, then the position will be relative to the scene. “$touchX/$touchY” only returns the position relative to the scene, while in this case, we assume that your button is grouped together in a container. This is where the formula “toLayerX/toLayerY” will play its role.
Step-by-step Instructions
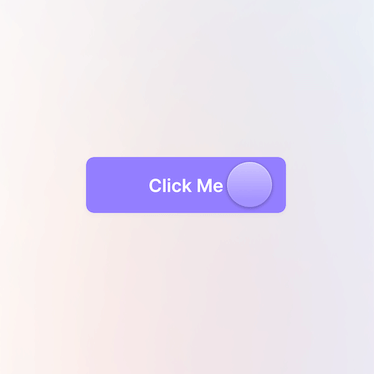
1. Make the ripple effect
Inside the Button container, do the following:
a. Create an oval with 0 in width and height.
b. Make this oval white (#FFFFFF) and transparent (Opacity = 0%).
c. Set the origin of the oval to the middle (x=50, y=50).
d. Name it “Ripple”.
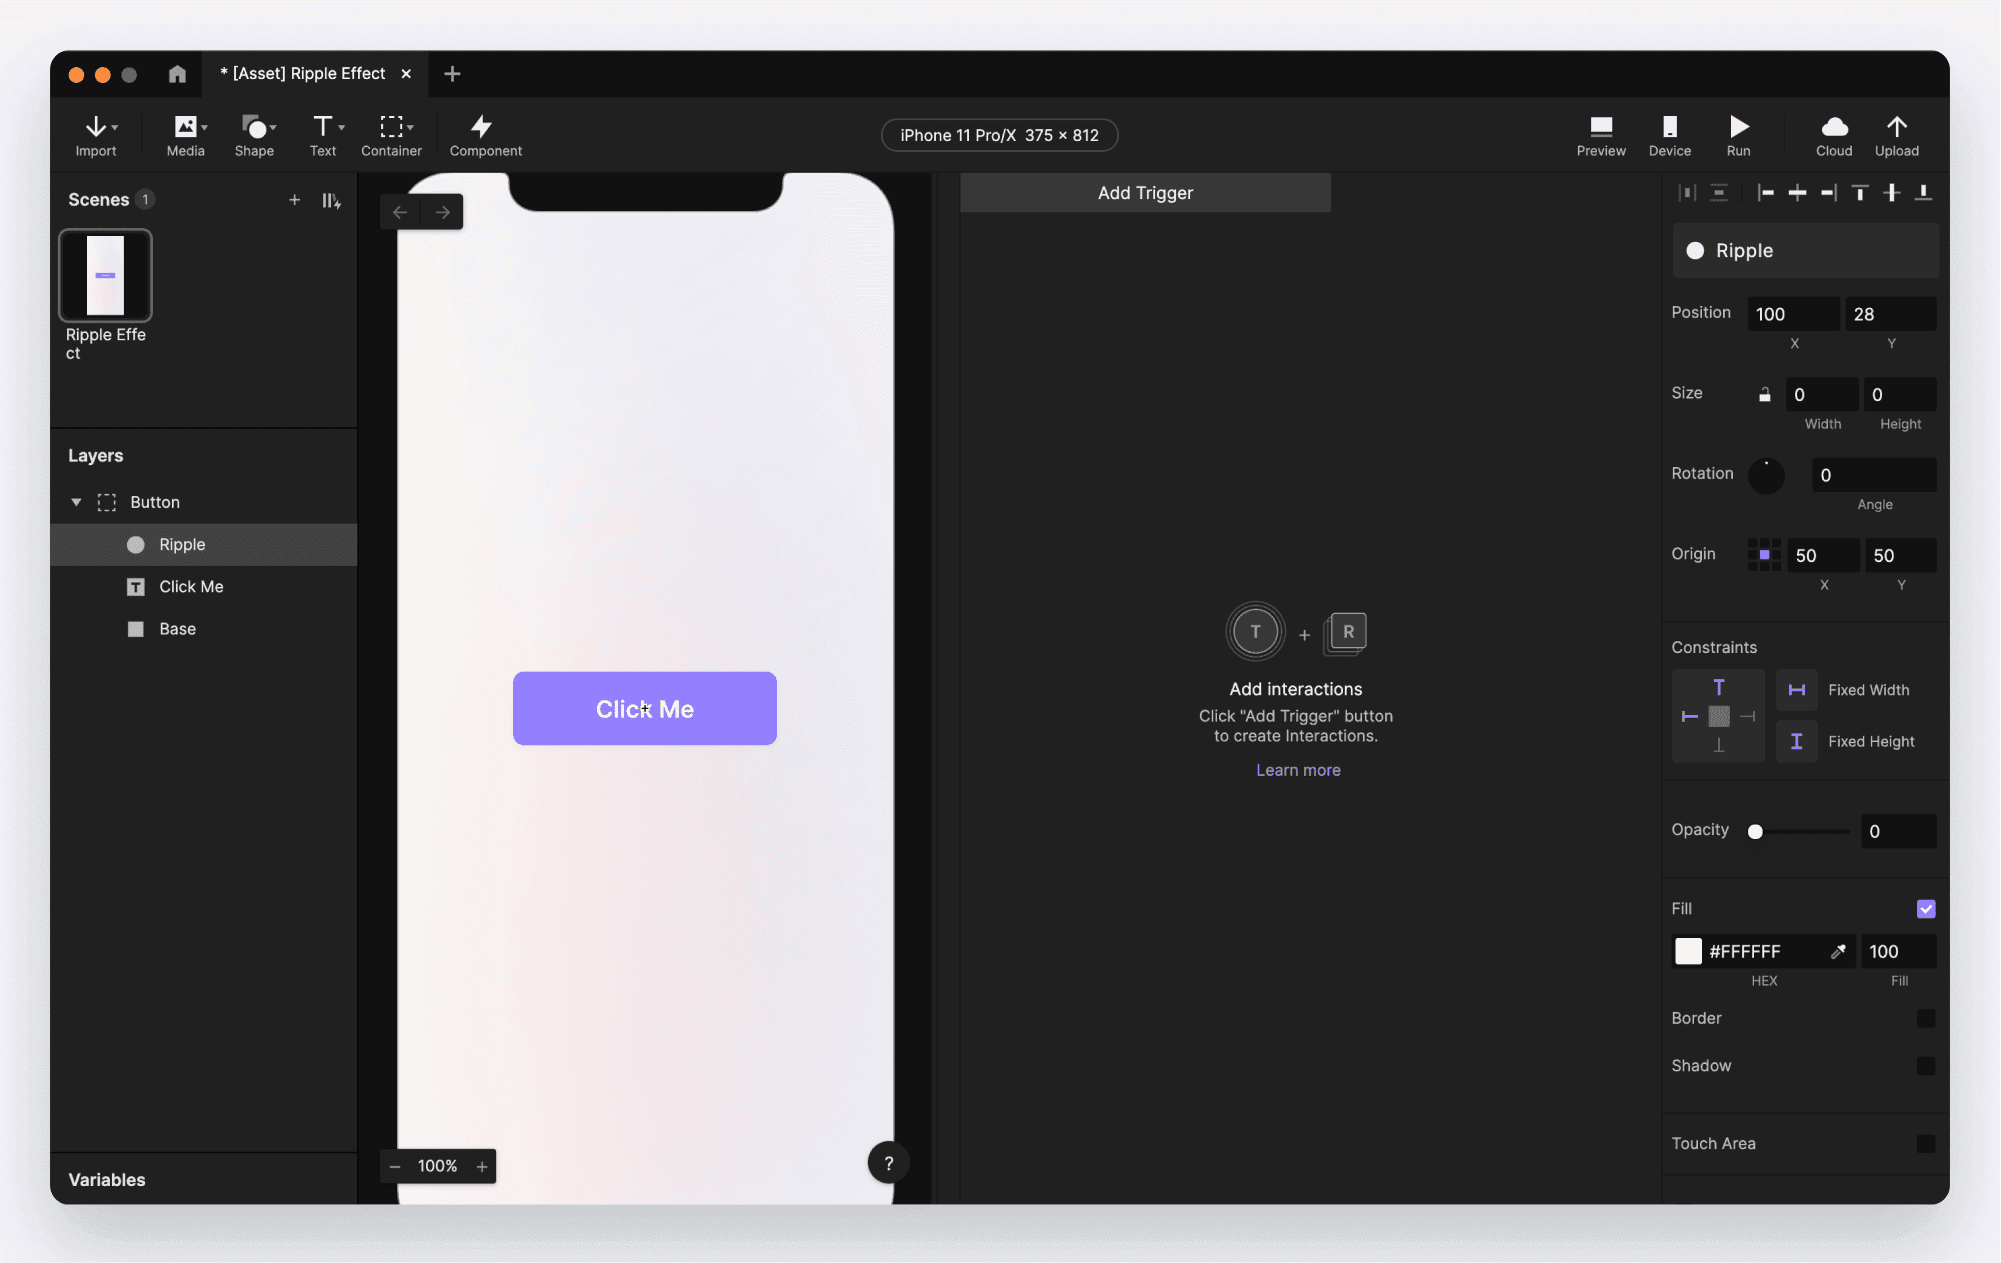
Add a Tap trigger to the Button container. Add the following responses to the Ripple layer so we have a ripple effect.
Scale 1 (Scaling up the oval)
Scale to: 600, 600
Start Delay: 0s
Duration: 0.8s
Scale 2 (Scaling down the oval)
Scale to: 0, 0
Start Delay: 0.8s
Duration: 0s
Opacity 1
Opacity: 40%
Start Delay: 0s
Duration: 0.4s
Opacity 2
Opacity: 0%
Start Delay: 0.4s
Duration: 0.4s
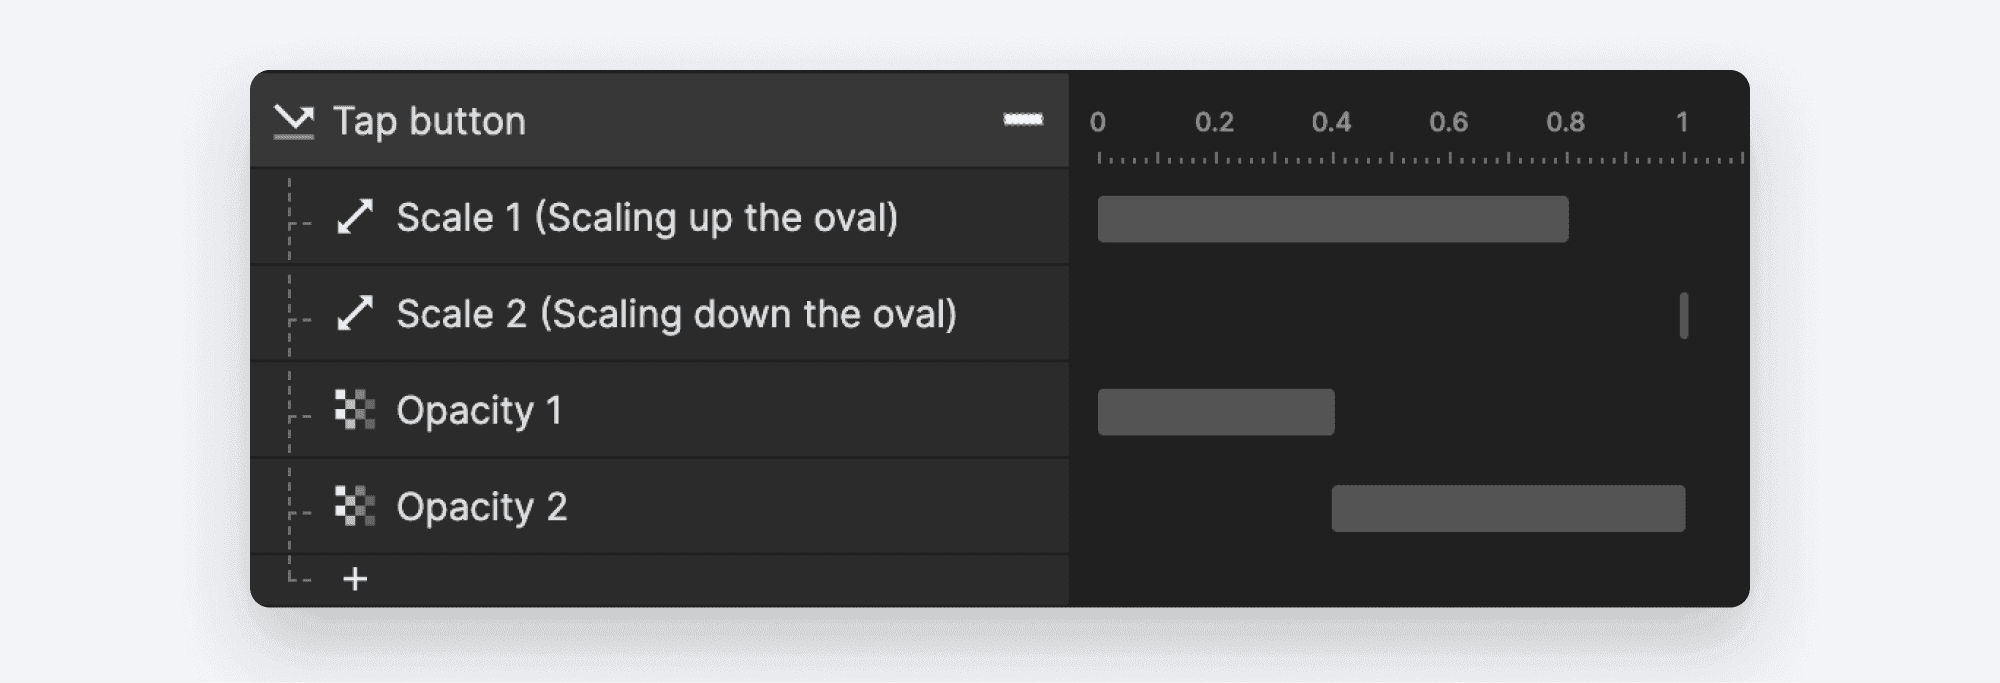
With this step done, the oval will scale like a ripple on tap. Feel free to choose any animation easing you like for the above responses but preferably ease in & out or cubic-bezier for a realistic ripple effect.
💡 Why use Scale and Opacity responses?
A ripple effect is achieved when the oval we created scales up and then becomes transparent. The scaling up & down and opacity delays give it a realistic feel.
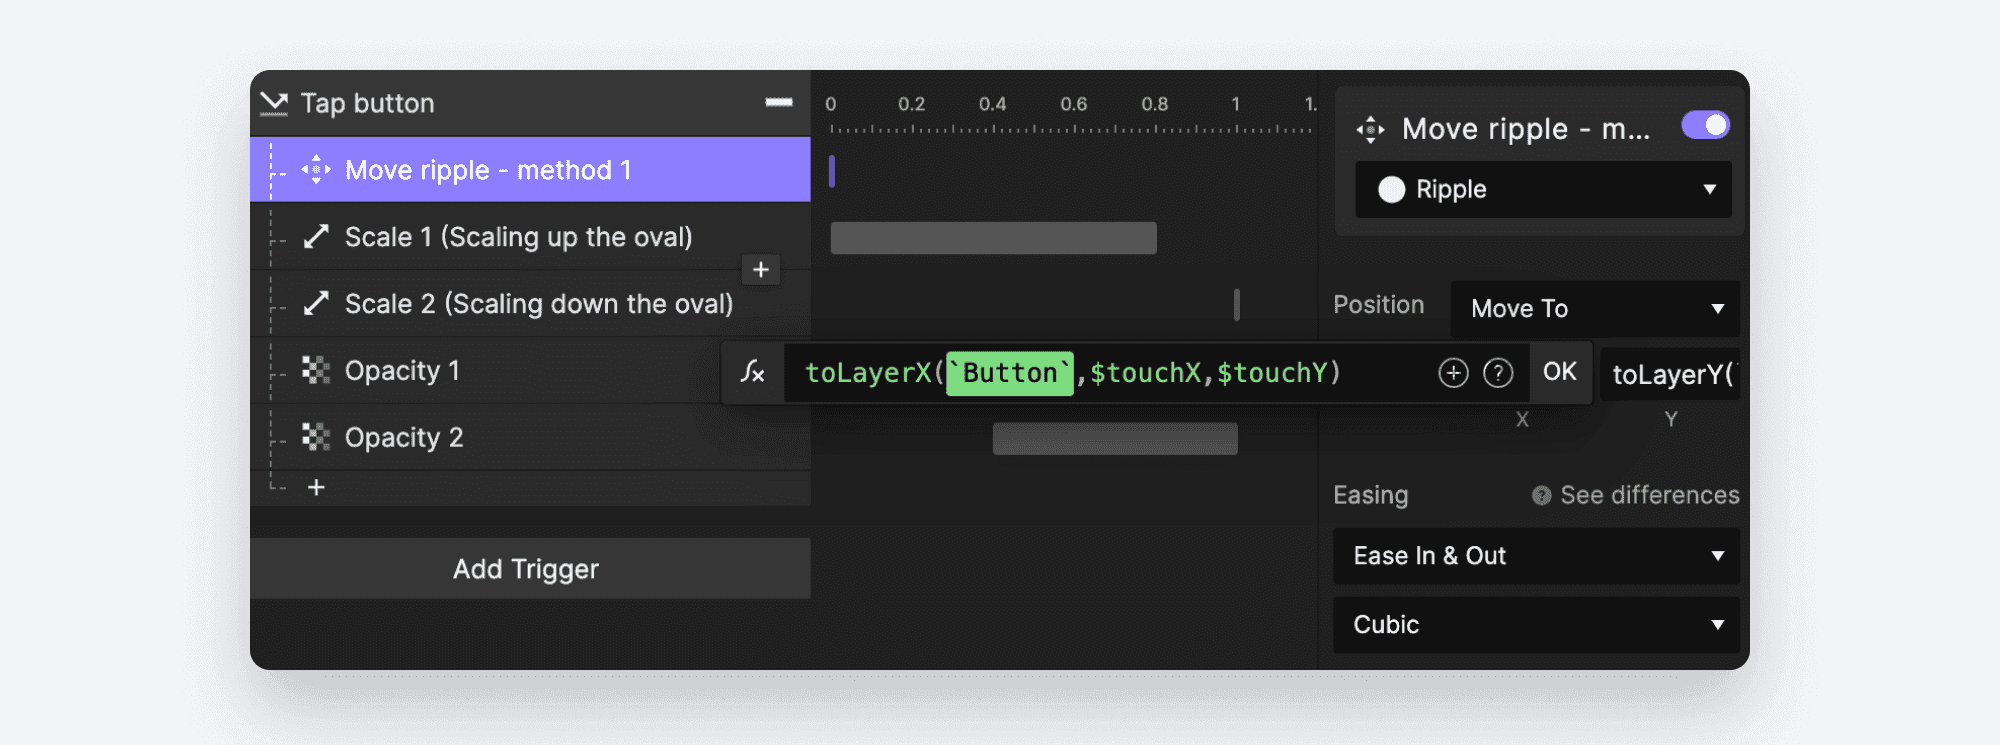
Now let’s move the ripple to where the button is clicked. Add a Move trigger to the Ripple layer. Now there are 2 options for you to choose to fill in the move values.
Option 1: Combine “$touchX/$touchY” and “toLayerX/toLayerY”
Type in X:
toLayerX('Button',$touchX,$touchY)Type in Y:
toLayerY('Button',$touchX,$touchY)
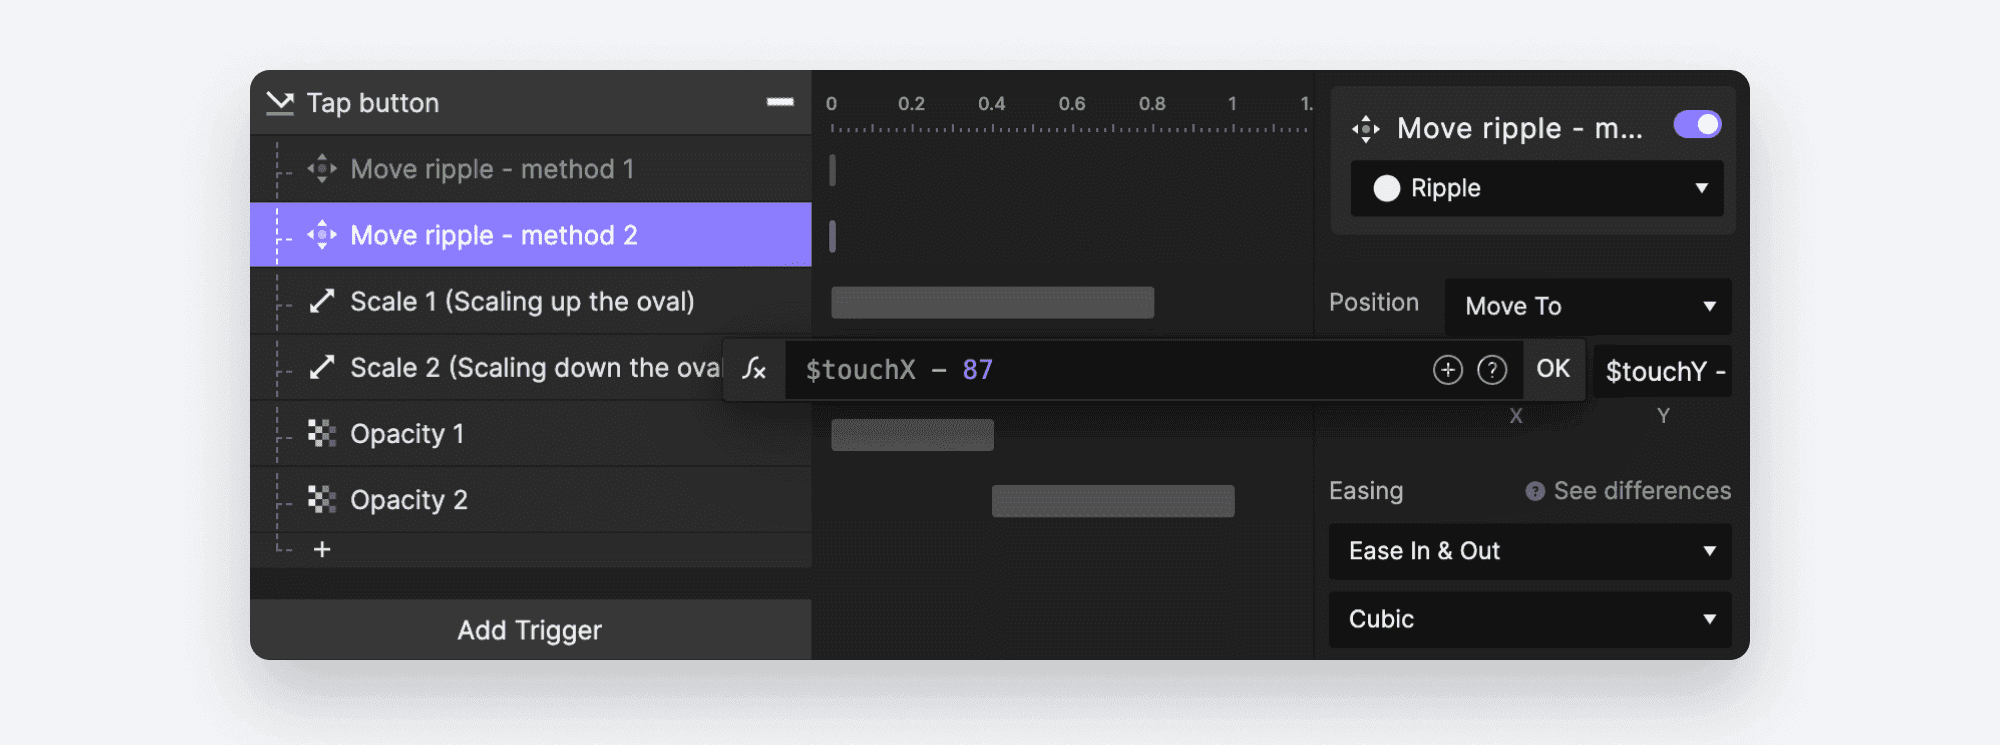
Option 2: Use “$touchX/$touchY” only
Type in X:
$touchX - 87Type in Y:
$touchY - 378
💡 Why use these formulas?
Because we want to move the Ripple layer. The Ripple layer is a child of the Button layer so while moving the Ripple layer we need to use its coordinates under the Button layer. As we know ($touchX,$touchY) work as the scene coordinates. What the formula does, is to convert the scene coordinates position into the Button layer’s local coordinates position, to keep it within the set bounds of the button.
Finally, tick the “Clip Sublayers” checkbox of the “Button” layer.
💡 Why “Clip Sublayers”?
The Ripple layer would be a sublayer of the Button layer. When we tick the Clip Sublayers for the Button layer, any sublayers of the Button layer won’t show beyond the bounds of the button as it acts as a mask.
2. Convert the button to a component for future use
With the Button container selected, click the Component button in the toolbar to convert it as a component.
Now in the main scene, try to move the button component around and see how it works.
If you chose option 2 (Use “$touchX/$touchY” only) in the previous step. You will notice the ripple doesn’t show at the correct place.
This is because
87and378are fixed numbers. With you moving the button around, the button container’s position is no longer the same, thus87and378are no more correct and need to be updated.
Now let’s fix it with dynamic values. Go to the component scene, change the move values of option 2 into the following:
X:
$touchX - 'Button'.xY:
$touchY - 'Button'.y
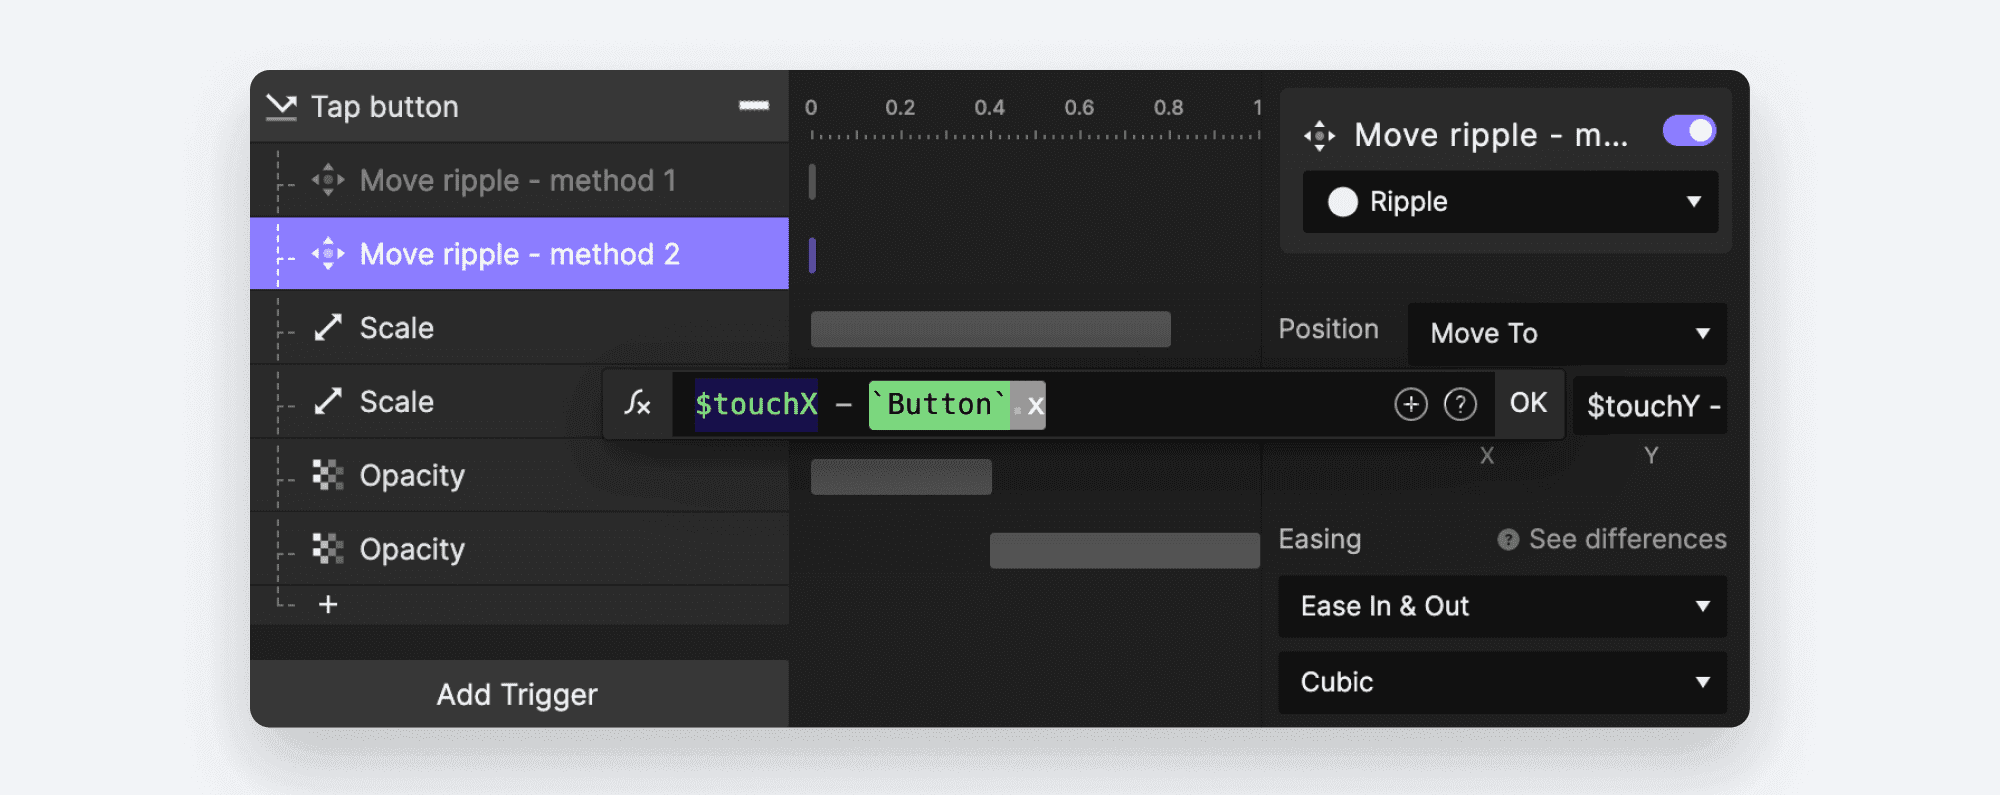
💡 ‘Button’.x and ‘Button’.y is the auto-updating version of 87and 378. That’s why, now wherever the “Button” component is, the Ripple effect will automatically show at the right place.
And you are done!
Congratulations on following through. As you can see, ProtoPie helps you achieve this amazing UI effect without having to write a single line of code. Try out the ripple effect for yourself!


