UX Design is Shifting Towards Realistic Prototyping
Find out how UX design is becoming more streamlined thanks to specialized tools that are changing the way we prototype such as ProtoPie's realistic prototyping.


Why UX design is empowered by realistic prototyping
When taking a deeper dive into UX design, you may come across the notion of realistic prototyping. Realistic prototyping has the power to bring your UX design's interactions to the forefront of your prototype. Provide your end-user with the intended user experience by switching to realistic prototyping.
Through this article, you’re going to see how realistic prototyping can bring your UX designs to life. With the right tools, you can avoid the rabbit hole of testing and iterating over, and over, again.
Bring your UX design to life with realistic prototyping
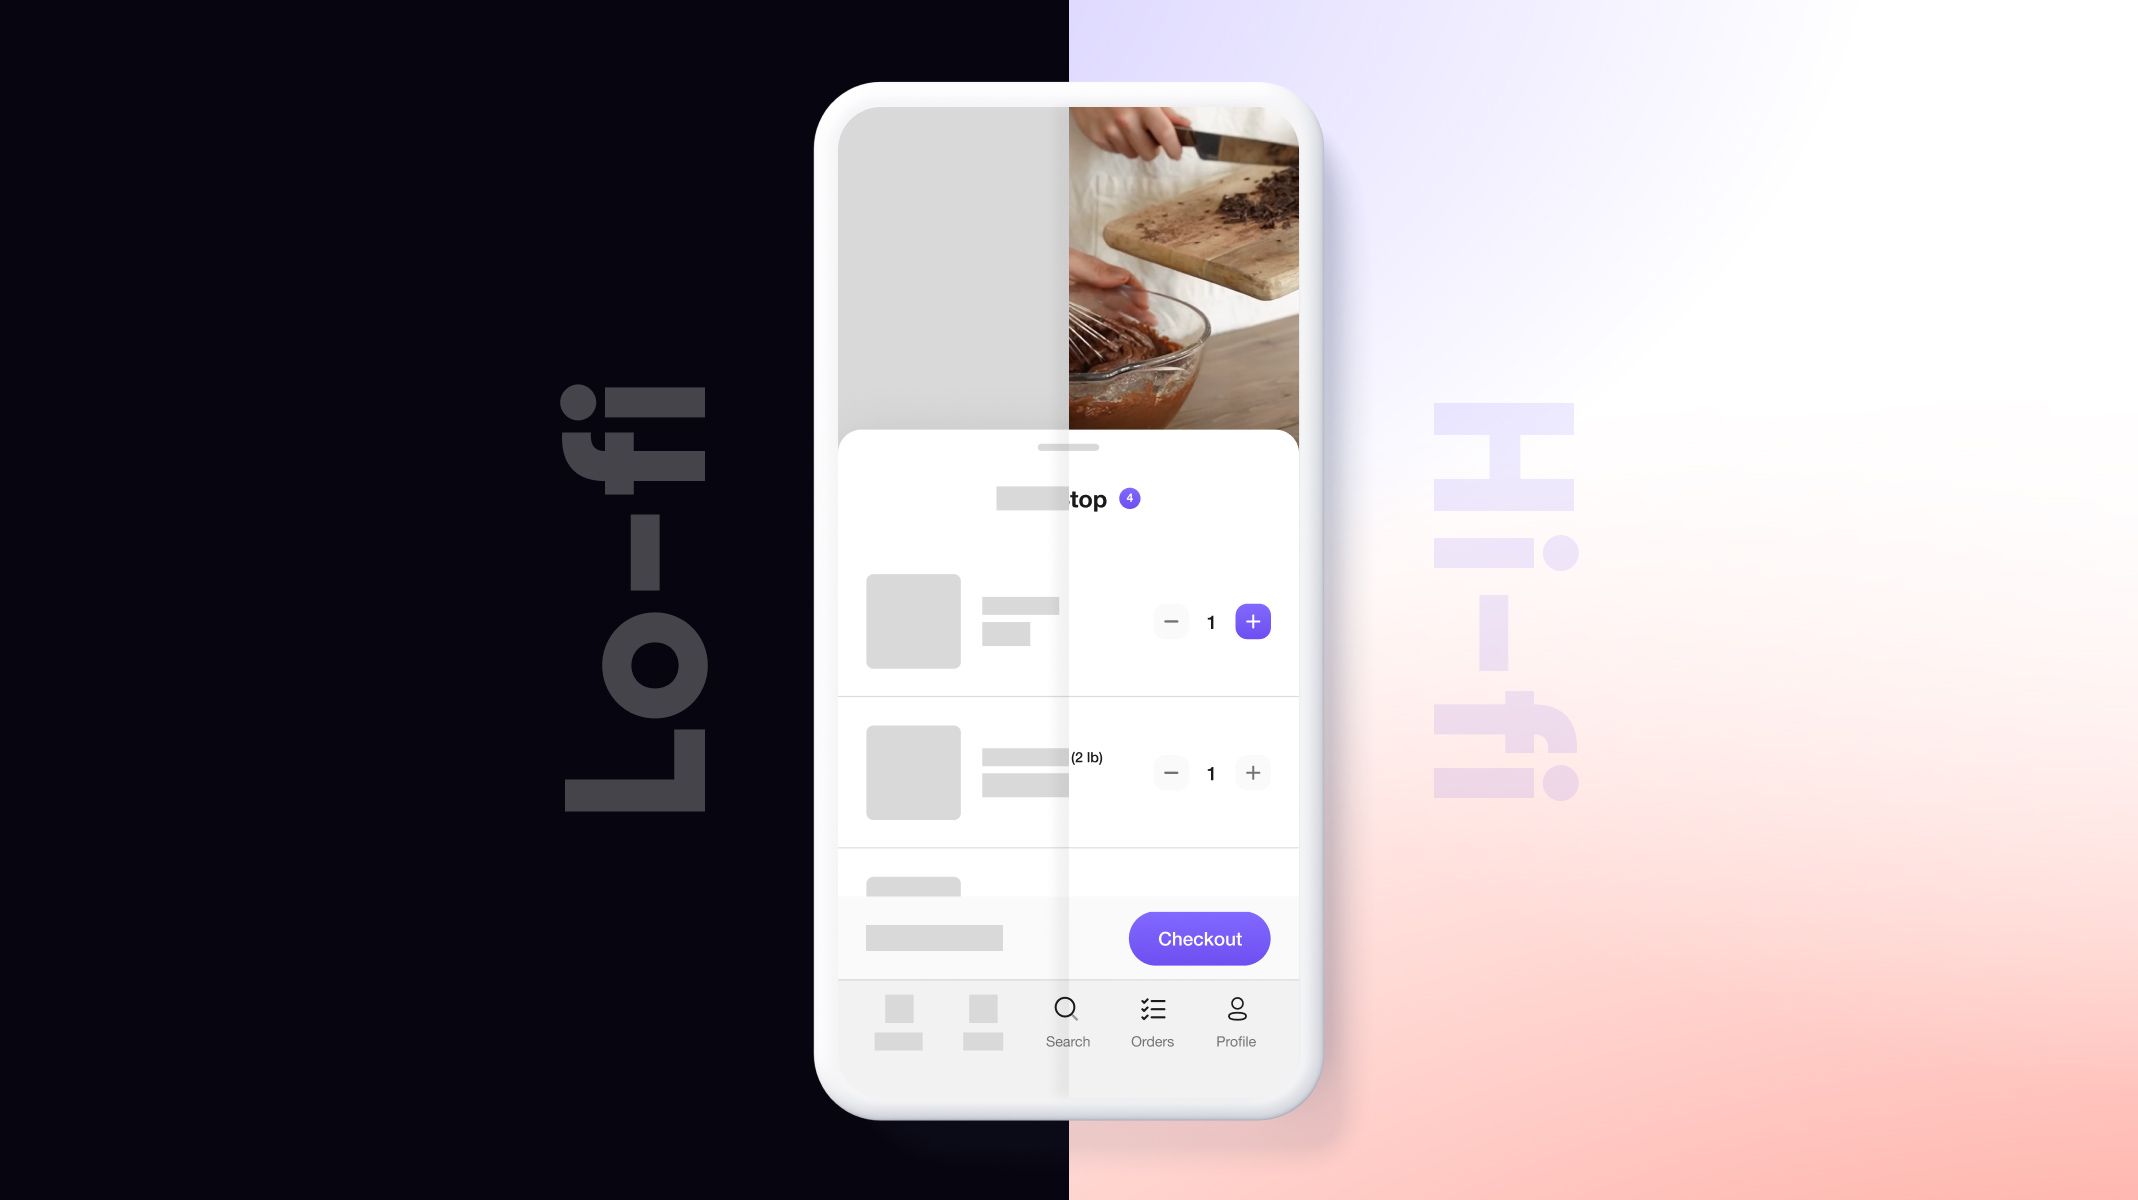
Before deep-diving into how and why you want to build a realistic prototype, we need to understand what a realistic prototype is and how they differ from more common prototyping methods such as low-fidelity and high-fidelity prototyping.

Low-fidelity prototypes: simple versions of designs with placeholder content and some basic interactions.
High-fidelity prototypes: more detailed and match the look and feel of the final product.
The main difference between them is the time and effort put into building the prototypes, including the UI and UX design.
This is why low-fidelity prototypes are usually preferred in earlier stages. Iterating becomes faster, but the translation of the UX design into the prototype weakens.
Is there a way to merge the convenience of low-fidelity prototyping with high-fidelity prototypes granularity? You can imagine the power of low-fi prototypes with deep UX design elements and extensive interactions. This is the power of realistic prototyping.
Take ProtoPie for a spin and try building your own realistic prototypes.
Realistic prototyping – using the right tools and practices to get the most out of your UX design
Building a realistic prototype doesn’t need major shifts in your processes or high levels of investment into new tools or hardware. Choose the right tools and start out with realistic prototypes in mind, the rest will follow.
The right tools should always be able to accommodate your UI design with ease. Always allow for external data sources, such as third-party solutions. They allow for a wider variety of commands for you to build deeper and smarter interactions.
How to work realistic prototyping into your UX design process
We’ve covered the concept of a realistic prototype, and it sounds pretty great, right? The reality of being able to build your own awesome interactions leads to realistic UX and top-tier UX design. All without sacrificing the speed and fluidity of low-fidelity prototyping.
So how can you do it?
Integrating key UX design concepts into your UX workflow
What is "defining a UX workflow"?
Set out the steps to go from early research to idea validation of your (realistic) prototype. Creating a prototype, UX design, and a realistic UI are not one-person tasks. These tasks are not sequential either. By splitting your workflow into steps that cater to your team's strengths, your UX workflow gains in efficiency.

To oversimplify what a typical UX workflow looks like, you could say that the initial steps are:
- Step 1: Find and understand the problem that you are looking to fix.
- Step 2: Define the role UX design will play in this undertaking.
- Step 3: Research, analyze and start the ideating phase.
- Step 4: Prepare the sitemap or information architecture. This includes basic user flows and navigation.
Step 4 is the perfect time to start thinking about the realistic prototypes or end result. To succeed, you need to know your tools, and what they are capable of. We discussed this in detail with ex-Microsoft UX designer Darren Bennett. He has been building design stacks for over 30 years and highlights the importance of tools.
The above steps are your solid base for your UX design process. You cannot skip building a solid base. Each of these steps is time heavy. They need information sharing between many stakeholders. There will be meetings, and emails. Lots of emails.
Next are the more hands-on UX designer-heavy steps.
- Step 5: Low-fidelity prototyping with a focus on UX wireframing and simple interactions
- Step 6: High-fidelity prototyping turning your initial wireframes into prototypes. Resemblance to the end product is key.
- Step 7: “My work here is done” - UX designer. The final step of handover to the development team where the bulk of UX design tasks end. The UX design team works with the development team to ensure the realistic prototype becomes a real product.
There are two key notions that are missing from this basic UX workflow: testing and iterating. This is because they are valid throughout the design process. A great product idea will usually have many user flows, many use cases, and appeal to different consumer demographics. Start testing and iterating early and often. With a streamlined approach and gathering feedback along the way, you’ll save plenty of time in the long run.
Realistic prototyping with a functional UX in mind
How do you take a UX workflow and build a realistic prototype without losing time on the finer details? Choose the UX design tools that complement your UX workflow. You shouldn't have to decide between efficiency and realistic outcomes.
The dream of seamless UX design is a reality with solutions such as ProtoPie. Picture a realistic UI, such as the mockup of a specific map. With a few simple clicks, you can add many interactions creating a realistic prototype in no time.
ProtoPie is shaking up the classic approach to UX workflows. UX designers everywhere work better with their UI design and developer colleagues by using ProtoPie. Not only does the solution combine rapid low-fi prototypes with the realism of high-fi prototyping. We understand that communication is key, so we've built to improve your collaboration across teams.
Visit our prototyping school to learn more about how ProtoPie is changing the industry, one prototype at a time.
You can now build realistic prototypes with functional UX whilst testing and iterating.
Merging low-fidelity and high-fidelity prototyping is coming to life.
A necessary change to help the future of UX design evolve towards something better. We understand that no software solution will replace the initial UX design process. Hand sketching wireframes and brainstorming user flows are a part of UX design that should not change. The idea is not to stifle creativity but to empower it.
There are many benefits to low-fidelity prototyping, such as:
- Lower cost
- Easier to create, requiring fewer skills
- Faster to produce, allowing for more variations
But there are also some negatives:
- Static UX design with very simple interactions mapped out
- No realistic UI
- Potential lack of clarity
- Confusing for other stakeholders or even other UX designers
Protopie is built for realistic prototyping and handling these negatives on the go. You don't have to worry about a lengthy high-fidelity prototyping process anymore.
Static UX design? Not with ProtoPie, you can add a number of interactions from pre-populated menus, or build your own.
Do your UI designers have a realistic UI ready to go? Would they like to try some new functionality, but need help from the UX design team? Import that Figma file and start adding interactions such as triggers and responses.
By tackling the real problems in UX design, such as lengthy processes, harsh transitions between low-fidelity and high-fidelity prototyping, and the sometimes complicated communication between UI designers, UX design teams, and developers, you can build realistic prototypes that will seamlessly be transformed into final products.
Automotive prototyping: putting theory into practice
When you think of a car dashboard, do you still imagine the classic cockpit design with mechanical dials and analog buttons? Or Tesla’s approach with the digital interface behind the steering wheel and all interactions done on a tablet-like screen?
There are new digital dashboard designs appearing at events such as CES each year. Each with more screens, more interactions, and more intricate UX design.
ProtoPie is not only packed with UX workflow timesavers for general UX design. We’ve gone deeper into specific niches where tailored solutions build the best realistic prototypes. This includes prototyping in the automotive industry.
The evolution of automotive HMI and the growing need for realistic prototyping
Modern cars have at least two displays or more. This increases the number of potential interactions between user and vehicle. And with it, the importance of UX design.
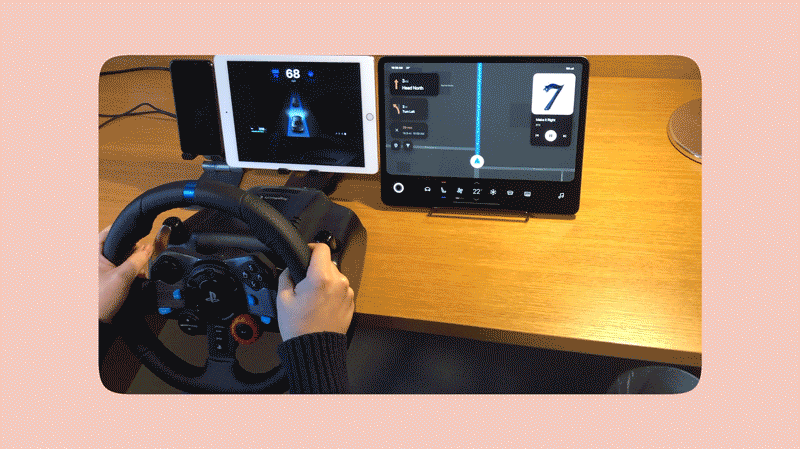
An automotive prototype needs to take into account:
- The interactions between many screens
- From different data sources
- Initiated by varying triggers
- Potential vocal commands
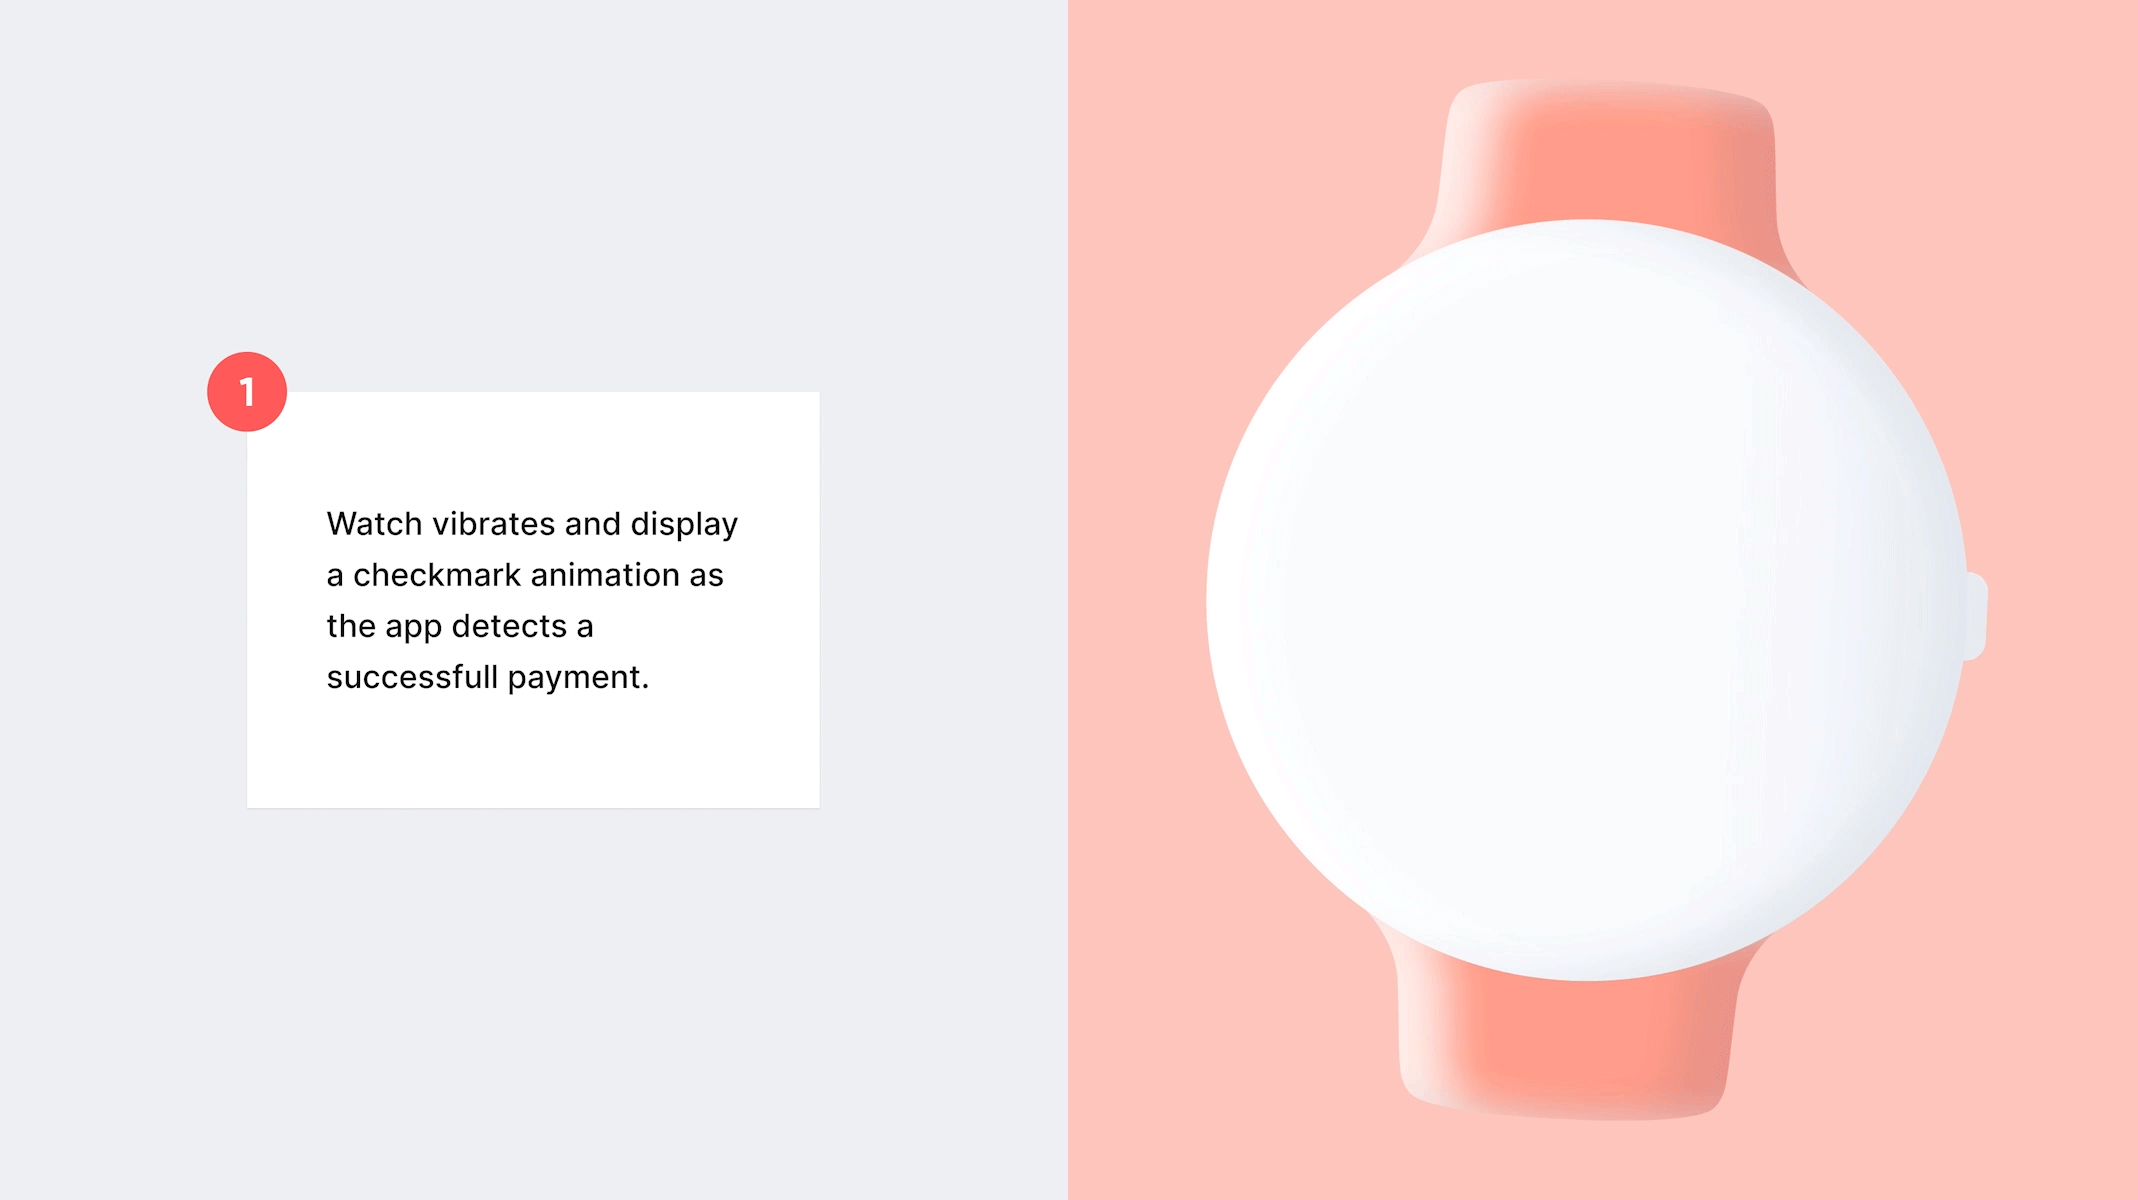
An automotive HMI (Human Machine Interface) is every action from the first interaction a driver has with his vehicle. From the moment they unlock the car door to the moment they exit the vehicle and lock the car. We’ve moved on from analog commands and physical buttons, with digital dashboards taking over. This means that the majority of automotive HMI focuses on the screens.
Thanks to ProtoPie's multi-screen support create complicated automotive UX designs. Use buttons on the center console display to trigger new information on the cluster display. All without any complicated code.
A realistic automotive prototype shouldn’t stop at physical triggers on-screen
What’s the point in having a smart computer in your car if you can’t talk to it? Make the most of your hardware by building a tailored voice assistant into your realistic prototype.
Voice prototyping is more important than before. Especially with the prelevance of Alexa and Google Home devices in our homes, and Siri and Google Assistant on our phones. But in automotive HMI, voice prototyping takes on a whole new dimension. Build your UX design with voice prototyping in mind, and provide your audience with a realistic prototype that they connect with.
Don’t stop at voice prototyping, there are so many ways to build new interactions. We decided to make it easier to use and integrate any technology you need for your automotive prototypes. From hand gestures to eye tracking, or using a physical button such as a knob or an analog button on the steering wheel. You can do it all and build a realistic prototype that meets your imagination.
Realistic prototyping requires the right tools that work for your UX workflow and bring your UX designs to life. From gaming to automotive prototyping, ProtoPie is building the solution for UX design. Make your own awesome designs in less time. Your realistic prototypes will revolutionize how your stakeholders work together. You will output game-changing UX designs for your business for the world to see.
Take ProtoPie for a spin and build your own awesome realistic prototypes today.
.jpg?fm=webp)

