
While AI design tools can generate sleek interfaces in seconds, a fundamental gap remains: software living in a browser tab can’t talk to real-world knobs, sensors, or motors. When you’re designing hardware, static click-throughs on a laptop fail to test physical feedback, ergonomic feel, and real-time timing.
Want to see the live demo and interactive setup in action?
In our webinar, Building a Magnetic Knob with Arduino and ProtoPie, Creative Technologist Joy Yeom demonstrated how to bridge this digital-physical divide. Using an Arduino board, a magnetic rotary encoder, a Python bridge script, and ProtoPie Connect, she showed how to control a high-fidelity coffee machine UI with a physical knob mounted directly on a tablet display.
Here is a step-by-step breakdown of how the team built this pipeline, along with the key technical takeaways.
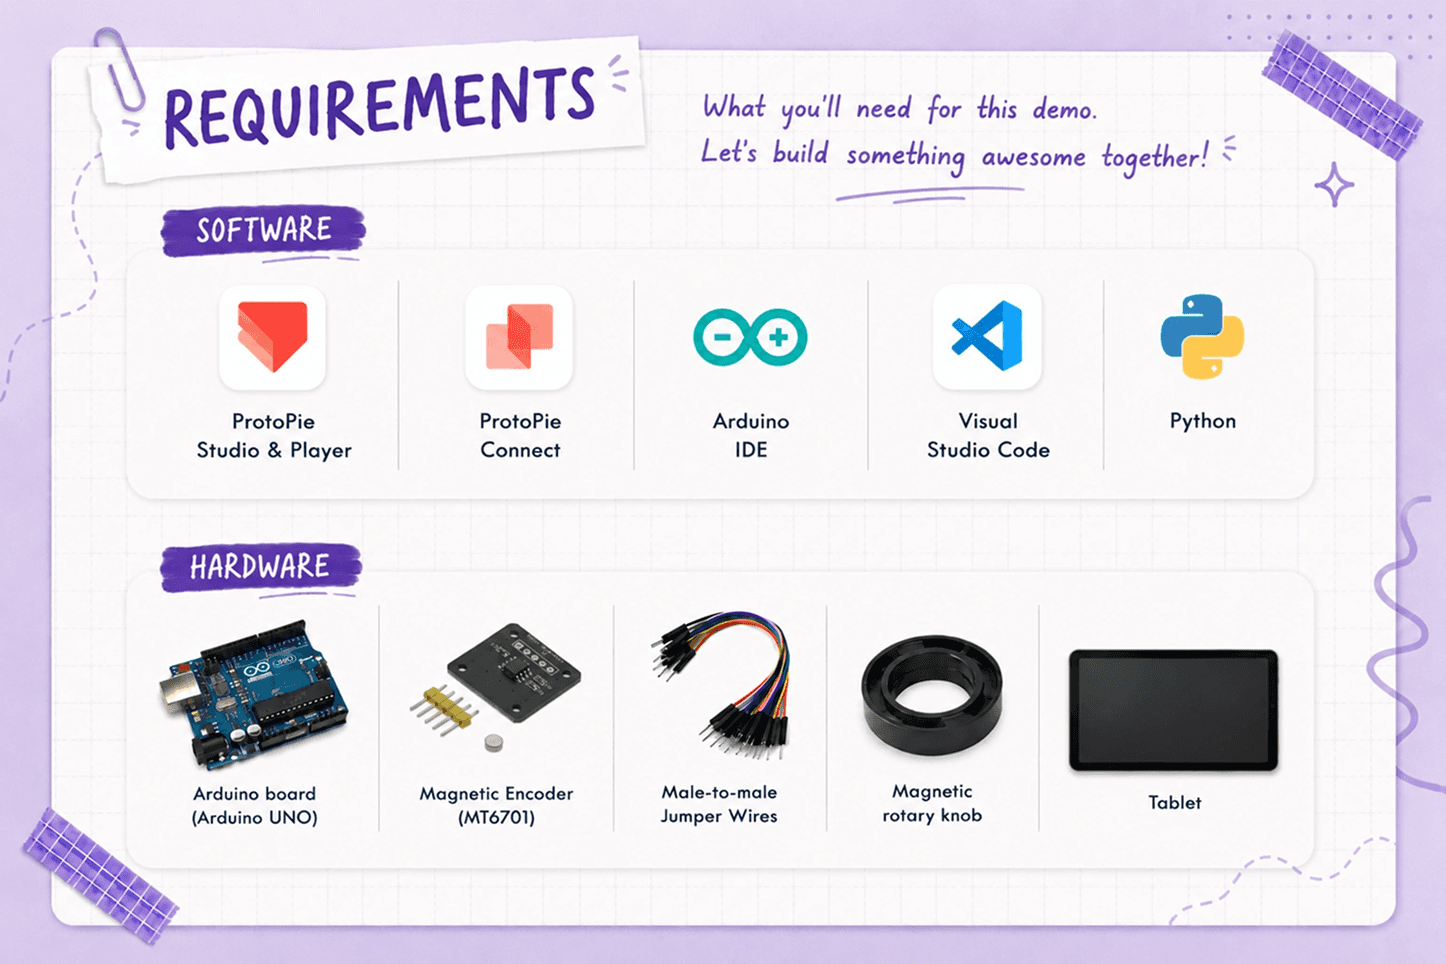
What You Need to Build a Smart Coffee Screen Prototype
To recreate this coffee machine prototype, you will need:
Step 1: The Hardware-to-Screen Pipeline
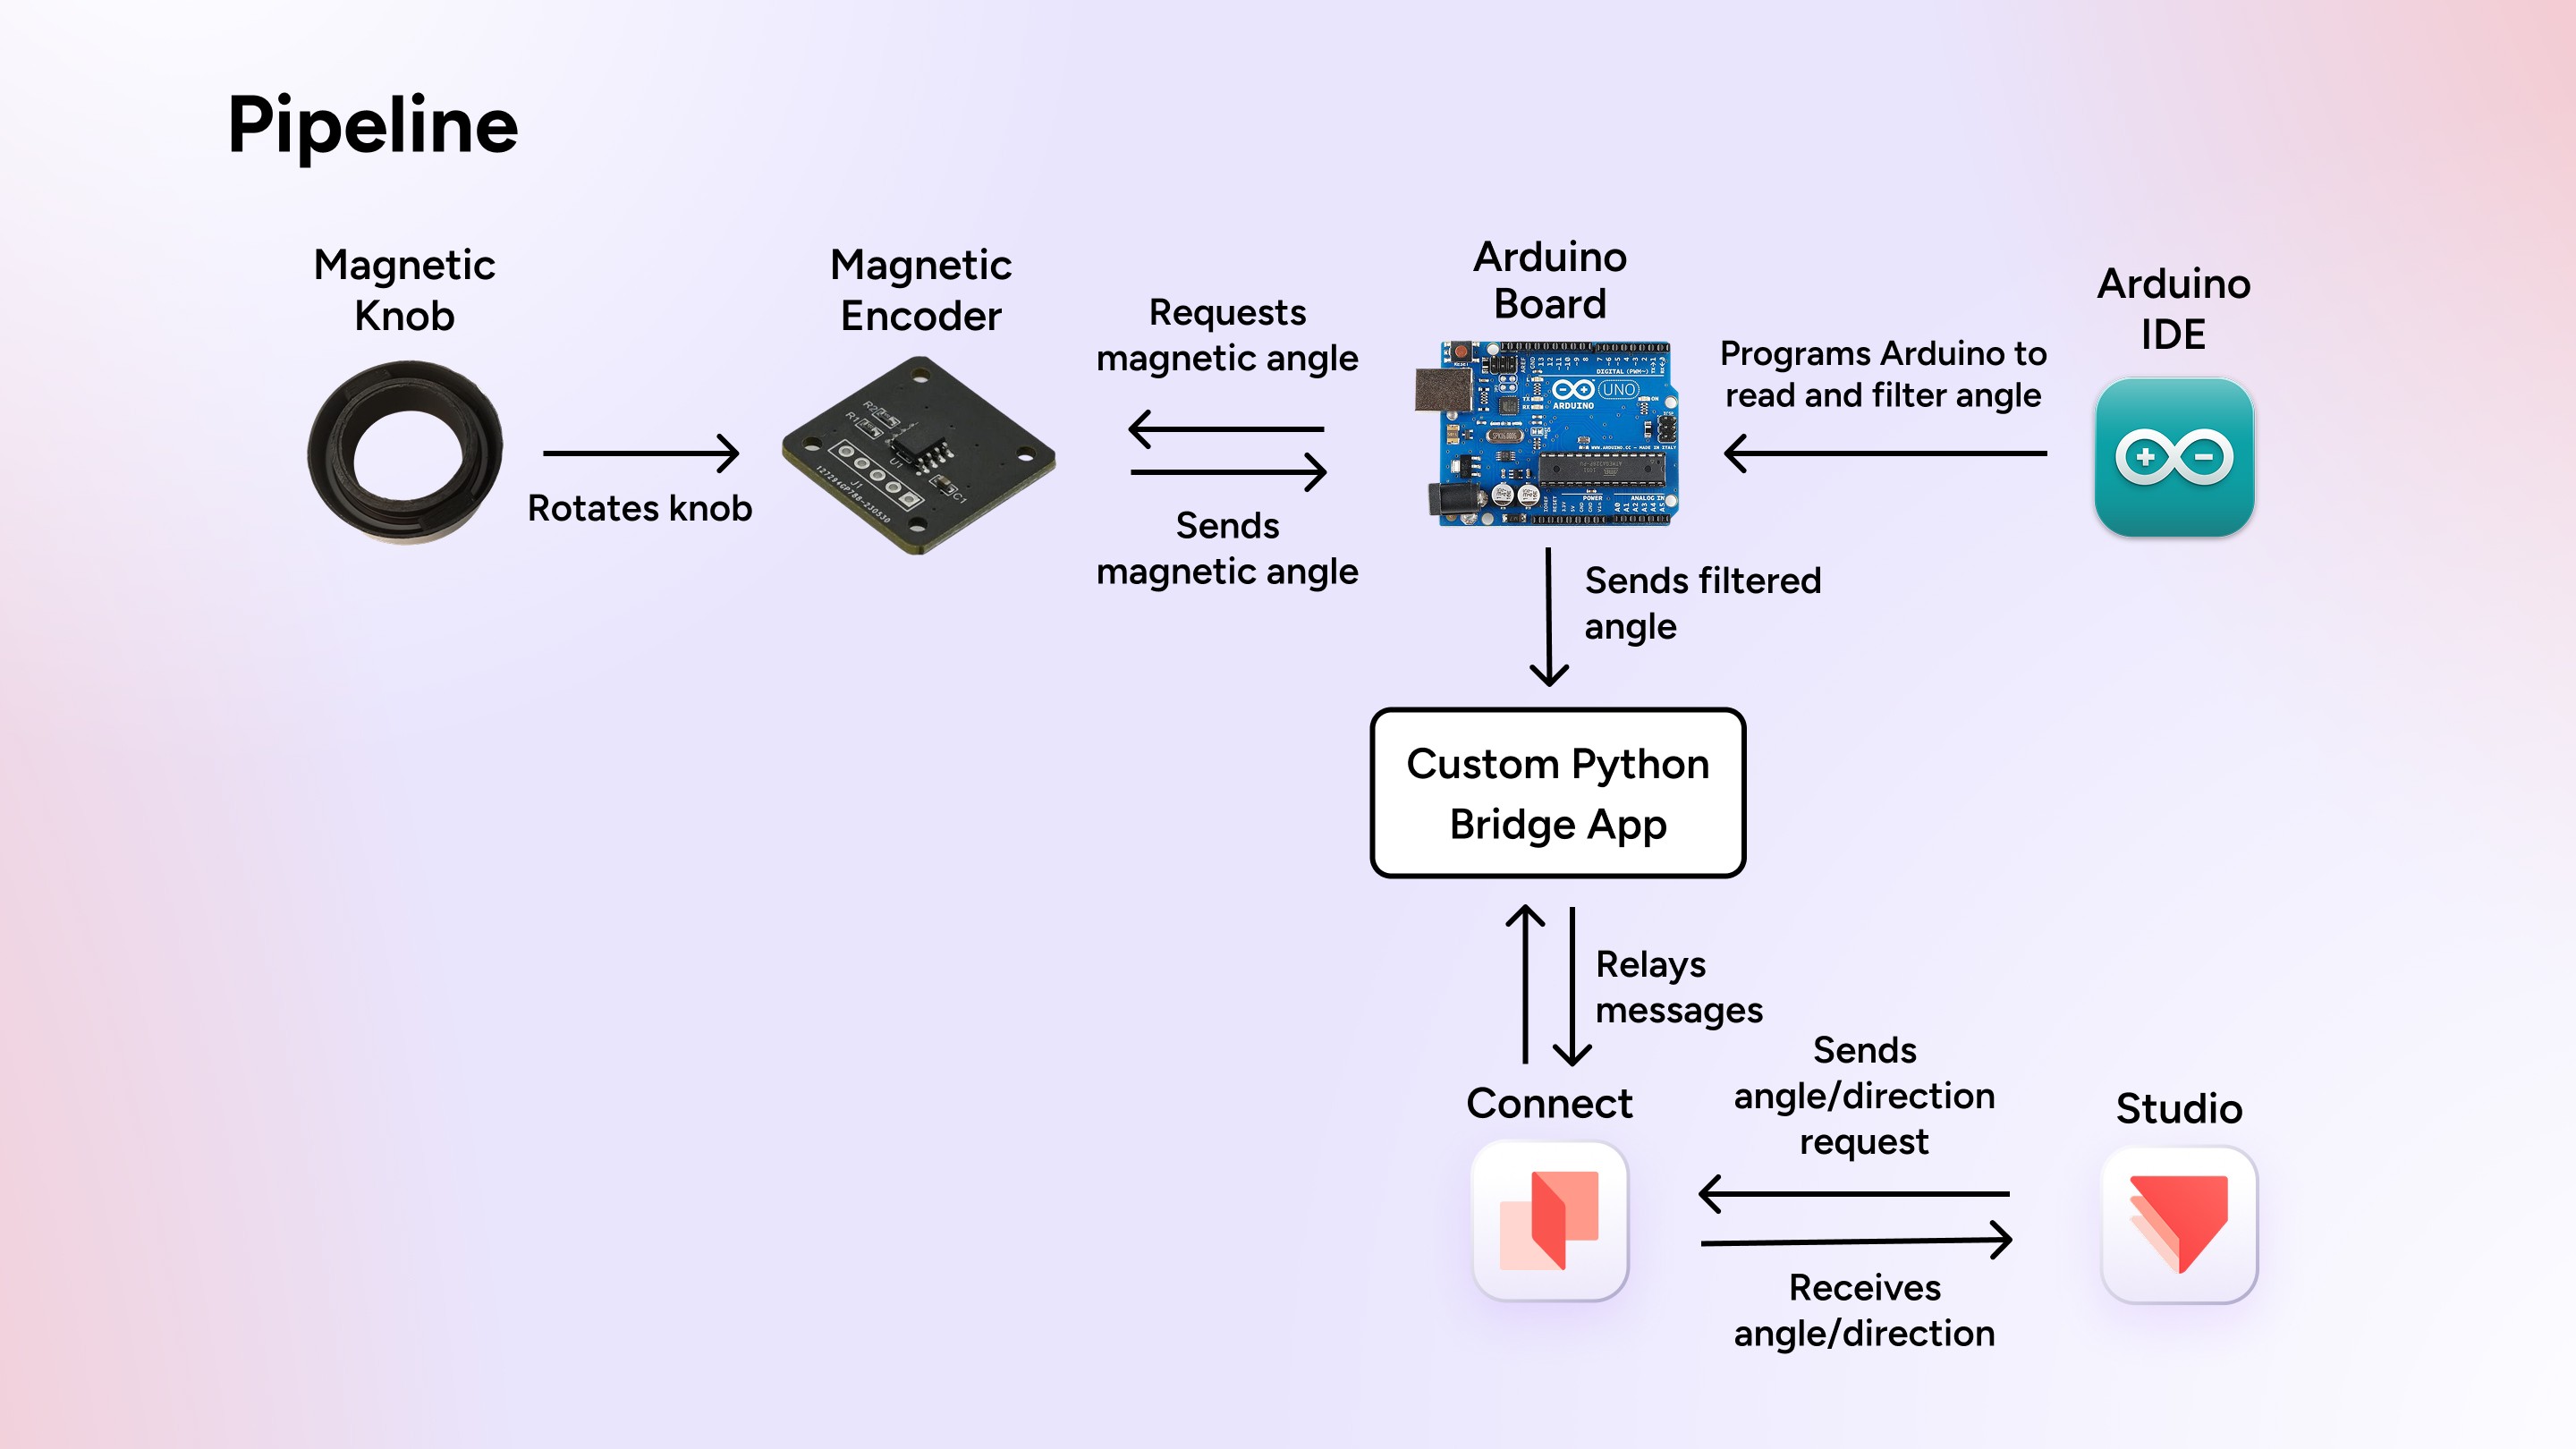
The physical setup places a 3D magnetic knob directly on the front of the screen, while the encoder sits hidden behind the tablet.
Capture the physical input: Turning the physical knob changes the magnetic angle detected by the MT6701 encoder.
Filter the input: The Arduino reads the raw angle, filters out small accidental movements, and keeps the value within the expected angular range before sending it over USB serial.
Relay the data: A lightweight Python script relays messages between the serial port and ProtoPie Connect via SocketIO.
Drive the interface: ProtoPie processes either the continuous angle or a discrete direction to drive the screen UI in real time.
Step 2: Smoothing Hardware Jitter in Arduino
Real-world hardware introduces signal noise and slight hand movements. If raw sensor data is sent directly to a digital UI, even small fluctuations can cause the interface to flicker or jump.
To prevent this, the Arduino filters out minor, unintended movements. Also, wraparound logic keeps the angle continuous when it crosses between 359° and 0°.
Want to try out this project yourself? Download the Bridge app project files. Click here to download the Pie file.
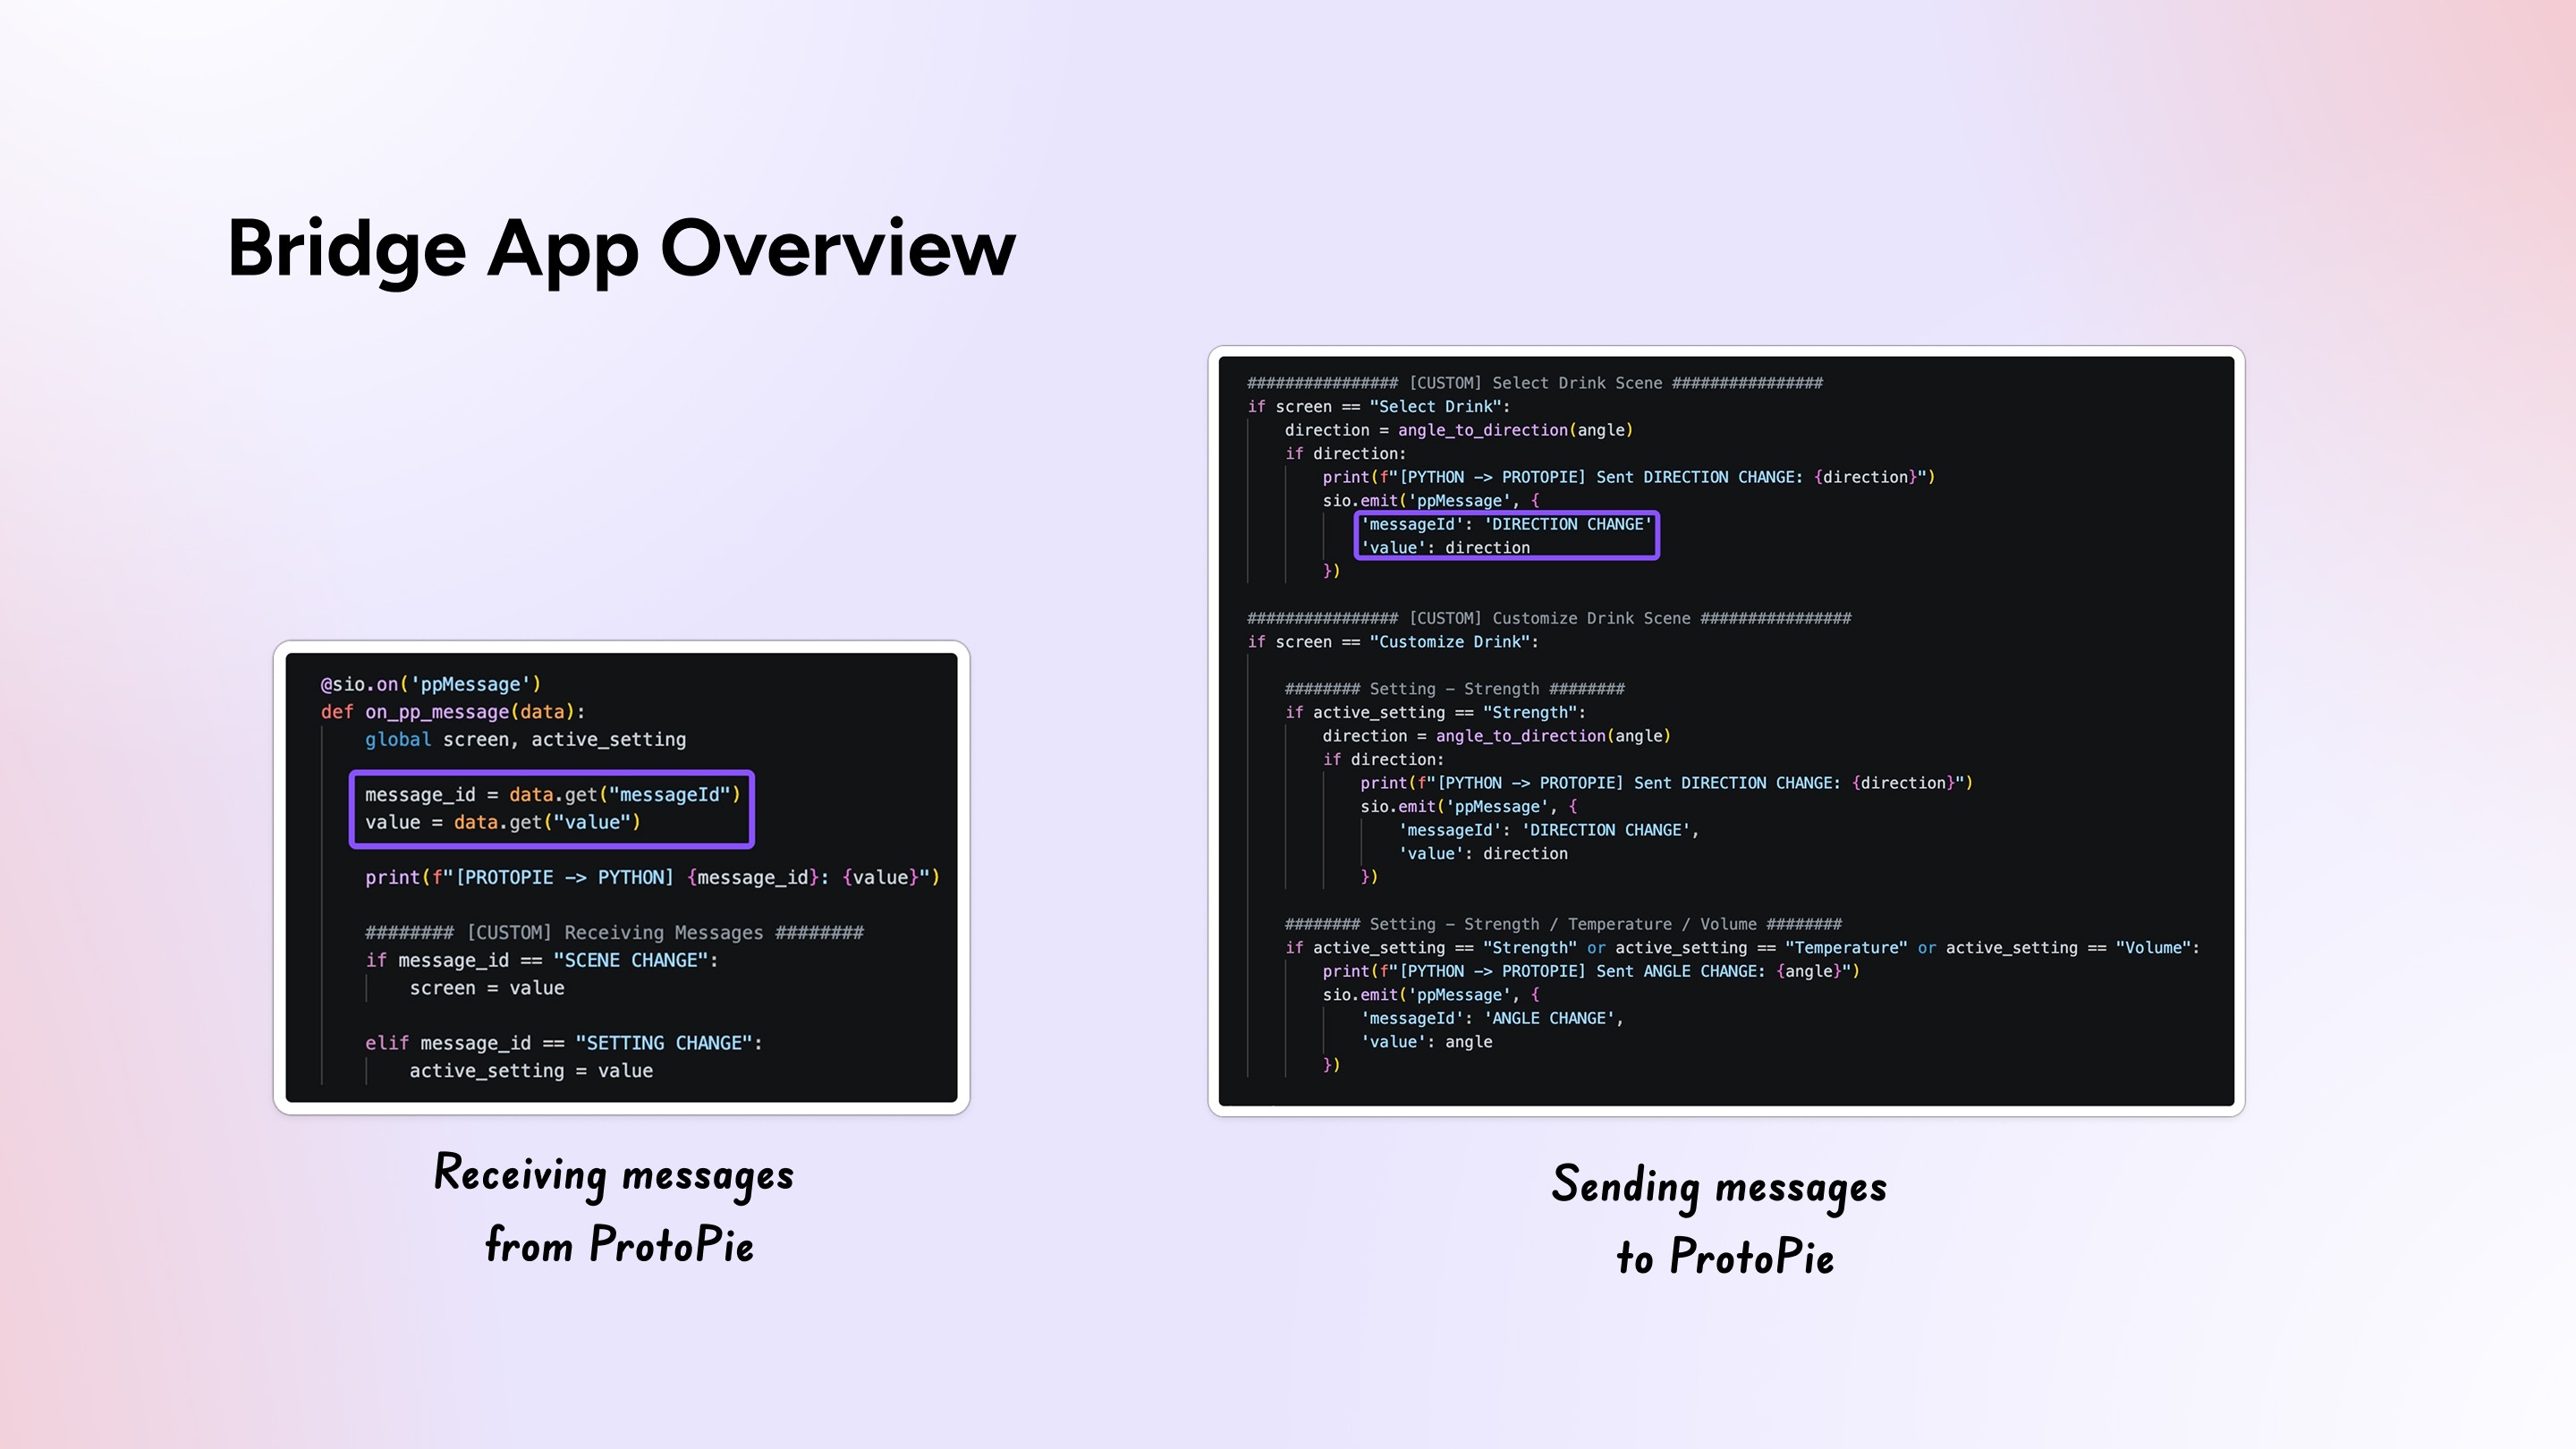
Step 3: Translating Signals via the Bridge App
Because different UI states require different types of data, the Python Bridge App converts continuous physical rotation into two distinct interaction modes:
Discrete Selection (Step-by-Step Control): When navigating the coffee selection menu, continuous angle changes are converted into discrete
LEFTorRIGHTsteps to prevent accidental item flickering.Fine-Grained Control: When adjusting values like brew temperature or volume, continuous angles pass directly to the screen.
The bridge receives screen state notifications from ProtoPie (e.g., SCENE CHANGE) and automatically shifts how it processes hardware inputs.
Step 4: Setting Multi-Context Logic in ProtoPie
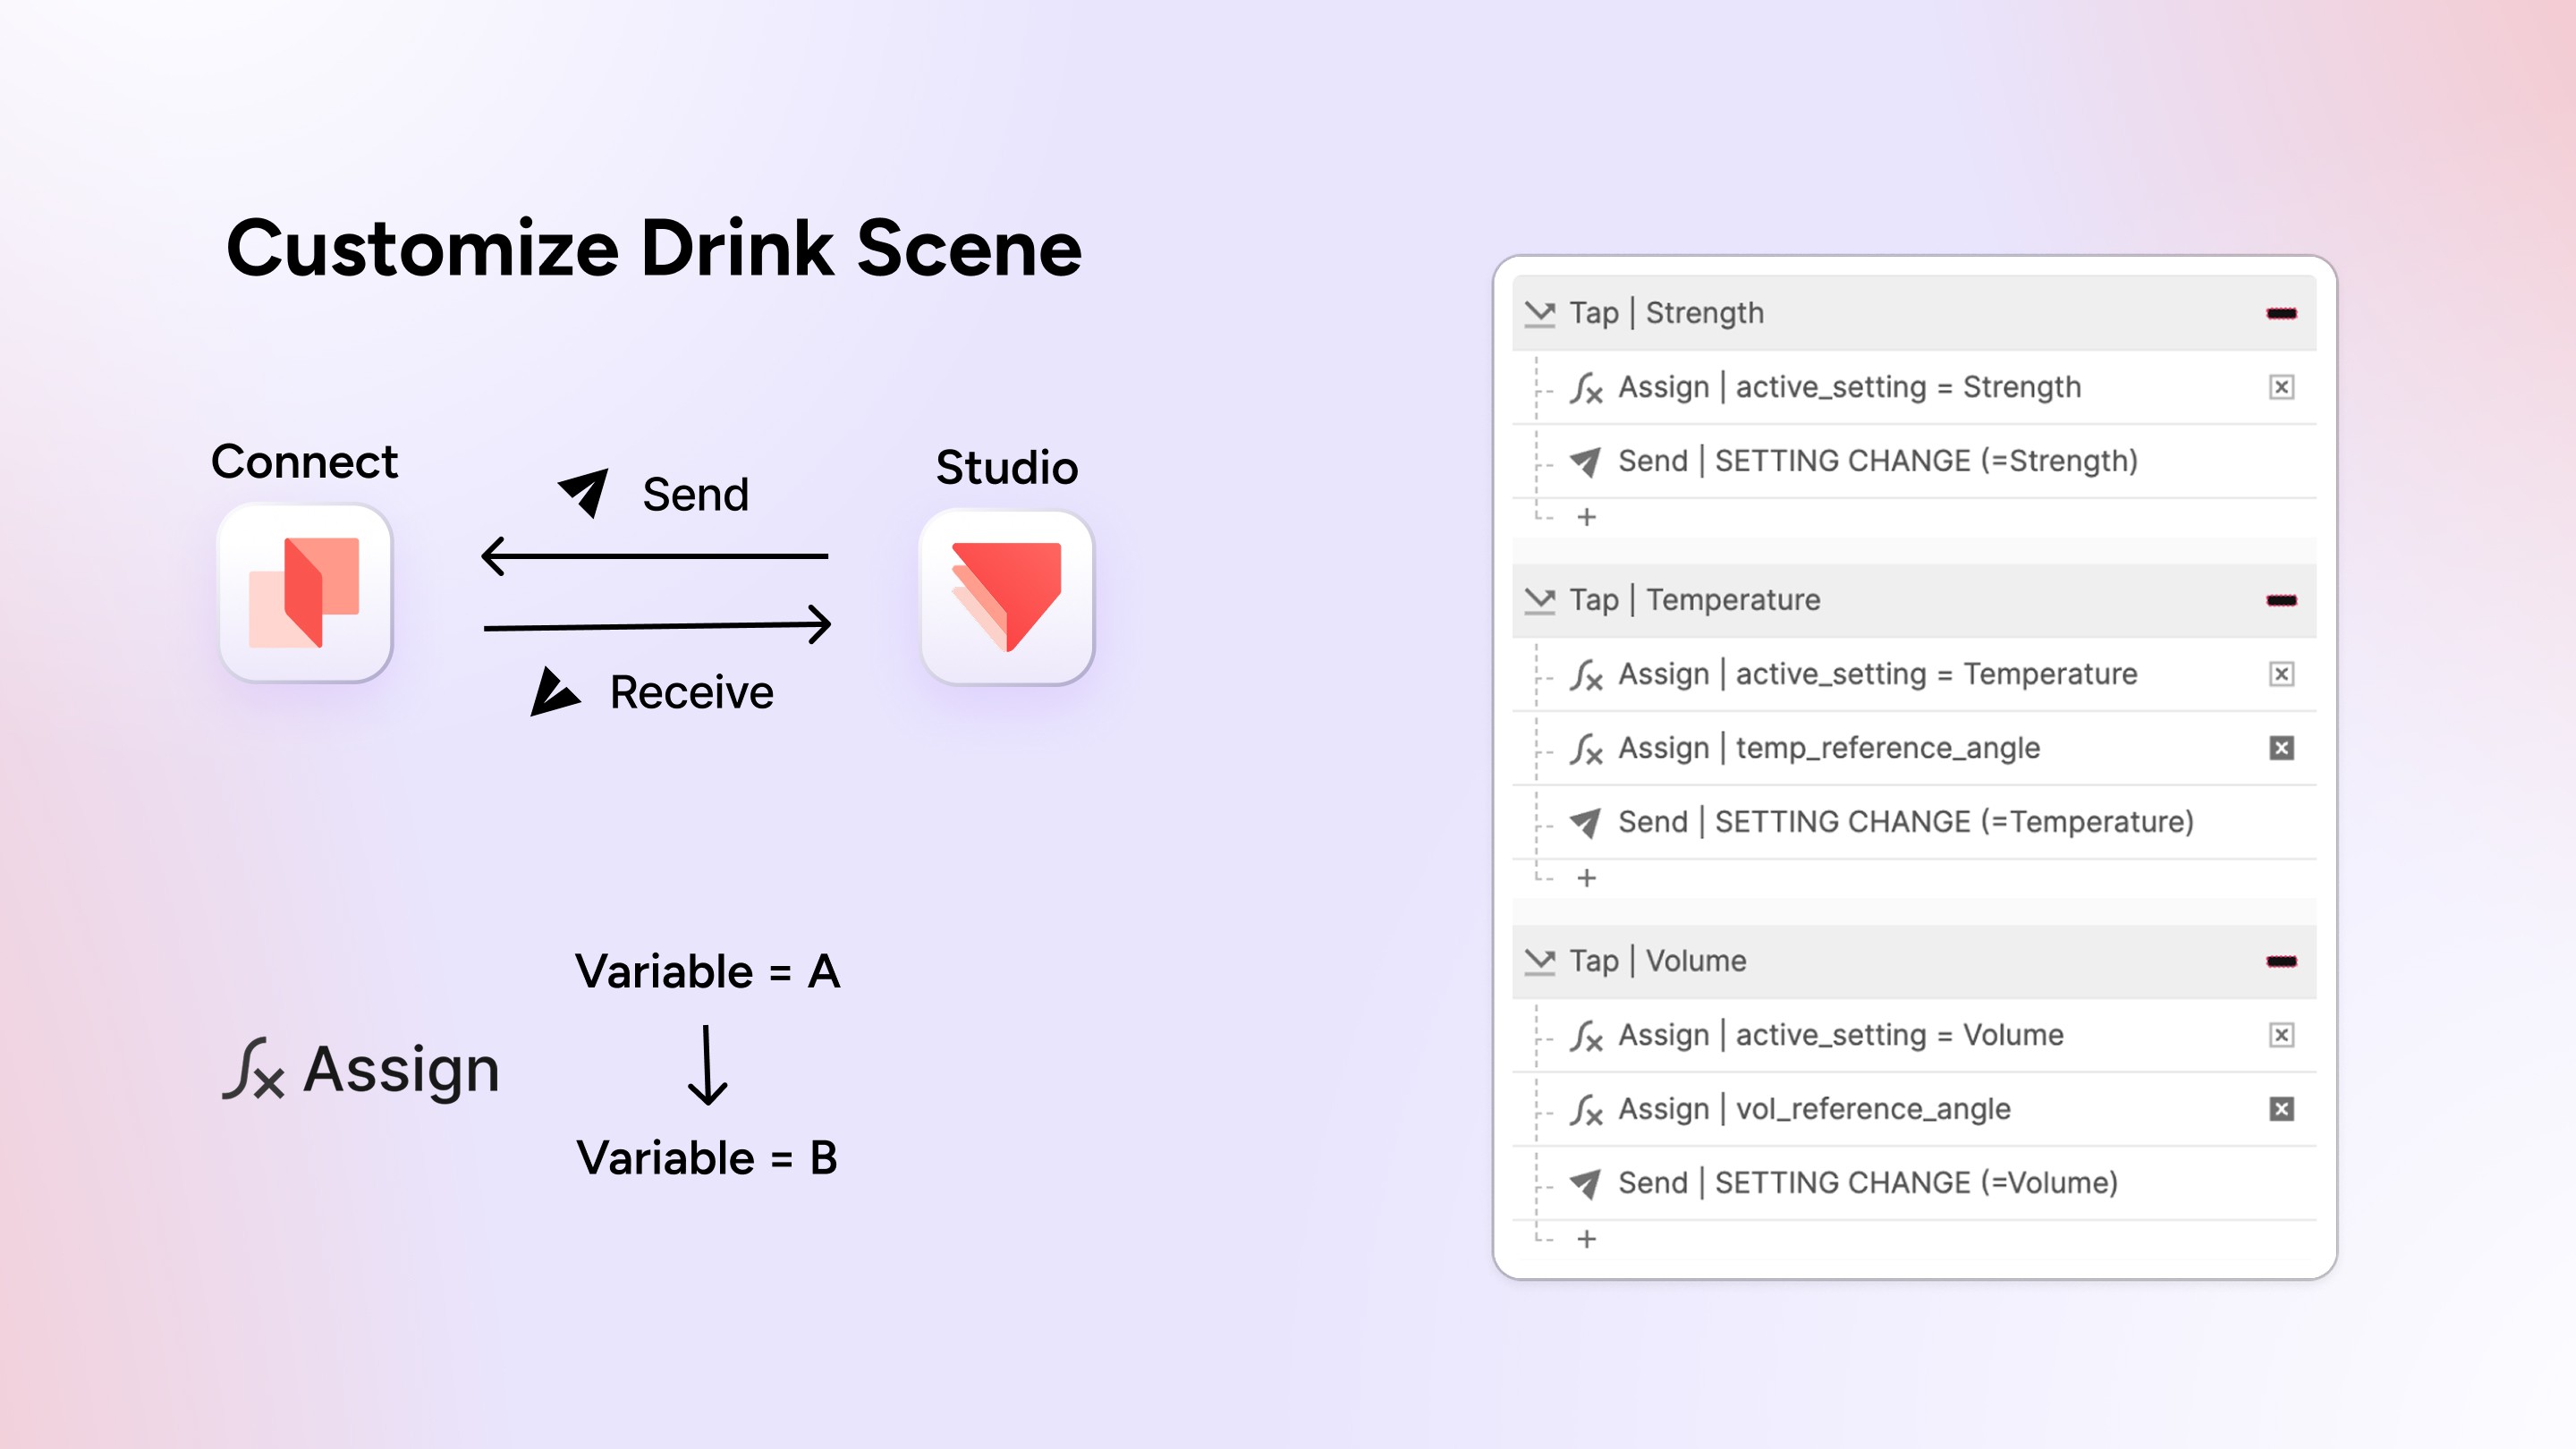
With hardware signals streaming into ProtoPie Connect, designers can map a single physical knob to multiple controls visually—without asking a firmware engineer to reflash code:
Drink Selection: Rotational steps trigger simple
LEFT/RIGHTactions to scroll through options (Espresso, Latte, Cappuccino).Context-Aware Tuning: On the customization screen, the exact same knob adjusts three distinct parameters:
Coffee Strength: Light, Medium, Heavy.
Temperature & Volume: Continuous angle mapping. ProtoPie’s Chain triggers remap raw angles into real-world units (e.g., 60-90℃ or 100-350ml) while animating circular progress indicators.
Cross-Scene Memory: Using global variables, custom selections persist into the final brewing animation scene seamlessly.
Webinar Q&A Highlights
Q. How much engineering support do designers need?
Joy Yeom: Very little for standard boards like Arduino, Raspberry Pi, or ESP32 thanks to ready-made starter code. Custom hardware may need initial backend wiring, but designers can iterate on UI behaviors completely independently once it’s set up.
Q. Can you bypass custom bridge scripts?
Joy Yeom: Absolutely! You can use plugins like blokdots as a plug-and-play intermediary between Arduino and ProtoPie.
Q. What if Wi-Fi drops during a live test?
Joy Yeom: USB serial communication between the hardware board and host machine stays intact. As long as ProtoPie Player and Connect share a local connection, everything runs smoothly offline.
Q. What other types of products or interactions could you build with this setup?
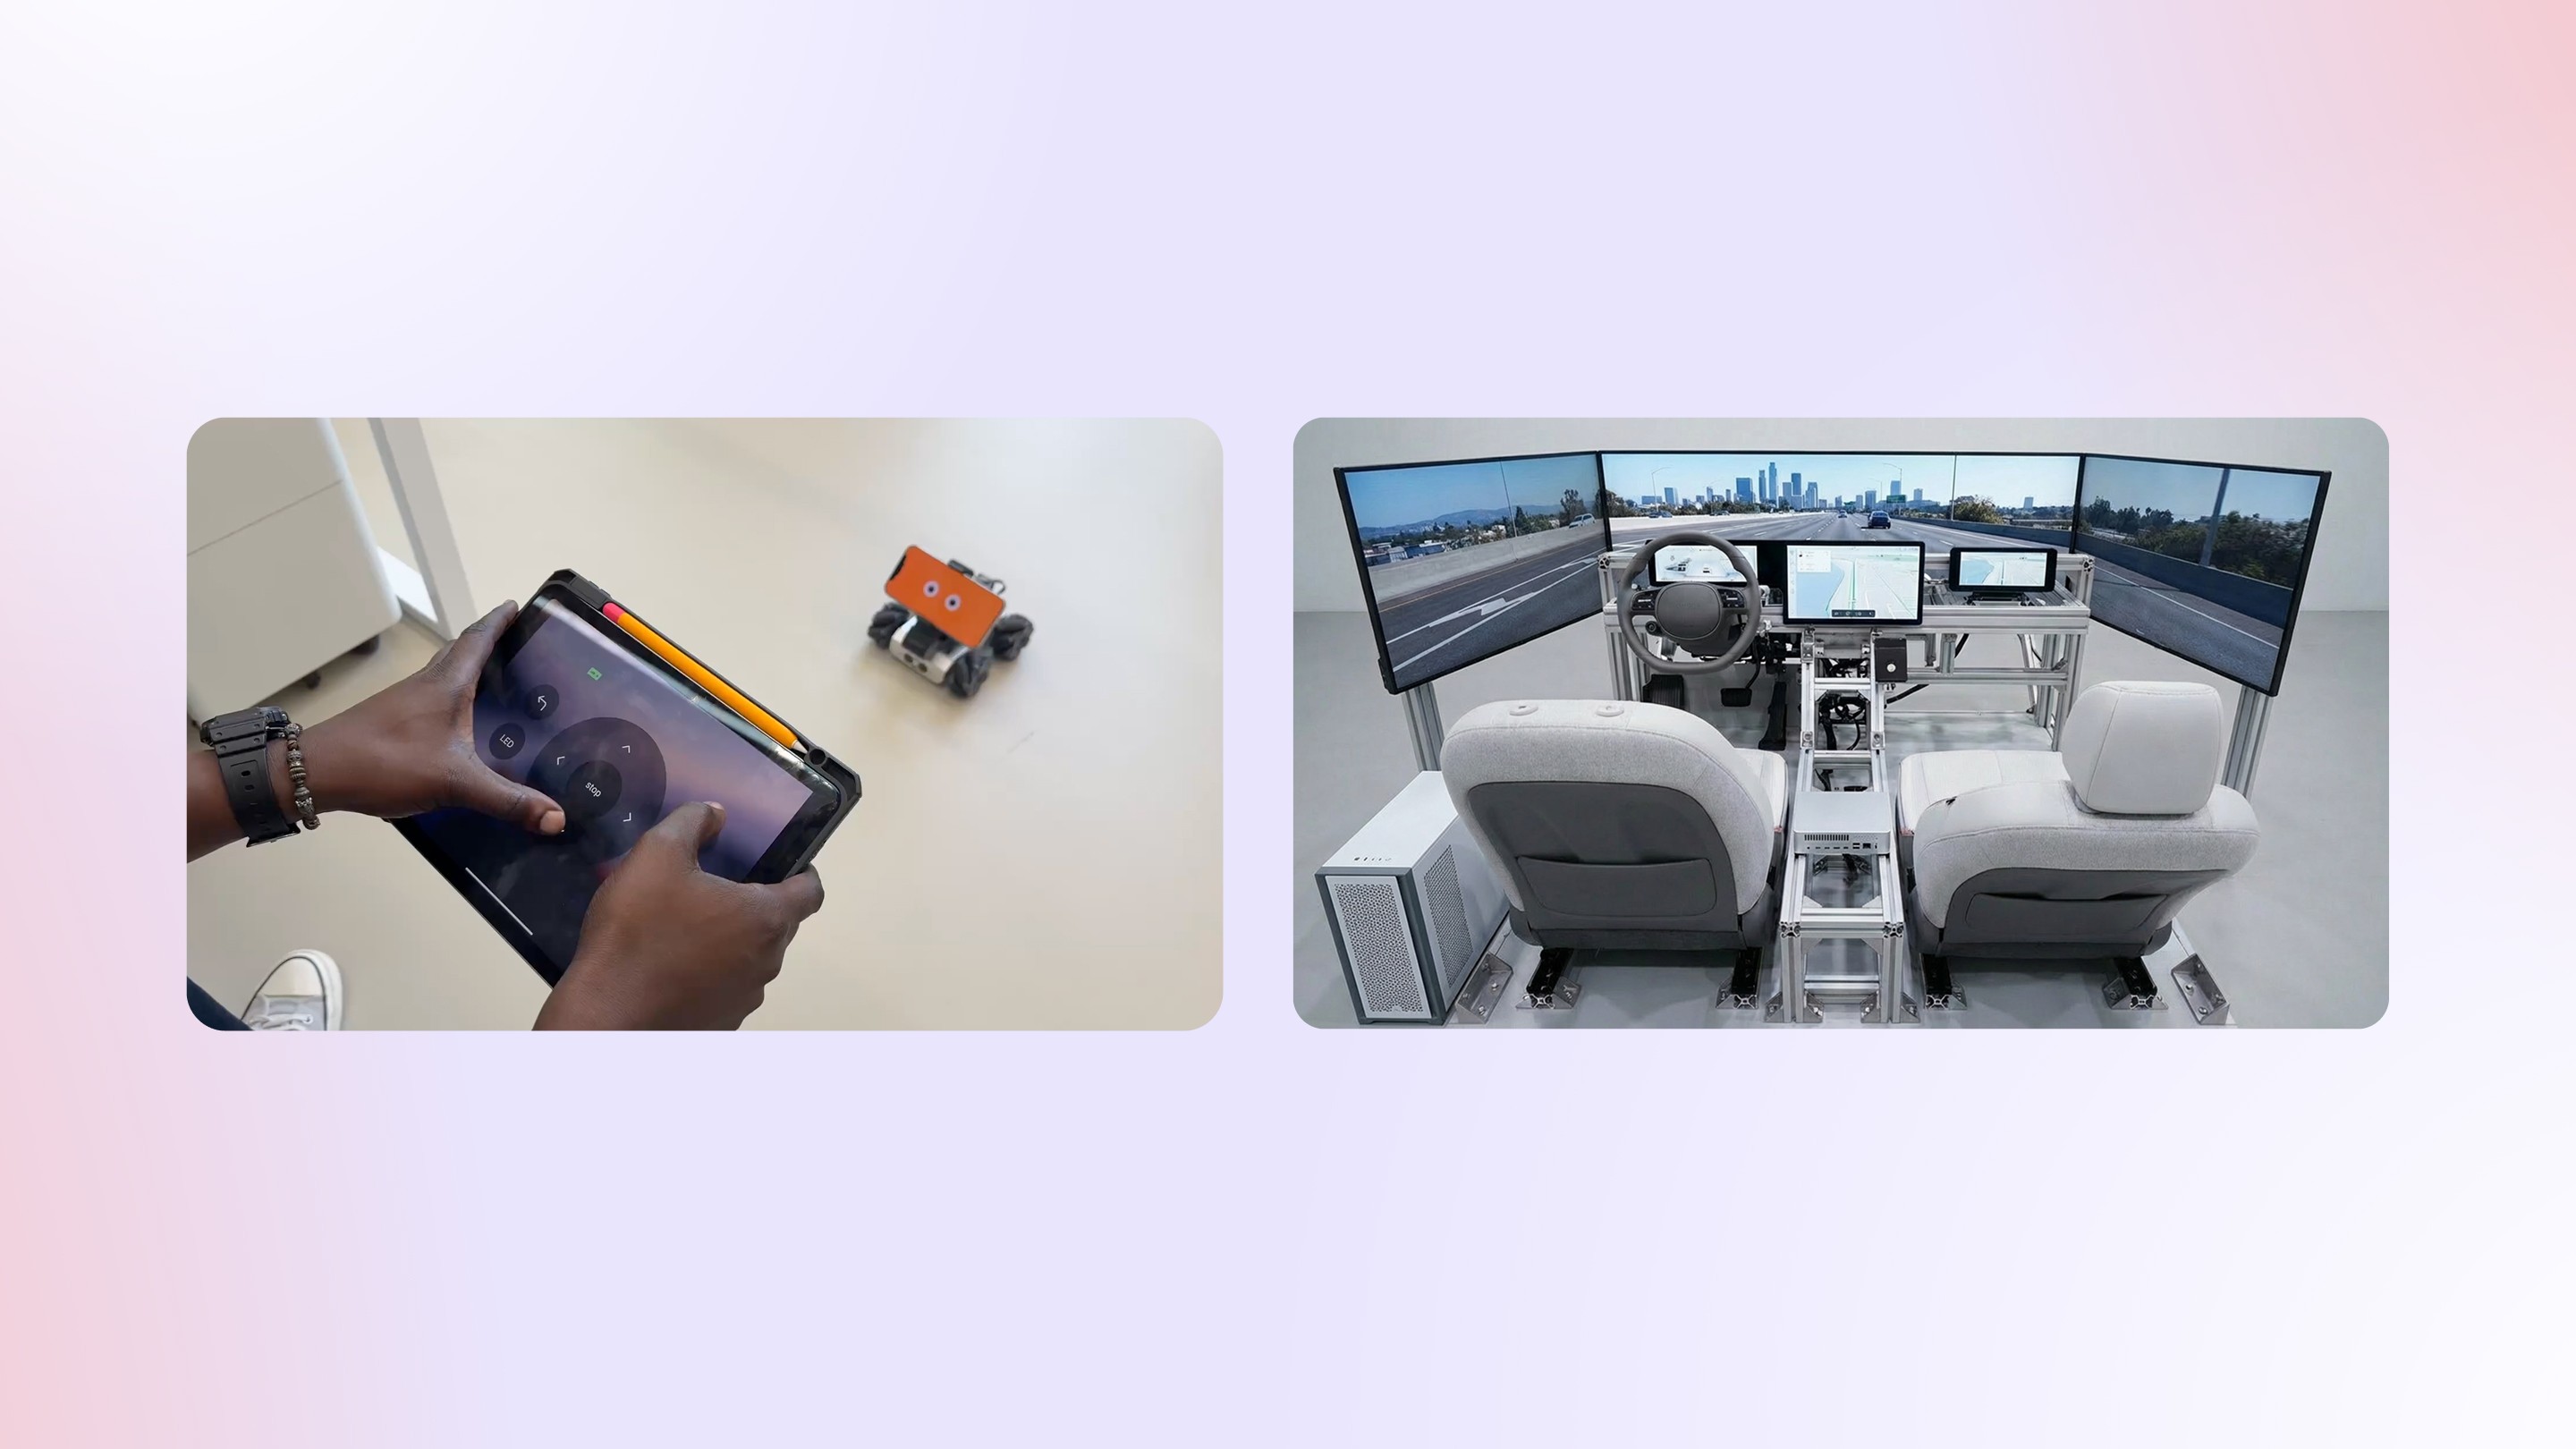
Joy Yeom: This workflow is not limited to the coffee machine prototype and can be used to build:
Smart home products
Automotive interfaces / HMI cockpit experiences
Medical devices
Remote control robots
Aviation systems
Multi-device smart appliances
Ready to Build Physical Prototypes with Your Team?
Connecting custom hardware to interactive screens doesn’t have to mean fighting complex setup protocols. ProtoPie Connect gives design and engineering teams a pre-built foundation to validate physical-digital experiences fast.
Have a custom hardware concept, smart appliance, or automotive cockpit idea you’re trying to test? Reach out to our team today to see how ProtoPie can help bring your physical product ideas to life.