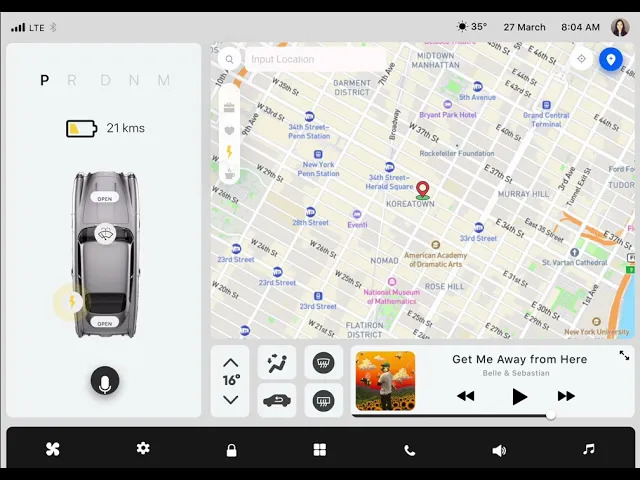
Description: In this tutorial, you'll learn how to create a static map image that dynamically updates based on user input within your ProtoPie prototypes. We'll achieve this by integrating the Google Maps Places API (New) to fetch location coordinates and the Mapbox Static Images API to generate the map, all orchestrated seamlessly through ProtoPie Connect.
MapSearch, a dynamic map prototype built entirely in ProtoPie by Jubilee Mayanja, Creative Technologist.
What You'll Need:
ProtoPie Studio (latest version recommended)
ProtoPie Connect (latest version recommended)
A Google Cloud Platform account with a project set up and billing enabled (billing is often required for API access, even for free tier usage).
A Mapbox account.
API keys for both Google Maps Platform (specifically Places API) and Mapbox.
Part 1: Setting Up Your API Keys
1.1 Getting Your Google Maps Platform API Key
Go to Google Cloud Platform: Visit
console.cloud.google.com.Create a project (if you don't already have one): In the top bar, click the project dropdown and select "New Project," then follow the prompts.
Enable billing: Even for free-tier usage, billing needs to be enabled for most Google Maps Platform APIs. Go to "Billing" in the left-hand navigation and set up a billing account.
Enable APIs & Services:
In the left-hand navigation, go to "APIs & Services" > "Enabled APIs & Services."
Click "+ Enable APIs and Services."
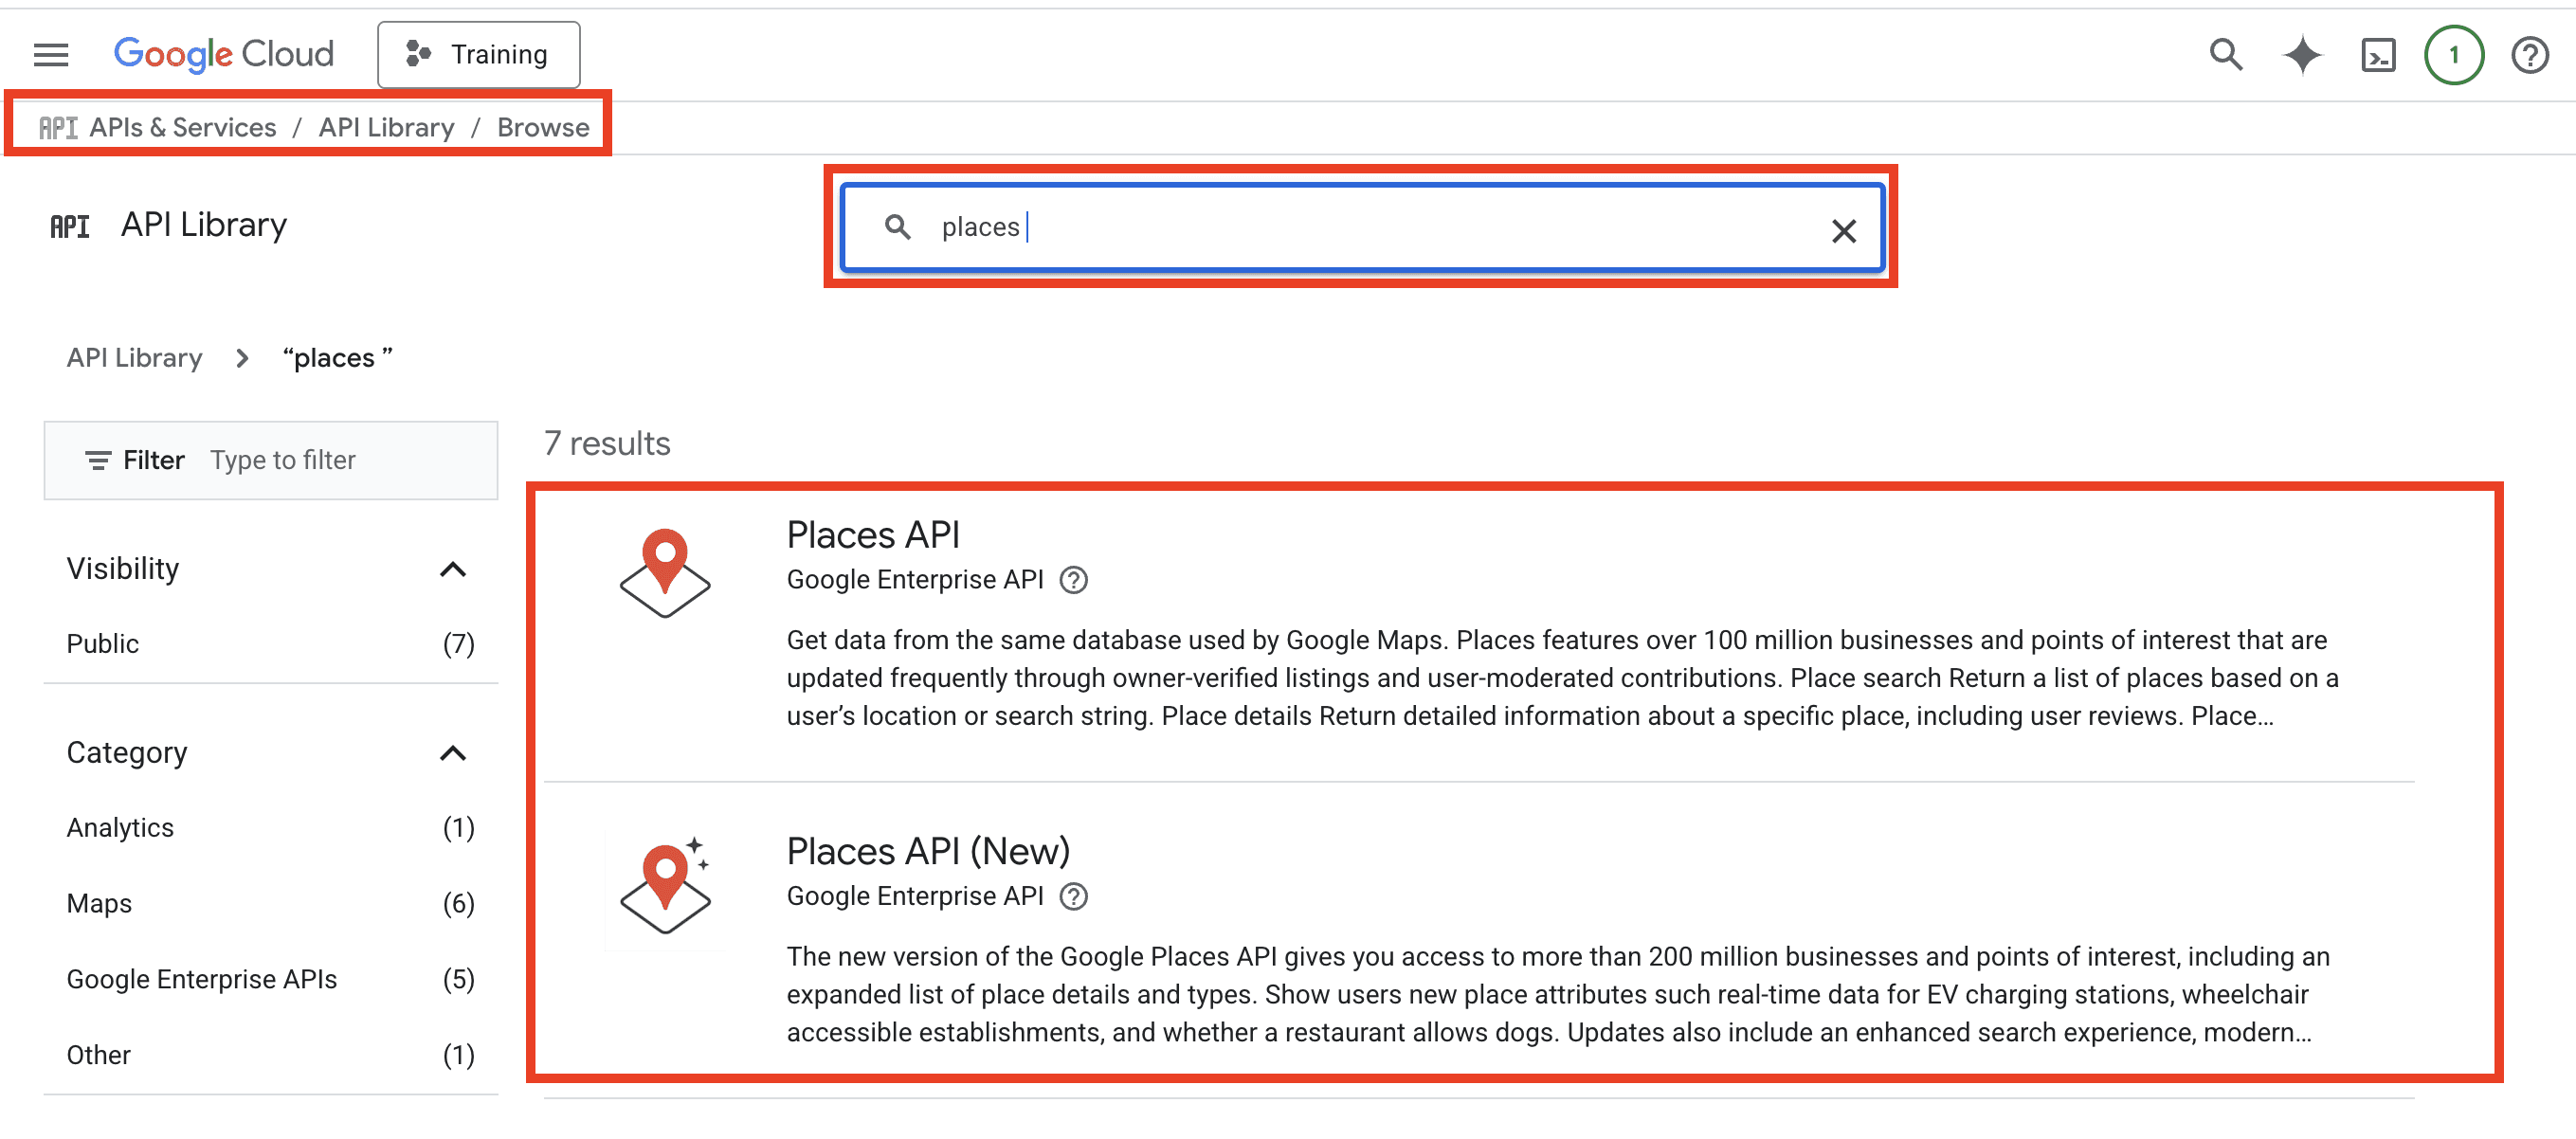
Search for "Places API (New)" and enable it.
Optional but recommended: search for "Geocoding API" and enable it too. Places API (New) usually provides coordinates directly, but Geocoding is a handy fallback for specific address-to-coordinate needs.
Create your API credentials:
Go to "APIs & Services" > "Credentials."
Click "+ Create Credentials" and select "API Key."
Copy the generated key and keep it somewhere safe. You can restrict it later for security — for now, just copy it.
NOTE: Keep your API key private. Treat it the same way you'd treat a password.
1.2 Getting Your Mapbox Access Token
Go to your Mapbox account: Visit
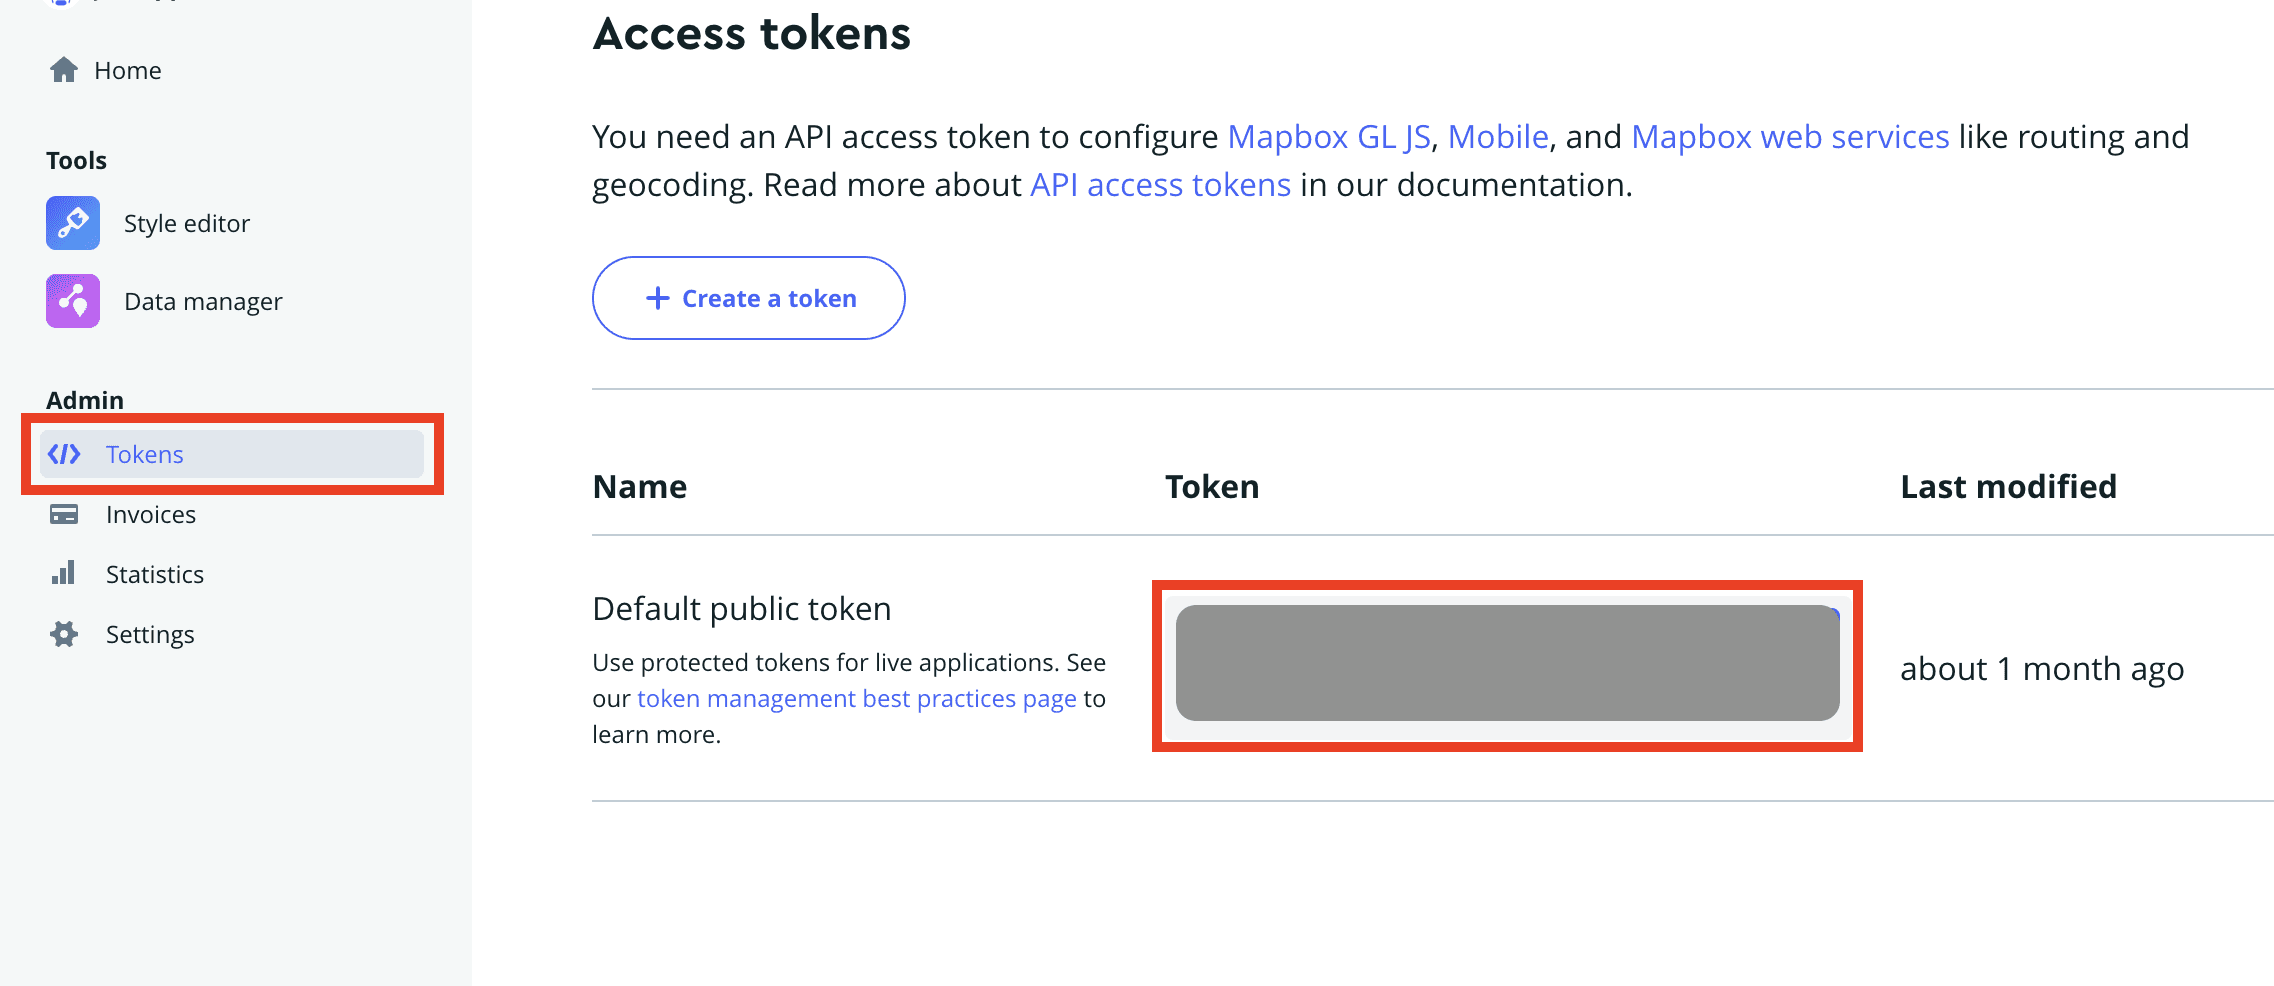
account.mapbox.com.Grab your public token: On your dashboard, you'll see your "Default public token." If you don't have one, click "Create a token" to generate a new one.
Copy this token — this is your Mapbox Access Token.
Part 2: Designing Your ProtoPie Prototype
2.1 Preparing ProtoPie Studio for Figma Import
Open ProtoPie Studio and create a new Pie file.
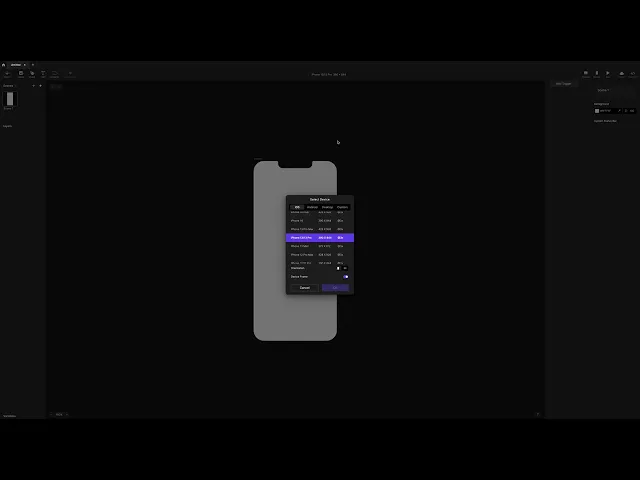
Match your canvas size to your Figma frame: Before importing, make sure your ProtoPie canvas size matches the frame you're exporting from Figma. This keeps the import 1:1 and avoids any scaling issues.
2.2 Importing Your Design from Figma
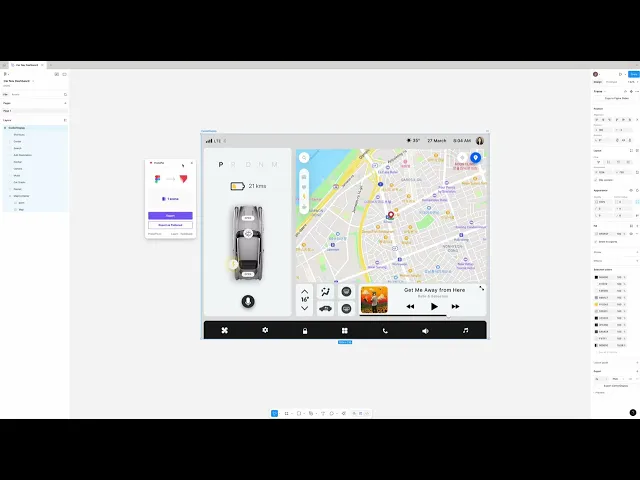
Prepare your design in Figma: Make sure your Figma file's layers are organized into a single frame. If you'd rather skip this step, you can start from the provided Figma file instead.
Export from Figma:
Click the "Actions" icon in the lower toolbar.
Select the "Plugins and Widgets" tab.
Search for "ProtoPie" and click on the plugin.
In the plugin window, select "Export." Your design imports directly into your open ProtoPie Studio file.
2.3 Basic UI Setup
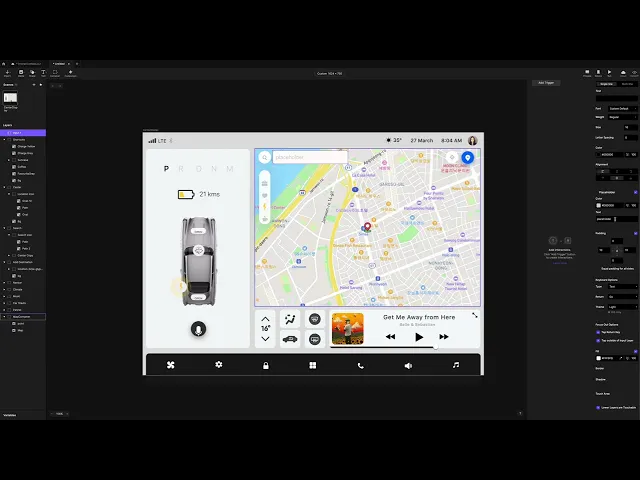
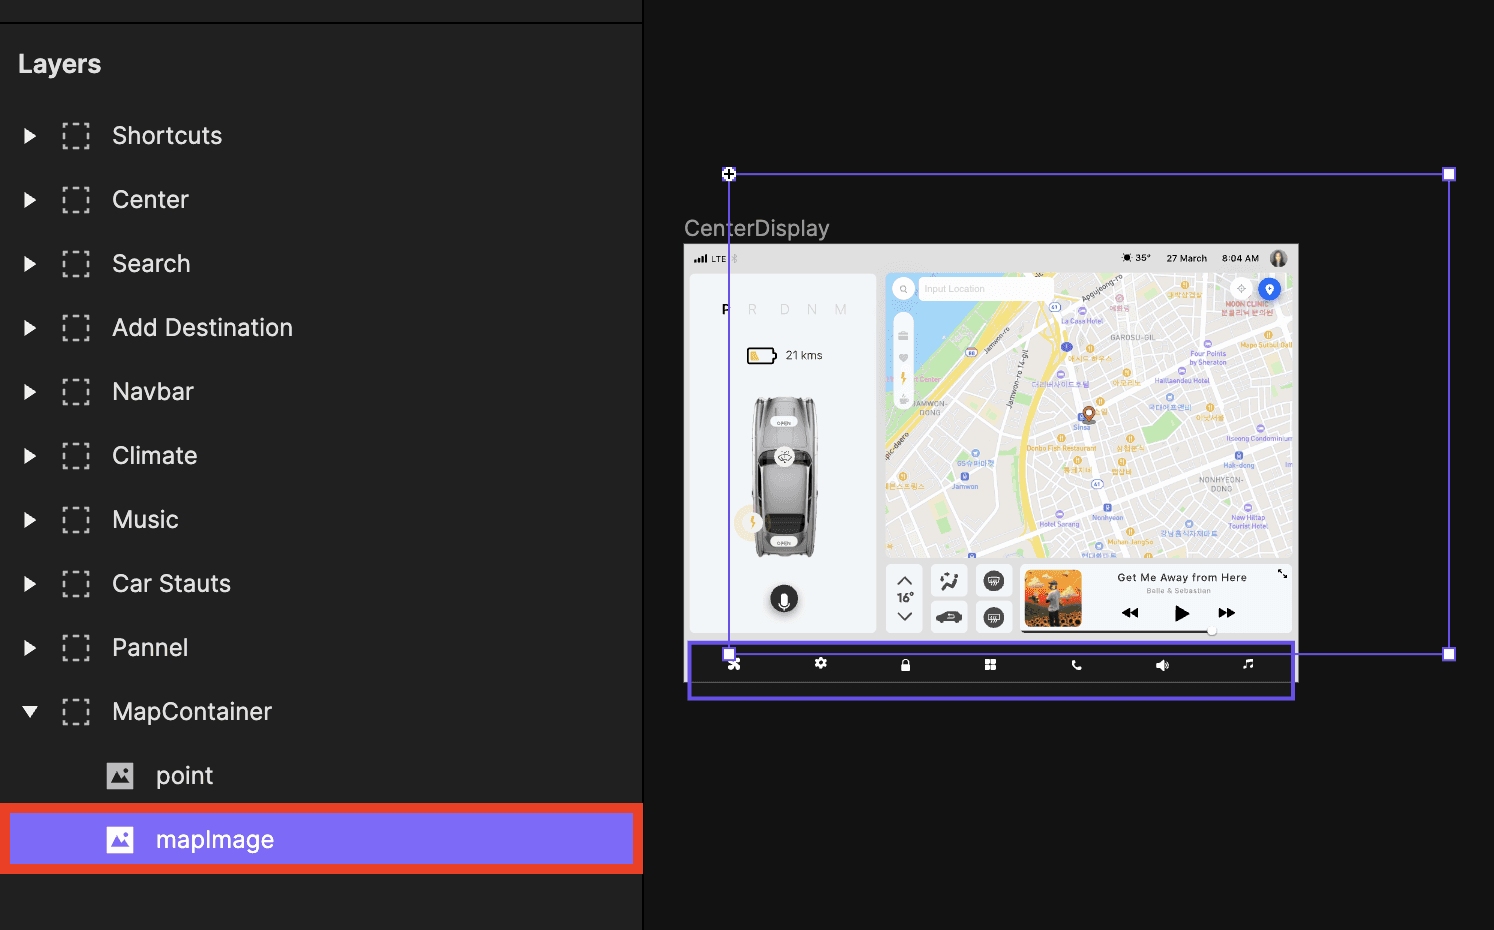
Whether you imported from Figma or built your UI directly in ProtoPie Studio, make sure your layers are set up like this:
Create your input layer:
Add a "Text Input" layer and name it
locationInput. This is where users will type the location they want to search for.Optional: move
locationInputinto aSearchcontainer to keep things organized.The template project uses these settings for the Text Input:
Size: 226 x 40
Radius: 8
Placeholder color:
D0D0D0Box Fill:
FFFBFB
Create your image layer:
Add or locate an "Image" layer to act as your map placeholder, and name it
mapImage.
Part 3: Connecting ProtoPie to the Google Places API (via ProtoPie Connect)
This is where ProtoPie Connect shines: we'll use its API plugin to make the HTTP request to Google Places.
3.1 A Quick Look at the Google Places API (New)
Before we dive into setup, it's worth understanding why the Google Places API (New) is central to this project. It's Google's latest generation of location data API, offering better performance, better data quality, and more flexible pricing than its predecessors — and it covers everything from businesses to points of interest to general geographic locations.
For this tutorial, we'll use its "Text Search" capability. It lets us send a plain-text query — like "Eiffel Tower" or "New York City" — and get back detailed place information, critically including precise latitude and longitude coordinates. That's the essential first step in turning a typed location into something a map service can actually use.
3.2 Why ProtoPie Connect?
Your Pie prototype can't make direct API calls on its own — this is exactly the gap ProtoPie Connect fills. Connect acts as a bridge between your prototype and external services: it sends the HTTP request to Google Places, receives the raw response, and passes it back to your Pie to process and display. Without Connect, there'd be no way for the prototype to fetch the coordinates it needs.
3.3 Capturing the User's Input
First, let's make the prototype continuously track what the user types and store it in a variable.
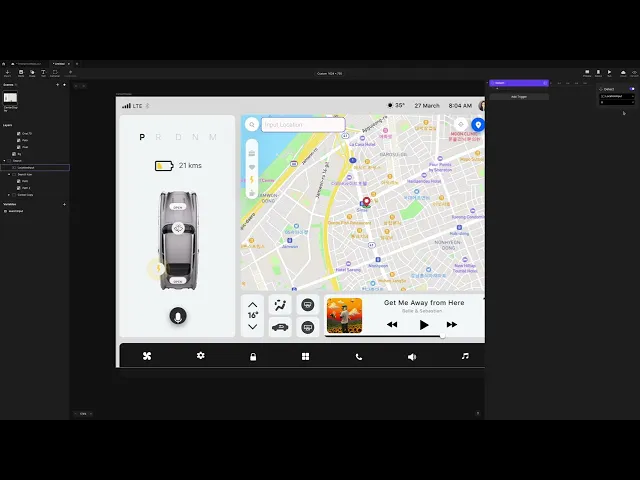
Create a new Text Variable:
Open the Variables Panel (bottom-left of ProtoPie Studio).
Create a new Text Variable (For All Scenes / global) named
searchInput— this will hold whatever the user types.Make sure its type is set to "Text," not "Number."
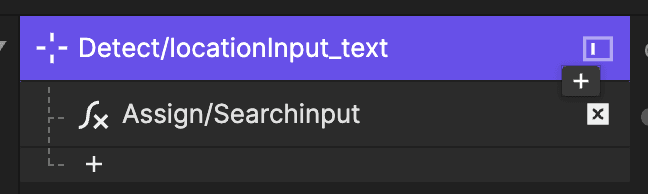
Capture the input with a Detect Trigger:
Add a "Detect" Trigger.
Target:
locationInput→Text(this watches the input field's text property).Inside the Detect Trigger, add an "Assign" Response:
Target:
searchInputvariableFormula:
locationInput.text
Why this works: as the user types,
locationInput.textchanges, the Detect Trigger fires, and the Assign Response updatessearchInputwith the latest text. Turn on Debug to watch the variable update live.Open Preview and try typing in the field — you should see
searchInputupdating in real time in the debug view.NOTE: Give your triggers and responses descriptive names as you go — future you (and anyone else opening the project) will thank you.
3.4 Triggering the API Request with the Return Key
Add two new global variables:
googleMapsRequestBody(Text Variable, For All Scenes): holds the full JSON request body for the Places API (New). Initialize it with this exact string:
{
"textQuery": "<INPUT QUERY>", "languageCode": "en", "regionCode": "kr"
}
textQueryis the field for the user's search query.<INPUT QUERY>is a placeholder we'll swap out for the real input.languageCode: "en"sets the response language to English.regionCode: "kr"biases results toward South Korea — adjust this to whatever region makes sense for you.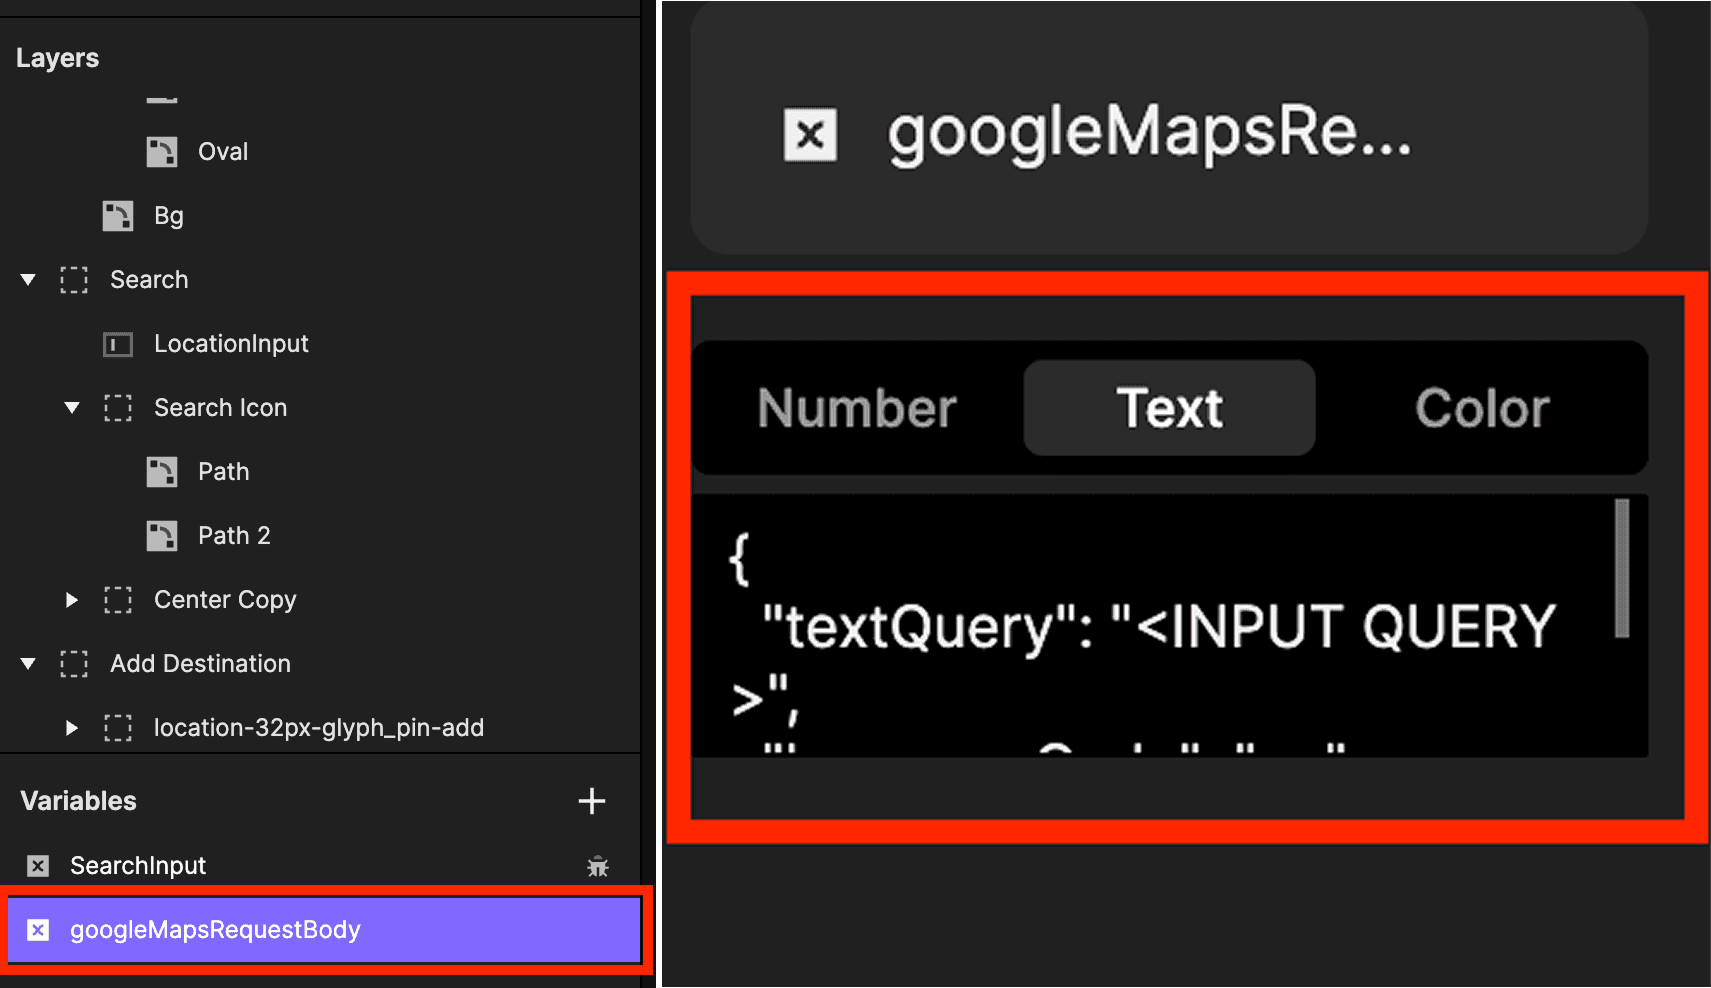
inputQuery(Text Variable, For All Scenes): a placeholder variable we'll swap dynamically. Initialize it with<INPUT QUERY>.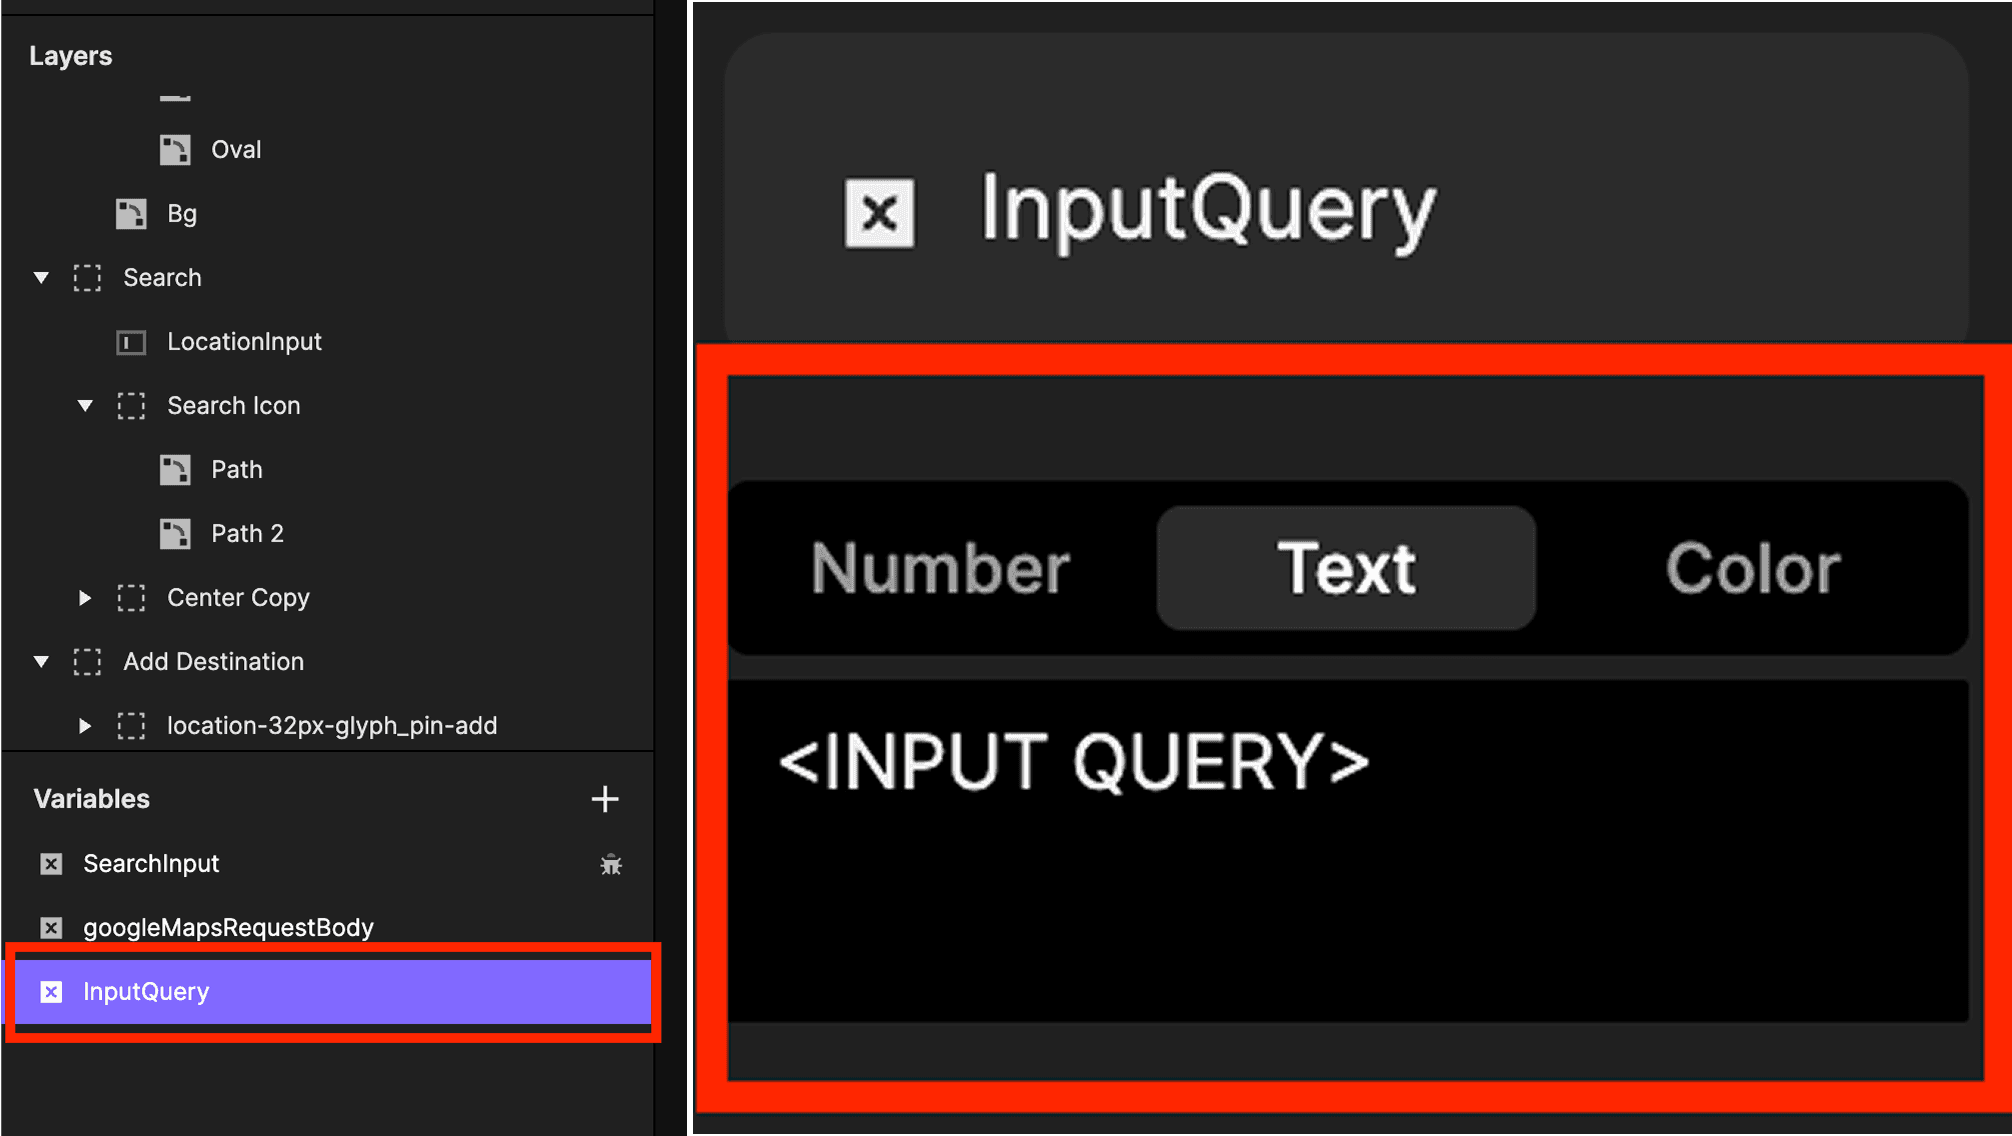
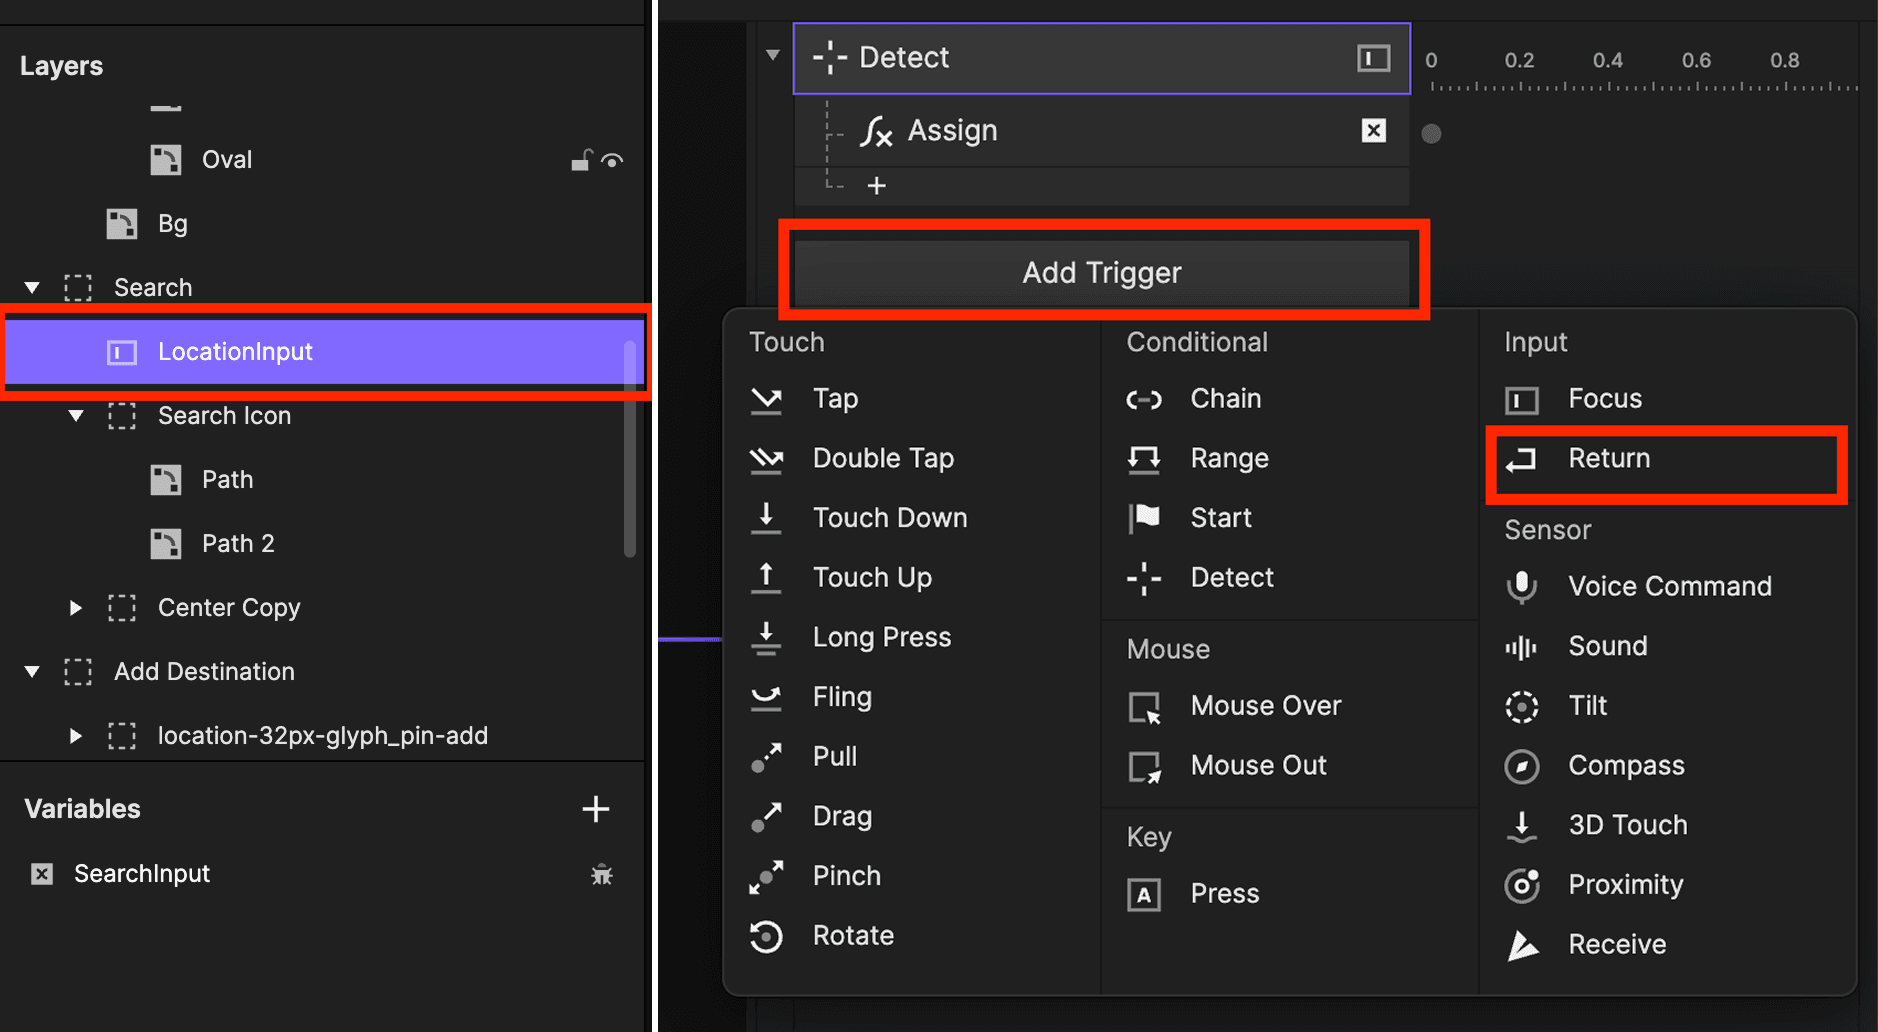
Add a "Return" Trigger:
Select the
locationInputlayer.Add a "Return" Trigger — this fires when the user presses Enter/Return, a natural pattern for search fields.
Prepare the request body and send it:
Inside the "Return" Trigger, add an "Assign" Response:
Target:
googleMapsRequestBodyFormula:
replace(googleMapsRequestBody, inputQuery, searchInput)Why this works: this formula finds every instance of
inputQuery(initially<INPUT QUERY>) insidegoogleMapsRequestBodyand replaces it withsearchInput, the text the user just typed.
Add another "Assign" Response to reset
inputQueryfor the next search:Target:
inputQueryFormula:
searchInputWhy this works: after the swap, we update
inputQueryto the current search term. Next time around,replacewill look for that term and swap in the new one — no hardcoding needed for each search.
Add a "Send" Response to fire off the request:
Channel: ProtoPie Connect/Studio
Message:
searchTextRequest(the message ProtoPie Connect listens for)Value: Formula →
googleMapsRequestBody
This sends the complete, dynamically built JSON request body over to Connect.
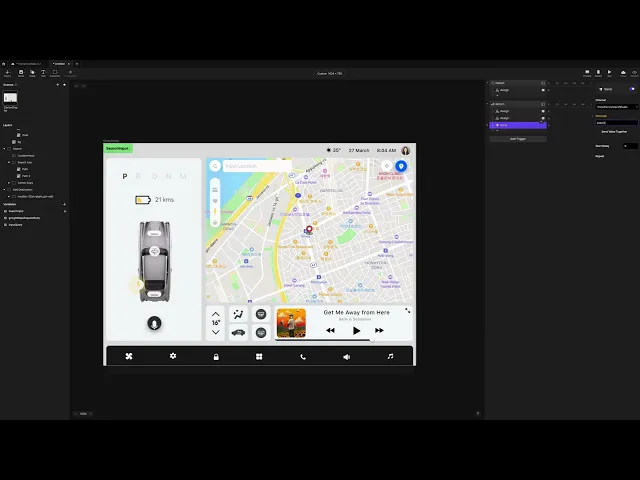
3.5 Receiving the Response and Building the Mapbox URL
Once ProtoPie Connect gets a response back from Google Places, it passes it to the Pie. Here, we'll receive that data, parse out the coordinates, and use them to dynamically build the Mapbox Static Images API URL.
Set up the variables you'll need (For All Scenes):
apiResponseRaw(Text Variable): receives the raw JSON from ProtoPie Connect.latitude(Text Variable): stores the extracted latitude.longitude(Text Variable): stores the extracted longitude.mapBox_URL(Text Variable): holds your base Mapbox URL with placeholders for latitude and longitude (<LAT>and<LON>):
https://api.mapbox.com/styles/v1/mapbox/streets-v12/static/<LON>,<LAT>,14,0/1200x800?access_token=YOUR_MAPBOX_TOKEN
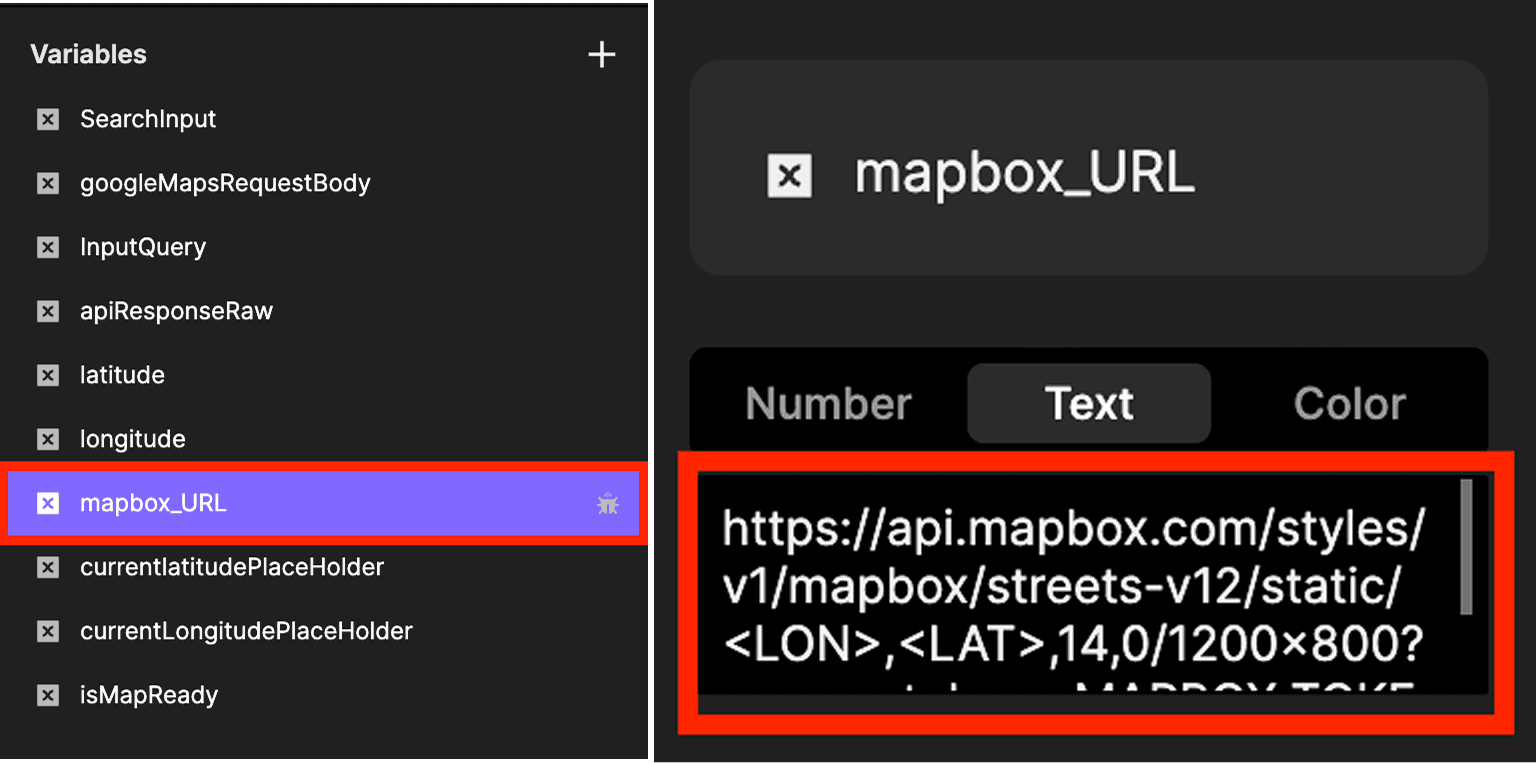
NOTE: Replace YOUR_MAPBOX_TOKEN with your actual Mapbox Access Token.
currentlatitudePlaceholder(Text Variable): initialize with<LAT>— tracks the last latitude value inserted intomapBox_URL.
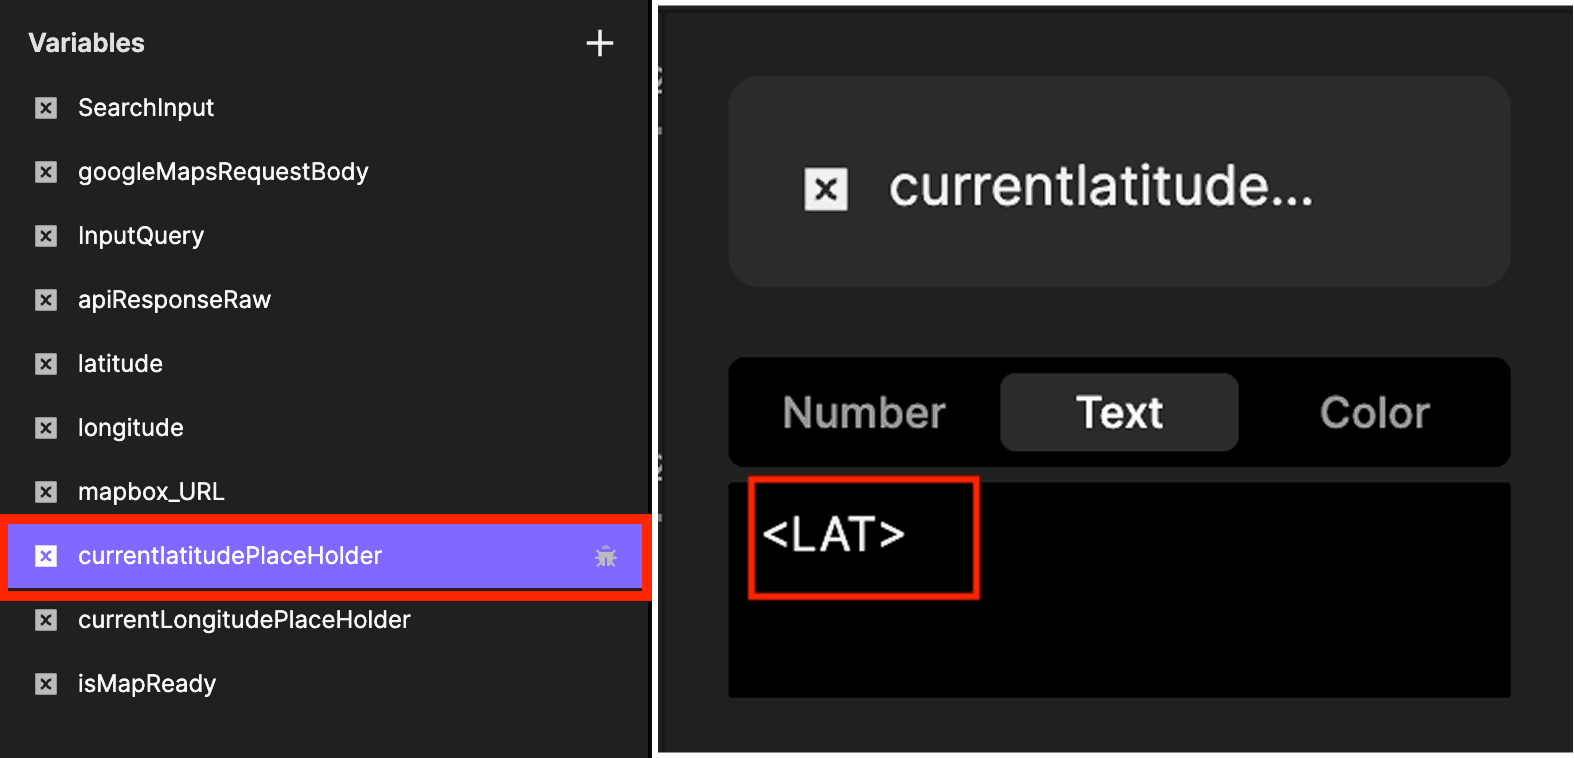
currentLongitudePlaceholder(Text Variable): initialize with<LON>— tracks the last longitude value inserted intomapBox_URL.
Add a "Receive" Trigger:
Channel: ProtoPie Connect/Studio
Message:
searchLocationReceivedAssign to Variable: check this box and select
apiResponseRaw(type: Text).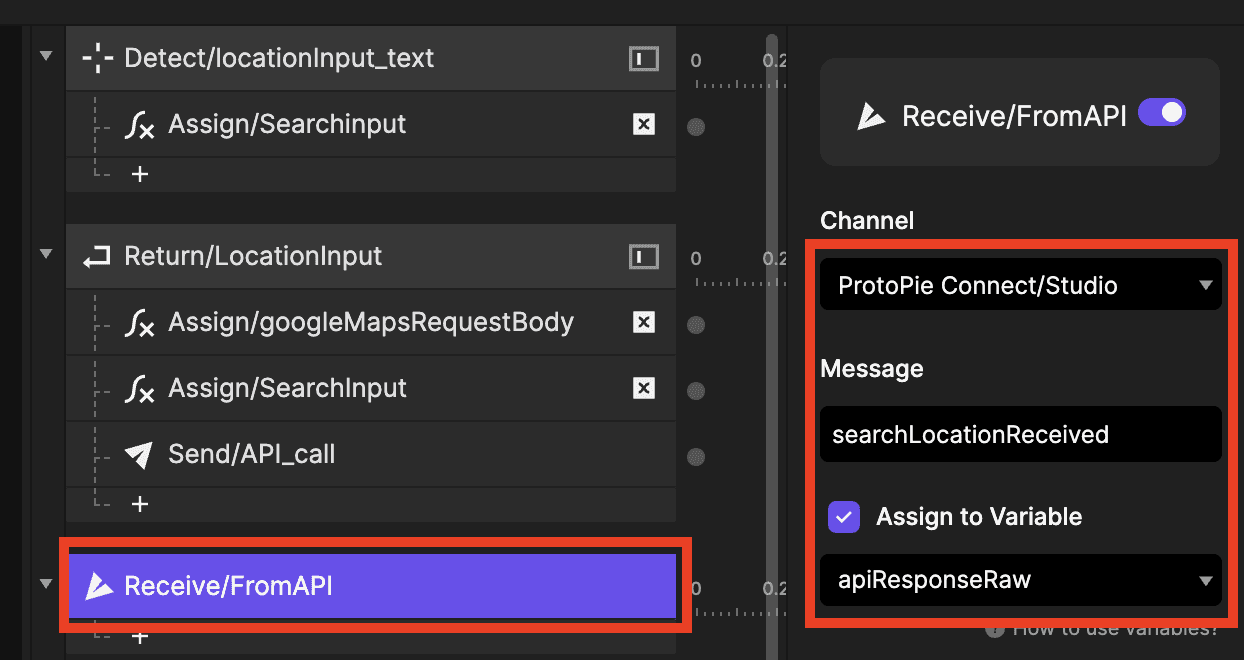
Add a "Detect" Trigger for
apiResponseRaw:Target:
apiResponseRawInside it, add two "Assign" Responses to pull out the coordinates:
Latitude — Target:
latitude,Formula:parseJson(apiResponseRaw, "places.0.location.latitude")places.0refers to the first result in theplacesarray (the API can return more than one match), andlocation.latitudeis the path to the value we want.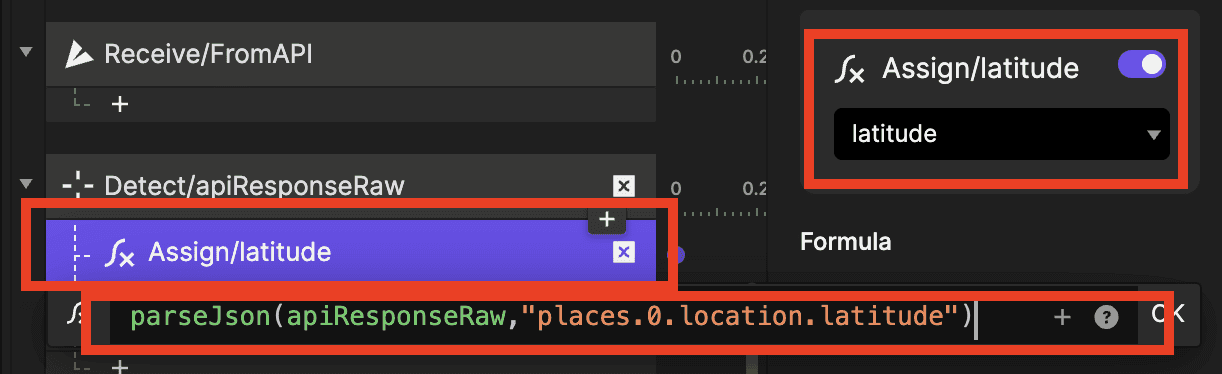
Longitude — Target:
longitude, Formula:parseJson(apiResponseRaw, "places.0.location.longitude")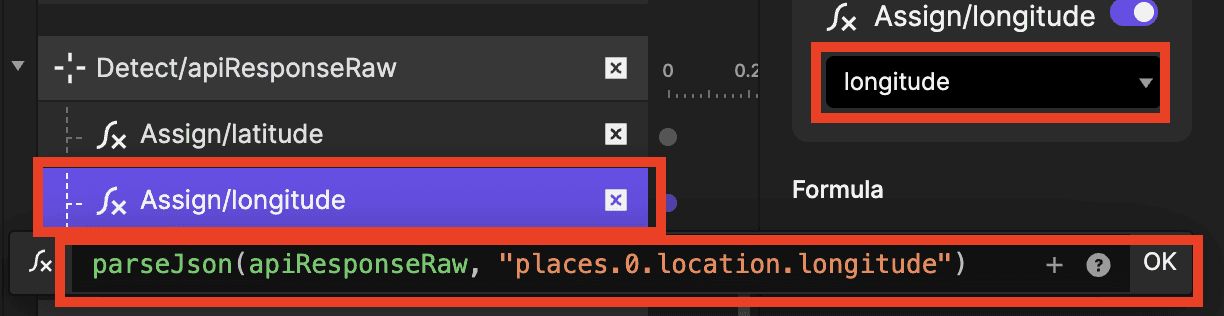
Add a "Detect" Trigger for
longitude:Target:
longitudeInside it:
Assign — Target:
mapBox_URL, Formula:replace(mapBox_URL, currentLongitudePlaceholder, longitude)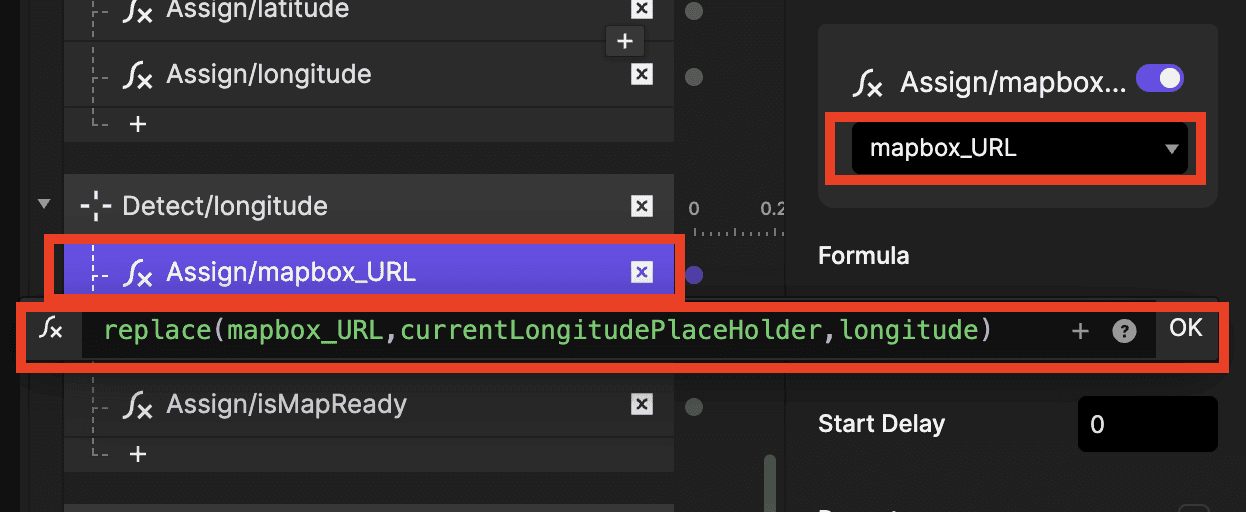
Assign — Target:
currentLongitudePlaceholder, Formula:longitude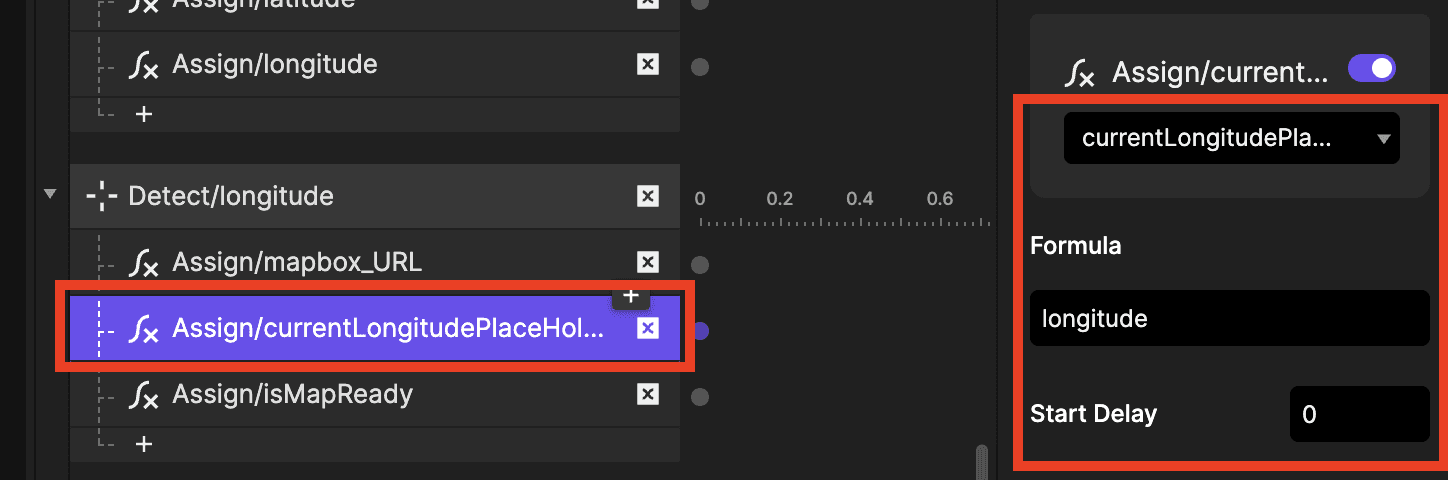
Assign — Target:
isMapReady, Formula:isMapReady + 1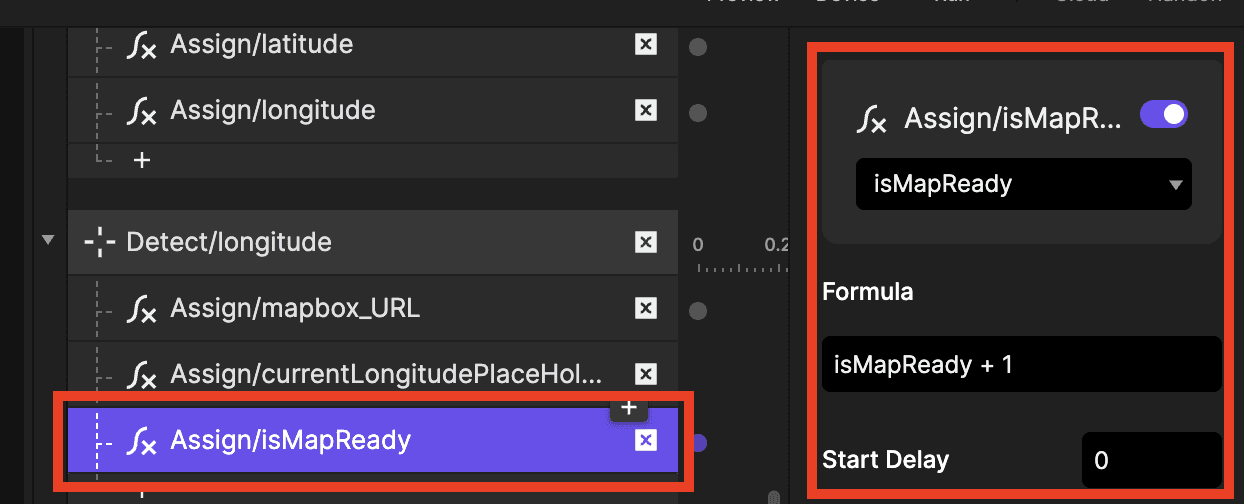
Add a "Detect" Trigger for
latitude:
Target:
latitudeInside it:
Assign — Target:
mapBox_URL, Formula:replace(mapBox_URL, currentLatitudePlaceholder, latitude)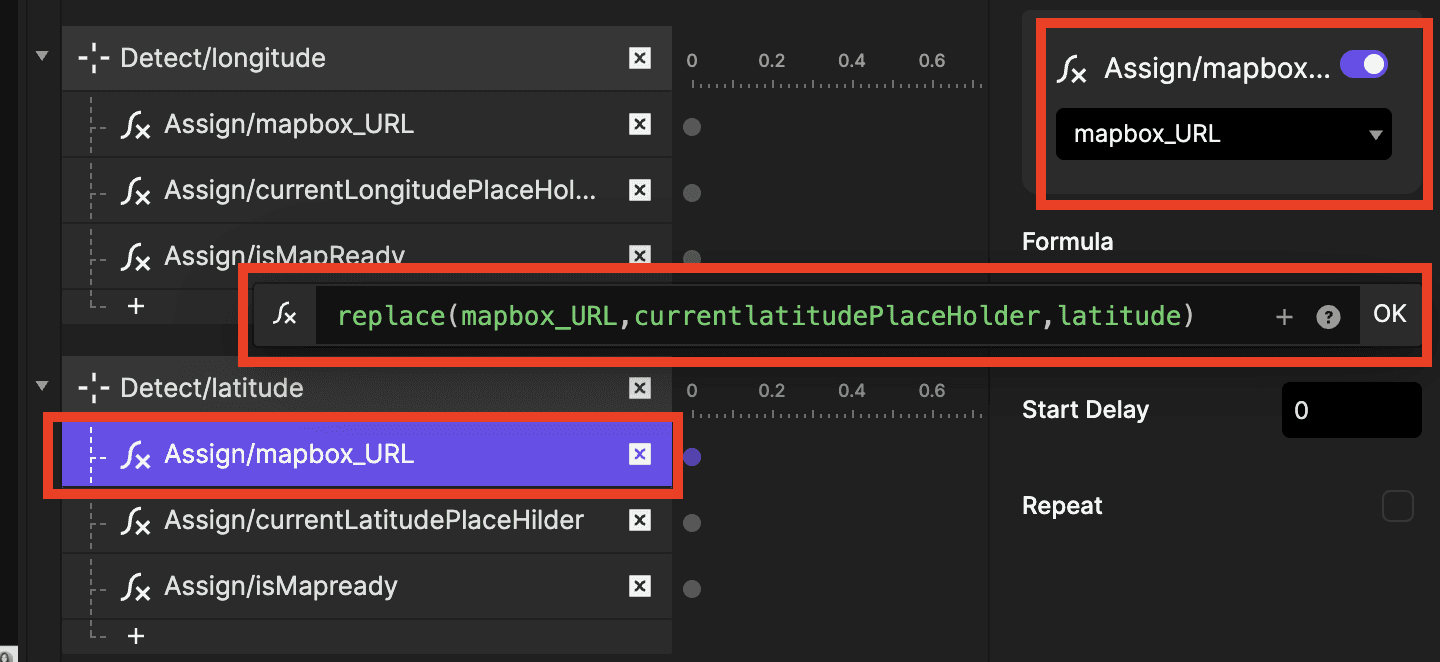
Assign — Target:
currentLatitudePlaceholder, Formula:latitude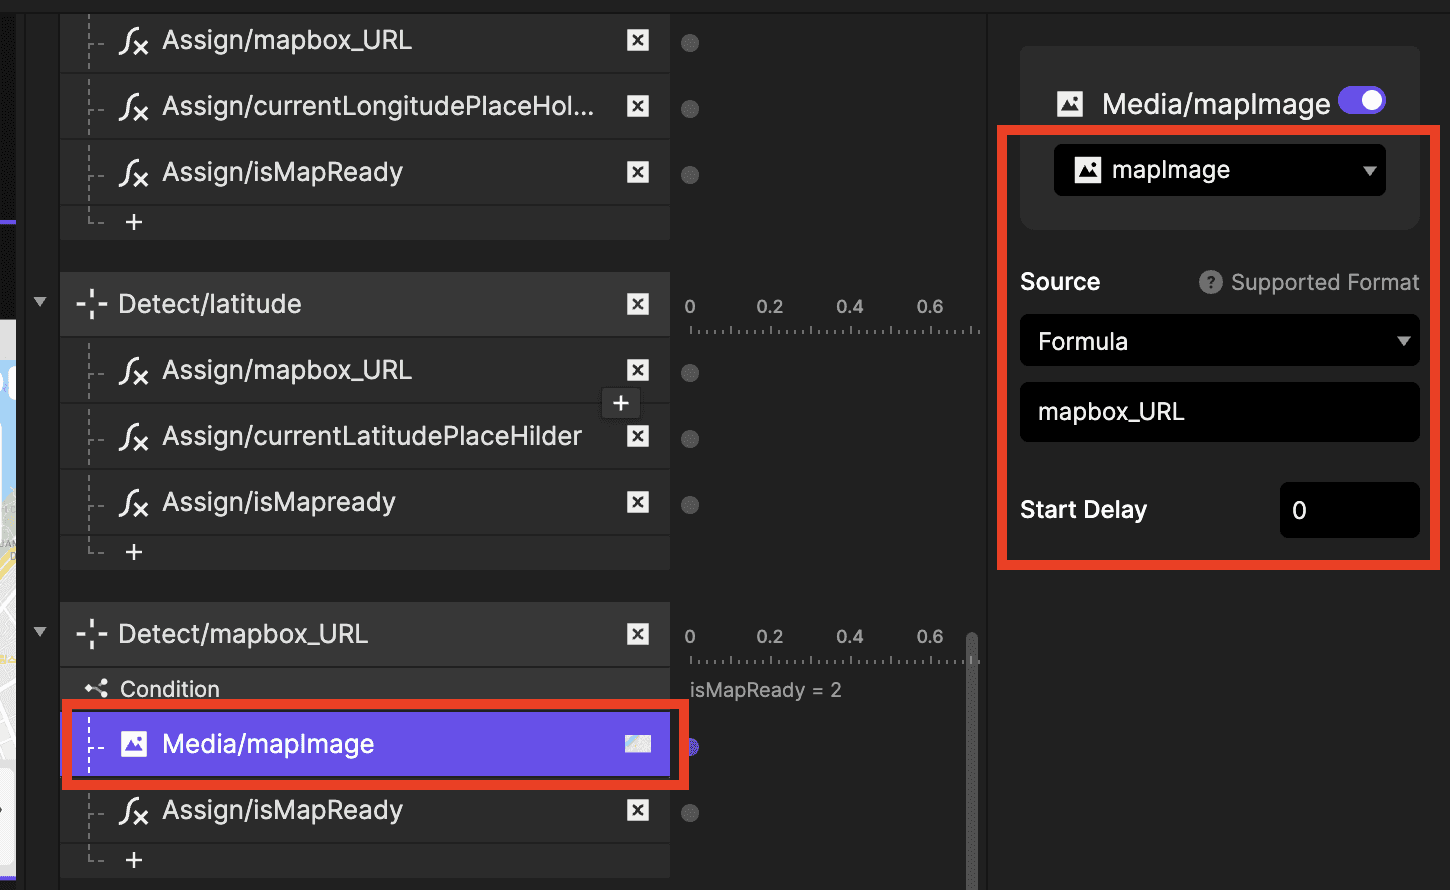
Assign — Target:
isMapReady, Formula:isMapReady + 1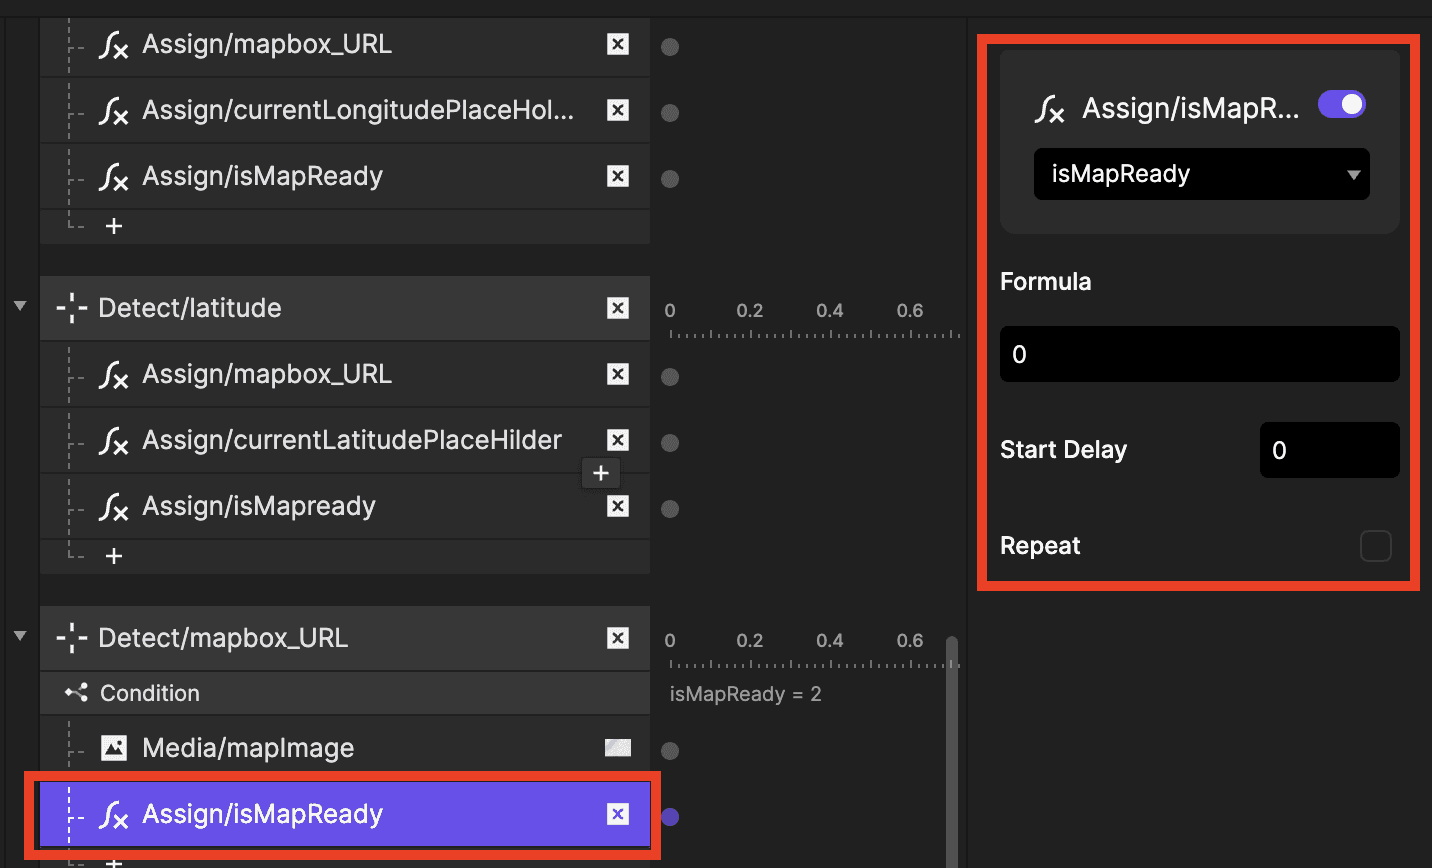
Add a "Detect" Trigger for
isMapReady(to load the image):
Target:
isMapReadyCondition:
isMapReady = 2— this confirmsmapBox_URLnow has both coordinates.Respond with an "Image" Response — Target:
mapImage, Source: Formula, Formula:mapBox_URLAssign — Target:
isMapReady, Formula:0(reset for the next search)
3.6 Configuring the API Plugin in ProtoPie Connect
Now let's set up ProtoPie Connect to handle searchTextRequest and talk to the Google Places API (New).
Save your ProtoPie file locally or in the cloud.
Open the saved
.piefile in ProtoPie Connect.Click "Plugin" in the top right.
Select "API" from the plugin list and click "+."
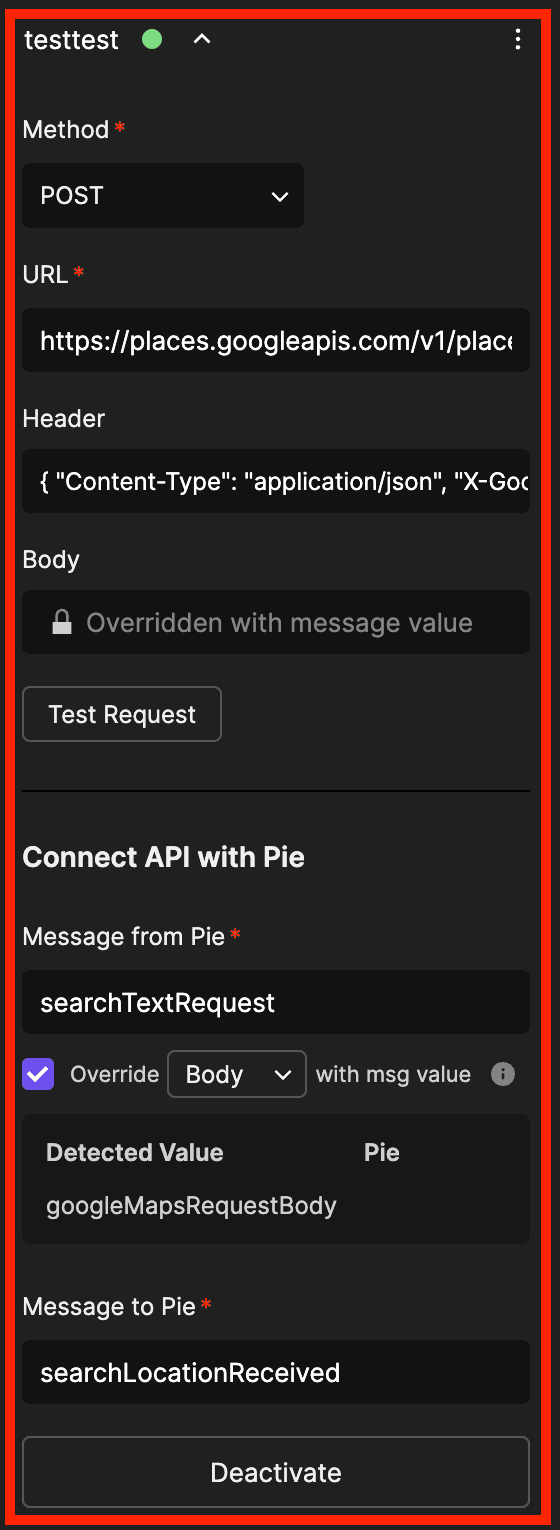
Configure the API Plugin:
Method:
POSTURL:
https://places.googleapis.com/v1/places:searchTextHeader:
{ "Content-Type": "application/json", "X-Goog-Api-Key": "YOUR_GOOGLE_API_KEY", "X-Goog-FieldMask": "places.location" }(Replace
YOUR_GOOGLE_API_KEYwith your actual Google API Key.)
Body: leave empty — it's generated dynamically from the Pie.
Message From Pie:
searchTextRequestCheck Override and set BODY to Message Value.
Message To Pie:
searchLocationReceivedClick "Activate."
Part 4: Testing Your Prototype
Make sure your Pie is updated in ProtoPie Connect if you've made changes since it was first loaded.
Confirm ProtoPie Connect is running, your Pie is loaded, and the API plugin is activated.
Run the prototype in a web browser via ProtoPie Connect's preview link.
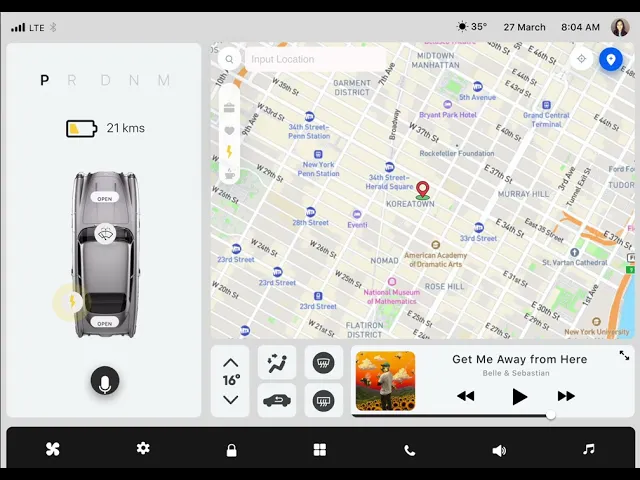
Type a location — "Eiffel Tower," "Times Square" — into the input field and press Enter.
Your map should reload centered on the new location.
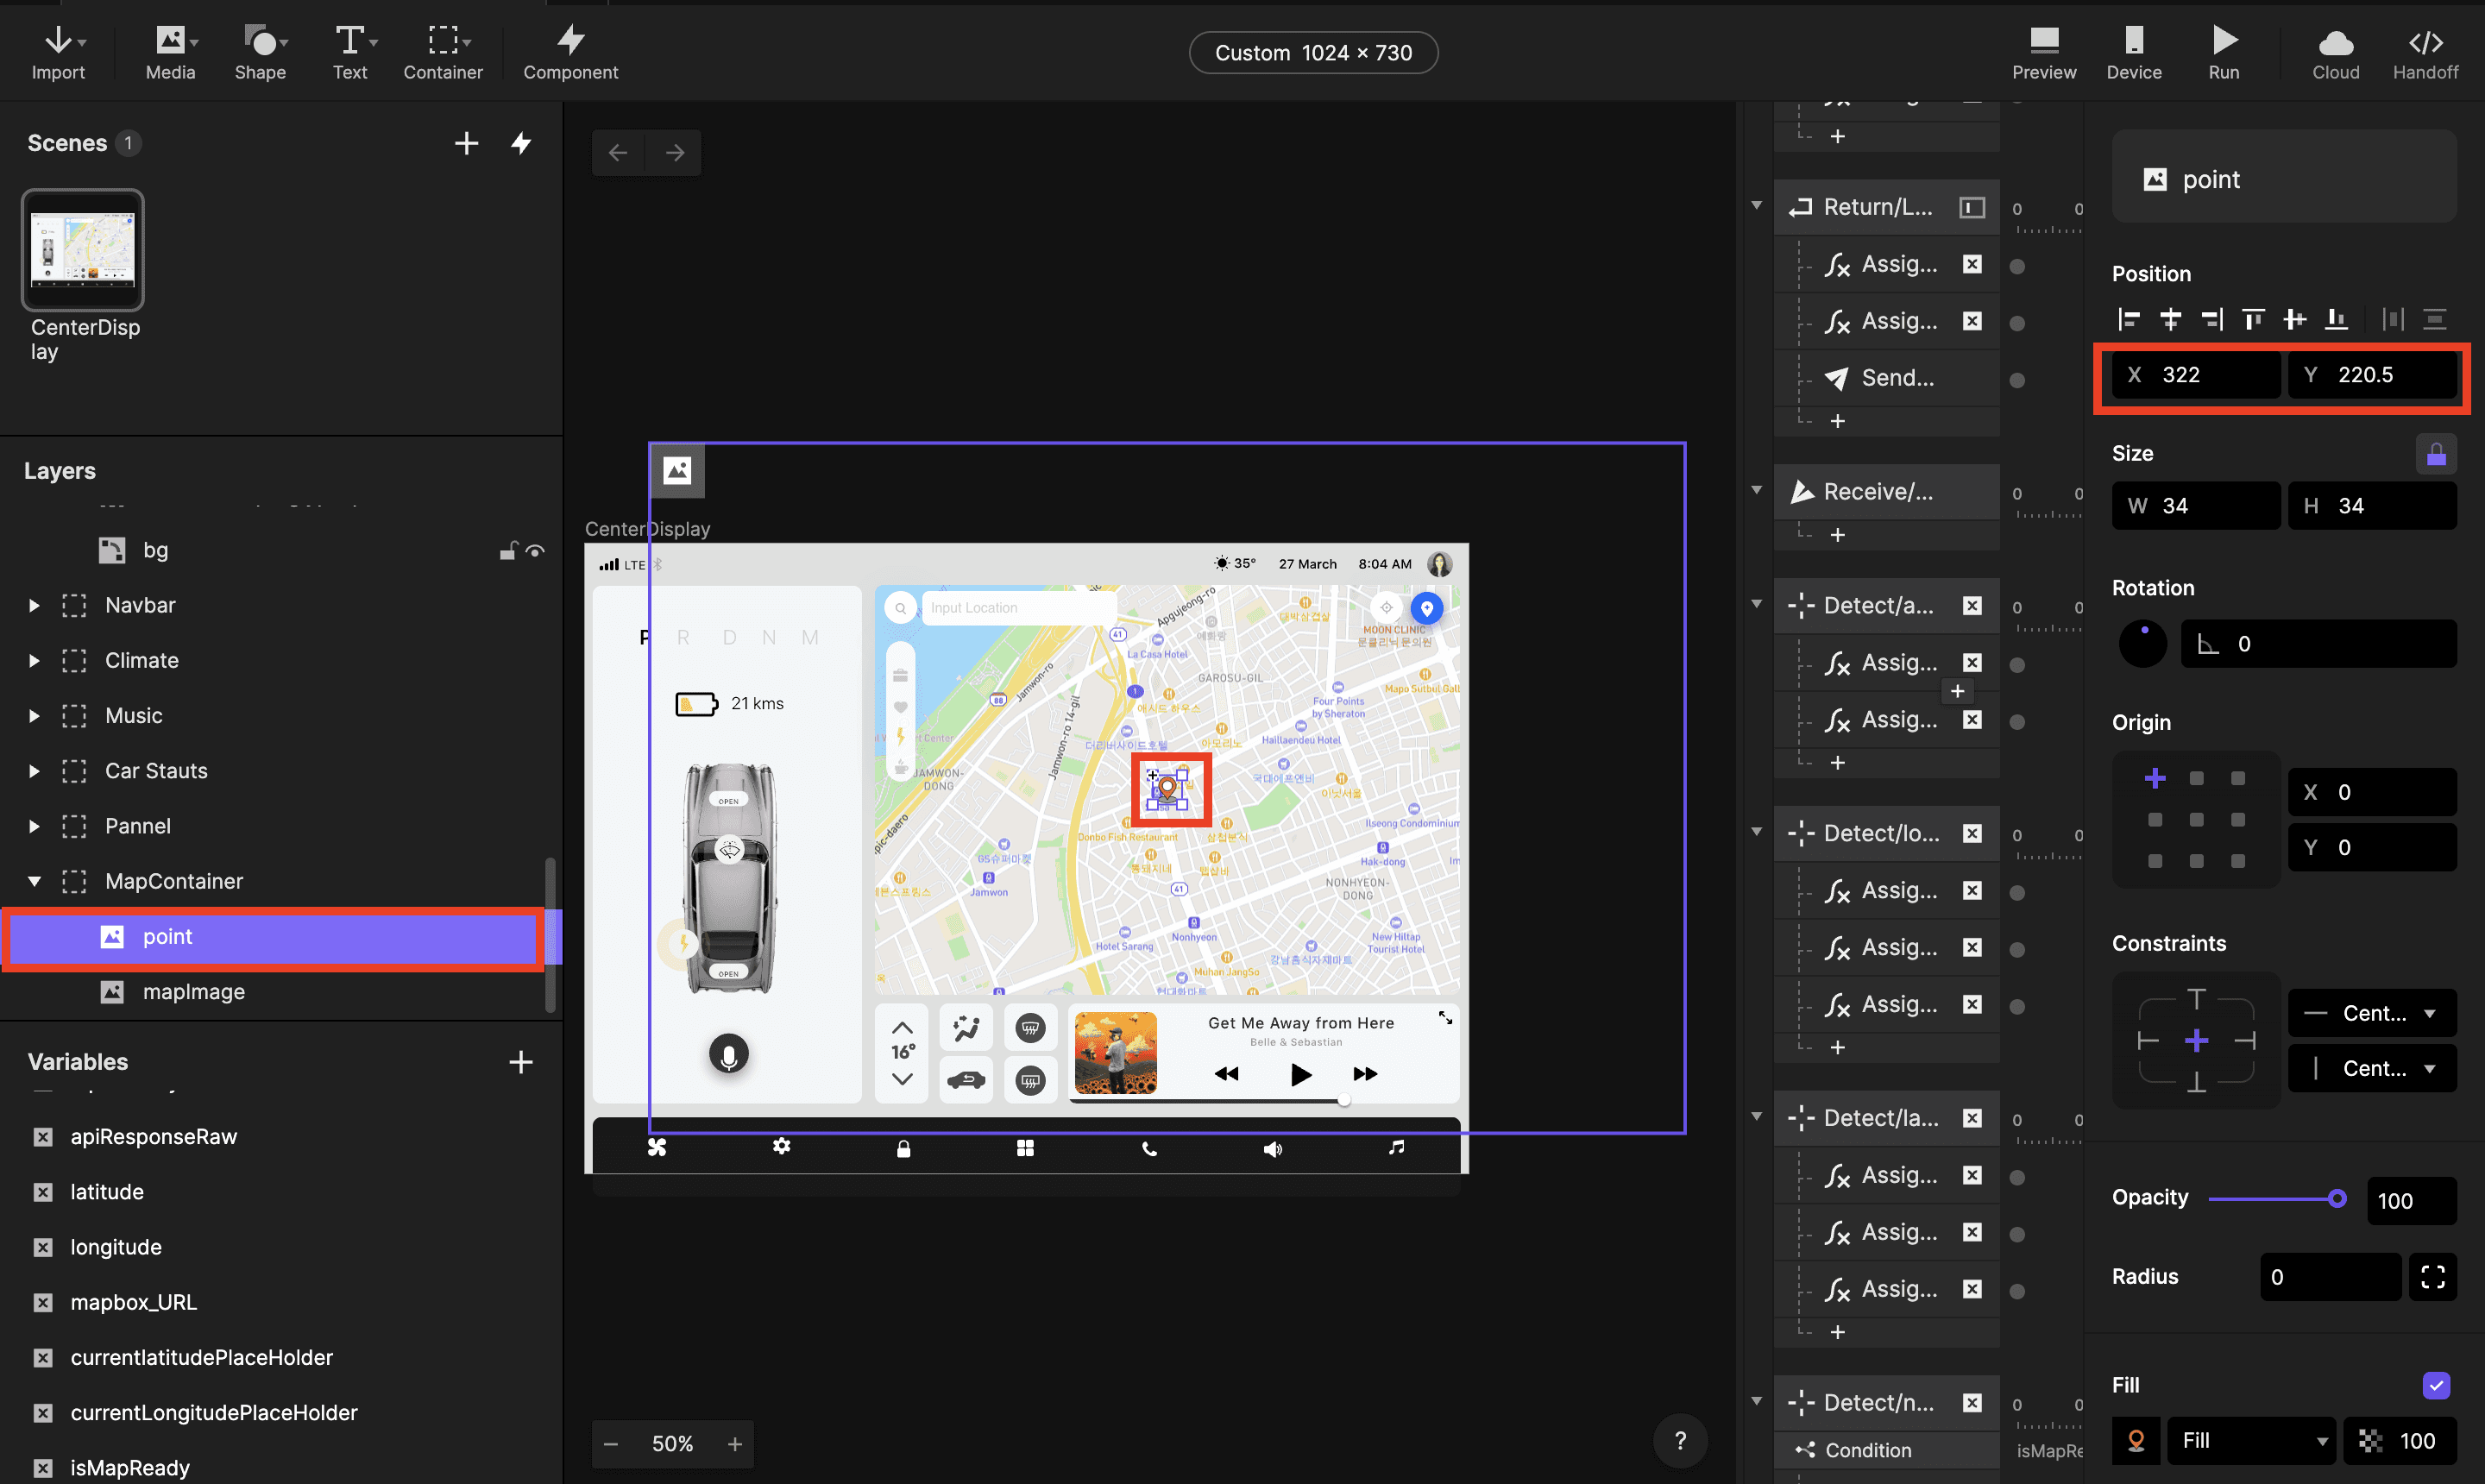
Tip: Since the static map always loads centered on the searched location, placing a marker at the center of your ProtoPie canvas will always point to the right spot on the map, no matter where the user searches.
Additional Improvements
Once the core flow is working, consider layering in a loading screen while the map fetches, and map drag interactions for a more polished feel.
Ready to try it yourself?
Google Places and Mapbox aren't the only APIs you can bring into a ProtoPie prototype — and now that you've seen the pattern (fetch data with Connect, feed it into a formula, update your UI), you're ready to plug in other location, data, or media services the same way.
Download ProtoPie Studio and Connect and start building.