Arduino Prototyping with ProtoPie
Interaction prototyping across the boundary between software and hardware.


Update 2021: I wrote another article about software and hardware-integrated prototypes for beginners that explains how you can get started with Arduino & ProtoPie. You might be interested in reading that one first!
These days, software interactions often take place organically alongside hardware interactions—and in some cases, there is no clear boundary between the two. However, as a designer myself, I know that there has traditionally been a huge barrier between software and hardware that cannot easily be overcome. Software designers usually aren't sure how to deal with hardware, or how to create software interactions by using signals that are inputted into hardware. Likewise, hardware designers usually need to resort to coding in order to test the software that's embedded into their hardware.
This is where Arduino and ProtoPie come in.
ProtoPie communicates with Arduino via ProtoPie Connect
ProtoPie is a hi-fi prototyping tool for mobile, web, dashboard, digital screens, etc. Its extension,ProtoPie Connect, helps you take these prototypes and put them into action. You can create interactions between smart devices and communicate among IoT devices or physical computing tools such as Arduino. You can check out some demos that we made using ProtoPie Connect on the ProtoPie YouTube channel.
ProtoPie Connect can communicate directly with hardware that supports socket.io signals. This means you don't need to develop any other bridge app and can simply connect ProtoPie Connect with Arduino. In this article, we will show you an even easier way: Communicating with USB. This method means that you don't need to write any code for bridge apps.

This example uses an Arduino device to mimic a car, featuring LEDs, pushbuttons, piezo buzzers, and light sensors on an UNO board.
- Pressing a switch will play the sound of a car engine turning on and change the screen on an Android phone to show a driver’s seat.
- Tapping on the horn will cause the piezo buzzer to go off.
- Pressing a button on the screen will turn on the LED.
- Covering the light sensor (or darkening the surroundings) will darken the window view in the car.
Watch the video below and check out this prototype in action.
Set up ProtoPie
ProtoPie allows you to communicate with other devices by using the Receive Trigger and the Send Response. In order to communicate with an Arduino device, all that is needed is to set the Channel to “ProtoPie Studio” and set the Message to whatever you wish.

For reference, the following Messages were used in this example.

Set up Arduino
To set it up, we need a Photoresistor, an LED, a Piezo Buzzer, a Switch, and 2 resistors(330Ω for LED, 10kΩ for Photoresistor.) When you're ready, go ahead and connect them by following this circuit diagram.

We put together the following code using the Messages that we mentioned above. Here's the Arduino Sketch example.
// pin numbers
const int LED = 13;
const int PIEZO = 12;
const int SWITCH = 8;

const int LIGHT_VAL_CRITERIA = 600;

int lastSwVal = 0;
int lastBright = -1; // -1: unkown, 0: dark, 1: bright

void setup() {
  pinMode(PIEZO, OUTPUT);
  pinMode(LED, OUTPUT);
  pinMode(SWITCH, INPUT_PULLUP);

  Serial.begin(9600);
}

void loop() {
  // Read from the switch
  int swVal = digitalRead(SWITCH);
  if (swVal != lastSwVal) {
    if (swVal == 0) {
      Serial.println("SWITCH");
    }
    lastSwVal = swVal;
  }

  // Read from the light sensor
  int lightVal = analogRead(A4);
  if (lastBright != 0 && lightVal < LIGHT_VAL_CRITERIA) {
    lastBright = 0;
    Serial.println("BRIGHT"); // Send "BRIGHT" to ProtoPie
  } else if (lastBright != 1 && lightVal >= LIGHT_VAL_CRITERIA) {
    lastBright = 1;
    Serial.println("DARK"); // Send "DARK" to ProtoPie
  }

  // Read from ProtoPie-Connect
  while (Serial.available() > 0) {
    int b = Serial.read();

    if (b == 'O') { // Turn on the LED
      digitalWrite(LED, HIGH);
    } else if (b == 'X') { // Turn off the LED
      digitalWrite(LED, LOW);
    } else if (b == 'B') { // Play a beep
      tone(PIEZO, 1047, 100);
    }
  }
}
Put them together
- Use USB cables to connect your laptop and Arduino Uno.
- Send your Arduino code on Arduino Sketch (Arduino IDE) to Arduino Uno.
- Connect your laptop and mobile within the same network environment.
- Connect Arduino with ProtoPie Connect by clicking "...", choose the USB port (the port name could be different from mine), and enter 9600 for the baud rate.
💡 You cannot connect if the serial monitor is turned on in the Arduino IDE, so first make sure you turn off the serial monitor.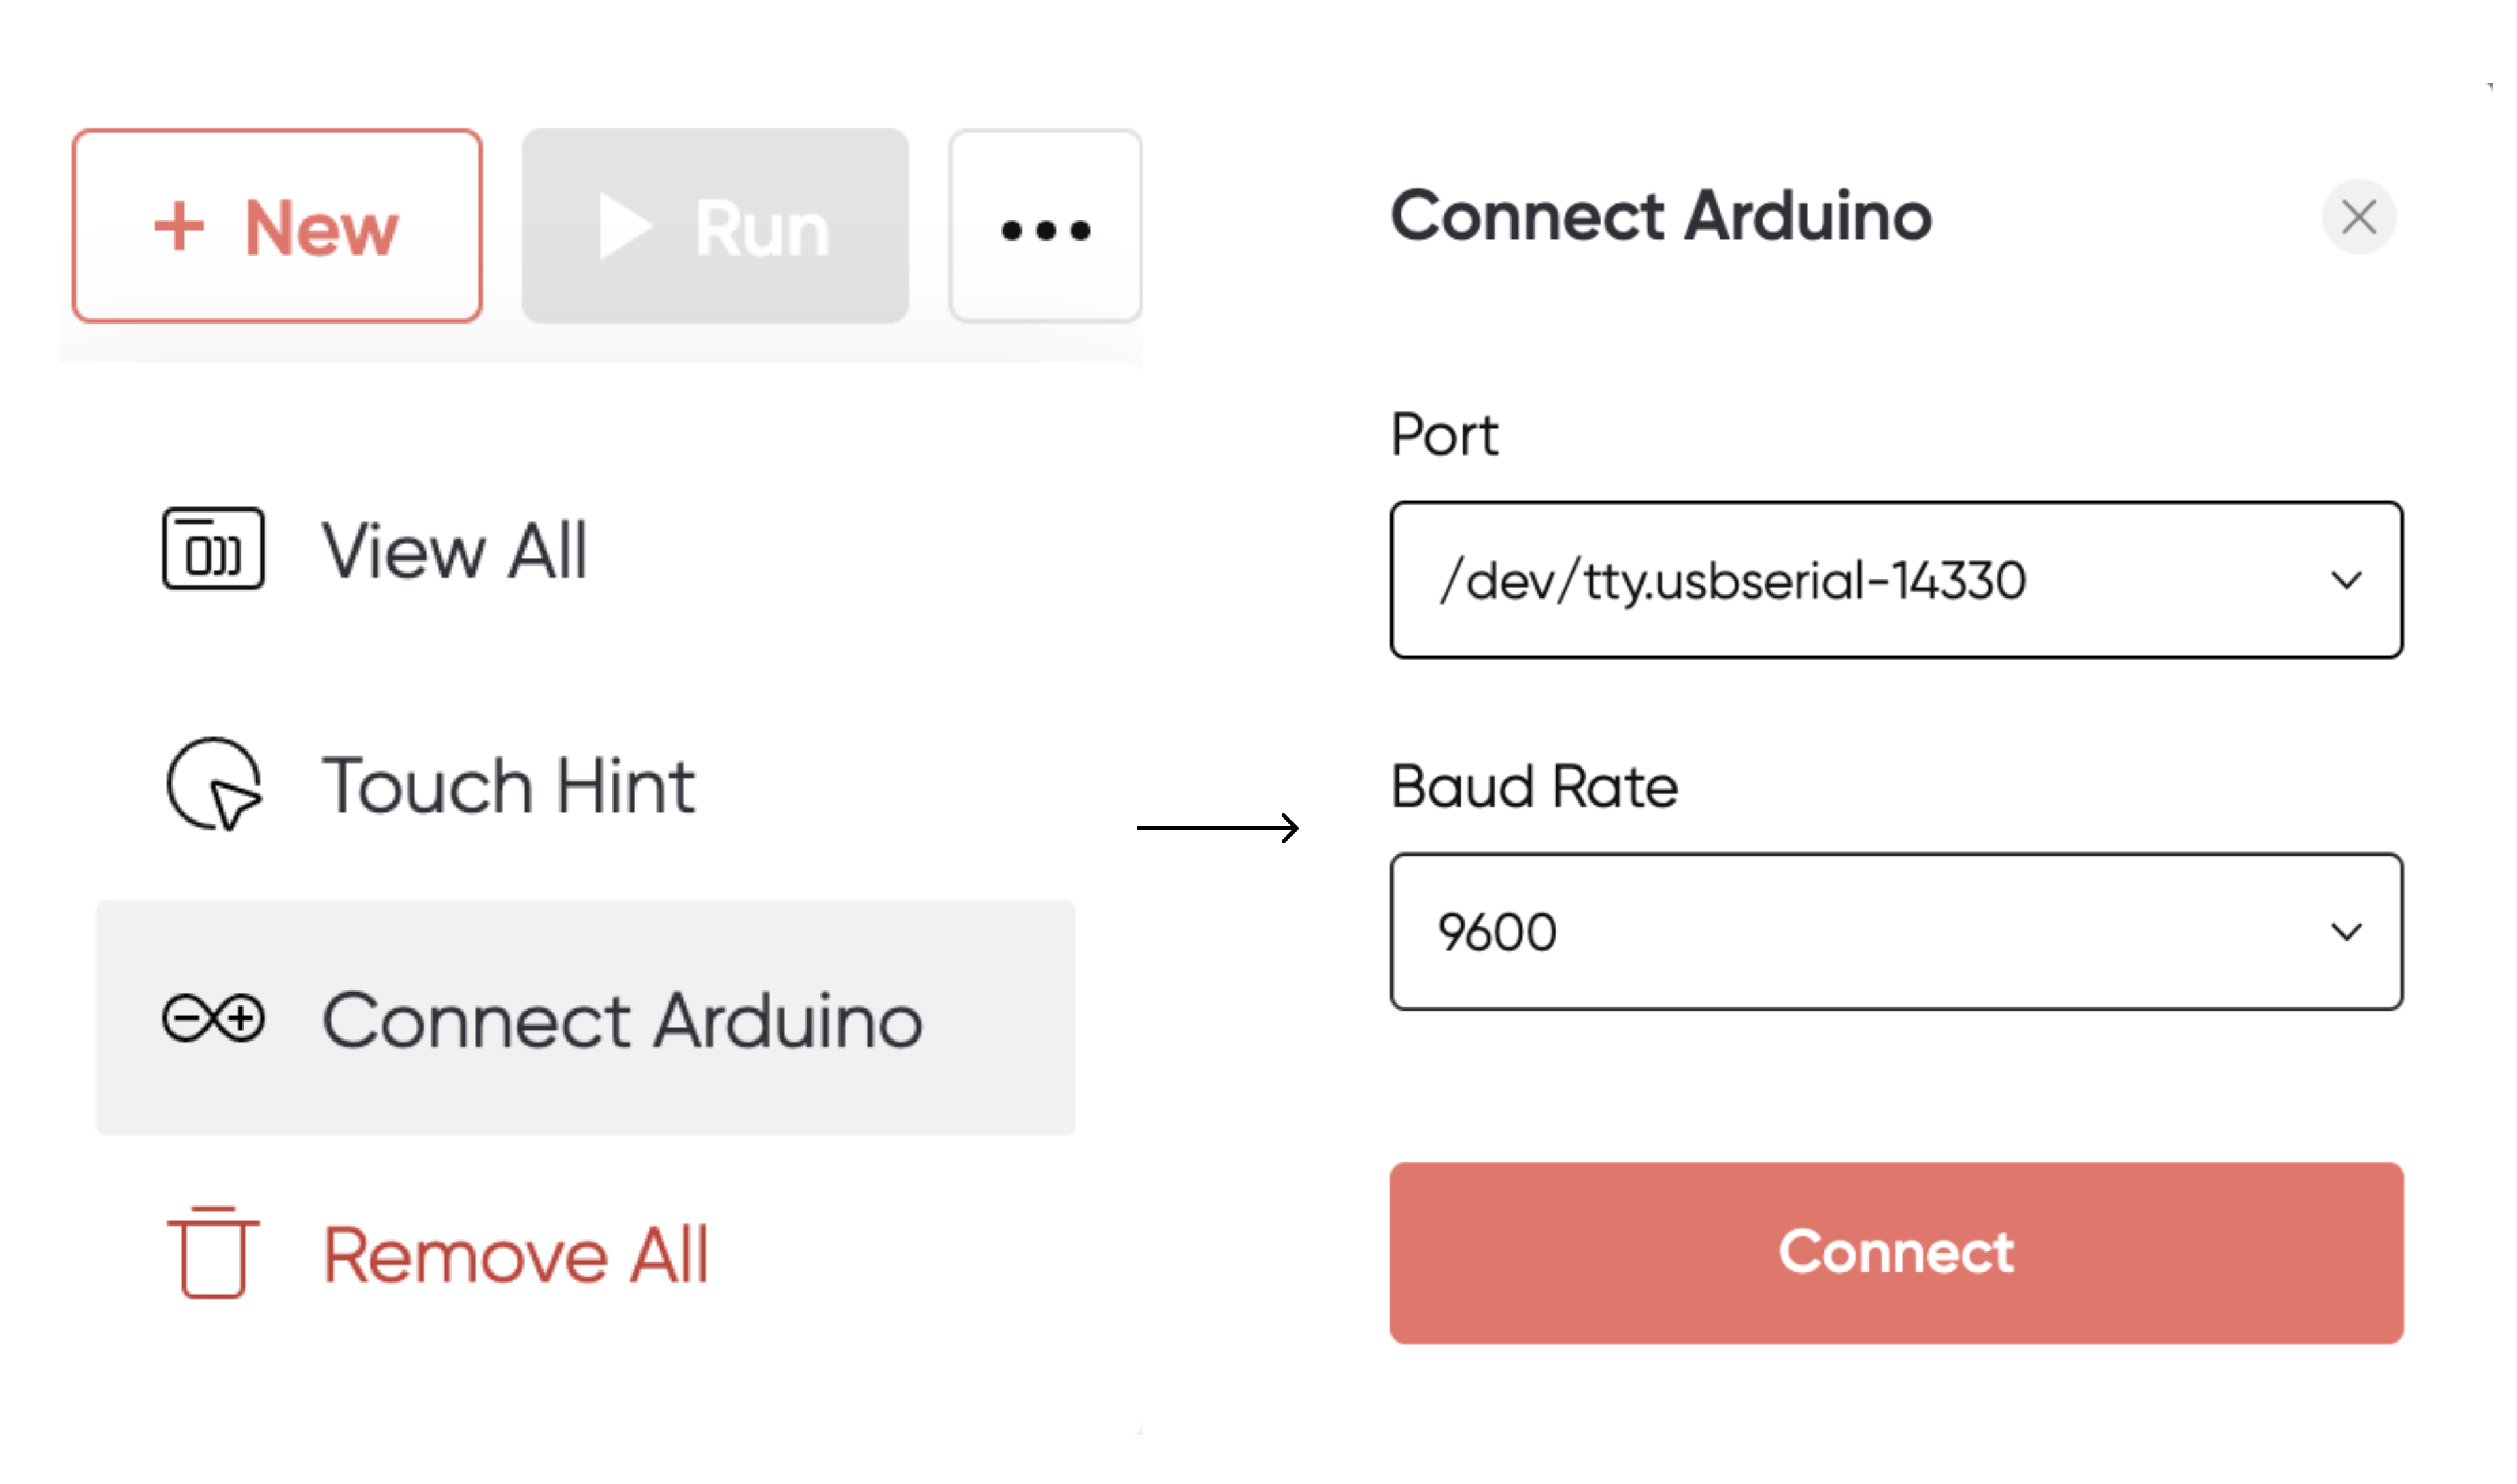 Connect Arduino with ProtoPie Connect
 - Then, click the NEW button to upload the pie file to ProtoPie Connect.
- The last step is to open ProtoPie Player on your mobile and scan the QR code shown on ProtoPie Connect. You will then see that your prototype has been synced to Player from Connect.
💡 To connect Player and Connect via a QR code, you have to make sure they're both connected via the same network. If they aren't, I recommend that you use a USB to connect them.

You’re all set to play with Arduino!
With ProtoPie Connect, Arduino can communicate with Android and iOS devices. Pressing a physical button on Arduino will cause a reaction on your mobile while tapping on the touch screen of your mobile will trigger a reaction on your Arduino.
ProtoPie is a software prototyping tool that makes it possible for your software prototypes to communicate with hardware devices. Follow the steps outlined above and begin to embrace revolutionary design possibilities, today.
Oh, but remember—you'll first need ProtoPie Connect.


